Deploying a three-tier application in Docker containers
 Ugochi Ukaegbu
Table of contents
- Introduction
- Pre-requisite
- Stages to deploy three-tier app on Docker Containers
- Step 1: Create a Virtual Machine
- Step 2: Get a domain name
- Step 3: Create Dockerfiles for the Application
- Step 4: Update .env files
- Step 5: Create a compose.yml file
- Step 6: Build the application
- Step 7: Create your ngnix.conf file
- Step 8: Login to nginx proxy server
- Step 9: Request for SSL Cert
- Step 10: Configure your application's Routing
- Proof of Deployment
Docker containers are lightweight, portable, and self-sufficient software units that package everything needed to run an application, including code, runtime, system tools, libraries, and settings.
These containers use Docker technology to ensure consistency across different environments, allowing applications to run reliably on any infrastructure that supports Docker.
In simpler terms, Docker containers make it easier to build, ship, and run software by keeping everything it needs together in a tidy, portable package.
This project can be helpful to intermediate learners who require solid projects to add to their portfolios.
Introduction
An end-to-end application is a complete software program that handles everything from start to finish for a specific task or service.
Take Instagram for instance, from taking a photo, uploading it, adding filters, and writing a caption, to sharing it with friends; that's the end-to-end experience of using Instagram.
Similarly, an end-to-end application in software development includes every phase and component needed for a particular task or service.
For example, if you were building a social media platform from scratch, your end-to-end application would include everything: the front-end where users see and interact with posts, the back-end that stores and manages those posts, databases to keep everything organized, and servers to make it all accessible online.
Deploying such an application in Docker containers means packaging each part (like front-end, back-end, databases) into separate, neat packages that can run independently but still work together seamlessly.
This makes it easier to develop, test, and run the whole application consistently across different computers and servers.
Pre-requisite
An EC2 instance
Install Docker
Install Docker Compose
Stages to deploy three-tier app on Docker Containers
This guide outlines the key stages of deploying a three-tier application using Docker containers.
Step 1: Create a Virtual Machine
Create a virtual machine on any of the cloud providers. For this project, I used an ec2 of instance type t2.medium. Increase the capacity of the storage size.
Step 2: Get a domain name
Get a domain name and map your IP to the domain name. For free domain names, visit afraid dns. Create three sub-domain names and map the IP address of your server to them. The three domains are for the:
application
proxy server
database manager
Step 3: Create Dockerfiles for the Application
You can start by using the docker init to get a template for the application and adjust the commands to suit your needs or the requirements stated in the READme file of the frontend and backend directory.
You have to create separate docker files to build the application; one for the frontend and the other for the backend.
Frontend Dockerfile
# Use the latest official Node.js image as a base
FROM node:latest

# Set the working directory
WORKDIR /app

# Copy the application files
COPY . .

# arg command
ARG VITE_API_URL=${VITE_API_URL}

# Install dependencies
RUN npm install

# Expose the port the development server runs on
EXPOSE 5173

# Run the development server
CMD ["npm", "run", "dev", "--", "--host", "0.0.0.0"]
Backend docker file
# Use the latest official Python image as a base
FROM python:latest

# Install Node.js and npm
RUN apt-get update && apt-get install -y \
    nodejs \
    npm

# Install Poetry using pip
RUN pip install poetry

# Set the working directory
WORKDIR /app

# Copy the application files
COPY . .

# Install dependencies using Poetry
RUN poetry install
ENV PYTHONPATH=/app

# Expose the port FastAPI runs on
EXPOSE 8000

# Run the prestart script and start the server
CMD ["sh", "-c", "poetry run bash ./prestart.sh && poetry run uvicorn app.main:app --host 0.0.0.0 --port 8000 --reload"]
Step 4: Update .env files
Go into the frontend and backend directory and update the .env files
.env file for the frontend
This file holds the domain name that is attached to your virtual machine IP address.
VITE_API_URL=https://sapphireaura.twilightparadox.com
.env file for the backend
# Domain
# This would be set to the production domain with an env var on deployment
DOMAIN=localhost

# Environment: local, staging, production
ENVIRONMENT=local

PROJECT_NAME="Full Stack FastAPI Project"
STACK_NAME=full-stack-fastapi-project

# Backend
BACKEND_CORS_ORIGINS="http://localhost,http://localhost:5173,https://localhost,https://localhost:5173,http://<server-ip>:5173"
SECRET_KEY=2e2************************
FIRST_SUPERUSER=devops@hng.tech
FIRST_SUPERUSER_PASSWORD=devops#HNG11
USERS_OPEN_REGISTRATION=True
DATABASE_URLpostgresql://${POSTGRES_USER}:{POSTGRES_PASSWORD}@{POSTGRES_SERVER}:5432/{POSTGRES_DB}
# Emails
SMTP_HOST=
SMTP_USER=
SMTP_PASSWORD=
EMAILS_FROM_EMAIL=info@example.com
SMTP_TLS=True
SMTP_SSL=False
SMTP_PORT=587

# Postgres
POSTGRES_SERVER=db-postgres   # name of your db service
POSTGRES_PORT=5432
POSTGRES_DB=apidb
POSTGRES_USER=app
POSTGRES_PASSWORD=app
Step 5: Create a compose.yml file
Create a compose.yml file to build up your three-tier architecture. In a docker-compose.yml file, services represent the containers that will be created in the application.
This file contains the configuration build for the frontend, backend, database, proxy server, and adminer.
Adminer is an application used to manage databases while, the proxy manager is a tool that helps manage and configure routing traffic, and load balancing, and enhances security in web applications.
For this project, the nginx proxy server was used.
services:
  backend:
    build:
      context: ./backend
      args:
         - VITE_API_URL=https://sapphireaura.twilightparadox.com
    container_name: fastapi_app
    ports:
      - "8000:8000"
    depends_on:
      - db-postgres
    env_file:
      - ./backend/.env

  frontend:
    build:
      context: ./frontend
    container_name: nodejs_app
    ports:
      - "5173:5173"
    env_file:
      - ./frontend/.env

  db-postgres:
    image: postgres:latest
    container_name: postgres_db
    ports:
      - "5432:5432"
    # volumes:
    #   - postgres_data:/var/lib/postgresql/data
    env_file:
        - ./backend/.env
  adminer:
    image: adminer
    container_name: adminer
    ports:
      - "8080:8080"
    depends_on:
      - db-postgres

  proxy:
    image: jc21/nginx-proxy-manager:latest
    container_name: nginx_proxy_manager
    restart: unless-stopped
    ports:

      - '80:80'    # Public HTTP Port
      - '8090:81'    # Admin Web Port
      - '443:443'  # Public HTTPS Port
    environment:
      DB_SQLITE_FILE: "/data/database.sqlite"
      DB_PGSQL_HOST: "db"
      DB_PGSQL_PORT: 5432
      DB_PGSQL_USER: "proxy_user"
      DB_PGSQL_PASSWORD: "proxy00123"
      DB_PGSQL_NAME: "proxy_db"
    volumes:
      - ./data:/data
      - ./letsencrypt:/etc/letsencrypt
    depends_on:
      - db-postgres
      - backend
      - frontend
      - adminer

volumes:
  postgres_data:
  data:
  letsencrypt:
Step 6: Build the application
It is time to bring the app to life. Run the commands
$ docker-compose up -d
Step 7: Create your ngnix.conf file
This file is the main configuration file for the Nginx web server. It defines the behavior of the Nginx server, specifying how it should handle requests, route traffic, manage resources, and apply security settings.
Your goal in a three-tier app is to route from the front end to the back end. For this application, I decided to route to /dcos, /redoc and /api . The fastapp_api represents the backend service stated in the compose.yml.
In other words. I want the front-end service to route to my back-end service.
location /api {
    proxy_pass http://fastapi_app:8000;
    proxy_set_header Host $host;
    proxy_set_header X-Real-IP $remote_addr;
    proxy_set_header X-Forwarded-For $proxy_add_x_forwarded_for;
    proxy_set_header X-Forwarded-Proto $scheme;
}

location /docs {
    proxy_pass http://fastapi_app:8000;
    proxy_set_header Host $host;
    proxy_set_header X-Real-IP $remote_addr;
    proxy_set_header X-Forwarded-For $proxy_add_x_forwarded_for;
    proxy_set_header X-Forwarded-Proto $scheme;
}

location /redoc {
    proxy_pass http://fastapi_app:8000;
    proxy_set_header Host $host;
    proxy_set_header X-Real-IP $remote_addr;
    proxy_set_header X-Forwarded-For $proxy_add_x_forwarded_for;
    proxy_set_header X-Forwarded-Proto $scheme;
}
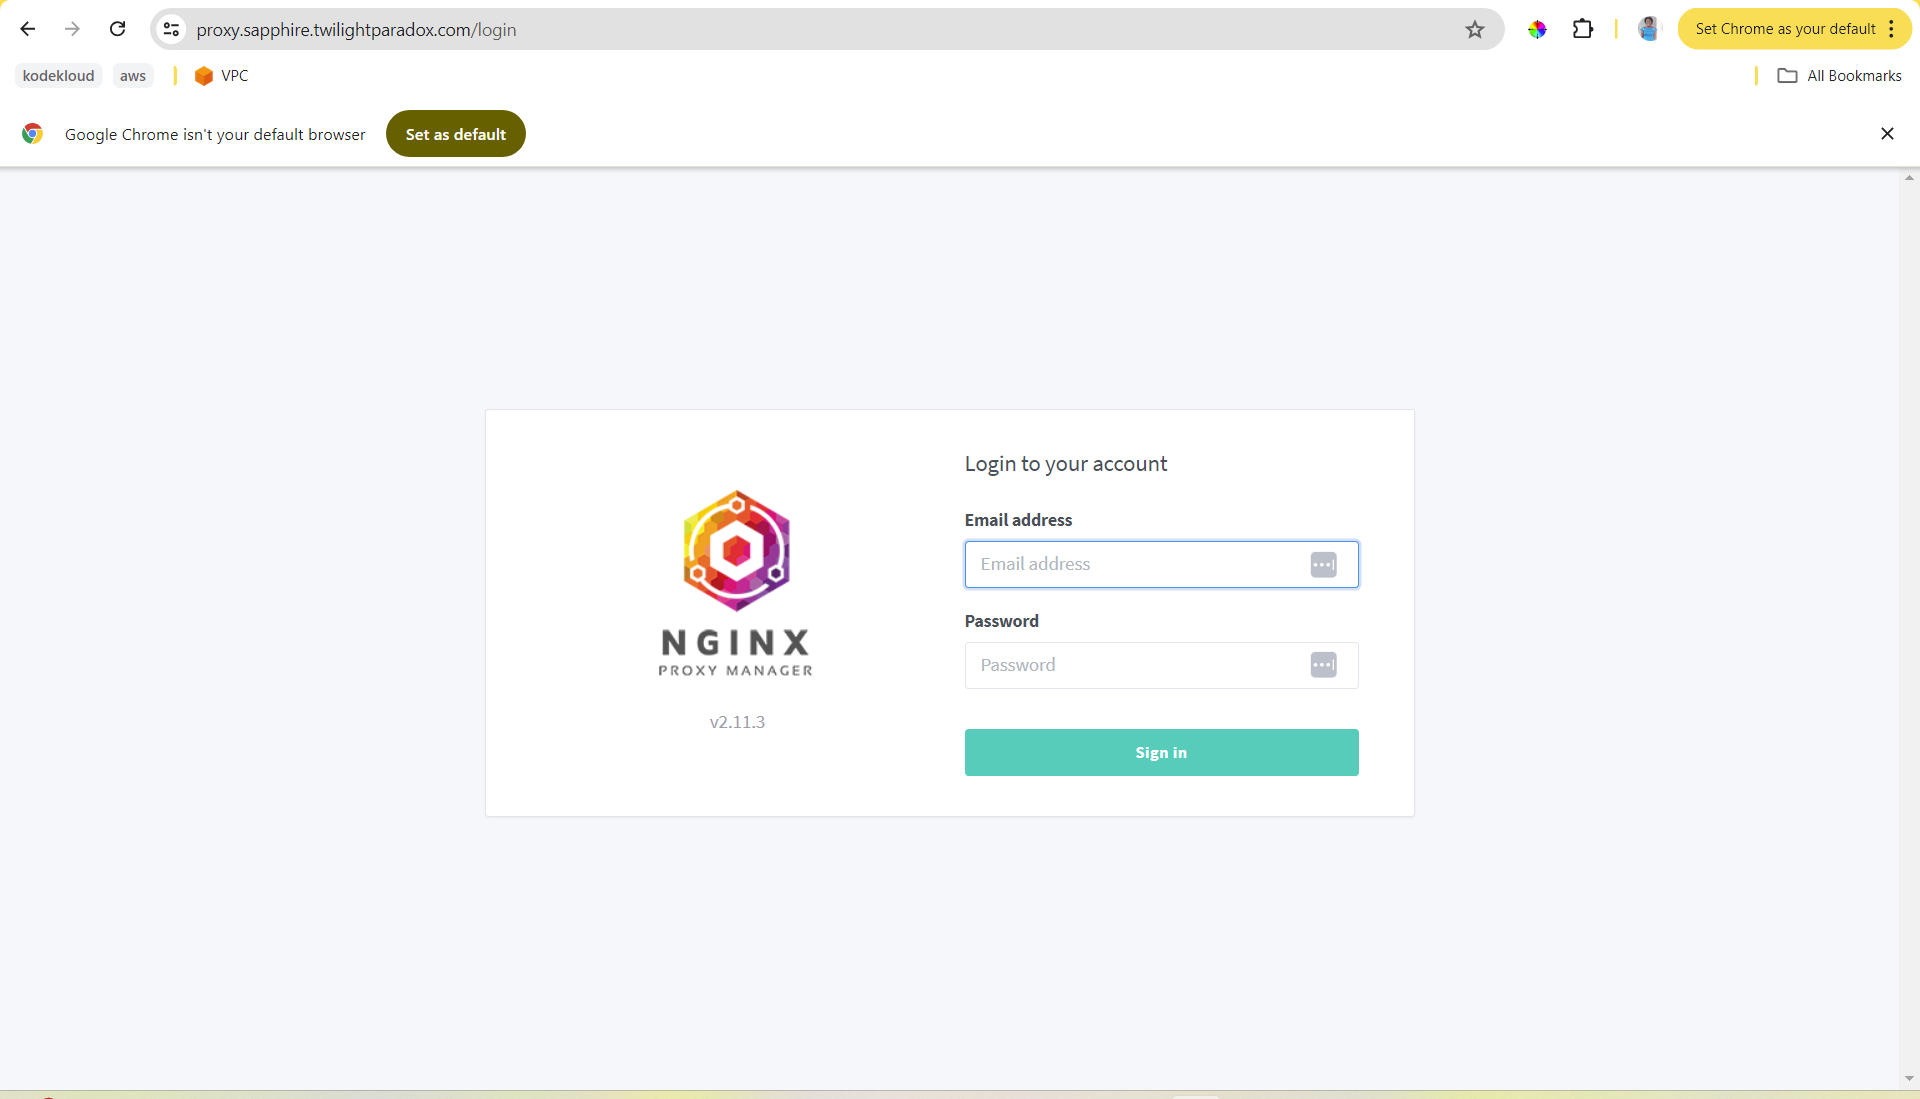
Step 8: Login to nginx proxy server
Copy the domain name of your proxy server and paste it into your browser.
Login with the credentials:
Email: admin@example.com
Password: changeme
Step 9: Request for SSL Cert
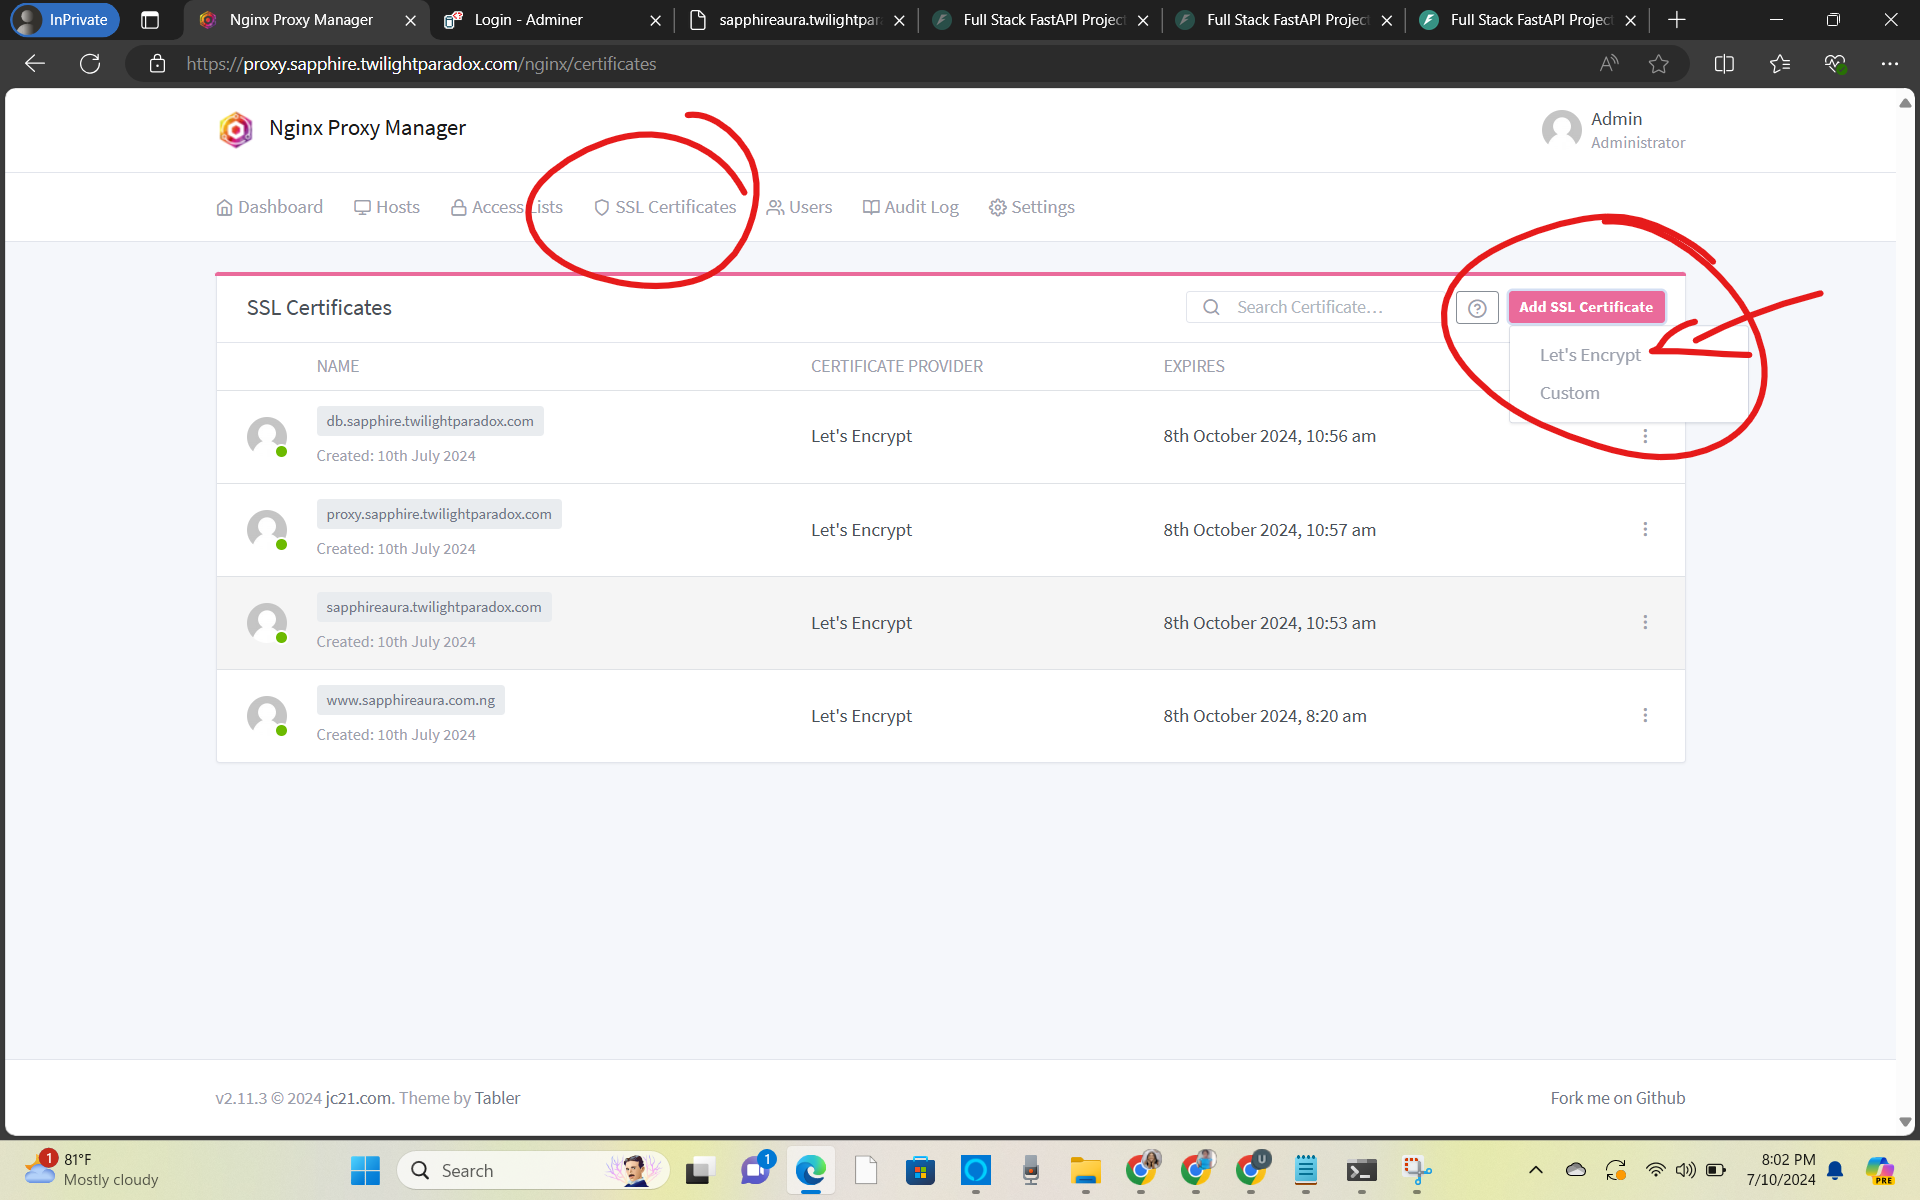
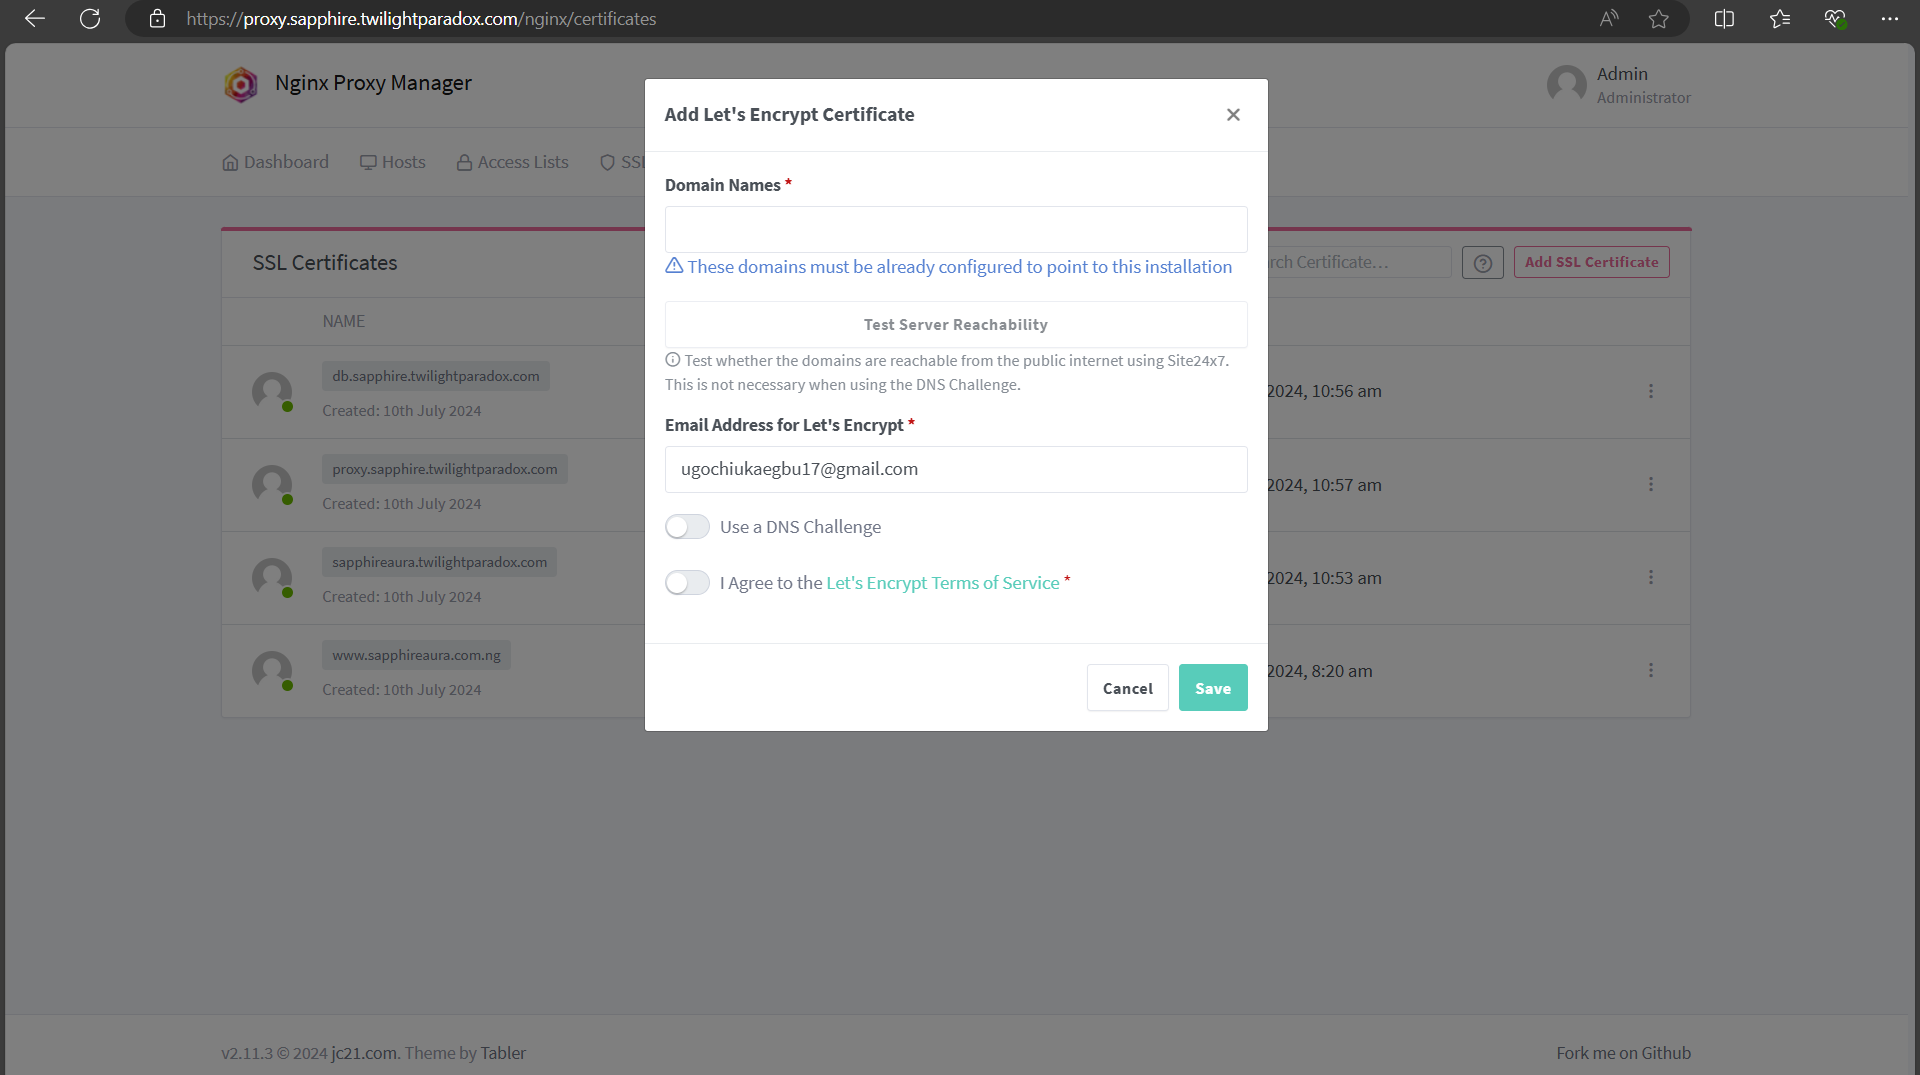
At this stage, you have to request an SSL certificate for each of your domain names. To do that:
click on SSL Certificates
click on Add SSL Certificates
click on Let's Encrypt
type your domain name.
click on Test server Reachability
click on the I Agree button
click on Save
Step 10: Configure your application's Routing
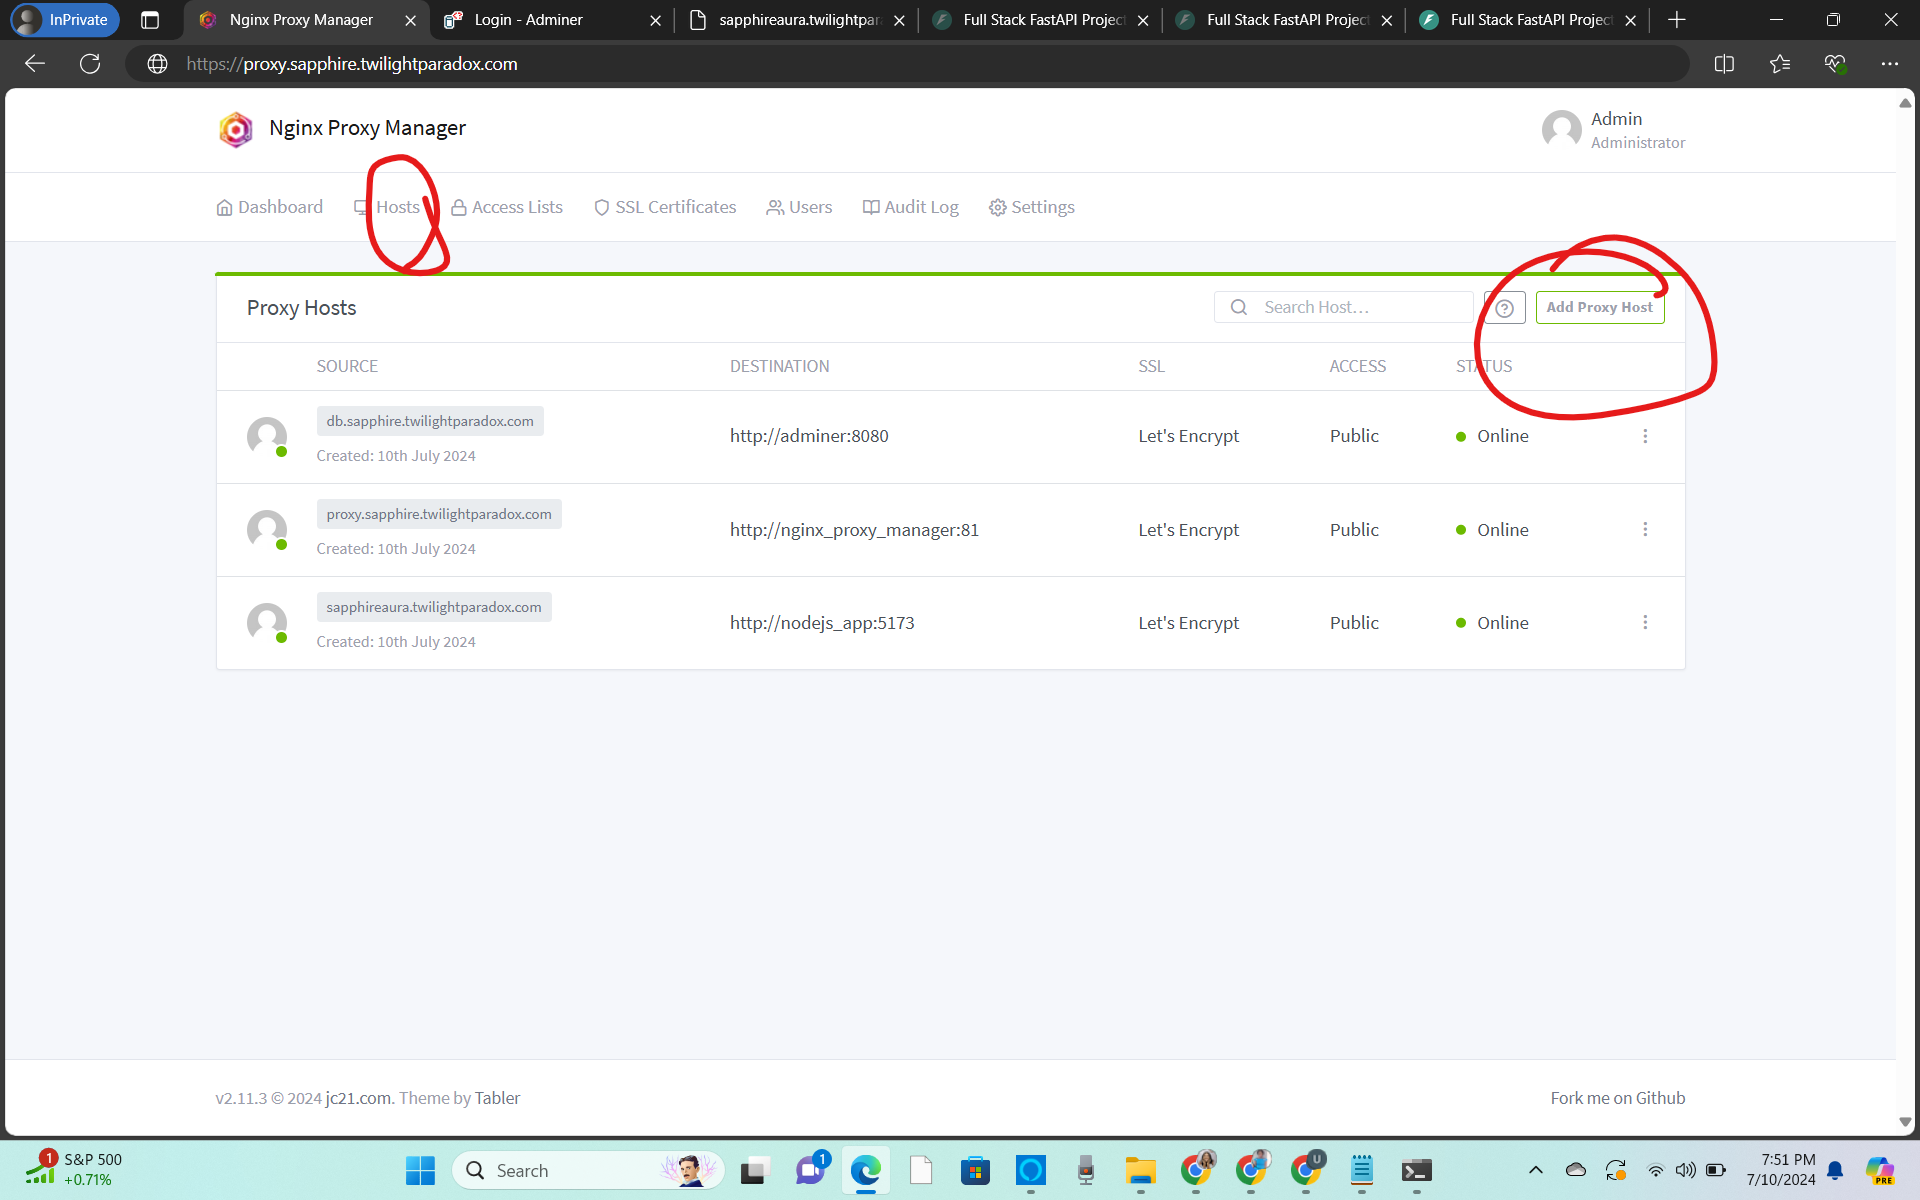
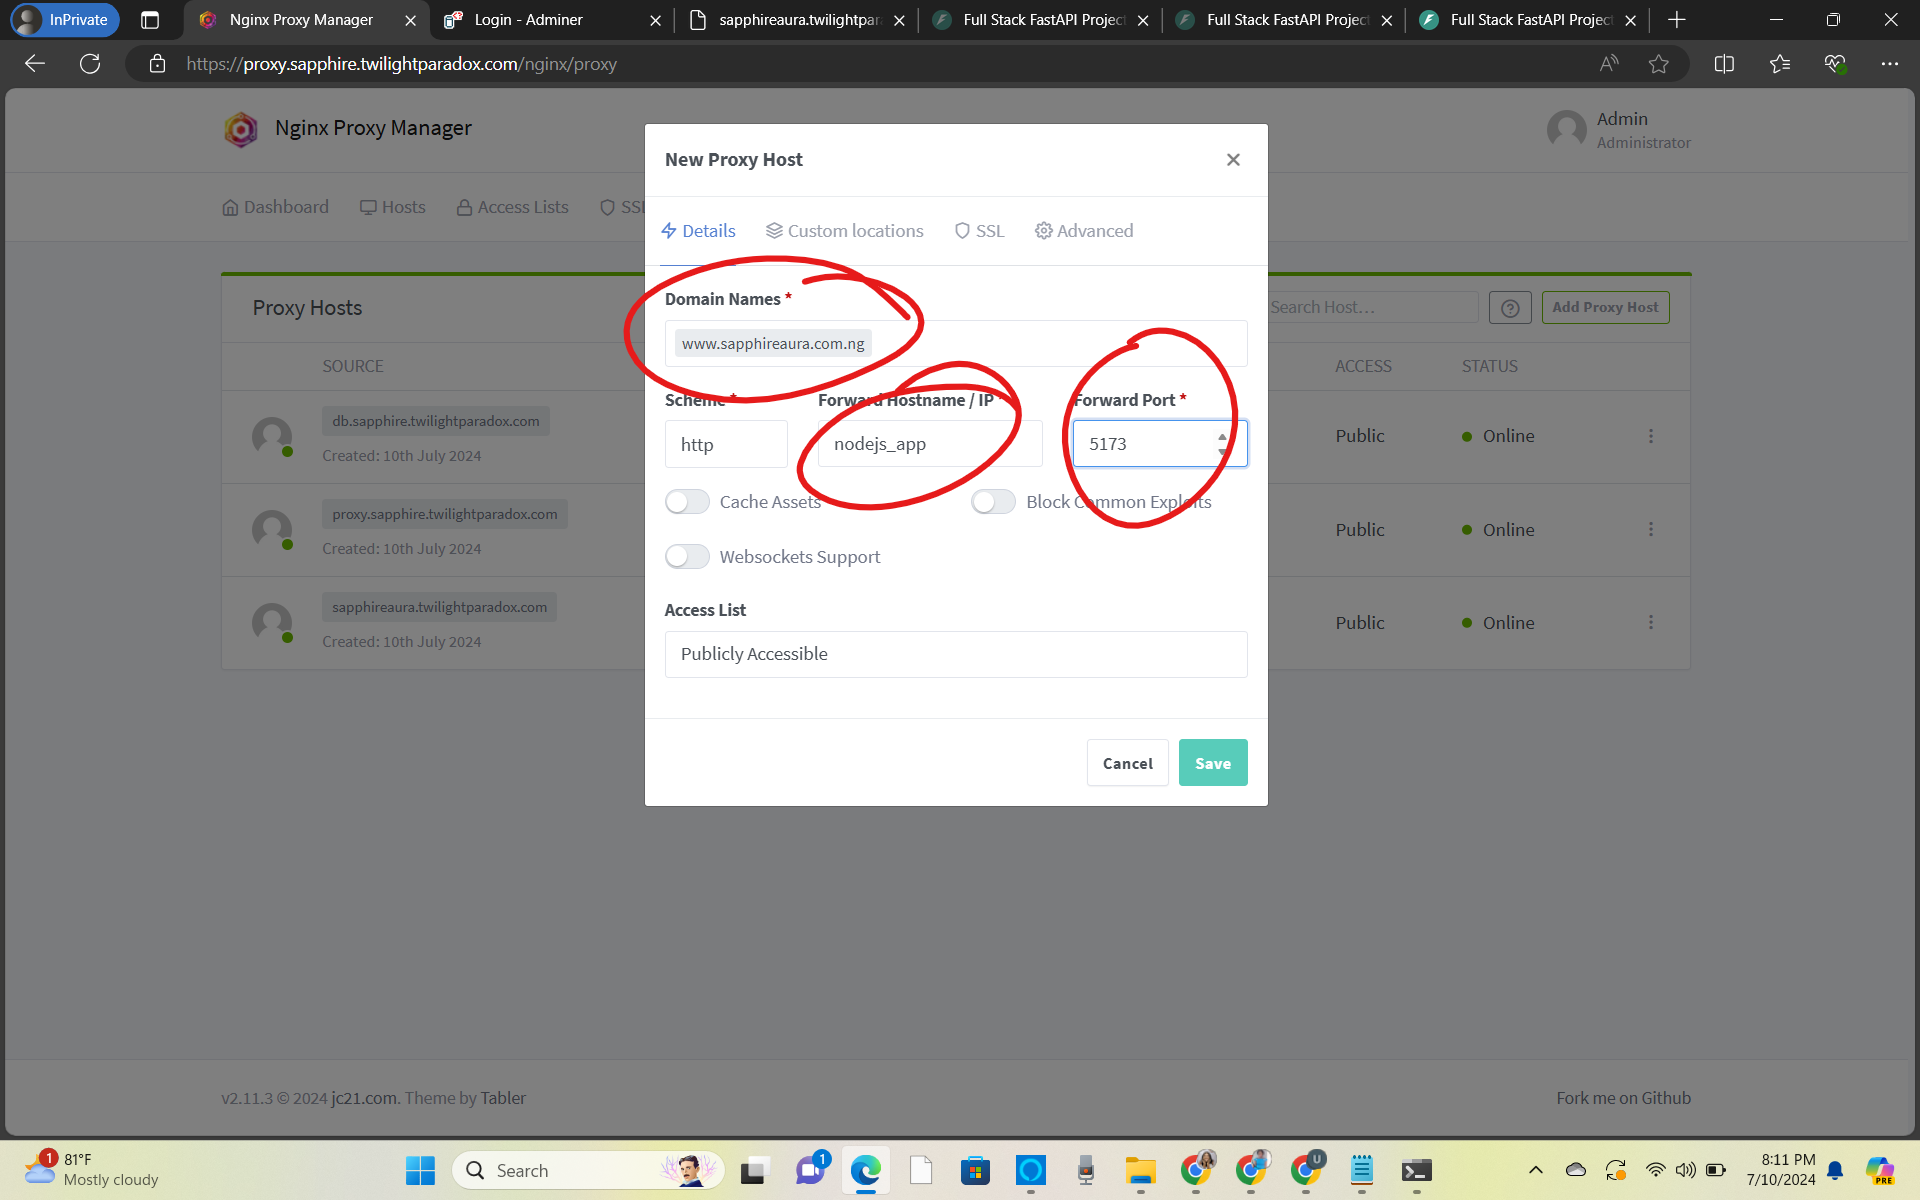
Click on Hosts
Click on the Proxy Host tab to add your configurations.
Click on Add Proxy Host
type the domain name you desire to use for the application
type the container name of the front-end app
type the port of the frontend port
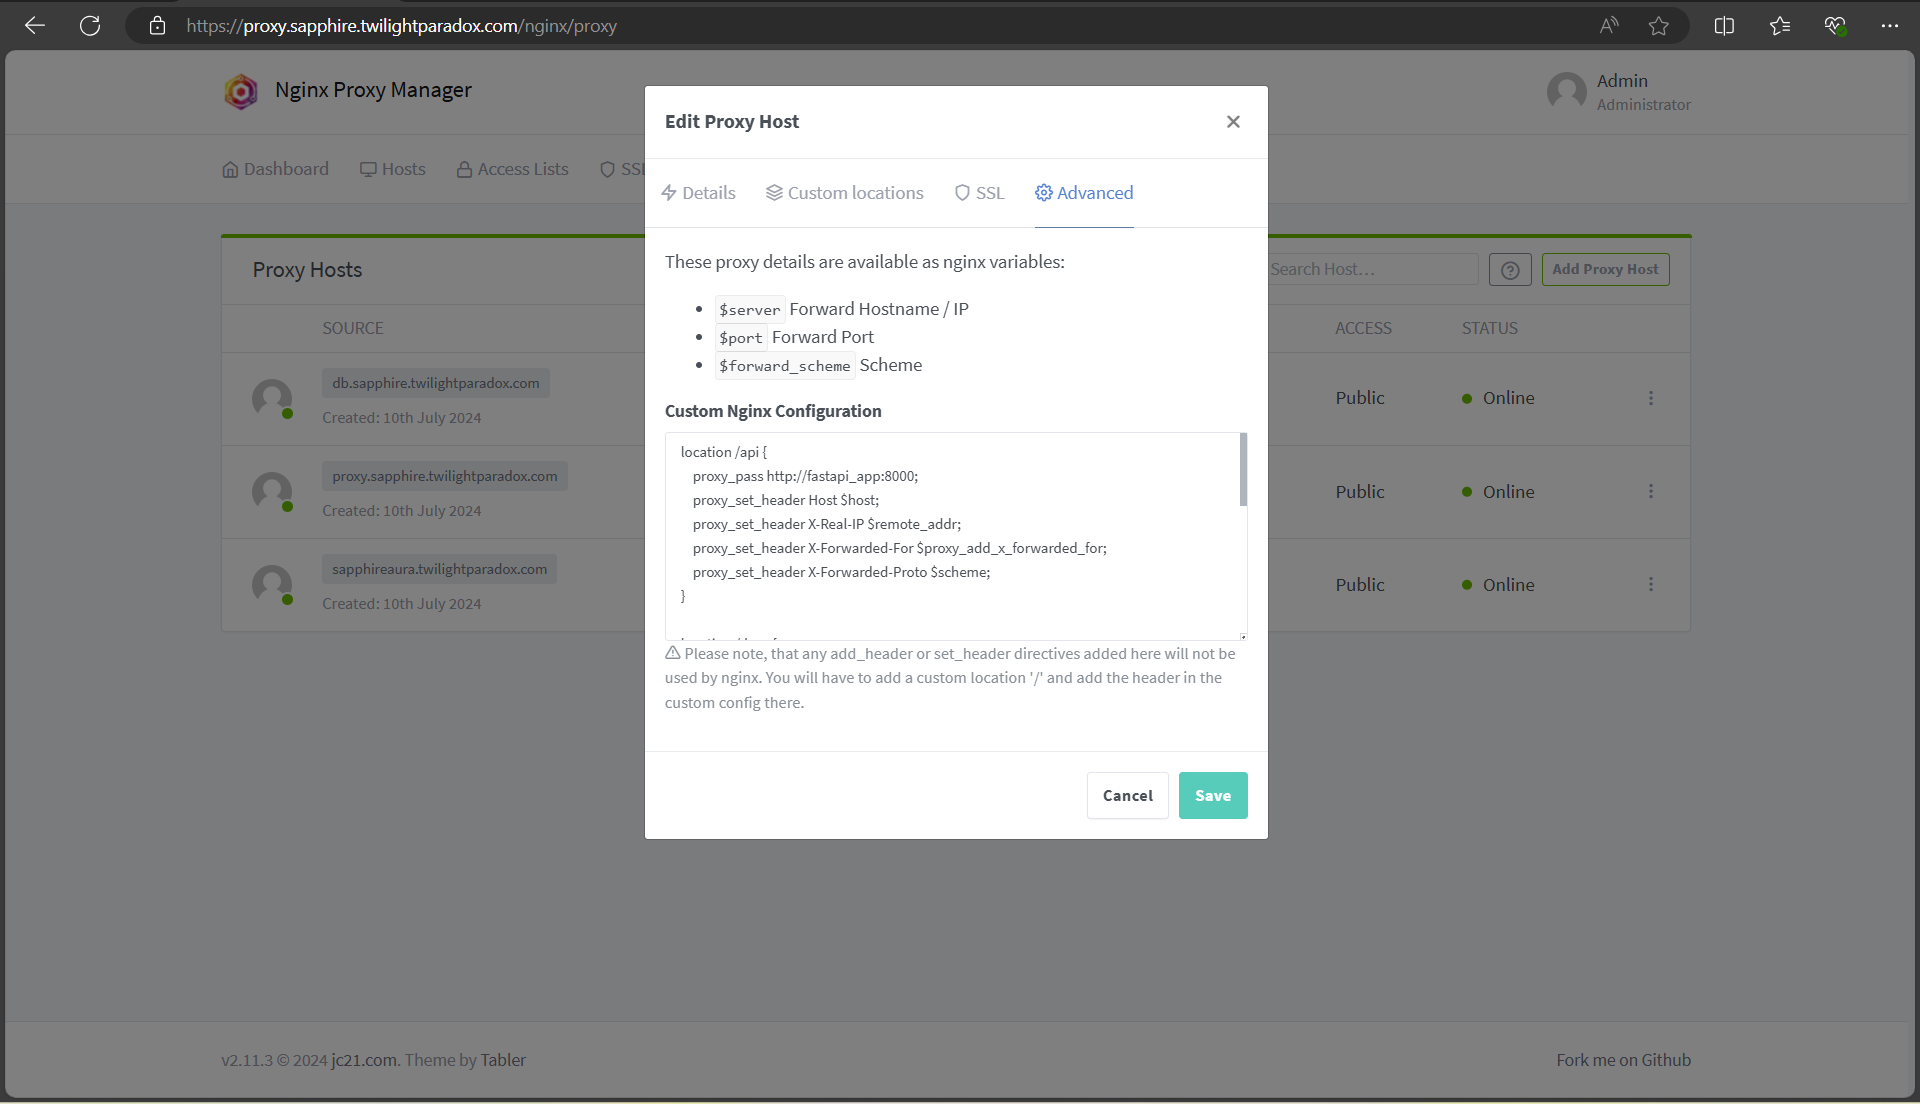
click on Advanced .
paste the nginx.conf configuration in the input field.
click Save
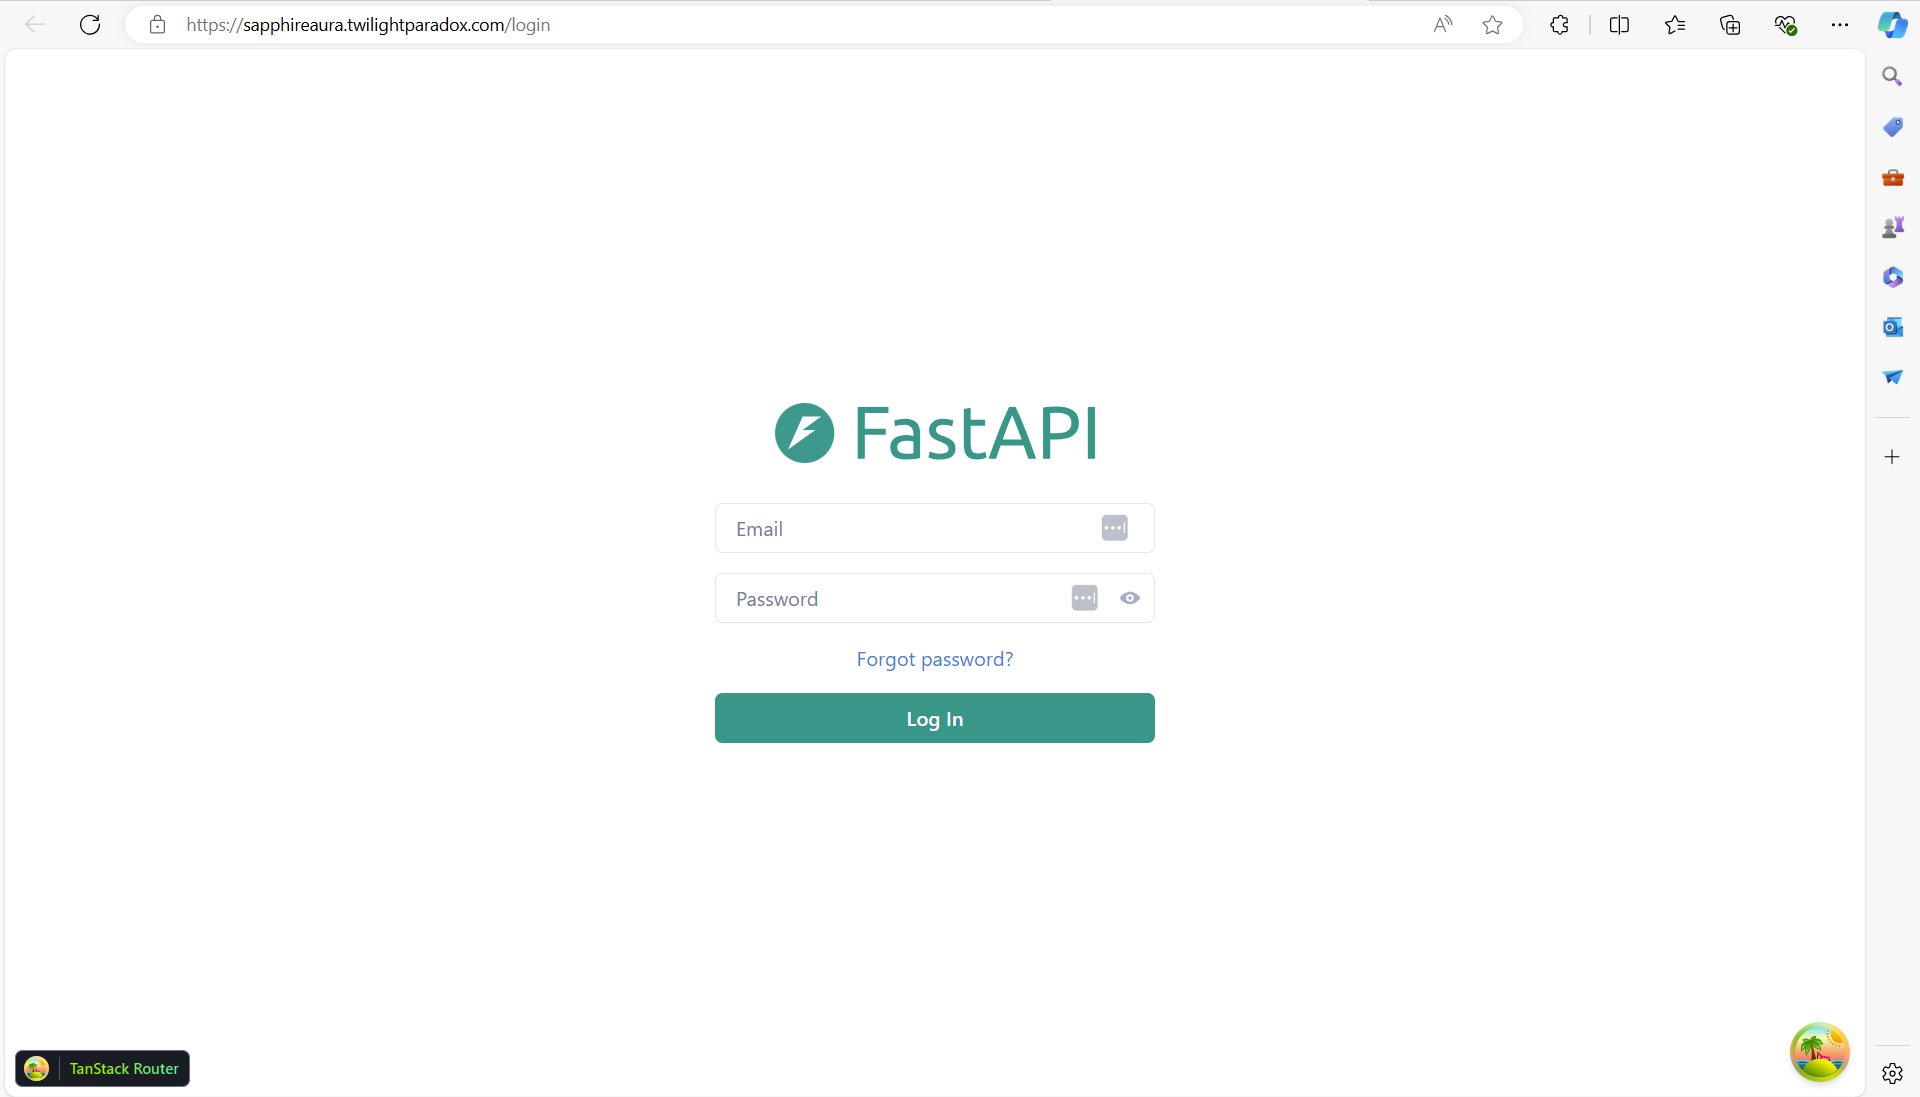
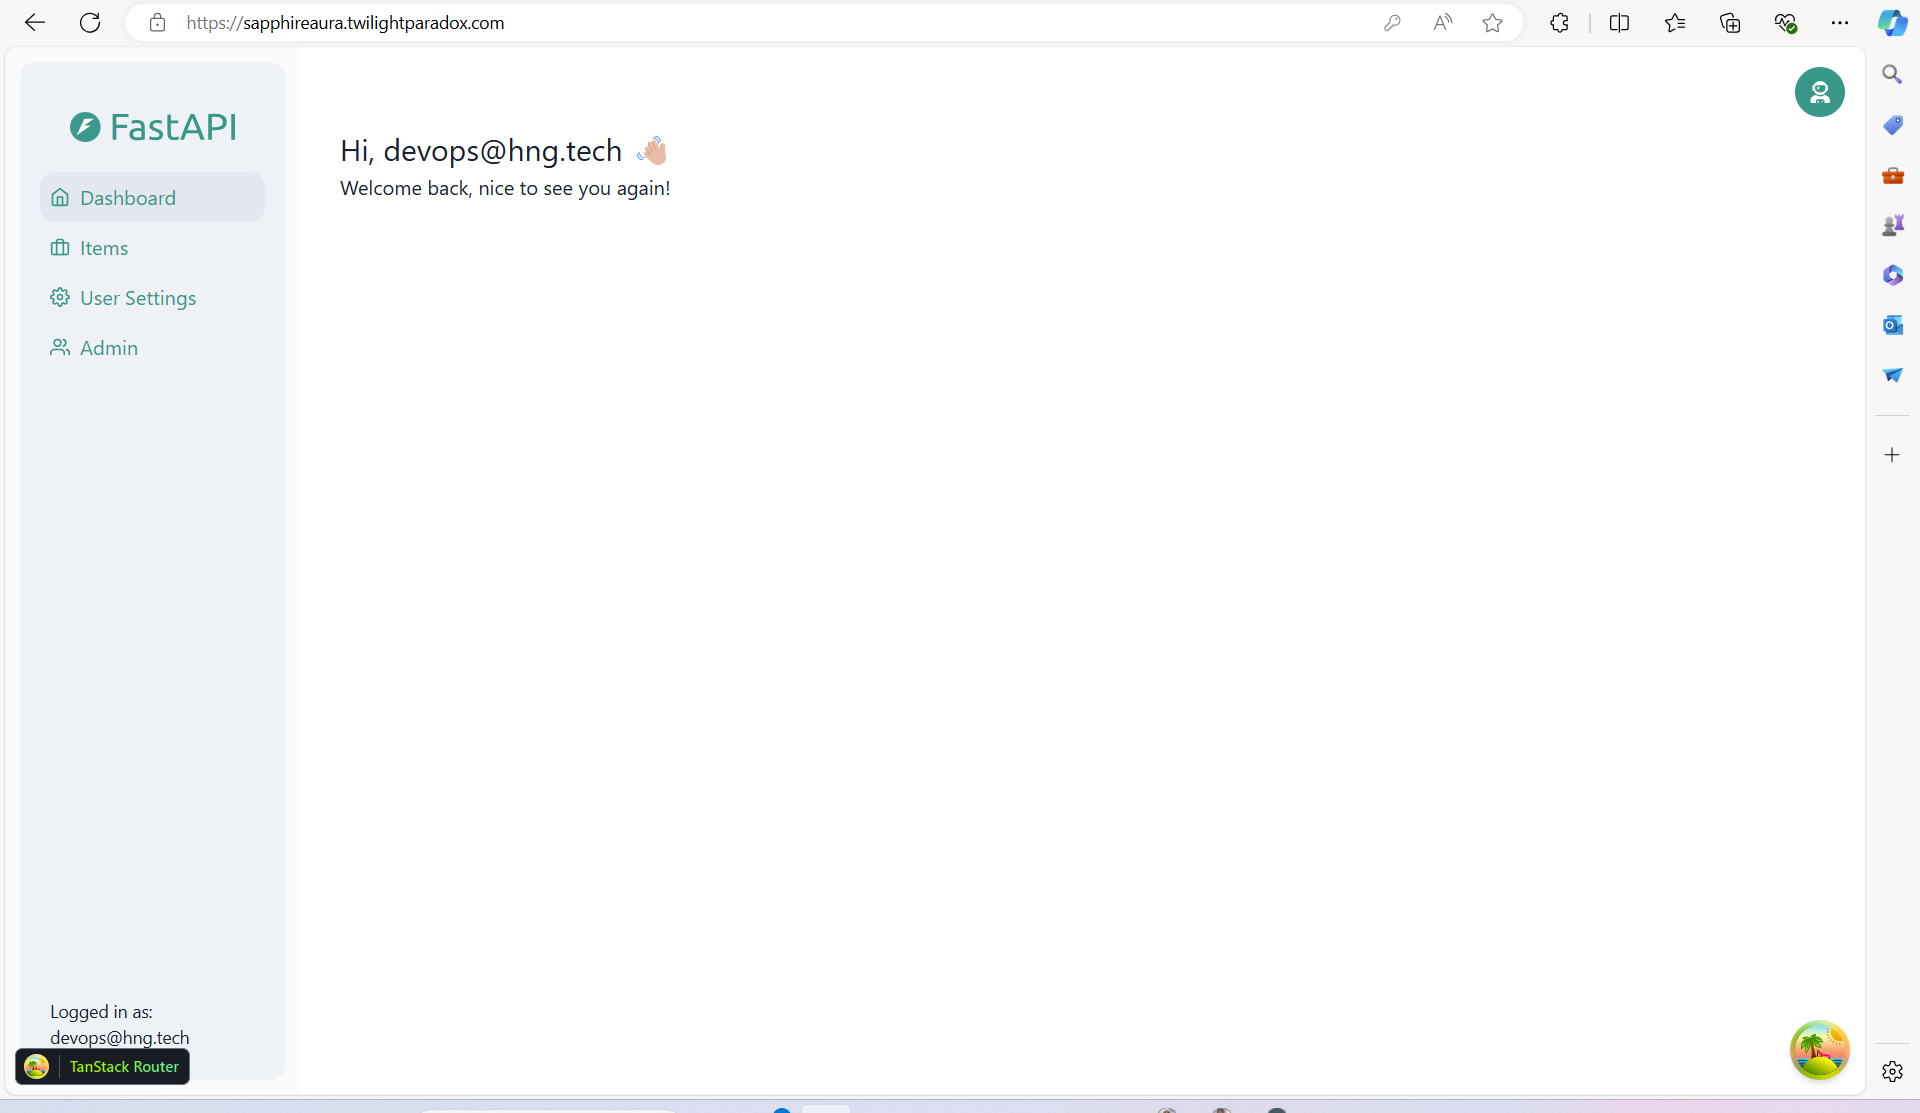
View your application on the browser.
Go through this process for the Adminer. You don't need a Nginx.conf file for that. Use the domain name assigned for the DB and configure using the Adminer container name and port.
You can also go through these processes for your proxy if you want it to have an SSL cert.
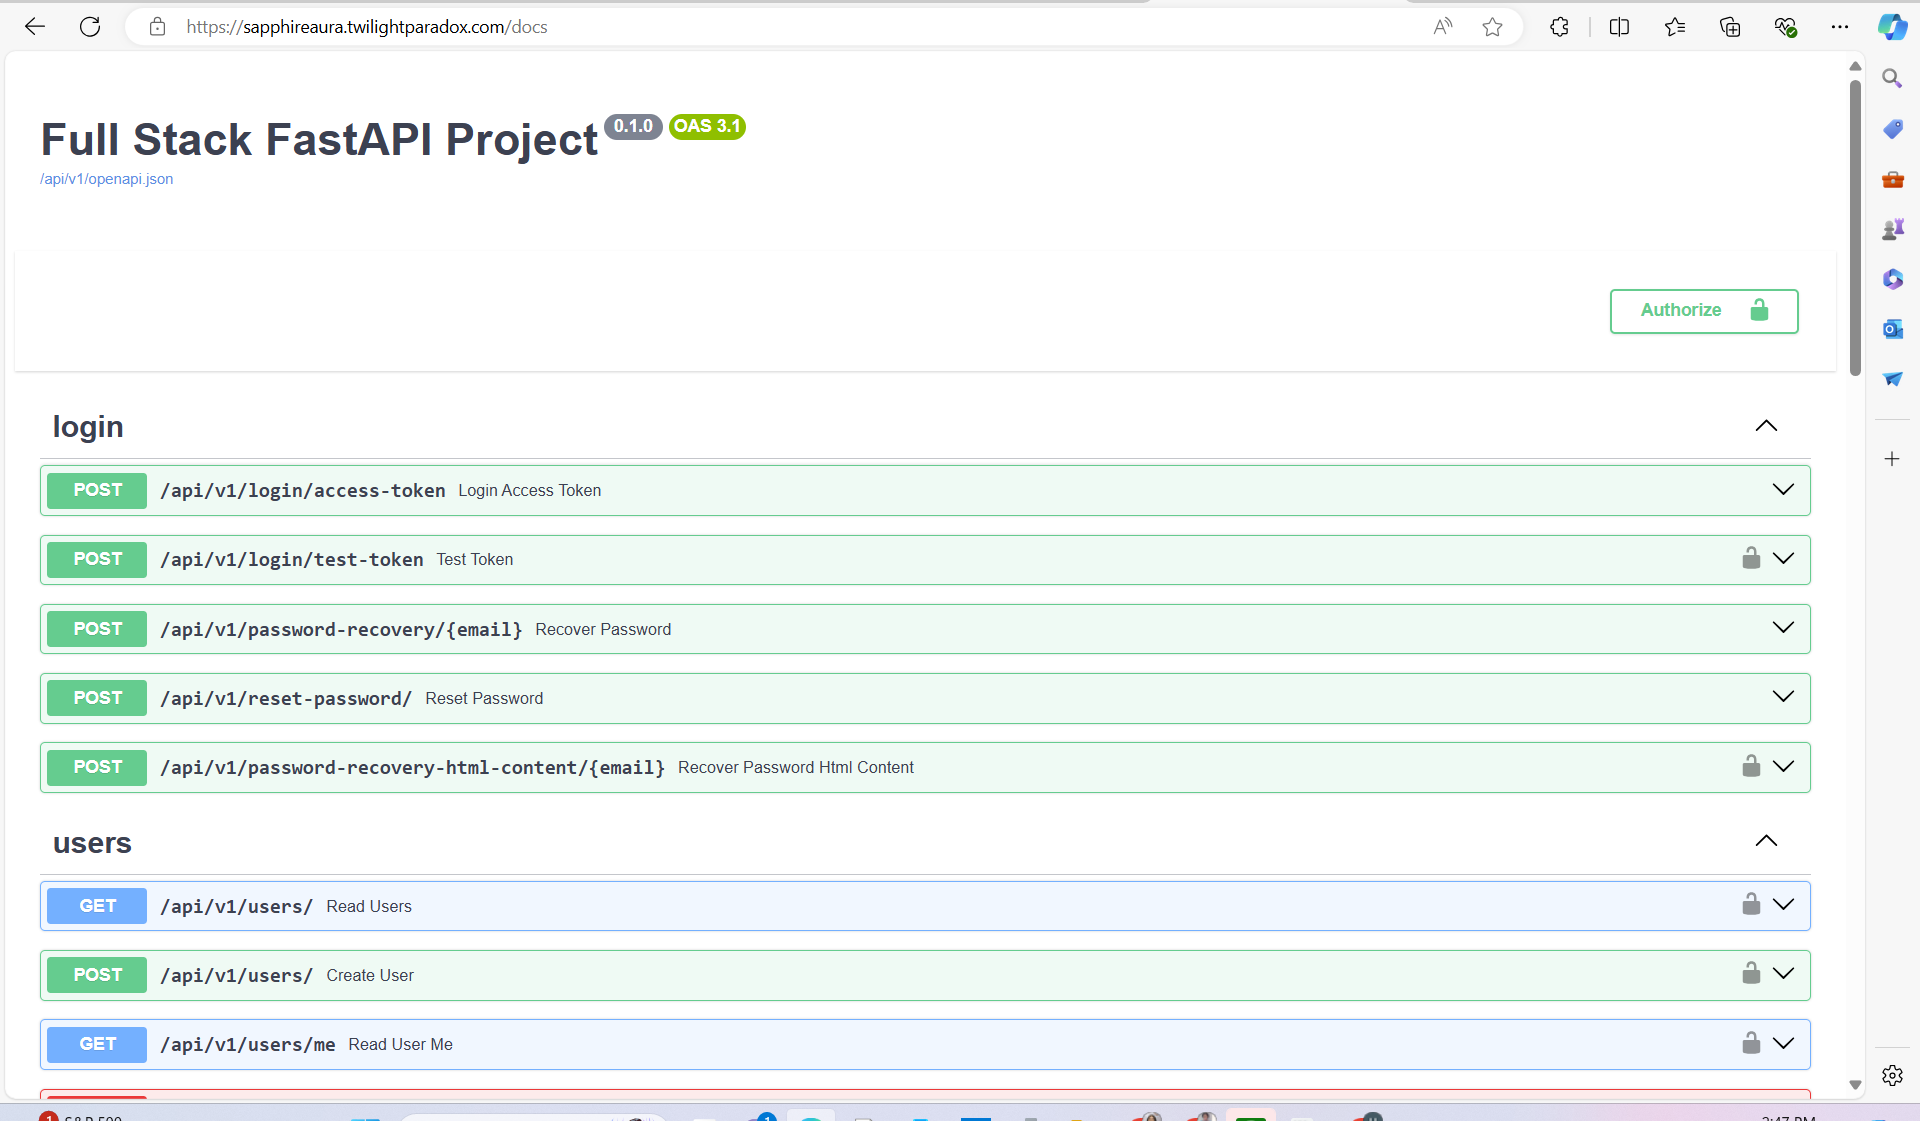
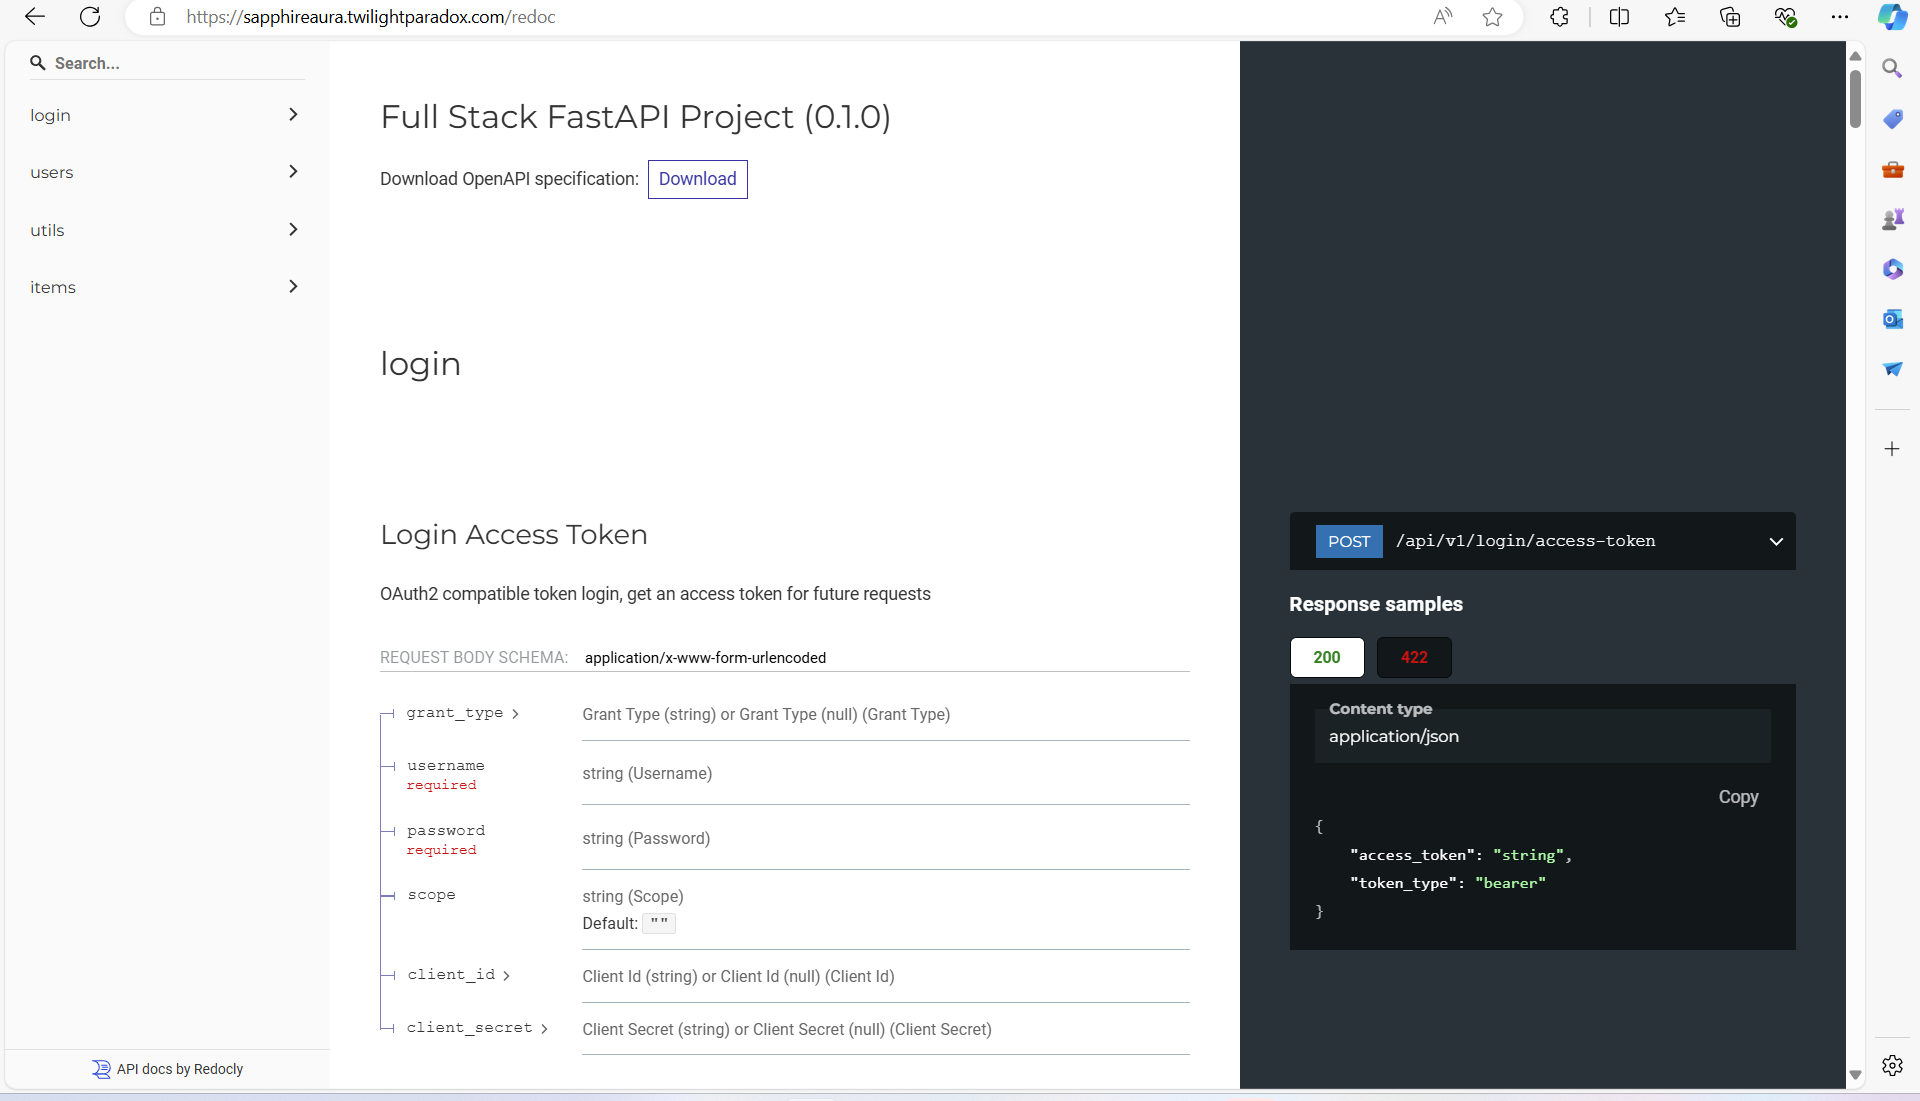
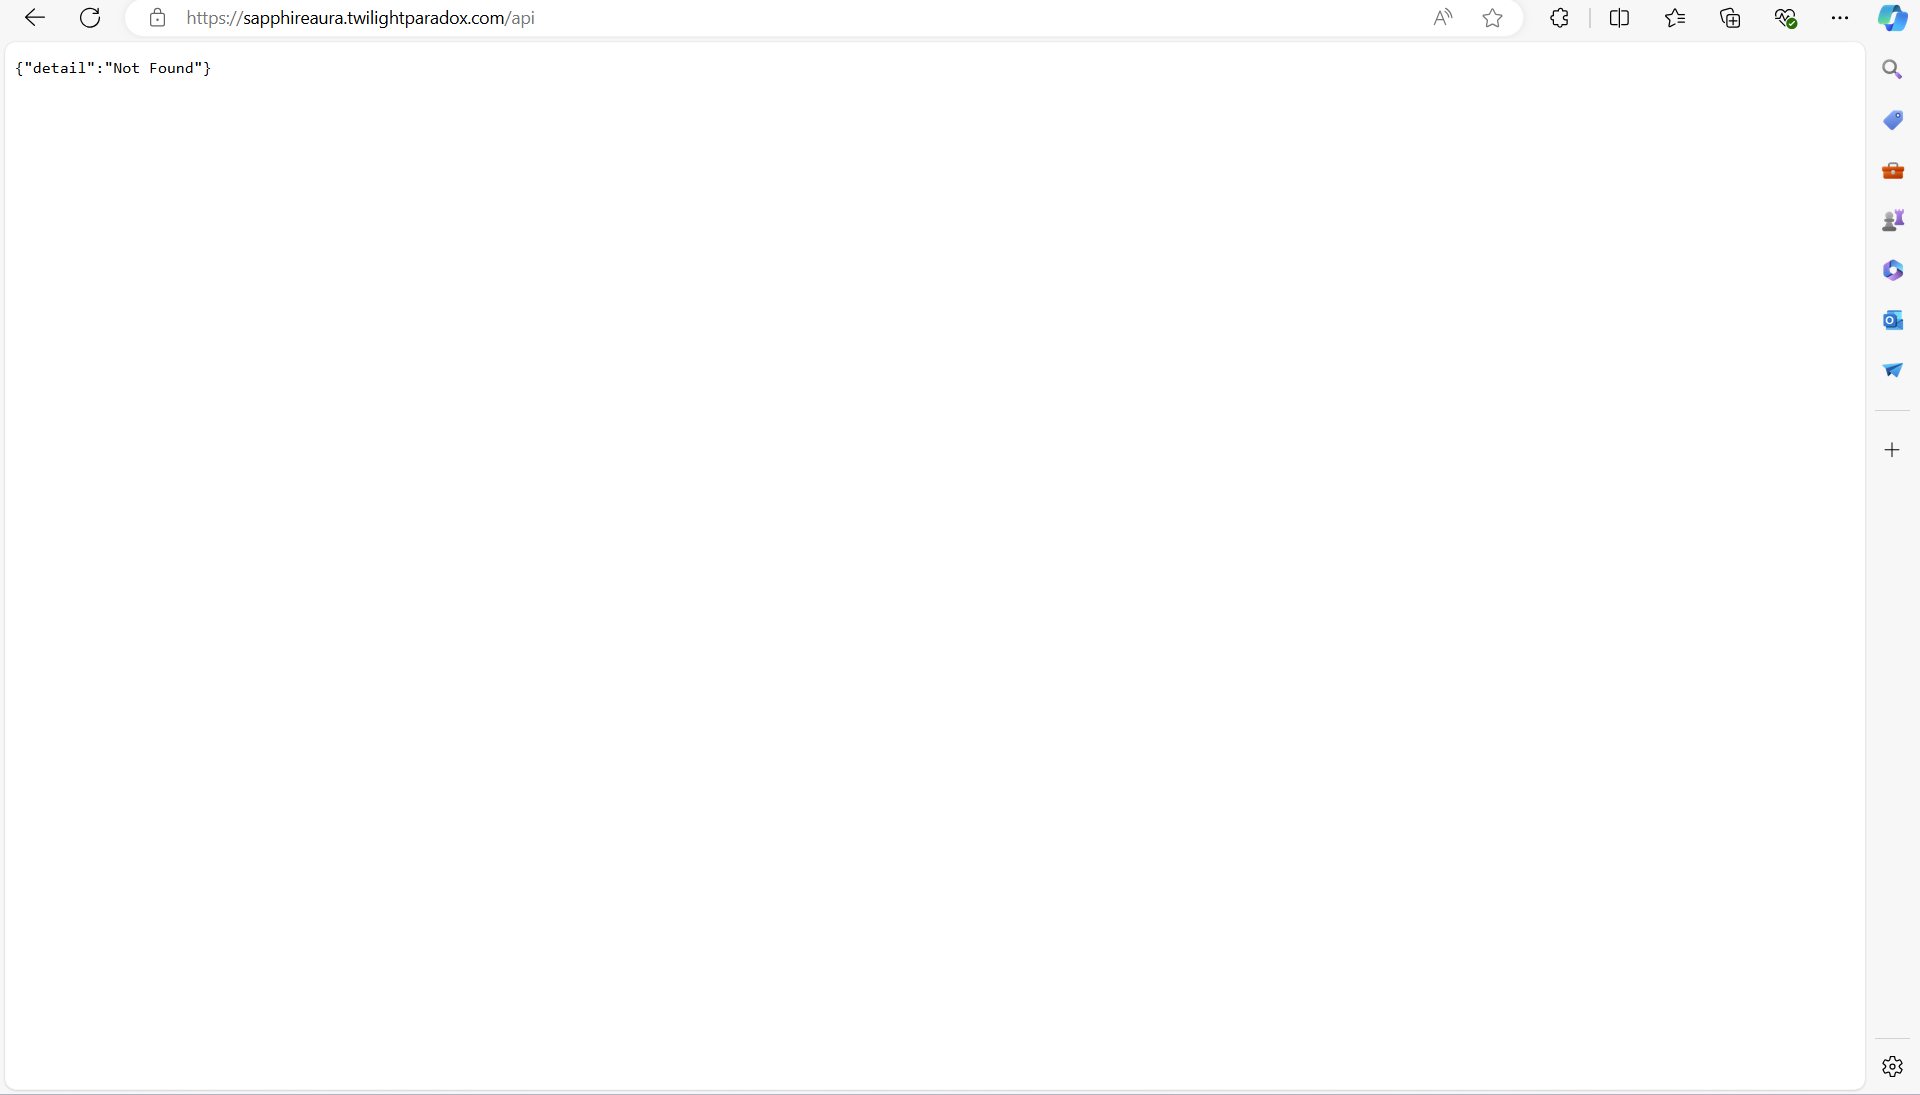
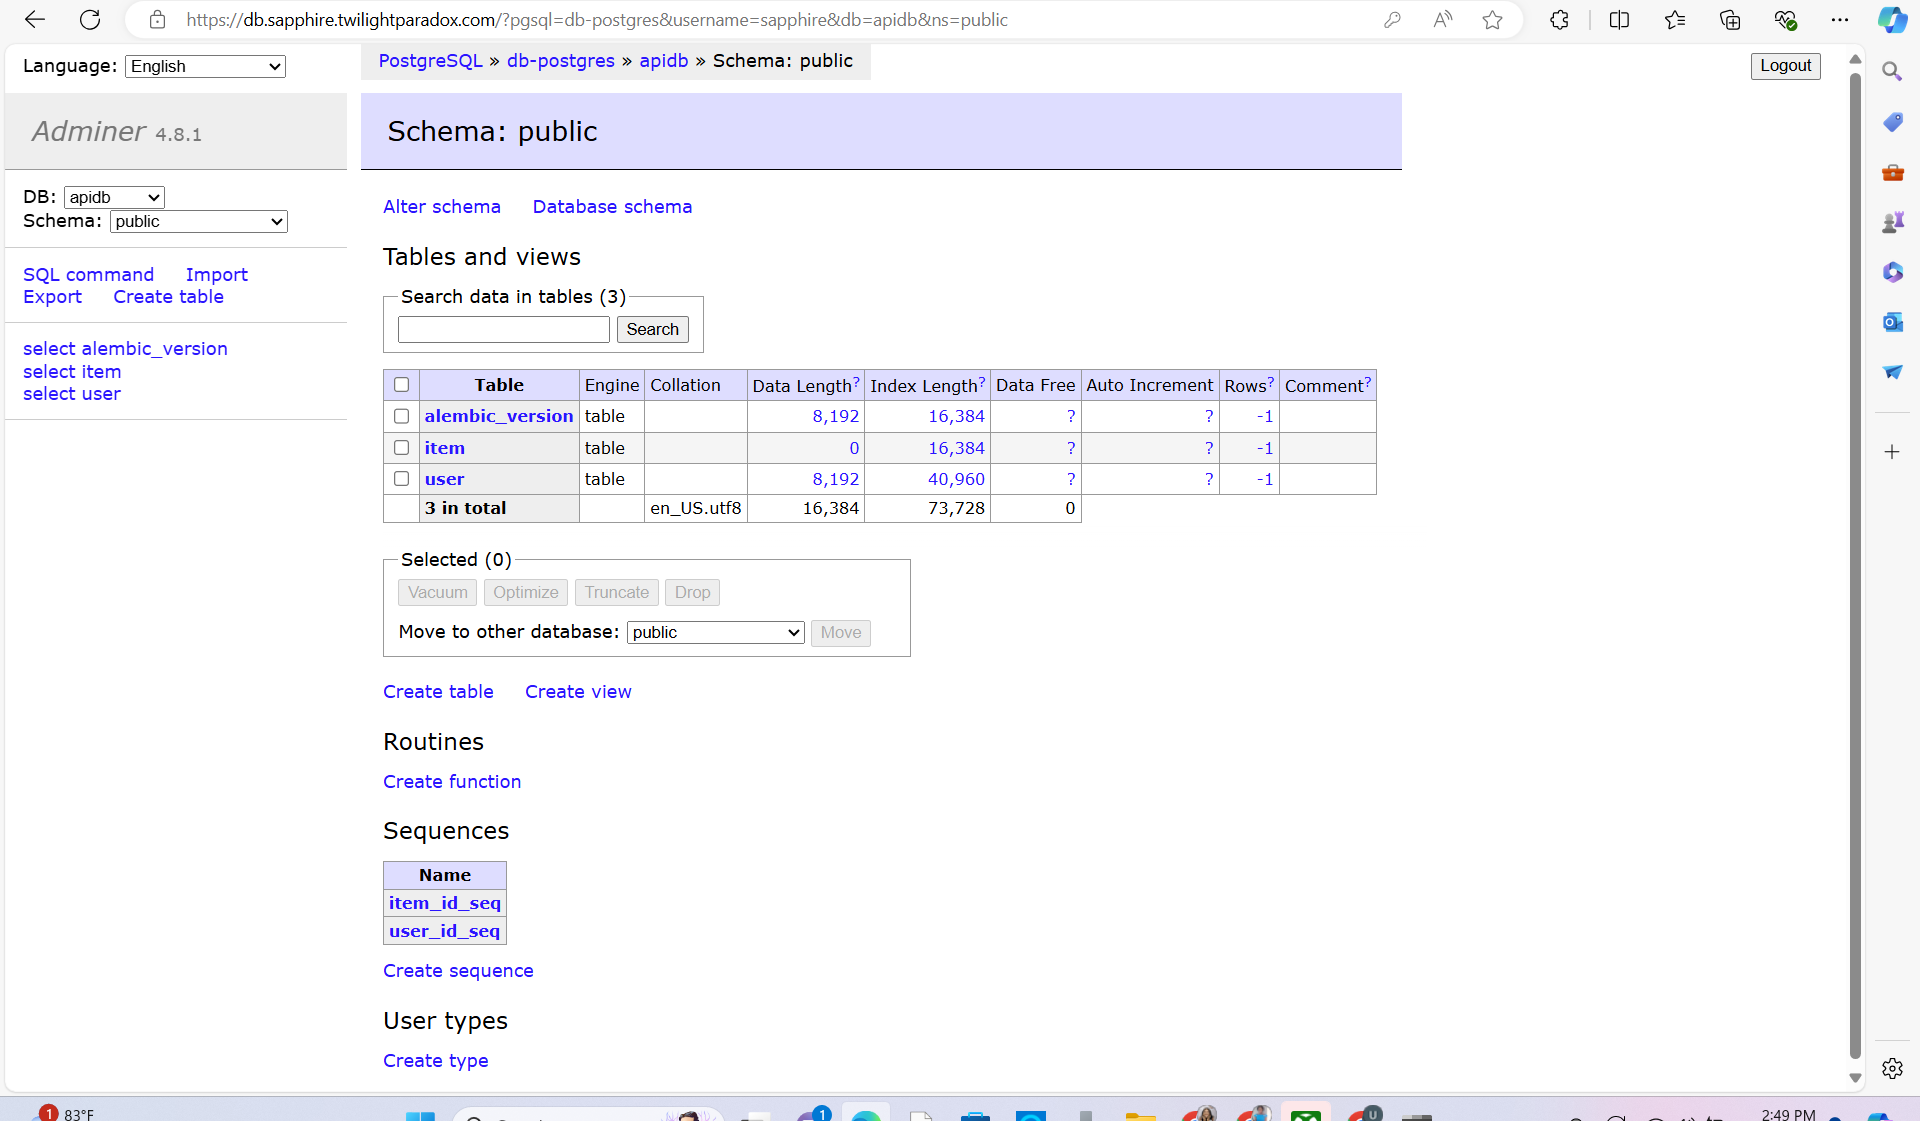
Proof of Deployment
Subscribe to my newsletter
Read articles from Ugochi Ukaegbu directly inside your inbox. Subscribe to the newsletter, and don't miss out.
Written by

Ugochi Ukaegbu
Ugochi Ukaegbu
DevOps/Cloud Engineer who loves learning, sharing knowledge and enjoys engaging with others on various topics. Welcome to my Universe of Learning, where I transform complex ideas into simple forms. My passion for sharing knowledge fuels my writing, making it accessible and fun.