Deploy a LAMP Stack Application to Amazon Lightsail
 Atharva Nevase
A LAMP stack is a popular set of open-source software used for web development. It stands for Linux, Apache, MySQL, and PHP:
Linux: The operating system that runs the server.
Apache: The web server software that delivers web pages to users.
MySQL: The database management system that stores and retrieves data for the website.
PHP: The programming language used to create dynamic web content.
Sequential guide:
Step 1: Navigate to Amazon Lightsail
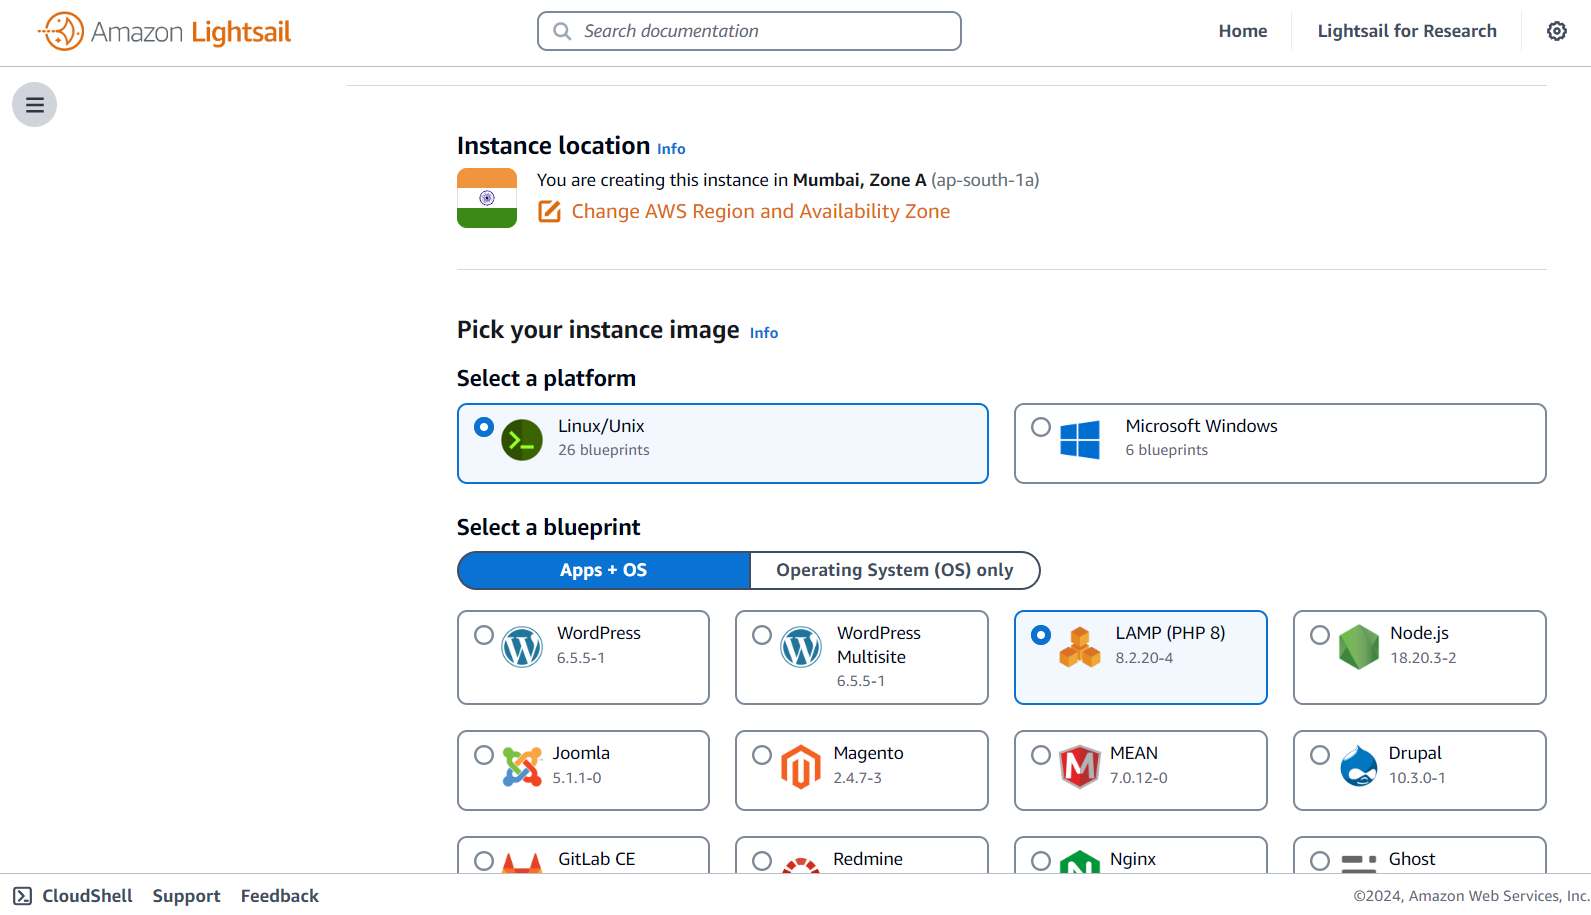
Start by logging into your Amazon Lightsail account. Choose a region that is closest to your geographical location for optimal performance. Linux is the default platform, which is ideal for running a LAMP stack due to its open-source compatibility.
Step 2: Select LAMP (PHP) Blueprint:
In the Lightsail dashboard, select the LAMP (PHP) blueprint. This pre-configured blueprint will set up your LAMP stack on your instance automatically.
Step 3: Building it with a Launch Script:
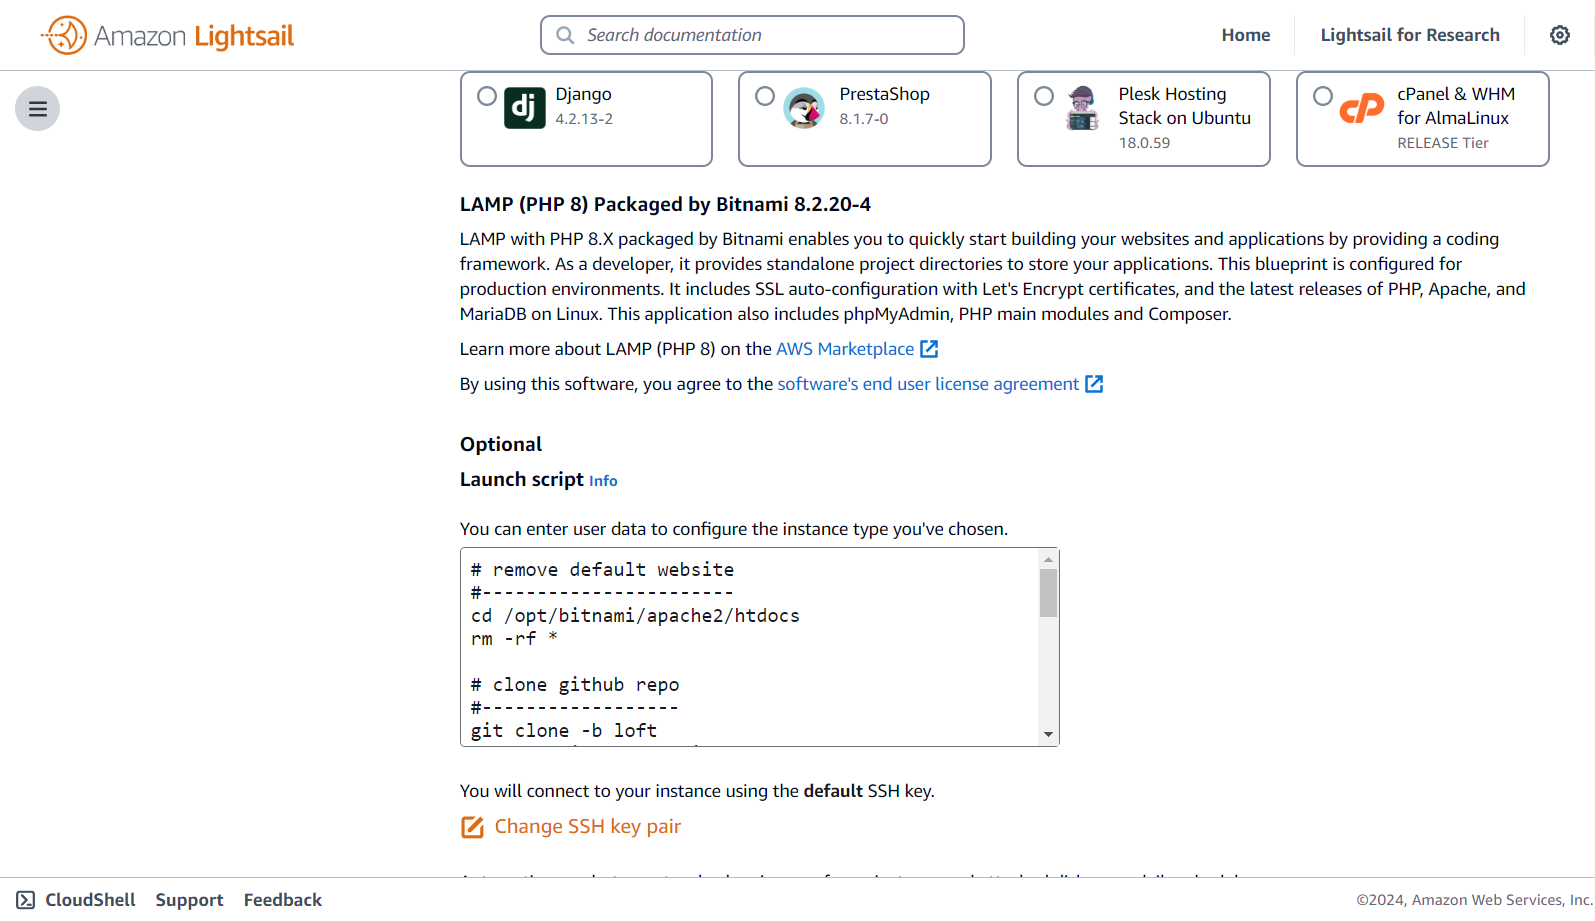
To set up your LAMP stack application, use the following launch script:
# remove default website
#-----------------------
cd /opt/bitnami/apache2/htdocs
rm -rf *

# clone github repo
#------------------
git clone -b loft https://github.com/mikegcoleman/todo-php .

# set write permissions on the settings file
#-----------------------------------
sudo chown bitnami:daemon connectvalues.php
chmod 666 connectvalues.php

# inject database password into configuration file
#-------------------------------------------------
sed -i.bak "s/<password>/$(cat /home/bitnami/bitnami_application_password)/;" /opt/bitnami/apache2/htdocs/connectvalues.php

# create database
#----------------
cat /home/bitnami/htdocs/data/init.sql | /opt/bitnami/mariadb/bin/mysql -u root -p$(cat /home/bitnami/bitnami_application_password)
Summary of the Code:
Remove Default Website:
Clear out the default website files from the Apache web directory.
cd /opt/bitnami/apache2/htdocs
rm -rf *
Clone GitHub Repository:
Clone the
loftbranch of the GitHub repository into the Apache web directory.
git clone -b loft https://github.com/mikegcoleman/todo-php .
Set Write Permissions on the Settings File:
Adjust the permissions of the
connectvalues.phpfile to ensure it is writable.
sudo chown bitnami:daemon connectvalues.php
chmod 666 connectvalues.php
Inject Database Password into Configuration File:
Replace the placeholder
<password>in the configuration file with the actual password.
sed -i.bak "s/<password>/$(cat /home/bitnami/bitnami_application_password)/;" /opt/bitnami/apache2/htdocs/connectvalues.php
Create Database:
Set up the database using the SQL script.
cat /home/bitnami/htdocs/data/init.sql | /opt/bitnami/mariadb/bin/mysql -u root -p$(cat /home/bitnami/bitnami_application_password)
Step 4: Select Instance Size, Name Your Instance, and Create:
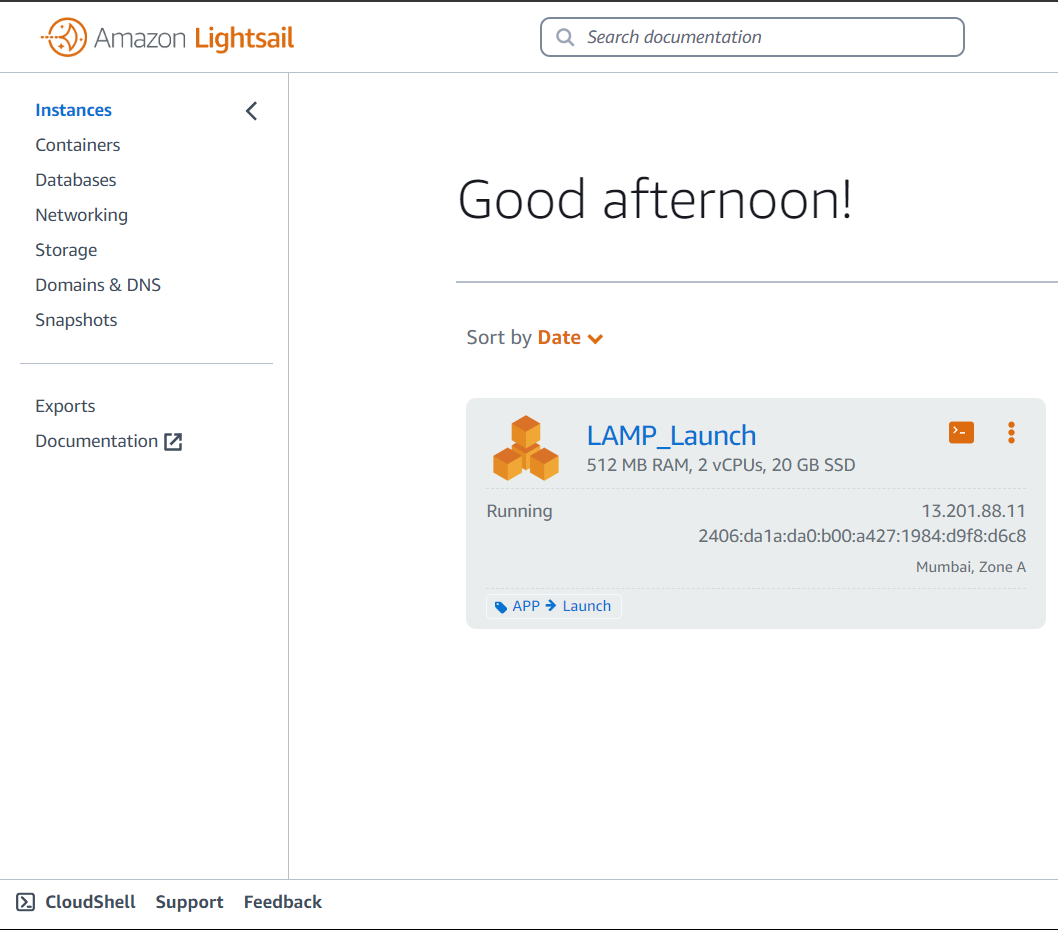
Choose the instance size that fits your needs; the $5 option is a popular choice. Name your instance and click “Create.” Optionally, add tags such as APP -> Todo to help organize and identify your instance.
Step 5: Access LAMP Stack Application:
Once your instance is up and running, access your LAMP stack application by navigating to your instance’s public IP address in your browser. You’ll see the todo application where you can add tasks, set their severity, and mark them as complete or incomplete.
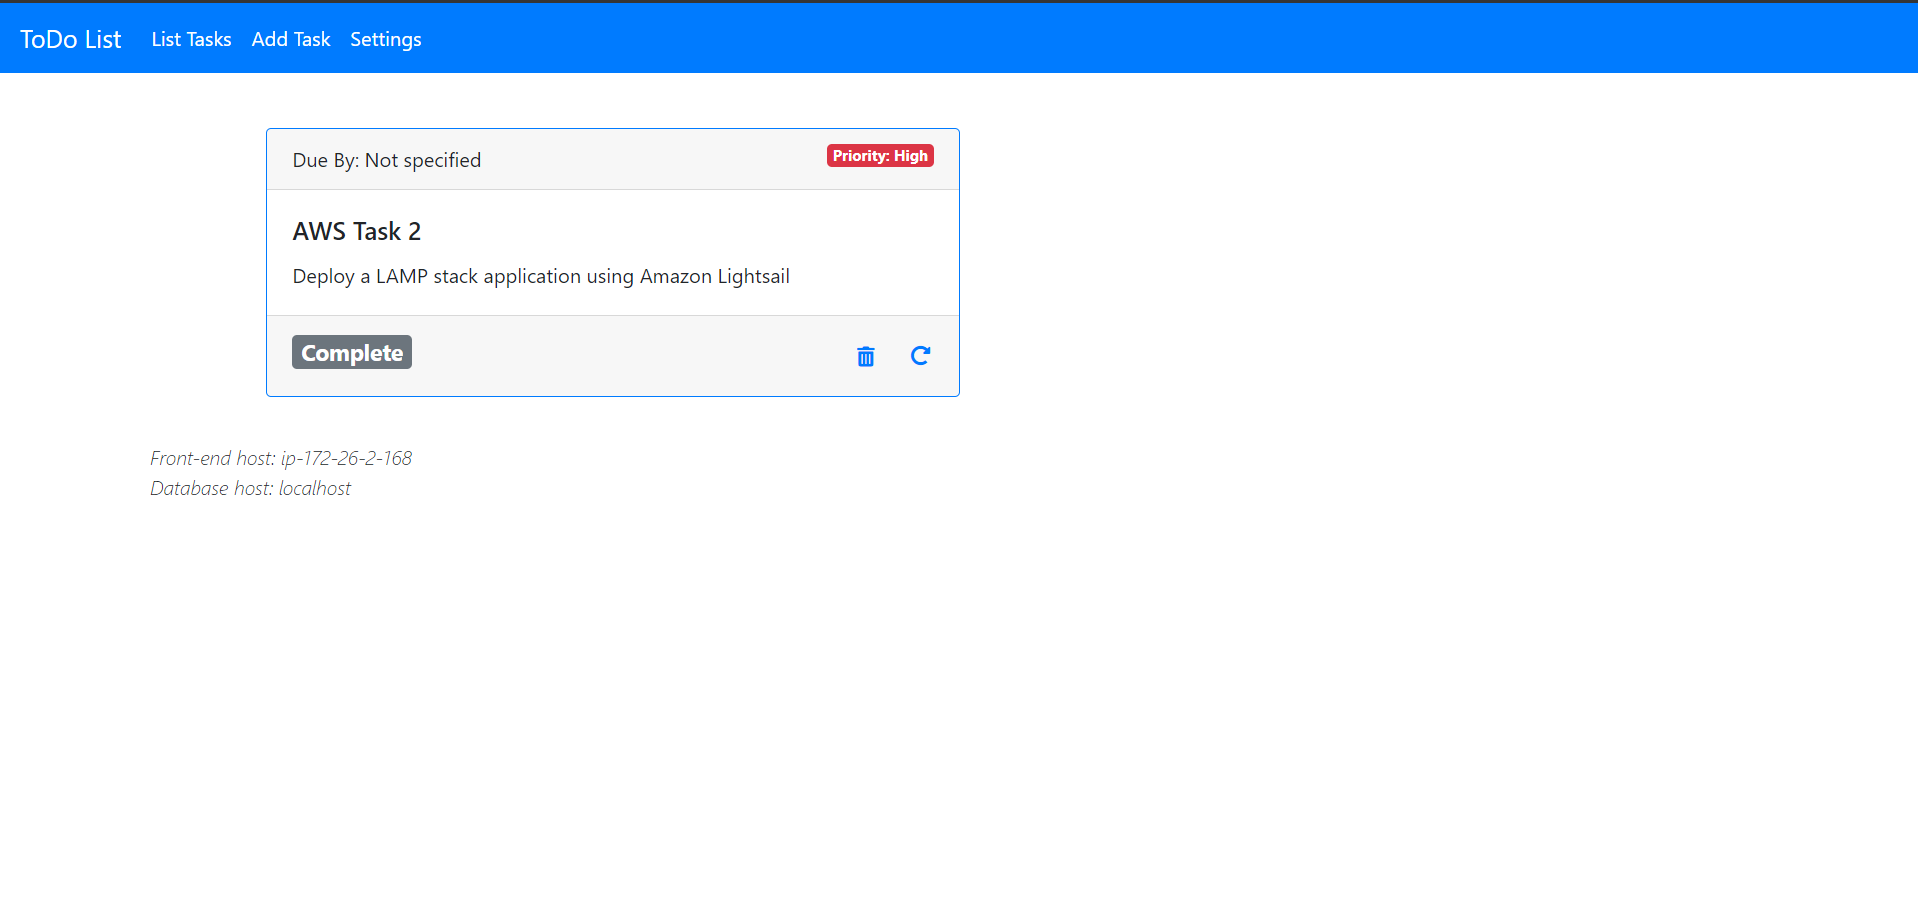
You’ve successfully deployed a LAMP stack application on Amazon Lightsail. By following this guide, you’ve set up a powerful and flexible web environment, configured it with a launch script, and deployed a functional todo application.
This setup not only demonstrates the ease and efficiency of Amazon Lightsail but also provides a robust foundation for further web development projects.
Enjoy exploring and expanding your new LAMP stack application!
Subscribe to my newsletter
Read articles from Atharva Nevase directly inside your inbox. Subscribe to the newsletter, and don't miss out.
Written by
