How to Set Up ComfyUI on macOS: A Comprehensive Guide (M1, M2, M3)
 Tenith

Setting up ComfyUI on macOS can seem daunting, but with the right guidance, it becomes a manageable process. This blog post will walk you through the installation and setup steps for ComfyUI, enabling you to leverage its capabilities for generating stunning images with various models. Let's dive into the details!
Introduction to ComfyUI
ComfyUI is an advanced interface for interacting with image generation models, particularly suitable for intermediate to advanced users. It offers a robust environment for configuring and running different image generation models, including Stable Diffusion.
Prerequisites
Before we begin, ensure your macOS is updated to the latest version. Additionally, you will need:
An internet connection
Basic familiarity with using the terminal
Homebrew installed on your system
Step-by-Step Installation Guide
1. Install Homebrew
Homebrew is a package manager for macOS that simplifies the installation of software. To install Homebrew, open your terminal and execute the following command:
/bin/bash -c "$(curl -fsSL https://raw.githubusercontent.com/Homebrew/install/HEAD/install.sh)"
2. Install Miniconda
Miniconda is a minimal installer for Conda, a package and environment management system. Using Homebrew, install Miniconda with the command:
brew install --cask miniconda
3. Create a Conda Environment
Creating a dedicated Conda environment ensures that dependencies for ComfyUI do not interfere with other projects. Execute the following commands to create and activate a new environment named comfyui-env:
conda create --name comfyui-env python=3.9
conda activate comfyui-env
4. Clone the ComfyUI Repository
Next, clone the ComfyUI repository from GitHub to your local machine. Navigate to the directory where you want to store the repository and run:
git clone https://github.com/comfyanonymous/ComfyUI
cd ComfyUI
5. Upgrade pip and Install Requirements
To ensure compatibility and smooth operation, upgrade pip and setuptools, then install the required packages:
pip install --upgrade pip setuptools
pip install --pre torch torchvision torchaudio --index-url https://download.pytorch.org/whl/nightly/cpu
pip install -r requirements.txt
6. Download and Place the Model File
ComfyUI requires specific model files to generate images. You can download any compatible model, such as DreamShaper or Juggernaut Reborn. Follow these steps:
Download the Model:
For DreamShaper, navigate to DreamShaper onCivitAI and download the
dreamshaper.safetensorsmodel file.For Juggernaut Reborn, navigate to Juggernaut Reborn on Comfy and download the
juggernaut_reborn.safetensorsmodel file.
Place the Model:
Once downloaded, place the model file in the
models/checkpointsdirectory within your ComfyUI installation.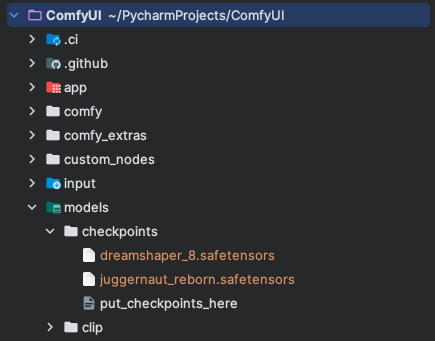
7. Run the Main Application
With everything set up, you can now start ComfyUI by running:
python main.py
Using ComfyUI to Generate an Image
Open in Browser
Open your browser and navigate to http://127.0.0.1:8188/.
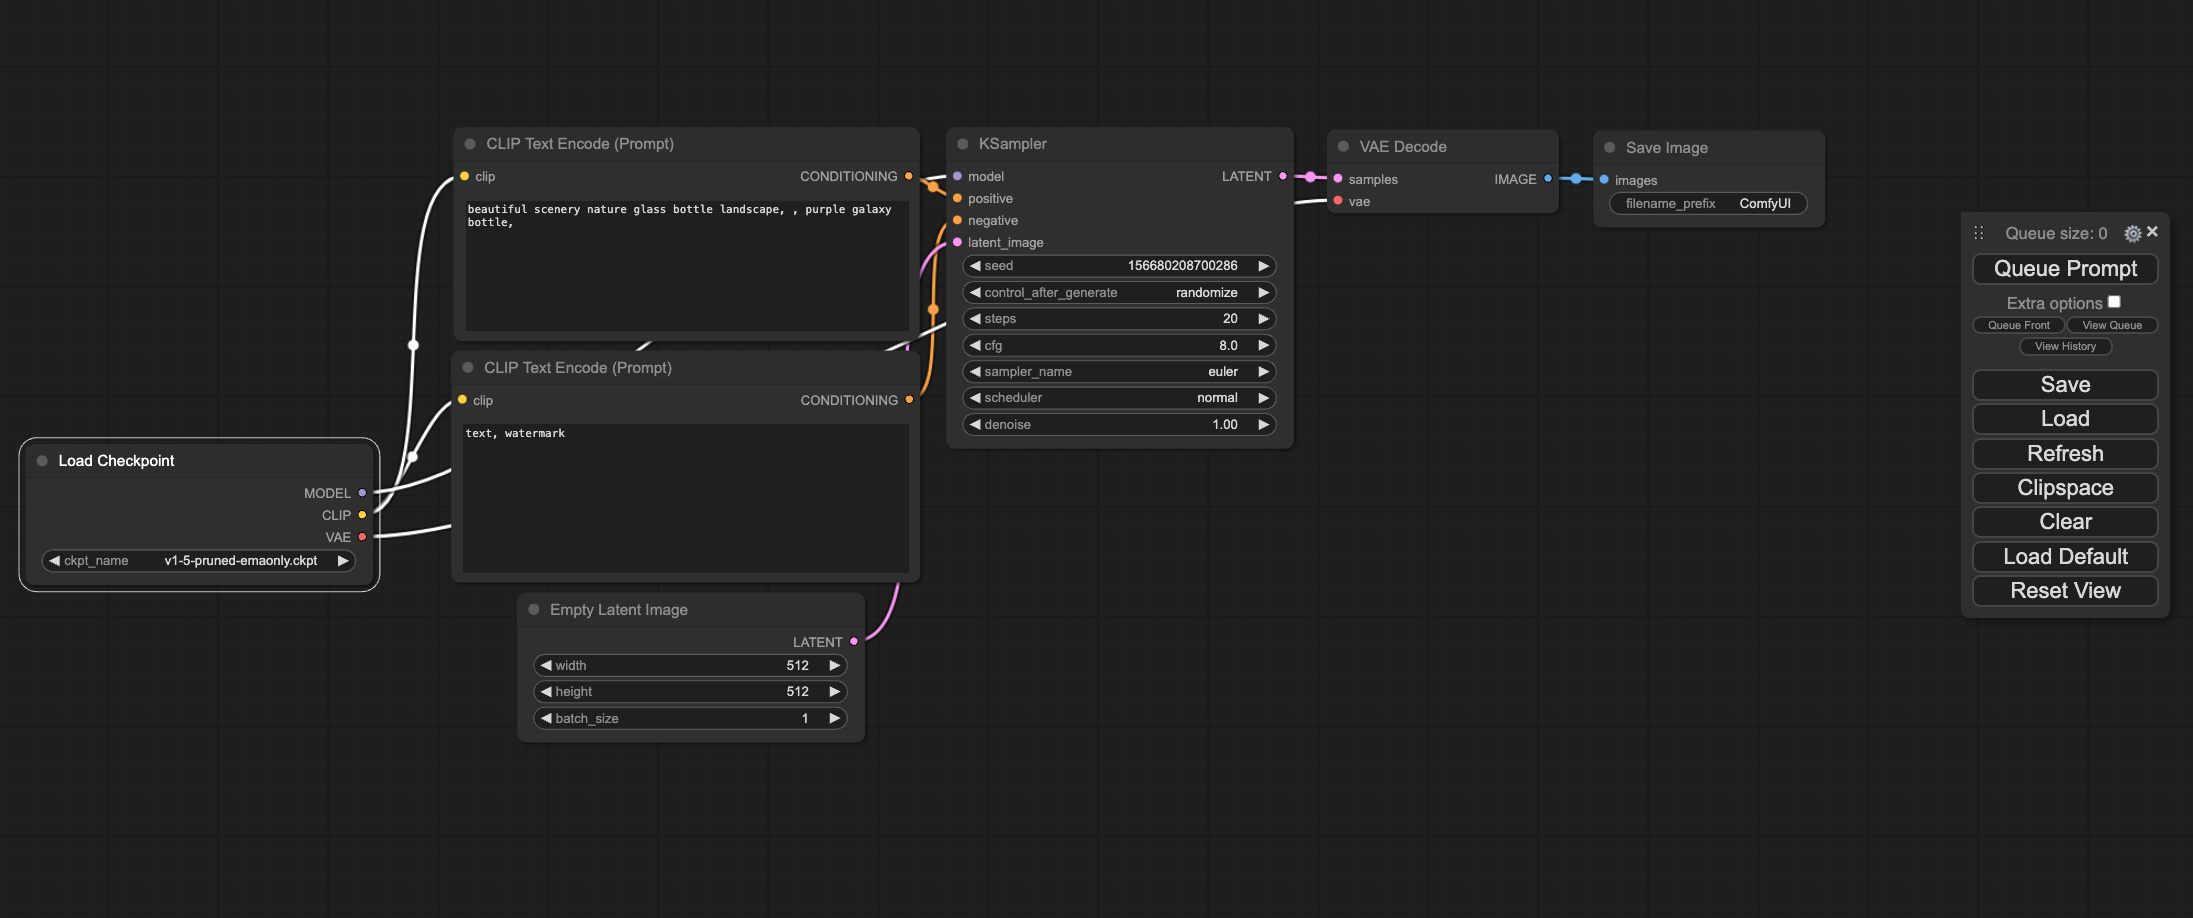
Load the Model
In the start node tree, select the "Load Checkpoint" node.
Choose the
juggernaut_reborn.safetensorsordreamshaper.safetensorsmodel from the list of checkpoints.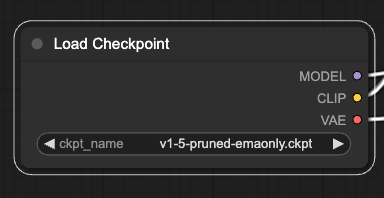
Generate the Image
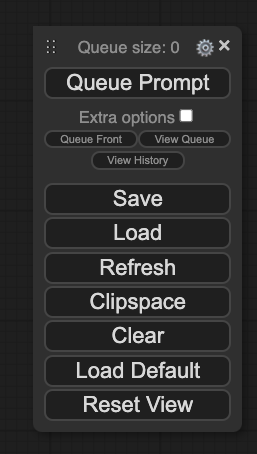
Click the "queue prompt" button located in the toolbox.
The selected node will highlight in green as each step is processed.
Once complete, the generated image will be displayed.
Conclusion
Setting up ComfyUI on macOS is straightforward if you follow the steps outlined above. By leveraging this powerful interface, you can explore and generate stunning images using a variety of models. Whether you are an intermediate or advanced user, ComfyUI offers a flexible and efficient way to work with image generation models.
FAQs
1. Can I use other models with ComfyUI?
- Yes, you can use various image generation models. Ensure they are compatible and placed in the correct directory.
2. Is it necessary to use Conda for this setup?
- While not mandatory, using Conda simplifies dependency management and prevents conflicts.
3. What should I do if I encounter errors during installation?
- Double-check the commands and ensure all prerequisites are met. Consult the ComfyUI GitHub repository for troubleshooting tips.
4. Can I run ComfyUI on other operating systems?
- Yes, ComfyUI can be set up on other operating systems with some adjustments to the installation steps.
5. Where can I find more information about using ComfyUI?
- The ComfyUI GitHub repository and community forums are excellent resources for additional information and support.
By following these steps, you'll have ComfyUI up and running on your macOS, ready to generate amazing images with ease. Happy creating!
Subscribe to my newsletter
Read articles from Tenith directly inside your inbox. Subscribe to the newsletter, and don't miss out.
Written by
