Struggling to Integrate MongoDB with Express? Here's Your Ultimate Guide
 Aditya Kumar Gupta
Table of contents
- Modules Required to Install
- How to Save Data in a MongoDB Database
- Installing MongoDB Compass
- Creating an Express App and Installing Important Modules
- Setting Up the EJS Template Engine
- Setting up the MongoDB Schema
- Connecting MongoDB with our Backend
- Setting up a route & importing our MongoDB schema in the Express app to save data
- Making a Request with a Button Click
- Conclusion
Are you struggling to integrate MongoDB with your Express application?
Look no further! In this article, we provide a comprehensive guide to seamlessly connect MongoDB with Express, ensuring your data is stored securely and efficiently.
Follow along as we walk you through each step, from setting up your environment to saving data in your MongoDB database.
Modules Required to Install
Express
Ejs (Template Engine)
Mongoose
Node
How to Save Data in a MongoDB Database
Saving data in a MongoDB database is a fundamental skill for any developer working with this powerful NoSQL database. Whether you're building a simple application or a complex system, understanding how to efficiently store and manage data is crucial.
In this section, we will provide a step-by-step guide to help you save data in MongoDB using Mongoose, a popular Object Data Modeling (ODM) library for MongoDB and Node.js.
By following these steps, you'll be able to seamlessly integrate MongoDB into your application and ensure your data is stored securely and efficiently.
Installing MongoDB Compass
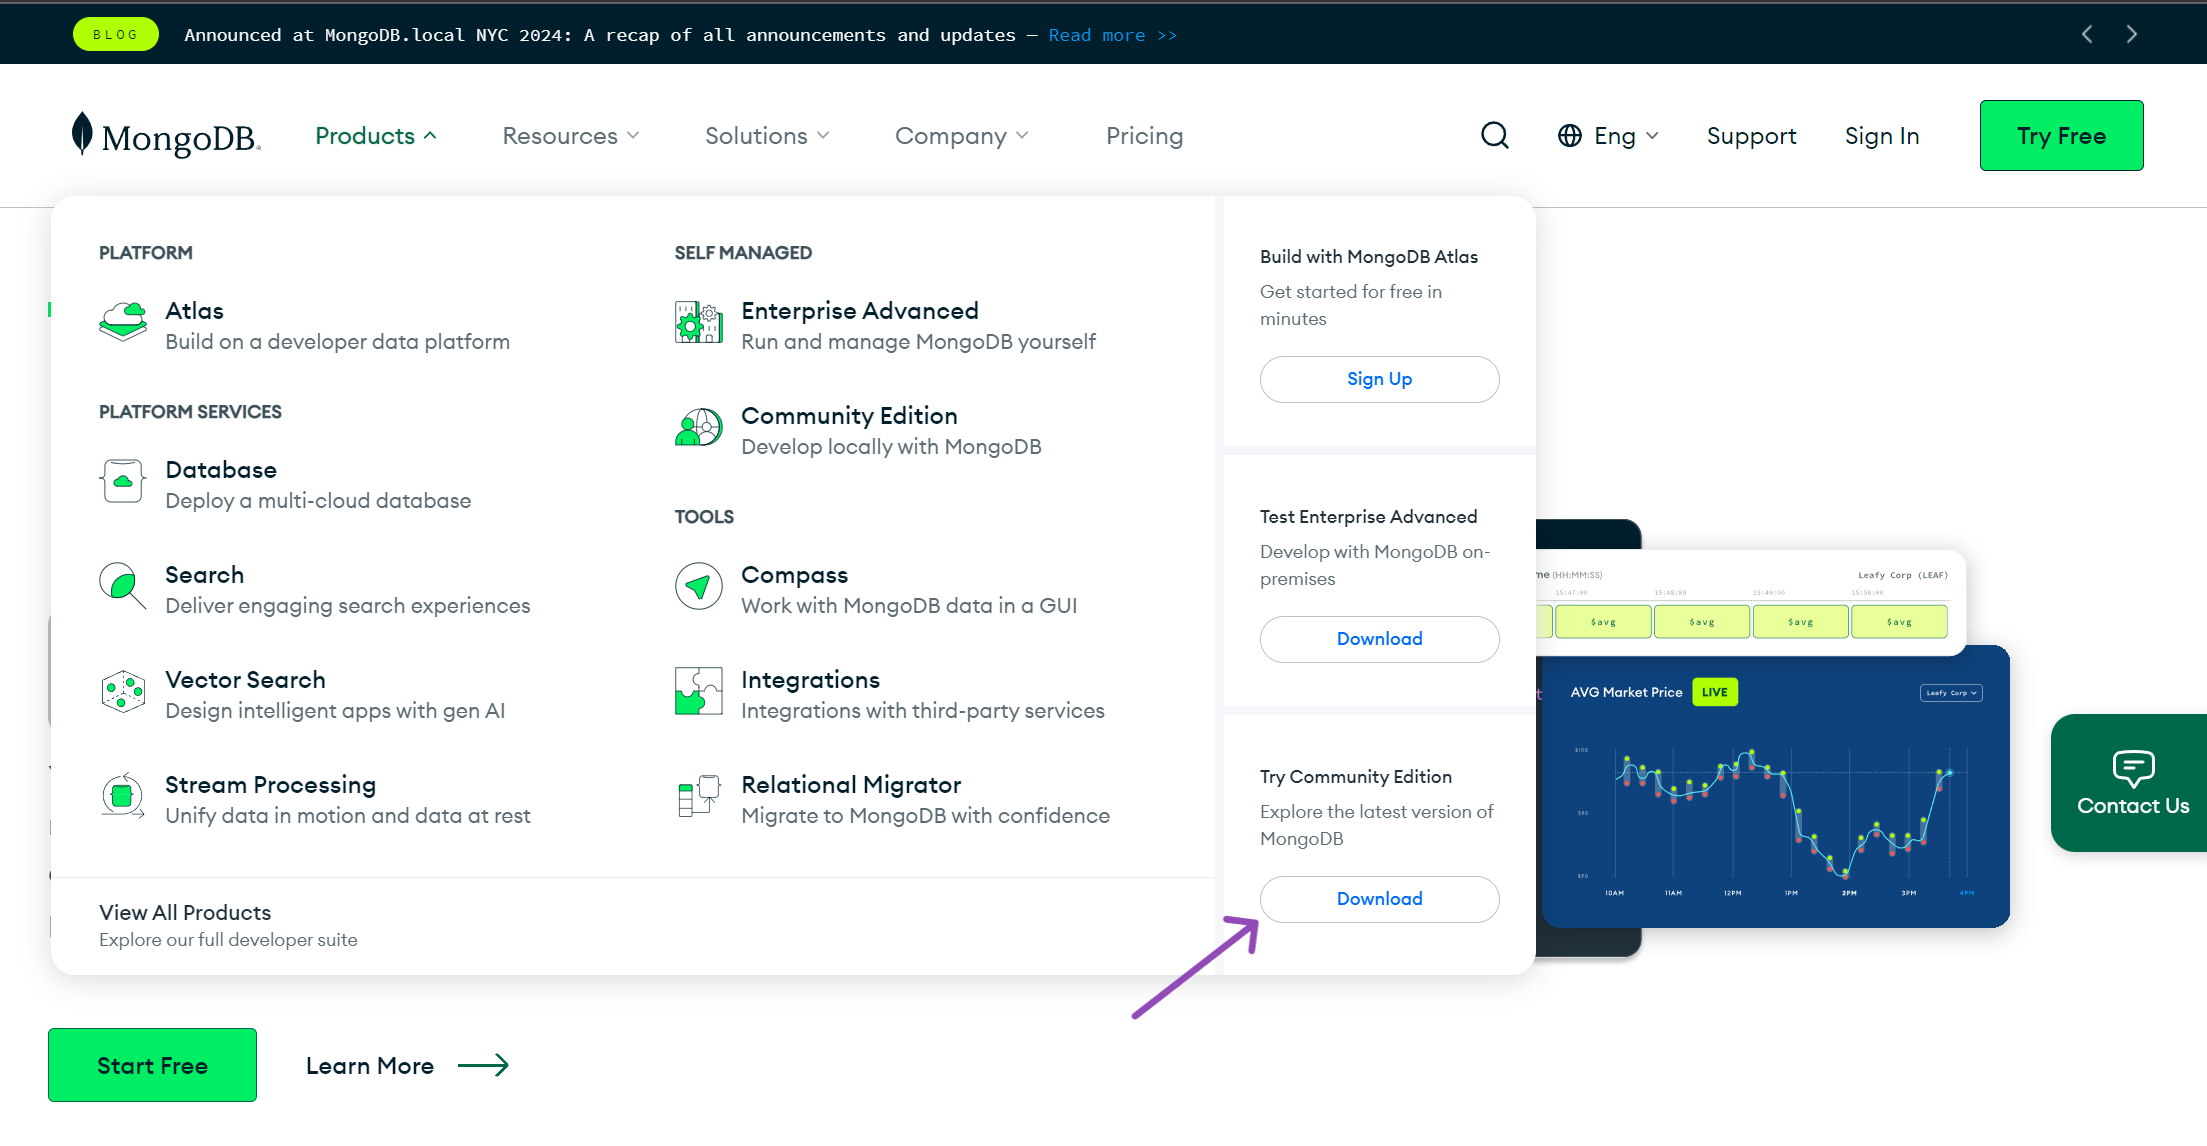
Step 1. First, You have to go to Mongodb.com then under the Product section you have to download the community edition of MongoDB.
Step 2. Then, you will be redirected to the next page where you just have to click on the download button and download it as per your system requirements.
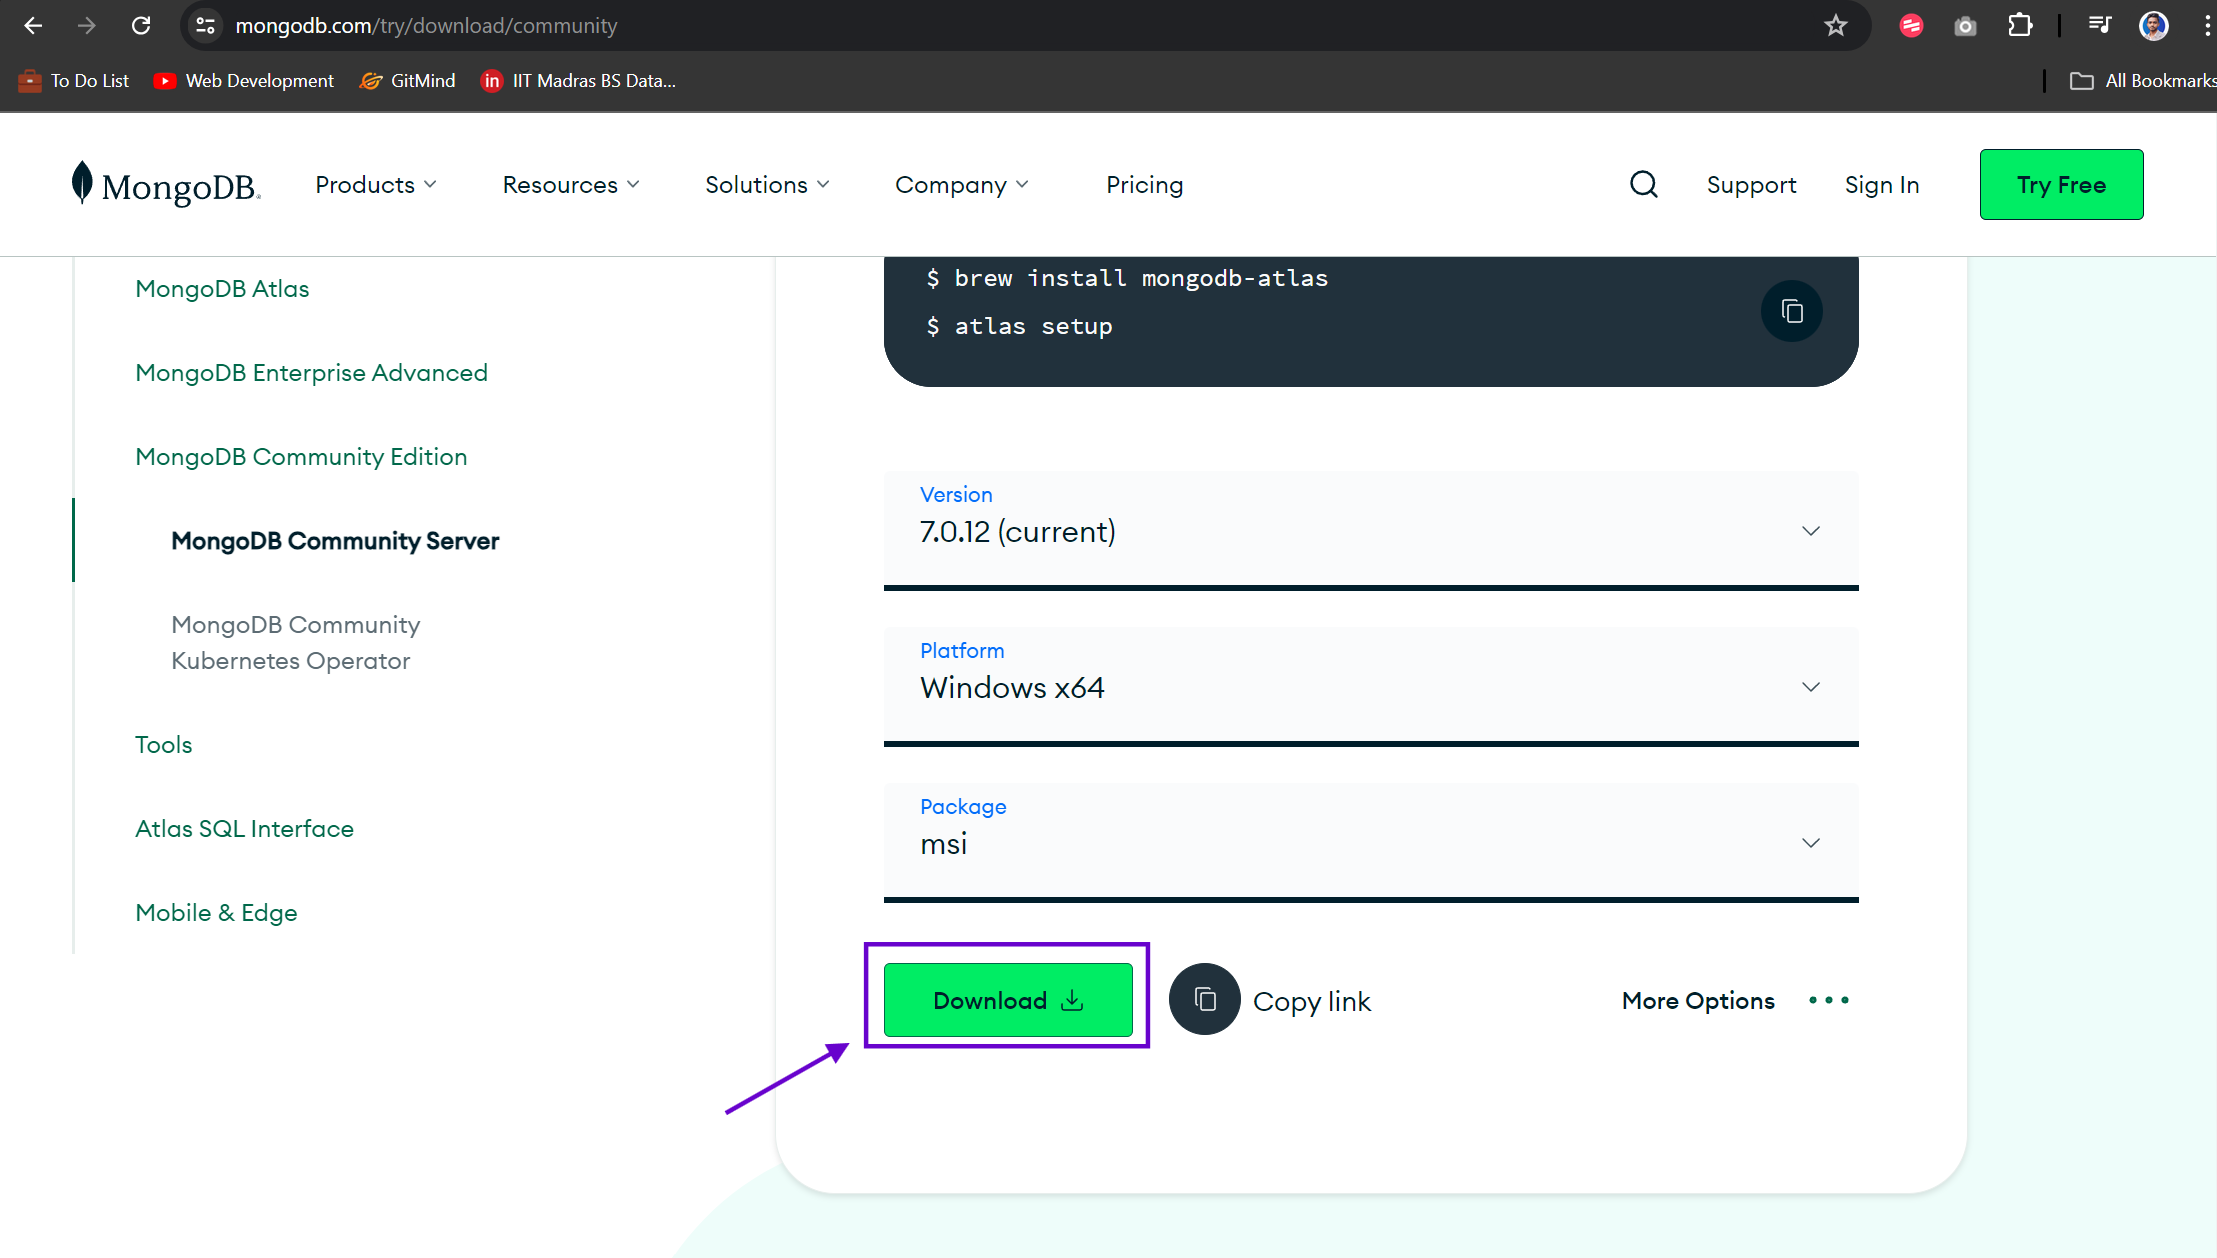
Then, just install it on your system and proceed to the next part.
Creating an Express App and Installing Important Modules
Step 1. Now open your code editor and create a file with an extension an .js extension.
Step 2. Then, Open the terminal and use npm init -y to initialize the project.

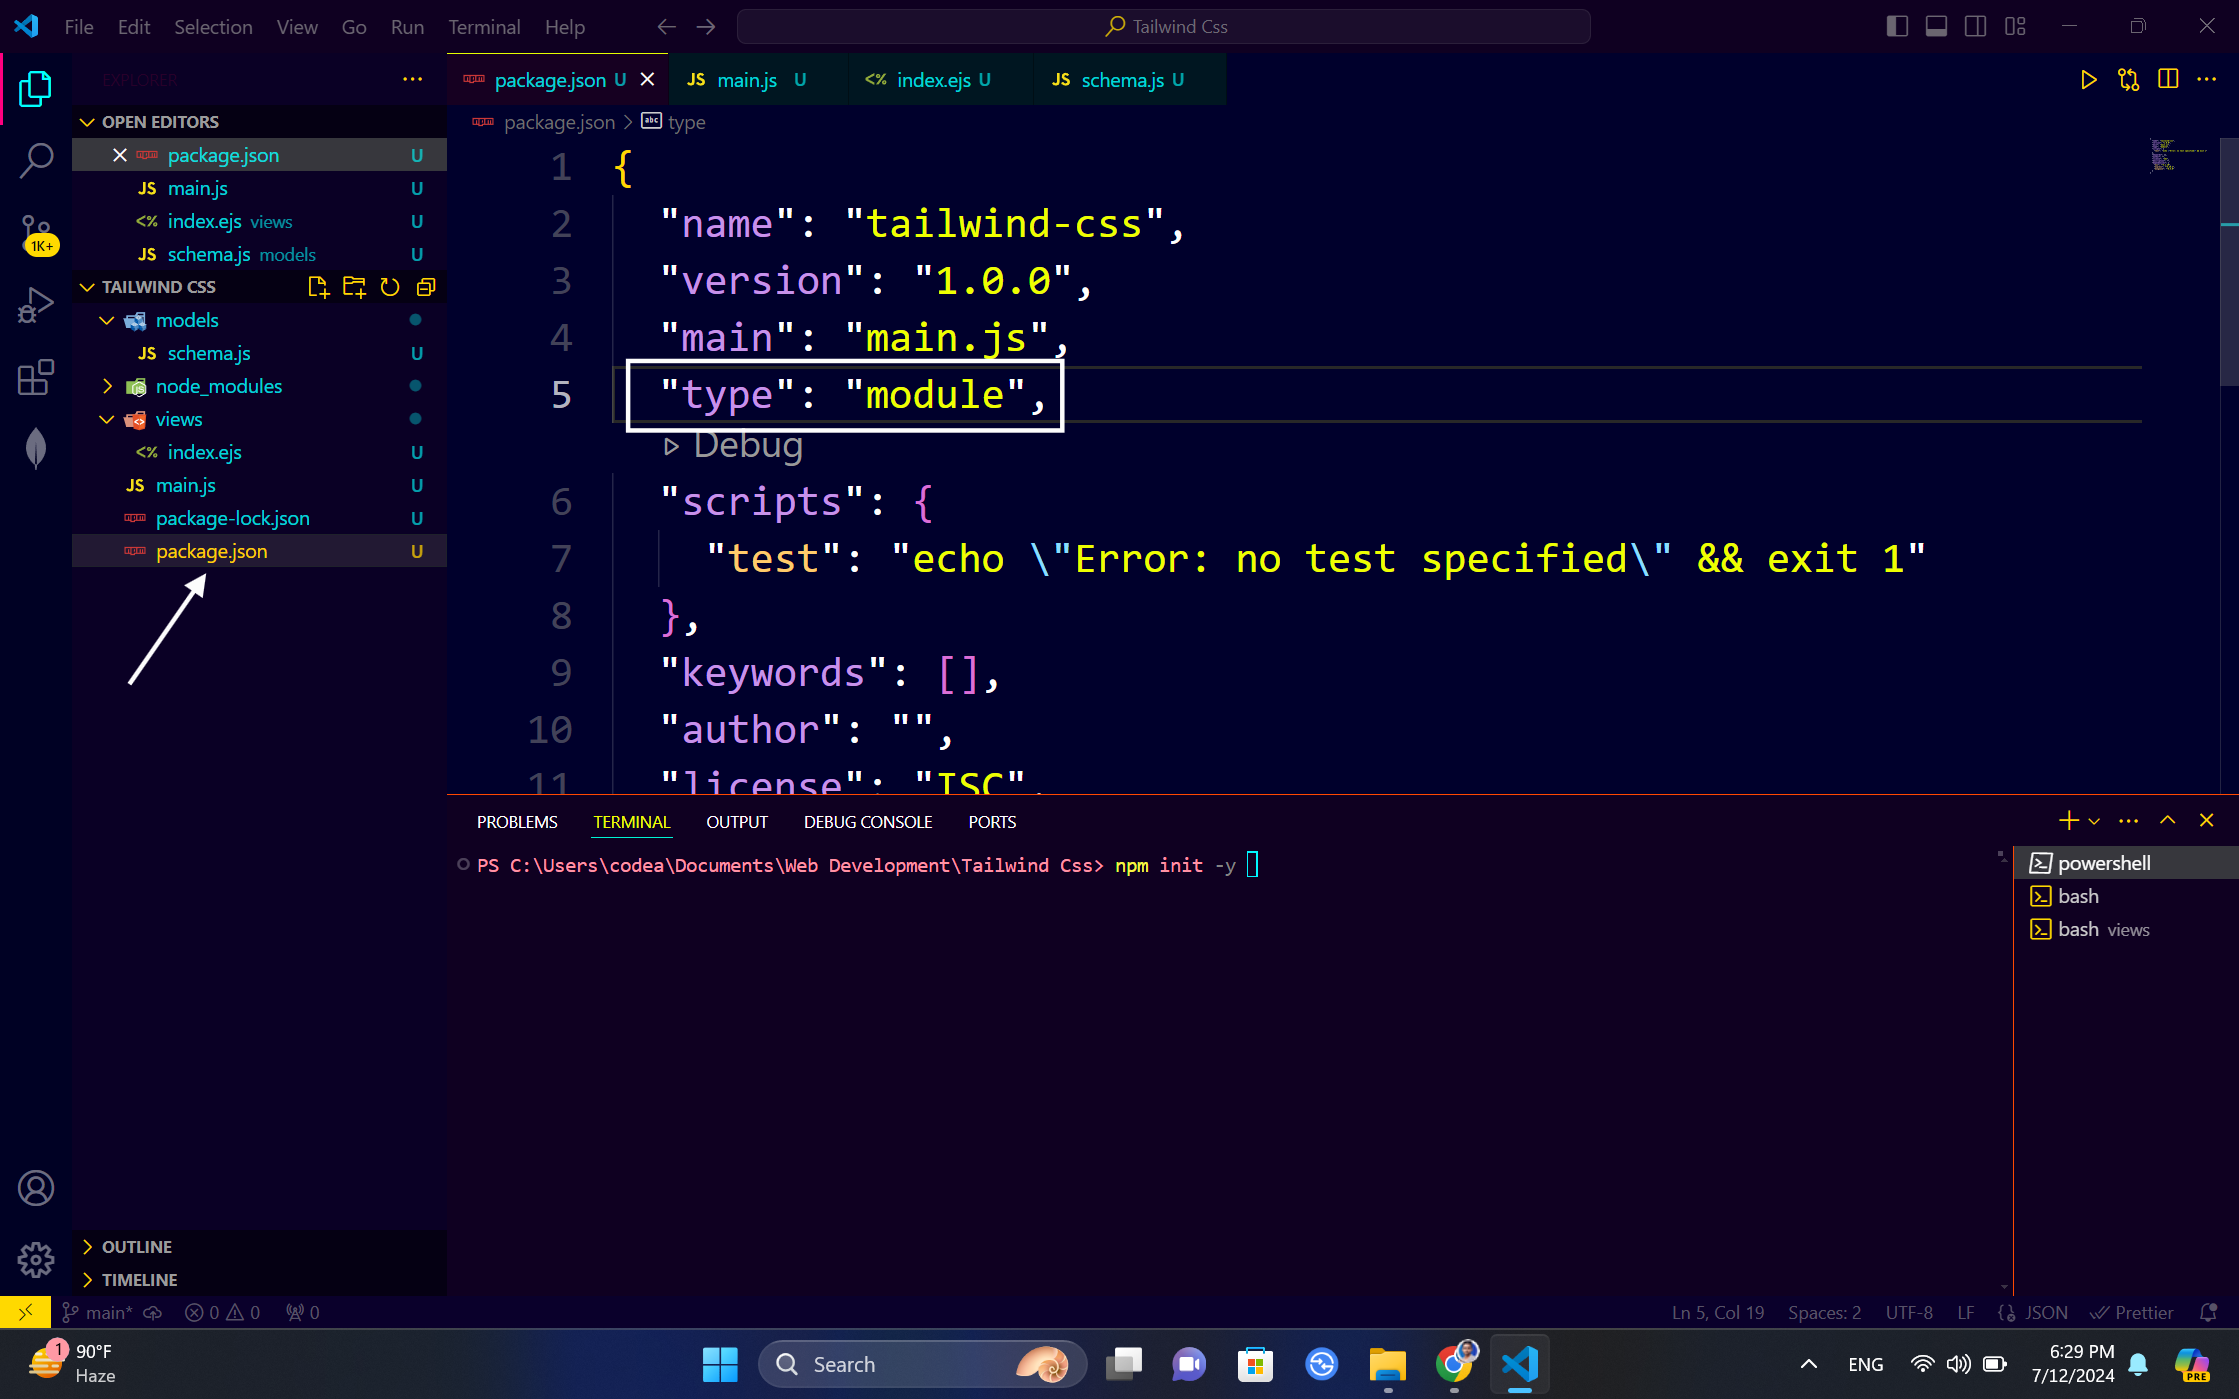
Step 3. Now go to the package.json file and add this line "type":"module because in this project we will use ES modules.
Step 4. Go to your main js file and open the terminal.
Step 5. Now, Install the express package using the command given below. Pase the commands in the terminal and hit enter
npm i express
Step 6. Now, install the Mongoose package. Copy the command below and paste it into the terminal:
npm i mongoose
Step 7. In this project, we will use a template engine called ejs. Use the command below to download ejs
npm i ejs
Step 8. Next, open the code editor, import the express module and set up the routes and port.
import express from "express"
const app = express()
app.get("/", (req, res) => {
    res.send("Hello World")
})
app.listen(port, () => {
    console.log('I am running at port', port);
})
Now run the express using node or you can also use nodemon module to automatically restart the server. Use the commands given below
For Node
node filename.js
For Nodemon
nodemon filename.js
Open the browser and use localhost:3000 it to see your express app.
Setting Up the EJS Template Engine
Hey there! Ready to set up the EJS template engine? Let's get started!
Step 1. We already have installed the ejs package. now just add this line to your express app.
app.set('view engine', 'ejs');
Step 2. Now, In the next step create a folder with the name views and then you can create the HTML file that you want to render but have to add .ejs an extension
Note: You need to add your HTML code to the file you want to render.
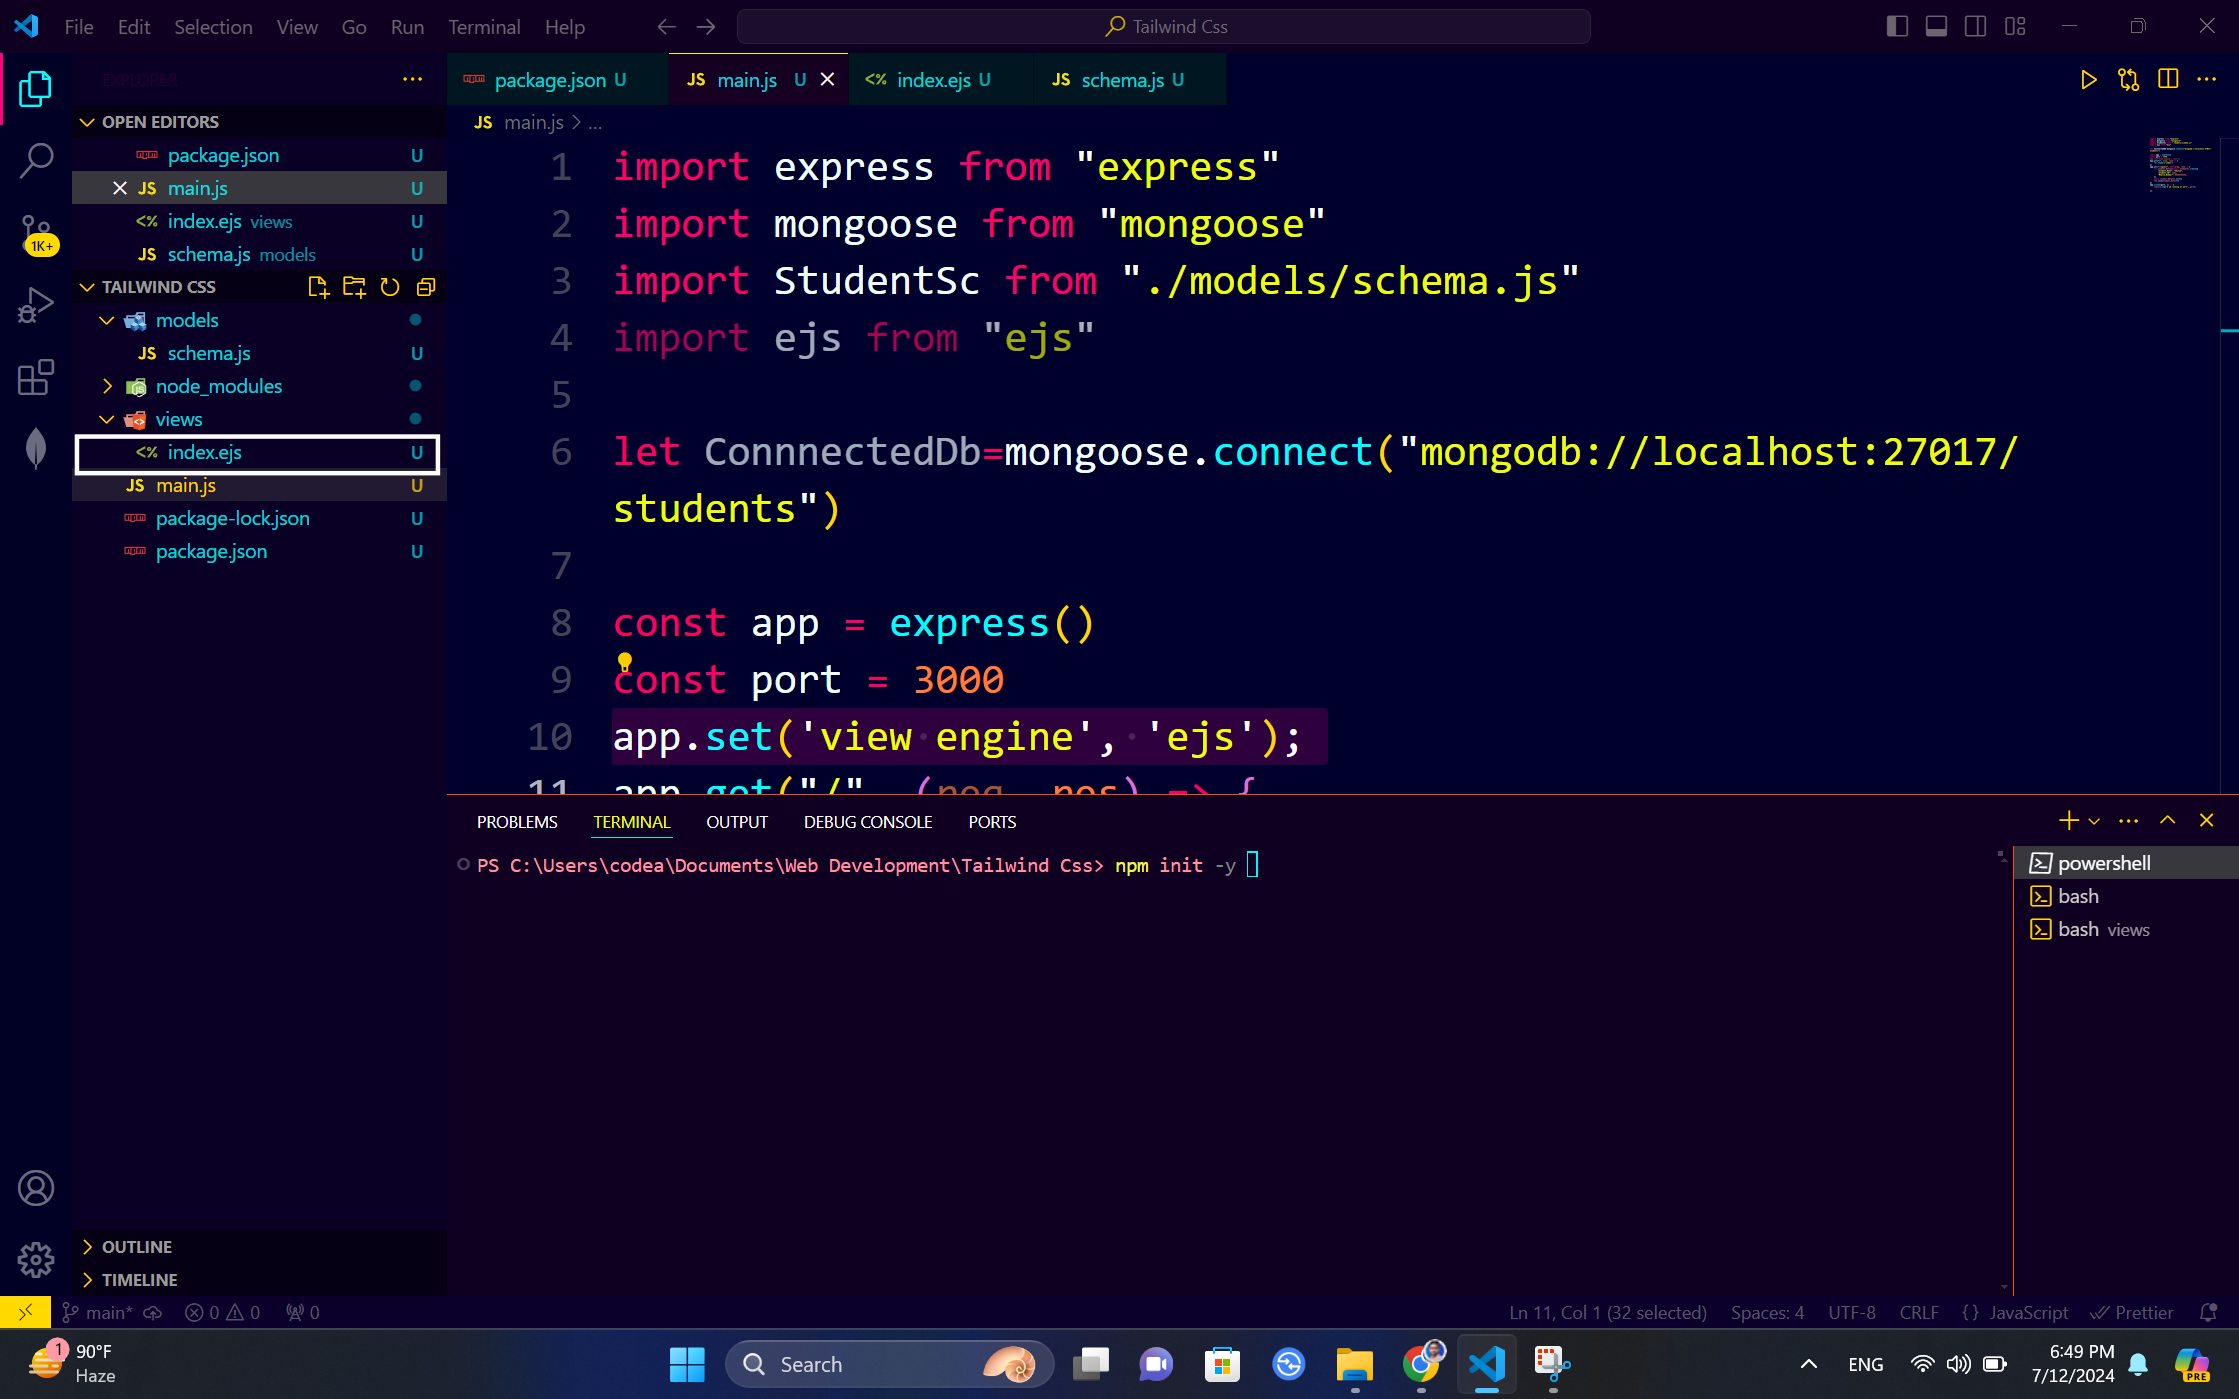
Step 3. After that, we need to render the file. In this case, we will render the index file in the main route, which is inside the views folder. To do this, we will use the .render method in Express. Add the code below and change the filename to your file to render it.
app.get("/", (req, res) => {
    res.render('filename')
})
Setting up the MongoDB Schema
Setting up the MongoDB schema is a crucial step in structuring your data for efficient storage and retrieval.
In this section, I will guide you through the process of defining a schema using Mongoose, which will help you enforce data validation and create a clear blueprint for your MongoDB collections.
By the end of this guide, you'll have a solid understanding of how to set up and utilize schemas in your MongoDB database.
Step 1. Create a folder in the same project directory with the name model and create a .js file.
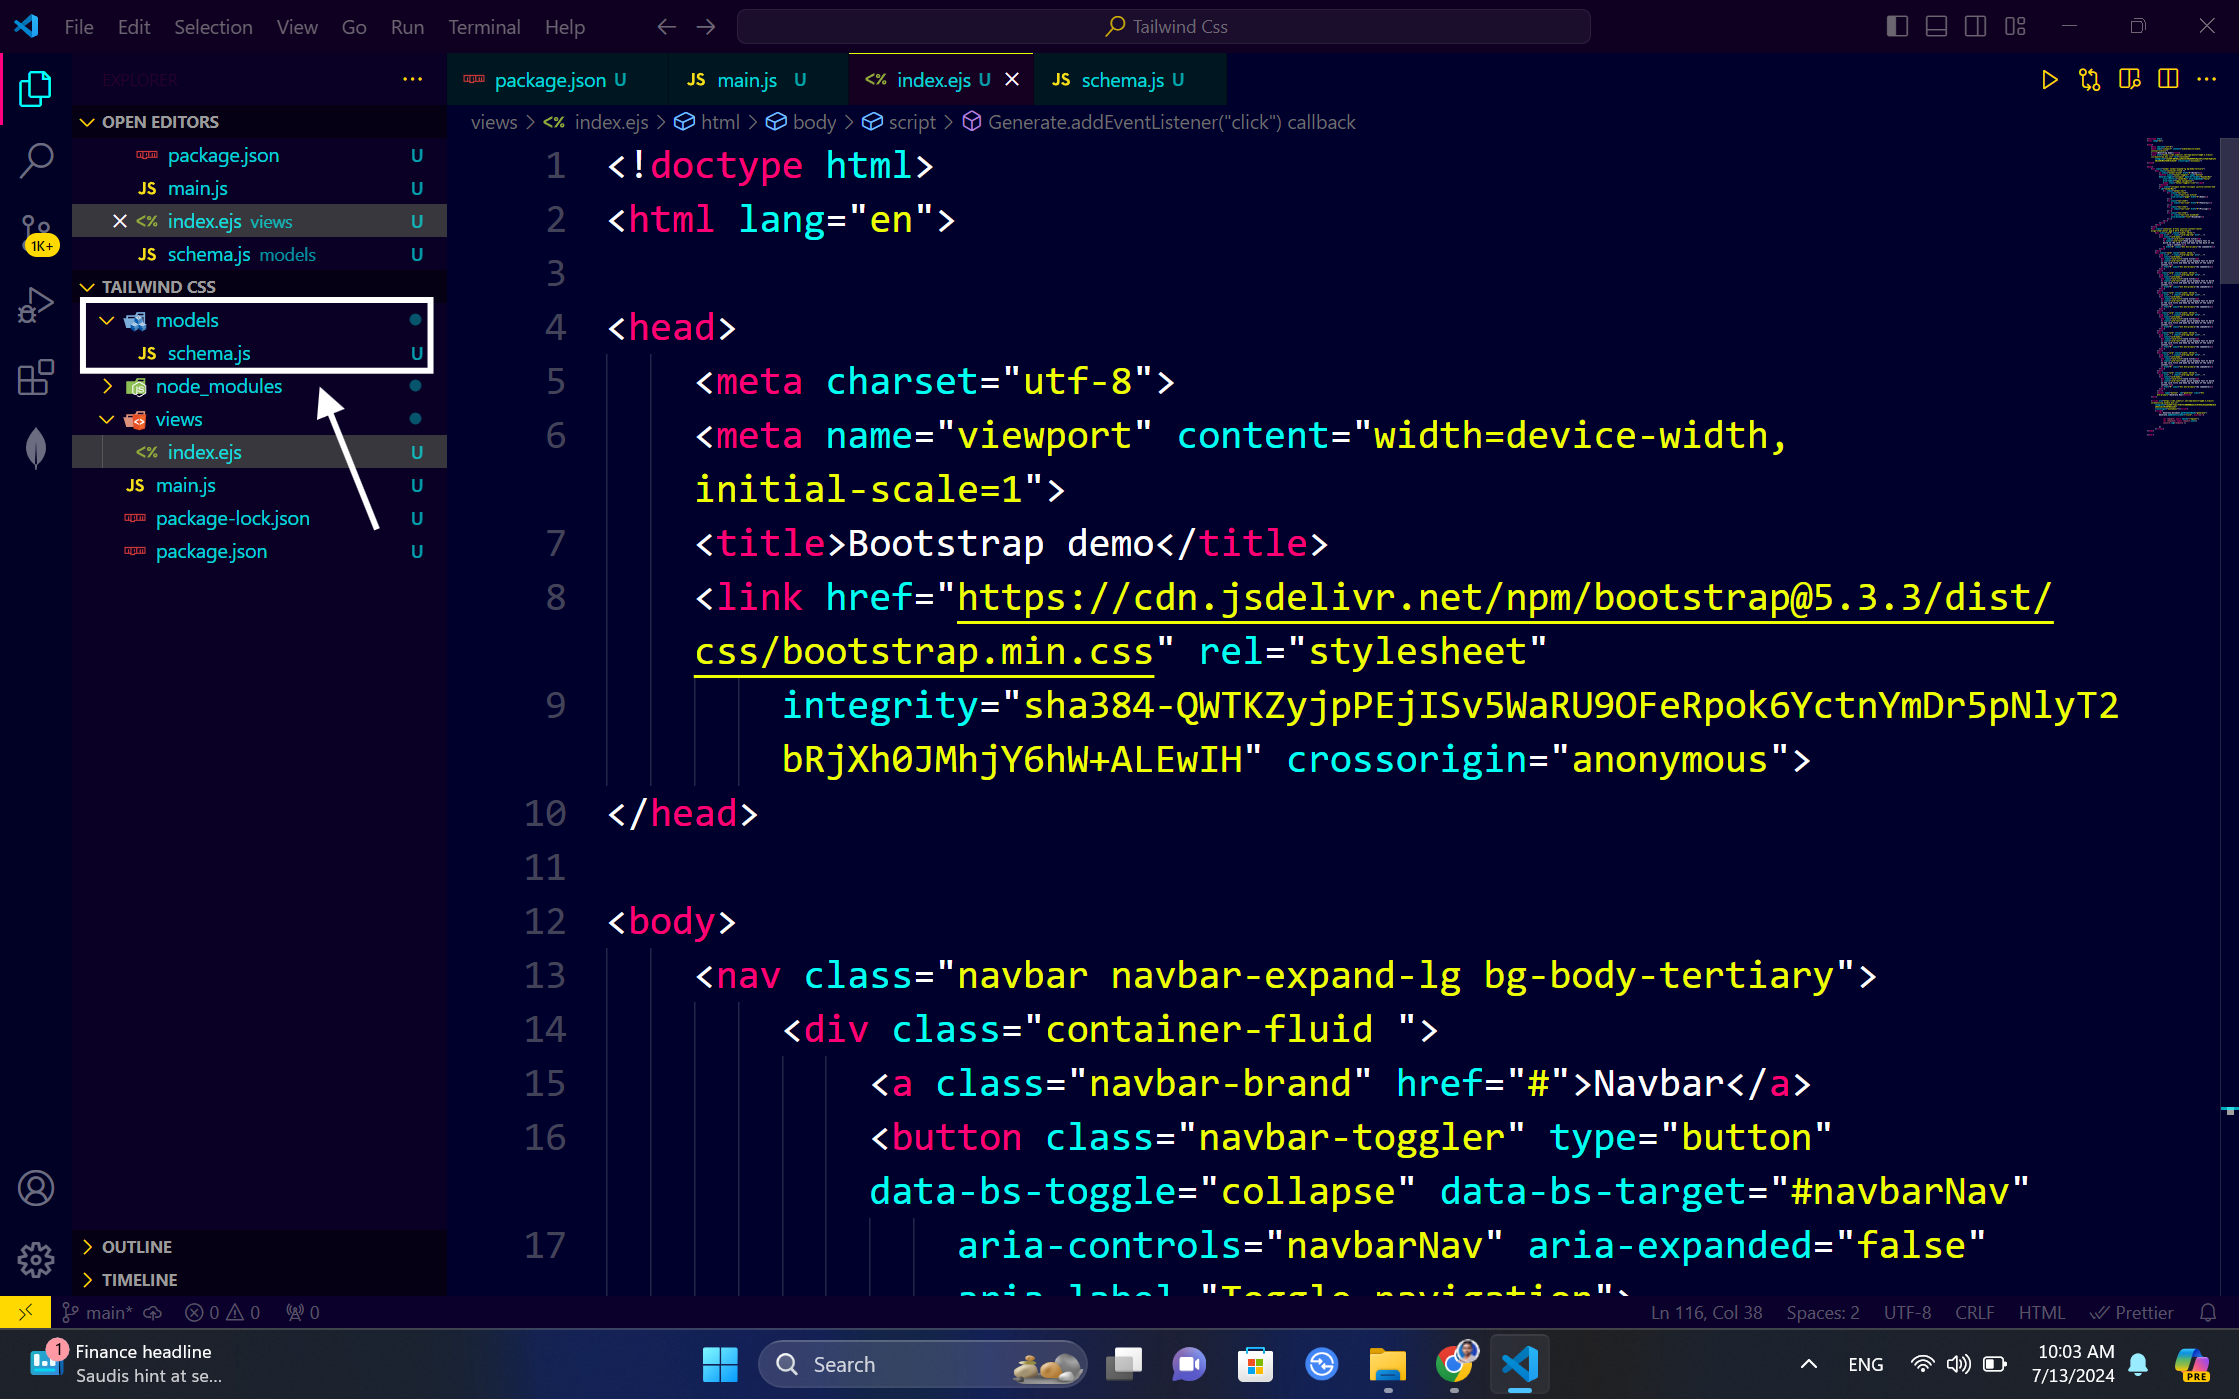
Step 2. Now, in that js file first, we have to import the Mongoose library.
import mongoose from "mongoose";
Step 3. Once we have imported the Mongoose library, the next step is to create a new schema and define the fields and their data types that we want to store in our MongoDB database.
import mongoose from "mongoose";
let StudentSchema=new mongoose.Schema({
    "Student_Name":String,
    "Student_ID":Number,
    "Mobile_Number":Number,
})
Step 3. Now, we need to use the model function from Mongoose to create a model. By default, it takes two arguments: the name of our MongoDB collection and the schema.
import mongoose from "mongoose";
let StudentSchema=new mongoose.Schema({
    "Student_Name":String,
    "Student_ID":Number,
    "Mobile_Number":Number,
})
const StudentSc=mongoose.model("StudentDB",StudentSchema)
Step 4. And, in the last step, we just have to export it so that we can use it with our backend file
import mongoose from "mongoose";
let StudentSchema=new mongoose.Schema({
    "Student_Name":String,
    "Student_ID":Number,
    "Mobile_Number":Number,
})
const StudentSc=mongoose.model("StudentDB",StudentSchema)
export default StudentSc
Connecting MongoDB with our Backend
Step 1. First, Open your MongoDB compass application which you have installed. And copy the connection string.
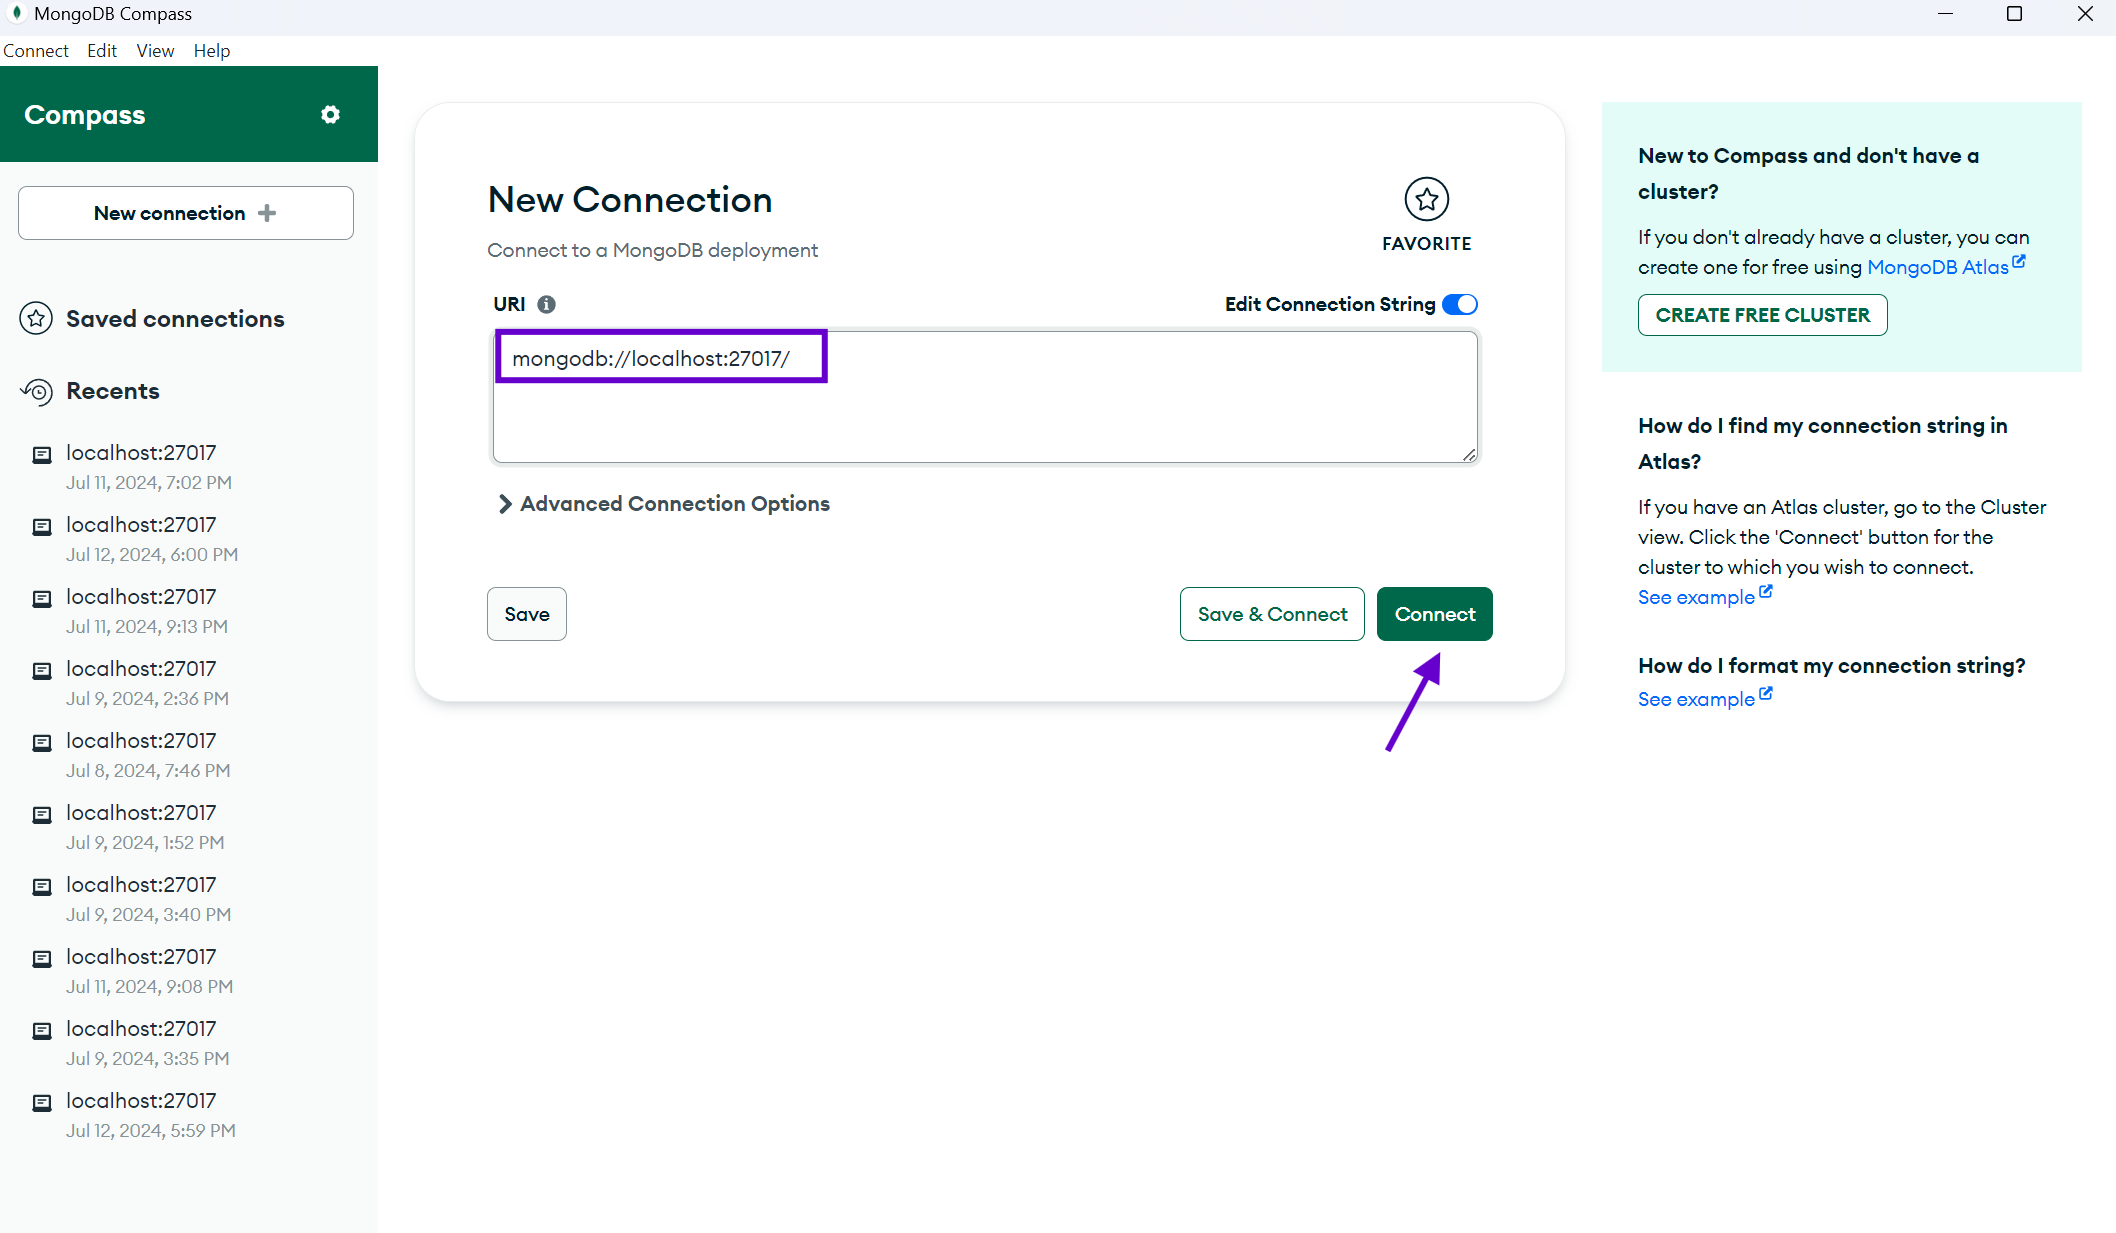
Step 2. Now come you our main backend file and connect the mongoDB with the database.
Note: After the connection string, you need to type the name you want to use for the database. In my case, it is "student".
let ConnnectedDb=mongoose.connect("mongodb://localhost:27017/students")
Setting up a route & importing our MongoDB schema in the Express app to save data
Step 1. Let's come to our main backend file and define a new route with app.get method.
app.get("/request", (req, res) => {
    res.send("Testing")
})
Step 2. Now Import our mongoDB Schema
import StudentSc from "./models/schema.js"
Step 3. Let's create dummy data and save it with the help of the schema that we have imported. To create a new record we just have to type our schema name and use the create method. An example is given in the code.
app.get("/request", async(req, res) => {
    let student_Dataset=StudentSc.create({
        "Student_Name": "Aditya",
        "Student_ID": 1321,
        "Mobile_Number": 43242342342,
    })
    student_Dataset.save()
    res.send(student_Dataset)
})
Step 4. The create and save method is an async code therefore we have to make it an async function and await its completion.
app.get("/request", async(req, res) => {
    let student_Dataset=await StudentSc.create({
        "Student_Name": "Aditya",
        "Student_ID": 1321,
        "Mobile_Number": 43242342342,
    })
    await student_Dataset.save()
    res.send(student_Dataset)
})
Step 5. Now, whenever someone hits the request route, it will save the data that we have written.
Making a Request with a Button Click
To make this functionality user-friendly, we will create a button within our EJS file located inside the views folder. This button will allow users to trigger the request route we defined earlier, thereby saving the student data in our MongoDB database.
Step 1. First, navigate to your views folder and open the EJS file where you want to add the button. Let's add a simple HTML button element and then make a API Call.
<!DOCTYPE html>
<html lang="en">
<head>
    <meta charset="UTF-8">
    <meta name="viewport" content="width=device-width, initial-scale=1.0">
    <title>Student Data Entry</title>
</head>
<body>
    <h1>Save Student Data</h1>
    <button id="saveStudentBtn">Save Student</button>

    <script>
        document.getElementById('saveStudentBtn').addEventListener('click', () => {
            fetch('/request')
                .then(response => response.json())
                .then(data => {
                    console.log('Success:', data);
                    alert('Student data saved successfully!');
                })
                .catch((error) => {
                    console.error('Error:', error);
                    alert('Failed to save student data.');
                });
        });
    </script>
</body>
</html>
In this example, we have created a button with the ID saveStudentBtn. We then add an event listener to this button that listens for a click event. When the button is clicked, it sends a GET request to the /request route using the Fetch API.
The server will handle this request, create a new student record, save it to the database, and return the saved data as a JSON response. If the request is successful, the user will see a success message; otherwise, an error message will be displayed.
By adding this button, we provide a simple and interactive way for users to save student data without needing to manually send a request through tools like Postman or cURL. This makes the application more accessible and easier to use.
Conclusion
In conclusion, integrating MongoDB into your application using Mongoose and Express is a powerful way to manage and store data efficiently. By following the steps outlined in this guide, you can set up a robust backend, define clear data schemas, and create interactive features that enhance user experience.
Whether you're building a simple project or a complex system, these foundational skills will help you leverage the full potential of MongoDB, ensuring your data is secure, well-structured, and easily accessible. Happy coding!
Subscribe to my newsletter
Read articles from Aditya Kumar Gupta directly inside your inbox. Subscribe to the newsletter, and don't miss out.
Written by

Aditya Kumar Gupta
Aditya Kumar Gupta
Hi there! I'm Aditya, a passionate Full-Stack Developer driven by a love for turning concepts into captivating digital experiences. With a blend of creativity and technical expertise, I specialize in crafting user-friendly websites and applications that leave a lasting impression. Let's connect and bring your digital vision to life!