Day 32: AWS ElastiCache: Detailed Step-by-Step Tutorial⚡
 Shailesh
Introduction
AWS ElastiCache is a fully managed in-memory caching service designed to boost application performance by retrieving data from high-speed caches rather than relying solely on slower disk-based databases. In this blog post, we will provide a detailed, step-by-step guide to setting up and using AWS ElastiCache.
Setting Up AWS ElastiCache🛠
🔸Prerequisites
Before you begin, ensure you have the following:
An AWS account with appropriate permissions to create and manage ElastiCache resources.
Basic knowledge of AWS management console navigation.
🔸Step 1: Login to AWS Management Console
Go to the AWS Management Console at AWS Console.
Sign in with your AWS account credentials.
🔸Step 2: Navigate to ElastiCache Dashboard
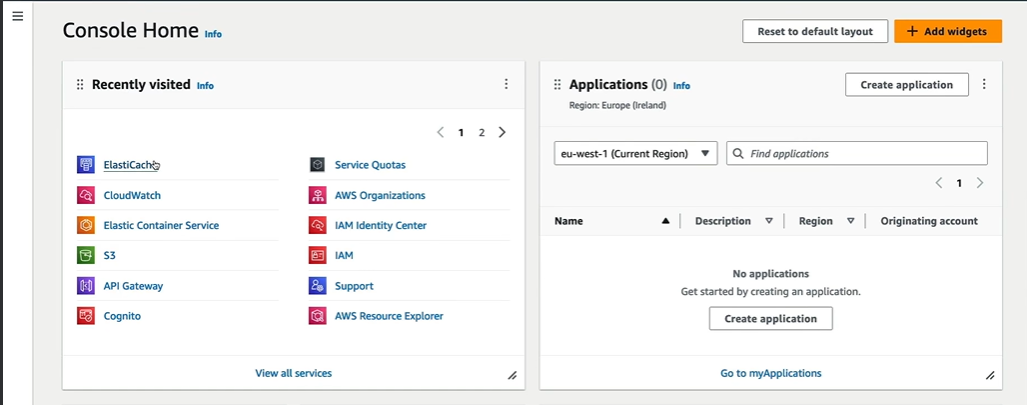
In the AWS Management Console, type "ElastiCache" in the search bar and select "ElastiCache" from the services dropdown.
Click on the "ElastiCache" link to open the dashboard.
🔸Step 3: Create an ElastiCache Cluster
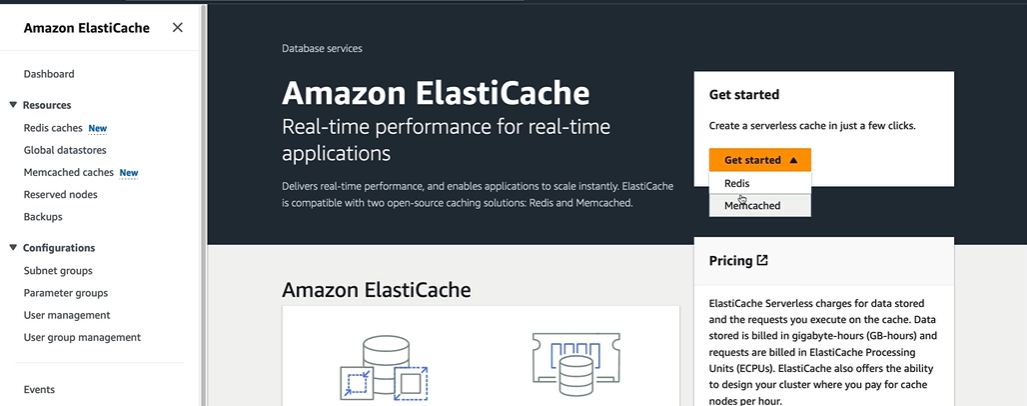
In the ElastiCache dashboard, click on "Create" to start the cluster creation process.
Select the caching engine. AWS ElastiCache supports Redis and Memcached. For this guide, we will choose Redis.
🔸Step 4: Configure Redis Cluster Settings
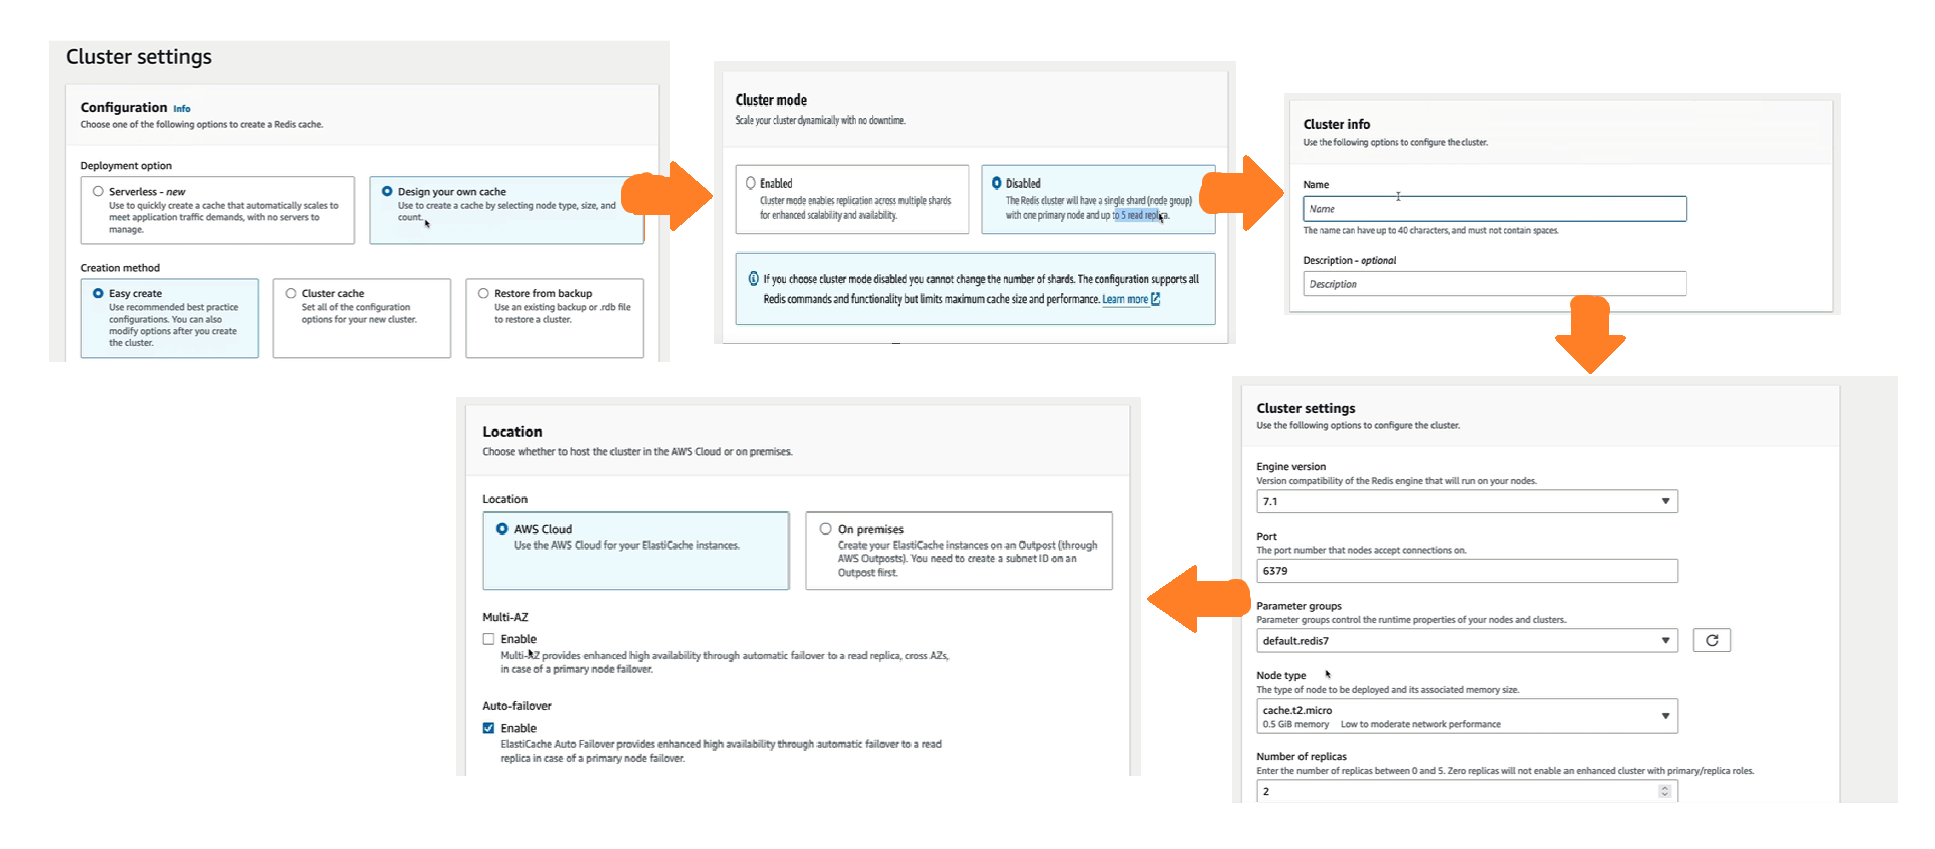
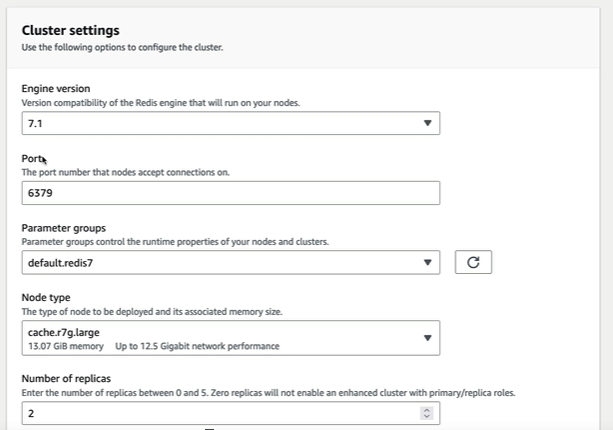
Cluster Engine: Select the Redis engine.
Cluster Mode: Choose "Cluster Mode Disabled" for a simple Redis setup. Cluster Mode can be enabled for more complex configurations with sharding.
Name: Enter a name for your cluster (e.g., "my-redis-cluster").
Description: Optionally, provide a description for your cluster.
Engine Version: Select the desired Redis engine version.
🔸Step 5: Specify Node Configuration
Node Type: Choose the instance type based on your performance and memory requirements (e.g., "cache.t2.micro" for testing or "cache.m5.large" for production).
Number of Replicas: Optionally, specify the number of read replicas to enhance read scalability and availability.
AZ Mode: Choose "Single-AZ" for development or "Multi-AZ" for high availability.
🔸Step 6: Configure Advanced Settings
Parameter Group: Use the default parameter group or create a custom one if specific configurations are needed.
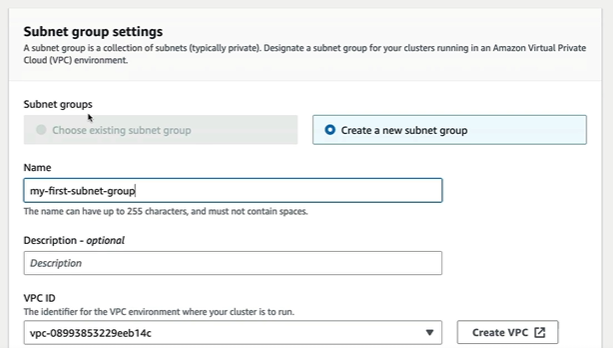
Subnet Group: Select a subnet group for your cluster. This determines the VPC and subnets where your nodes will be deployed.
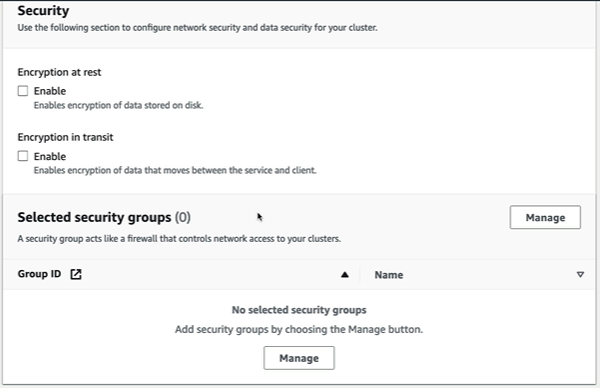
Security Groups: Select the security groups to control inbound and outbound traffic to your cluster.
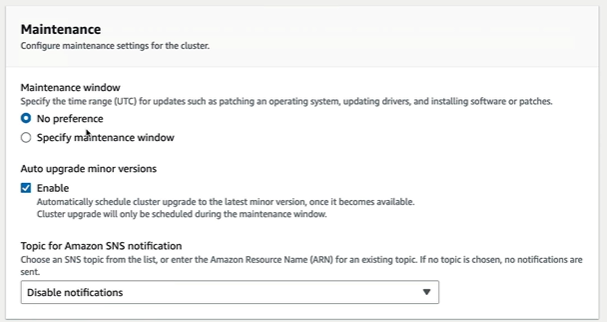
Maintenance Window: Optionally, specify a maintenance window for applying updates.
🔸Step 7: Review and Create
Review all the settings you have configured.
Click on the "Create" button to launch your Redis cluster.
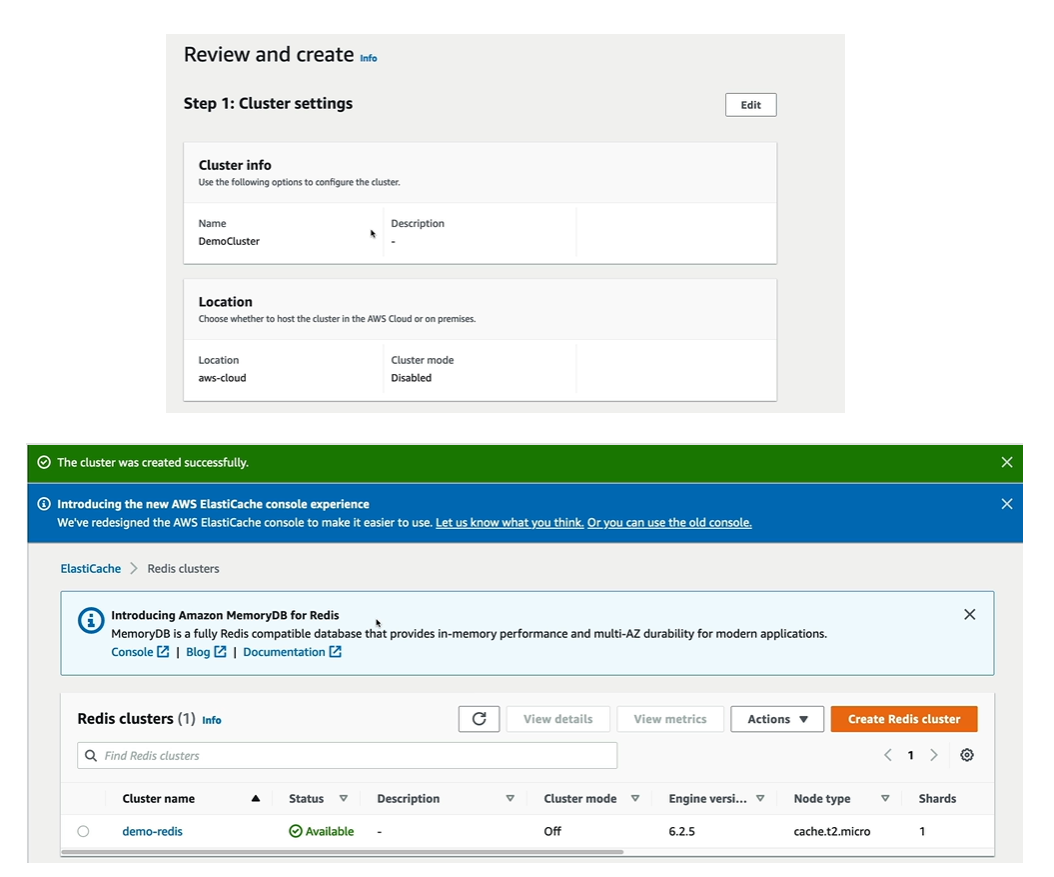
Connecting to Your ElastiCache Cluster🔌
Once your cluster is created, you need to connect to it from your application or an EC2 instance.
Step 1: Launch an EC2 Instance
Navigate to the EC2 dashboard.
Launch an instance with an appropriate AMI and instance type.
Ensure the instance is in the same VPC and subnet as your ElastiCache cluster, or has network access to it.
Step 2: Connect to the EC2 Instance
SSH into your EC2 instance using your preferred SSH client.
Install the Redis client on your EC2 instance. For example, on an Amazon Linux instance, you can use the following commands:
 bashCopy codesudo yum update -y
 sudo yum install -y redis
Step 3: Connect to Redis Cluster
Retrieve the primary endpoint of your Redis cluster from the ElastiCache dashboard.
Use the Redis client to connect to your cluster. For example:
bashCopy coderedis-cli -h <primary-endpoint> -p 6379
Managing ElastiCache Clusters⚙
🔹Scaling the Cluster
In the ElastiCache dashboard, select your cluster.
Choose "Actions" and then "Modify".
Adjust the node type or number of replicas as needed.
Save changes to scale your cluster.
🔹Monitoring and Maintenance
Use CloudWatch metrics to monitor the performance and health of your ElastiCache cluster.
Set up alarms and notifications to stay informed about the cluster’s status.
Conclusion💡
AWS ElastiCache is a powerful tool to enhance the performance and scalability of your applications by providing fast, in-memory data retrieval. By following this step-by-step guide, you can set up and manage a Redis cluster using AWS ElastiCache, improving the efficiency of your web applications.
Stay tuned for more AWS insights!!⚜ If you found this blog helpful, share it with your network! 🌐😊
Happy cloud computing! ☁️🚀
Subscribe to my newsletter
Read articles from Shailesh directly inside your inbox. Subscribe to the newsletter, and don't miss out.
Written by

Shailesh
Shailesh
As a Solution Architect, I am responsible for designing and implementing scalable, secure, and efficient IT solutions. My key responsibilities include: 🔸Analysing business requirements and translating them into technical solutions. 🔸Developing comprehensive architectural plans to meet organizational goals. 🔸Ensuring seamless integration of new technologies with existing systems. 🔸Overseeing the implementation of projects to ensure alignment with design. 🔸Providing technical leadership and guidance to development teams. 🔸Conducting performance assessments and optimizing solutions for efficiency. 🔸Maintaining a keen focus on security, compliance, and best practices. Actively exploring new technologies and continuously refining strategies to drive innovation and excellence.