Day 22. Jenkins Security
 Ashvini Mahajan
Jenkins Security Best Practices
Enabling Security
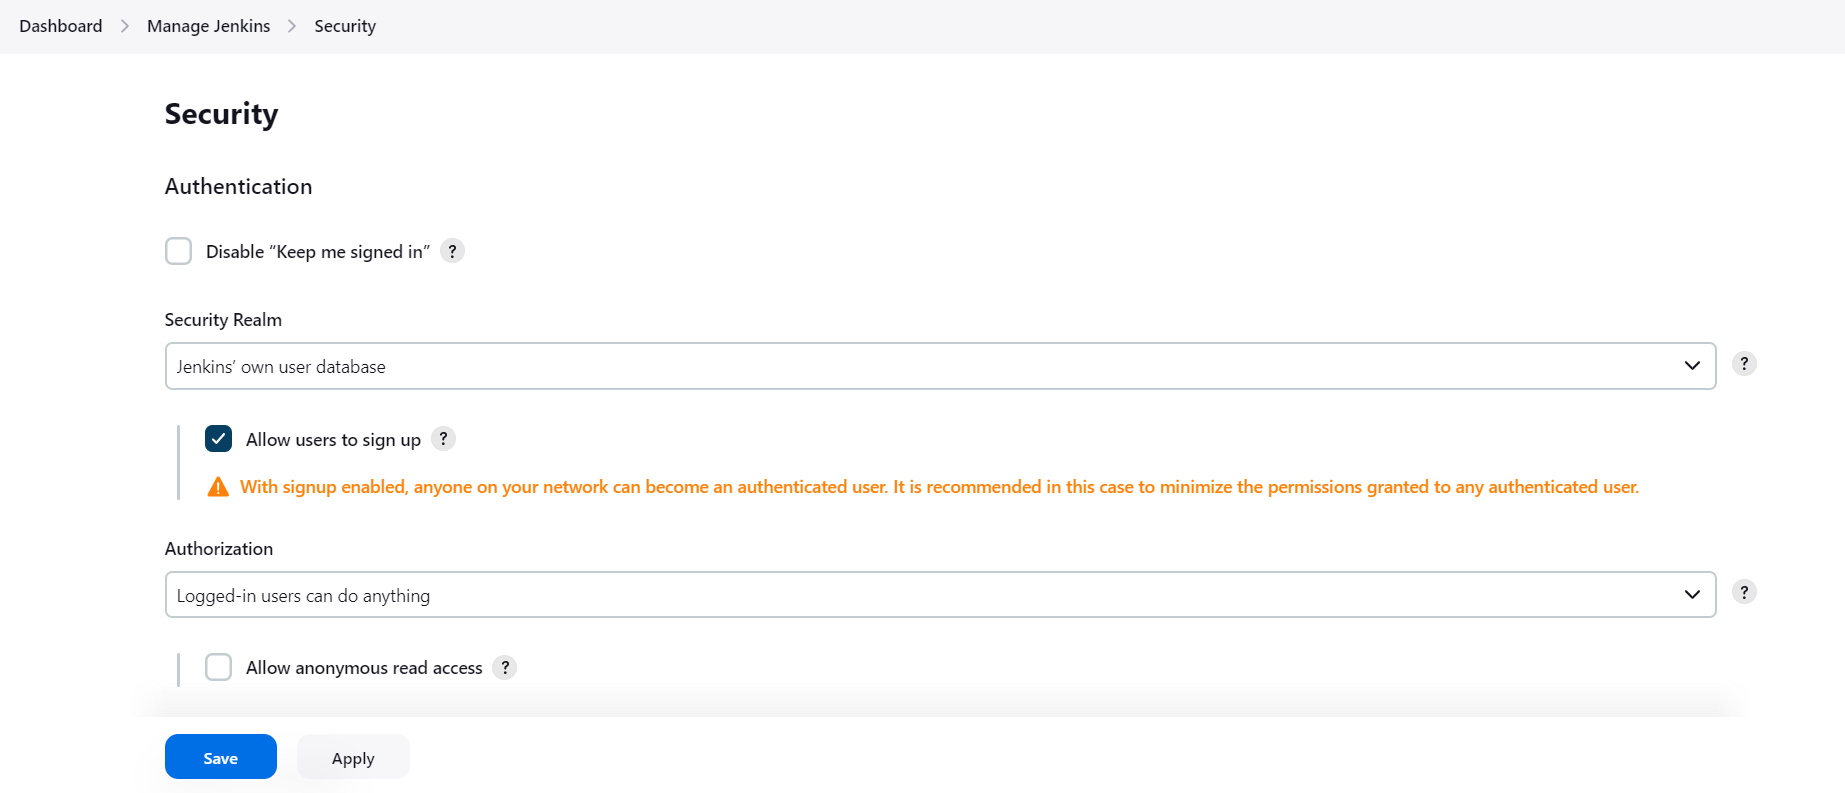
The top option on the global security configuration page is also the most high-level one—meaning that it encompasses the most related functionality. Without the “Enable security” option checked, security-checking operations are not enabled. With this option turned on, security can be configured along two dimensions—authentication and authorization.
Authentication here refers to how users can identify themselves to the system, such as by user ID and password. This is now called “Security Realm” in Jenkins. Authorization refers to what permissions authorized users have. These two orthogonal dimensions can, together, implement nearly any desired security policy
Access Control
Access Control is the primary mechanism for securing a Jenkins environment against unauthorized usage. Two facets of configuration are necessary for configuring Access Control in Jenkins:
A Security Realm which informs the Jenkins environment how and where to pull user (or identity) information from. Also commonly known as "authentication."
Authorization configuration which informs the Jenkins environment as to which users and/or groups can access which aspects of Jenkins, and to what extent.
Access Control—A Security Realm
This section allows us to specify which entity will be responsible for authenticating users to Jenkins. There are several choices.
**Delegate to servlet container -**The servlet container being referenced here is the one running the Jenkins instance. These days, this is usually Jetty, but it might also be Tomcat or some other servlet if the installation has been customized. The specifics of how to set this up depend on how authentication is configured for the particular servlet container being used.
Jenkins’ own user database. This option delegates authentication to the list of people maintained by/known to Jenkins. This is not a typical use case, but can be suitable for smaller, basic setups. Note that this includes not only all the users that Jenkins specifically knows about, but also users mentioned in commit messages.
LDAP. The Lightweight Directory Access Protocol (LDAP) is a software protocol for locating people, organizations, devices, and other resources on a network.
Unix user/group database. This option delegates authentication to the host Unix system’s user database. If this is used, users can log into Jenkins using their Unix username and password. Unix groups can also be used for authentication.
Access Control—Authorization
Once authenticated, Jenkins needs to know what kind of operations users should be allowed to do. Like in the Security Realm section, there are several options here.
Anyone can do anything. No real authentication is done with this option. Basically, everyone is considered as “trusted”—including anonymous users (even if they haven’t logged in yet). This is not recommended, but can be suitable in rare cases for completely trusted environments to allow unrestricted access for simplicity and efficiency.
Legacy mode. This mode emulates Jenkins behavior prior to v1.164: anyone who has the “admin” role has full control, and everyone else has read-only access.
Logged-in users can do anything. As the name implies, users must first log in, but then have full access. This is useful if you don’t mind allowing everyone full access, but want to keep track of who is doing what (via them being logged in). A sub option here enables anonymous users to have read-only access.
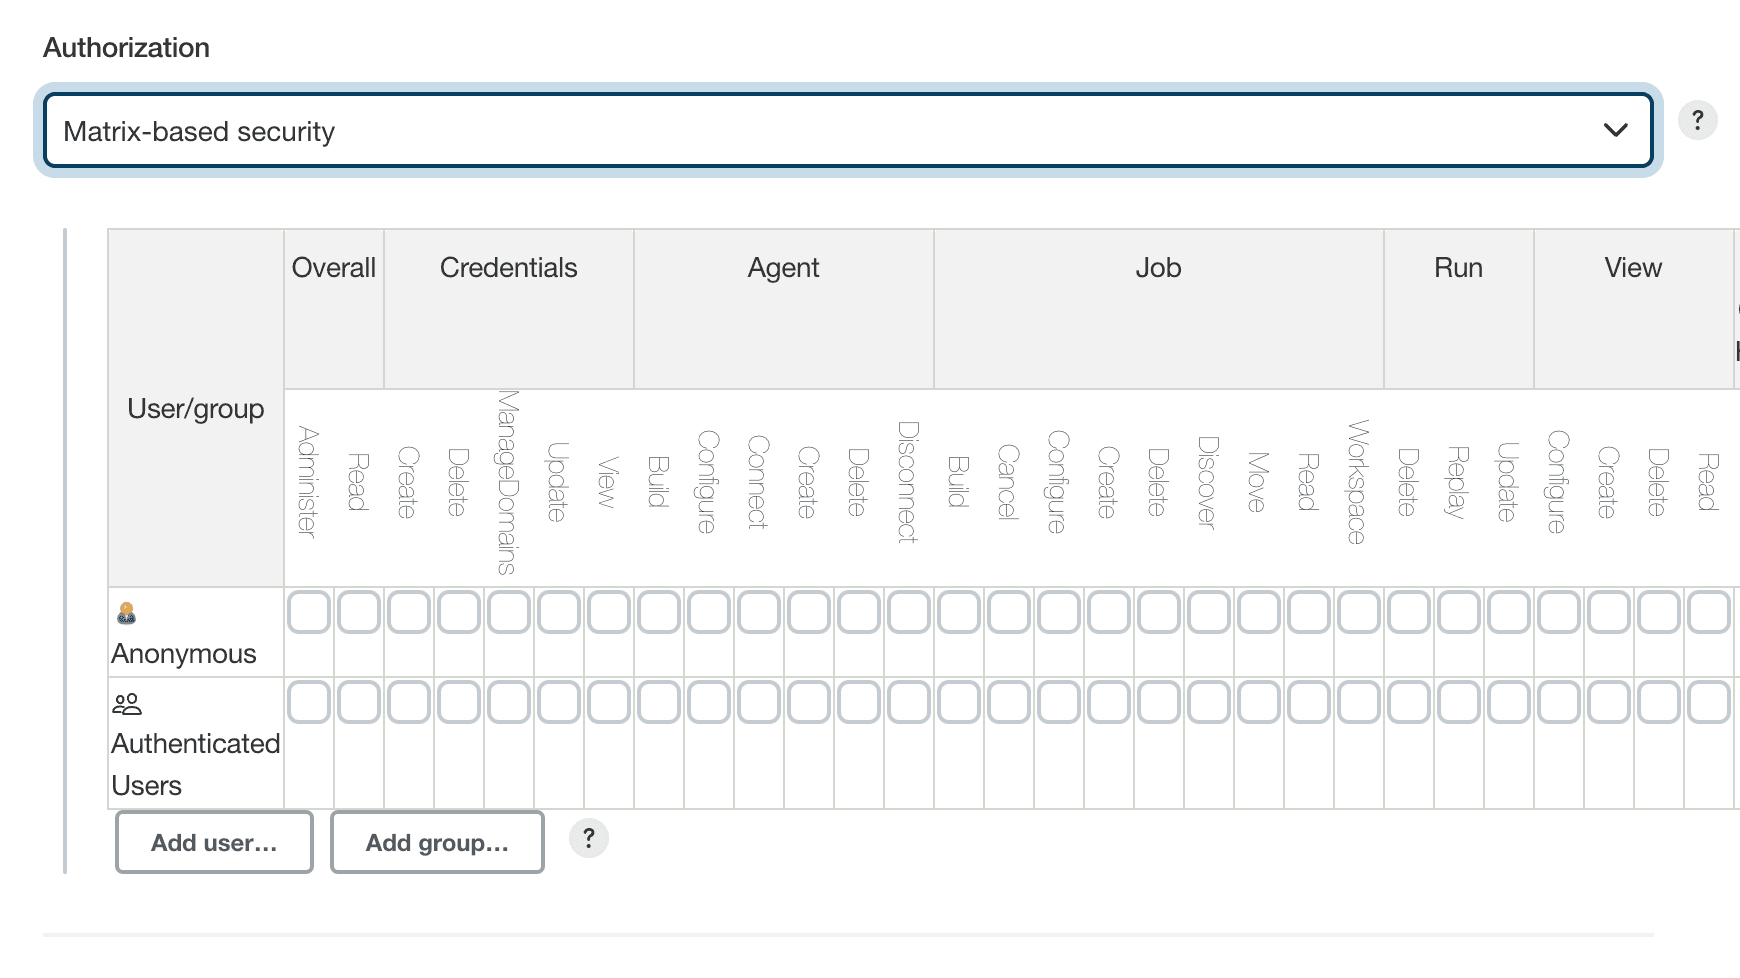
Matrix-based security. This option allows you to specify very specific permissions for individual users or groups via checkboxes in a matrix arrangement. The columns in the matrix are divided into categories (groupings) such as “Overall,” “Job,” “Run,” etc. Then underneath each of those items are further specific permissions related to that category.
The rows of the matrix each represent a user or group. There are two default groups that are automatically added: “Anonymous Users” (users who have not logged in) and “Authenticated Users” (users who have logged in). A text box under the matrix allows you to add new users.
Granting a particular permission to a user or group is just a matter of clicking in the box that corresponds to the appropriate row for the user/group and the column for the specific permission. Removing a permission involves just clicking again to clear the checkbox.
At the end of each row are boxes you can click on to grant all permissions or remove all permissions for that user/group.

Project-based matrix authorization strategy. This option is an extension to the “Matrix based security” model described in the preceding section. When selected, this adds a similar matrix to each project’s configuration page. This allows for configuration by user/group per project, so you can restrict access to some projects while allowing it for others.
More specifically, when this option is set in the global security page, each project’s configuration page will have an “Enable project-based security” option in the General configuration section.
Controller Isolation
What exactly happens during a build is often controlled by people less trusted than a Jenkins administrator:
Jenkins users with Job/Configure permission
Build script authors (
pom.xml,Makefile, etc.)Code authors (for example test code executed during a build)
They all have some control over commands executed during a build.
To ensure the stability of the Jenkins controller, builds should be executed on other nodes than the built-in node. This concept is called distributed builds in Jenkins.
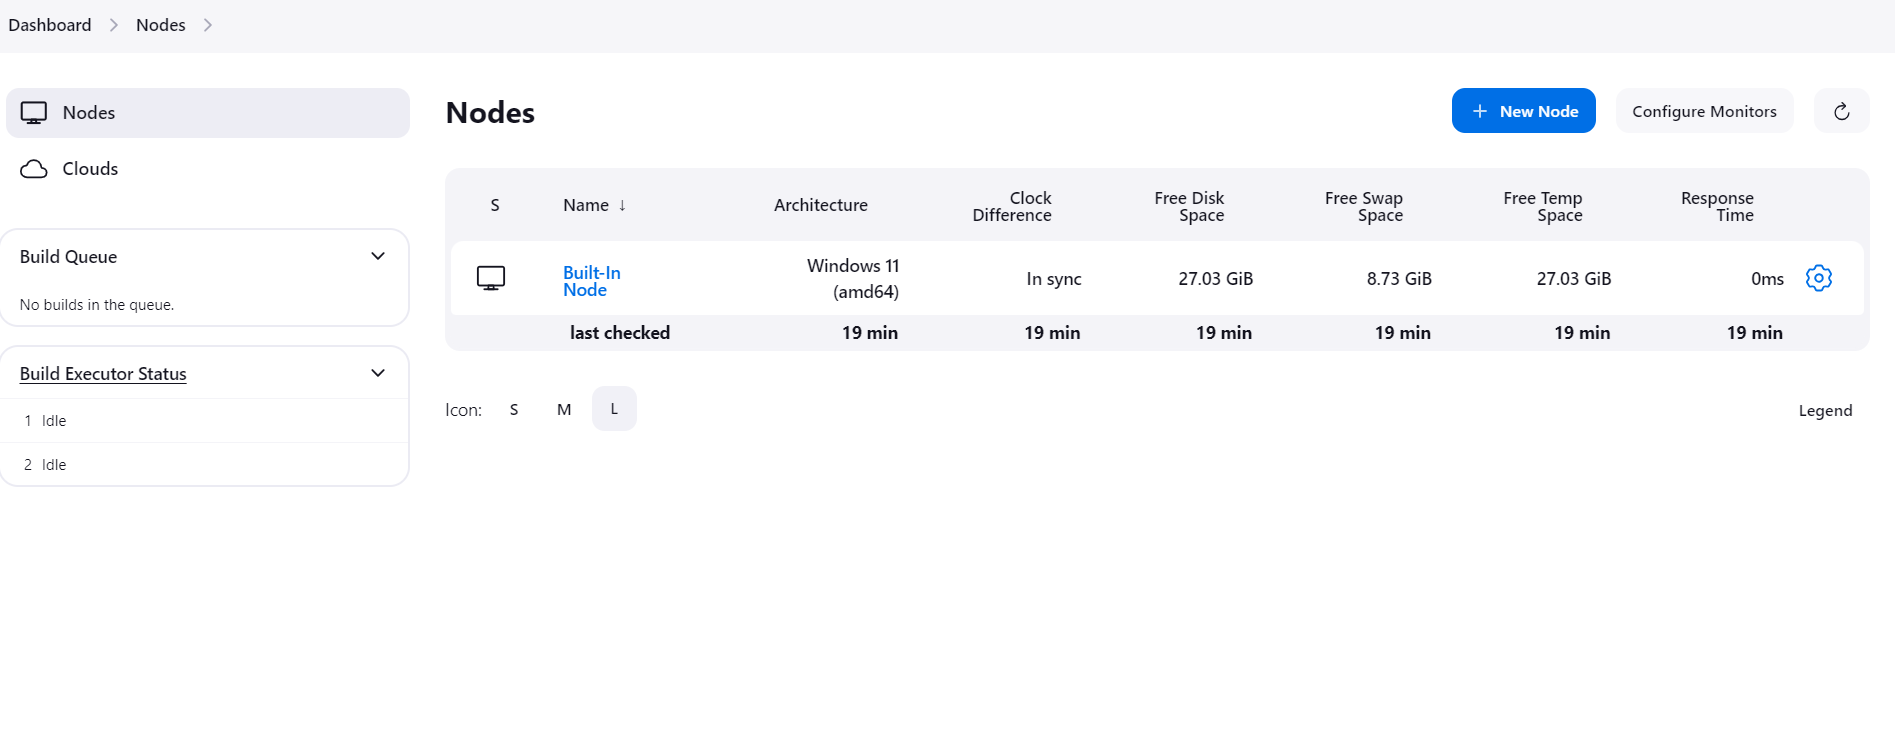
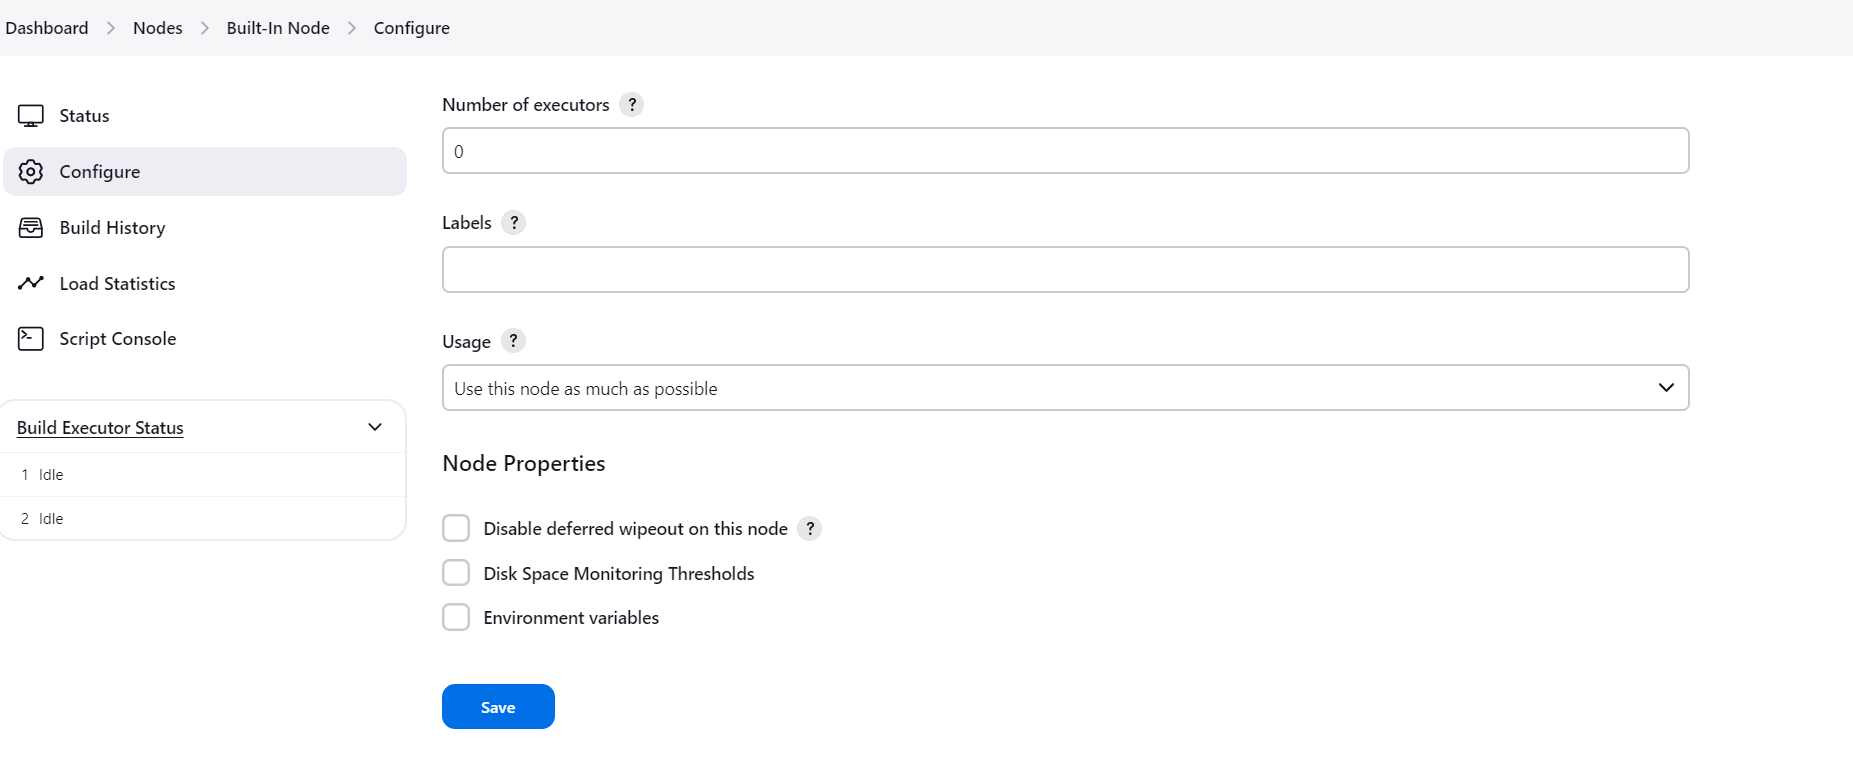
To prevent builds from running on the built-in node directly, navigate to Manage Jenkins » Nodes and Clouds. Select Built-In Node in the list, then select Configure in the menu. Set the number of executors to 0 and save. Make sure to also set up clouds or build agents to run builds on, otherwise builds won’t be able to start.
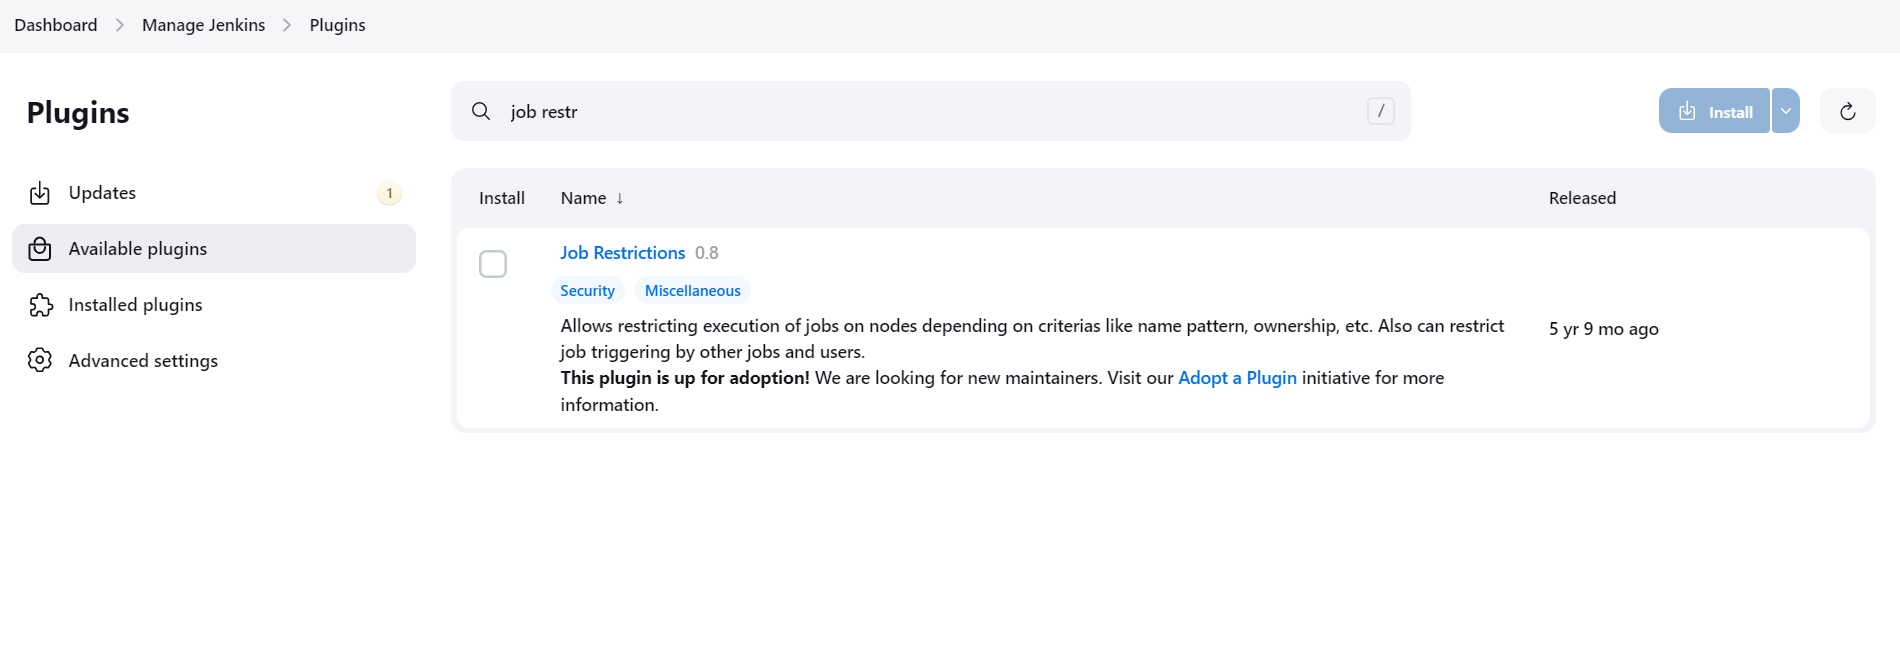
Alternatively, use a plugin such as Job Restrictions Plugin to limit which jobs can be run on certain nodes (like the built-in node), independent of what your less trusted users may use as label expression in their jobs' configurations.
Agent → Controller Access Control
The Jenkins controller and agents can be thought of as a distributed process which executes across multiple discrete processes and machines. This allows an agent to ask the controller process for information available to it, for example, the contents of files, etc., and even to have the controller run certain commands when requested by the agent.
So while not building on the built-in node is a good general practice to protect from bugs and less sophisticated attackers, an agent process taken over by a malicious user would still be able to obtain data or execute commands on the Jenkins controller. To prevent this, the Agent → Controller Access Control system prevents agent processes from being able to send malicious commands to the Jenkins controller.

CSRF Protection
Cross-Site Request Forgery(CSRF or XSRF) is a type of security vulnerability in web applications. Without protection from CSRF, a Jenkins user or administrator visiting some other web site would allow the operator of that site to perform actions in Jenkins as the victim.
CSRF Protection in Jenkins
CSRF protection uses a token (called crumb in Jenkins) that is created by Jenkins and sent to the user. Any form submissions or similar action resulting in modifications, like triggering builds or changing configuration, requires that the crumb be provided. The crumb contains information identifying the user it was created for, so submissions with another user’s token would be rejected. All of this happens in the background and has no visible impact except in rare circumstances, e.g., after a user’s session expired and they logged in again.
Configuring CSRF Protection
In Manage Jenkins » Security » CSRF Protection, administrators can configure CSRF Protection.

The Default Crumb Issuer encodes the following information in the hash used as crumb:
The user name that the crumb was generated for
The web session ID that the crumb was generated in
The IP address of the user that the crumb was generated for
A salt unique to this Jenkins instance
Working with Scripted Clients
Requests sent using the POST method are subject to CSRF protection in Jenkins and generally need to provide a crumb. This also applies to scripted clients that authenticate using username and password. Since the crumb includes the web session ID, clients need to do the following:
Send a request to the
/crumbIssuer/apiendpoints, requesting a crumb. Note theSet-Cookieresponse header.For all subsequent requests, provide the crumb and the session cookie in addition to username and password.
Access Control for Builds
Similar to access control for users, builds in Jenkins run with an associated user authorization. By default, builds run as the internal SYSTEM user that has full permissions to run on any node, create or delete jobs, start and cancel other builds, etc.
In a Jenkins setup with fine-grained permissions control, this is undesirable. For example, having builds run as SYSTEM could allow users with access to configure and start one job to start builds of any other jobs using Pipeline Build Step Plugin.
One solution to this is to configure access control for builds. This is implemented by Authorize Project Plugin, which allows flexible configuration of global and per-project build authorization. That plugin is however not actively maintained, and there are known limitations to this approach.
Handling Environment Variables
Setting special environment variables
Special environment variables can change the behavior of build scripts: PATH (or Path on Windows) is generally used to find the programs that are launched during a build, so overriding its value may have an unexpected effect, as other programs than usually expected may be launched.
Less well known variables, such as LD_PRELOAD (on Linux) and DYLD_LIBRARY_PATH (on macOS) may have a similar effect. Many other environment variables are read by different programs, and setting them may alter behavior.
Any user who can add environment variables with a name they choose may be able to modify the behavior of builds this way. While this is a useful feature for users with Job/Configure permission, administrators should review plugins' ability to add arbitrary environment variables into the build environment from sources that do not require permission to configure jobs.
Markup Formatters
Jenkins allows users with the appropriate permissions to enter descriptions of various objects, like views, jobs, builds, etc. These descriptions are filtered by markup formatters. They serve two purposes:
Allow users to use rich formatting for these descriptions
Protect other users from Cross-Site Scripting (XSS) attacks
Configuring the Markup Formatter
The markup formatter can be configured in Manage Jenkins » Security » Markup Formatter.
The default markup formatter Plain text renders all descriptions as entered: Unsafe HTML metacharacters like < and & are escaped, and line breaks are rendered as <br/> HTML tags.
Another commonly installed markup formatter is Safe HTML, provided by the OWASP Markup Formatter Plugin. It allows the use of a basic, safe subset of HTML.

Disabling SSHD
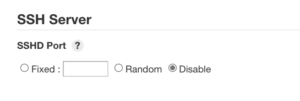
If the SSH Server plugin is installed, verify that SSH is turned off by configuring "Manage Jenkins" → "Configure Global Security" → "SSH Server" → "Disable"
Limiting The Agent Permissions
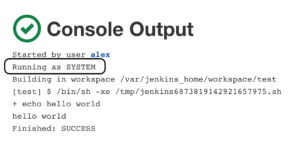
By default, build pipelines will be running with the internal SYSTEM user permissions. This gives builds the ability to run code on any node, create and delete jobs, start and cancel other builds, and more. Running builds with such permissions can cause serious security issues if, for example, Jenkins pulls malicious build pipelines from the SCM platform, which the Jenkins administrator doesn’t monitor. Here is an example for a default privileged build log showing the permissions at the second line:
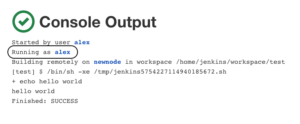
By using Authorize Project plugin, you can configure which user, hence what permissions, will run the build. The rule of thumb would be setting the least privilege for every project. Here is an example for the build log after modifying its permissions at "Manage Jenkins" → "Configure Global Security" → "Access Control for Builds" to have the same as the user who triggered the build.

Audit Logs
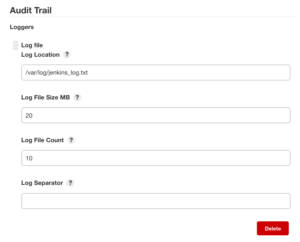
Plugins like Audit Trail allow writing or sending logs to a remote server (Syslog server or Elastic Search). Enabling this feature allows investigating security incidents or creating anomaly rules to detect malicious activity and prevent breaches. After you install the plugin, you should go to "Manage Jenkins" → "Configure System" → "Audit Trail" and configure your desired logging method.
Subscribe to my newsletter
Read articles from Ashvini Mahajan directly inside your inbox. Subscribe to the newsletter, and don't miss out.
Written by
Ashvini Mahajan
Ashvini Mahajan
I am DevOps enthusiast and looking for opportunities in DevOps.