Kubernetes Deployments with ConfigMaps: A Hands-On Guide🚀
 Aniket Kharpatil
Welcome to the world of Kubernetes! 🌐 Today, we're going to create k8s deployments for NGINX server with the help of ConfigMaps, a handy tool for managing configuration data in Kubernetes. We'll make this journey interactive and fun, so let's get started! 🎉
Prerequisites:
Docker installed
Minikube setup (on Windows/Linux terminal)
Basic knowledge of kubernetes and nginx web server
Familiarity with kubectl commands
Goals:
Create a cluster with minikube
Create two deployments having nginx pods
Create ConfigMaps with custom HTML and use them in the above deployments
Expose the deployments with the help of k8s Sevice
Access both the deployments on web browser
🛠️ Setting Up Kubernetes
Before we start make sure docker is installed and running. If you don't, do it now🚀
Install Docker Desktop on Linux
Install Docker Desktop on Windows
Once it's running, we will need a Kubernetes cluster. If you don't have one, here are a few options:
Minikube: A local Kubernetes, great for testing.
kind: Runs Kubernetes in Docker.
Cloud Providers: Use the free tiers of providers like AWS, Google Cloud, or Azure.
👉You can refer to my previous blog for the same here.
Here's a quick Minikube setup:
minikube start
It will take few minutes to setup your node...Scroll some reels meanwhile🙂
Once your minikube is started you can check the node using this command:
kubectl get nodes
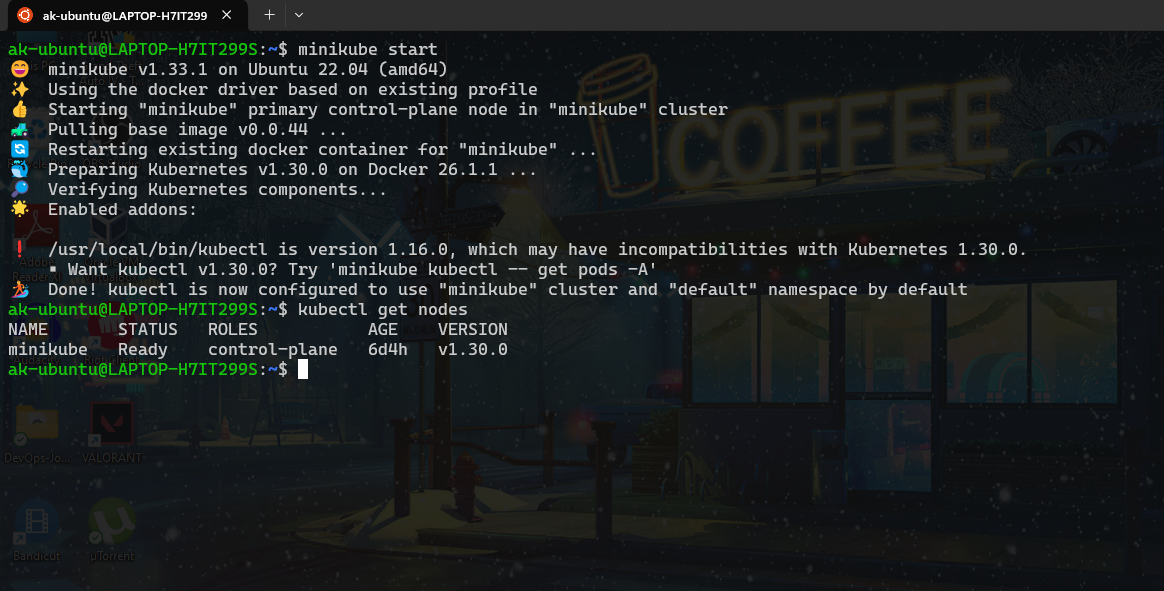
Let's move forward to create configmap🤠
📜 Creating the ConfigMaps
A ConfigMap is an API object used to store non-confidential data in key-value pairs. Pods can consume ConfigMaps as environment variables, command-line arguments, or as configuration files in a volume. You can read more about configmaps from my blog 👉 Configmaps-and-secrets-in-kubernetes
In this project we are going deploy 2 nginx pods which will contain HTML page mounted via our configmaps. As we know for nginx server we need an index.html file which opens up when you try to access the website. To begin with create a directory for our YAML templates. I've named it as templates.
mkdir templates
cd templates
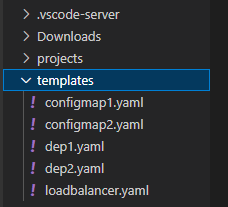
Let's write the configmap now. You can use your favourite text editor like vim, nano, notepad, VS-code. I've setup my WSL ubuntu on VS-code using remote WSL extension you can check it out here.
Create a file configmap1.yaml
apiVersion: v1
kind: ConfigMap
metadata:
  name: html-configmap-1
data:
  index.html: |
    <html>
    <h1>Hello World!</h1>
    </br>
    <h1>Deployment One</h1>
    </html
Here metadata name is the identifier for our configmap it will be used when we mount this in our deployment. The data filed contains what data we want to store in the configmap, its actually a key-value pair. Here our key is index.html file and rest is the value or the content of that file. Since it's a data containing multiple lines of string we have used | operator and below we have added our HTML.
Also we need to create the second configmap which will be used by our 2nd nginx deployment. Create a file configmap2.yaml. Make sure you have metadata name as html-configmap-2 and different content in the HTML.
apiVersion: v1
kind: ConfigMap
metadata:
  name: html-configmap-2
data:
  index.html: |
    <html>
    <h1>Hello World!</h1>
    </br>
    <h1>Deployment Two</h1>
    </html
Now it's time to write the deployment files☸️
📝 Write the Deployments with Pods running NGINX
Create a file dep1.yaml. Go through this file and try to understand the process. We are referencing the name of the config map which we created previously.
apiVersion: apps/v1
kind: Deployment
metadata:
  name: nginx1
spec:
  selector:
    matchLabels:
      app: nginx
  replicas: 1
  template:
    metadata:
      labels:
        app: nginx
    spec:
      containers:
      - name: nginx
        image: nginx
        ports:
        - containerPort: 80
        volumeMounts:
            - name: index-file-1
              mountPath: /usr/share/nginx/html
      volumes:
      - name: index-file-1
        configMap:
          name: html-configmap-1
          items:
            - key: index.html
              path: index.html
Let's understand this deployment in detail
I've tried to explain this in the simplest way possible🤠
spec: The specification of the desired behavior of the Deployment.
selector: Defines how the Deployment finds which Pods to manage.
- matchLabels: Specifies that the Deployment will manage Pods with the label
app: nginx.
- matchLabels: Specifies that the Deployment will manage Pods with the label
replicas: 1: Specifies that one replica of the Pod should be running.
template: Describes the Pods that will be created by the Deployment.
metadata:
labels: Adds labels to the Pods.
- app: nginx: Labels the Pods with
app: nginx.
- app: nginx: Labels the Pods with
spec: The specification of the containers inside the Pod.
containers: Defines the containers within the Pod.
name: nginx: The name of the container.
image: nginx: The Docker image for the NGINX container.
ports: The ports exposed by the container.
- containerPort: 80: Exposes port 80 on the container.
volumeMounts: Mounts a volume into the container.
name: index-file-1: Refers to the volume named
index-file-1.mountPath: /usr/share/nginx/html: Mounts the volume at
/usr/share/nginx/html, the default directory for serving NGINX content.
volumes: Defines the volumes available to the containers in the Pod.
name: index-file-1: Names the volume
index-file-1.configMap: Specifies that the volume will be populated by a ConfigMap.
name: html-configmap-1: Refers to the ConfigMap named
html-configmap-1.items: Specifies the key-to-path mappings. (*Key and path are very important make sure it's the same key which we have in configmap)
key: index.html: The key in the ConfigMap.
path: index.html: The path where the key's value will be stored in the container.
In short terms,
This Deployment ensures that one replica of the NGINX container is running.
The container uses the NGINX image and exposes port 80.
A ConfigMap named
html-configmap-1is used to populate the/usr/share/nginx/htmldirectory inside the container with anindex.htmlfile.The
volumeMountssection mounts the volume at the desired path in the container, effectively serving the content defined in the ConfigMap as the NGINX default webpage.
Now we have to create another Deployment file which will be using the second configmap and creating the NGINX pods.
Here is the file dep2.yaml
apiVersion: apps/v1
kind: Deployment
metadata:
  name: nginx2
spec:
  selector:
    matchLabels:
      app: nginx
  replicas: 1
  template:
    metadata:
      labels:
        app: nginx
    spec:
      containers:
      - name: nginx
        image: nginx
        ports:
        - containerPort: 80
        volumeMounts:
            - name: index-file-2
              mountPath: /usr/share/nginx/html
      volumes:
      - name: index-file-2
        configMap:
          name: html-configmap-2
          items:
            - key: index.html
              path: index.html
Make sure you are giving the metadata and configmap names different for both the files.
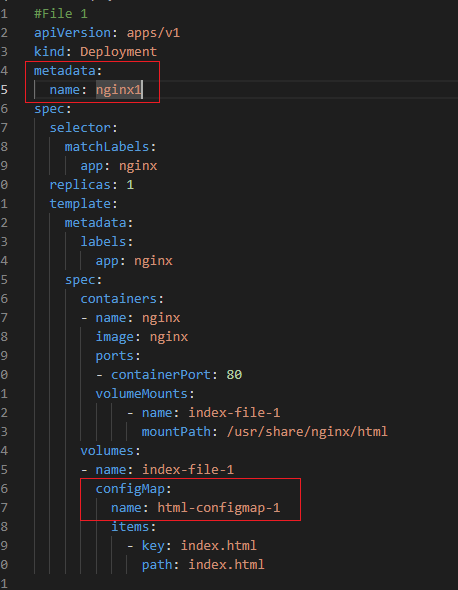
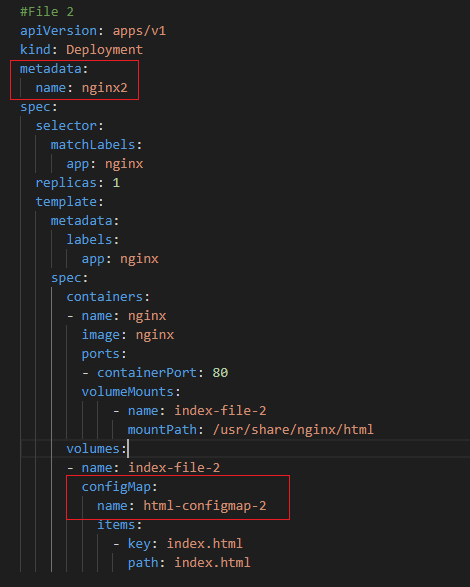
We are good to go for creating these NGINX deployments.
🔹Apply the configmaps on k8s
Apply the ConfigMap with:
kubectl apply -f configmap1.yaml
kubectl apply -f configmap2.yaml
In order to check if our configmaps are created use the follwoing command:
kubectl get configmap
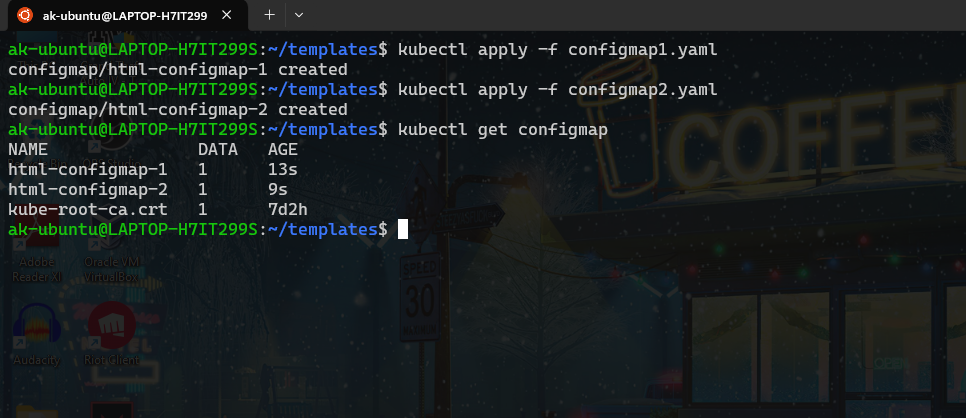
To describe and see the content use this command
kubectl describe configmap html-configmap-1

🔹 Create the Deployments with NGINX Pods
We can apply the deployment using, kubectl apply -f <deployment_file_name.yml>. In our case:
kubectl apply -f dep1.yaml
kubectl apply -f dep2.yaml
Also you can check the deployments using the following command:
kubectl get deployments
Similarly for pods
kubectl get pods
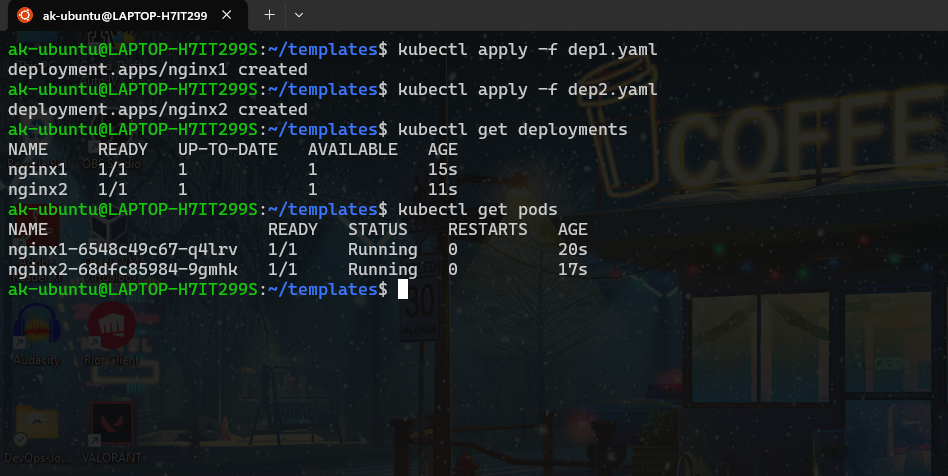
For more information on pods use this command:
kubectl get pods -o wide

Now that our pods are up and running we will need to ccreate a service to expose and access the webpage. You might get a question
What are services in k8s? 🤔
A Kubernetes Service is an abstraction that defines a logical set of Pods and a policy by which to access them on the network. It provides a stable endpoint (IP and DNS name) to access a group of Pods and simplifying the communication between different parts of an application. You can read more about them in my article: k8s services
So basically there are different types of services
ClusterIP: Default, internal cluster access.
NodePort: Exposes service on Node IPs at a static port.
LoadBalancer: External load balancer for cloud providers.
ExternalName: Maps service to a DNS name for external access.
We are going to create a service of type LoadBalancer since the minikube is running on docker and in order to to access our webpage we need an external IP. This Service will expose the NGINX application to the outside world.
Let's write the service YAML
Create a file loadbalancer.yaml
apiVersion: v1
kind: Service
metadata:
  name: nginx-service
spec:
  type: LoadBalancer
  selector:
    app: nginx
  ports:
    - protocol: TCP
      port: 80
      targetPort: 80
Understand the spec:
type: LoadBalancer: Specifies that the Service will be exposed externally.
selector: Defines how the Service finds which Pods to route traffic to.
- app: nginx: Specifies that the Service will route traffic to Pods with the label
app: nginx.
- app: nginx: Specifies that the Service will route traffic to Pods with the label
ports: Defines the ports that the Service will expose and route traffic to.
protocol: TCP: The protocol used by the Service, in this case, TCP.
port: 80: The port on which the Service will be exposed.
targetPort: 80: The port on the Pod that the traffic will be forwarded to.
⚖️Apply the LoadBalancer Service
Apply the service configuration kubectl apply -f <service_file.yml>
kubectl apply -f loadbalancer.yaml
Check the service which has been created
kuebctl get svc -o wide

If you observe we did not get an external-IP for our service and it's in pending state. Usually this is given by the cloud provider like if our nodes were created on EKS Cluster on AWS or GCP then we would have got an external-IP which would have been created by the Cloud LoadBalancer. Here we are running the node on minikube which is local. There is one command which helps us to expose this service to the Internet. Open another terminal window and run this command.
minikube tunnel
minikube tunnel is a command used in Minikube to create a network tunnel, which allows you to access Kubernetes Services of type LoadBalancer on your local machine. This is especially useful when you're running Kubernetes clusters locally and need to expose services externally in a way that mimics cloud providers' LoadBalancer services.
As I said run this command in a separate terminal since we will have to keep it running.


Note: If you face an Error stating unkown state "minikube" Make sure your node is up. Just run minikube start and the issue will get resolved.
Now re-check the load-balancer service. Go back to the terminal window where our pods are running and run this command.
kubectl get svc -o wide

As you can see we got our External-IP, we will be able to access our webpage at this IP on port 80.
Open any web-browser like Google Chrome and hit this 127.0.0.1:80
or you can run curl from your terminal
curl <external_IP>:<listening_port>
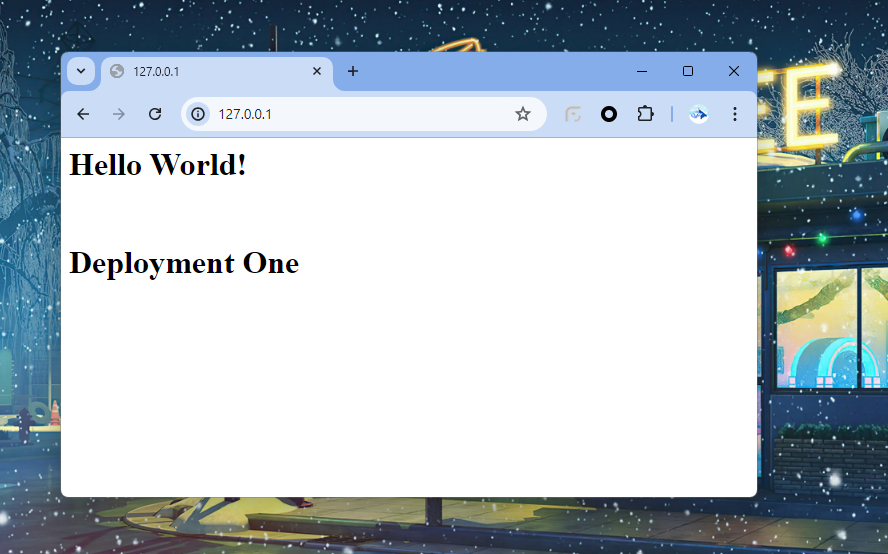
Hurray!!🎉 if you have reached till this step then you have achieved the goal of this tutorial which was deploying NGINX server with custom HTML
This webpage page is showing us "Deployment One", it means that the traffic is routed to the first NGINX deployment i.e nginx1. Try to refresh the page now or try hitting the same url in different tabs (repeat few times until you see the following).
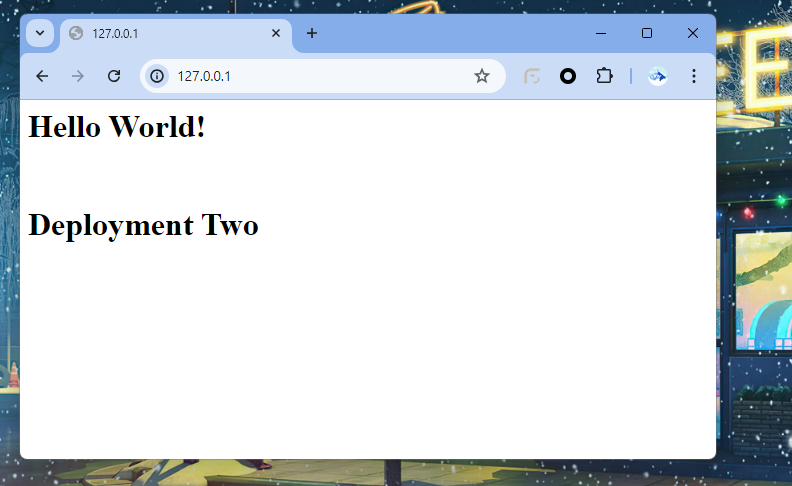
Here we got the output as "Deployment Two" it means the traffic is now routed to the second deployment which is nginx2 pod.
But why this is happening? 🤔Let's try to understand,
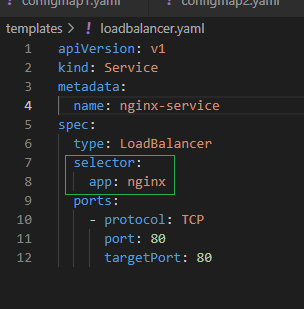
When we created our LoadBalancer service in the selector we gave app: nginx.
Also if you check both the deployments of nginx1 and nginx2 we have the selector matchLabels as app: nginx
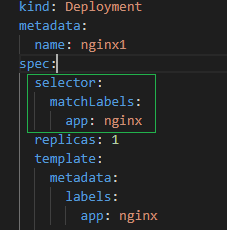
This is why the LoadBalancer service tries to expose both of these pods via single external IP at the common port 80. Hence one time we get to see the output as "Deployment One" and next time it is "Deployment Two".
Can we solve this problem of routing? Yes we can. I'll be explaining that with the help of ingress and NodePort Service in the next blog since this blog was to understand the usage of ConfigMaps in Deployments.
🛠️ Troubleshooting and Best Practices
🔧 Troubleshooting Tips:
Ensure your ConfigMap name matches in your deployment.
Check for syntax errors in your YAML files.
Use
kubectl describe configmap <name>andkubectl describe pod <name>to debug issues.
🌟 Best Practices:
Use ConfigMaps for non-sensitive data.
Keep ConfigMaps organized and manageable.
Use environment variables for application settings.
🧹Cleaning Up
Since we will be re-using all of this setup for the next tutorial you can just stop the minikube tunnel using ctrl+c And stop the minikube cluster using
minikube stop
So that whenever you start the minikube server again using minikube start cmmand your resources would be present as it is👻
Else if you wish to clear up everything do the following:
To delete our resources which are the pods, configmaps, deployments and services we can use the following commands
Go to the same directory where your YAML files are present.
Run this: kubectl delete -f <file-name>.yaml
kubectl delete -f dep1.yaml
Or you can simply delete the whole minikube cluster using,
minikube delete

Great we are done! 😎
🔹Conclusion
You did it! 🎊 You've learned how to create and use ConfigMaps in Kubernetes.
We successfully created our deployments for NGINX server with custom HTML using configmaps. Thank you for following along this tutorial and reading this whole article, I'll be soon publishing the next part where we will create different services and access these webpages on different ports and routes. Now experiment with your own projects and explore further. For more reading, check out the Kubernetes official documentation and keep reading my blogs.
Bye! Happy Kuberneting! 🚀

Subscribe to my newsletter
Read articles from Aniket Kharpatil directly inside your inbox. Subscribe to the newsletter, and don't miss out.
Written by

Aniket Kharpatil
Aniket Kharpatil
Dynamic DevOps Engineer with expertise in Kubernetes, AWS Cloud, CICD pipelines, and GitOps, specializing in automation, monitoring, and scalable solutions. Skilled in optimizing workflows, managing production releases, and driving efficiency in cloud-native environments. As a lifelong learner and problem-solver, I thrive on tackling complex business challenges by leveraging the latest DevOps tools, best practices, and innovation.