Don't Ship Buggy Code: Your Roadmap to Reliable Bitcoin Core Tests
 Prabhat Verma
This article will guide you on how to write fuzz tests and unit tests to better test you code or to increase coverage in already existing or newly written bitcoin files .
Generating Coverage reports
When testing your new code and writing tests for it, you need to check which lines of code are being used. A secure codebase has many lines of tests for each line of implementation code. In bitcoin-core, test coverage is generated using lcov. Follow the steps below to generate an lcov report of the test coverage in the bitcoin-core repo.
sudo apt-get update
sudo apt-get install lcov
After you have succesfully installed lcov , you would need to follow these steps to generate a code coverage report.
make clean
./configure --enable-lcov
make -j "$(($(nproc)+1))" cov
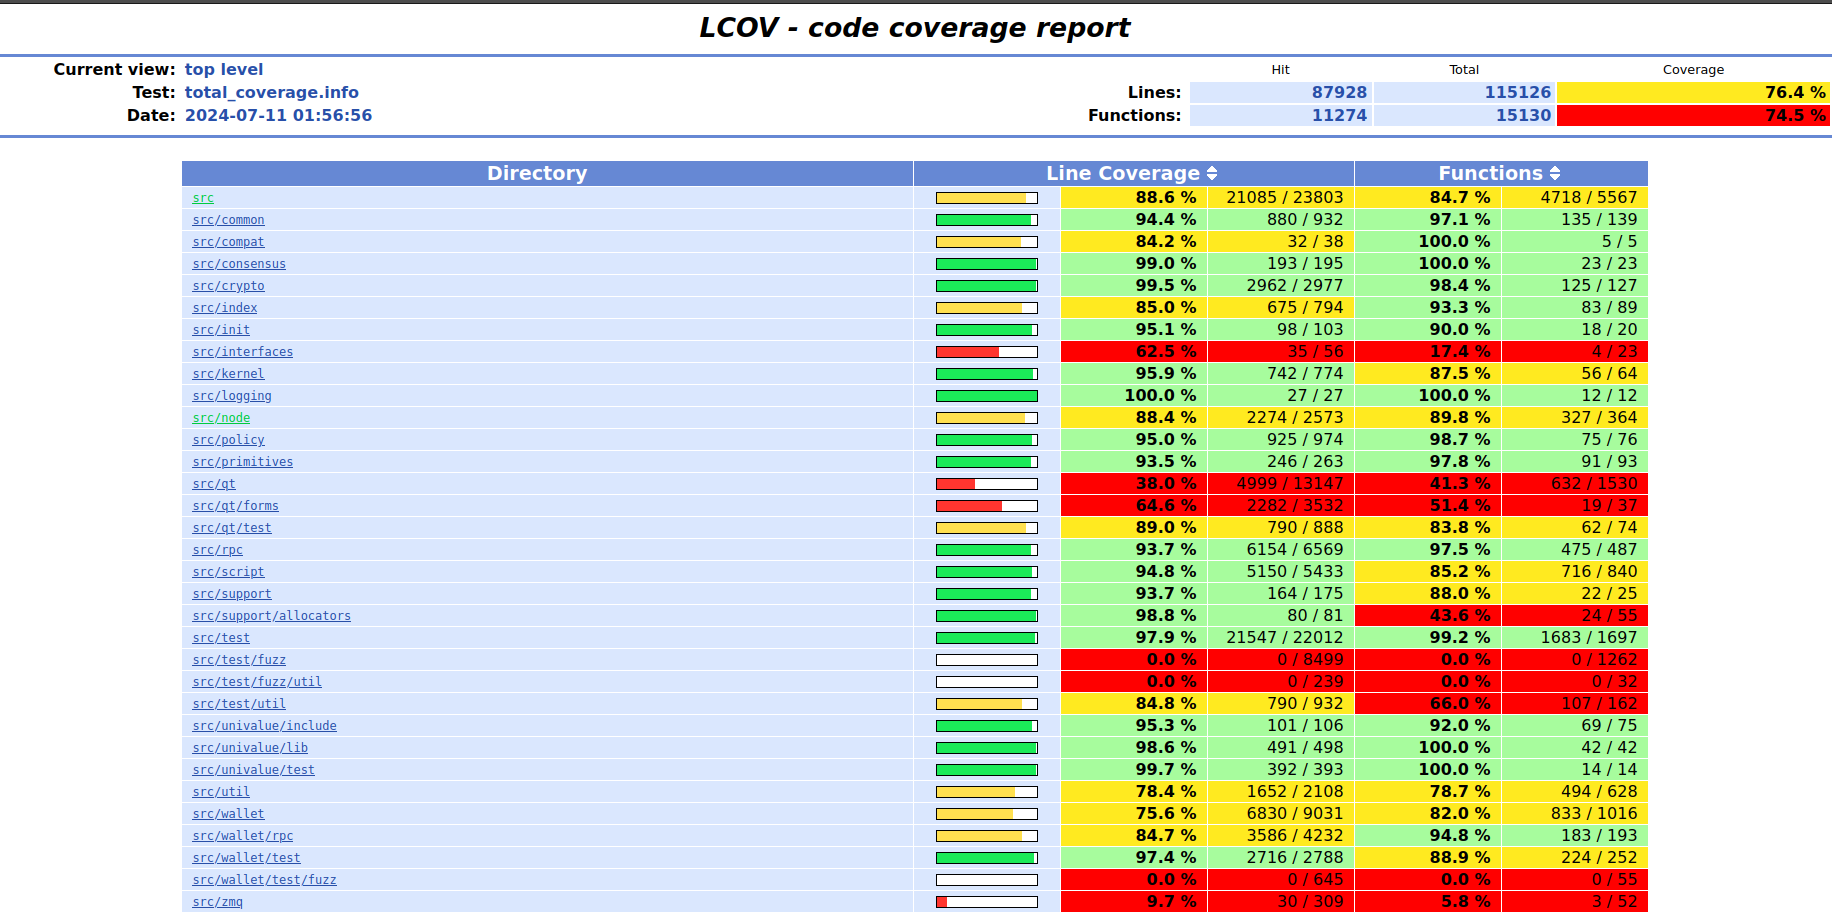
This will generate two directories: test_bitcoin.coverage and total.coverage. You can then open the index.html file in each directory to see a graphical report of the coverage, like this.

You can navigate through this to check for the coverage of the file you are working on . The general know hows of the lcov reports can be found here
Writing Unit tests using BOOST libraries.
Unit tests are written using Boost libraries. If you don't know how to run unit tests in Bitcoin Core, read my previous blog here. To start writing a unit test, you need to set up the testing environment using BOOST_FIXTURE_TEST_SUITE(txreconciliation_tests, BasicTestingSetup). This will create a basic testing environment with Boost libraries. Now, let's write the test. Here is a small test I wrote for txreconciliation.cpp when I was reviewing this PR. I will explain each line of code step by step. So, let's begin.
BOOST_AUTO_TEST_CASE(BreachMaxFanout)
{
    CSipHasher hasher(0x0706050403020100ULL, 0x0F0E0D0C0B0A0908ULL);
    TxReconciliationTracker tracker(TXRECONCILIATION_VERSION, hasher);
    FastRandomContext frc{/*fDeterministic=*/true};

    int inbound_peers = 36;

    for (int i = 1; i < inbound_peers; ++i) {
        tracker.PreRegisterPeer(i);
        BOOST_REQUIRE_EQUAL(tracker.RegisterPeer(i, /*is_peer_inbound=*/true, 1, 1), ReconciliationRegisterResult::SUCCESS);
    }

    for (int i = 1; i < inbound_peers; ++i) {
        // create 4000 random wtxids so that FANOUT_TARGETS_PER_TX_CACHE_SIZE is breached
        for (int j = 0; j < 4000; ++j) {
            tracker.ShouldFanoutTo(Wtxid::FromUint256(frc.rand256()), i,
                                   /*inbounds_fanout_tx_relay=*/0, /*outbounds_fanout_tx_relay=*/0);
        }
    }
}
BOOST_AUTO_TEST_CASE(BreachMaxFanout)
This is how we initialize tests in Boost. Here, BreachMaxFanout is the name of the test, which will be used to run it.
    CSipHasher hasher(0x0706050403020100ULL, 0x0F0E0D0C0B0A0908ULL);
    TxReconciliationTracker tracker(TXRECONCILIATION_VERSION, hasher);
    FastRandomContext frc{/*fDeterministic=*/true};
These are some utilities we need for writing our code. This includes a hasher, a tracker to get the current status with other nodes, and a randomization provider..
int inbound_peers = 36;

    for (int i = 1; i < inbound_peers; ++i) {
        tracker.PreRegisterPeer(i);
        BOOST_REQUIRE_EQUAL(tracker.RegisterPeer(i, /*is_peer_inbound=*/true, 1, 1), ReconciliationRegisterResult::SUCCESS);
    }
Here, I am setting inbound_peers to 36 (it should be set to a number greater than or equal to 10 to trigger the IsFanoutTarget function, which needs increased coverage). After this, we preregister the peer and then register it, ensuring it returns ReconciliationRegisterResult::SUCCESS, indicating the peer has registered successfully.
for (int i = 1; i < inbound_peers; ++i) {
        // create 4000 random wtxids so that FANOUT_TARGETS_PER_TX_CACHE_SIZE is breached
        for (int j = 0; j < 4000; ++j) {
            tracker.ShouldFanoutTo(Wtxid::FromUint256(frc.rand256()), i,
                                   /*inbounds_fanout_tx_relay=*/0, /*outbounds_fanout_tx_relay=*/0);
        }
    }
Here, we iterate over each peer. Each peer is then checked with 4000 wtxids (there can be duplicates). This ensures that if the IsFanoutTarget function is triggered, the number of wtxids added to the cache is significantly greater than FANOUT_TARGETS_PER_TX_CACHE_SIZE, which was not the case previously, thus increasing the coverage.
This shows how easy it is to write tests in Bitcoin Core. This simple example gives you a good idea of how to start writing tests. You can also write more complex and robust tests.
Running Fuzz tests in bitcoin core using libFuzzer
If you are running fuzz tests, you need to update Clang to the current minimum requirements. If you have Linux (<24.04), you will need to upgrade Clang since the default version is not supported. This might cause issues. To fix these issues, simply enter the following lines on the command line.
export LIBRARY_PATH=/usr/lib/gcc/x86_64-linux-gnu/11:$LIBRARY_PATH
export LD_LIBRARY_PATH=/usr/lib/gcc/x86_64-linux-gnu/11:$LD_LIBRARY_PATH
export CXXFLAGS="-std=c++20 -isystem /usr/include/c++/11 -isystem /usr/include/x86_64-linux-gnu/c++/11"
The rest of the procedure is simple. Just follow these steps:
make clean
CC=clang CXX=clang++ ./configure --enable-fuzz --with-sanitizers=address,fuzzer,undefined
make -j "$(($(nproc)+1))"
FUZZ=process_message src/test/fuzz/fuzz
Note: You will need to change the name of the target according to your needs. In this example, the target is process_message. The command src/test/fuzz/fuzz makes all the test executables run. We are not adding a custom corpus for this tutorial, but if you would like to, you can see the official documentation here.
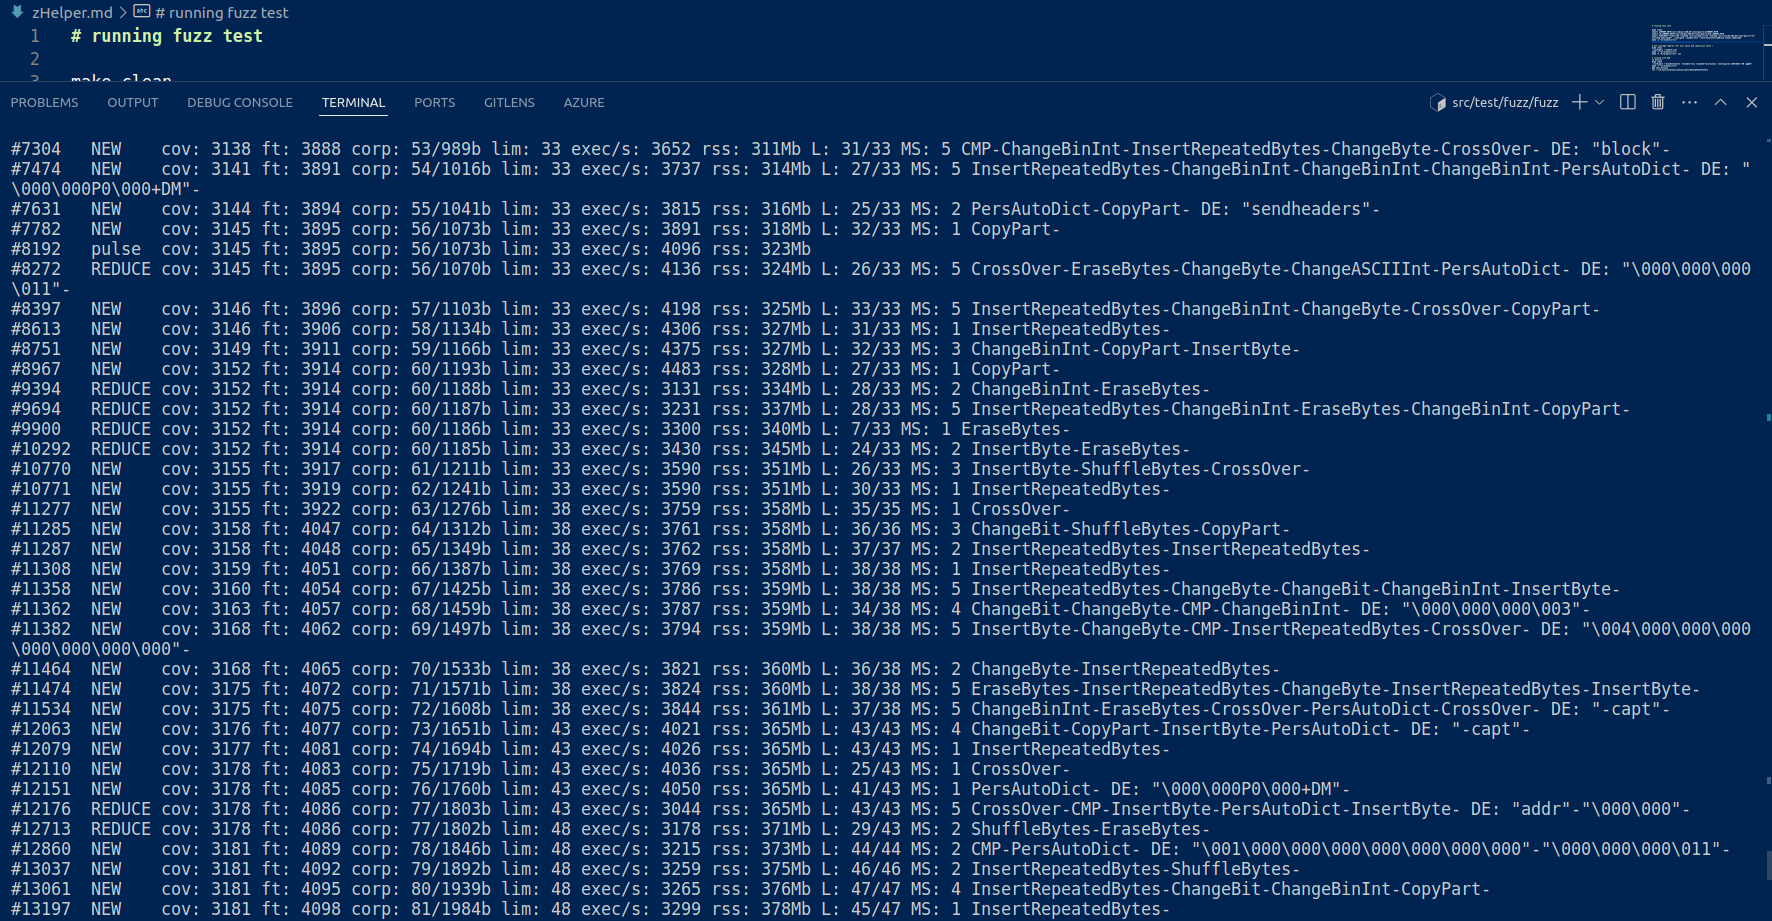
After running this , you will see in you terminal fuzz runs running . They are made to run infinitely until there is a crash or the tests are interrupted manually.

Writing Fuzz tests for Bitcoin core
Writing fuzz tests is even simpler . I will be taking the same approach of explaining a small test written by me . Keep tight !
#include <net_processing.h>
#include <node/transaction.h>
#include <node/txreconciliation.h>
#include <test/fuzz/FuzzedDataProvider.h>
#include <test/fuzz/fuzz.h>
#include <test/fuzz/util.h>
#include <test/util/setup_common.h>

namespace {

    CSipHasher hasher(0x0706050403020100ULL, 0x0F0E0D0C0B0A0908ULL);
    TxReconciliationTracker tracker(TXRECONCILIATION_VERSION, hasher);
    FastRandomContext frc{/*fDeterministic=*/true};

}

FUZZ_TARGET(BITSHALA_TEST)
{

   FuzzedDataProvider fuzzed_data_provider{buffer.data(),buffer.size()};

   LIMITED_WHILE(true , 1000)
   {

     const NodeId peer_id = fuzzed_data_provider.ConsumeIntegral<uint8_t>();
     assert(!tracker.IsPeerRegistered(peer_id));

     tracker.PreRegisterPeer(peer_id);
     assert(!tracker.IsPeerRegistered(peer_id));

     const bool is_peer_inbound = fuzzed_data_provider.ConsumeBool();
     const uint32_t peer_recon_version = fuzzed_data_provider.ConsumeIntegral<uint8_t>() + 1;
     const uint64_t remote_salt = fuzzed_data_provider.ConsumeIntegral<uint64_t>();

     tracker.RegisterPeer(peer_id,is_peer_inbound,peer_recon_version,remote_salt);
     assert(tracker.IsPeerRegistered(peer_id));

     tracker.ForgetPeer(peer_id);
     assert(!tracker.IsPeerRegistered(peer_id));
   }

}
namespace {

    CSipHasher hasher(0x0706050403020100ULL, 0x0F0E0D0C0B0A0908ULL);
    TxReconciliationTracker tracker(TXRECONCILIATION_VERSION, hasher);
    FastRandomContext frc{/*fDeterministic=*/true};

}
This code snippet initialises components for transaction reconciliation. It creates a custom hashing object (CSipHasher), a transaction reconciliation tracker (TxReconciliationTracker), and a deterministic random number generator (FastRandomContext). The tracker is used to keep track and FastRandomContext is used to generate randomness. (Although using this in a fuzz test is not advised. Try to utilise fuzz number generators always and use this only if you need some randomness with some determinism). All the code written in namespace is what is always needed in the fuzz targets we are about to write . Since these fuzz targets are rerun with new inputs , reinitialising them is these targets is waste of runtime and to avoid that we use namespace. All the functions or others helpers needed in the fuzz targets are initialised or declared here.
FUZZ_TARGET(BITSHALA_TEST)
This is just us declaring the piece of code inside this is what our target is and what is needed to be rerun again and again. The name written inside is the name of the fuzz target.
FuzzedDataProvider fuzzed_data_provider{buffer.data(),buffer.size()};
This fuzzed_data_provider will be providing us the fuzzing inputs. You can look at FuzzedDataProvider.h to look for various functions providing fuzz input in different types .(Complex/Custom types are to be created ourselves using these functions)
LIMITED_WHILE(true , 1000)
   {

     const NodeId peer_id = fuzzed_data_provider.ConsumeIntegral<uint8_t>();
     assert(!tracker.IsPeerRegistered(peer_id));

     tracker.PreRegisterPeer(peer_id);
     assert(!tracker.IsPeerRegistered(peer_id));

     const bool is_peer_inbound = fuzzed_data_provider.ConsumeBool();
     const uint32_t peer_recon_version = fuzzed_data_provider.ConsumeIntegral<uint8_t>() + 1;
     const uint64_t remote_salt = fuzzed_data_provider.ConsumeIntegral<uint64_t>();

     tracker.RegisterPeer(peer_id,is_peer_inbound,peer_recon_version,remote_salt);
     assert(tracker.IsPeerRegistered(peer_id));

     tracker.ForgetPeer(peer_id);
     assert(!tracker.IsPeerRegistered(peer_id));
   }
LIMITED_WHILE is how we declare while inputs with the two parameters beings (condition,max_runs). Rest of the code is us preregistering , registering and forgetting the peer while using assert to enforce conditions. This is it !
Armed with these tools, go forth and conquer those pesky bugs! Remember, strong code keeps Satoshi's dream alive.
Subscribe to my newsletter
Read articles from Prabhat Verma directly inside your inbox. Subscribe to the newsletter, and don't miss out.
Written by
