Get Started with Firebase: A Quick Guide 🚀
 Mahima Manik
Key Features 🔥
Cross-platform: Firebase provides seamless integration across various platforms including web, Android, iOS and popular framework like React and Flutter. This ensures that developers can build and deploy their applications across different devices without encountering major compatibility issues.
Extension options: Firebase provides extensions for common development tasks like authentication, payments, email, etc — which can be added per project basis.
Integration with frontend stack: Easy integration with Flutter and Unity game. Both Flutter and Firebase is developed by Google — so integrating them is just a matter of running few commands on Flutter project.
To build any application using Firebase, we need to understand the building blocks well. In this article, I am learning most important Firebase concepts. This will enable developers to start creating app architecture in Firebase ecosystem.
Quick plug: I just launched a project on Product hunt which you can use as your boilerplate to start building apps in minutes. It's a shortcut. Here's the link :)
Firebase setup 🛠️
Firebase project is the container to hold resources or services for one or more apps (upto 30). These apps can be Apple, Android, or web apps — they are generally platform variants or versions of the same application.
To follow along this tutorial: Create your project through Firebase console here. You can disable Google Analytics for the project to keep it simple. Make sure to select Webapp.
Resources can be storage, database, auth providers, functions, analytics, etc. All the apps registered under the project share and have access to all the resources and services provisioned for the project.
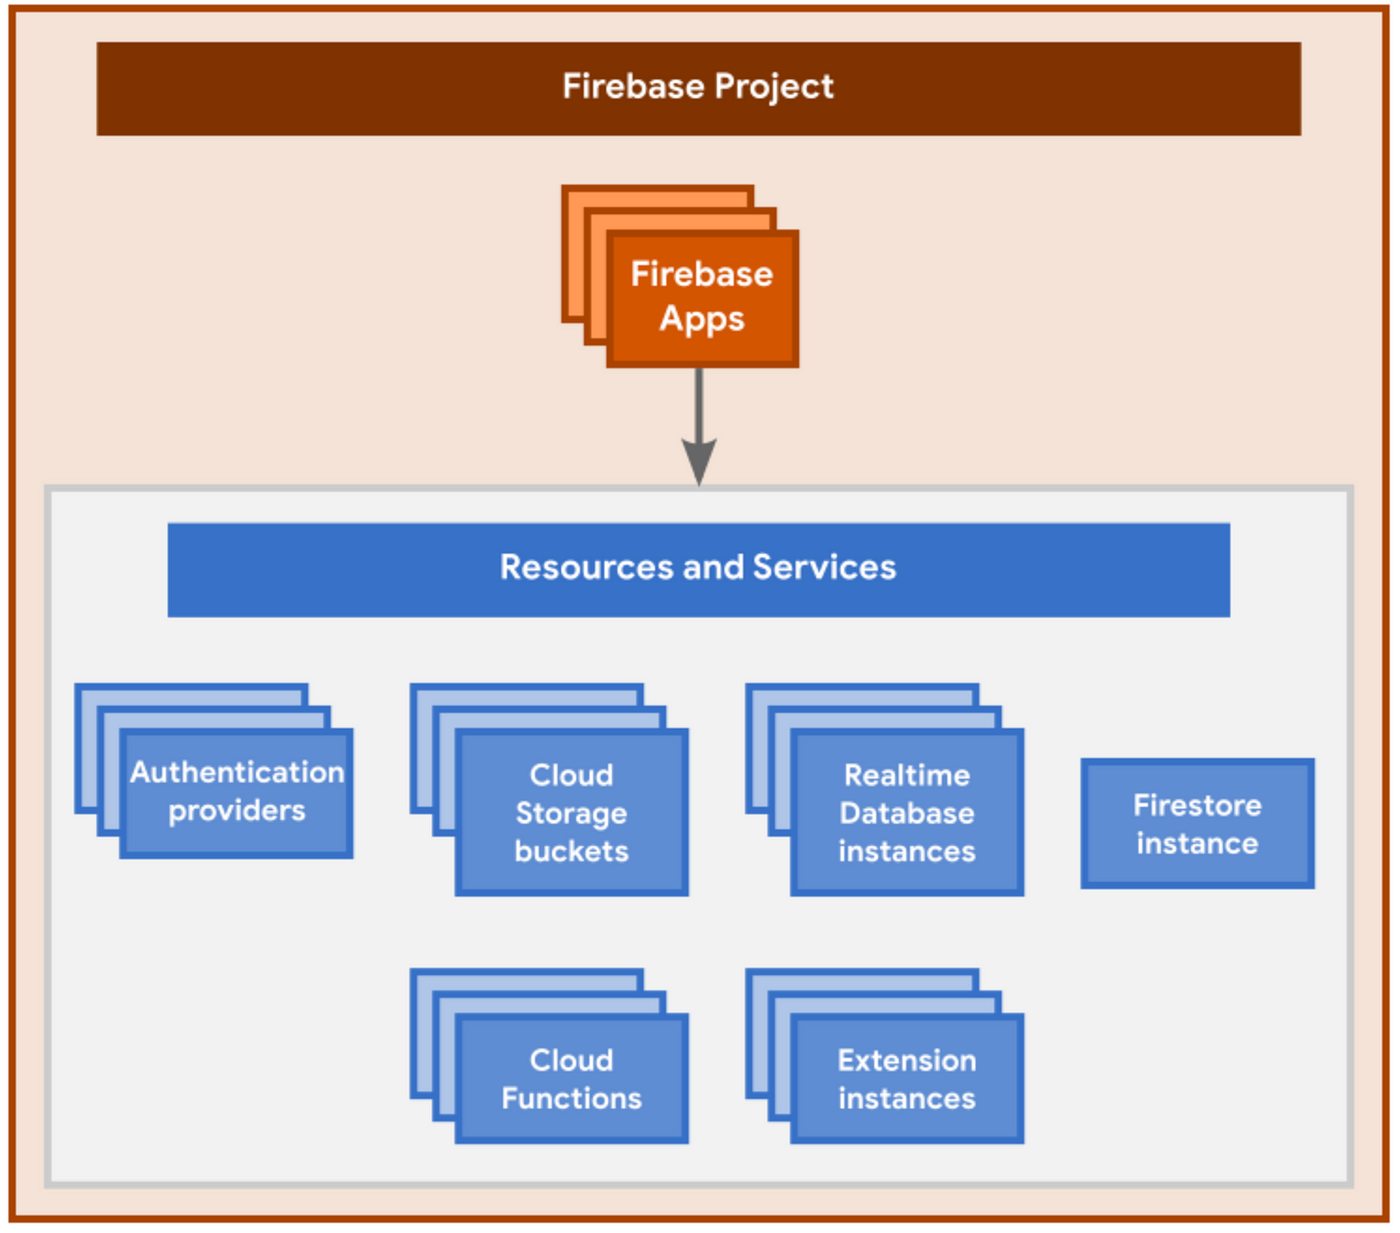
Apps sharing project resources
General guideline: If a set of apps don’t share the same data and configurations, strongly consider registering each app with a different Firebase project
Why are Firebase API Keys not secret?
API key is unique to all Firebase projects. They are used to route requests to Firebase project, but do not grant access to backend resources. Instead of API key, Firebase uses Security Rules and app checks to secure data stored in the project.
Therefore, API keys for Firebase services are ok to included in code or checked-in config files. However, there are risks involved that we should understand. Like any REST API, there is risk of another user making large number of requests using Firebase API key and trying to exploit ap and its security (Example: user can authenticate, store too much data in Firebase storage and exceed the quota).
As a best practice, you should have different API keys for environments like Dev, Staging and Prod — in that case you can populate API key value through environment variables or configuration files.
Project Setup
I have created a simple Node.js project to understand each function deeply. You can use it: https://github.com/mahima-manik/firebase-learnings or create from scratch.
Go to project directory (say firebase-learnings) and setup Node project inside it.
Run
npm initinside the folder. This will createpackage.jsonfile in the directory.Create
index.jsfile where we will write our codeAdd firebase dependency to the project. Run
npm install firebaseUpdate scripts in package.json to run
index.js(Optional) Install other dependencies like
dotenvso that you can place all your config or other projects in.envfile.
To interact with the Firebase resources, we need to setup the configuration. Go to Firebase Console -> Project Settings. In the “Your Apps” section, go to Web Apps and choose the web version of your project. Under “SDK setup and configuration”, you will find Firebase configuration. These configurations can be directly used in the code, but I have chosen to put them as environment variables.
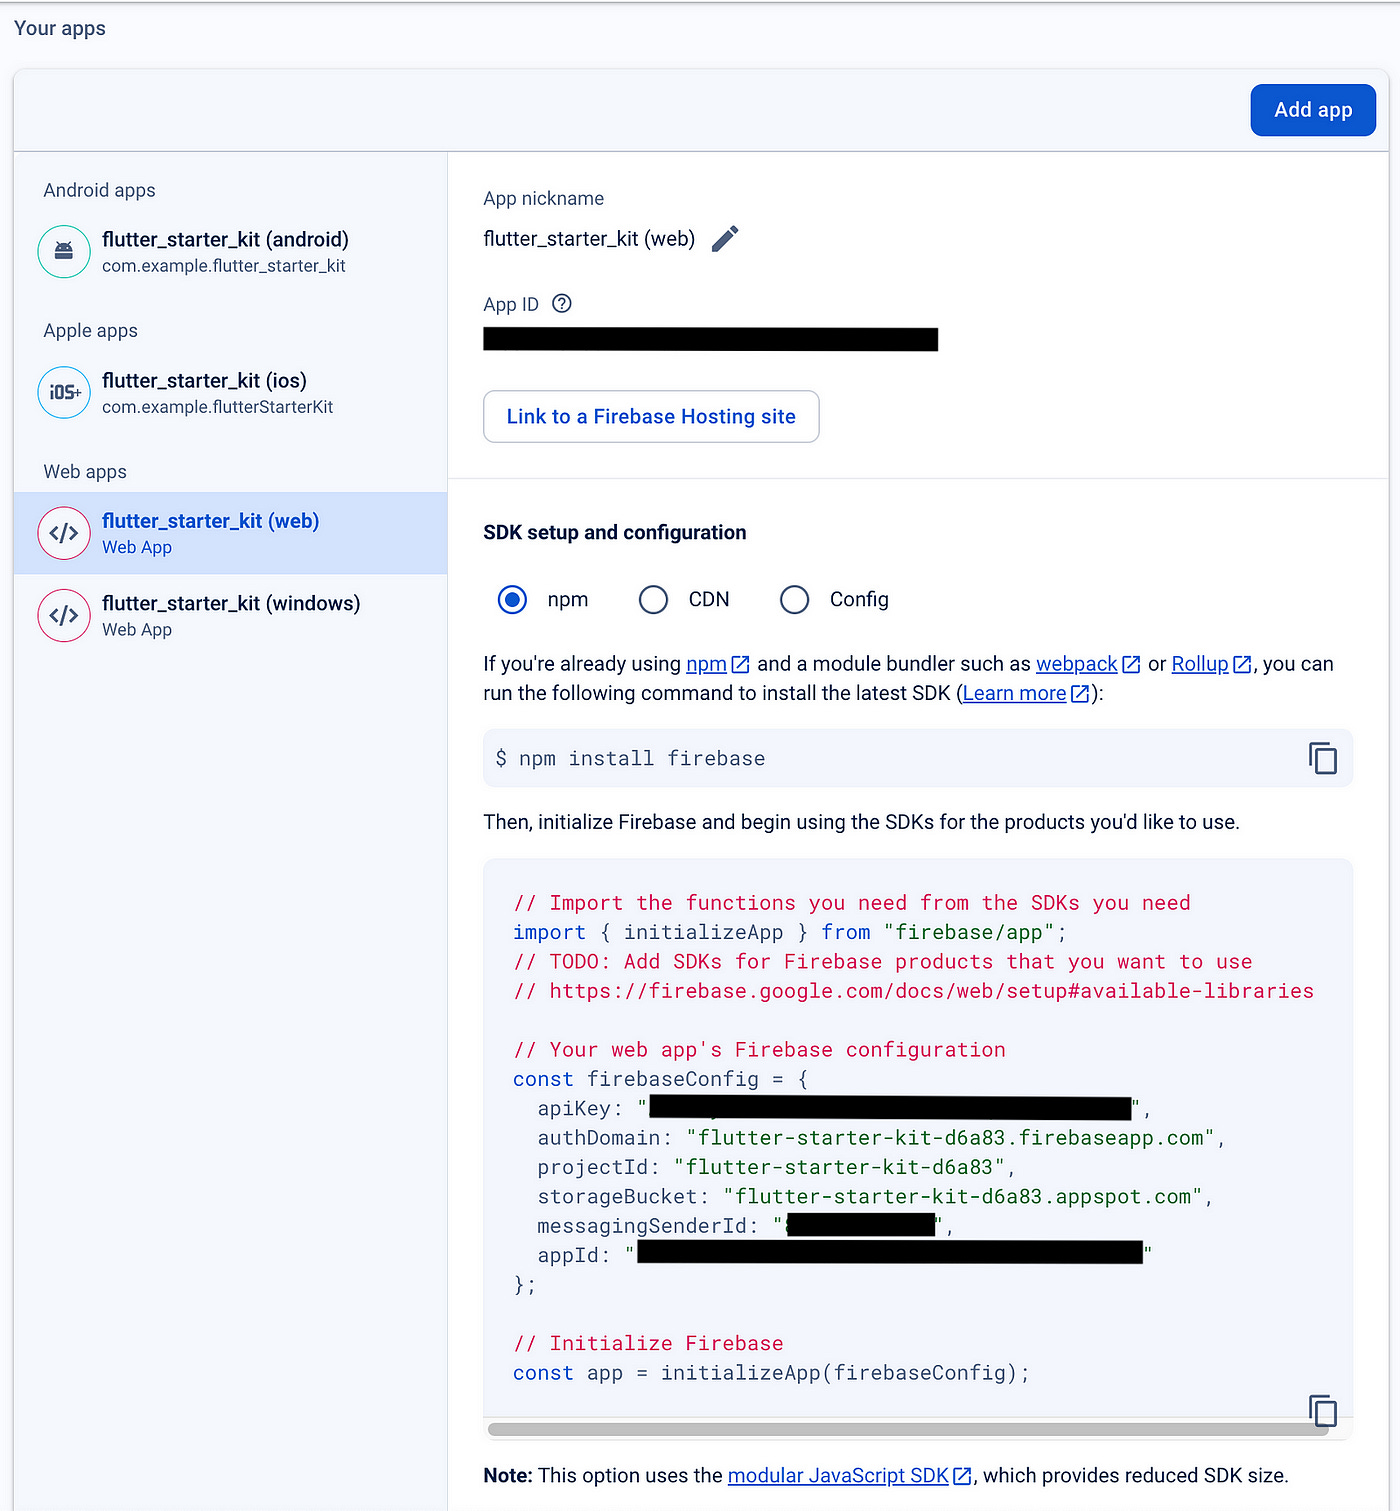
Setting up environment variables from Firebase
Firebase Authentication 📛
Firebase authentication lets user sign-in into the application using the sign-in methods that they already have, like — Google, Facebook, Twitter, Github accounts. This way customers don’t have to create a new account to use your app. Hence, we can say it provides customer identity as a service.
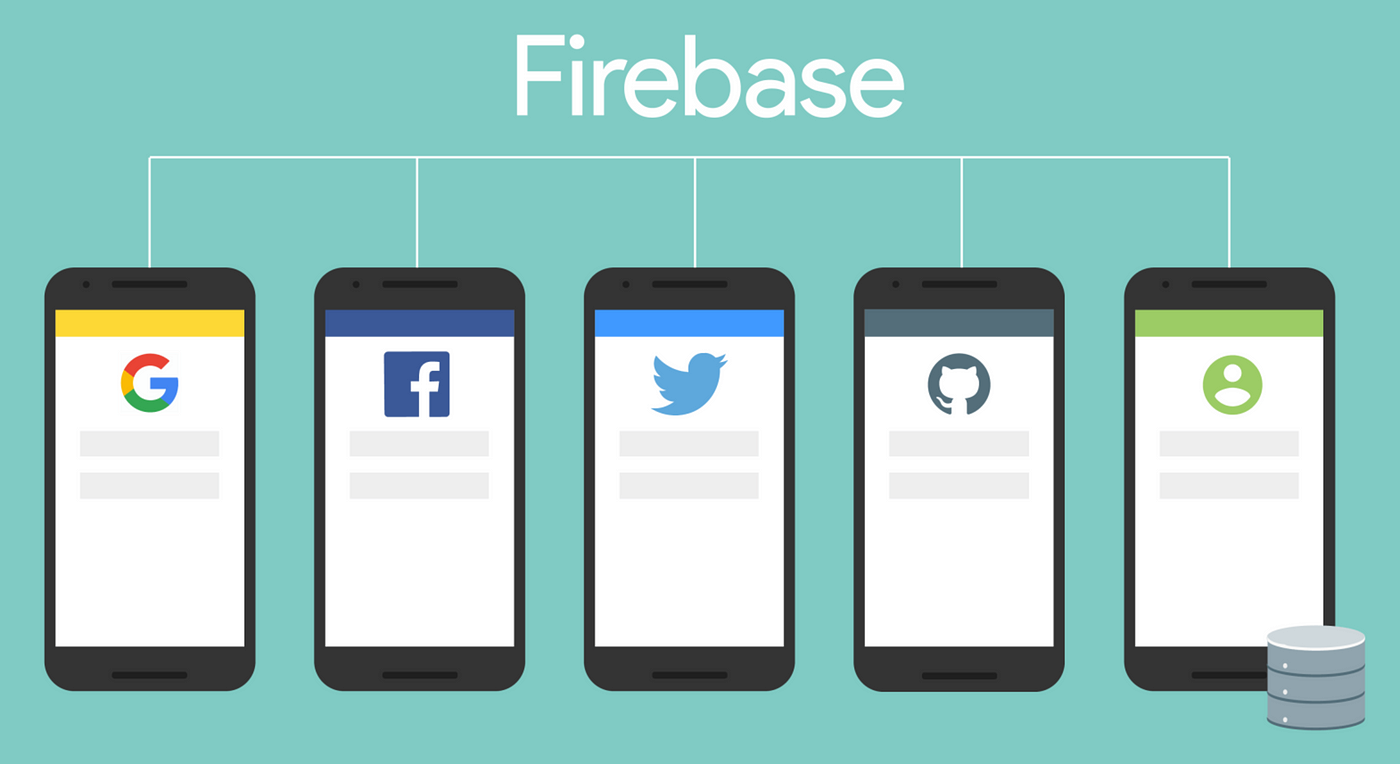
Firebase Authentication Providers
Once the user is signed-in using Google Auth — their data is stored in the cloud. Each signed-in user is assigned a unique record in Firebase system. This record contains a unique userID (UID) and a signed web token. This unique userID enables app developers to can give the same experience to customers across mobile/web/other apps in the project.
Based on user’s authentication data, we can grant/deny them access to other Firebase products like Storage or Firestore through Firebase security rules. This enables user to access only their information in the cloud.
Google authentication also provides advanced features like email verification and account linking.
Here are some important flow of information to use when setting up Auth.
- Go to Firebase console -> Build -> Authentication -> Get Started
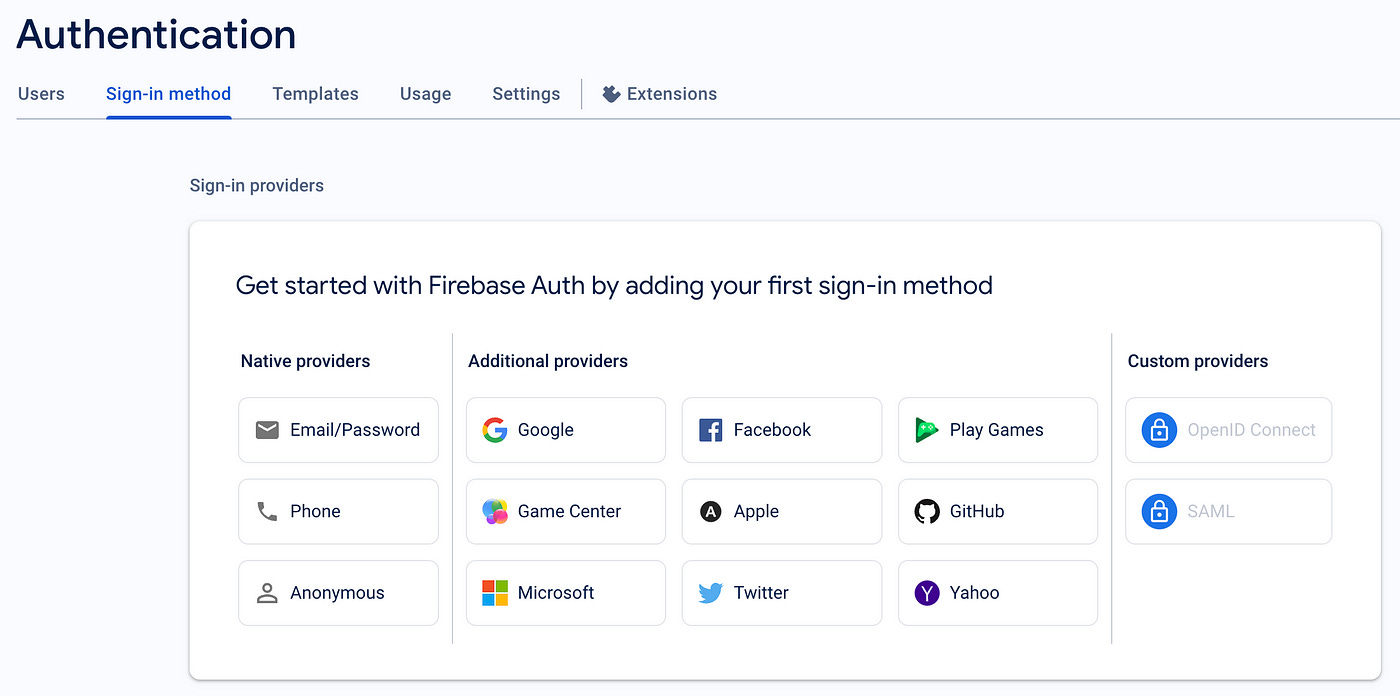
You can choose the desired provider. Email/Password is the most simple one. For other sign-in providers, there are few additional settings before you begin.
import { initializeApp } from "firebase/app";
import { getAuth } from "firebase/auth";


// Replace the firebaseConfig with your app's Firebase project configuration
// See: https://firebase.google.com/docs/web/learn-more#config-object
const firebaseConfig = {
  apiKey:
  authDomain:
  projectId:
  appId:
  ...
};

// Initialize Firebase with config
const app = initializeApp(firebaseConfig);
// Creating reference to the Firebase auth service
const auth = getAuth(app);
Firebase Authentication provides an inbuilt function onAuthStateChanged that listens to any change in auth data. Here is a simple way to listen and react on user data change.
It takes auth as first parameter and callback function as second parameter which is invoked when auth data changes (i.e. user signs in or out).
import { onAuthStateChanged } from 'firebase/auth';

import { useEffect, useState } from 'react';

// State hook to keep track of user and whether Firebase is in progress for loading user data
const [authUser, setAuthUser] = useState(null);
const [isLoading, setIsLoading] = useState(true);


// This function is invoked by onAuthStateChanged
// whenever auth state is changed
const authStateChangedObserver = async (user) => {
  setIsLoading(true);
  if (!user) {
    // User is signed out
    setAuthUser(null);
    setIsLoading(false);
    return;
  }

  // User is signed in, see docs for a list of available properties
  // https://firebase.google.com/docs/reference/js/auth.user
  setAuthUser({
    uid: user.uid,
    email: user.email,
  });
  setIsLoading(false);
}


useEffect(() => {
    const unsubscribe = onAuthStateChanged(auth, authStateChangedObserver);
    return () => unsubscribe();
}, [])
If a user want to logout from the app, we can use the following:
import { signOut as authSignOut } from 'firebase/auth';

const signOut = () => authSignOut(auth).then(() => {
    setAuthUser(null)
    setIsLoading(false)
});
Few other important concepts in Auth are:
userChanges(): In addition to user sign in and sign out, this method also listens to the event related to change in user attributes like display Name, display photo, email, phone number, etc. It will come handy when you update user’s profile and reflect in state change across the application.reload(): This function forces a reload of the user’s profile data from Firebase. This is useful when you want to ensure you have the most up-to-date information about the user, especially if you suspect changes might have been made outside of your app’s direct control (like through the Firebase Admin SDK or the Firebase console). Example usage:Firebase.instance.currentUser.reload();
How to show authentication screens in UI?
Firebase provides pre-built UI library for user authentication — it has required register and login screens. It is easy to integrate and provides other functionalities like “Forgot Password”’ flow.
For React based project, we can add using npm install react-firebaseui
Use signInWithPopup() instead of signInWithRedirect(). Authenticates a Firebase client using a popup-based OAuth authentication flow.
Setting up config:
const REDIRECT_PAGE = '/dashboard';

const uiConfig = {
  signInFlow: 'popup',
  signInSuccessUrl: REDIRECT_PAGE,
  signInOptions: [
    EmailAuthProvider.PROVIDER_ID,
    GoogleAuthProvider.PROVIDER_ID,
    // Add more as per your requirements
    // It can be Facebook, Twitter, Github, email/password, etc
  ],
};
UI for authentication can be added to any component like dialog box when the user clicks on “Sign In” button on the app.
<StyledFirebaseAuth uiConfig={uiConfig} firebaseAuth={auth} />
If login succeeds, the signed in user along with the provider’s credential are populated in authUser we created. This is because onAuthStateChanged listens to any change in auth data.
If sign in was unsuccessful, returns an error object containing additional information about the error.
Cloud Storage 🗃️
It is a storage service used to store and retrieve user generated content. They are generally used to store big blobs of data that don’t change often like photos, audio, videos, docs, etc.
Cloud storage provides auto scaling based on amount of data stored.
Resources accessed by users are cached nearby using Global edge caching for fast retrieval.
Access to the cloud storage is implemented through security rules. These rules grants access to each object to correct user.
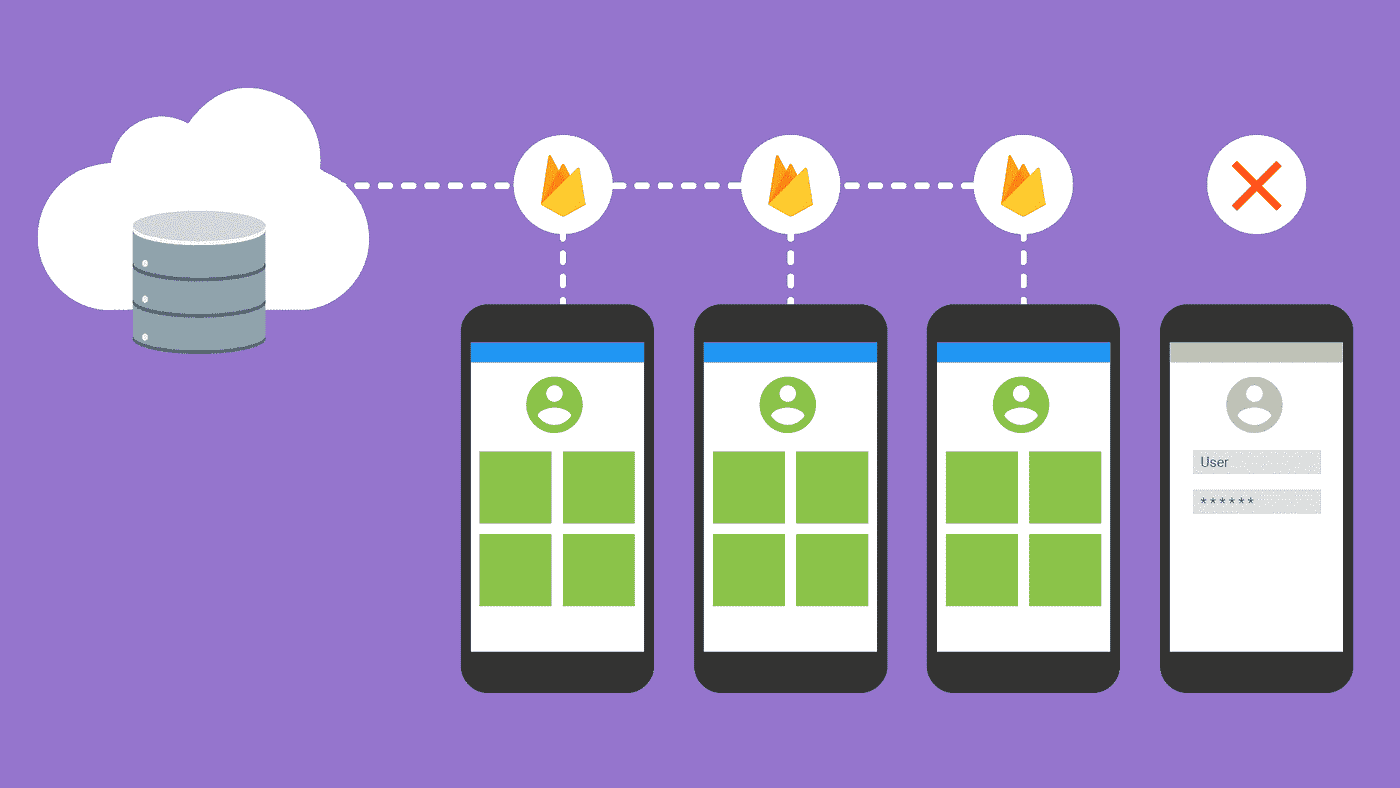
PS: It can be compared to S3 bucket in AWS or Blob storage in Azure
How to setup storage?
Go to Firebase console -> Build -> Storage -> Get Started. Choose Test mode for starters and cloud storage location (preferably near your location). Note: storage location cannot be changed after creation.
Once the bucket is created, data can be organized into directories based on schema of your choice. Example: each user can have their own directory, so userId can be used as folder name.
import { initializeApp } from "firebase/app";
import { getStorage } from "firebase/storage";


// Replace the firebaseConfig with your app's Firebase project configuration
// See: https://firebase.google.com/docs/web/learn-more#config-object
const firebaseConfig = {
  apiKey:
  authDomain:
  projectId:
  appId:
  ...
};

// Initialize Firebase with config
const app = initializeApp(firebaseConfig);
// Creating reference to the Firebase storage
const storage = getStorage(app);
Once we have initialized Firebase storage object, we write functions to interact with the same. Copy the bucket URL on top of the table to reference the bucket.
import {
  deleteObject,
  getDownloadURL as getStorageDownloadURL,
  ref,
  uploadBytes
} from 'firebase/storage';

const BUCKET_URL = 'gs://example-app-99d99.appspot.com';

export async function uploadImage(image, userId) {
    // You can choose any other name for your image file
    const formattedDate = format(new Date(), "yyyy-MM-dd'T'HH:mm:ss'Z'");
    const imagePath = `${BUCKET_URL}/${userId}/${formattedDate}.jpg`;

    // Creating storage reference where file will be uploaded
    const storageRef = ref(storage, imagePath);

    // Uploading image file using storage reference
    await uploadBytes(storageRef, image);
}


export async function getImageDownloadURL(imagePath) {
    // Get storage reference to the file for which download URL is needed
    const storageRef = ref(storage, imagePath);
    // Get the download URL of the file
    const downloadURL = await getStorageDownloadURL(storageRef);
    return downloadURL;
}

export async function deleteImage(imagePath) {
    // Get storage reference to the file that needs to be deleted
    const storageRef = ref(storage, imagePath);
    // Delete the file from Cloud Storage
    await deleteObject(storageRef);
}
As you have noted above the important functions to remember when using Firebase storage are:
ref: Before uploading any file to storage, a reference pointer is created for the file. Reference is just a pointer to the file in cloud. This function returns the reference to file location where we want to perform read/write operation. References are light-weight and reusable for multiple operations like upload, download, list or delete.
uploadBytes: This function uploads the requested file (
FileorBlobtypes) to the storage reference. When uploading a file, you can also specify metadata for that file — this will go as third parameter.getStorageDownloadURL: This function is used to obtain the download URL of a file stored in Cloud Storage. It can be used to display file to the user through the application. Note that the download URL is public by default, but Firebase provides options to control access to files through security rules if needed.
deleteObject: This method is called on the file reference, which returns a
Promisethat resolves, or an error if thePromiserejects. Note: Deleting a file is a permanent action. You can use Object versioning to preserve deleted objects as versioned, noncurrent objects.
Cloud Firestore 💥
Its a NoSQL document-model Database which is used to store data like strings, numbers.
Unlike Firebase Storage which holds big chunks of data like image, videos, etc, Firestore is used for simple data types. Data is Firebase Storage doesn’t change often, but Firestore is usually updated frequently. Firestore is used to contain structured data.
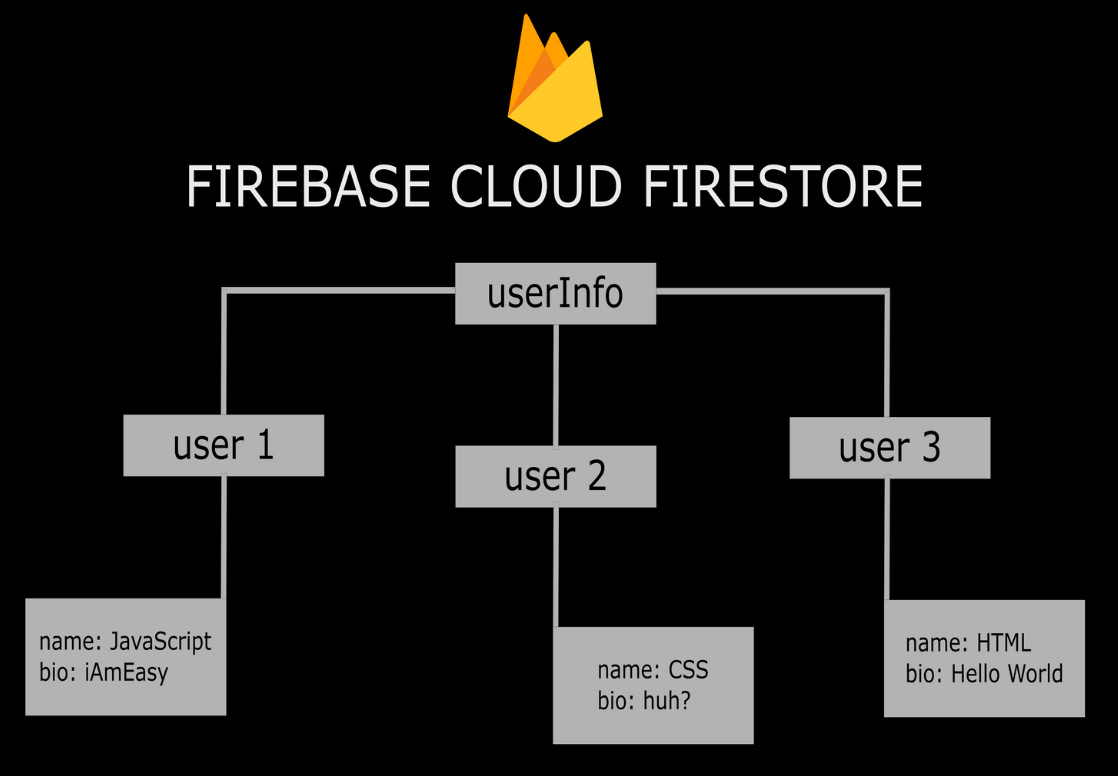
Source: freeCodeCamp.org
Steps:
Initialize Firestore in Firebase console. Build -> Firestore Database -> Get started -> Test Mode.
Firestore Database location will be same as Firebase storage bucket location.
import { initializeApp } from "firebase/app";
import { getFirestore } from "firebase/firestore";


// Replace the firebaseConfig with your app's Firebase project configuration
// See: https://firebase.google.com/docs/web/learn-more#config-object
const firebaseConfig = {
  apiKey:
  authDomain:
  projectId:
  appId:
  ...
};

// Initialize Firebase with config
const app = initializeApp(firebaseConfig);
// Creating reference to the Firestore database
export const db = getFirestore(app);
How to structure data in Firestore?
Data is stored inside documents in Firestore. Each document contains a set of key-value pairs.
Documents support many different data types, from simple strings and numbers, to complex, nested objects.
Document is stored in collection. Document cannot contain collections, but it can contain reference to other collections. The names of documents within a collection are unique. You can provide your own keys, such as user IDs, or you can let Cloud Firestore create random IDs for you automatically.

Cloud Firestore is optimized for storing large collections of small documents. Store your data in documents, organized into collections. Documents can contain complex nested objects in addition to subcollections.
Let’s see few examples where we add student’s information to Firestore DB.
import { addDoc, collection, deleteDoc, doc, getDocs, onSnapshot, orderBy, query, setDoc, where } from 'firebase/firestore';

const COLLECTION_NAME = 'students';

async function addStudentDataToFirestore(uid, name, age, grade) {
    await addDoc(collection(db, COLLECTION_NAME), {
        uid,
        name,
        age,
        grade
    });
}
Tip: If you get permission denied error on query or updating firestore, you need to check “rules” section.
Collections and documents are created implicitly in Cloud Firestore. Simply assign data to a document within a collection. If either the collection or document does not exist, Cloud Firestore creates it.

Some other important functions include:
Composite Index
Composite index stores a sorted mapping of all the documents in a collection. It is sorted based on some ordered list of fields to index. It is used to support queries not already supported by single field indexes
async function getAllStudentsFromFirestore() {
   // Get all documents from the "students" collection
    const querySnapshot = await getDocs(collection(db, COLLECTION_NAME));

    // Extract data from each document
    querySnapshot.forEach(doc => {
        console.log(doc.id, " => ", doc.data());
    });
}

async function deleteStudentFromFirestore(studentId) {
   // Delete the document with the specified ID from the "students" collection
    await deleteDoc(doc(db, COLLECTION_NAME, studentId));
    console.log("Student deleted successfully.");
}
There is a lot more to cover in Firestore. Modelling data for read-write updates is one of the most important decisions in app design. I will cover it in more details in the next post - you can follow me on Twitter to be updated - here's my profile link.
Subscribe to my newsletter
Read articles from Mahima Manik directly inside your inbox. Subscribe to the newsletter, and don't miss out.
Written by
