Create your first EC2 instance!
 Namdev Pratap
Quick Overview!
EC2 is one of the most popular AWS offerings. EC2 stands for Elastic Compute Cloud, and it provides Infrastructure as a Service (IaaS). With EC2, you can:
Run virtual machines, called instances.
Store data on virtual drives, known as EBS.
Distribute loads across machines using ELB.
Scale services with Auto-Scaling Groups (ASG).
Understanding EC2 is crucial for learning how the cloud works. When you rent an EC2 instance, you can configure the following:
Operating System (OS): Choose between Linux or Windows (Mac is not available).
Compute Power and Cores (CPU): Select the number of CPUs.
RAM: Decide how much memory you need.
Storage Space:
Network Attached: EBS & EFS.
Hardware Attached: EC2 instance store.
Network Card: Specify the speed and public address.
Firewall Rules: Set up security groups.
Bootstrap Script: Configure the instance at first launch.
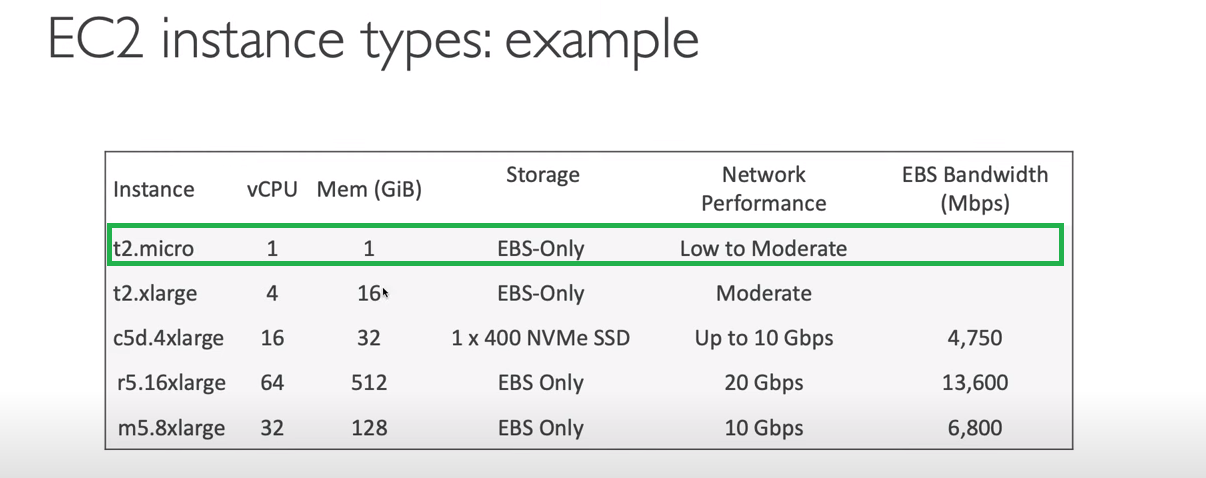
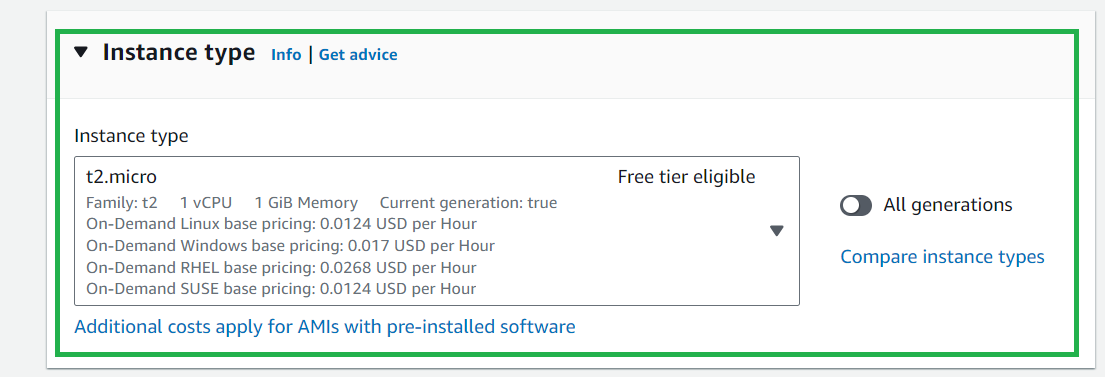
For practice, we will use the t2.micro instance type because it's free.
Let's start to create your first EC2 instance : >
EC2 instance is nothing but a virtual machine,
There are 7 simple steps to follow
Choose AMI: Select an Amazon Machine Image.
Choose Instance Type: Pick the instance type.
Configure Instance: Set up the instance settings
Add Storage: Specify the storage requirements.
Add Tags: Add tags for identification.
Configure Security Group: Set up security rules.
Review: Review all the settings before launching.
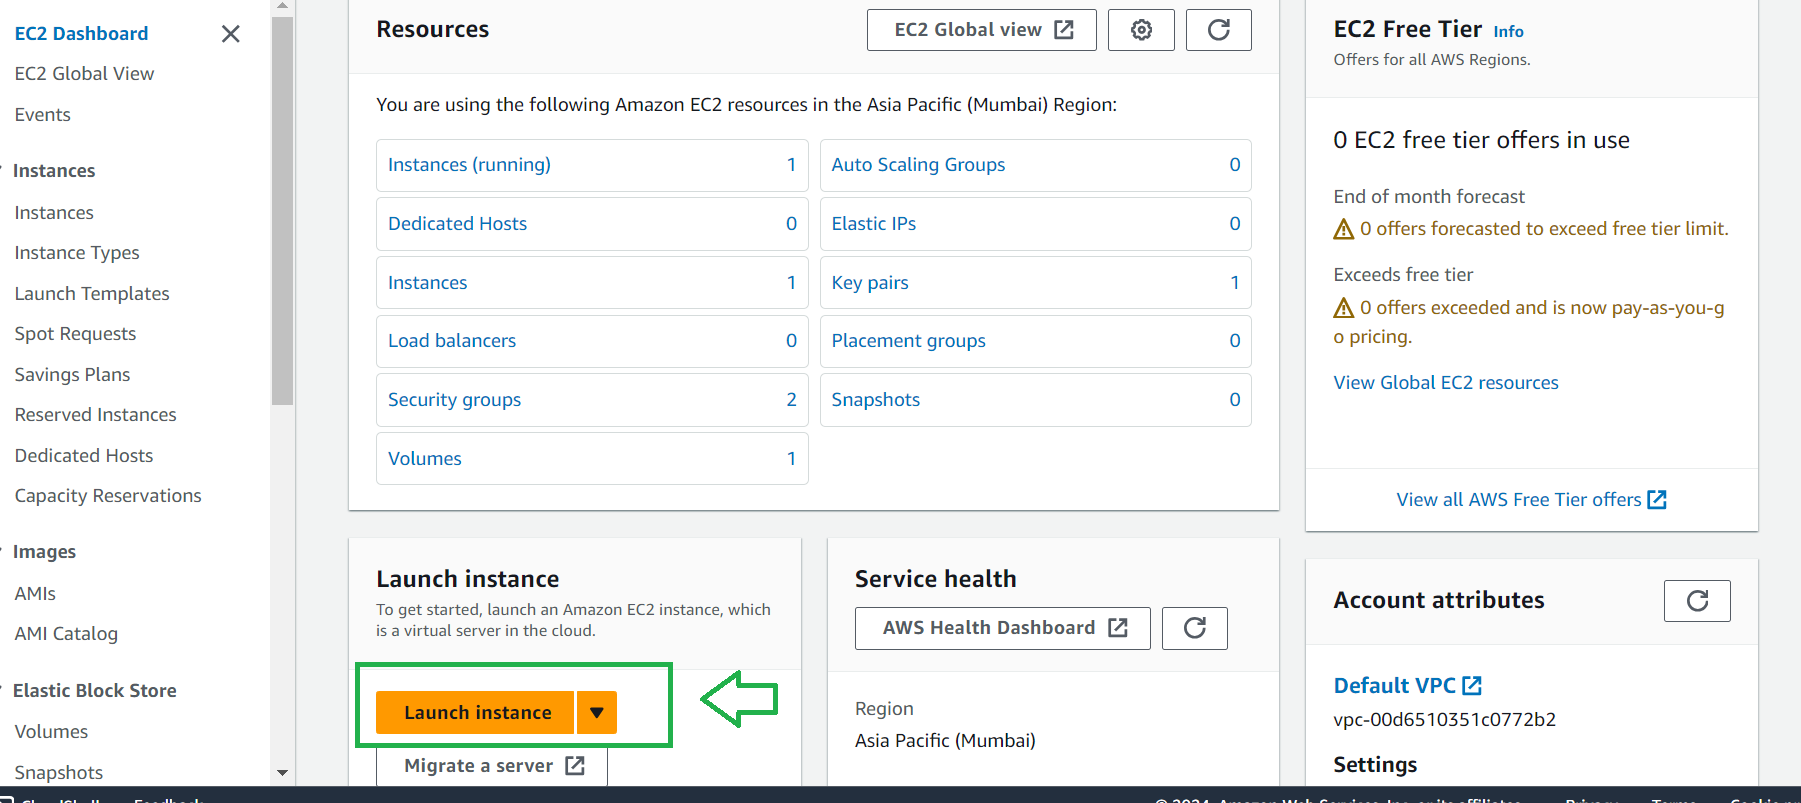
1. After you log in go to Homepage -> top left click on Services -> Click on EC2, if you don't find it click on All services and locate EC2

When the page loads click on the launch instance as shown below
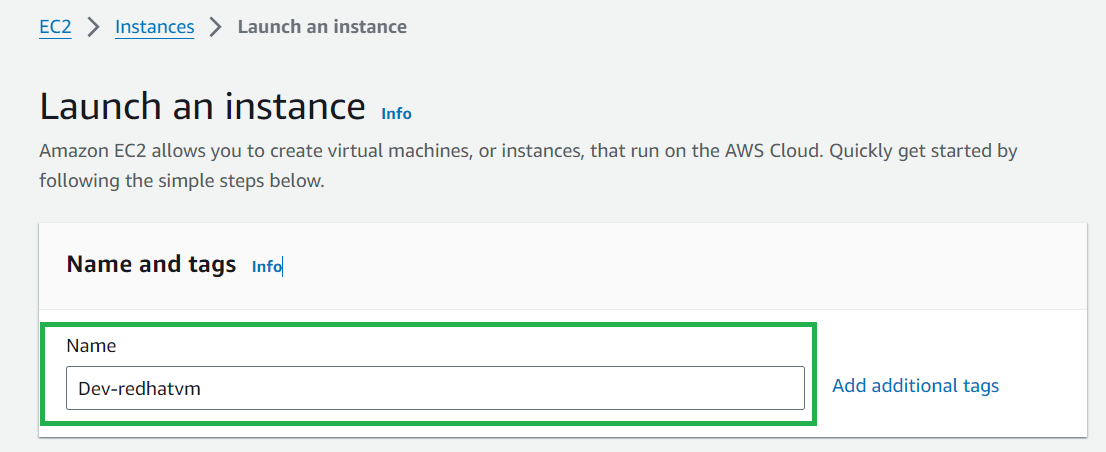
Give a name to your instance
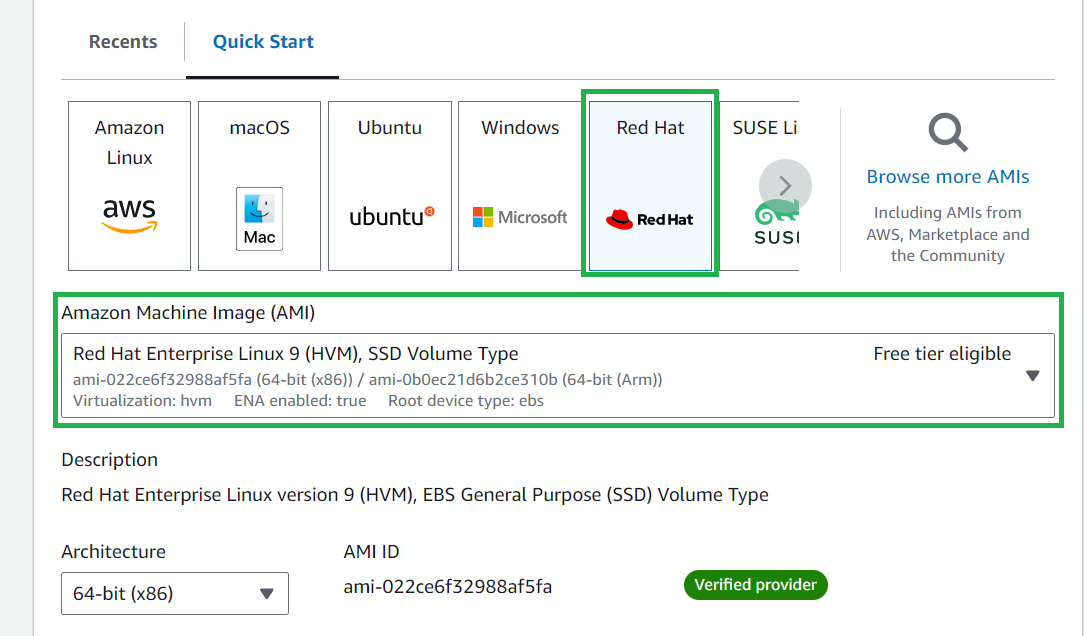
Select Application and OS Images (Amazon Machine Image)
this is nothing but choosing an operating system
Select Redhat and Select Red Hat Enterprise Linux 9 which is (free tire eligible) as shown below
Select instances as t2.micro
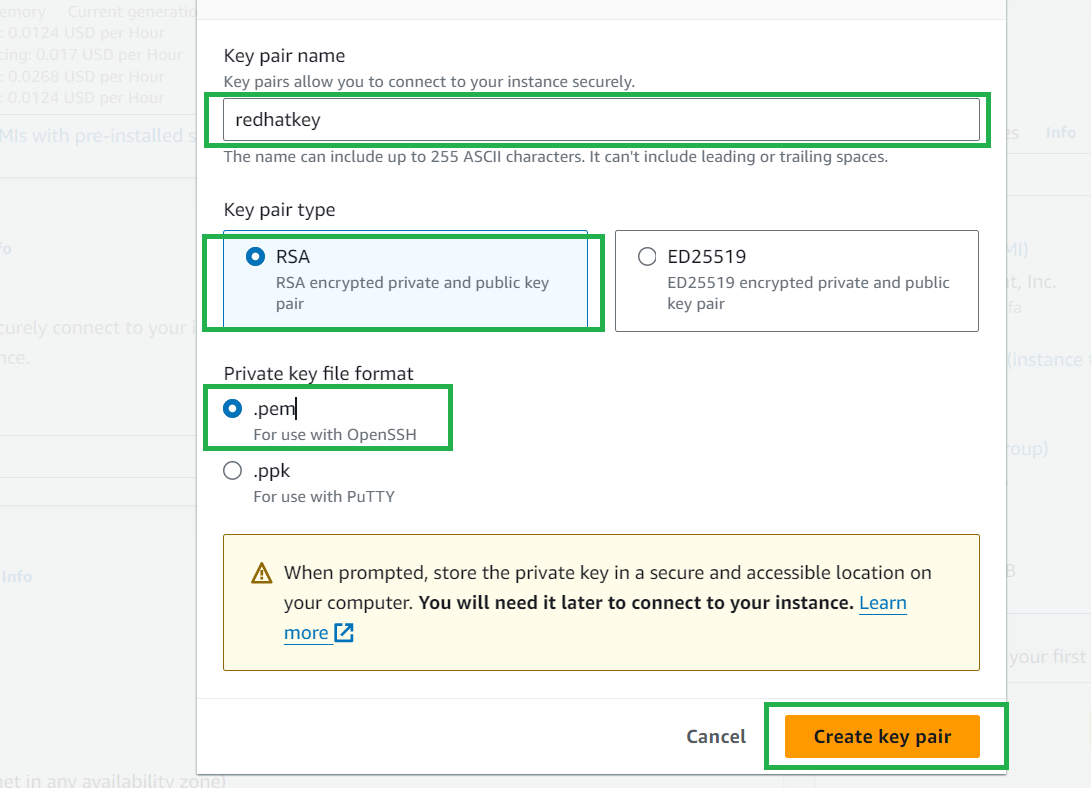
Select the key pair ( this step is important )
click on Create a new pair, to know what a is keypair click here>>

Now enter the key pair name, Select RSA, and Private key format as .pem
and then click on Create key pair
Under Network settings
Select Create security group, and select SSH traffic from [anywhere] for this example which is unsafe but for this example, we will select this
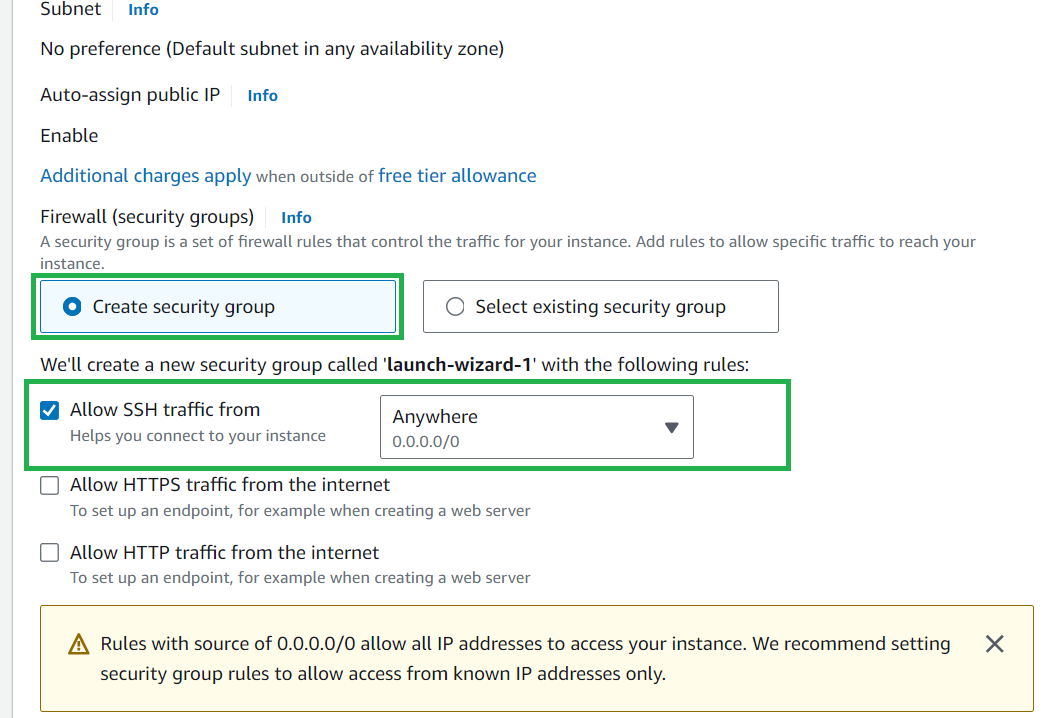
You can also select an existing Security group that you have created for additional security but for now, let's select anywhere
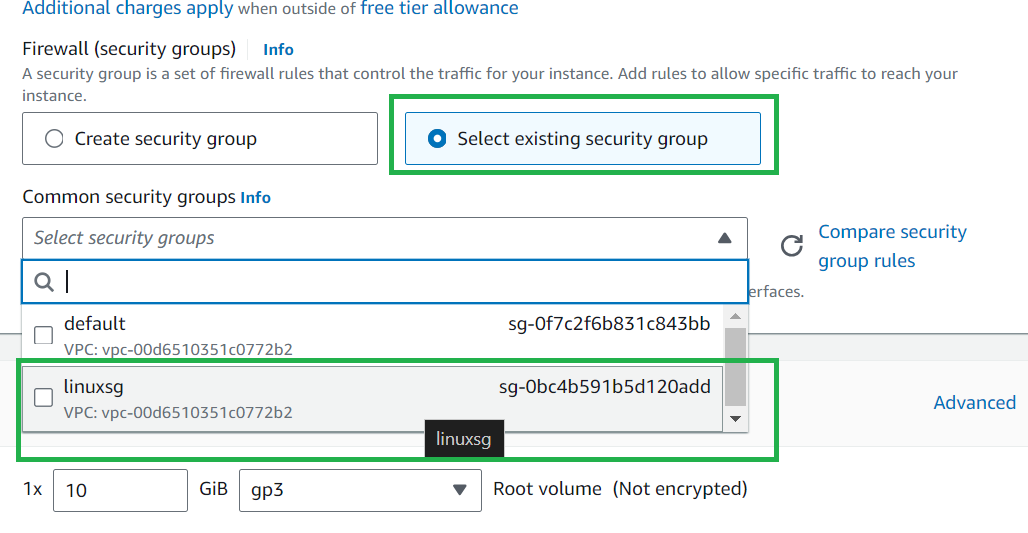
Scroll down and click on launch instance
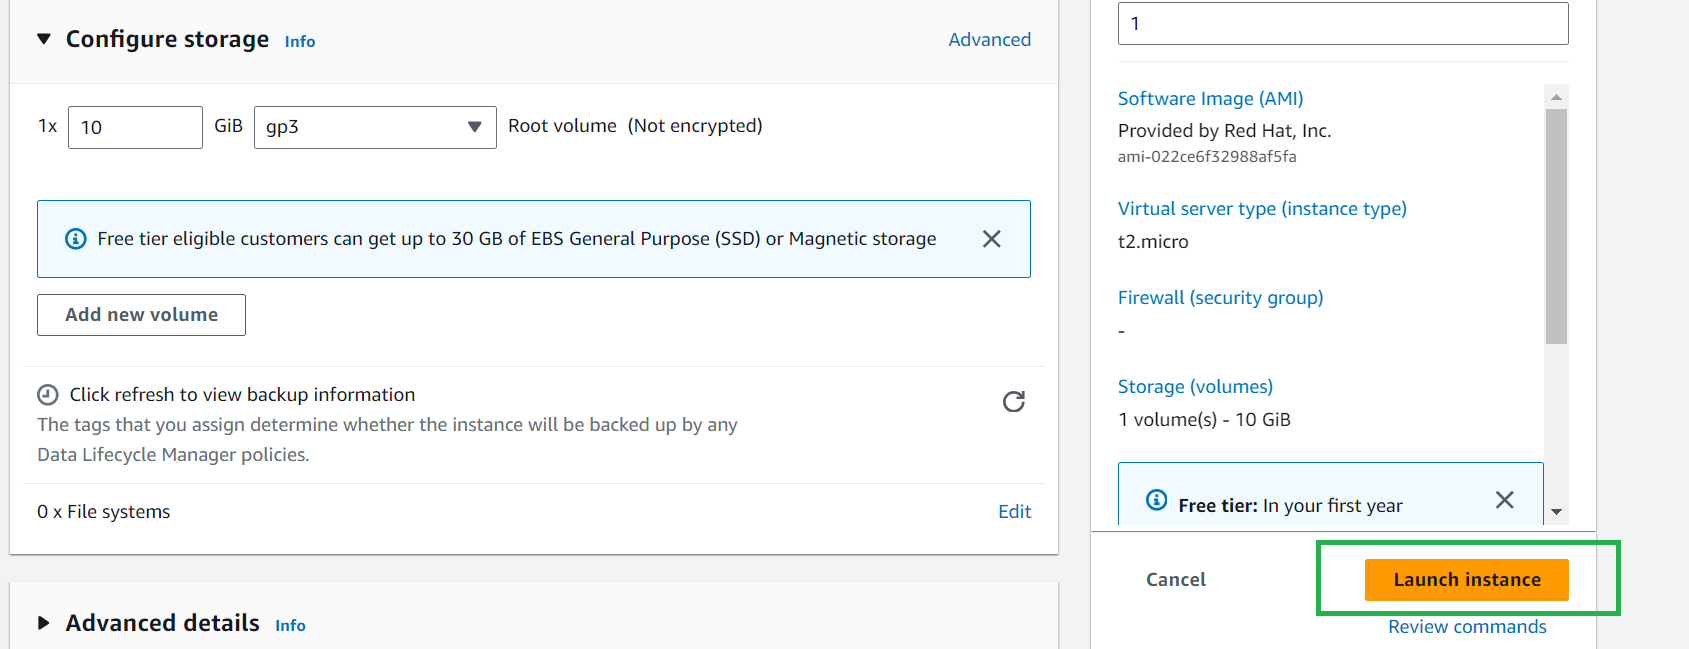
One instance is created

Scroll down and click on View all instances

Now select the instance you have created and click on connect

Now go to Ec2 instance connect, and click on Connect
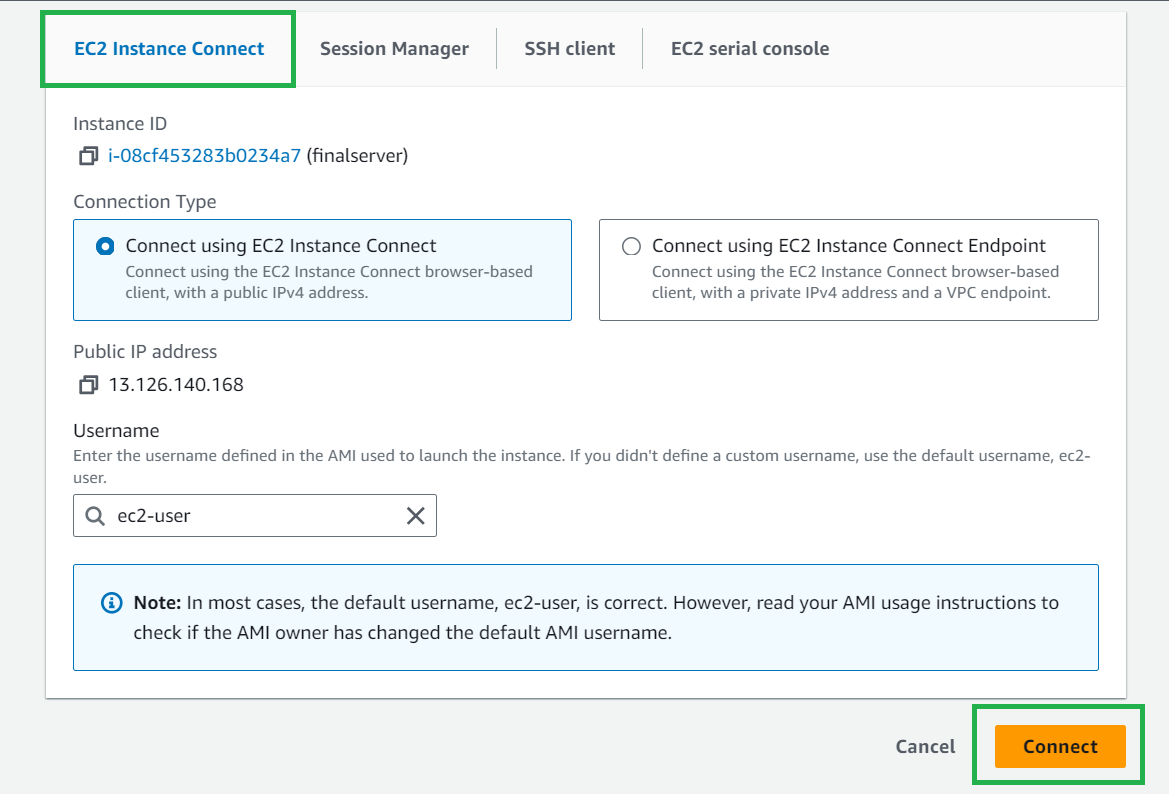
You may encounter an error as below.

This is due to the failure to set the SSH inbound ruleHow to fix: error Failed to connect to your instance Error establishing SSH connection to your instance. Try again later.
Failure to set the SSH inbound rule refers to not properly configuring the security group rules for an EC2 instance to allow SSH (Secure Shell) access. This rule is crucial because it determines who can remotely connect to your instance over the internet.
What Happens When SSH Inbound Rule is Not Set
No Remote Access: Without the SSH inbound rule, you cannot remotely connect to your EC2 instance using SSH. This means you can't perform any management or configuration tasks on the instance.
Access Denied Errors: Any attempt to SSH into the instance will result in connection errors, typically "Connection timed out" or "Connection refused."
Operational Delays: Inability to access the instance can delay deployment, maintenance, and troubleshooting processes, affecting productivity and operations.
How to Properly Set the SSH Inbound Rule
Open Security Groups in the AWS Console: Go to the EC2 dashboard, find the "Security Groups" section, and select the security group associated with your instance.
Add Inbound Rule:
Type: Select "SSH."
Protocol: This will automatically be set to TCP.
Port Range: This will automatically be set to 22.
Source: Specify the IP address range that is allowed to connect. For instance:
0.0.0.0/0allows SSH access from any IP address (not recommended for security reasons).A specific IP address or range (e.g.,
192.168.1.0/24) restricts access to only those addresses.
Save the Rule: Click "Save" or "Apply" to update the security group.
Example: Allow SSH from a Specific IP
Type: SSH
Protocol: TCP
Port Range: 22
Source:
203.0.113.0/24(replace with your IP range)
By setting this rule, you ensure that only the specified IP addresses can SSH into your instance, enhancing both accessibility and security.
Let me show you step by step:
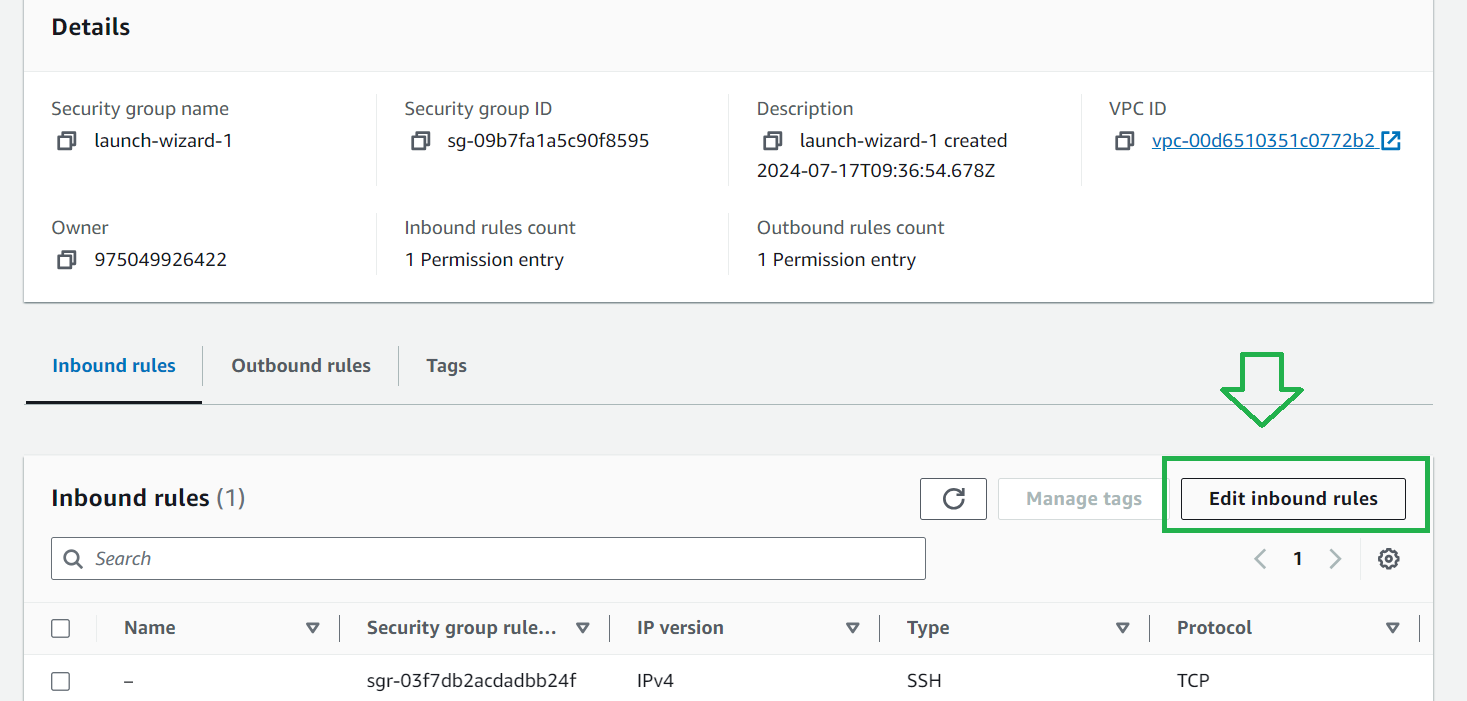
Go to instances and go to security as shown below
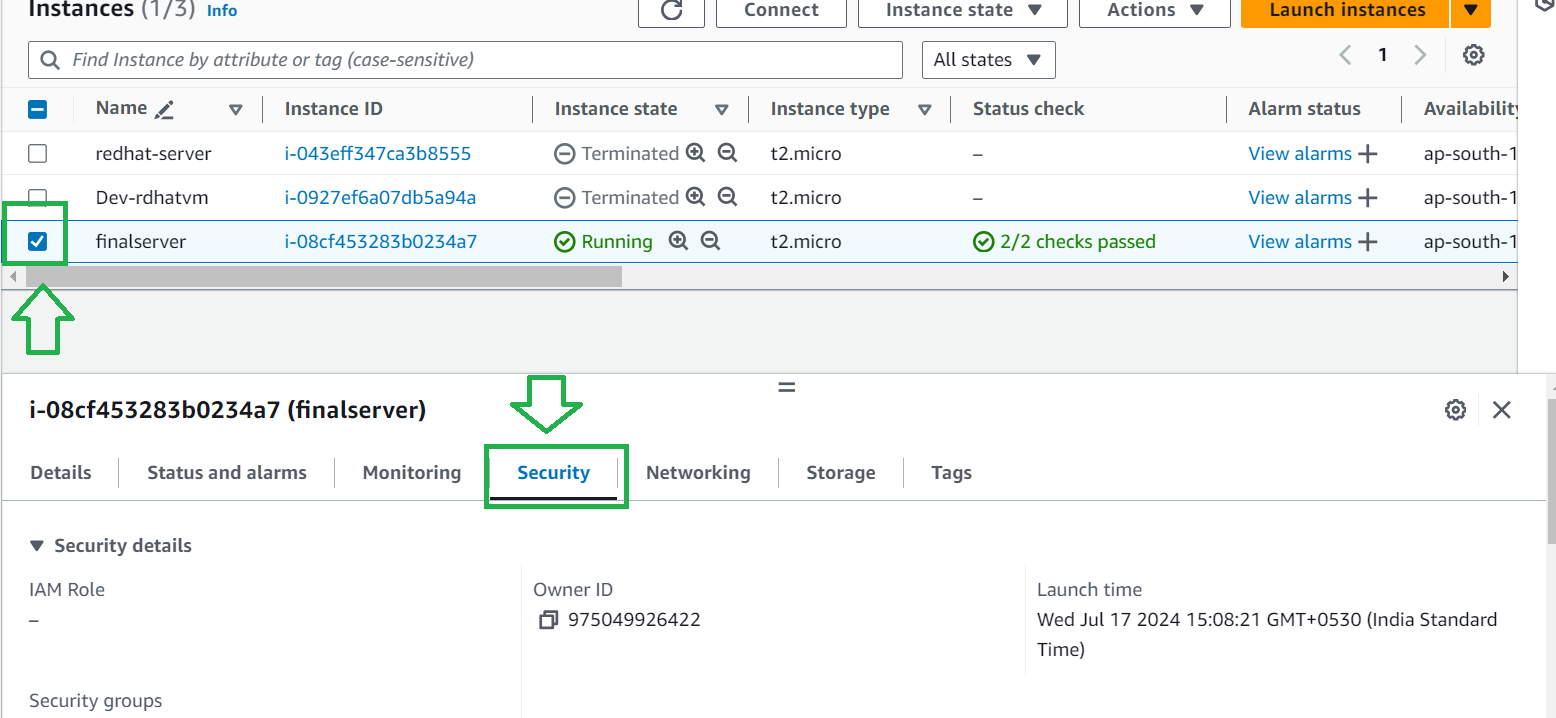
Under security click on security group

Then click on edit inbound rules
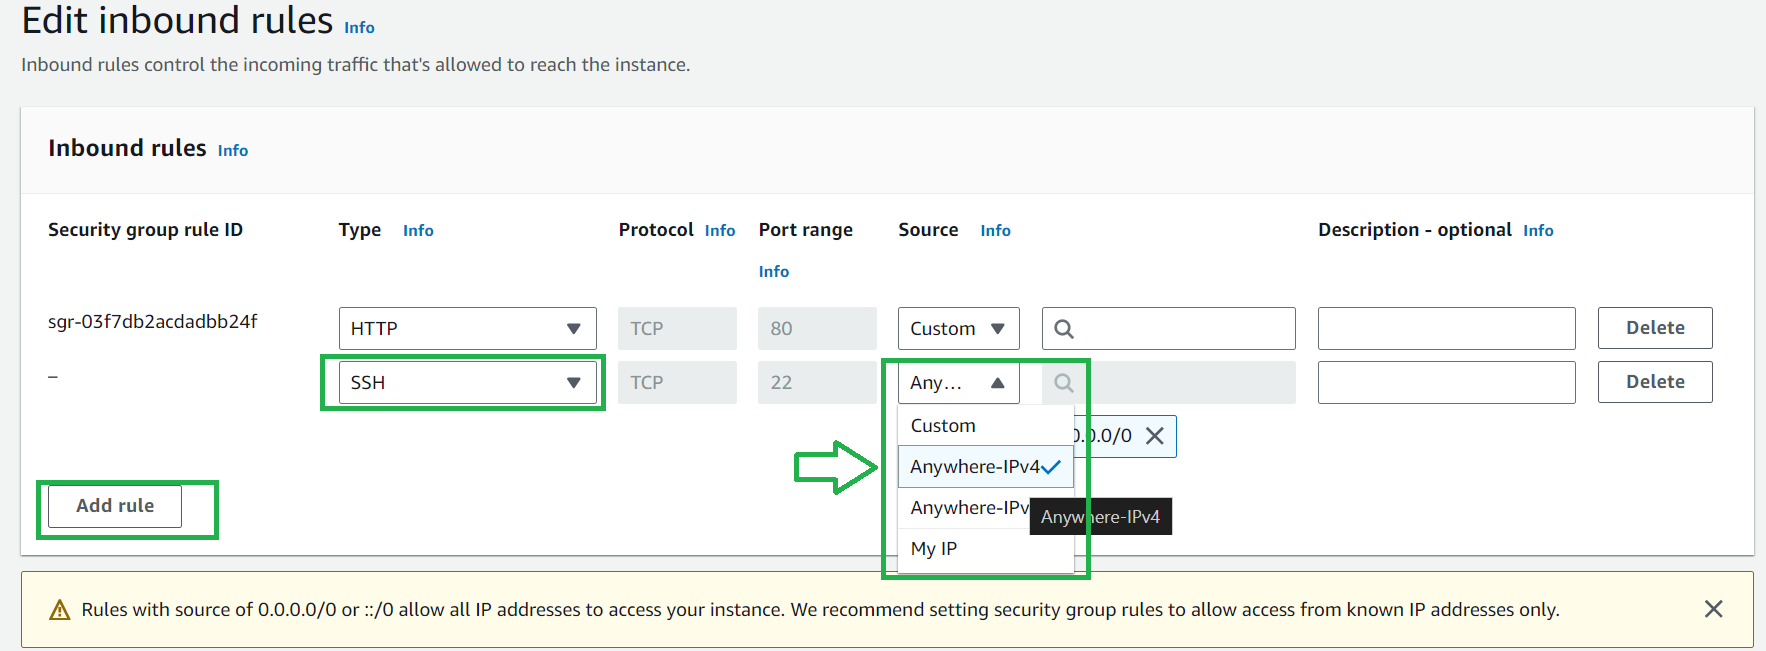
Then select Add rules

Then select SSH , source Select Anywhere -Ipv4 and click on save rule
Now to connect to the server from our command prompt
Open the command prompt to see where the .pem file is stored for me its downloaded in the Downloads folder go to the download foldercd:\users\Dev>cd downloads

Now under the connect instance go to the SSH client
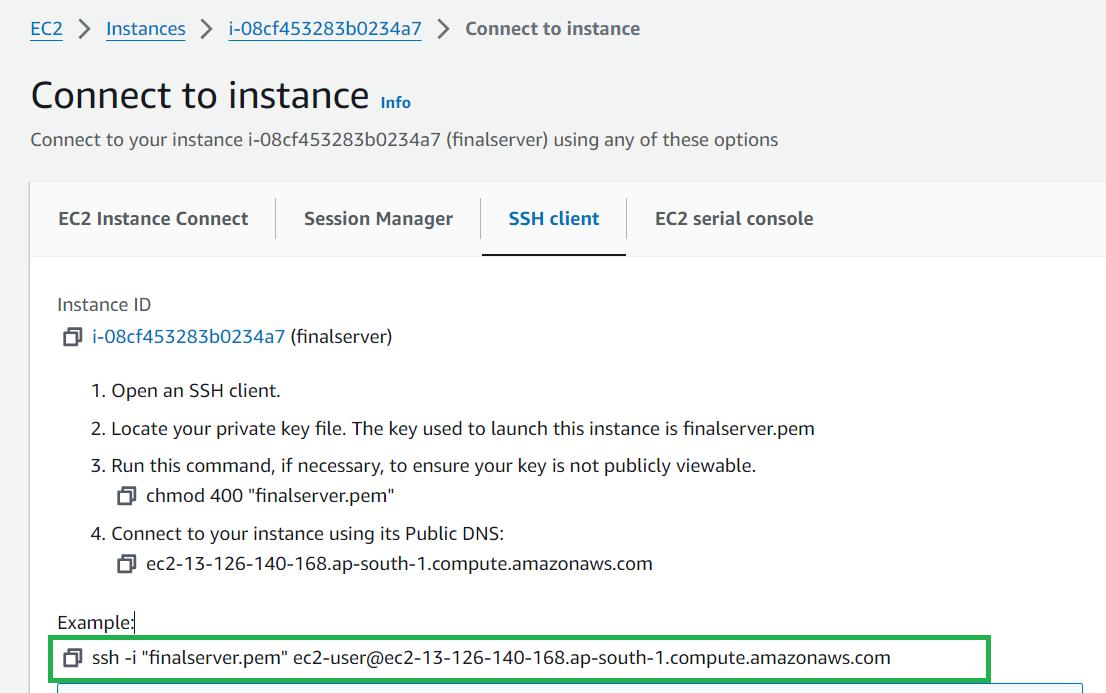
Copy the public DNS paste it into the command prompt and hit enter

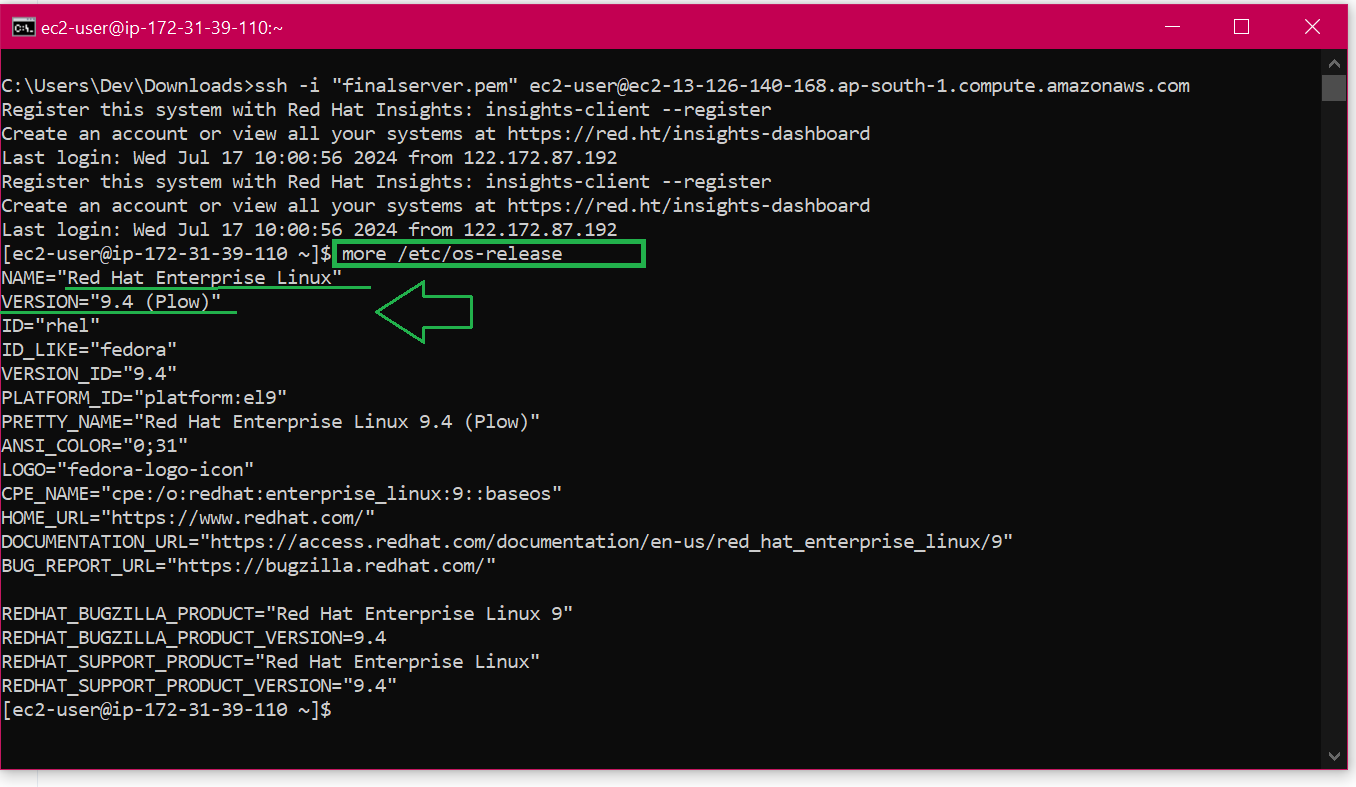
You have successfully connected to the instance (server)
to know the Name of the OS, version,
type $more /etc/os-release
Hope you learned something new today !
Subscribe to my newsletter
Read articles from Namdev Pratap directly inside your inbox. Subscribe to the newsletter, and don't miss out.
Written by

Namdev Pratap
Namdev Pratap
Come along with me on a public learning journey into AWS Cloud and DevOps, designed specifically for those without a technical background. I'll be documenting each step in straightforward, easy-to-understand language to help others make a smooth transition into DevOps. Together, we'll delve into continuous integration, deployment, and automation, breaking down complex concepts into manageable, actionable insights.