Setting up Email Sending Module for WSO2 Identity Server for Developers 📨
 Nipuna Upeksha
Table of contents

When we talk about IAM or Identity and Access Management, we often see the terms MFA(Multi-factor Authentication) and 2FA(Two-factor authentication). When developers need to check certain flows involving service providers and local and outbound authentication configurations with MFA, they often use email OTP as their second factor coupled with username + password-based basic authentication as the first step. But sometimes, the developers may feel exhausted or prompted to use another factor like SMS-OTP or TOTP when they cannot configure the email OTP as a second factor. This often happens when they get errors when setting up the email-sending module for the WSO2 Identity Server.
In this article, I am explaining multiple options that developers can use to configure the email-sending module for the WSO2 Identity Server. Although the latest version of WSO2 IS is 7.0 as of writing this article, I will be using WSO2 IS 6.1 for the demonstrations.
We will be checking the following scenarios for email OTP configurations.
Gmail
Mailtrap
Mailhog
Email Publisher Configurations
We will check how to configure them one by one and you can choose whatever you think is good as your email-sending module configuration.
Gmail
To configure Gmail as your email-sending mechanism for WSO2 (Although we are talking mainly about email OTPs, what we are discussing is how to configure the email-sending module for WSO2 IS) you need to create a new Gmail account at https://gmail.com.
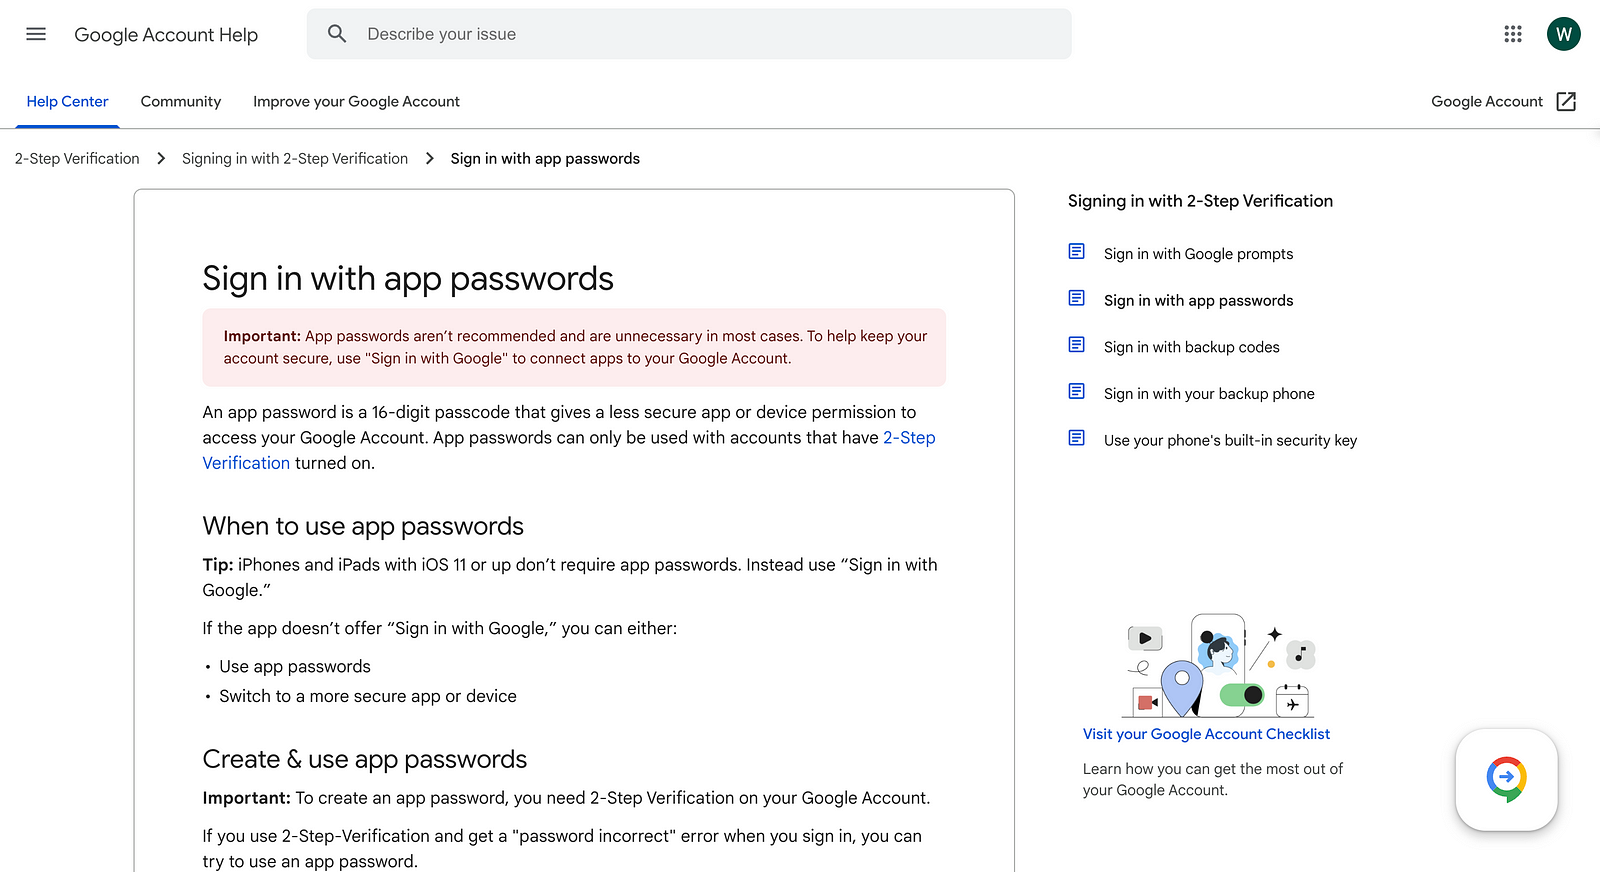
After creating that account, set up the App passwords(Make sure to enable two-step verification).
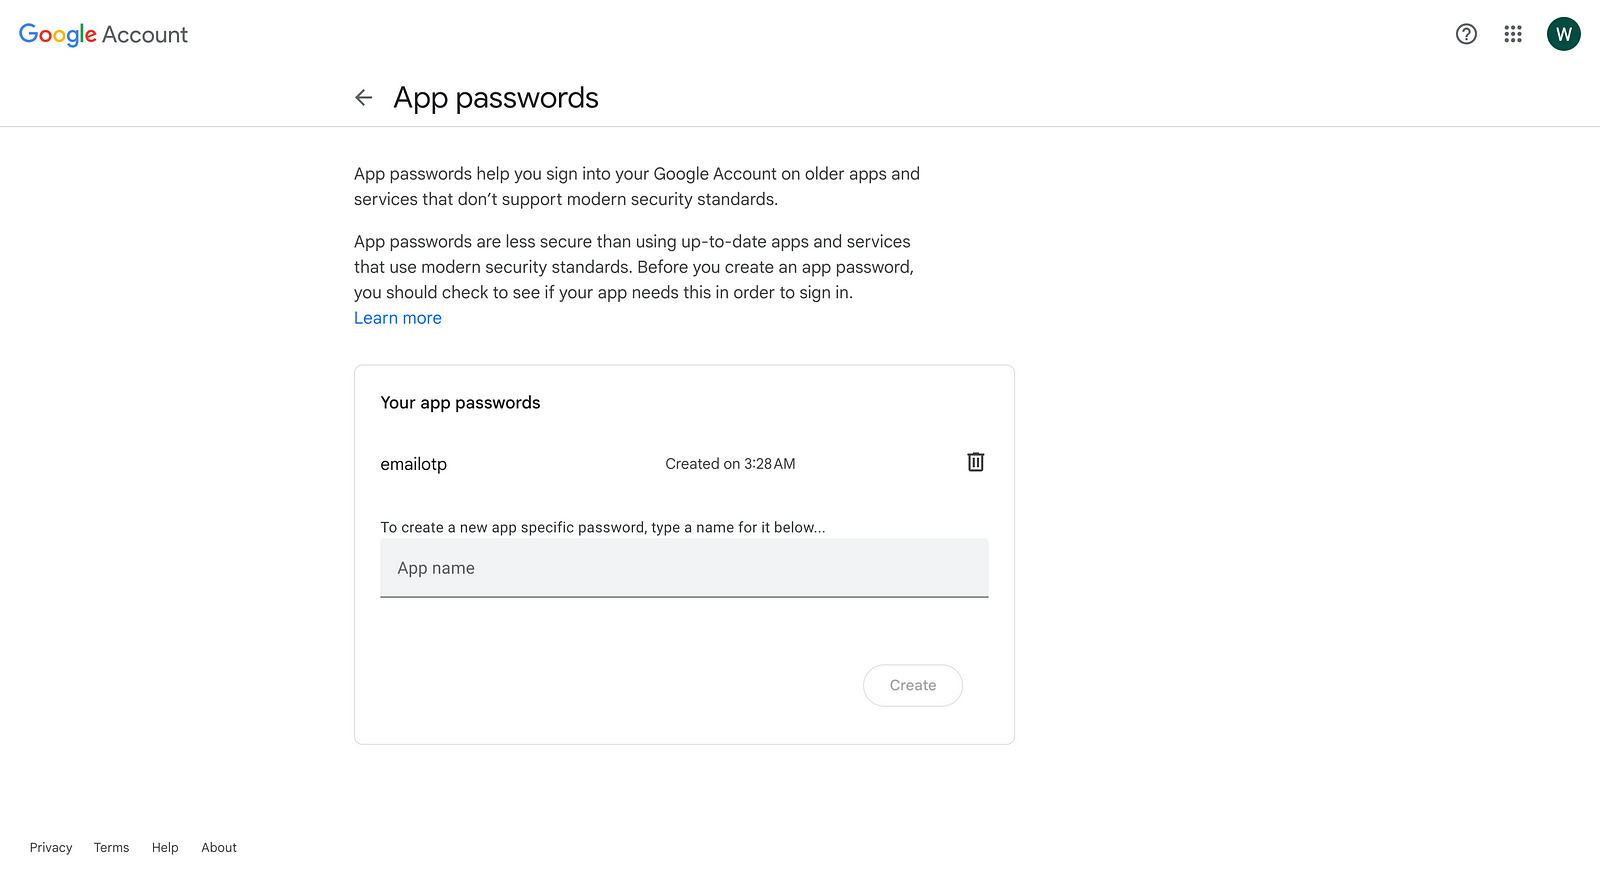
After following the necessary steps create an app password. Make sure to copy the generated password as it is only shown once.
Next, download a fresh WSO2 IS 6.1 pack from here and open <IS_HOME>/repository/conf/deployment.toml file. Add the following configuration there.
[output_adapter.email]
from_address= "wso2testiam@gmail.com"
username= "wso2testiam"
password="<generated_password>"
hostname= "smtp.gmail.com"
port= 587
enable_start_tls= true
enable_authentication= true
Make sure to replace from_address , username , and password accordingly. If your password contains special characters (e.g. <,>,&), update the password parameter as follows.
password="<![CDATA[xxxx]]>"
Next, go to <IS_HOME>/repository/conf/email/email-admin-config.xml and add the following if the configuration type EmailOTP is not there.
<configuration type="EmailOTP" display="EmailOTP" locale="en_US" emailContentType="text/html">
 <targetEpr></targetEpr>
 <subject>WSO2 IS Email OTP</subject>
 <body> Hi, Please use this one-time password {OTPCode} to sign in to your application. </body>
 <footer> Best Regards, WSO2 Identity Server Team http://www.wso2.com </footer>
 <redirectPath></redirectPath>
</configuration>
Next, go to <IS_HOME>/bin directory and run the WSO2 Identity Server using the below commands.
Linux/Mac Users →
./wso2server.shWindows →
wso2server.bat
Next, go to https://localhost:9443/carbon and use the default username admin and password admin to log in.
Go to Identity Providers → Add. Provide EmailOTP as the Identity Provider’s Name and go to Federated Authenticators → Email OTP Configuration.
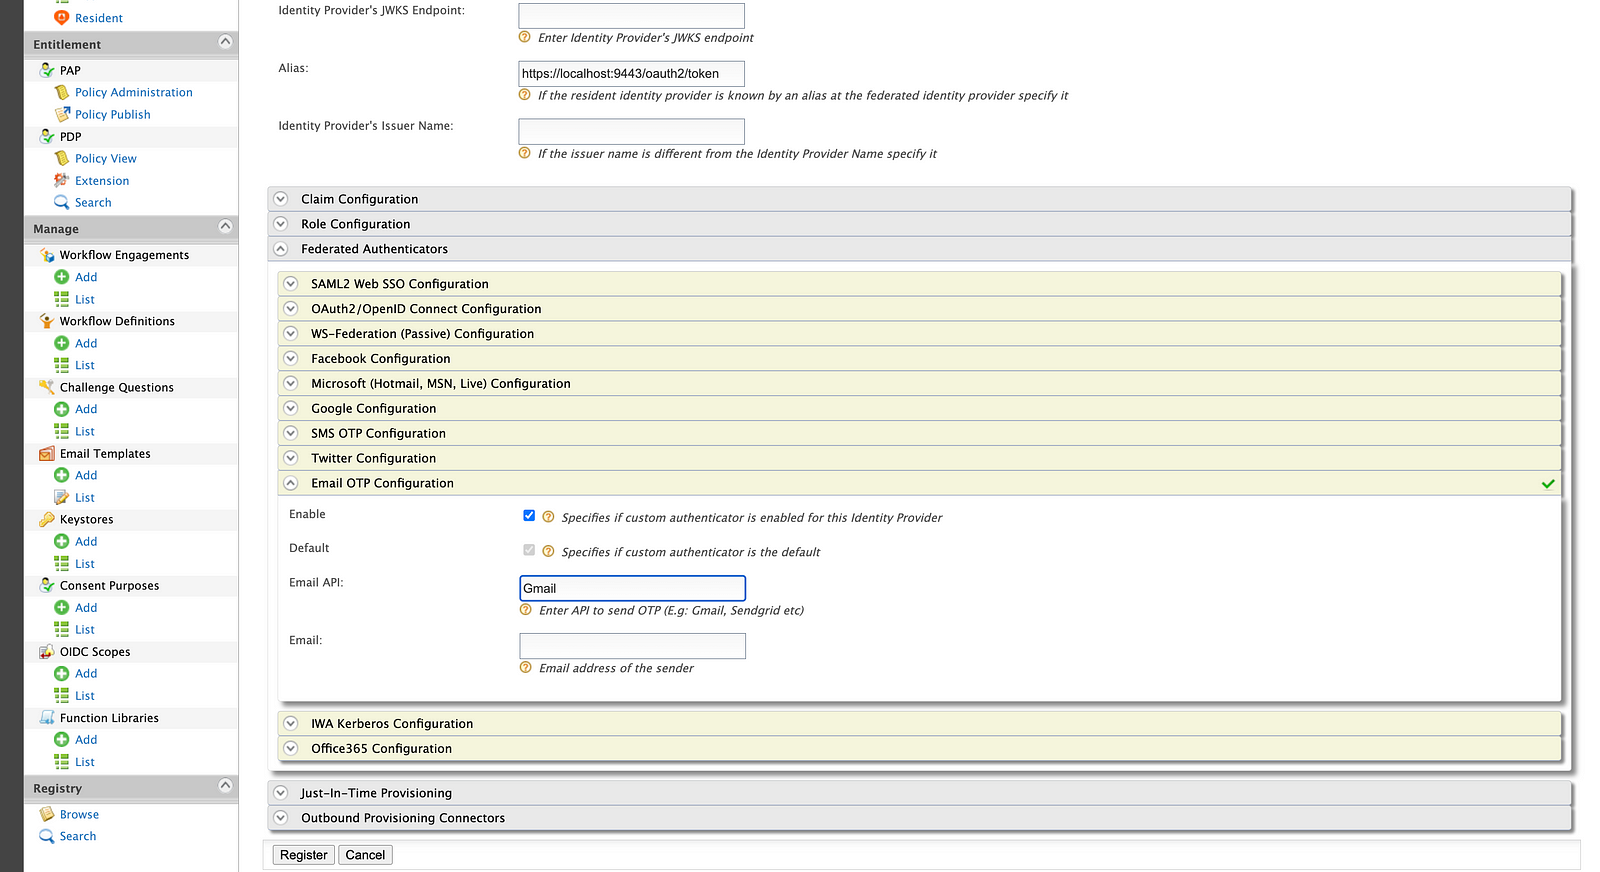
Click on Enable and provide Gmail for the Email API. Then click the Register button to add the federated authenticator.
Next, create a new service provider using the DCR API. If you want to know more about DCR API you can refer to my article about it from here.
curl -k -X POST -H "Authorization: Basic YWRtaW46YWRtaW4=" -H "Content-Type: application/json" -d '{"client_name": "playground_2","grant_types": ["authorization_code","password"], "redirect_uris": ["http://localhost:8080/playground2/oauth2client"],"ext_param_client_id":"provided_client_id0001","ext_param_client_secret":"provided_client_secret0001" }' "https://localhost:9443/api/identity/oauth2/dcr/v1.1/register"
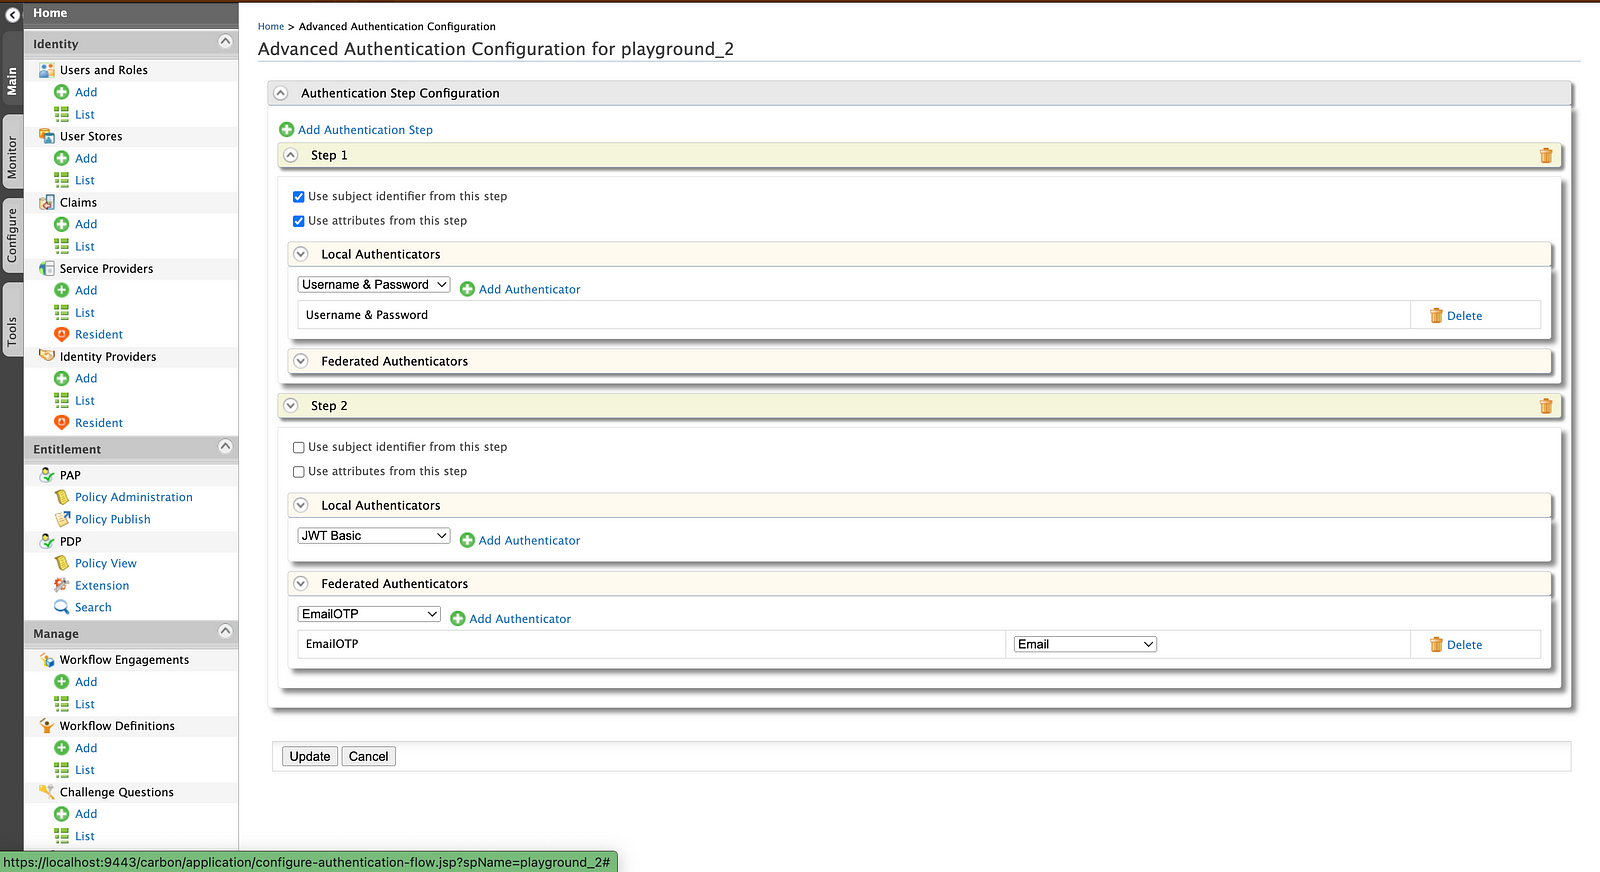
Next, go to Service Providers → playground_2 → Local & Outbound Authentication Configurations and select Advanced Configurations. Select Username & Password as the first step and EmailOTP as the second step.
Make sure to select, Use subject identifier from this step, and Use attributes from this step.
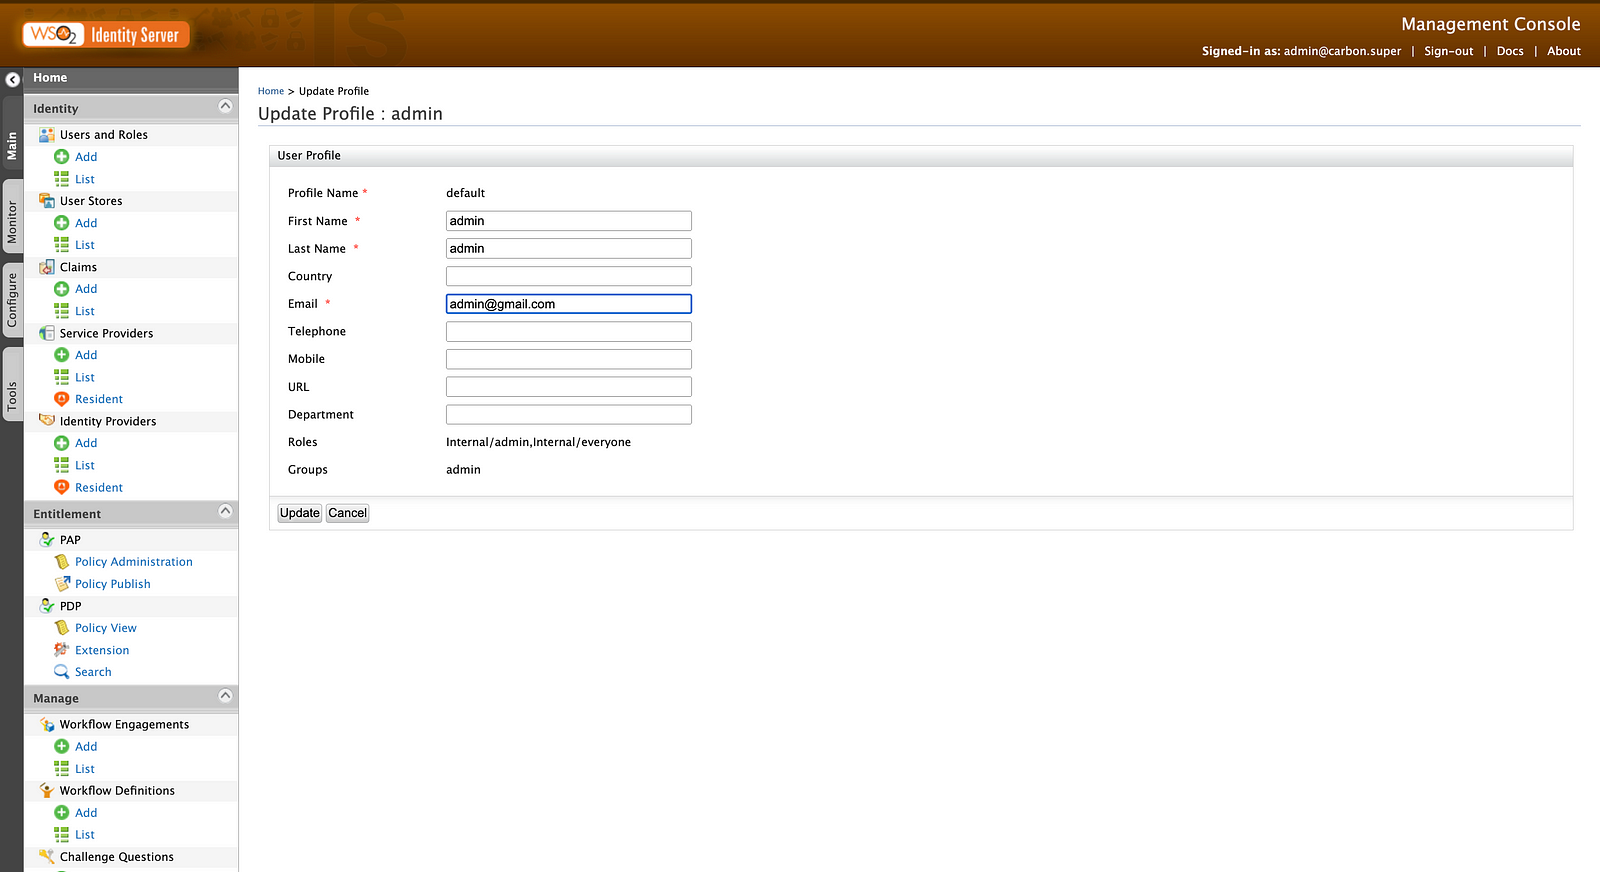
Finally, go to Users & Roles → Users → List → admin → User Profile → default and add an email with other required claims.
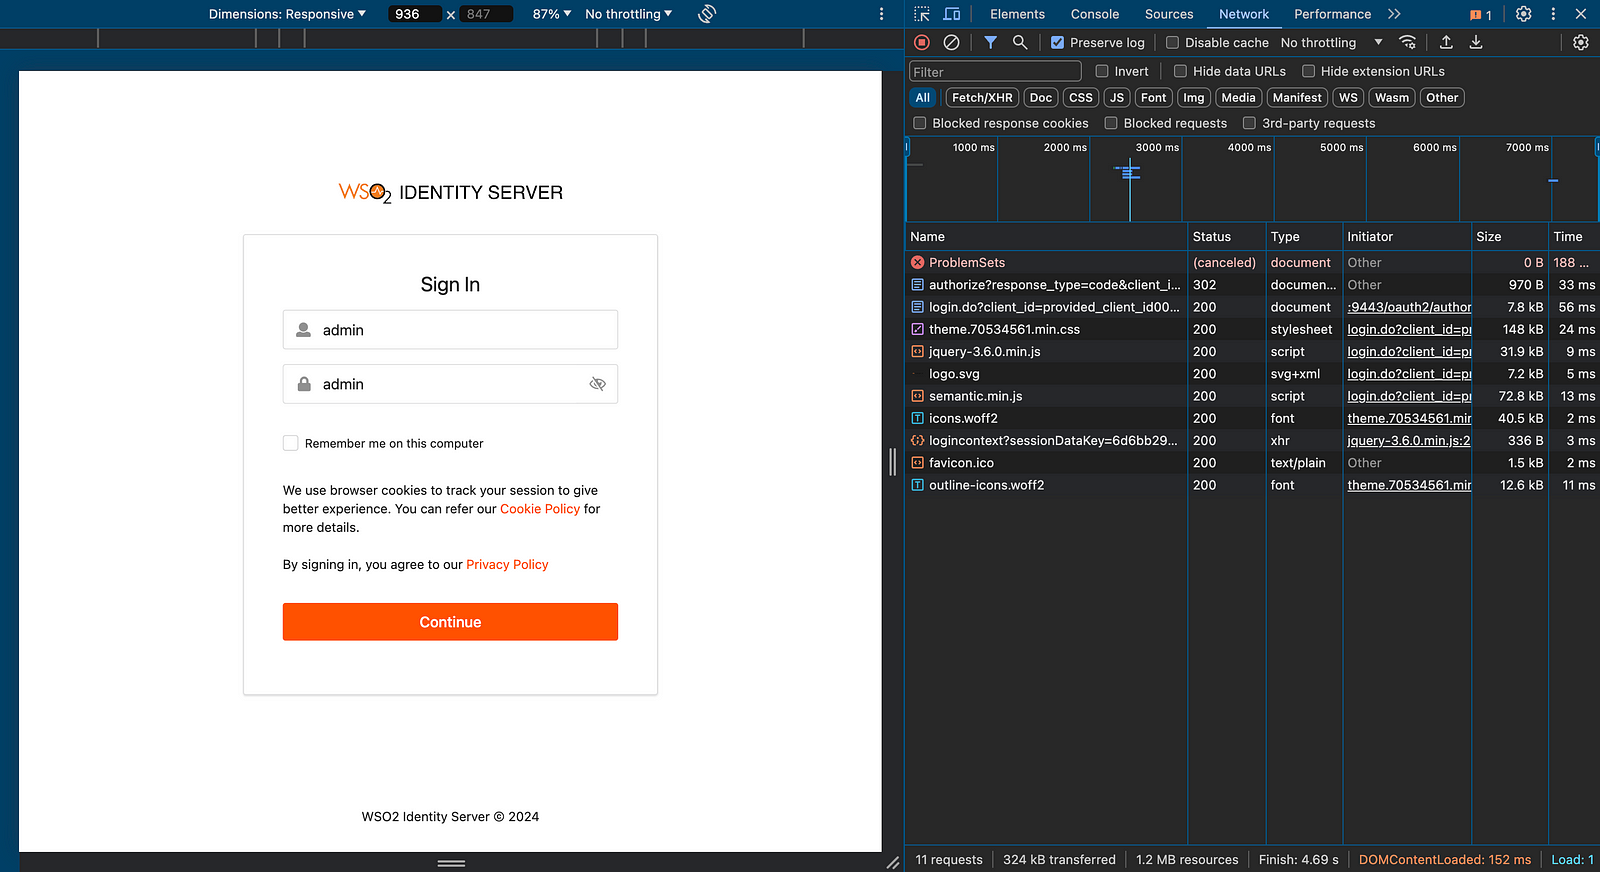
Now, if you type the following URL for Authorization Code grant type in the browser, you are prompted to enter the email OTP. You can find the OTP from the sent emails of your Gmail account.
https://localhost:9443/oauth2/authorize?response_type=code&client_id=provided_client_id0001&redirect_uri=http://localhost:8080/playground2/oauth2client&scope=openid
Provide username and password for the first step and click Continue.
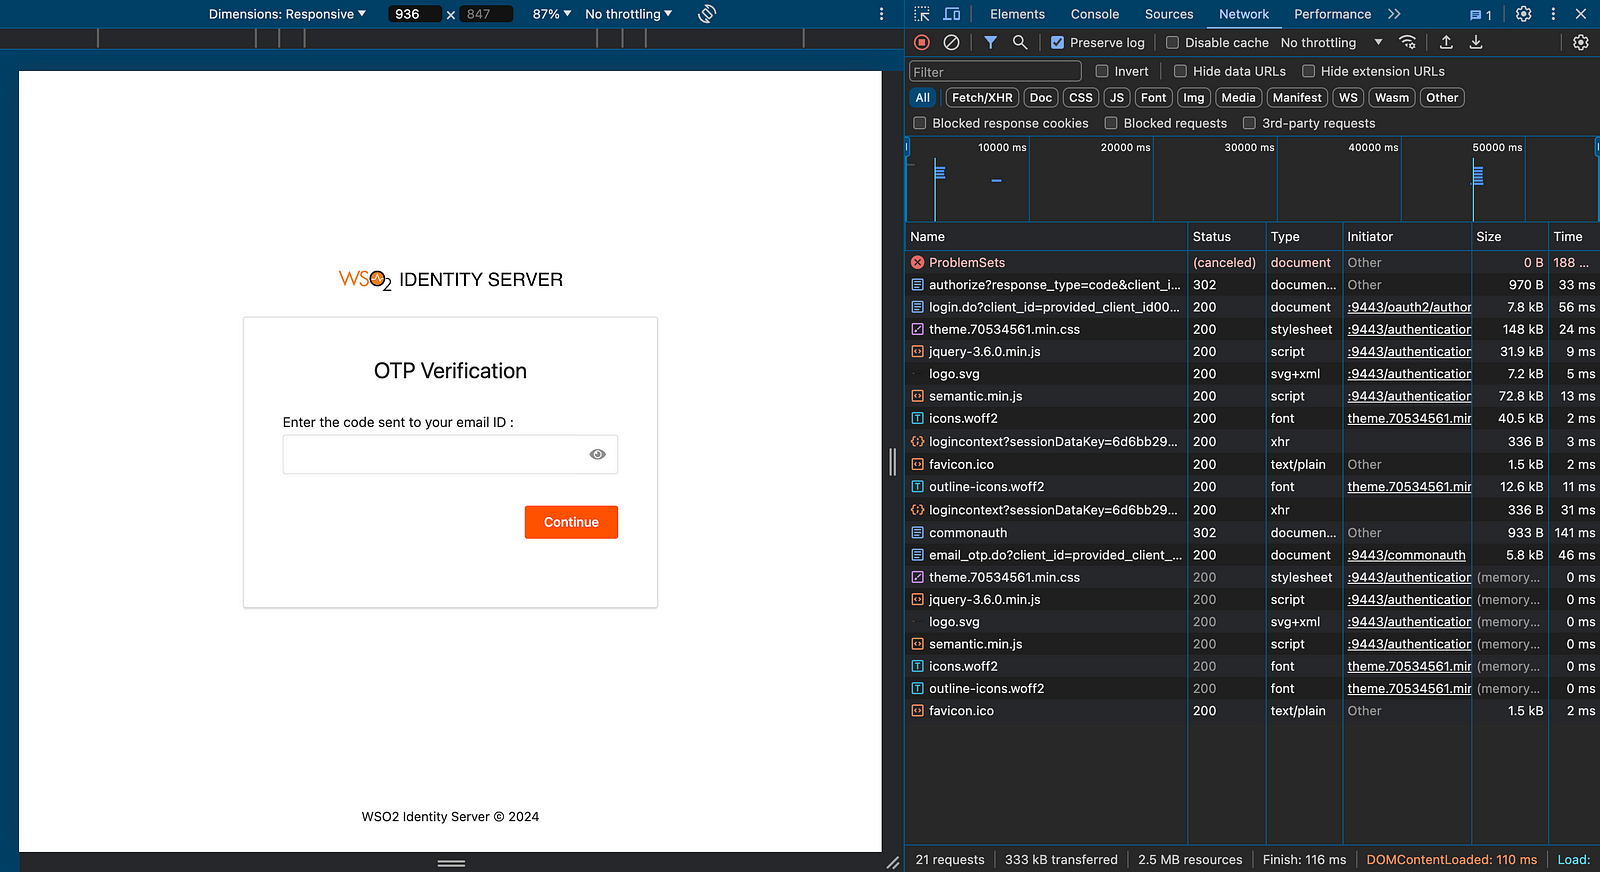
On the next page, you will be prompted to enter the email OTP.
You can find the email from your Gmail account.
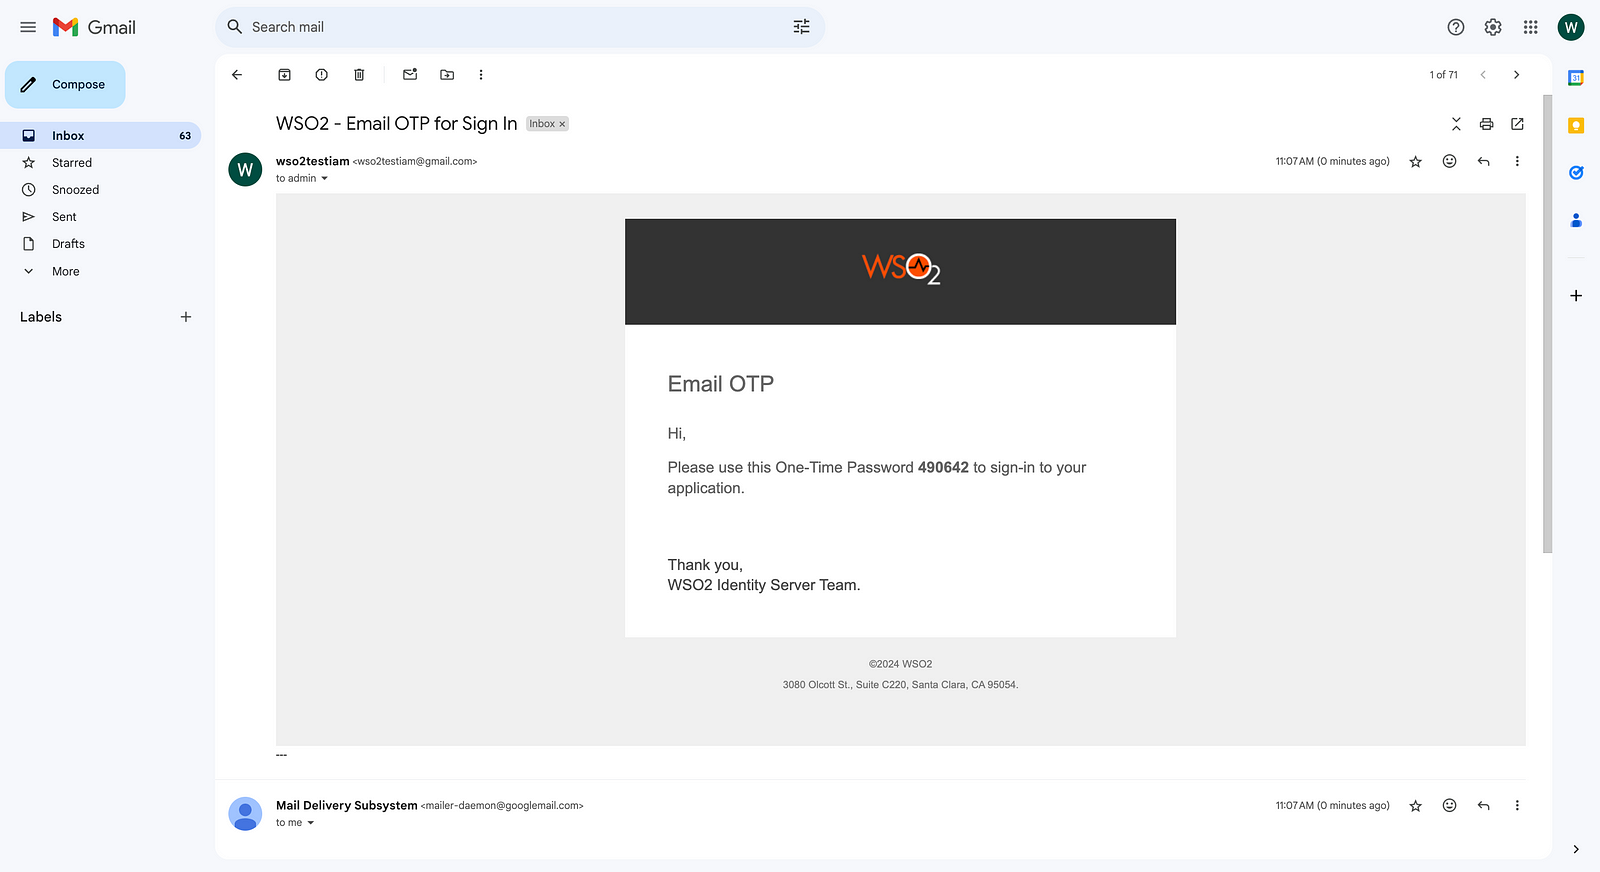
This is how you can set up email OTP with a Gmail account. Next, we will look at how you can use Mailtrap as the email-sending module.
Mailtrap
Mailtrap is a service that you can trap emails without actually sending them to the recipients. Using this, developers can set up the email-sending module in the WSO2 Identity Server and check out emails sent out from it.
To configure Mailtrap, first go to https://mailtrap.io/ and create a new account.
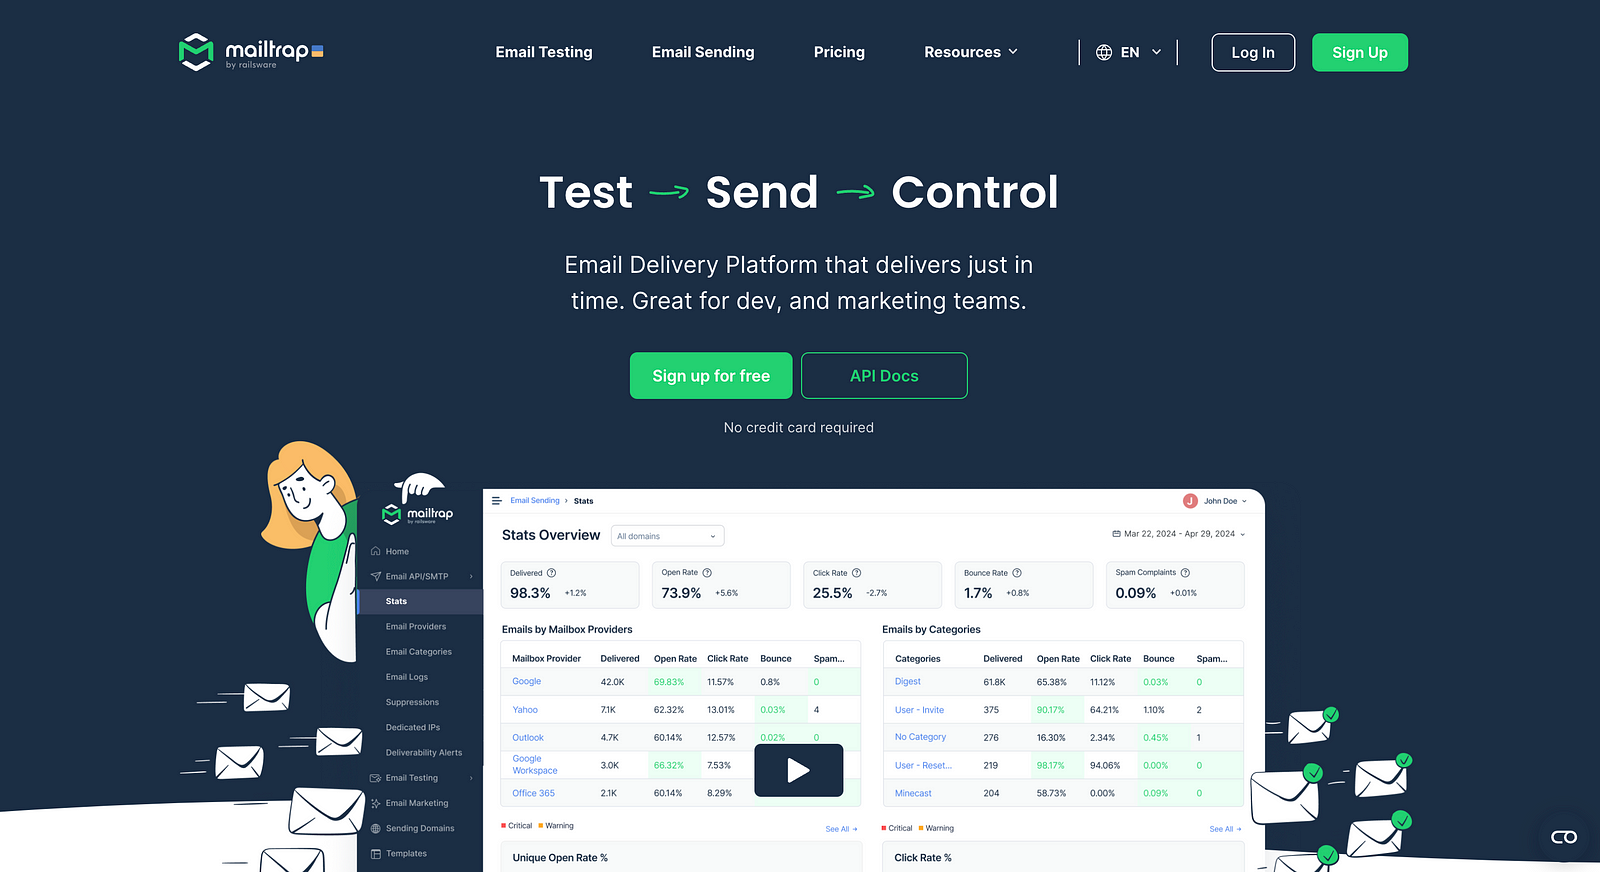
Next, go to Email Testing → Inboxes
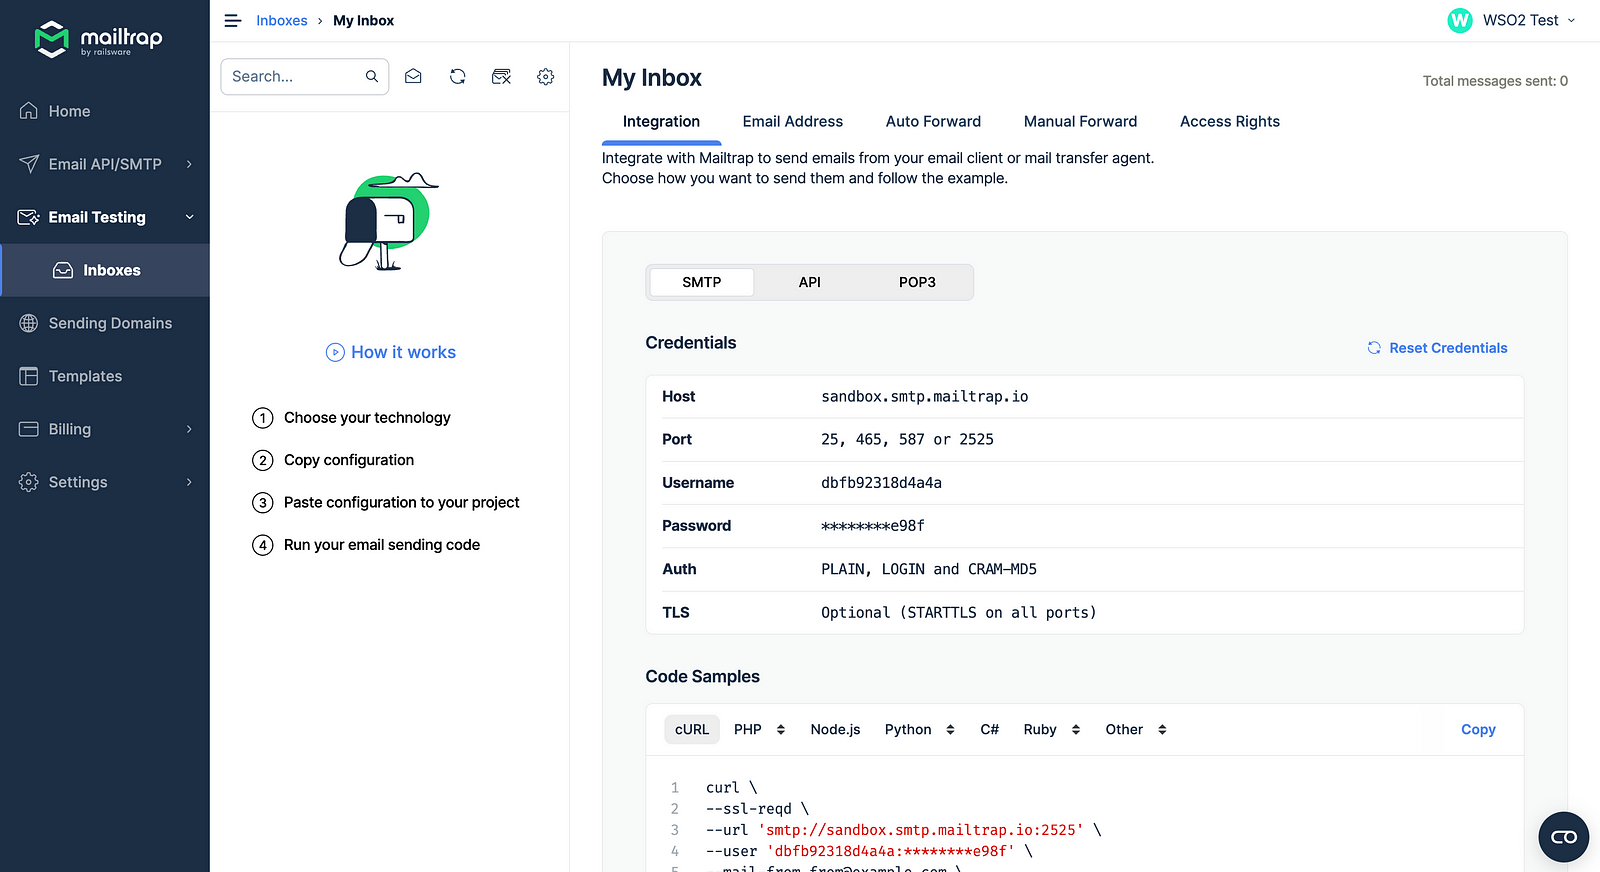
Replace the deployment.toml configurations with the SMTP configurations mentioned in there.
[output_adapter.email]
from_address= "3b37281a97-ba4f3c+1@inbox.mailtrap.io"
username= "dbfb92318d4a4a"
password="<password>"
hostname= "sandbox.smtp.mailtrap.io"
port= 587
enable_start_tls= true
enable_authentication= true
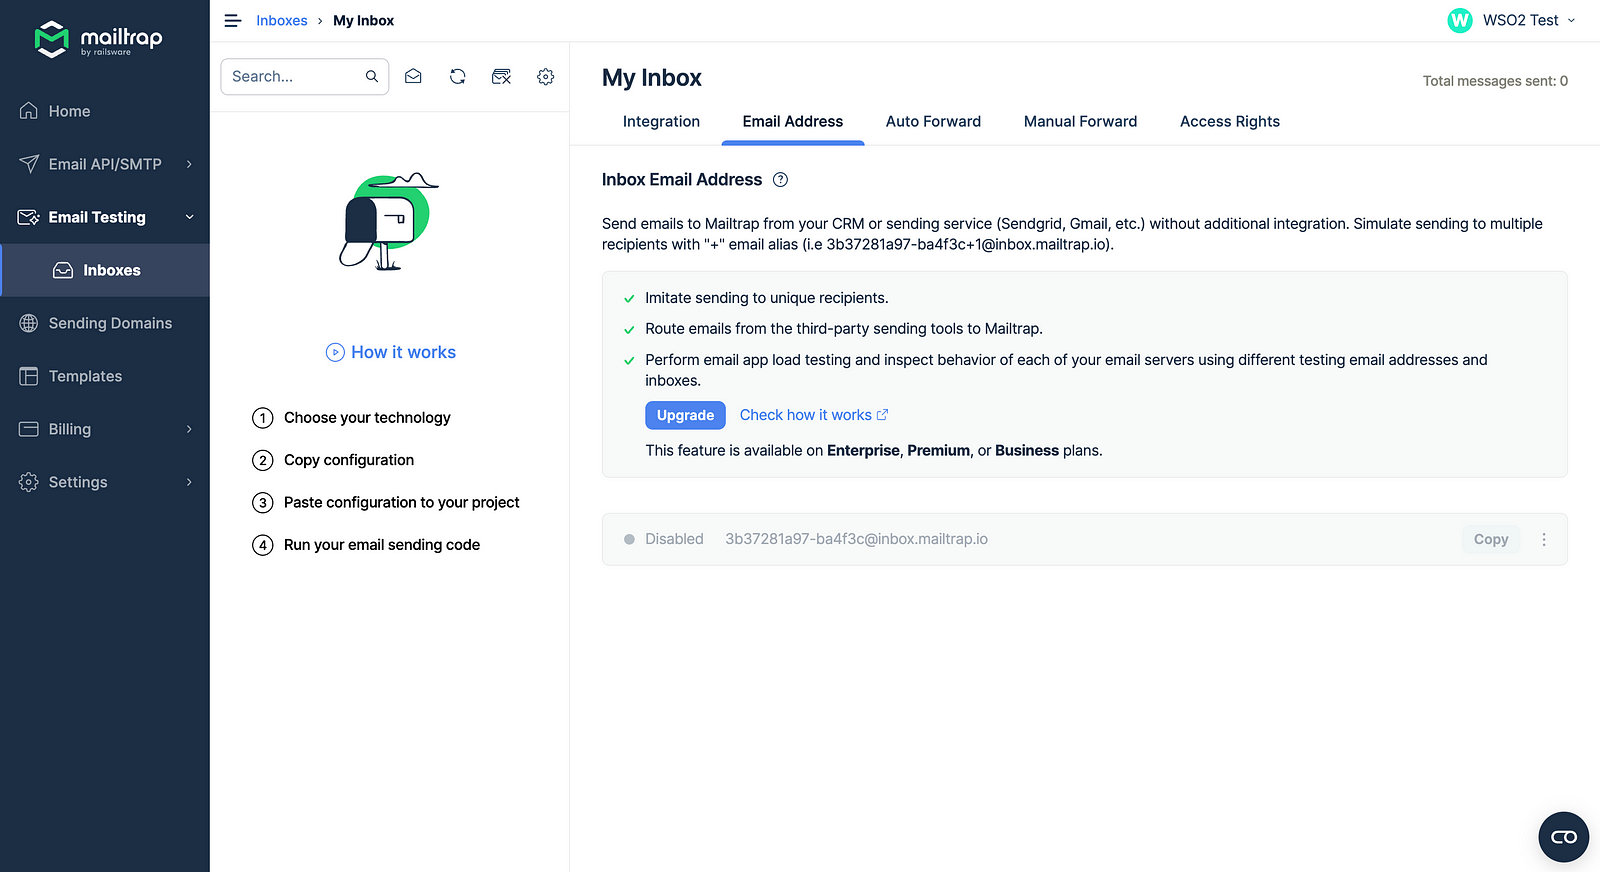
Make sure to check Email Address section to find out your from_address email.
Now, you go to the second step of the authentication with playground_2 app, you can see that you are sending an email via Mailtrap.
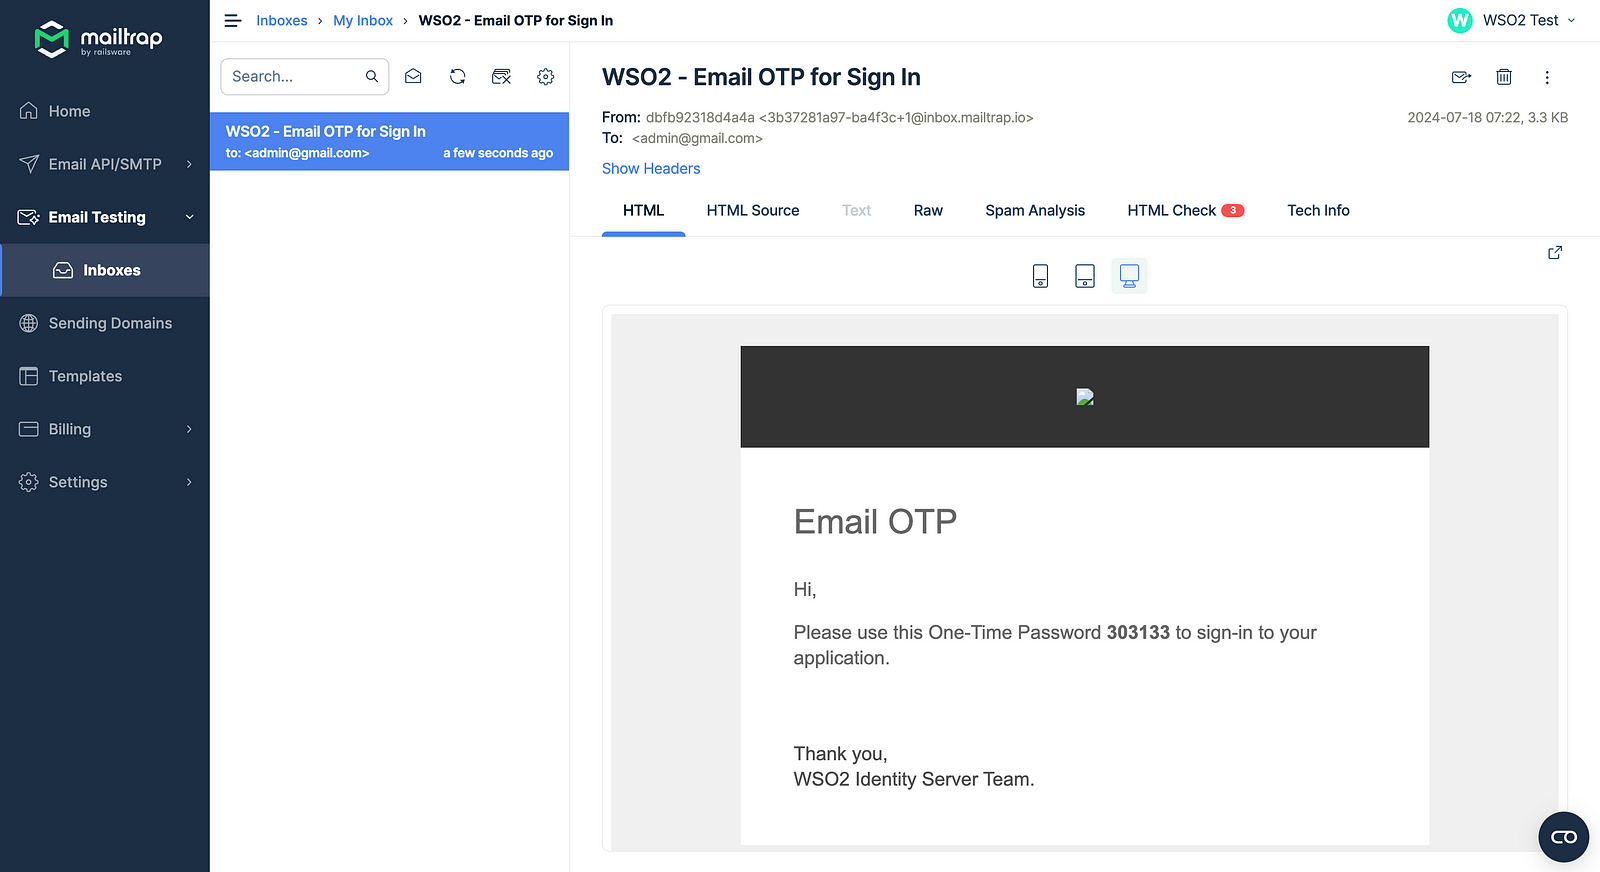
So this is it. This is how easy it is to configure the email-sending module for developers with Mailtrap for the WSO2 Identity Server.
Next, let’s check how you can set up the email-sending module with Mailhog for the WSO2 Identity Server.
Mailhog
The easiest way to use Mailhog is a Docker container. You can install Docker by referring to their official documentation. After installation, make sure Docker is running with the following command.
docker ps -a
After that, run the following command to create a new Mailhog container. This command will pull the Mailhog image from Docker Hub and create a container for you.
docker run -d -p 1025:1025 -p 8025:8025 --name mailhog-container mailhog/mailhog
After that, go to http://localhost:8025 to view the Mailhog UI.
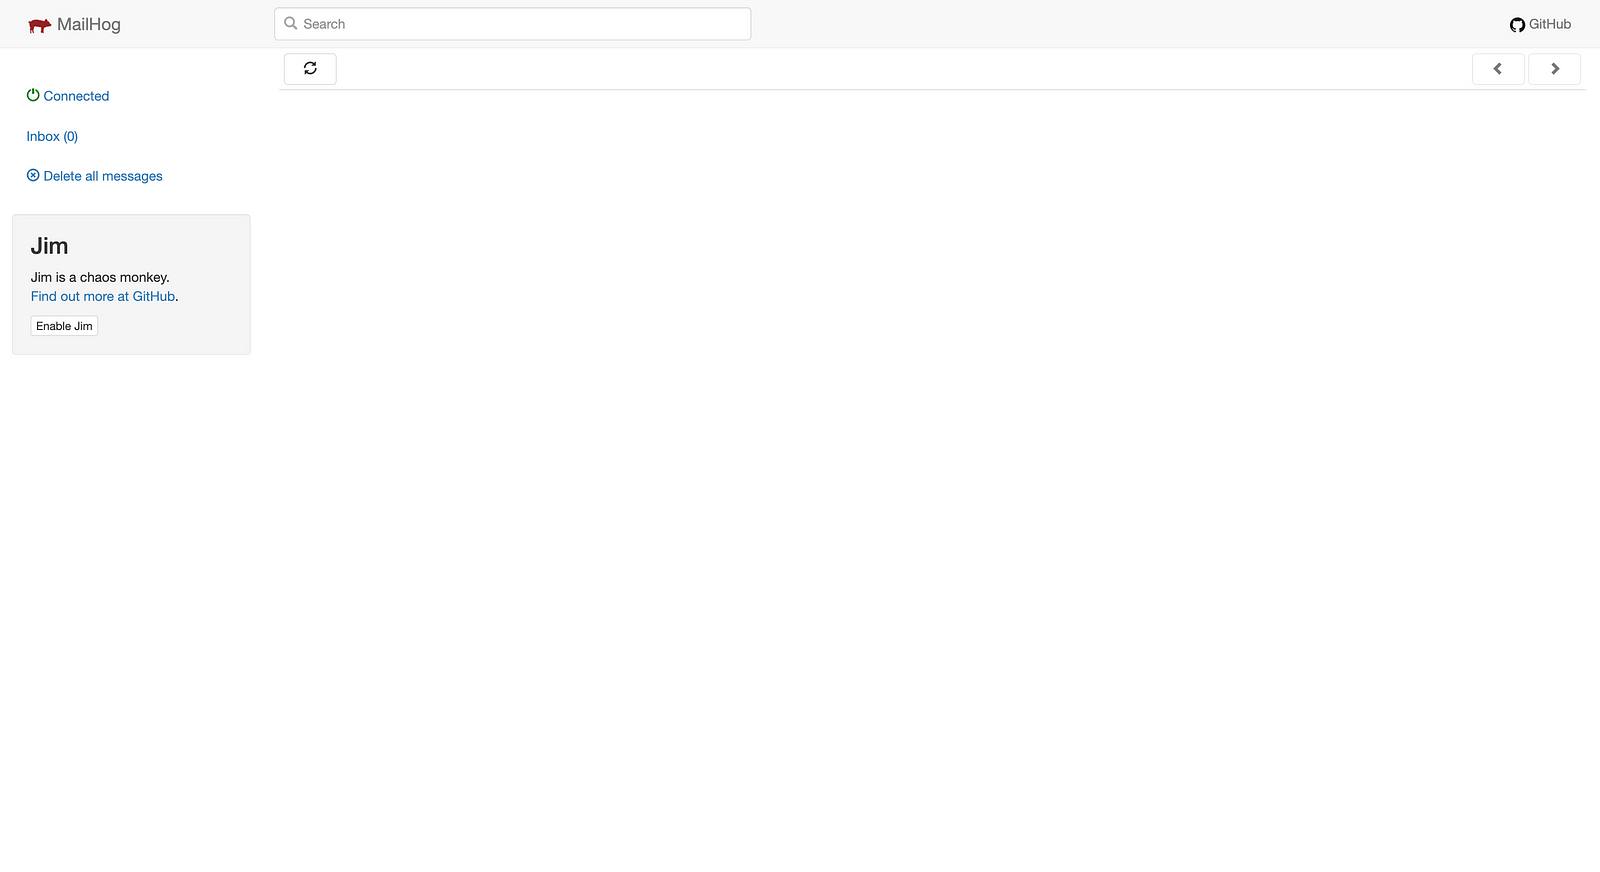
Next, update the deployment.tomlsettings as follows.
[output_adapter.email]
from_address= "john@mailhog.com"
username= "anything"
password="anything"
hostname= "localhost"
port= 1025
enable_start_tls= false
enable_authentication= true
You can replace from_address with any <username>@mailhog.com . And for username and password, you can provide any value.
Now, if we go to the second step of authentication in our playground_2 application, you can see that a mail has been sent from Mailhog with the OTP.
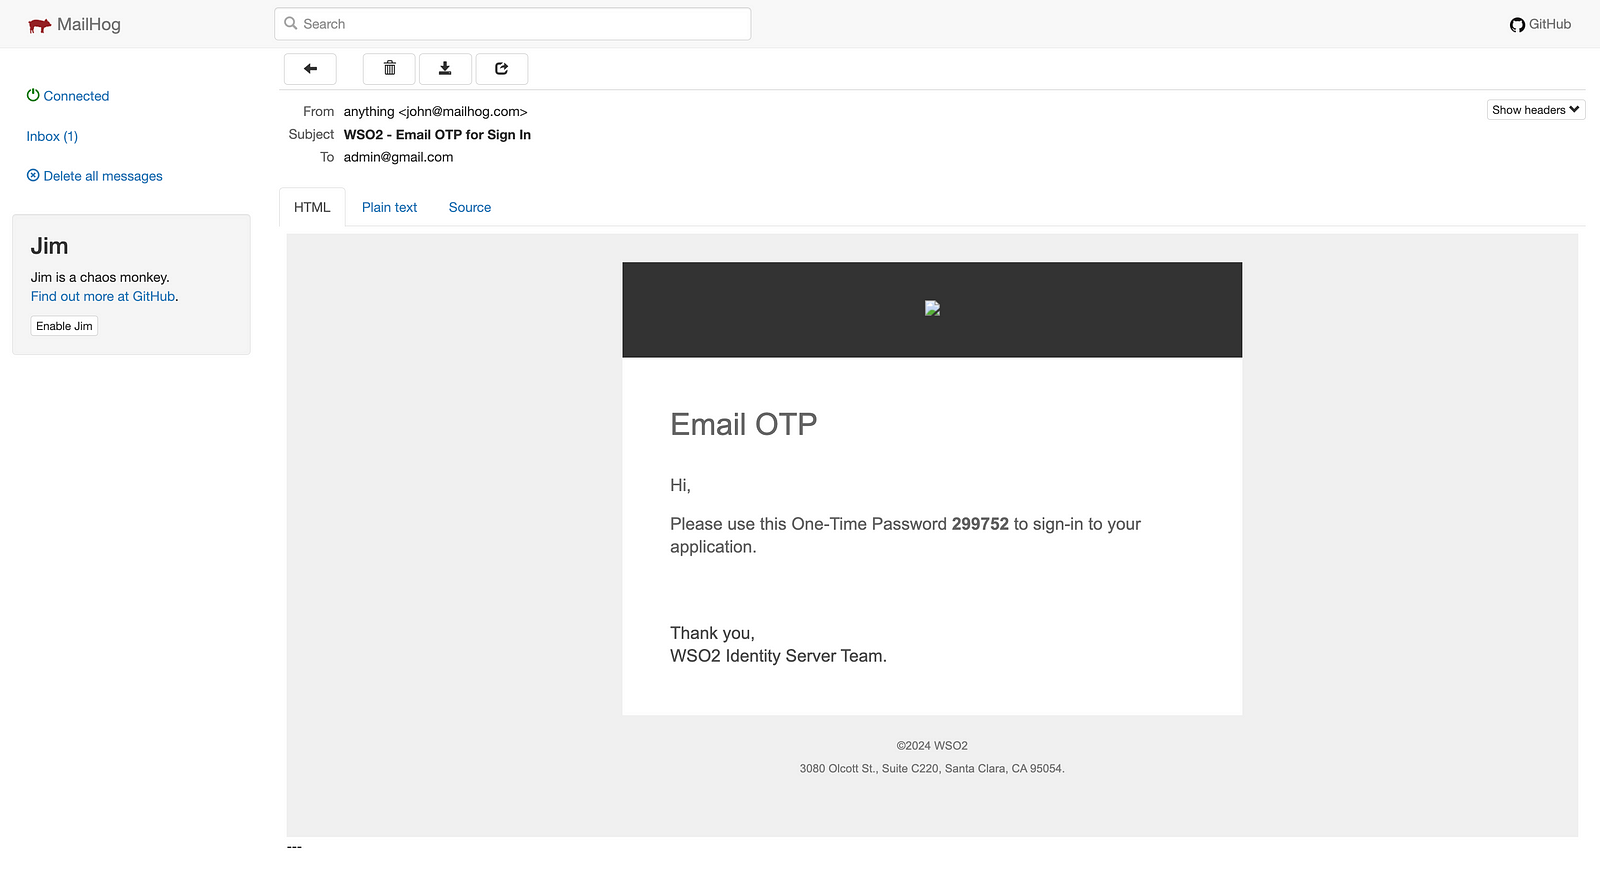
So this is it. This is how easy it is to configure the email-sending module for developers with Mailhog for the WSO2 Identity Server.
Next, let’s check how you can set up the email-sending module with Webhook for the WSO2 Identity Server.
Email Publisher Configurations
For this, first, open the WSO2 Management Console and go to Registry → Browse. In the location search bar, search for _system/config/identity/email and find emailotp under the entries. If it is there, select Actions → Delete. After that stop the WSO2 Identity Server.
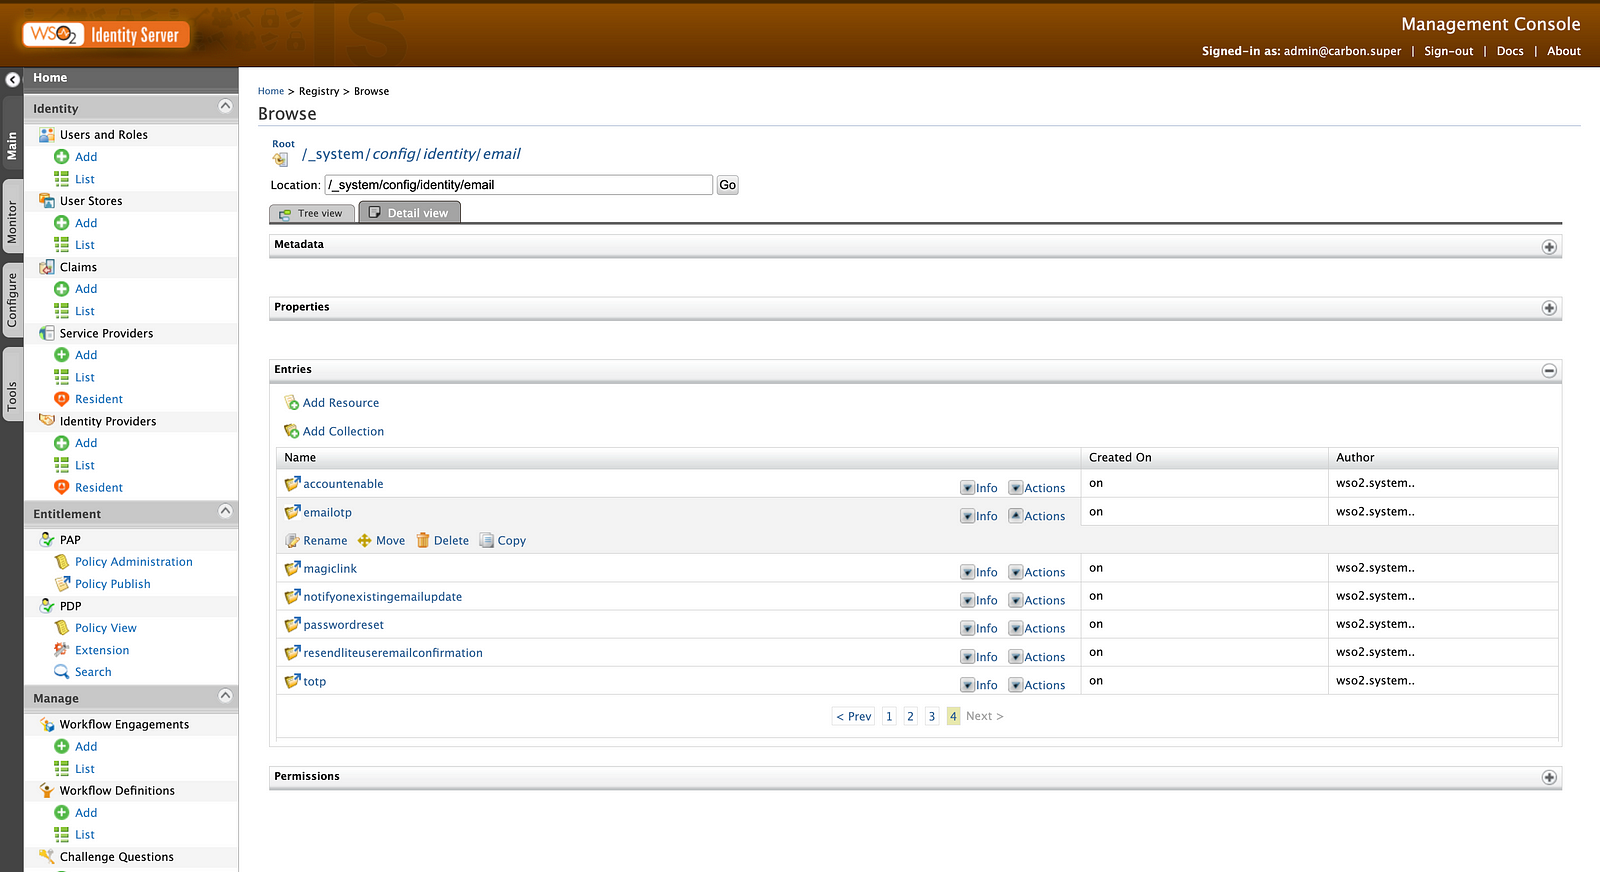
Then go to <IS_HOME>/repository/deployment/server/webapps/eventpublishers and update EmailPublisher.xml as shown below.
<?xml version="1.0" encoding="UTF-8"?>
<eventPublisher name="EmailPublisher" statistics="disable"
  trace="disable"
 xmlns="http://wso2.org/carbon/eventpublisher">
 <from streamName="id_gov_notify_stream" version="1.0.0"/>
 <mapping customMapping="enable" type="text">
  <inline>{{body}}{{footer}}</inline>
 </mapping>
 <to eventAdapterType="email">
  <property name="email.address">{{send-to}}</property>
  <property name="email.type">{{content-type}}</property>
  <property name="email.subject">{{subject}}</property>
  <property name="mail.smtp.password">password</property>
  <property name="mail.smtp.from">wso2testiam@gmail.com</property>
  <property name="mail.smtp.user">wso2testiam</property>
 </to>
</eventPublisher>
You can see that for properties, mail.smtp.password , mail.smtp.from , and mail.smtp.user , I have provided my Gmail configurations. If you do not want to use Gmail, you can use your Mailtrap or Mailhog configurations for this. But depending on the service, you may need to provide additional properties.
Also, make sure to remove previously added output_adapter.email configurations from the deployment.toml file.
Then restart the WSO2 Identity Server. And now if you go to the second step of authentication of the playground_2 app, you can see a new mail has been sent from Gmail.
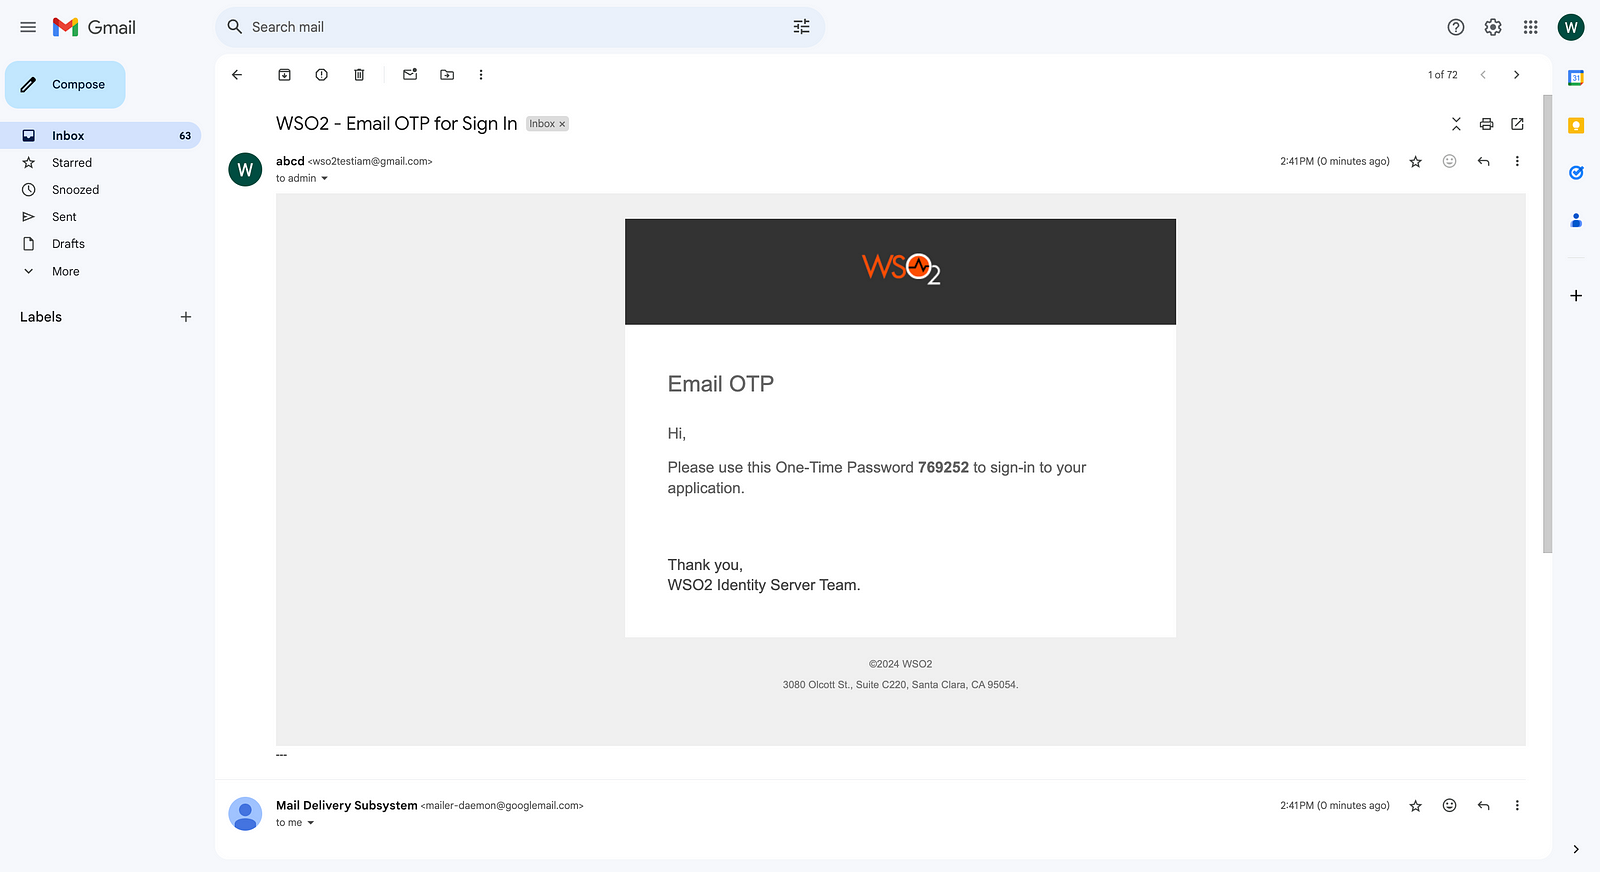
So these are the ways that you can configure the email-sending module with the WSO2 Identity Server. For me, I prefer to use Mailhog due to its simplicity, but you can try the above options and pick your choice.
Cheers!
Subscribe to my newsletter
Read articles from Nipuna Upeksha directly inside your inbox. Subscribe to the newsletter, and don't miss out.
Written by

Nipuna Upeksha
Nipuna Upeksha
Software Engineer | MSc. in Big Data Analytics | Java | Spring | IAM Expert | AWS SAA | AWS DVA