Creating The Starter Folder
 Buidl On Base
The buidl-on-base-starter folder, downloadable from github here, is the starting point for all of our development exercises. It consists of basically an integration with the Onchainkit from the Base devs, and a tailwind css UI dependency, daisyUI, which will enhance our applications.
To get started open the terminal inside of the folder of choice
mkdir buidl-on-base-starter
cd buidl-on-base-starter
After this we are going to create our Next.js application using create-next-app
npx create-next-app@latest web
This will run the Next.js app creation wizard. You will be presented with a series of choices:
Would you like to use Typescript?
Would you like to use ESLint?
Would you like to use Tailwind CSS?
Would you like to use
src/directory?Would you like to use App Router? (recommended)
Accept all the defaults, because we will be using Typescript in all of our projects.
Once accepted the installation should commence
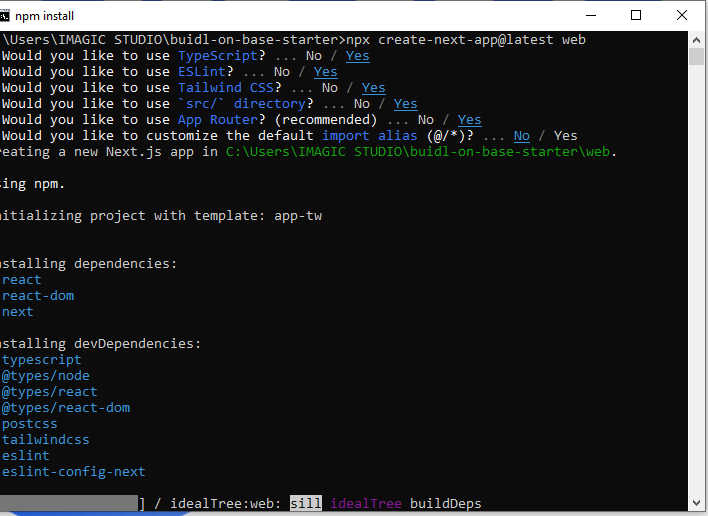
After the Next.js app is created we need to change directory into the newly created 'web' directory
cd web
Inside this directory we are going to install the 2 dependencies already mentioned.
First we will be installing the daisyUI
npm i -D daisyui@latest
This command should install daisyUI as a Tailwind CSS plugin,which is what we need to use daisyUI in our code, and it should not take long to complete.
Before we can use daisyUI in our code we need to make an adjustment to the tailwind.config.ts file as follows
module.exports = {
  //...
  plugins: [
    require('daisyui'),
  ],
}
Our project can now make use of daisyUI.
The next thing we are going to install is the OnchainKit. All the instructions can be found on here
The first step is to run this command
npm install @coinbase/onchainkit
Wait for the installation to be completed.
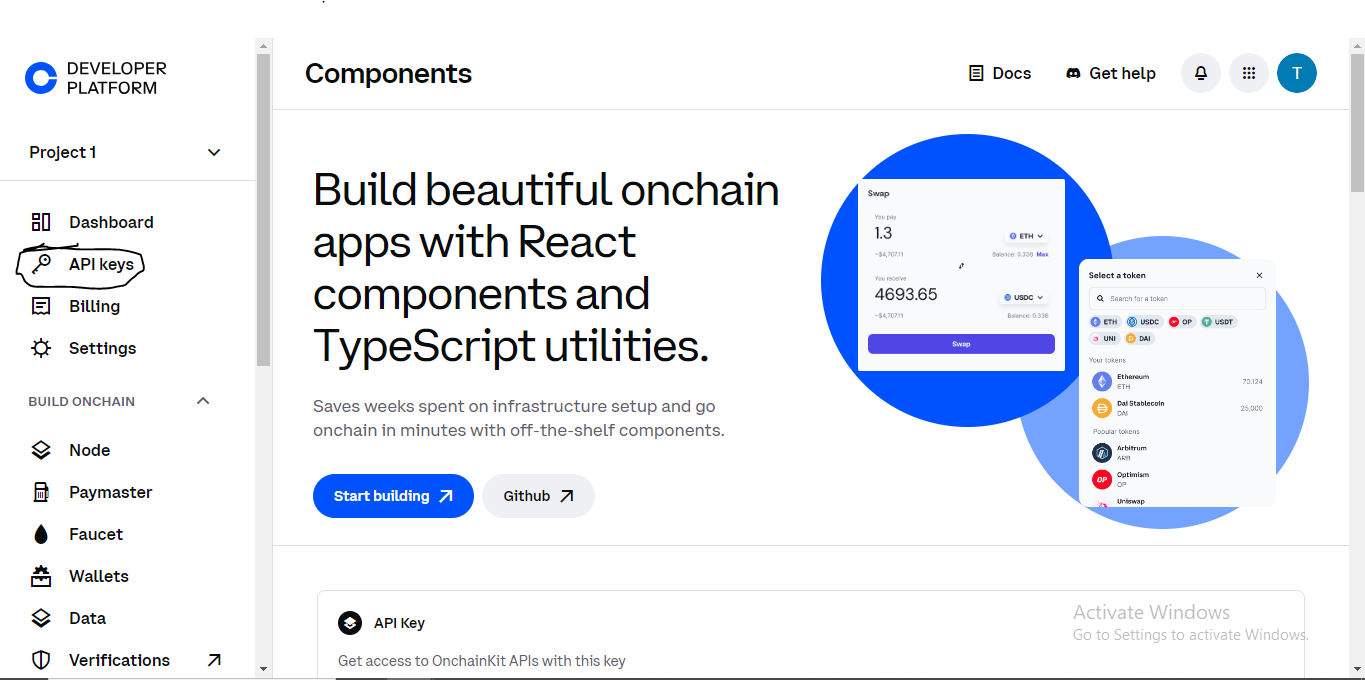
You will need to register on the Coinbase Developer Platform for an API key
Once you have registered and signed in you will see your API key in the dashboard, or you can access the API keys page via the menu on the left side of the page
In the root of the 'web' directory we are going to create a .env file which we are going to use to store our API key
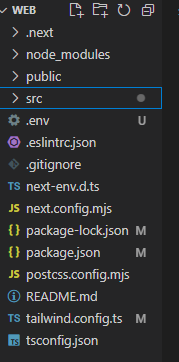
In the newly created .env file, add the following line of code
PUBLIC_ONCHAINKIT_API_KEY=YOUR_PUBLIC_API_KEY
Change the "YOUR_PUBLIC_API_KEY" to the actual API key you got from the Coinbase Developer Platform.
Now you need to create 2 files inside your '/src/app/' folder, OnchainProviders.tsx and wagmi.ts
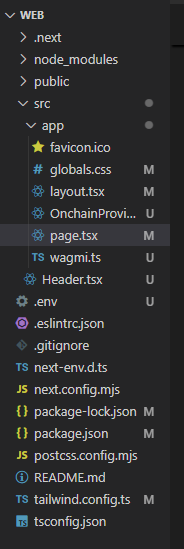
Add this code to the OnchainProviders.tsx
'use client';
import { ReactNode } from 'react';
import { OnchainKitProvider } from '@coinbase/onchainkit';
import { QueryClient, QueryClientProvider } from '@tanstack/react-query';
import { base } from 'viem/chains';
import { WagmiProvider } from 'wagmi';
import { wagmiConfig } from './wagmi';

type Props = { children: ReactNode };

const queryClient = new QueryClient();

function OnchainProviders({ children }: Props) {
  return (
    <WagmiProvider config={wagmiConfig}>
      <QueryClientProvider client={queryClient}>
        <OnchainKitProvider
          apiKey={process.env.PUBLIC_ONCHAINKIT_API_KEY}
          chain={base}
        >
          {children}
        </OnchainKitProvider>
      </QueryClientProvider>
    </WagmiProvider>
  );
}

export default OnchainProviders;
To the newly created wagmi.ts file add this code
import { http, createConfig } from 'wagmi';
import { base } from 'wagmi/chains';
import { coinbaseWallet } from 'wagmi/connectors';

export const wagmiConfig = createConfig({
  chains: [base],
  multiInjectedProviderDiscovery: false,
  connectors: [
    coinbaseWallet({
      appName: 'yourAppName',
      preference: 'smartWalletOnly', // set this to `all` to use EOAs as well
      version: '4',
    }),
  ],
  ssr: true,
  transports: {
    [base.id]: http(),
  },
});
What this does is as follows:
The OnchainProvider.tsx code allows you to access your API key inside your code with this line
apiKey={process.env.PUBLIC_ONCHAINKIT_API_KEY}
It also ensures that your app has the context to interact with OnchainKit components and utilities with these lines
import { ReactNode } from 'react';
import { base } from 'viem/chains';
import { OnchainKitProvider } from '@coinbase/onchainkit';
A lot of the components in the OnchainKit require wagmi to work properly. The OnchainProvider makes this possible with the addition of the following in the code
import { QueryClient, QueryClientProvider } from '@tanstack/react-query';
//....
import { WagmiProvider } from 'wagmi';
import { wagmiConfig } from './wagmi';

//....

const queryClient = new QueryClient();

//....

 <WagmiProvider config={wagmiConfig}>
      <QueryClientProvider client={queryClient}>
//......

  </QueryClientProvider>
    </WagmiProvider>
Finally to enable your app to access the OnchainKit, you need to wrap the whole app with the OnchainProvider component inside the layout.tsx file
import type { Metadata } from "next";
import { Inter } from "next/font/google";
import OnchainProviders from './OnchainProviders';
import "./globals.css";
import { ReactNode } from 'react'; // Import ReactNode

const inter = Inter({ subsets: ["latin"] });

export const metadata: Metadata = {
  title: "Buidl On Base Starter",
  description: "Generated by create next app",
};

// Define the type for the props
type RootLayoutProps = {
  children: ReactNode;
};

export default function RootLayout({ children }: RootLayoutProps) {
  return (
    <html lang="en">
      <head>
        {/* Add any head tags here if needed */}
      </head>
      <body>
        <OnchainProviders>
          {children}
        </OnchainProviders>
      </body>
    </html>
  );
}
Now we can start creating our application. We start by creating a Header.tsx file inside our "/src/app/" directory
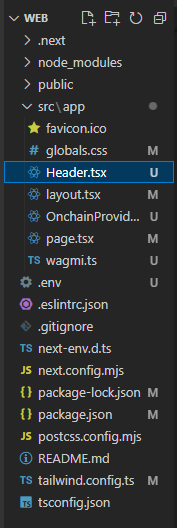
In the newly created Header.tsx first we create a blank Next.js component
 export default function Header() {

    return (
      <>

      </>
    );
  }
Then we are going to add a daisyUI Navbar from this page
<div className="navbar bg-base-100">
  <a className="btn btn-ghost text-xl">Buidl On Base Starter</a>
</div>
Next we are going to add the Connect Wallet component from the OnchainKit from this page, by importing all requirements to the page
import {
    ConnectWallet,
    Wallet,
    WalletDropdown,
    WalletDropdownLink,
    WalletDropdownDisconnect,
  } from '@coinbase/onchainkit/wallet';
  import {
    Address,
    Avatar,
    Name,
    Badge,
    Identity,
    EthBalance,
  } from '@coinbase/onchainkit/identity';
  import { color } from '@coinbase/onchainkit/theme';
Then adding this code to the jsx
  <div style={{ padding: '10px' }}>
              <Wallet>
                <ConnectWallet>
                  <Avatar className="h-6 w-6" />
                  <Name />
                </ConnectWallet>
                <WalletDropdown>
                  <Identity className="px-4 pt-3 pb-2" hasCopyAddressOnClick>
                    <Avatar />
                    <Name>
                      <Badge />
                    </Name>
                    <Address className={color.foregroundMuted} />
                    <EthBalance />
                  </Identity>
                  <WalletDropdownLink icon="wallet" href="https://wallet.coinbase.com">
                    Go to Wallet Dashboard
                  </WalletDropdownLink>
                  <WalletDropdownDisconnect />
                </WalletDropdown>
              </Wallet>
            </div>
Our Header.tsx component should look like this
import {
    ConnectWallet,
    Wallet,
    WalletDropdown,
    WalletDropdownLink,
    WalletDropdownDisconnect,
  } from '@coinbase/onchainkit/wallet';
  import {
    Address,
    Avatar,
    Name,
    Badge,
    Identity,
    EthBalance,
  } from '@coinbase/onchainkit/identity';
  import { color } from '@coinbase/onchainkit/theme';

  export default function Header() {

    return (
      <>
        <div>
          <div className="navbar bg-base-100 flex justify-between">
            <a className="btn btn-ghost text-xl">Buidl On Base Starter</a>
            <div style={{ padding: '10px' }}>
              <Wallet>
                <ConnectWallet>
                  <Avatar className="h-6 w-6" />
                  <Name />
                </ConnectWallet>
                <WalletDropdown>
                  <Identity className="px-4 pt-3 pb-2" hasCopyAddressOnClick>
                    <Avatar />
                    <Name>
                      <Badge />
                    </Name>
                    <Address className={color.foregroundMuted} />
                    <EthBalance />
                  </Identity>
                  <WalletDropdownLink icon="wallet" href="https://wallet.coinbase.com">
                    Go to Wallet Dashboard
                  </WalletDropdownLink>
                  <WalletDropdownDisconnect />
                </WalletDropdown>
              </Wallet>
            </div>
          </div>
        </div>
      </>
    );
  }
Now we open the page.tsx file inside our "src/app/" folder and modify it with this code
"use client"
import React, { useEffect } from 'react';
import  Header  from './Header'

export default function Home() {


  return (
    <>
      <Header />

    </>
  );
}
This imports React into our page, and the Header component
Thats all! We are ready to go. So in the terminal, type npm run dev
npm run dev
If all is well you should see the site running with the navbar
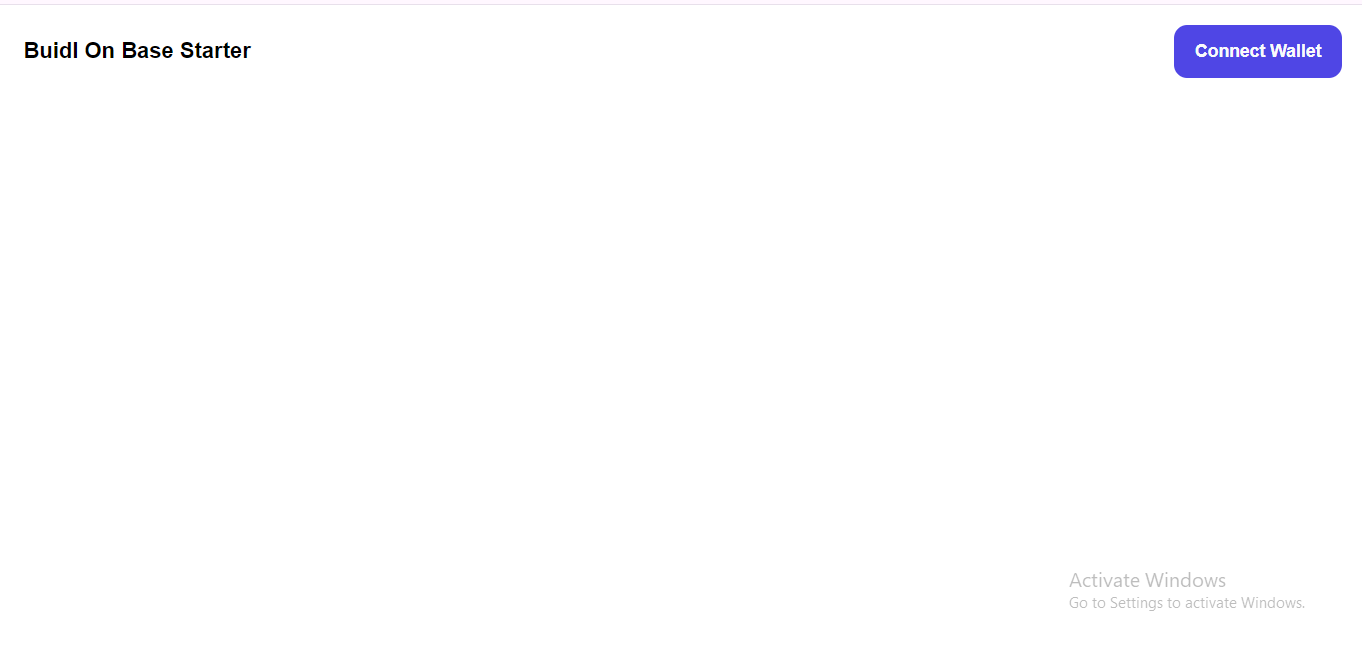
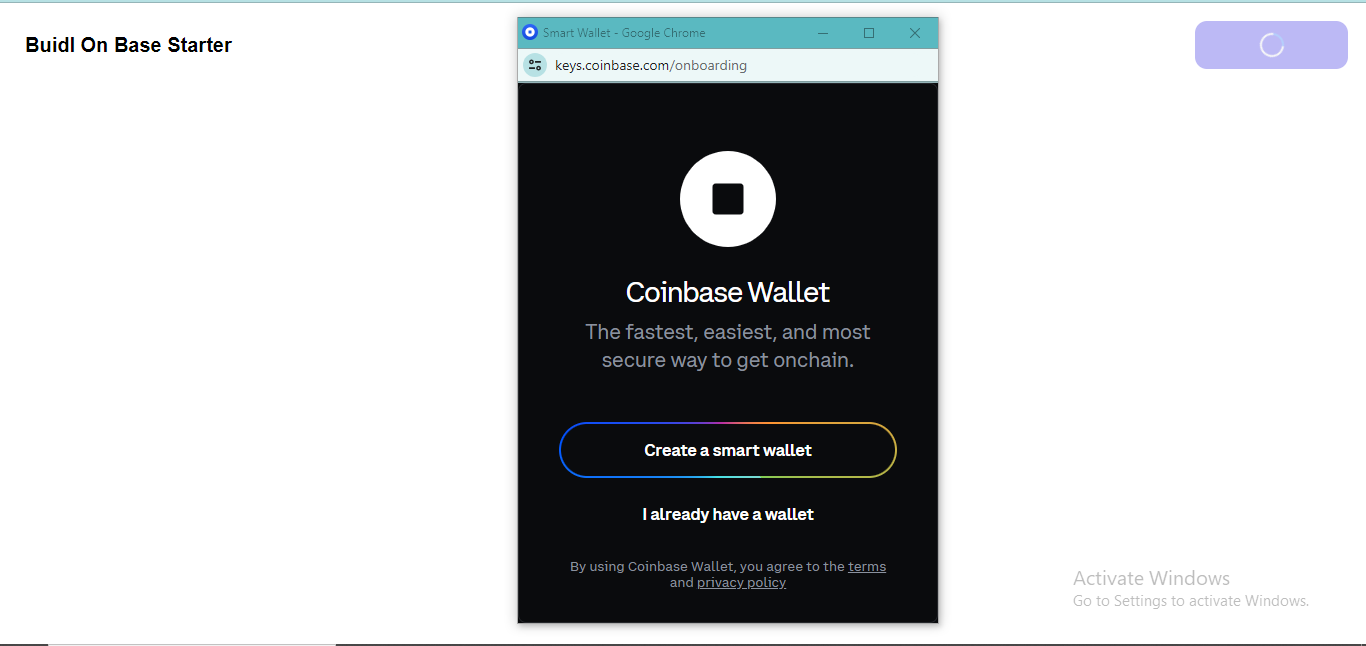
Clicking on connect wallet should bring up the pop up
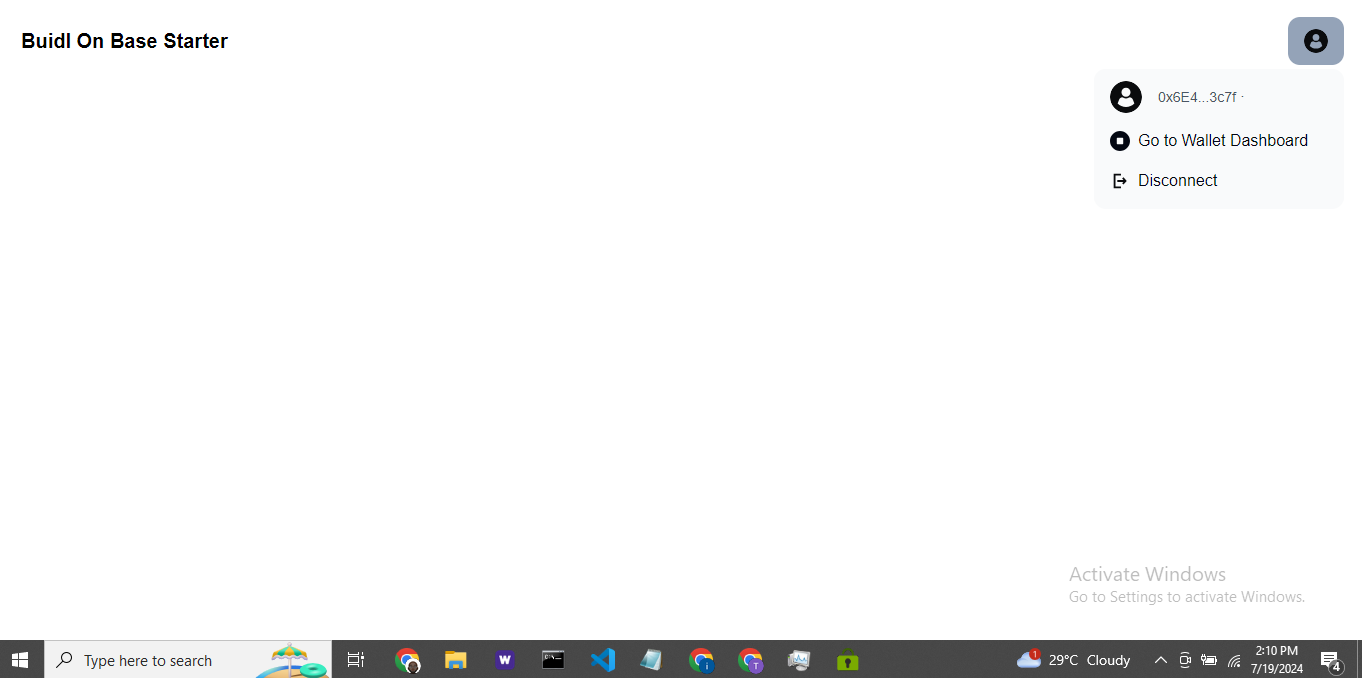
Once authenticated, you should be able to view your wallet information in the navbar
Subscribe to my newsletter
Read articles from Buidl On Base directly inside your inbox. Subscribe to the newsletter, and don't miss out.
Written by
