Day 9: Monitoring Process Script and configuring SMTP Postfix to send mail from ubuntu machine using Gmail account
 Vandana Pandit
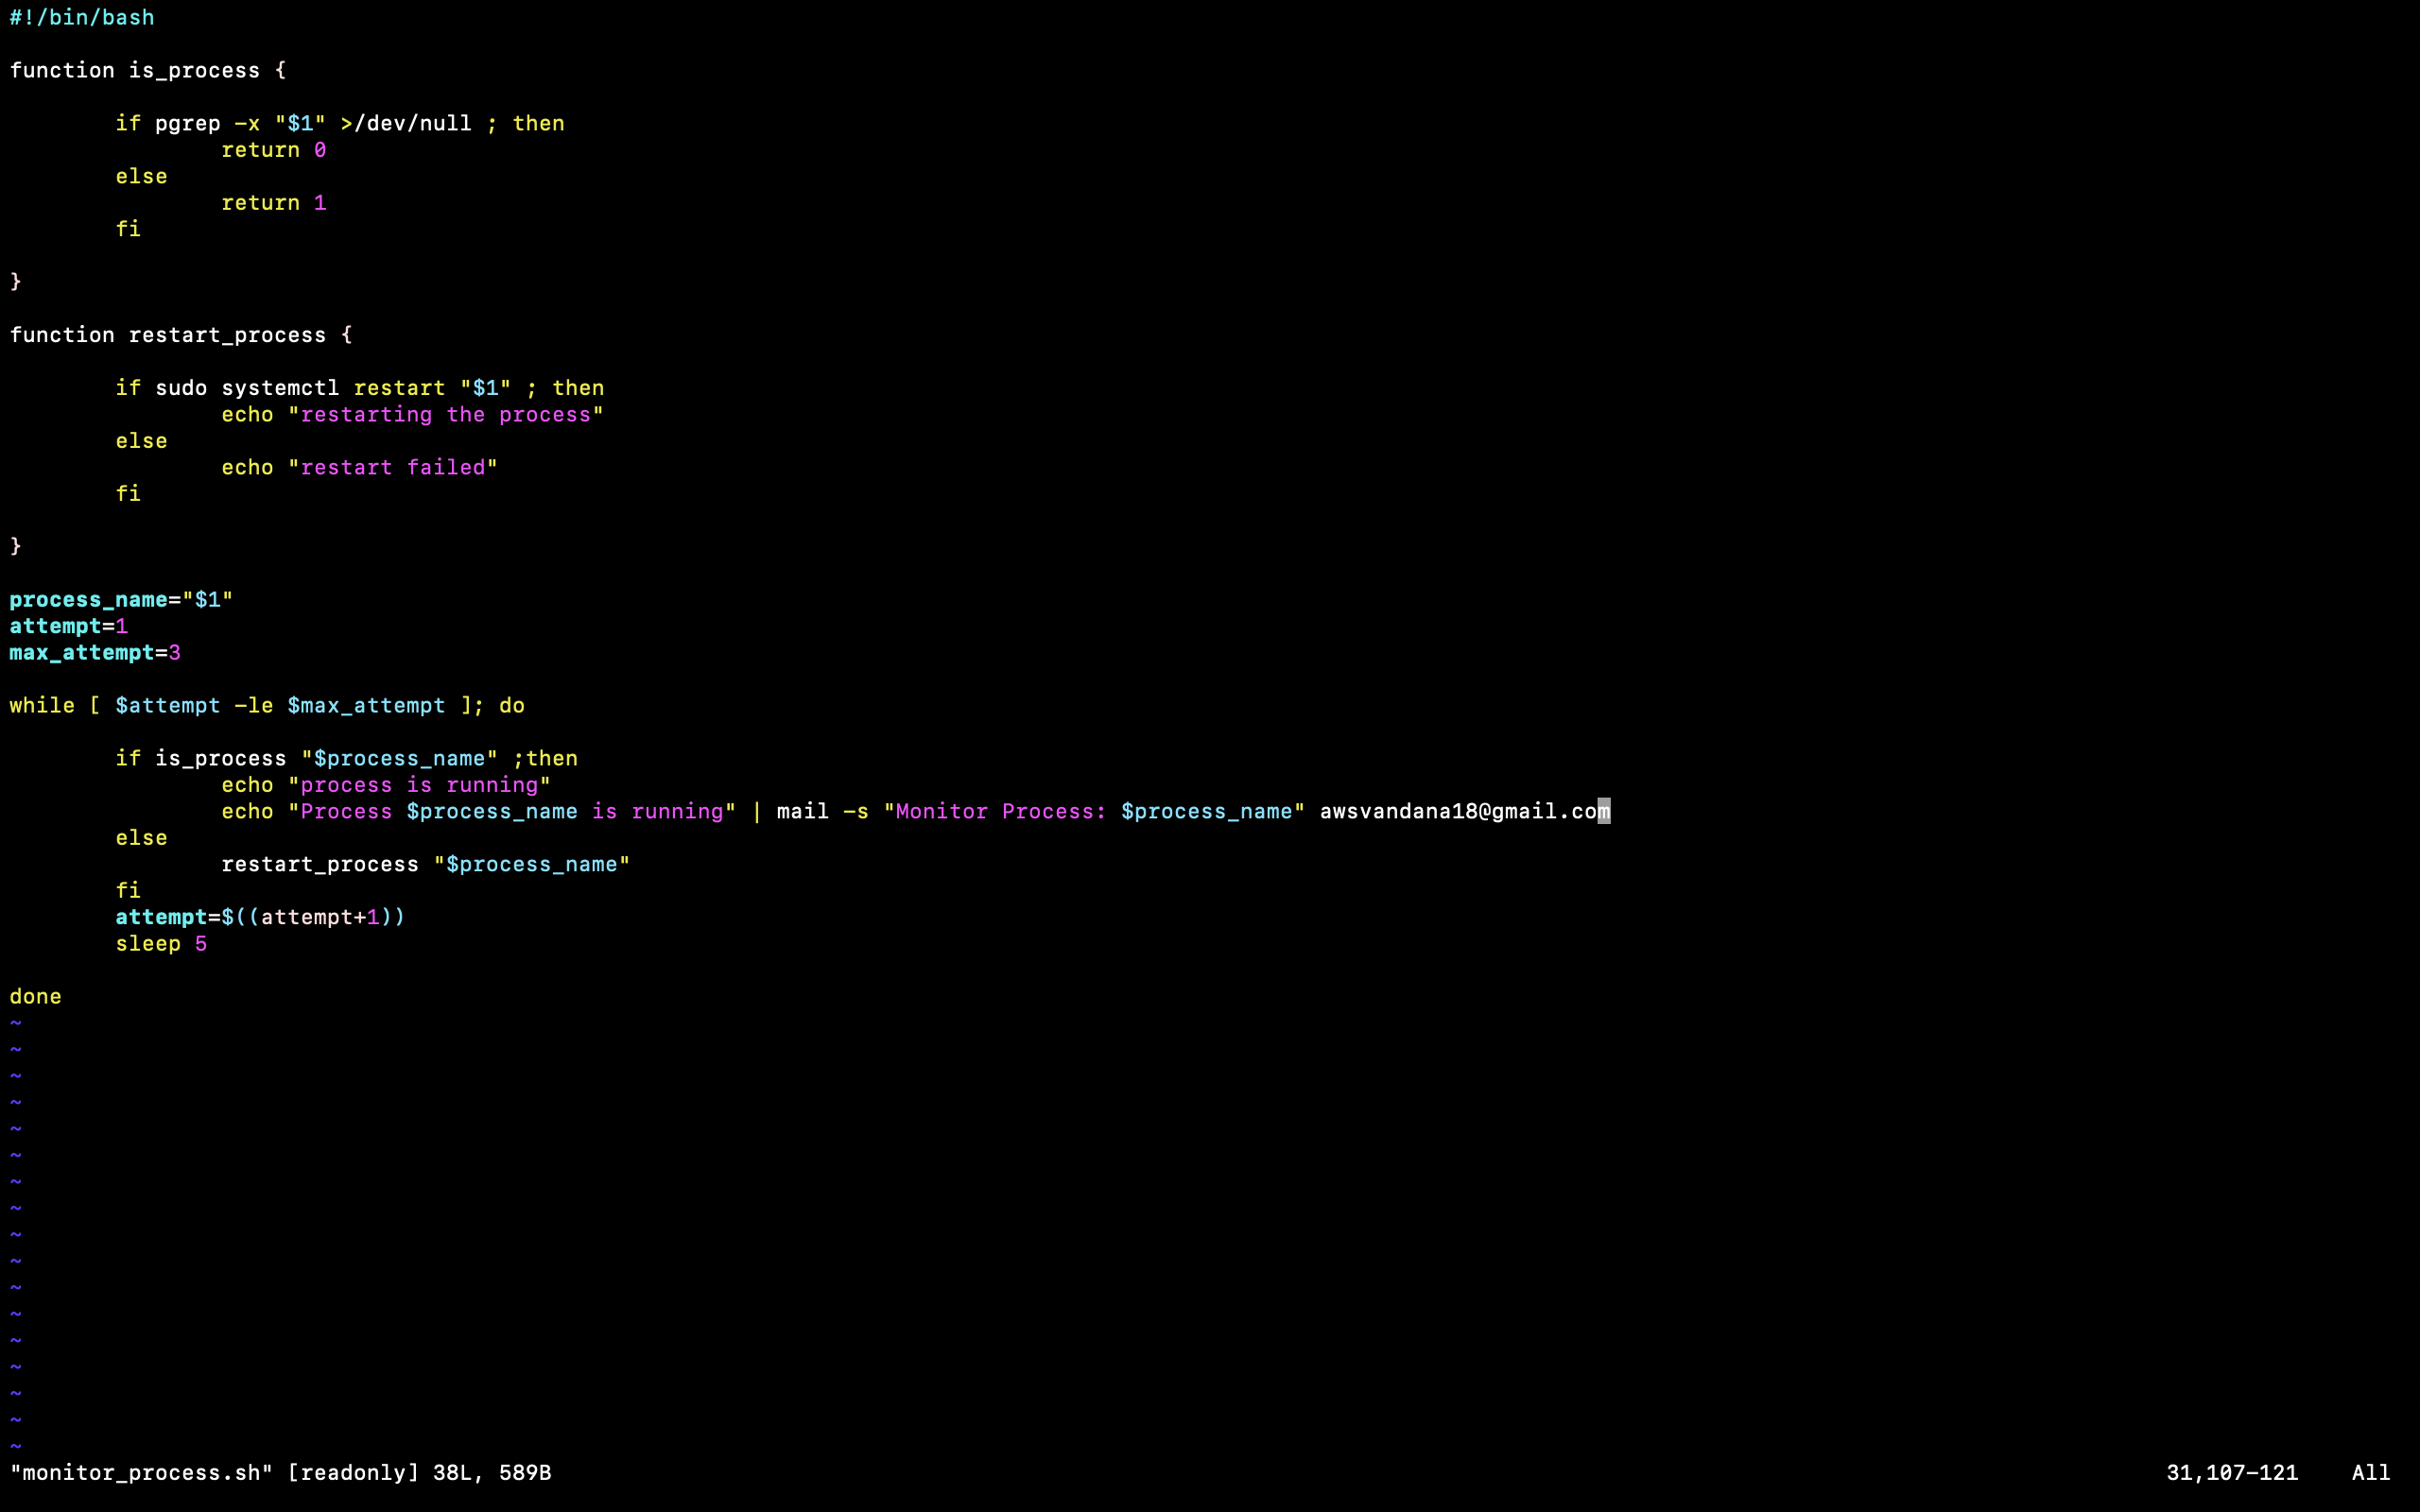
Task of Monitoring script:
Process Selection:
The script should accept a command-line argument to specify the target process to monitor. For example: ./monitor_process.sh <process_name>.
Process Existence Check:
Implement a function that checks if the specified process is currently running on the system.
If the process is running, print a message indicating its presence.
Restarting the Process:
If the process is not running, implement a function that attempts to restart the process automatically.
Print a message indicating the attempt to restart the process.
Ensure the script does not enter an infinite loop while restarting the process. Limit the number of restart attempts
Monitoring Process Script:
The script is available at https://github.com/VandanaPandit/LinuxCommandsAndShellScripts

Script output snapshots:


Just to verify the restarting of the process lets stop the service

Now, lets execute the script again

Steps to configure SMTP PostFix:
Install Postfix:
Update ubuntu so that the latest package is installed:
sudo apt-get update && sudo apt-get upgrade
Install postfix
sudo apt-get install postfix
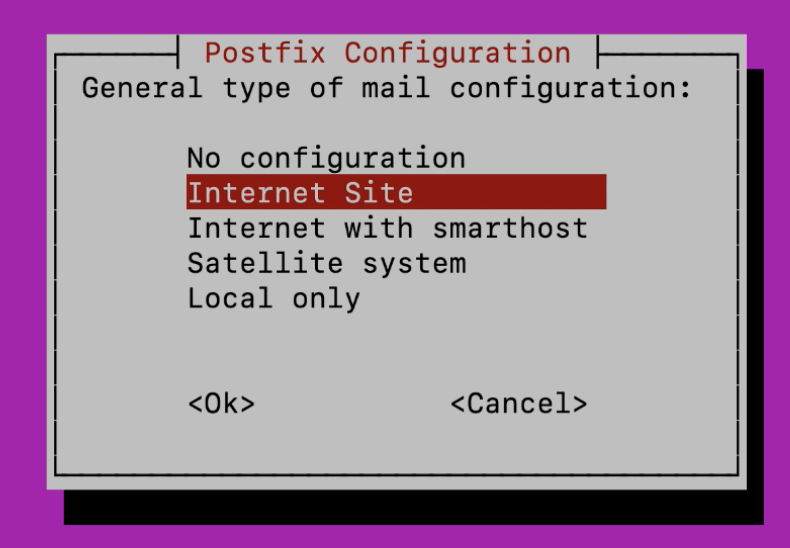
During the installation a popup will display asing for mail configuration type, go ahead and select 'Internet Site'

Once done just skip the next setting for domain name.
Get Google App Password :
Generate a google app password for the account with which you would like the share the mail.
For this you can go to security setting and then simple select google app password and generate the password but make sure to set 2 set authentication.
Configure SASL with Your Gmail Credentials:
Create a file /etc/postfix/sasl/sasl_passwd and provide below input
[smtp.gmail.com]:587 microdomainz@gmail.com:qodjkozoaqdmyqll
The mail in the command should be your email addres via which you would be sending emails followed by the app password generated in app password.
Create a hash database file with the following postmap command.
sudo postmap /etc/postfix/sasl/sasl_passwd
In order to protect the plain-text password, change the owner and permission for the SASL files as follows:
sudo chown root:root /etc/postfix/sasl/sasl_passwd /etc/postfix/sasl/sasl_passwd.db
sudo chmod 0600 /etc/postfix/sasl/sasl_passwd /etc/postfix/sasl/sasl_passwd.db
Edit the following line in configuration file /etc/postfix/main.cf
mydestination = $myhostname, localhost, localhost.localdomain
relayhost = [smtp.gmail.com]:587
mynetworks = 127.0.0.0/8 [::ffff:127.0.0.0]/104 [::1]/128
Add following line in the /etc/postfix/main configuration file at the bottom of the script
# Enable SASL authentication
smtp_sasl_auth_enable = yes
smtp_sasl_security_options = noanonymous
smtp_sasl_password_maps = hash:/etc/postfix/sasl/sasl_passwd
smtp_tls_security_level = encrypt
smtp_tls_CAfile = /etc/ssl/certs/ca-certificates.crt
Restart the postfix service
sudo systemctl restart postfix
To Test sending mail:
echo "This is a test email" | mail -s "Test Email" <RecipientEmailAddress>
To check the Mail log:
sudo tail -f /var/log/mail.log
Subscribe to my newsletter
Read articles from Vandana Pandit directly inside your inbox. Subscribe to the newsletter, and don't miss out.
Written by

Vandana Pandit
Vandana Pandit
👩💻 I am currently working as Infrastructure Engineer. 🔭 I’m currently preparing for CKA certification. 📝 Do check my linked post I keep posting articles related to DevOps