How to Integrate Swagger in Node Express for API Documentation
 Arnab gupta
As an API developer, I always aim to provide good documentation for the code I write. What better way to do that than by using Swagger? So today, I will write a guide on setting up Swagger with your Node Express project.
Start New Project
npm init -y
Install Packages
Swagger Jsdoc
Swagger Ui Express
Swagger Autogen
Express
Nodemon
npm i swagger-jsdoc swagger-ui-express swagger-autogen express nodemon
Create Entry Point
We will create an app.js file as our entry point and set up a few REST API routes for testing purposes.
// import required packages
const express = require("express");
const swaggerUi = require("swagger-ui-express");

// initialize express
const app = express();

// accept json requests
app.use(express.json());

// import swagger docs
const swaggerDocs = require("./swagger-output.json");

// use swagger docs
app.use("/docs", swaggerUi.serve, swaggerUi.setup(swaggerDocs));

// create test route to check if server is up
app.get("/", (req, res) => {
  // swagger autogen comments
  // #swagger.tags = ['General']
  // #swagger.summary = 'Test If Api is running'
  res.send("Hello World!");
});

// create a post route for to receive name and email
app.post("/user", (req, res) => {
  // swagger autogen comments
  // #swagger.tags = ['Users']
  // #swagger.summary = 'Get User Data'
  // get name and email from request
  const { name, email } = req.body;
  // return name and email
  res.json({ name: name, email: email });
});

// start server
app.listen(3000, () => {
  console.log("App listening on port http://127.0.0.1:3000/");
  console.log("Swagger Docs Available on port http://127.0.0.1:3000/docs/");
});
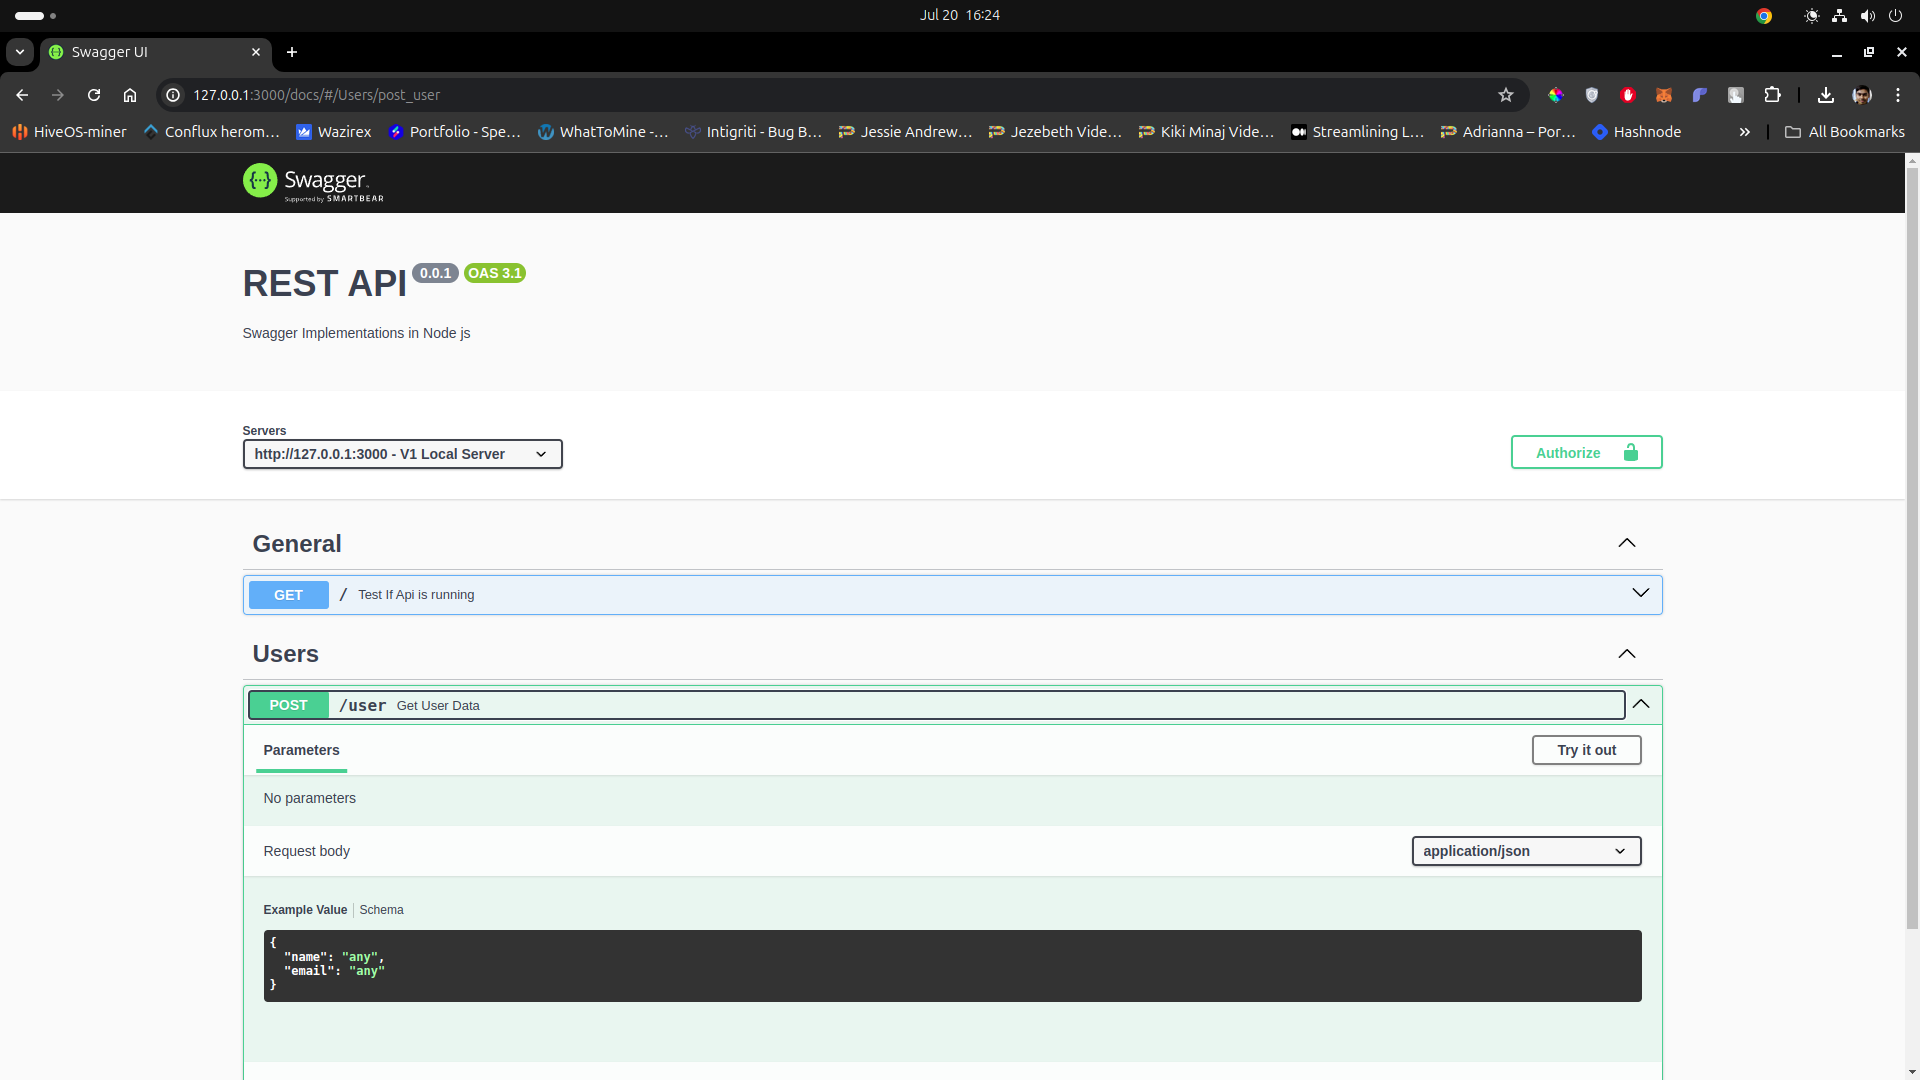
We created a GET route to test if the API is running and a POST route to send user data to the server. We use express.json() to parse the application/json data into req.body. Then, we set up Swagger docs with the generated JSON file and the swagger-ui-express package, which will serve on the /docs endpoint. Notice how we have set the tags and summary for the endpoints.
Generate the Swagger JSON
If you tried to run the previous code, you might have seen an error saying that swagger-output.json was not found. This is because we haven't created it yet. Let's create a swagger.js file to set up all the Swagger parameters.
/**
 * This script generates a Swagger JSON document based on the provided options
 * and saves it to a specified output file.
 *
 * @module swagger
 */

const swaggerJsDoc = require("swagger-jsdoc");
const swaggerAutogen = require("swagger-autogen");

// Define the output file path
const outputFile = "./swagger-output.json";

// Define the routes for which to generate Swagger documentation
// If you have more advanced application and your routes are defind in a routes folder then modify the app.js to be your routes entry point
const routes = ["./app.js"];

// Define the options for generating Swagger documentation
const autoGenOptions = {
  openapi: "3.1.0",
};

const options = {
  definition: {
    openapi: "3.1.0",
    info: {
      title: "REST API",
      version: "0.0.1",
      description: "Swagger Implementations in Node js",
    },
    servers: [
      {
        url: `http://127.0.0.1:3000`,
        description: "V1 Local Server",
      },
    ],
    components: {
      securitySchemes: {
        bearerAuth: {
          type: "http",
          scheme: "bearer",
          bearerFormat: "JWT",
        },
      },
    },
  },
  apis: routes,
};

// Generate the Swagger documentation
const swaggerDocs = swaggerJsDoc(options);

// Save the generated documentation to the specified output file
swaggerAutogen(autoGenOptions)(outputFile, routes, swaggerDocs);
Perfect! Now we have the Swagger config file ready to generate documentation. Next, we will modify the package.json to run some scripts, including one to execute this file.
  "scripts": {
    "start": "node app.js",
    "dev": "nodemon app.js",
    "generate": "node swagger.js"
  }
We will use the generate script to create the Swagger JSON file, which is included in app.js.
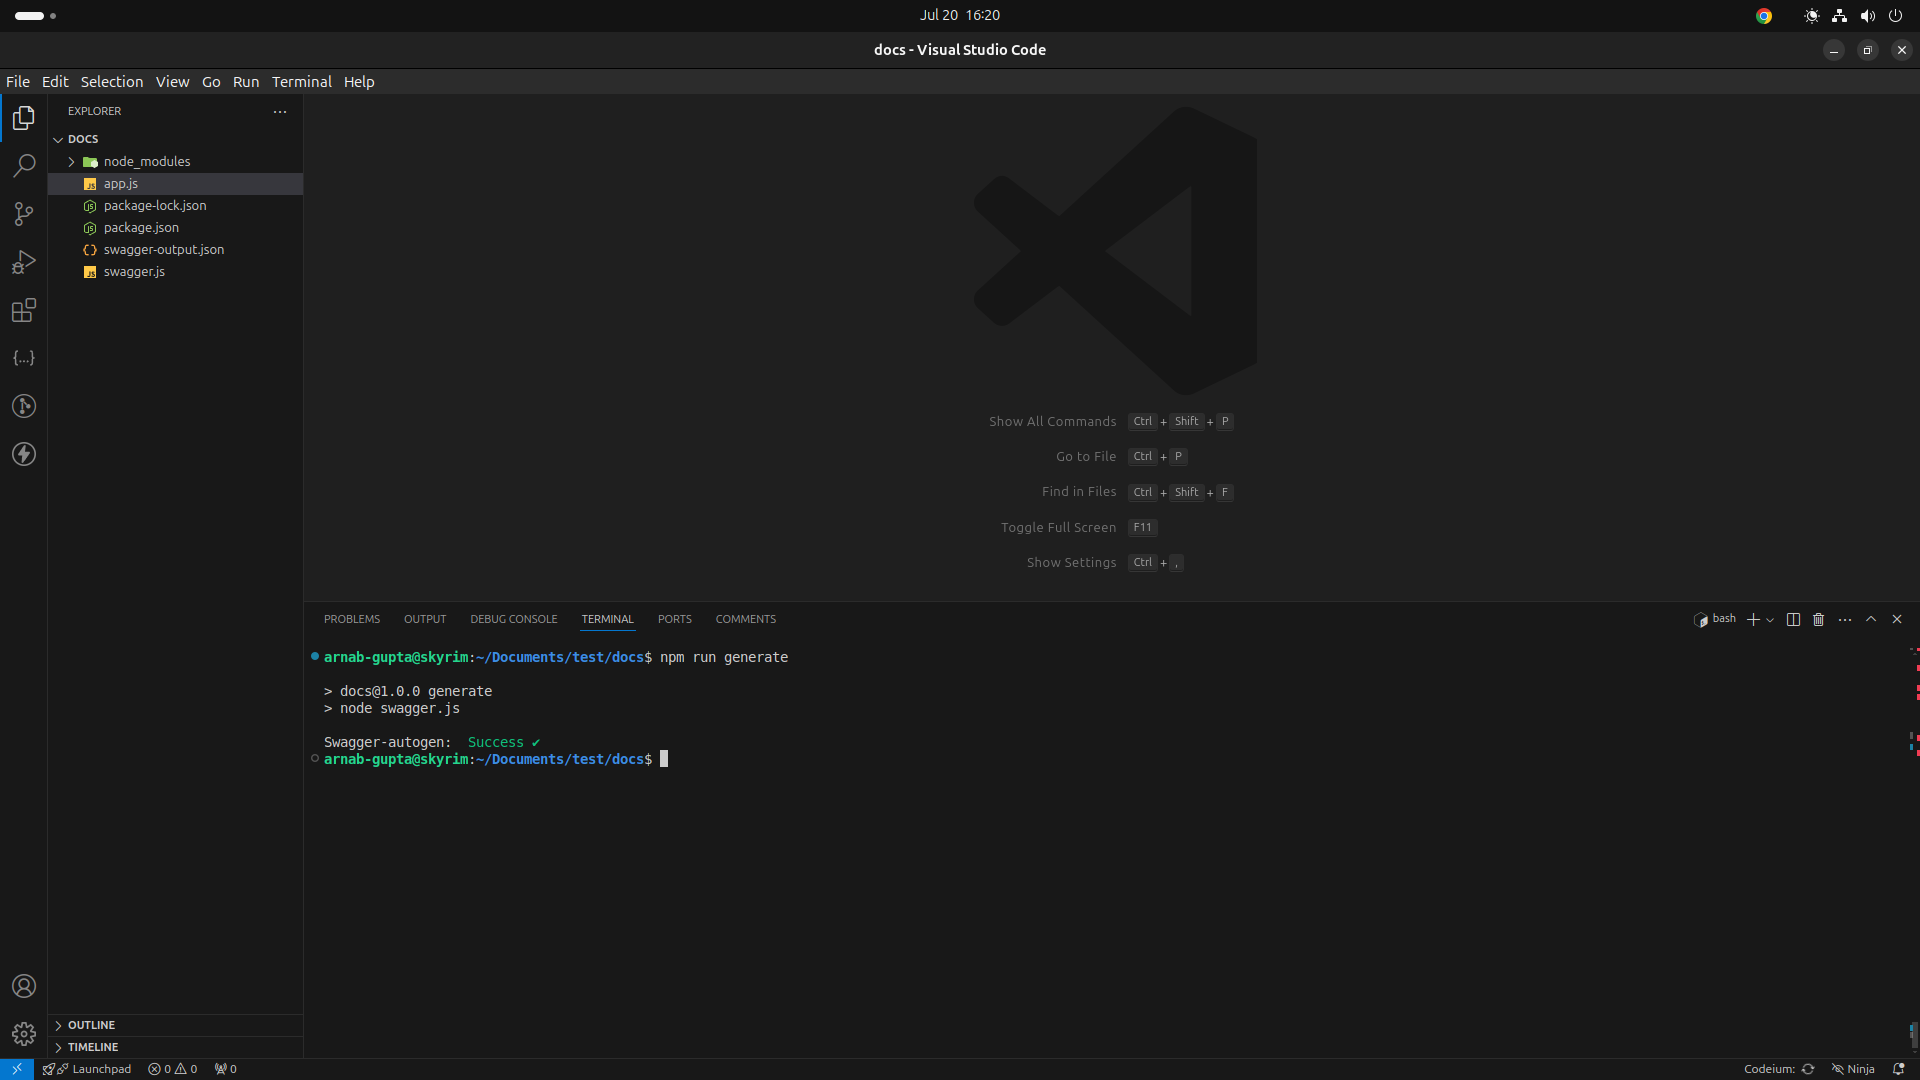
npm run generate
Once you are done with development and ready to share the code with the front-end team you can use the generate script to auto generate the documentations for you.

Running this you will see a success message in the terminal. So let's run the server now
npm run start

And the Swagger is running with auto generated documentations!
Conclusion
This is how you set up automatic documentation for your Node.js Express application. You can improve it by adding tags, summaries, and descriptions. Keep in mind that this is not a complete solution for all your projects. It cannot determine the data type of the request body or other parameters. For more detailed documentation, you will need to write it manually.
Subscribe to my newsletter
Read articles from Arnab gupta directly inside your inbox. Subscribe to the newsletter, and don't miss out.
Written by
