Secret Management in Kubernetes With ESO, Vault, and ArgoCD
 Bruno Gatete
Introduction
Managing secrets in Kubernetes presents significant security challenges. Hardcoding secrets directly into manifests not only risks accidental exposure but also complicates secret management and auditing. Traditional Kubernetes Secrets offer basic functionality but fall short in providing centralized control and comprehensive auditability.
In this blog, we’ll explore a more secure and efficient approach to secret management by integrating several powerful tools:
Deploying Redis with Helm and Argo CD: We'll walk through deploying Redis, a popular in-memory data store, using Helm for package management and Argo CD for GitOps-based deployment. This setup streamlines your deployment process and ensures consistency across environments.
Pushing Secrets to HashiCorp Vault with ESO's PushSecret Capability: We’ll demonstrate how to securely push secrets to HashiCorp Vault using the External Secrets Operator (ESO). The PushSecret feature of ESO allows us to manage and refresh secrets centrally, enhancing security and reducing the risk of exposure.
Consuming Redis Secrets with ExternalSecret Resource: Finally, we’ll show how to consume the Redis secrets within your application using the ExternalSecret resource. This approach abstracts secret management from application code, improving security and maintainability.
By following this guide, you'll adopt best practices for secure and scalable secret management in Kubernetes, ensuring your secrets are well-managed, auditable, and protected from unauthorized access.
Prerequisites
Kubernetes Cluster: i have a simple local cluster set up
HashiCorp Vault: A ruuning instance for secure secret storage
Argo CD: To manage application deployments.
External Secrets Operator: ESO installed and setup with a SecretStore resource configured to connect to your Vault instance. Refer the blog — Secrets Management with External Secrets Operator for more details.
Git Repository: To store all manifests for ArgoCD
Source Code:
https://github.com/Gatete-Bruno/K8s-secrets
Kubernetes Cluster Setup :
Setup Vault in Kubernetes:
Prerequisites
Before you begin, ensure you have the following:
A Kubernetes cluster up and running.
kubectlconfigured to interact with your cluster.Helm installed on your local machine
Create Vault Namespace
First, we need to create a separate namespace for Vault. This helps in managing resources specific to Vault independently.
kubectl create ns vault
Install Vault
We will install the latest version of Vault using the Helm chart provided by HashiCorp. There are two methods to do this: 1. directly running the Helm install command using the HashiCorp Helm repository or 2. downloading the Helm chart and installing it locally.
1. Add the HashiCorp Helm Repository
Add the HashiCorp Helm repository to your Helm configuration.
helm repo add hashicorp https://helm.releases.hashicorp.com
2. Installation Methods
1. Directly Running Helm Install
You can directly install Vault using the Helm chart from the HashiCorp repository with the following command:
helm install vault hashicorp/vault \
       --set='server.dev.enabled=true' \
       --set='ui.enabled=true' \
       --set='ui.serviceType=LoadBalancer' \
       --namespace vault
2. By Downloading the Helm Chart and Installing
Alternatively, you can download the Helm chart and install it locally:
# Download the Helm chart
helm pull hashicorp/vault --untar

# Install Vault using the downloaded chart
helm install vault \
       --set='server.dev.enabled=true' \
       --set='ui.enabled=true' \
       --set='ui.serviceType=LoadBalancer' \
       --namespace vault \
       ./vault-chart
Using these settings, we are installing Vault in development mode with the UI enabled and exposed via a LoadBalancer service to access it externally. This setup is ideal for testing and development purposes.
Running Vault in “dev” mode. This requires no further setup, no state management, and no initialization. This is useful for experimenting with Vault without needing to unseal, store keys, et. al. All data is lost on restart — do not use dev mode for anything other than experimenting. See https://developer.hashicorp.com/vault/docs/concepts/dev-server to know more
Output:
$ kubectl get all -n vault
NAME                                        READY   STATUS    RESTARTS   AGE
pod/vault-0                                 1/1     Running   0          2m39s
pod/vault-agent-injector-8497dd4457-8jgcm   1/1     Running   0          2m39s

NAME                               TYPE           CLUSTER-IP       EXTERNAL-IP    PORT(S)             AGE
service/vault                      ClusterIP      10.245.225.169   <none>         8200/TCP,8201/TCP   2m40s
service/vault-agent-injector-svc   ClusterIP      10.245.32.56     <none>         443/TCP             2m40s
service/vault-internal             ClusterIP      None             <none>         8200/TCP,8201/TCP   2m40s
service/vault-ui                   LoadBalancer   10.245.103.246   24.132.59.59   8200:31764/TCP      2m40s

NAME                                   READY   UP-TO-DATE   AVAILABLE   AGE
deployment.apps/vault-agent-injector   1/1     1            1           2m40s

NAME                                              DESIRED   CURRENT   READY   AGE
replicaset.apps/vault-agent-injector-8497dd4457   1         1         1       2m40s

NAME                     READY   AGE
statefulset.apps/vault   1/1     2m40s
Configure Vault
In this step, we will set up Vault policies and authentication methods to securely manage and access secrets within the Kubernetes cluster. This configuration ensures that only authorized applications can retrieve sensitive data from Vault.
1. Connect to the Vault Pod
After the installation, connect to the Vault pod to perform initial configuration:
kubectl exec -it vault-0 -- /bin/sh
2. Create and Apply a Policy
Next, we’ll create a policy that allows reading secrets. This policy will be attached to a role, which can be used to grant access to specific Kubernetes service accounts.
Create the policy file:
cat <<EOF > /home/vault/read-policy.hcl
path "secret*" {
  capabilities = ["read"]
}
EOF
Apply the policy:
vault policy write read-policy /home/vault/read-policy.hcl
3. Enable Kubernetes Authentication
Enable the Kubernetes authentication method in Vault:
vault auth enable kubernetes
4. Configure Kubernetes Authentication
Configure Vault to communicate with the Kubernetes API server:
vault write auth/kubernetes/config \
   token_reviewer_jwt="$(cat /var/run/secrets/kubernetes.io/serviceaccount/token)" \
   kubernetes_host=https://${KUBERNETES_PORT_443_TCP_ADDR}:443 \
   kubernetes_ca_cert=@/var/run/secrets/kubernetes.io/serviceaccount/ca.crt
5. Create a Role
Create a role(vault-role) that binds the above policy to a Kubernetes service account(vault-serviceaccount) in a specific namespace. This allows the service account to access secrets stored in Vault:
vault write auth/kubernetes/role/vault-role \
   bound_service_account_names=vault-serviceaccount \
   bound_service_account_namespaces=vault \
   policies=read-policy \
   ttl=1h
Here we can pass multiple service accounts and namespaces:
vault write auth/kubernetes/role/<my-role> \
   bound_service_account_names=sa1, sa2 \
   bound_service_account_namespaces=namespace1, namespace2 \
   policies=<policy-name> \
   ttl=1h
2. Using the Vault UI
List service in vaulf∫Ωt namespace to get the EXTERNAL-IP of the LoadBalancer.
$ kubectl get svc -n vault
NAME                       TYPE           CLUSTER-IP       EXTERNAL-IP    PORT(S)             AGE
vault                      ClusterIP      10.245.139.117   <none>         8200/TCP,8201/TCP   28h
vault-agent-injector-svc   ClusterIP      10.245.58.140    <none>         443/TCP             28h
vault-internal             ClusterIP      None             <none>         8200/TCP,8201/TCP   28h
vault-ui                   LoadBalancer   10.245.11.13     24.123.49.59   8200:32273/TCP      26h
Access the Vault UI using the above external IP of the loadbalancer.
Ex: <external-ip>:8200
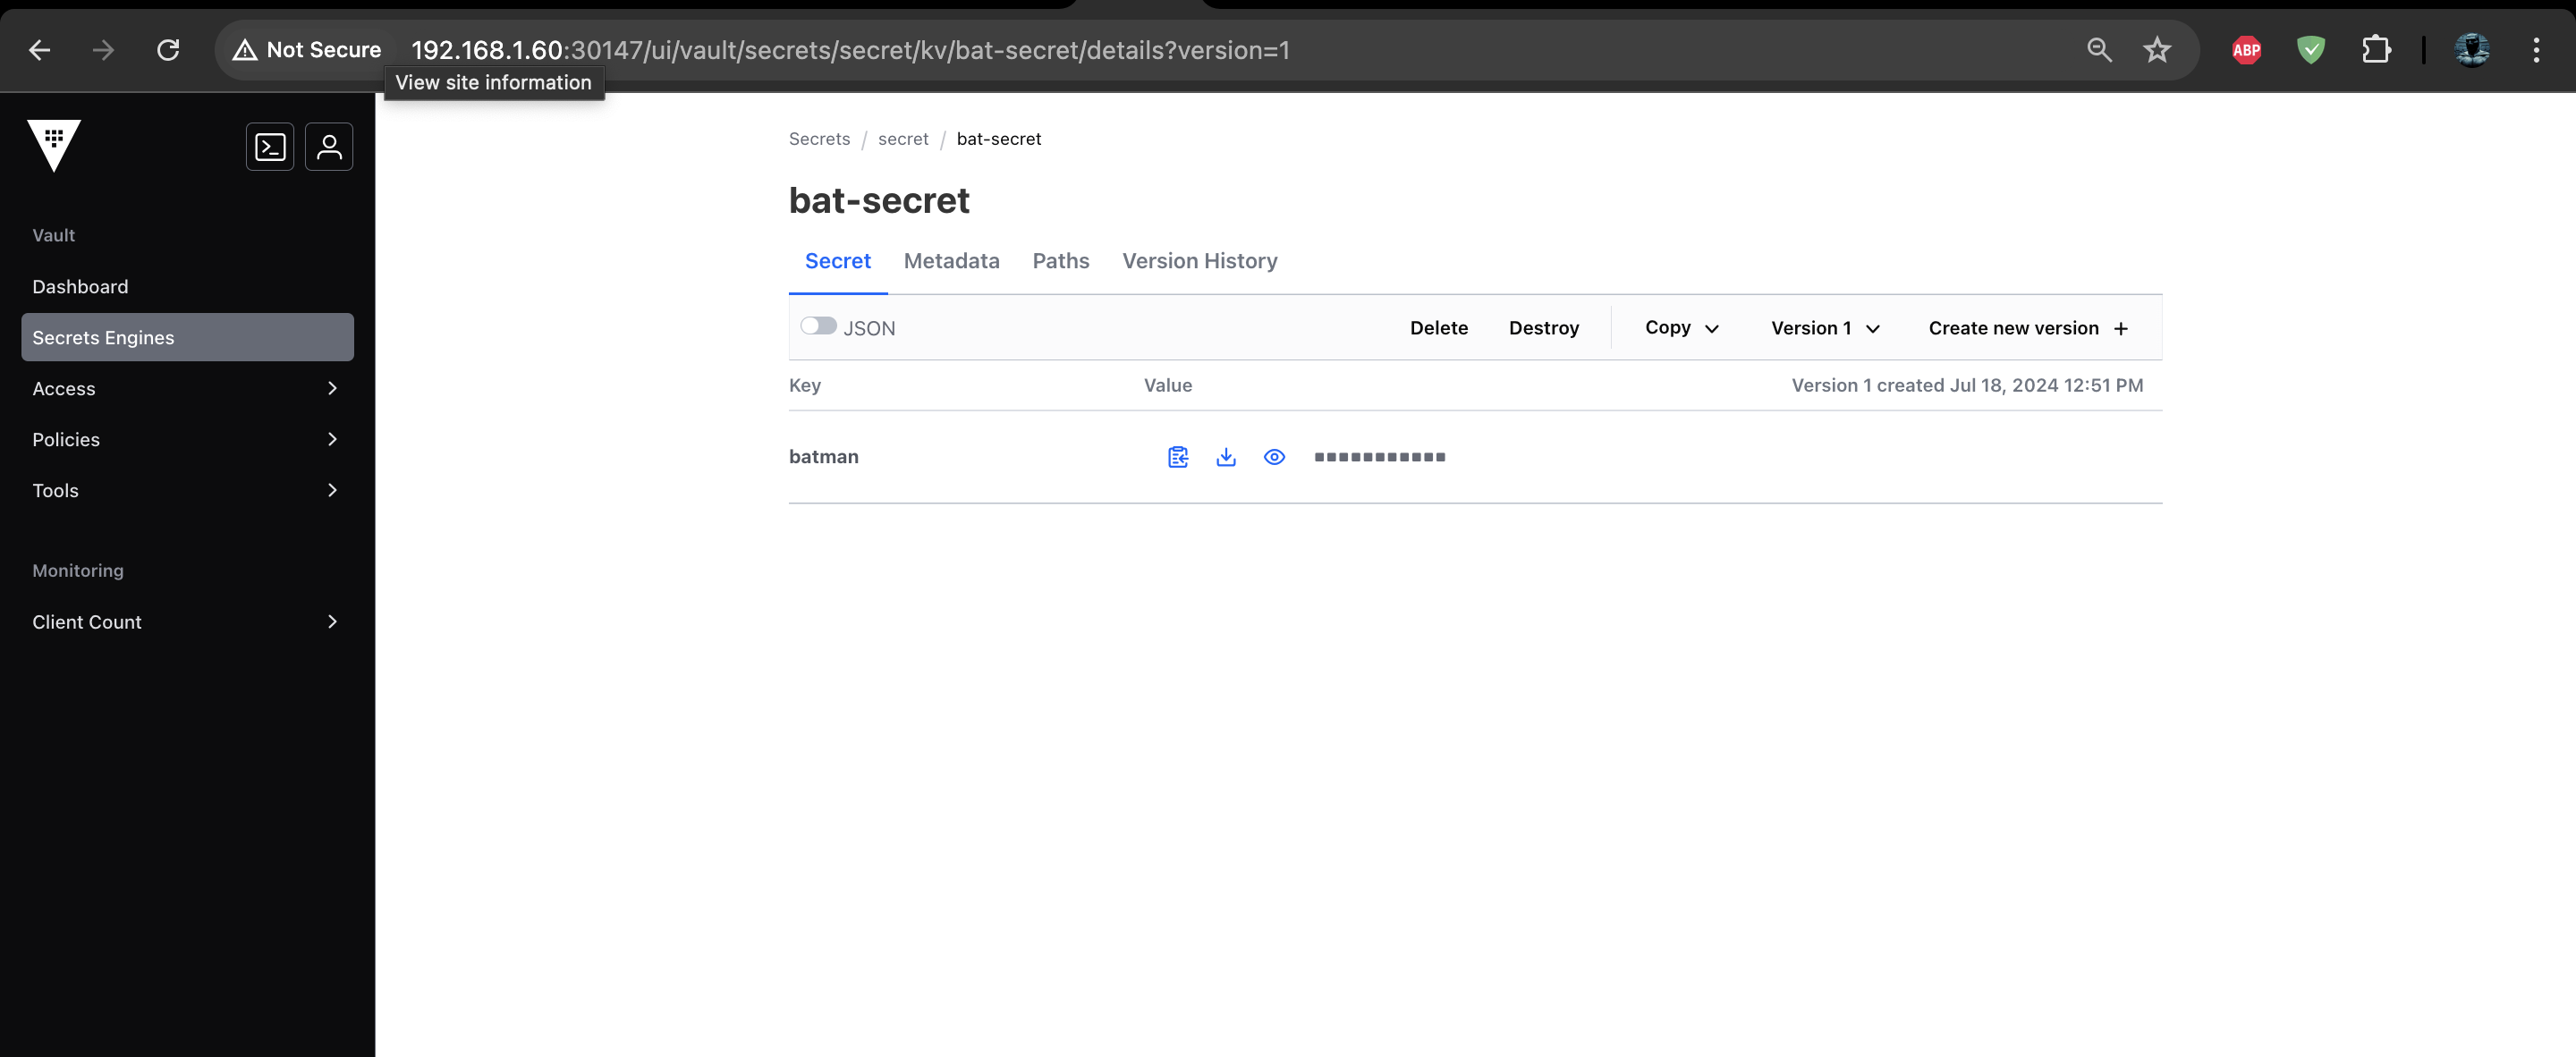
Now you can create secrets from the UI

What is the External Secrets Operator?
ESO is a Kubernetes operator that bridges the gap between your desired secret store (e.g., AWS Secrets Manager, HashiCorp Vault, Azure Key Vault) and your Kubernetes cluster. It acts as a mediator, fetching secrets from external providers and injecting them as Kubernetes Secrets into your pods.
Resource Model
The External Secrets Operator (ESO) simplifies secure secret management in Kubernetes by fetching them from external stores and injecting them into your cluster seamlessly. Here’s a breakdown without jargon:
Think of ESO as a bridge: It connects your Kubernetes cluster to your preferred external secrets manager (e.g., HashiCorp Vault, AWS Secrets Manager). Instead of storing secrets directly in Kubernetes (risky!), ESO keeps them secure outside. When your applications need them, ESO acts as a middleman, fetching the secrets and injecting them as Kubernetes Secrets.
How does ESO do this magic?
It uses special resources called Custom Resources (CRs):
SecretStore: Defines how to access your external secrets manager (credentials, etc.). You can configure multiple SecretStores for different managers or setups.ClusterSecretStore: Similar to SecretStore, but accessible from any namespace in your cluster.ExternalSecret: Acts as a blueprint for creating a secret. It specifies which secret to fetch from the external store and where to put it in Kubernetes.ClusterExternalSecret: Like ExternalSecret, but can create secrets in multiple namespaces.
Installing ESO on K8s
ESO can be installed using Helm or via an ArgoCD application.
Option 1: Helm
- Add the External Secrets repo
helm repo add external-secrets https://charts.external-secrets.io
- Install the External Secrets Operator
helm install external-secrets \
external-secrets/external-secrets \
-n external-secrets \
--create-namespace \
# --set installCRDs=true
Now let us begin:
Deployment and Configuration Process
Following steps outline the deployment and configuration process:
Detailed Flow:
ArgoCD: Deploys Redis in the redis namespace using a Helm chart.
ESO PushSecret: Detects the Redis secret and pushes it to HashiCorp Vault.
Vault: Stores the Redis secret securely.
ESO: Retrieves the Redis secret from Vault and creates a Kubernetes secret in the myapp namespace.
End Application: Consumes the Redis secret for its configuration.
Step1: Deploy Redis with Helm and ArgoCD
In your git repository create two directories for ArgoCD:
manifest: stores all the manifest (YAML) files
configs: stores all te configuration files (eg: values.yaml)Create a YAML file redis.yaml in your manifest directory with the following file content:
  apiVersion: argoproj.io/v1alpha1
  kind: Application
  metadata:
    name: redis
    namespace: argocd
  spec:
    destination:
      namespace: redis
      server: 'https://kubernetes.default.svc'
    source:
      repoURL: 'https://charts.bitnami.com/bitnami'
      targetRevision: 18.2.1
      chart: redis
      helm:
        releaseName: redis
        valueFiles:
          - values.yaml
    project: default
    syncPolicy:
      syncOptions:
        - CreateNamespace=true
      automated:
        prune: true
        selfHeal: true
Below is a breakdown of the key components of above manifest:
apiVersion: Specifies the API version being used, which is “argoproj.io/v1alpha1”.
kind: Defines the type of Kubernetes resource, which is “Application”.
name: The name of the Application, which is “redis”.
namespace: Specifies the namespace where the Redis instance should be deployed, which is “redis”.
source: Specifies the source of the Application’s manifests.
repoURL: The URL of the Helm chart repository containing the Redis Helm chart.
targetRevision: The specific version of the Helm chart to deploy, which is “18.2.1”.
chart: Specifies the name of the Helm chart, which is “redis”.
valueFiles: Specifies the path to the values file used to customize the Redis deployment, which is “values.yaml”.
CreateNamespace=true: Indicates that the namespace specified in the destination should be created if it does not already exist.
Next create another YAML file values.yaml in your config directory with the following file content:
architecture: replication
This YAML file is used to house the configuration values for the redis Helm chart we used in the ArgoCD manifest above.
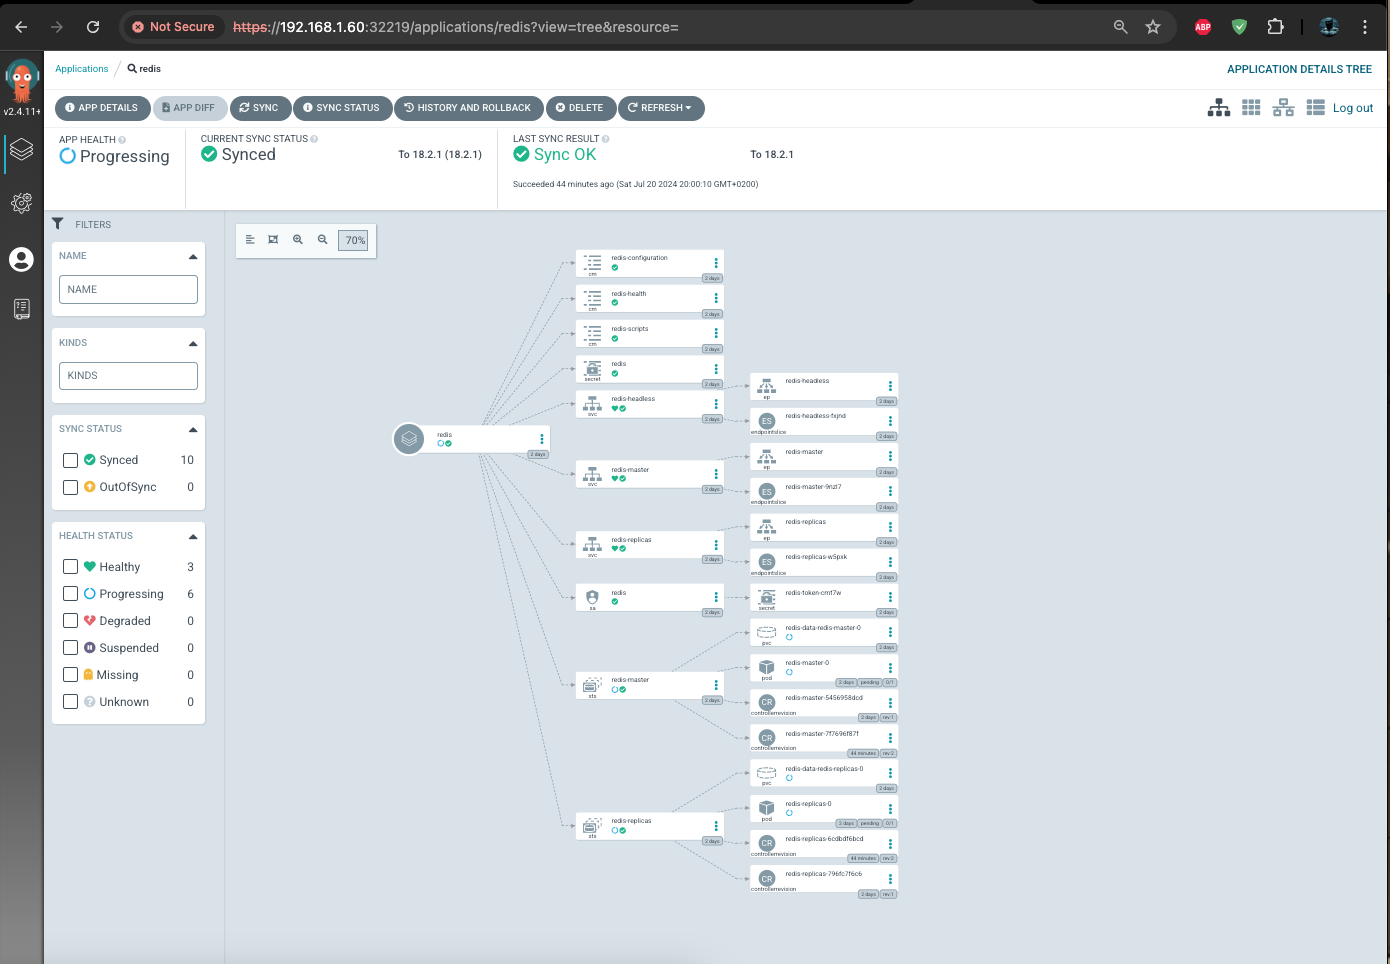
Now when you apply the manifest, ArgoCD will create a secret for your Redis instance in the redis namespace.
Step2: Push Redis Secret to Hashicorp Vault
In this step, we’ll use the External Secrets Operator (ESO) to push the Redis secret generated by the Helm installation to HashiCorp Vault. The PushSecret capability of ESO helps in dynamically generating and pushing secrets to Vault.
- Update the Redis Helm Chart for PushSecret:
    architecture: replication
    extraDeploy:
      - apiVersion: eso.kubernetes-client.io/v1alpha1
        kind: PushSecret
        metadata:
          name: redis-pushsecret
          namespace: redis
        spec:
          secretStoreRef:
            name: vault-secretstore
            kind: SecretStore
          refreshInterval: 1h
          data:
            - secretKey: redis-password
              remoteRef:
                key: redis/secret
                property: password
              property: data.redis-password
In this configuration:
extraDeploy adds additional resources to the Helm deployment.
PushSecret specifies the ESO resource for pushing secrets to Vault.
secretStoreRef points to the Vault SecretStore.
data maps the Redis password from the Kubernetes secret to a specific key in Vault.
Apply the Updated Helm Chart:
After updating the values.yaml, apply the changes using ArgoCD. ArgoCD will handle the deployment and ensure the Redis secret is pushed to Vault.
You need to login to argoCD, you could use the Ui or CLI , either way the steps are straight forward
    export ARGO_PWD=$(kubectl -n argocd get secret argocd-initial-admin-secret -o jsonpath="{.data.password}" | base64 -d)
    echo $ARGO_PWD
    kato@master1:~/vault/K8s-secrets$ argocd login 10.233.12.106
    WARNING: server certificate had error: tls: failed to verify certificate: x509: cannot validate certificate for 10.233.12.106 because it doesn't contain any IP SANs. Proceed insecurely (y/n)? y
    Username: admin
    Password:
    'admin:login' logged in successfully
    Context '10.233.12.106' updated
argocd app sync redis
Step3: Create ExternalSecret for the End Application
Now that the Redis secret is securely stored in Vault, the next step is to create an ExternalSecret resource that the end application can consume.
- Create ExternalSecret YAML:
In your Git repository, create a file named external-secret.yaml in the manifest directory with the following content:
    apiVersion: external-secrets.io/v1alpha1
    kind: ExternalSecret
    metadata:
      name: myapp-redis-secret
      namespace: myapp
    spec:
      secretStoreRef:
        name: vault-secretstore
        kind: SecretStore
      target:
        name: redis-secret
        creationPolicy: Owner
      data:
        - secretKey: redis-password
          remoteRef:
            key: redis/secret
            property: password
This ExternalSecret resource pulls the Redis password from Vault and creates a Kubernetes secret named redis-secret in the myapp namespace.
- Create ArgoCD Application for ExternalSecret:
In the manifest directory, create a YAML file named external-secret-app.yaml with the following content:
    apiVersion: argoproj.io/v1alpha1
    kind: Application
    metadata:
      name: external-secret-app
      namespace: argocd
    spec:
      destination:
        namespace: external-secrets
        server: 'https://kubernetes.default.svc'
      source:
        repoURL: 'https://github.com/Gatete-Bruno/K8s-secrets.git'
        path: '.'
      project: default
This manifest creates an ArgoCD application to manage the deployment of the ExternalSecret resource.
- Apply the ArgoCD Application:
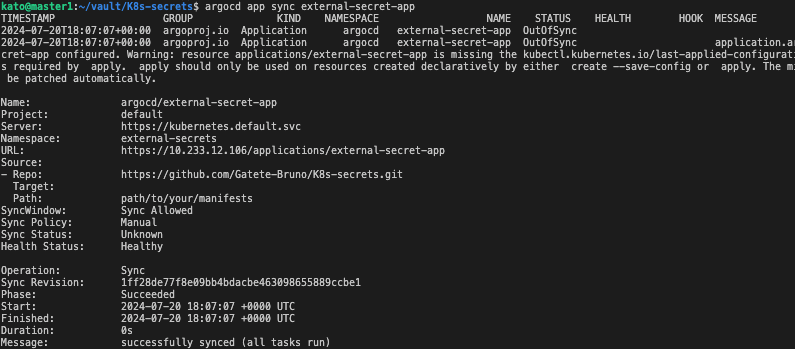
Apply the external-secret-app.yaml using ArgoCD:
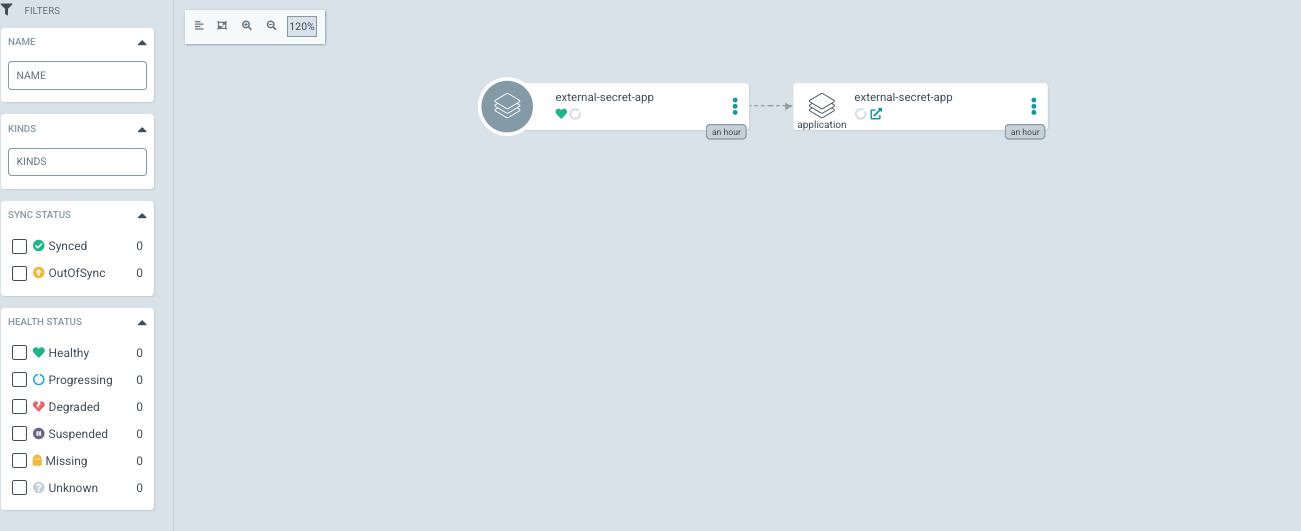
argocd app sync external-secret-app

From the UI :

Step4: Deploy the End Application
With the Redis secret now available in the myapp namespace, you can proceed to deploy the end application that will consume this secret.
- Create Application Deployment YAML
In your manifest directory, create a file named myapp-deployment.yaml with the following content:
    apiVersion: apps/v1
    kind: Deployment
    metadata:
      name: myapp
      namespace: myapp
    spec:
      replicas: 1
      selector:
        matchLabels:
          app: myapp
      template:
        metadata:
          labels:
            app: myapp
        spec:
          containers:
            - name: myapp-container
              image: myapp-image:latest
              env:
                - name: REDIS_PASSWORD
                  valueFrom:
                    secretKeyRef:
                      name: redis-secret
                      key: redis-password
This deployment uses the redis-secret created by the ExternalSecret to populate the REDIS_PASSWORD environment variable.
- Create ArgoCD Application for MyApp:
In the manifest directory, create a YAML file named myapp-app.yaml with the following content:
    apiVersion: argoproj.io/v1alpha1
    kind: Application
    metadata:
      name: external-secret-app
      namespace: argocd
    spec:
      destination:
        namespace: external-secrets
        server: 'https://kubernetes.default.svc'
      source:
        repoURL: 'https://github.com/Gatete-Bruno/K8s-secrets.git'
        path: '.'
        targetRevision: HEAD
      project: default
      syncPolicy:
        automated:
          prune: true
          selfHeal: true
argocd app create -f myapp-app.yaml

Conclusion
By implementing the steps outlined in this guide, you have effectively set up a robust system for managing secrets in Kubernetes using External Secrets Operator, HashiCorp Vault, and Argo CD. This approach offers several advantages:
Enhanced Security: By leveraging External Secrets Operator and HashiCorp Vault, you avoid hardcoding sensitive information directly into your Kubernetes manifests. This practice mitigates the risk of accidental exposure of secrets in version control systems or logs.
Centralized Control: HashiCorp Vault provides a central repository for managing and accessing secrets, enabling better control and auditing capabilities. This centralized management simplifies secret lifecycle management and ensures compliance with security policies.
Automated Deployment: Argo CD streamlines the deployment process, allowing for automated synchronization of your Kubernetes resources with the Git repository. This integration enhances consistency and reduces manual intervention, ensuring that your deployments are always up-to-date and aligned with the desired state defined in your Git repository.
Improved Auditability: The use of External Secrets Operator and HashiCorp Vault, combined with Argo CD’s visibility into deployment status, enhances your ability to audit and track changes to secrets and configurations. This transparency is crucial for maintaining security and compliance.
By following this example, you can effectively manage secrets in your Kubernetes environment while maintaining a high level of security and operational efficiency. Happy Kubernetes secret management!
Cheers 🍻
Subscribe to my newsletter
Read articles from Bruno Gatete directly inside your inbox. Subscribe to the newsletter, and don't miss out.
Written by

Bruno Gatete
Bruno Gatete
DevOps and Cloud Engineer Focused on optimizing the software development lifecycle through seamless integration of development and operations, specializing in designing, implementing, and managing scalable cloud infrastructure with a strong emphasis on automation and collaboration. Key Skills: Terraform: Skilled in Infrastructure as Code (IaC) for automating infrastructure deployment and management. Ansible: Proficient in automation tasks, configuration management, and application deployment. AWS: Extensive experience with AWS services like EC2, S3, RDS, and Lambda, designing scalable and cost-effective solutions. Kubernetes: Expert in container orchestration, deploying, scaling, and managing containerized applications. Docker: Proficient in containerization for consistent development, testing, and deployment. Google Cloud Platform: Familiar with GCP services for compute, storage, and machine learning.