Procure to Payment(P2P) Cycle
 Gautam Jain
Procure to Pay process which is also known as P2P cycle is followed by any organization in any ERP system if they would like to purchase any products (it could raw materials, office supplies, infrastructure etc.). Of course, when there is a purchase there should be a payment. This entire process of purchasing a product and making payment for that product to supplier is called procure to pay process.
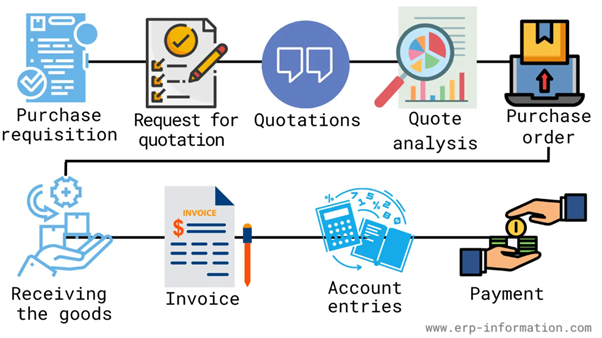
Essential Steps in the P2P Cycle in Oracle Apps
Creating a requisition
Request for quotation
Quotations
Quote analysis
Creating a purchase order
Receiving the goods or services
Creating an invoice
Creating account entries
Making the payment to the supplier
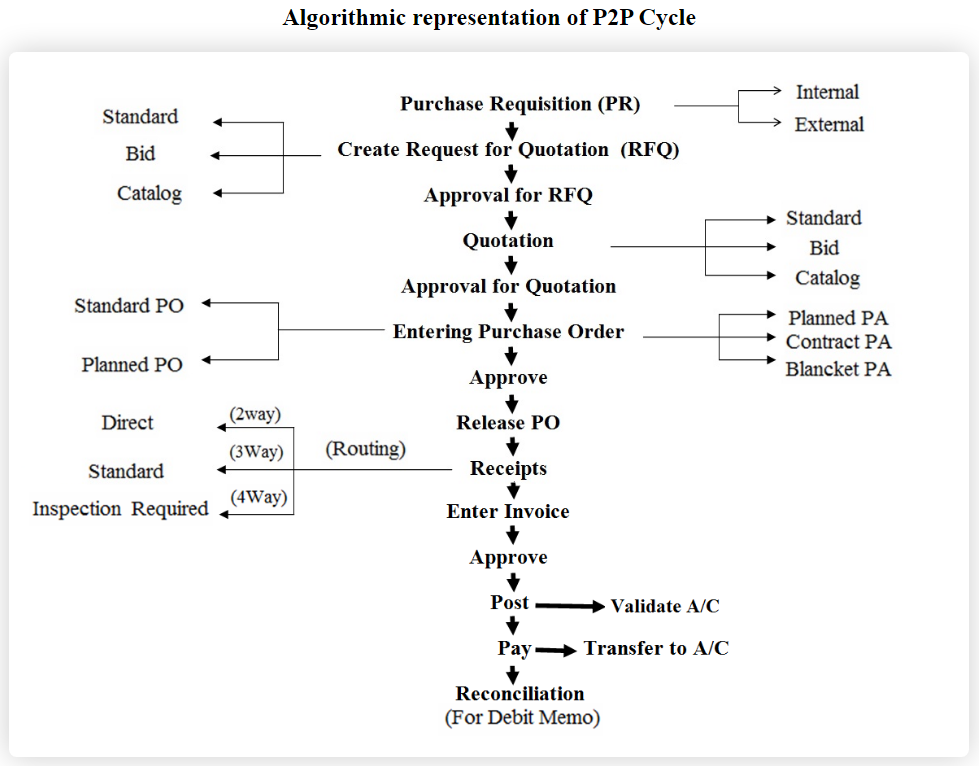
Step 1. Choosing an Item
Let us choose an item to be procured in our example.
Go to Purchasing Responsibility and follow the below navigation to check for the suitable item.
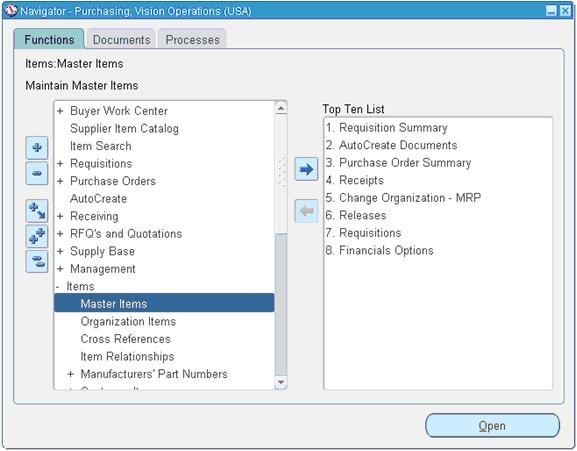
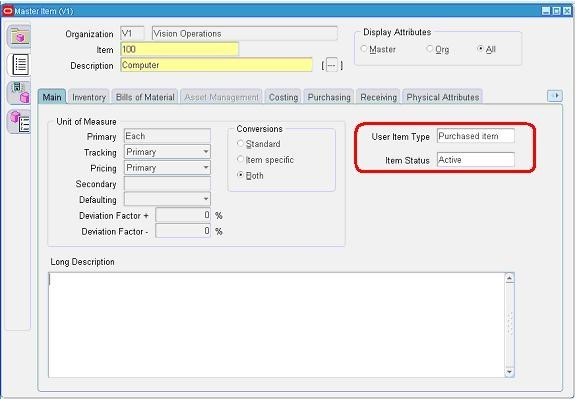
The item picked for our example should be purchasable item as above. Click on tools and choose “Categories” to view the below screen.
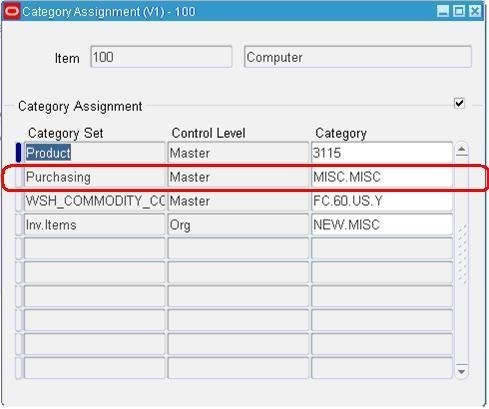
Step 2. Requisition
The second step in the p2p cycle in Oracle apps is creating a requisition. This is a request for goods or services sent to the supplier. You can do that by navigating to the “Requisitions” screen in Oracle Apps and clicking on the “Create Requisition” button.
You will then need to fill out the requisition form. The requisition must include all the necessary information to create a purchase order, including the item code, description, quantity, and price.
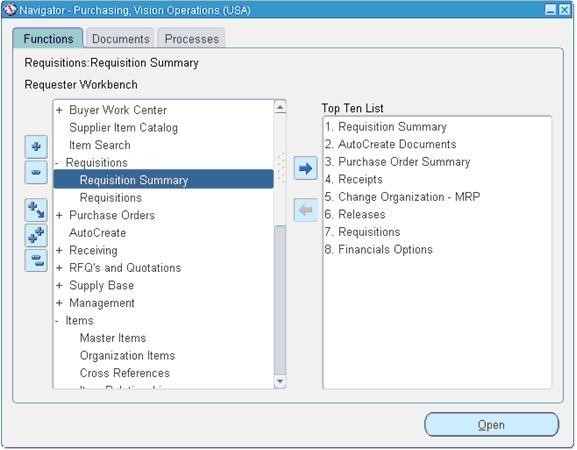
Follow the below Navigation to reach Requisition Form.
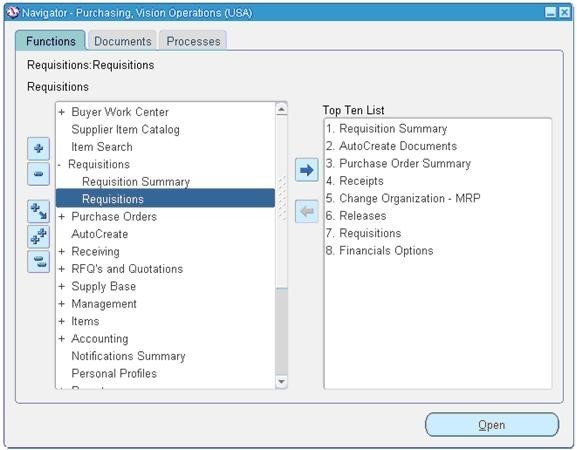
Create a new Requisition for the item viewed in Stage 1.
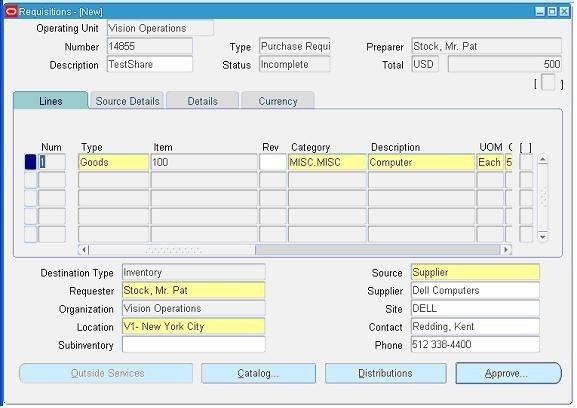
Click on Distributions to View the charge Account.

Save and Submit for Approval
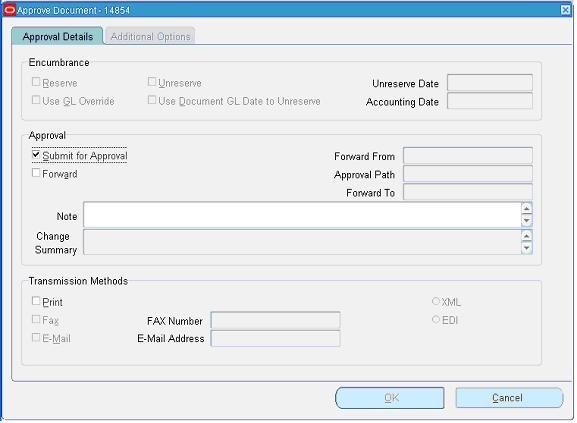
Now note down the Requisition number and open the “Requisition Summary Form” to view the status of it. For our Example, Requisition number is: 14855
Step 3. Status of Requisition
Checking the Status of Requisition
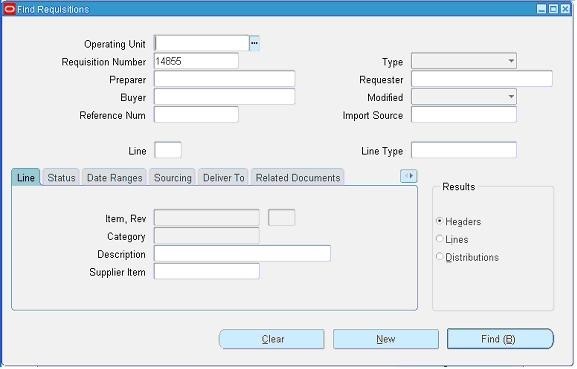
Query for the Requisition Number and click Find.
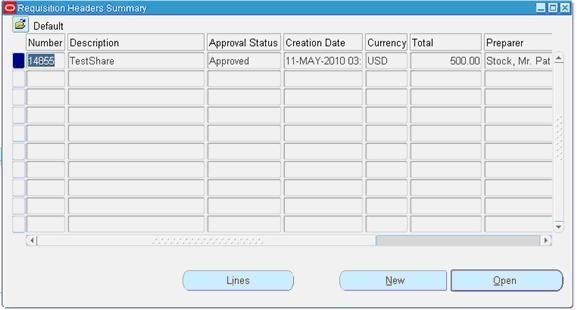
Here for our example purpose, I kept the submitted and approved person has same and hence it shows the status as approved.
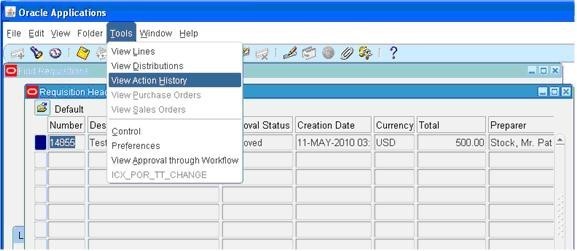
To see the approval status, please follow the below navigation.
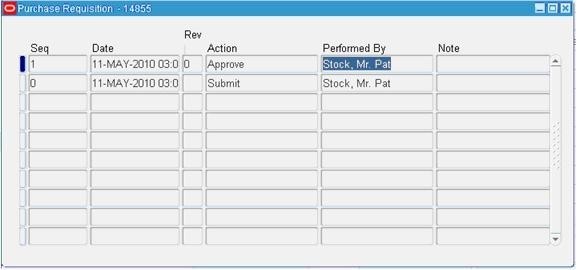
After the requisition has been created, you can generate a request for a quotation (RFQ). It is a document sent to the supplier that outlines the goods or services needed and the buyer’s price. The RFQ will also include any other terms and conditions relevant to the purchase.
Once the RFQ has been received, the supplier will send back a quotation. This document will include the price of the goods or services and any other terms relevant to the purchase.
Once the quotation has been received, it will need to be reviewed and approved. That is known as quote analysis. Quote analysis examines the supplier’s quotation and ensures that it meets all of the buyer’s requirements.
Step 4. Create PO
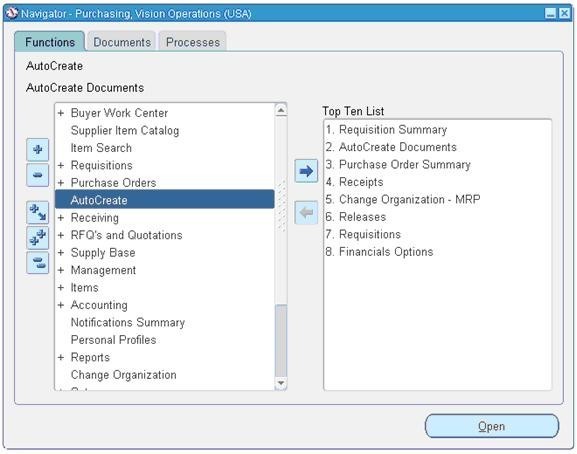
For creating a Purchase order, let us use the “Autocreate Documents” Form. Follow the below Navigation
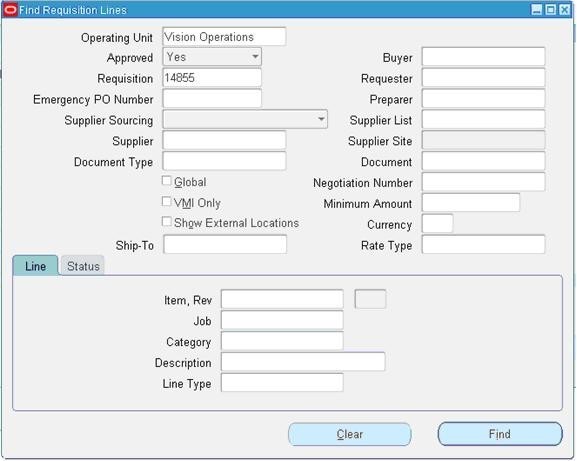
Query for the Requisition
Click on Automatic as shown in the above figure to create a Purchase Order
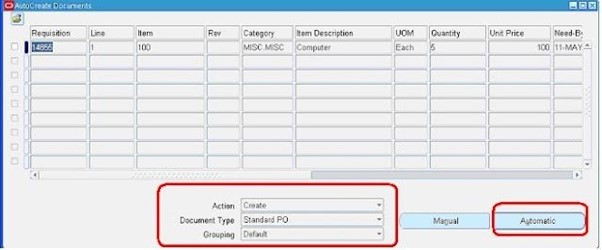
Click on “Create” button to create a Purchase order
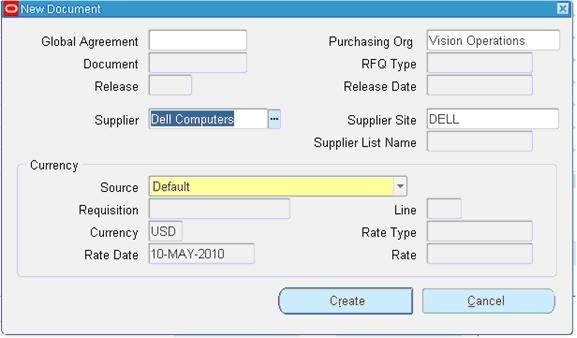
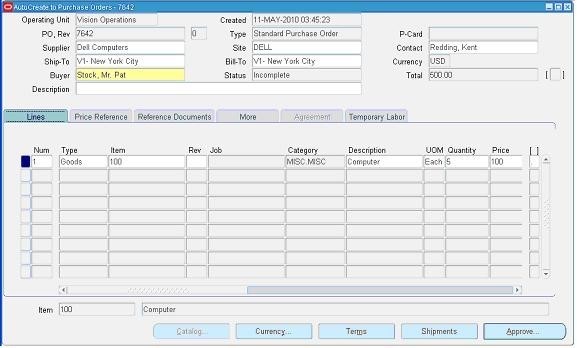
View the shipment screen to change the “Match Approval Level” to “2-Way”.
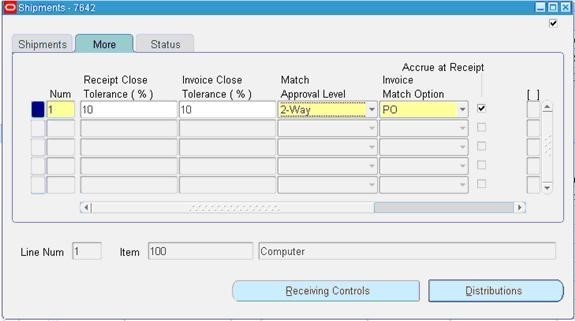
Click the “Receiving Controls” to make sure that the “Routing” is made as “Direct Routing”
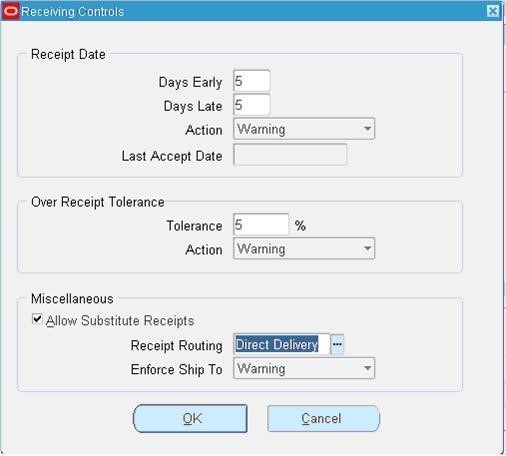
Click Save and submit for Approval.
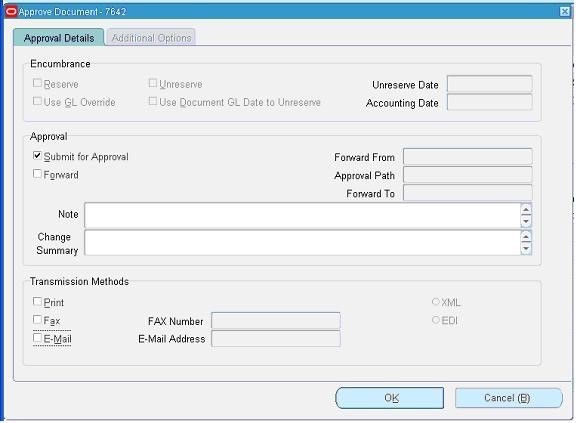
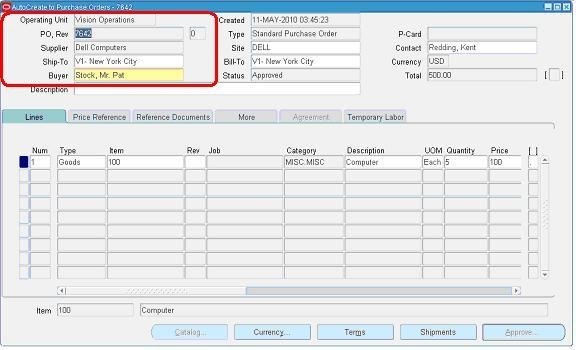
Note down the PO Number.
After the quotation has been approved, you can generate a purchase order (PO). The purchase order is a legal document that outlines the terms of the sale.
It will include the price, quantity, and delivery date of the goods or services. The purchase order will also include any other relevant terms and conditions.
Step 5
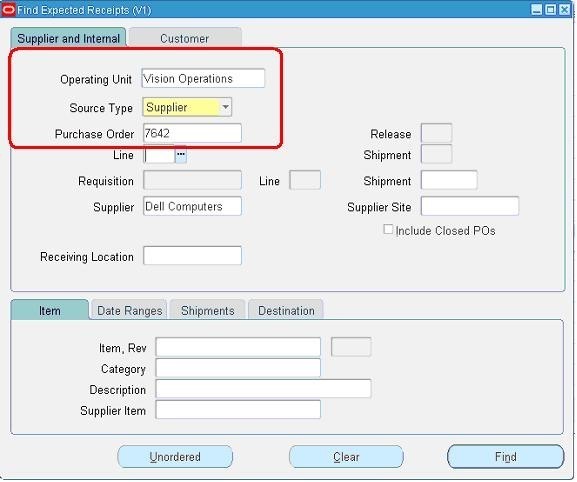
Query with the Purchase order created in the above stage.
Check the check box near to the lines that are received and click save.
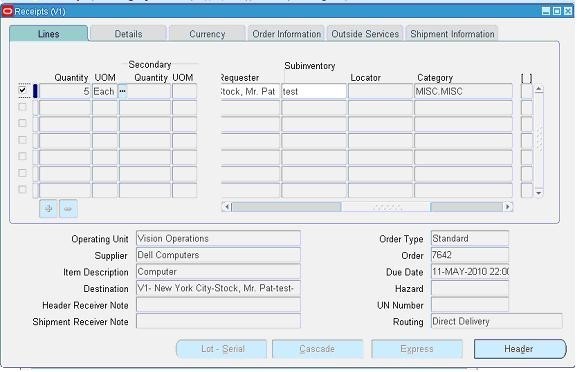
Click the “Header Button” to view the Receipt Number.
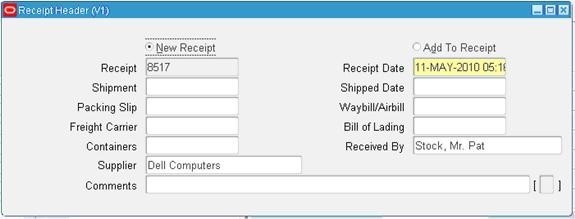
Step 6. Check On-hand Quantity
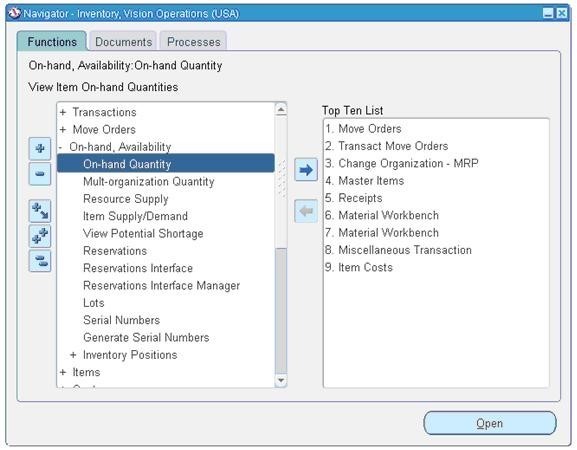
Go to any Inventory Responsibility and follow the below Navigation
Query for our Receipt and make sure the Organization is the same as we received.
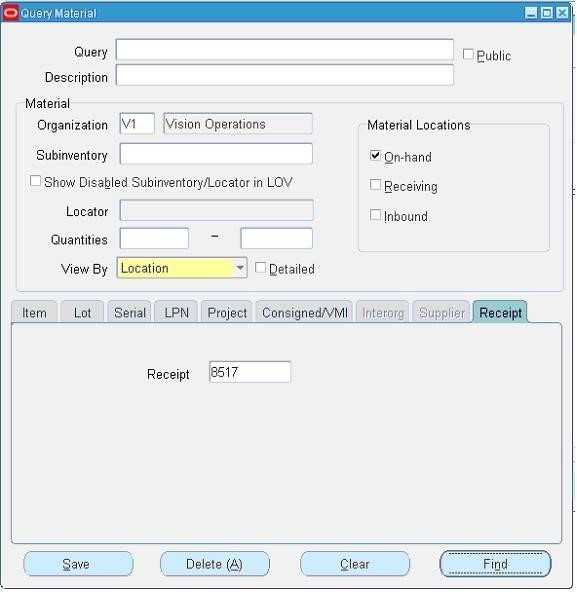
Below screen will show that our inventory has been increased by 5 quantities.
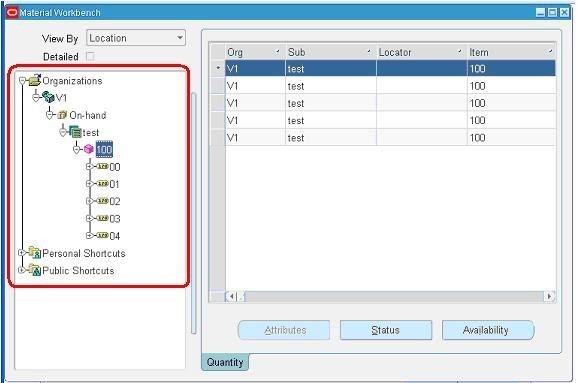
Step 7.
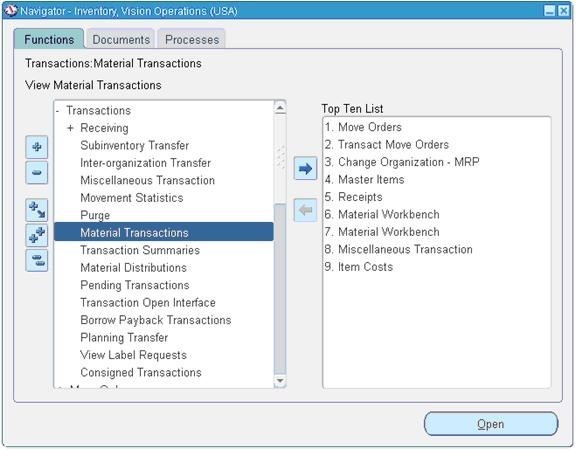
Follow the below Navigation to reach “Material Transactions” Form
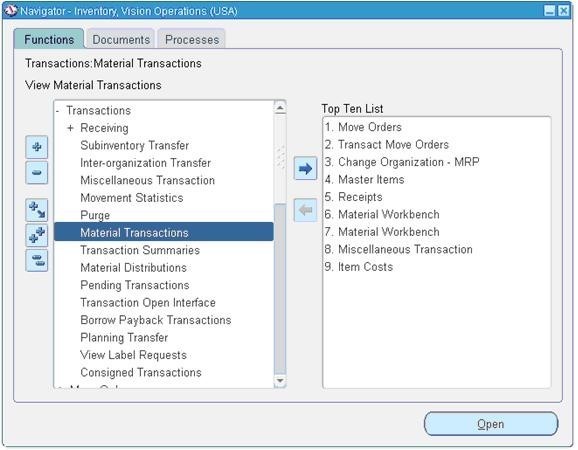
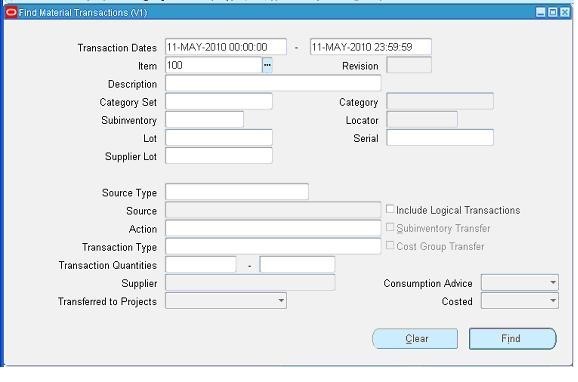
Query for the item and date as below
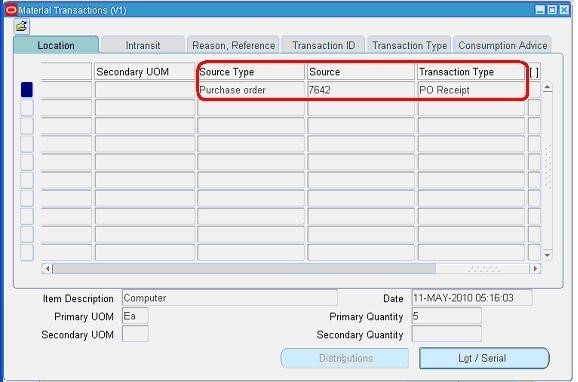
Below screen shows the source and transaction Type
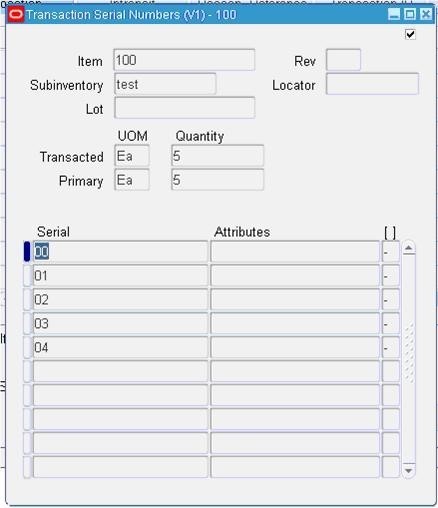
Below screen shows you the Serial Numbers of the items received.
Step 8: Creation of Invoice
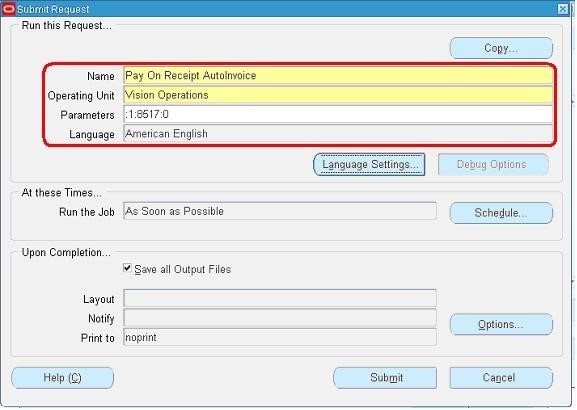
Navigate to any Purchasing Responsibility and view à Requests
Submit the below requests by providing the Receipt number as Parameter to create an invoice.
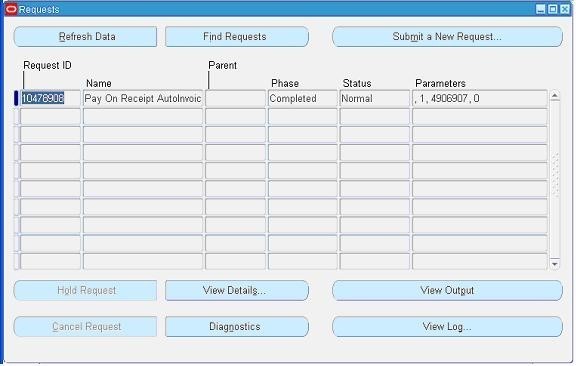
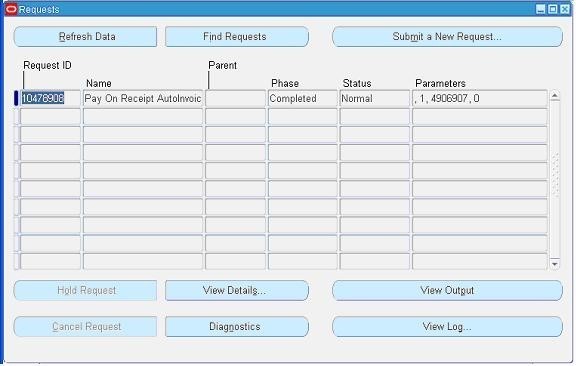
Check the status of the program.
Step 9: Checking the Invoice
Change to any Payables Responsibility and open the invoices Form.
Query for the Purchase order as below,
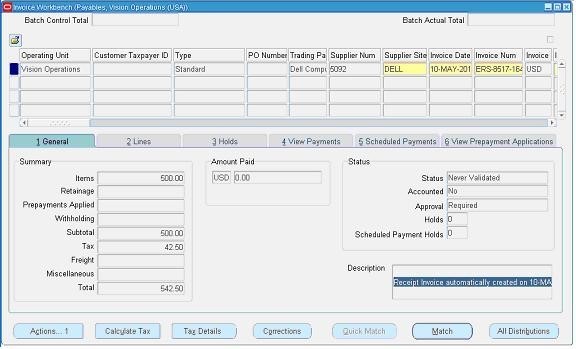
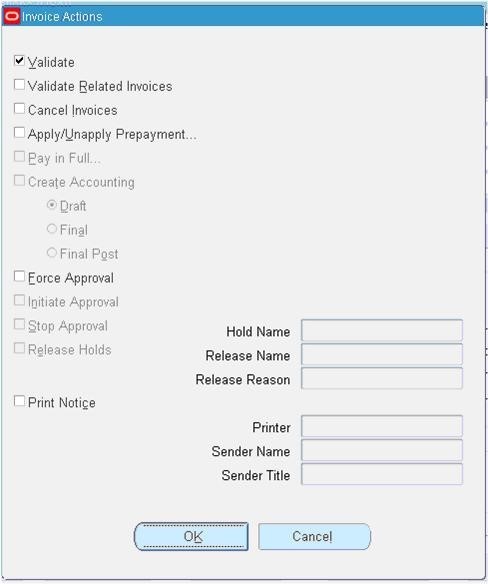
Click “Actions” Button then tick the “Validate Check Box” and press “Ok” to validate the invoice
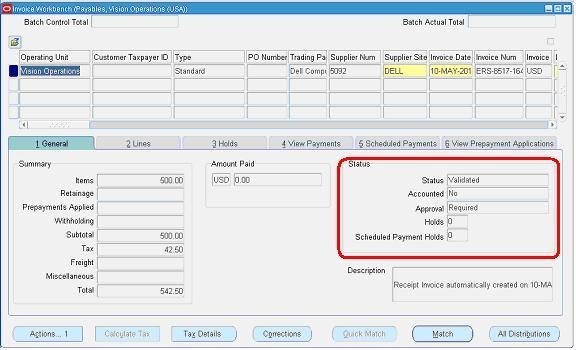
Below screenshot will give you the status of the invoice
Step 10: Creation of Accounting and Payment
Once invoice got approved, we can “Create Accounting” and “Create Payments” via “Action” Button in the “Invoice Form” as we validated the invoice.
Procure to Pay
First let’s see what the heading itself means. Procure to Pay means Procuring Raw Materials required to manufacture the final or finished Goods to Paying the Supplier from whom the material was purchased. But this is not just two steps. It involves many steps. Let’s see the steps and Oracle Application involved in performing those steps.
Oracle Purchasing: You enter Suppliers of different materials and products you want to purchase to manufacture a finished good that your organization plans to sell.
Oracle Purchasing: You prepare a Request for Quotation (RFQ) and send it to different suppliers to get the best and/or economical price for the product.
Oracle Purchasing: Suppliers sends their quotations, and you upload those quotations in Oracle Purchasing to get the best three quotes and further to get the one best quote.
Oracle Purchasing: You prepare a Purchase Order (PO) against the best RFQ to buy the goods from the supplier who quoted the suitable price and sends the PO to that supplier
Oracle Purchasing: The supplier receives the confirmation of purchase from PO and ships the ordered goods. You receive the goods enter aGoods Received Note (GRN) in Oracle Purchasing.
Oracle Inventory / Oracle Assets: It’s up to you whether you want to receive the goods at your head office or you Inventory directly. In either case you move the received goods to your different Raw Material Inventory from Oracle Purchasing to Oracle Inventory and the Item Count increases. If the item is Asset Type then it will move to Oracle Assets at the time of Invoice creation in Oracle Payables.
Oracle General Ledger: Once you move the goods to Oracle Inventory, it sends the Material Accounting to Oracle General Ledger.
Oracle Payables: After this the supplier sends you the invoice for the purchased goods and you Enter or Match the invoice against the PO from Oracle Purchasing in Oracle Payables. As said before, if the item is Asset in nature, then it will move to Oracle Asset.
Oracle General Ledger: When you enter the invoice, it means that you have created a Liability against that supplier and also you have recorded the expense incurred or asset purchased. Oracle Payables sends the invoice accounting to Oracle General Ledger.
Oracle Payables: You pay the invoice and settle the Liability.
Oracle General Ledger: The liability is settled, and your cash movement account is updated.
Oracle Cash Management: As you pay the invoice Oracle Payables sends the payment information to Oracle Cash Management for Bank Reconciliation. Once reconciled, Oracle Cash Management sends the updated Bank/Cash accounting entry to Oracle General Ledger.
Oracle General Ledger: Your cash at bank is updated with actual balance.
Oracle Process Manufacturing (OPM) / Oracle Discrete Manufacturing (ODM): You start the manufacturing of your final product. Both OPM or ODM requests the different raw materials from your inventory organizations and manufactures a finished good.
Oracle Inventory: As the raw materials are issued to OPM and ODM the inventory sends the issuing material accounting to General Ledger and decreases the Item Count from the Raw Material Store. As the finished good is prepared, Oracle Inventory receives the finished good in Finished Good Store and increase the Item Count.
Tables Affected in the P2P Cycle
Purchase Requisition
PO_REQUISITION HEADERS_ALL
PO_REQUISITION_LINES_ALL
PO_REQ_DISTRIBUTIONS_ALL
Requisition_header_id is the link between PO_REQUISITION_HEADERS_ALL and PO_REQUISITION_LINES_ALL tables
Requisition_line_id is the link between PO_REQUISITION_LINES_ALL and PO_REQ_DISTRIBUTIONS_ALL tables
Purchase Order
PO_RELEASES_ALL
PO_HEADERS_ALL
PO_LINES_ALL
PO_LINE_LOCATIONS_ALL
PO_DISTRIBUTIONS_ALL
PO_header_id is the link between all these tables
Receipt
RCV_SHIPMENT_HEADERS
RCV_SHIPMENT_LINES
RCV_TRANSACTIONS
Shipment_header_id is the link between RCV_SHIPMENT_HEADERS and RCV_SHIPMENT_LINE.
PO_header_id is the link between RCV_SHIPMENT_HEADERS and RCV_TRANSACTIONS
Quality results are stored in QA_RESULTS table
Once the Receipt process is completed, MTL_ONHAND_QUANTITIES table gets updated.
Invoices
AP_INVOICES_ALL
AP_INVOICE_LINES_ALL
AP_INVOICE_DISTRIBUTIONS_ALL
Invoice_id is the link between all these tables
Payments
AP_INVOICE_PAYMENTS_ALL
AP_PAYMENT_SCHEDULES_ALL
Check's information will be stored in AP_CHECKS_ALL table.
Check format information will be stored in AP_CHECK_FORMATS table.
Note
- RFQ & Quotation records also get stored in the same PO_HEADERS_ALL table, but with type_lookup_code as 'RFQ' and 'QUOTATION' respectively.
Subscribe to my newsletter
Read articles from Gautam Jain directly inside your inbox. Subscribe to the newsletter, and don't miss out.
Written by
