Image Menu to HTML Menu
 shishir srivastav
Introduction:
With advancing technology, we are seeing how some cafes and restaurants are offering their customers online menus for ordering instead of traditional physical menu cards.
But for smaller businesses to do this, they would need to either hire someone or learn basic HTML to create a simple webpage. Then, they would have to sit to add each item and its price one by one manually, and later figure out hosting and its cost.
Well, we thought of addressing the first hurdle with the help of AI. Imagine if AI could extract all the items with their prices, format them properly, and give you an HTML file with CSS included. You don't need to imagine anymore because today I will show you exactly how to do that and how YOU can create your first GenAI with us today.
Prerequisites:
Python 3.10+
Required packages: Streamlit, Pillow (PIL), Boto3, base64
An IDE for writing code (If you need it)
Git for cloning the code to your local machine.
Claude 3 Sonnet model access Amazon Bedrock
Access Credentials to Amazon Bedrock
Note: We are using the Amazon bedrock platform for accessing Claude's sonnet model for this tutorial; however, you can choose an AI model of your choice, like Gemini Pro from Google Cloud, and the principle will remain the same.
Note: This tutorial is going to incur some costs, hence please be cautious.
Key Features:
Image upload functionality
AI-powered image analysis and data extraction.
AI-powered HTML generation
Option to regenerate HTML and preview it
Break down the task into Steps:
Step 1: Make sure you have access to an AI model in Amazon Bedrock.
Navigate to the Amazon Bedrock service in your AWS console >> Scroll down on the left panel till you see 'Model Access' >> Click on 'Model Access'.
Here you can see a list of models available in Bedrock and the ones you have access to.

Note that access is not provided by default. if you don't have access, select Modify access at the top of the page and Request access.

Once your access is approved, you are good to go ahead with the next steps.
Step 2: Create Access keys for your user to access the Bedrock via your Python code.
Navigate to IAM users in your AWS Console >> Select the user you want to generate access Keys for.


Select the Local code as shown in the image below.
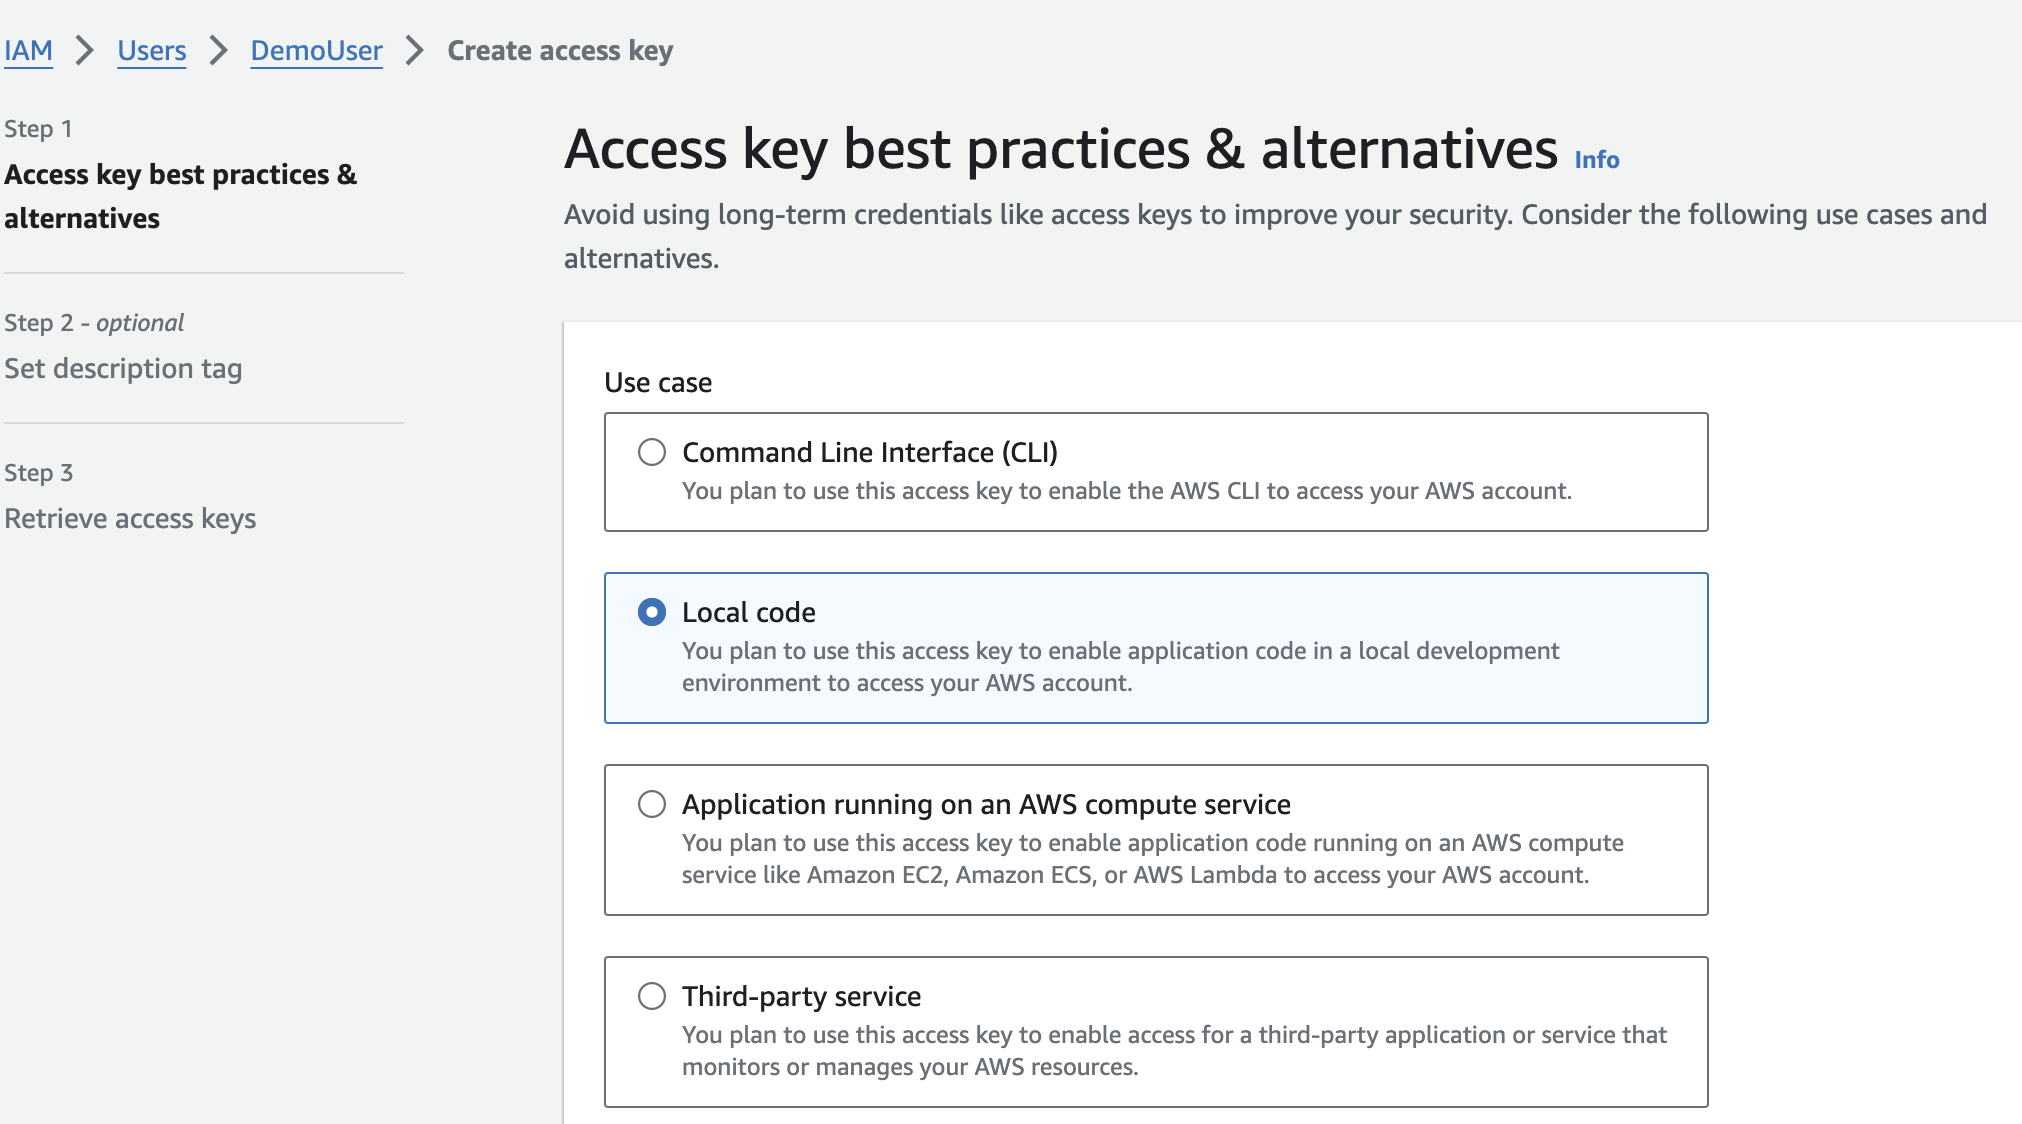
Copy the Access Key and Secret Access Key, store them, you'll need them in the next steps.

Now that we are done with our LLM access, we move on to the next part which is, actually implementing it.
Step 3: Setting up your coding environment.
- Open your terminal, clone the repository and navigate to the Image-To-Menu directory.
git clone https://github.com/Shishir420-GIT/GenAI-Usecases.git
cd Image-To-Menu
- Install the required packages
pip install streamlit pillow boto3 base64
- Set up AWS credentials:
Create a
.streamlit/secrets.tomlfile in the project directory.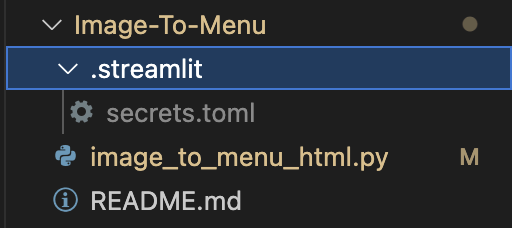
Add your AWS credentials:
  AWS_ACCESS_KEY_ID = "your_access_key_id"
  AWS_SECRET_ACCESS_KEY = "your_secret_access_key"
Make sure you add this file in the .gitignore file.
If you have reached this step, then give yourself a pat on the back, you are now ready to run your code.
Step 4: Running the code.
Make sure you are in the same folder as the main code file and run the below command,
streamlit run image_to_menu_html.py
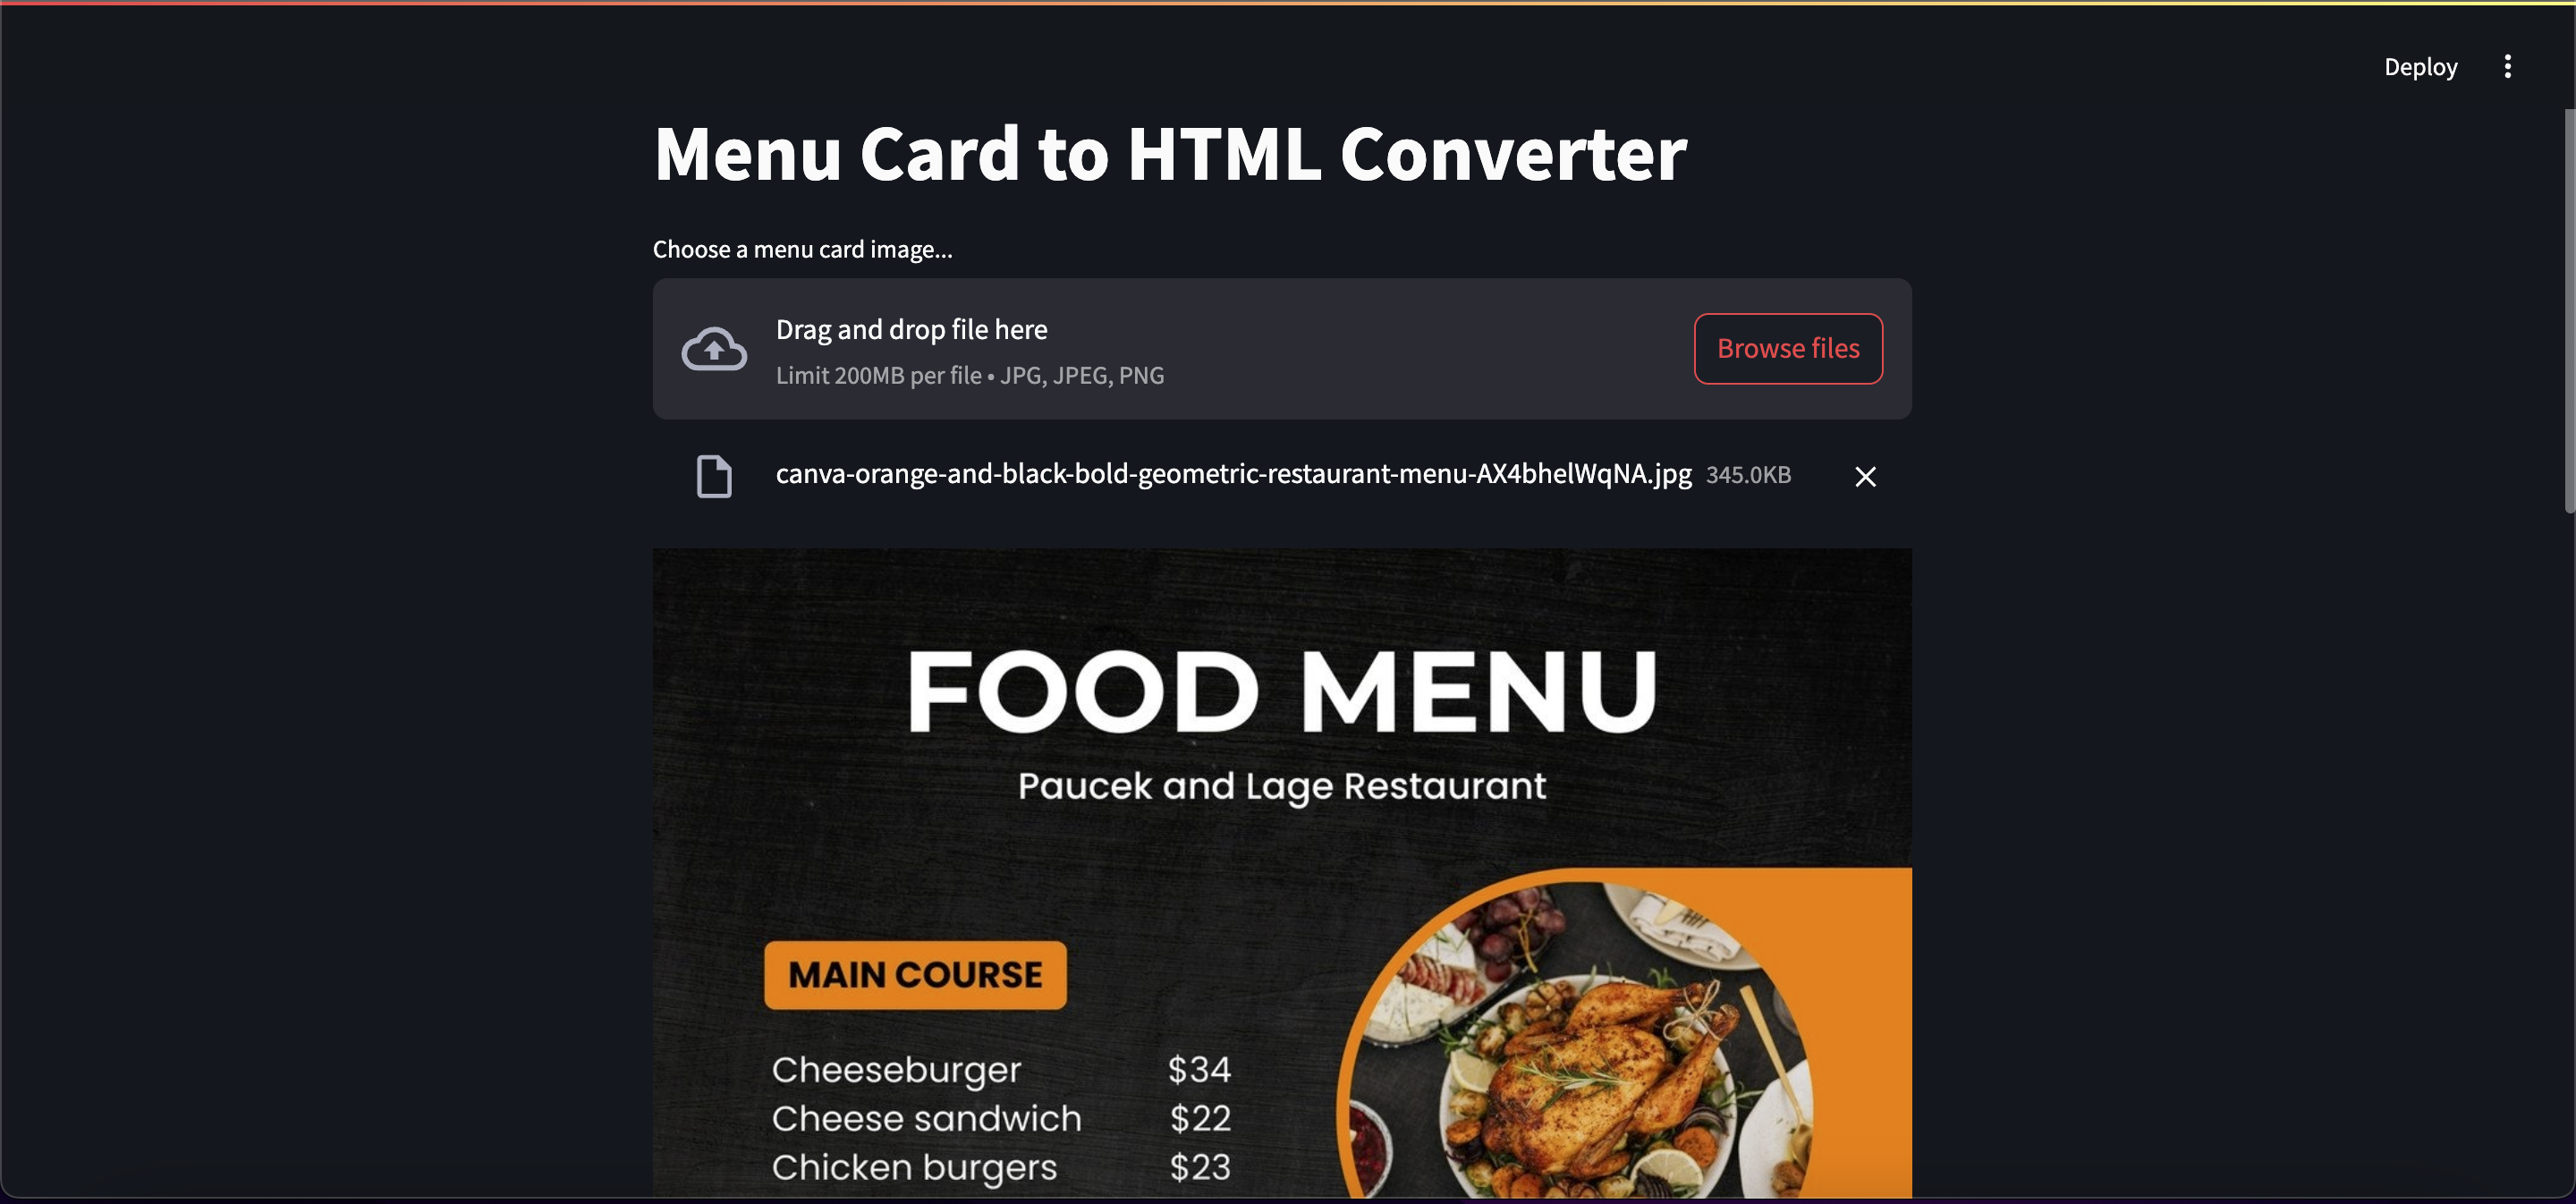
Open the provided URL in your web browser, your UI for the application should be as below:

For creating the UI, we are using a Python library called Streamlit.
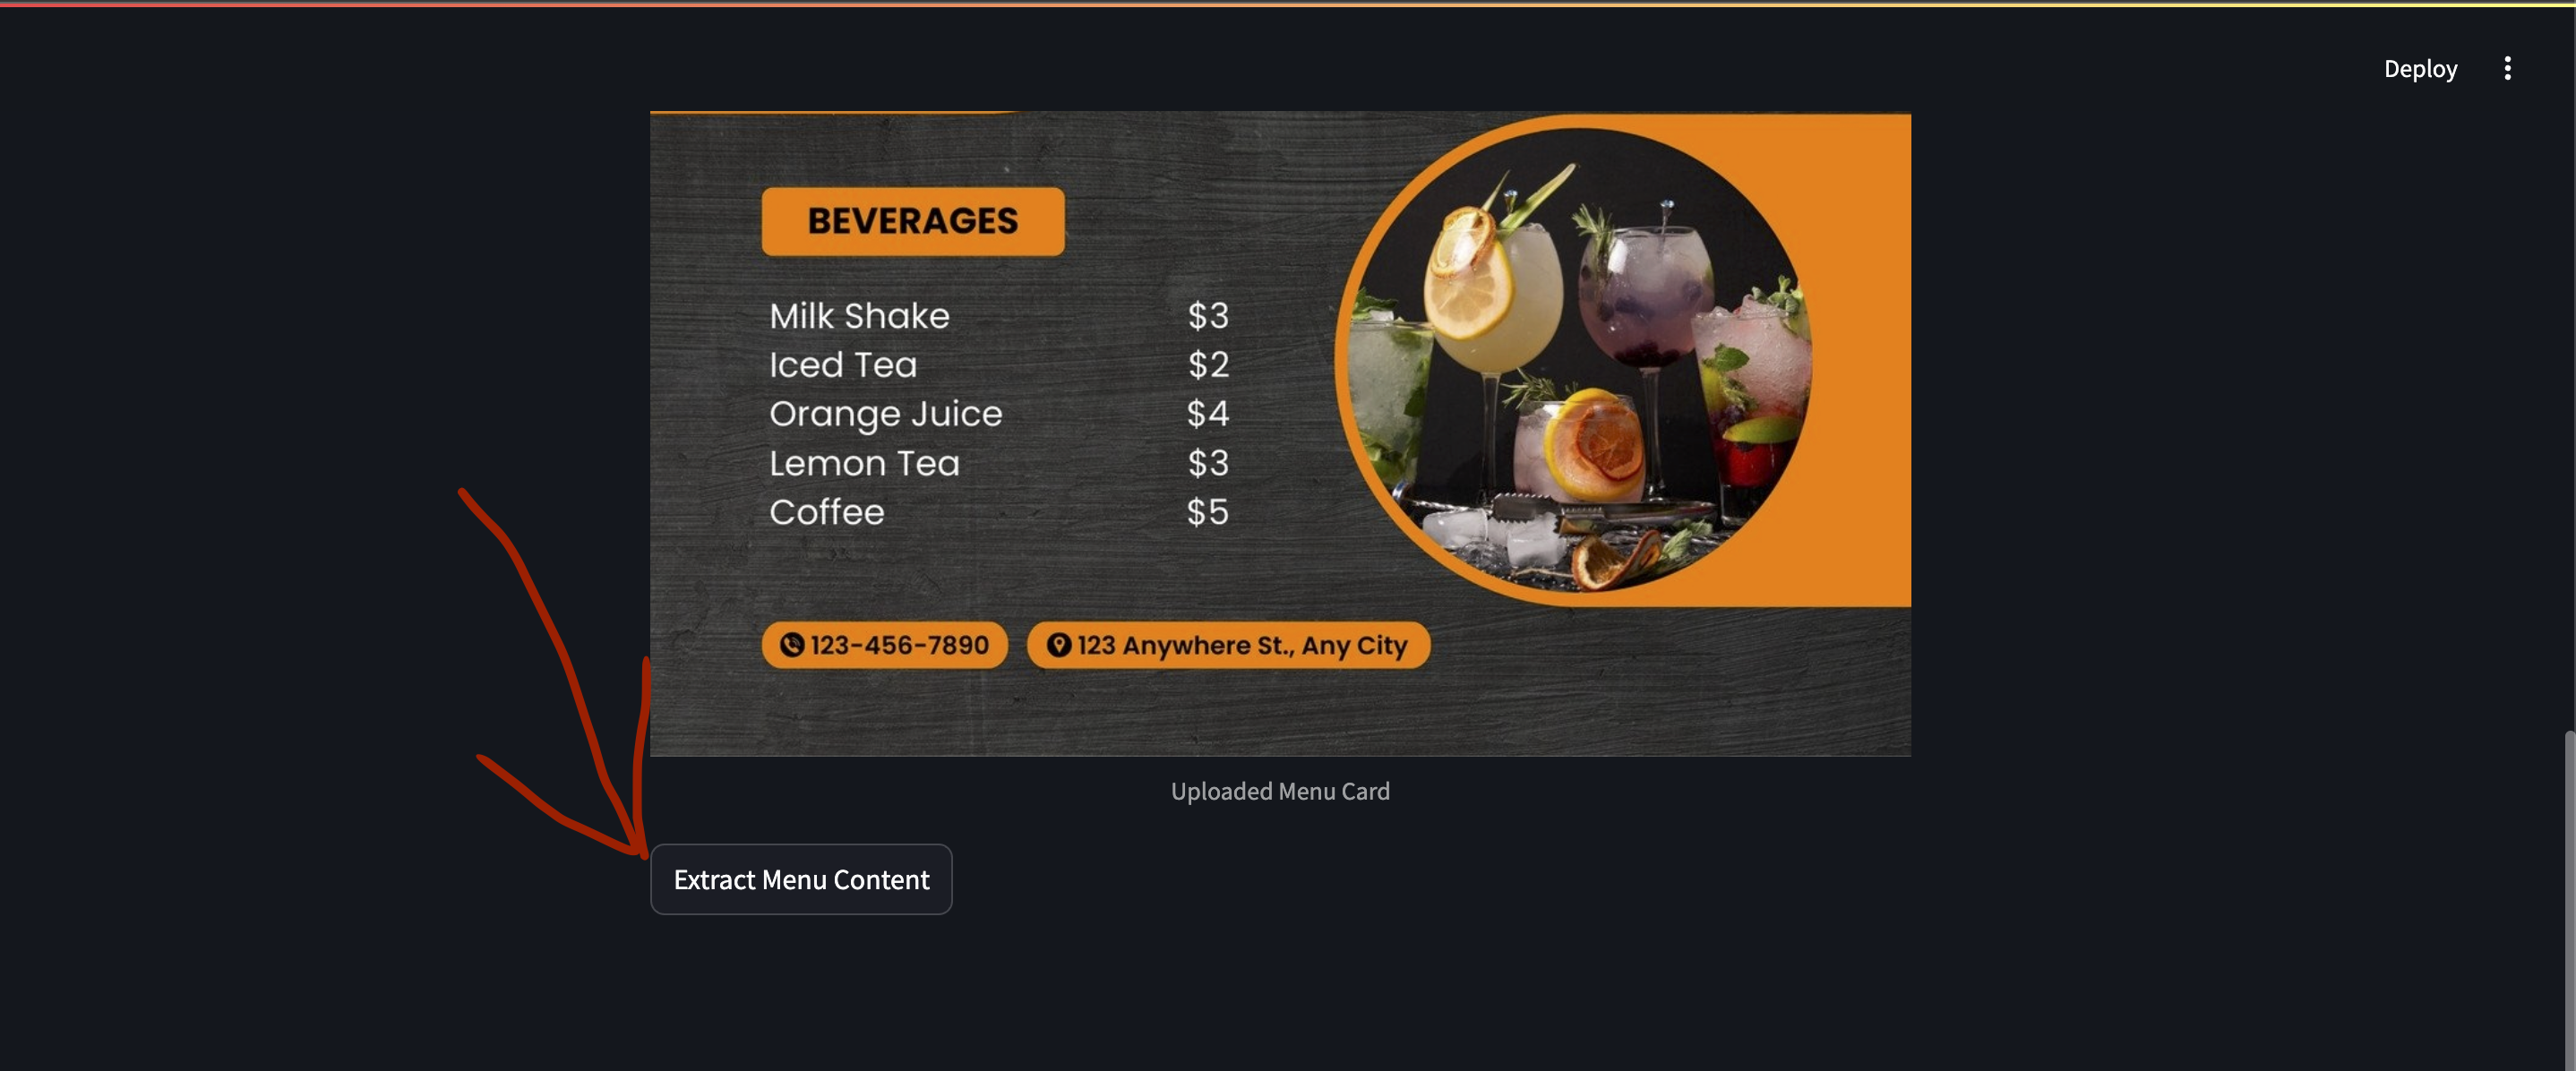
Click on Browse Image and select an Image Menu to be converted to an HTML Menu. Once the Image is selected, you'll see the 'Extract Menu Content' button.
Click on the "Extract Menu Content" to analyse and extract the contents of the image.
Observe the Extracted output, at the bottom, you can now see a 'Generate HTML'. button.
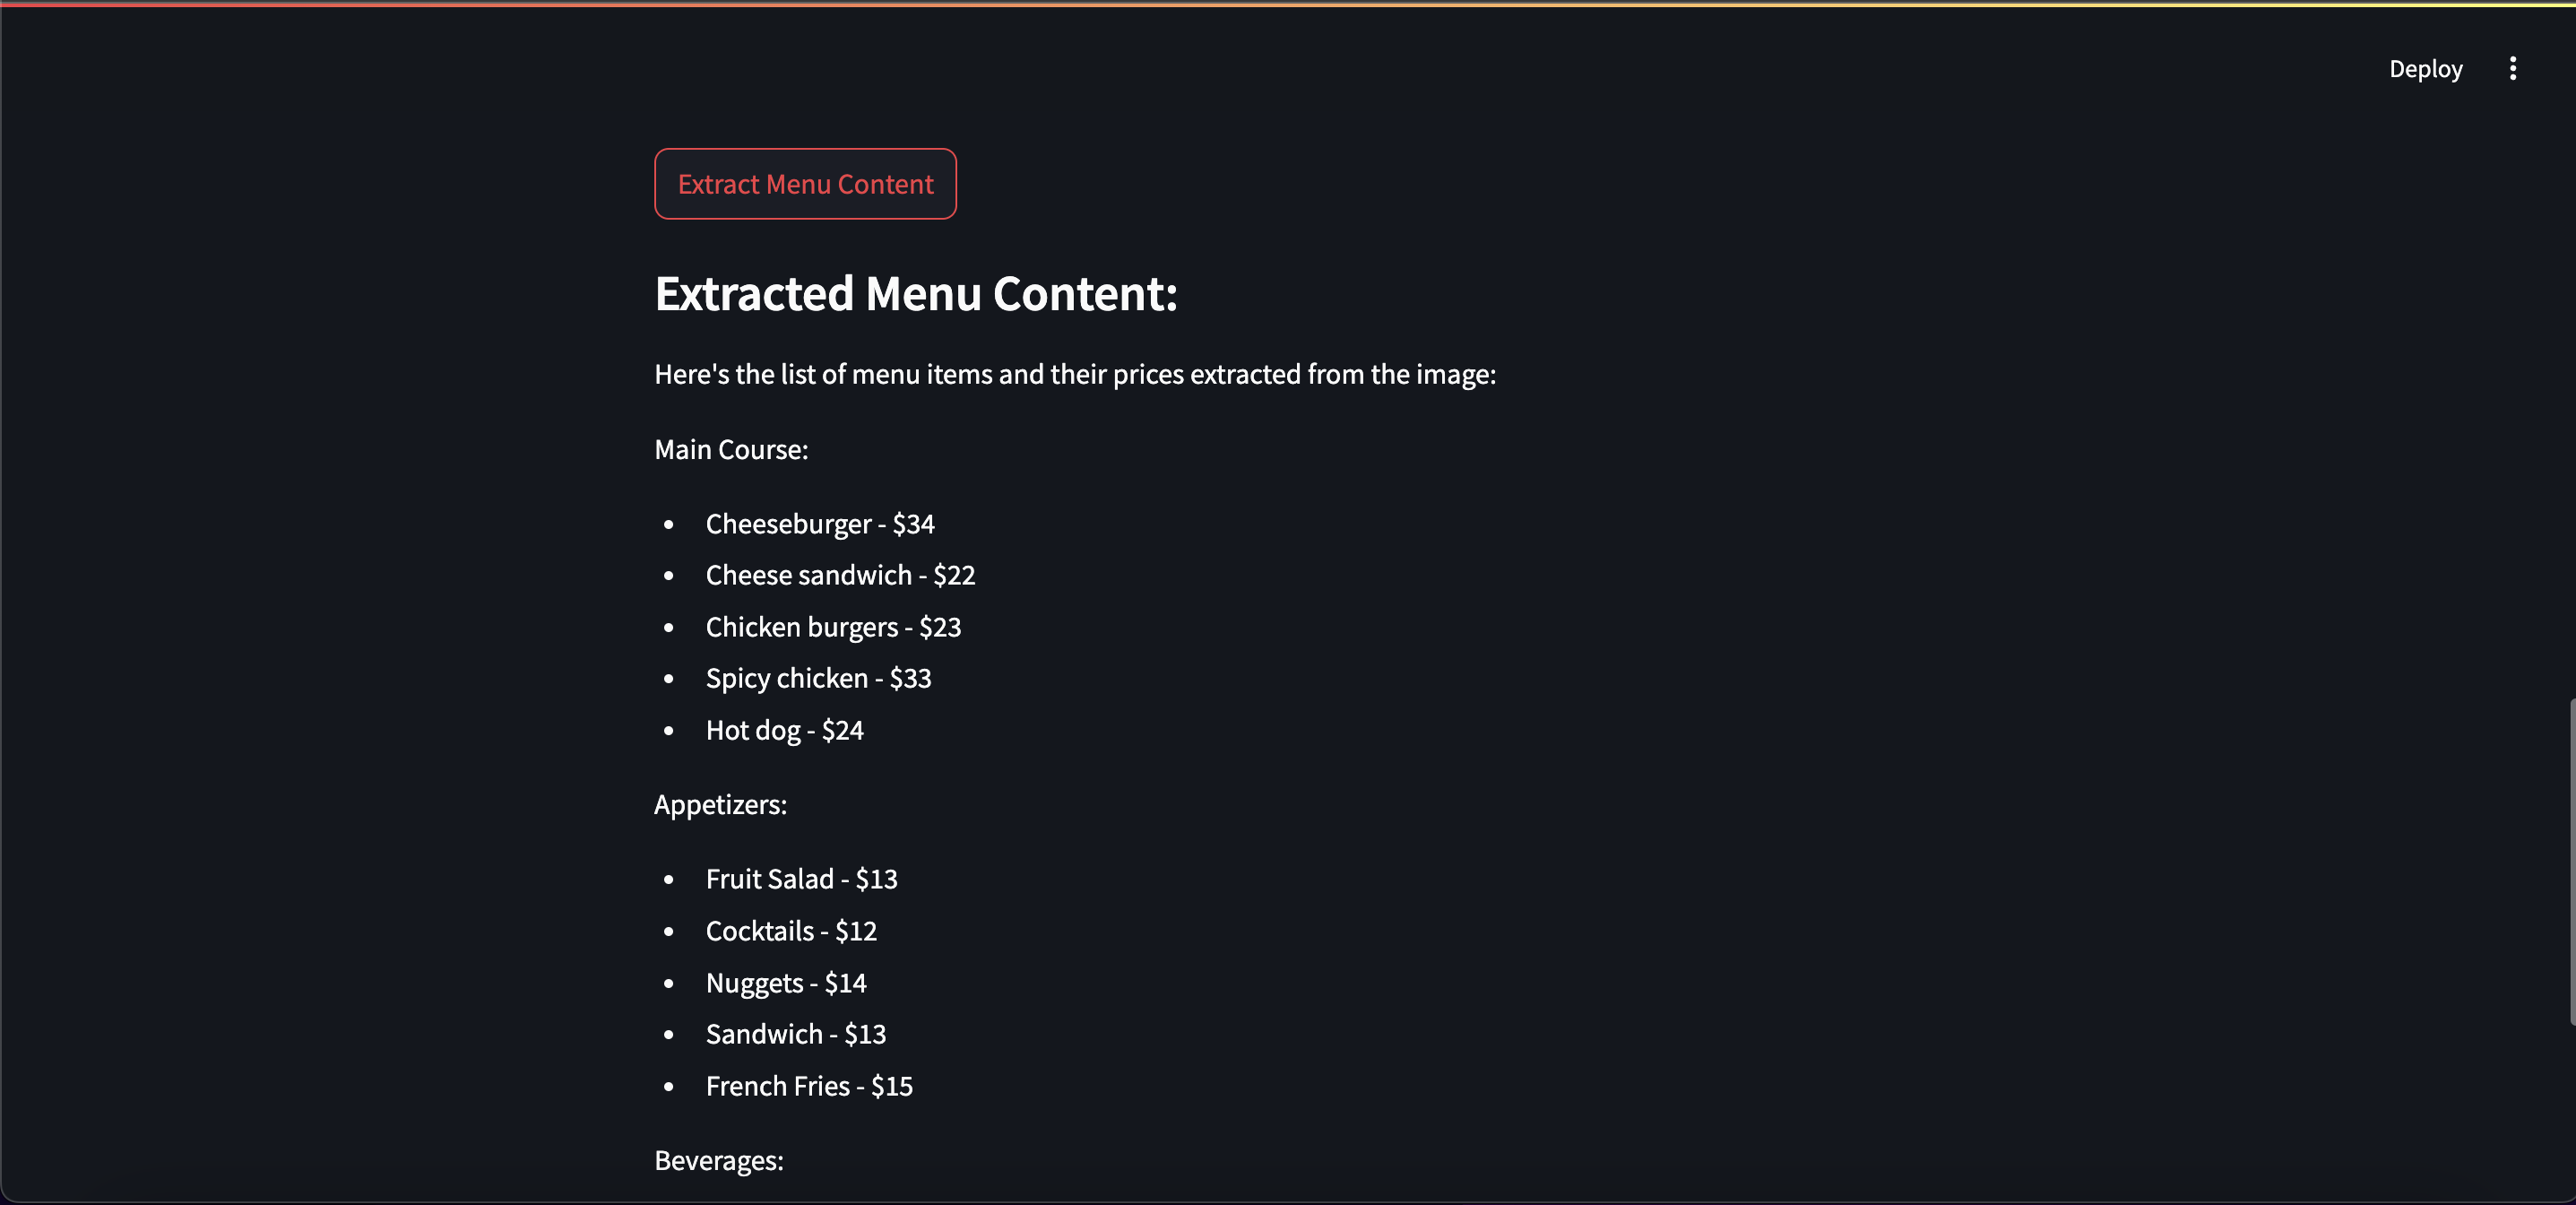
Now, click the generate HTML button
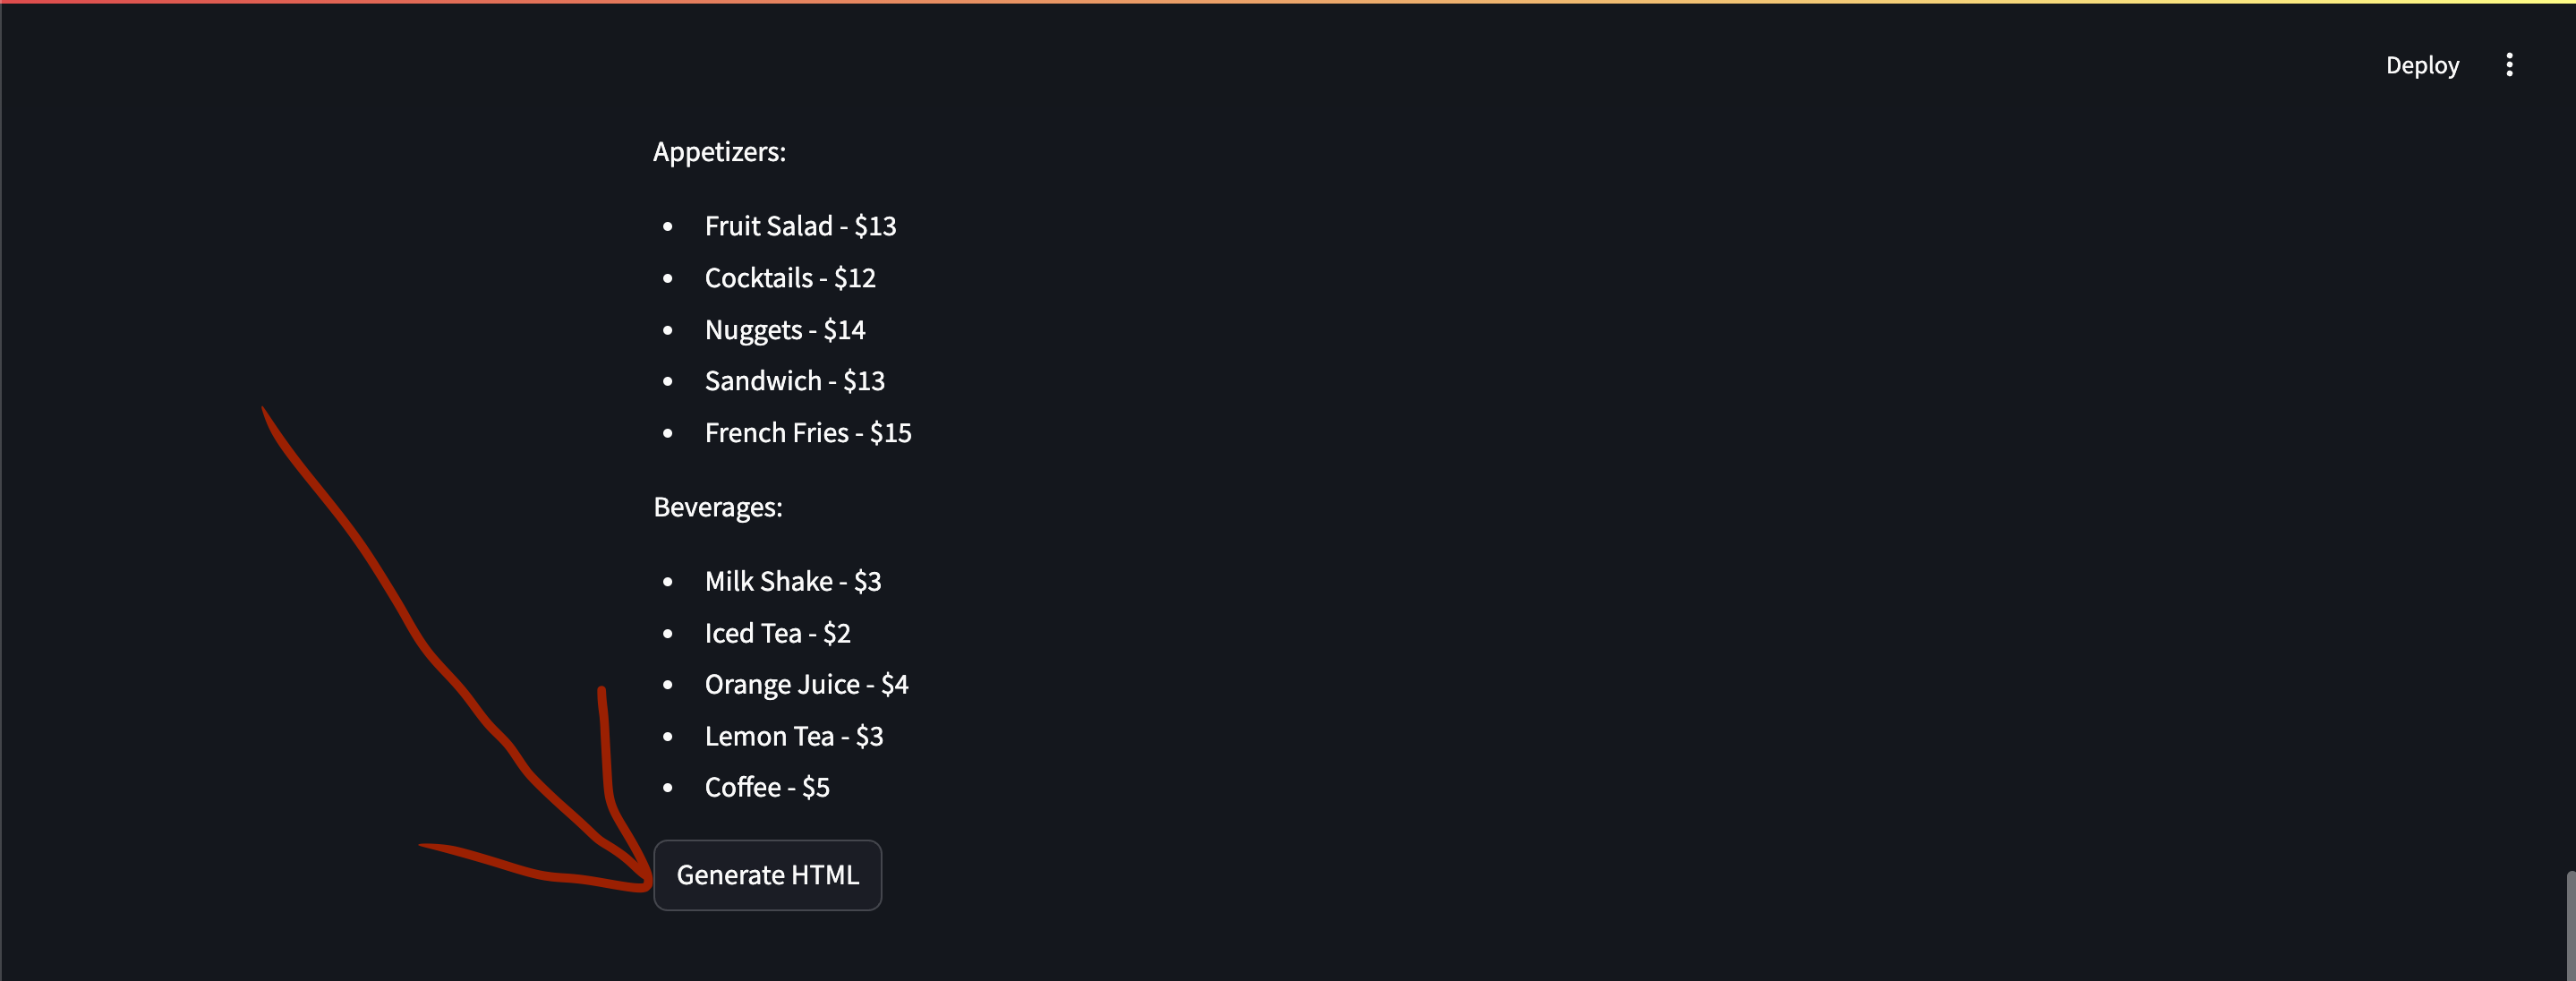
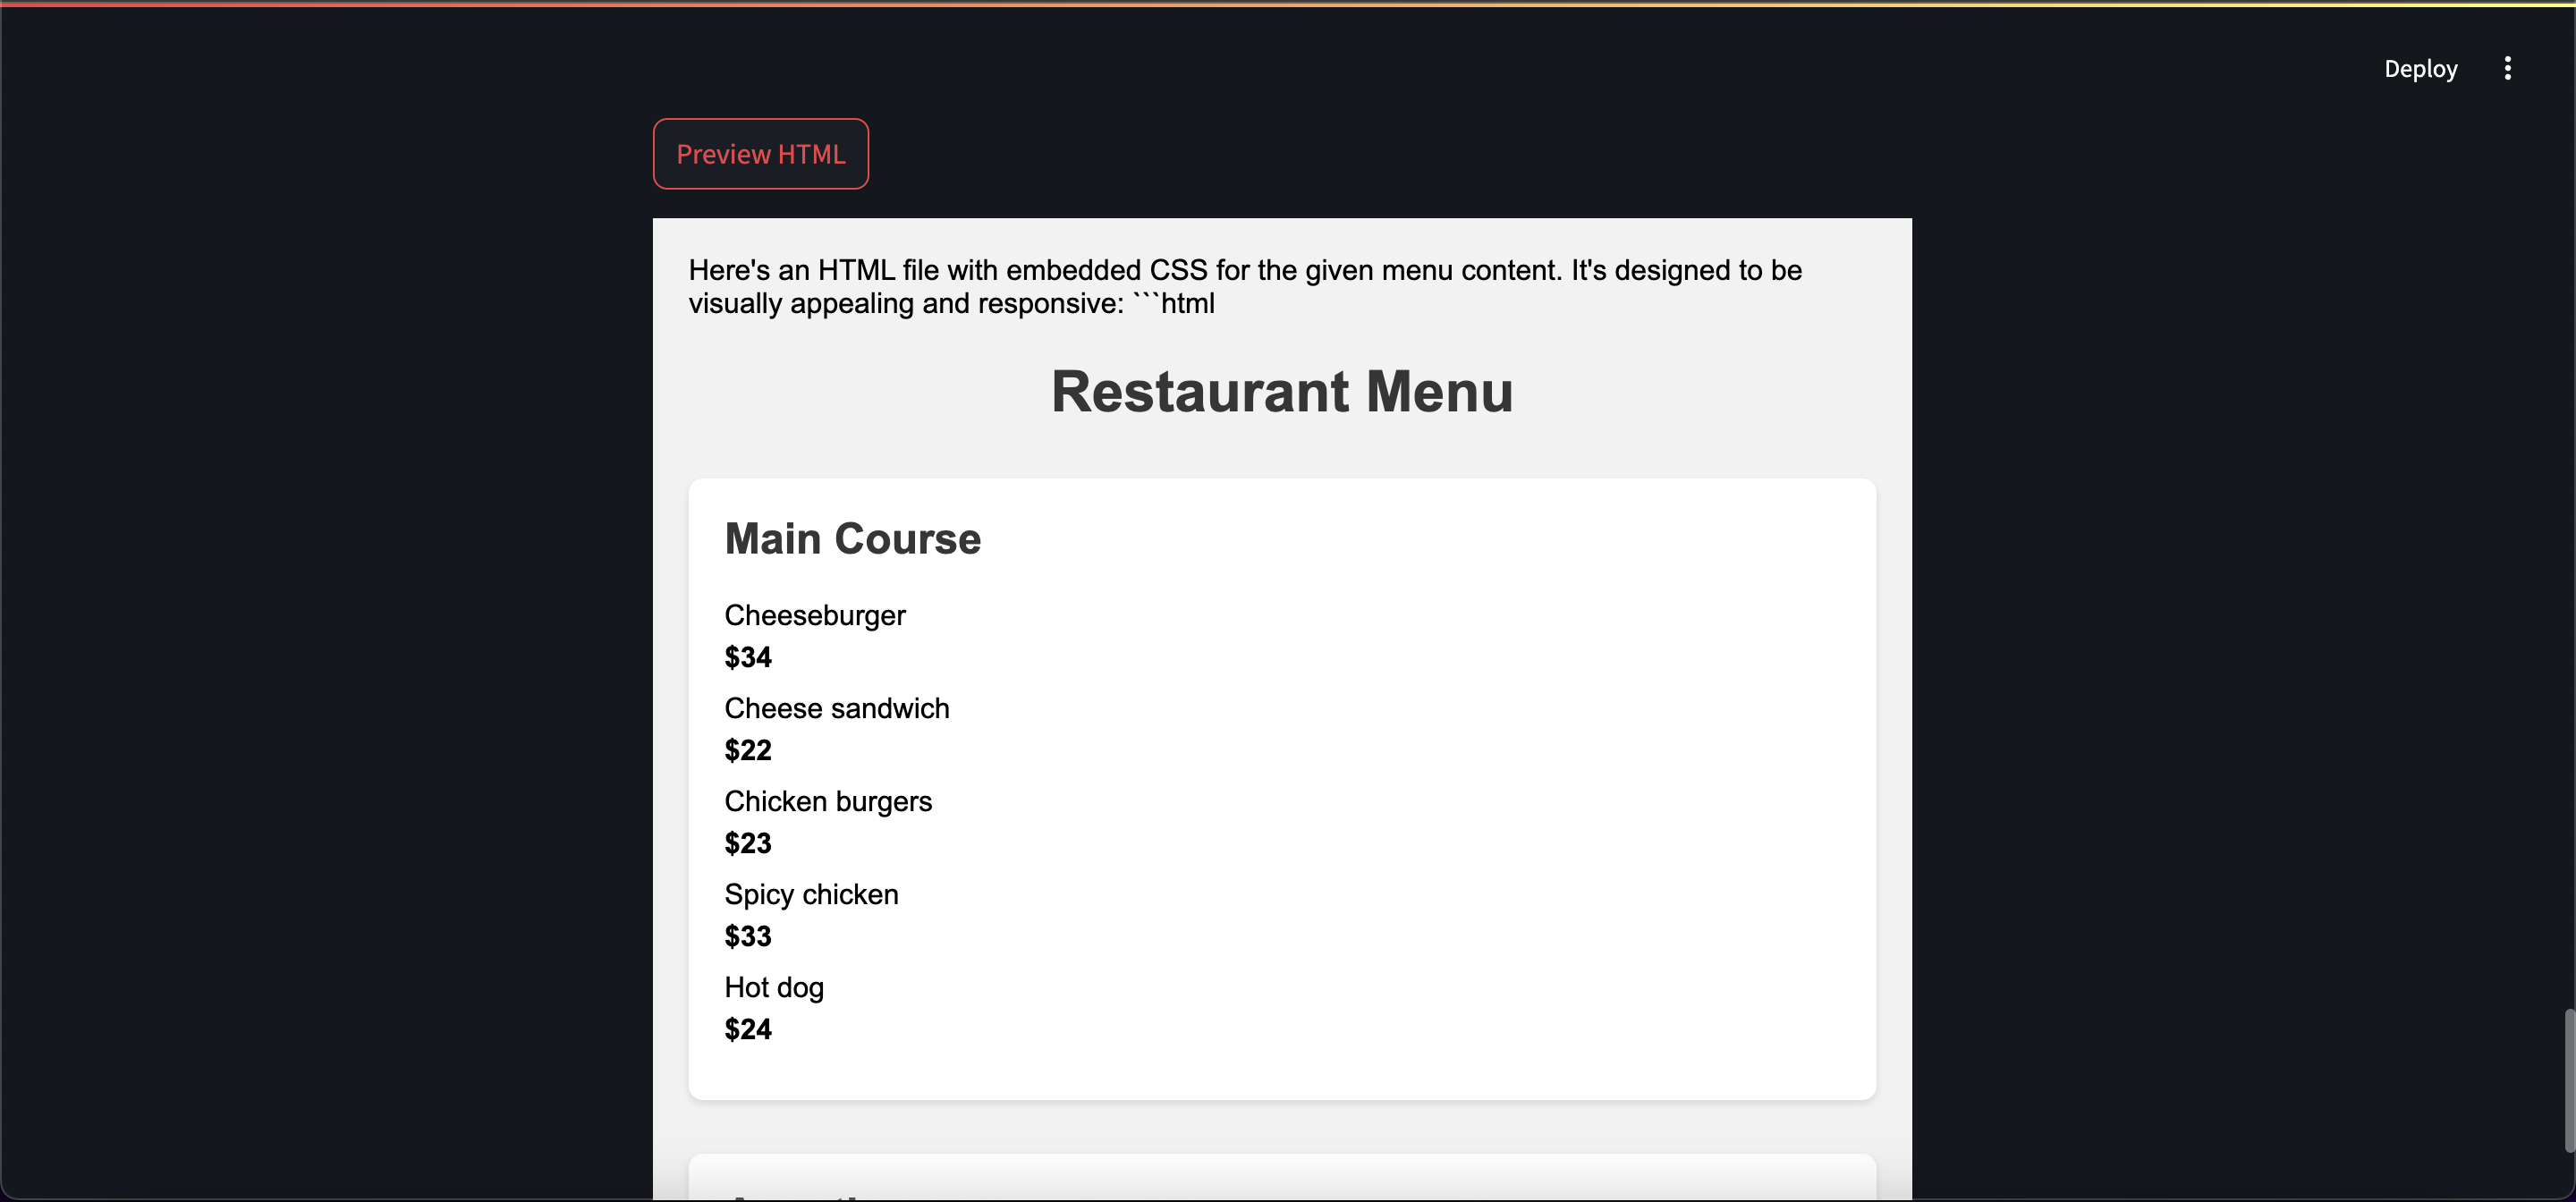
Once the HTML is generated, you'll see the download HTML and Preview your HTML buttons.
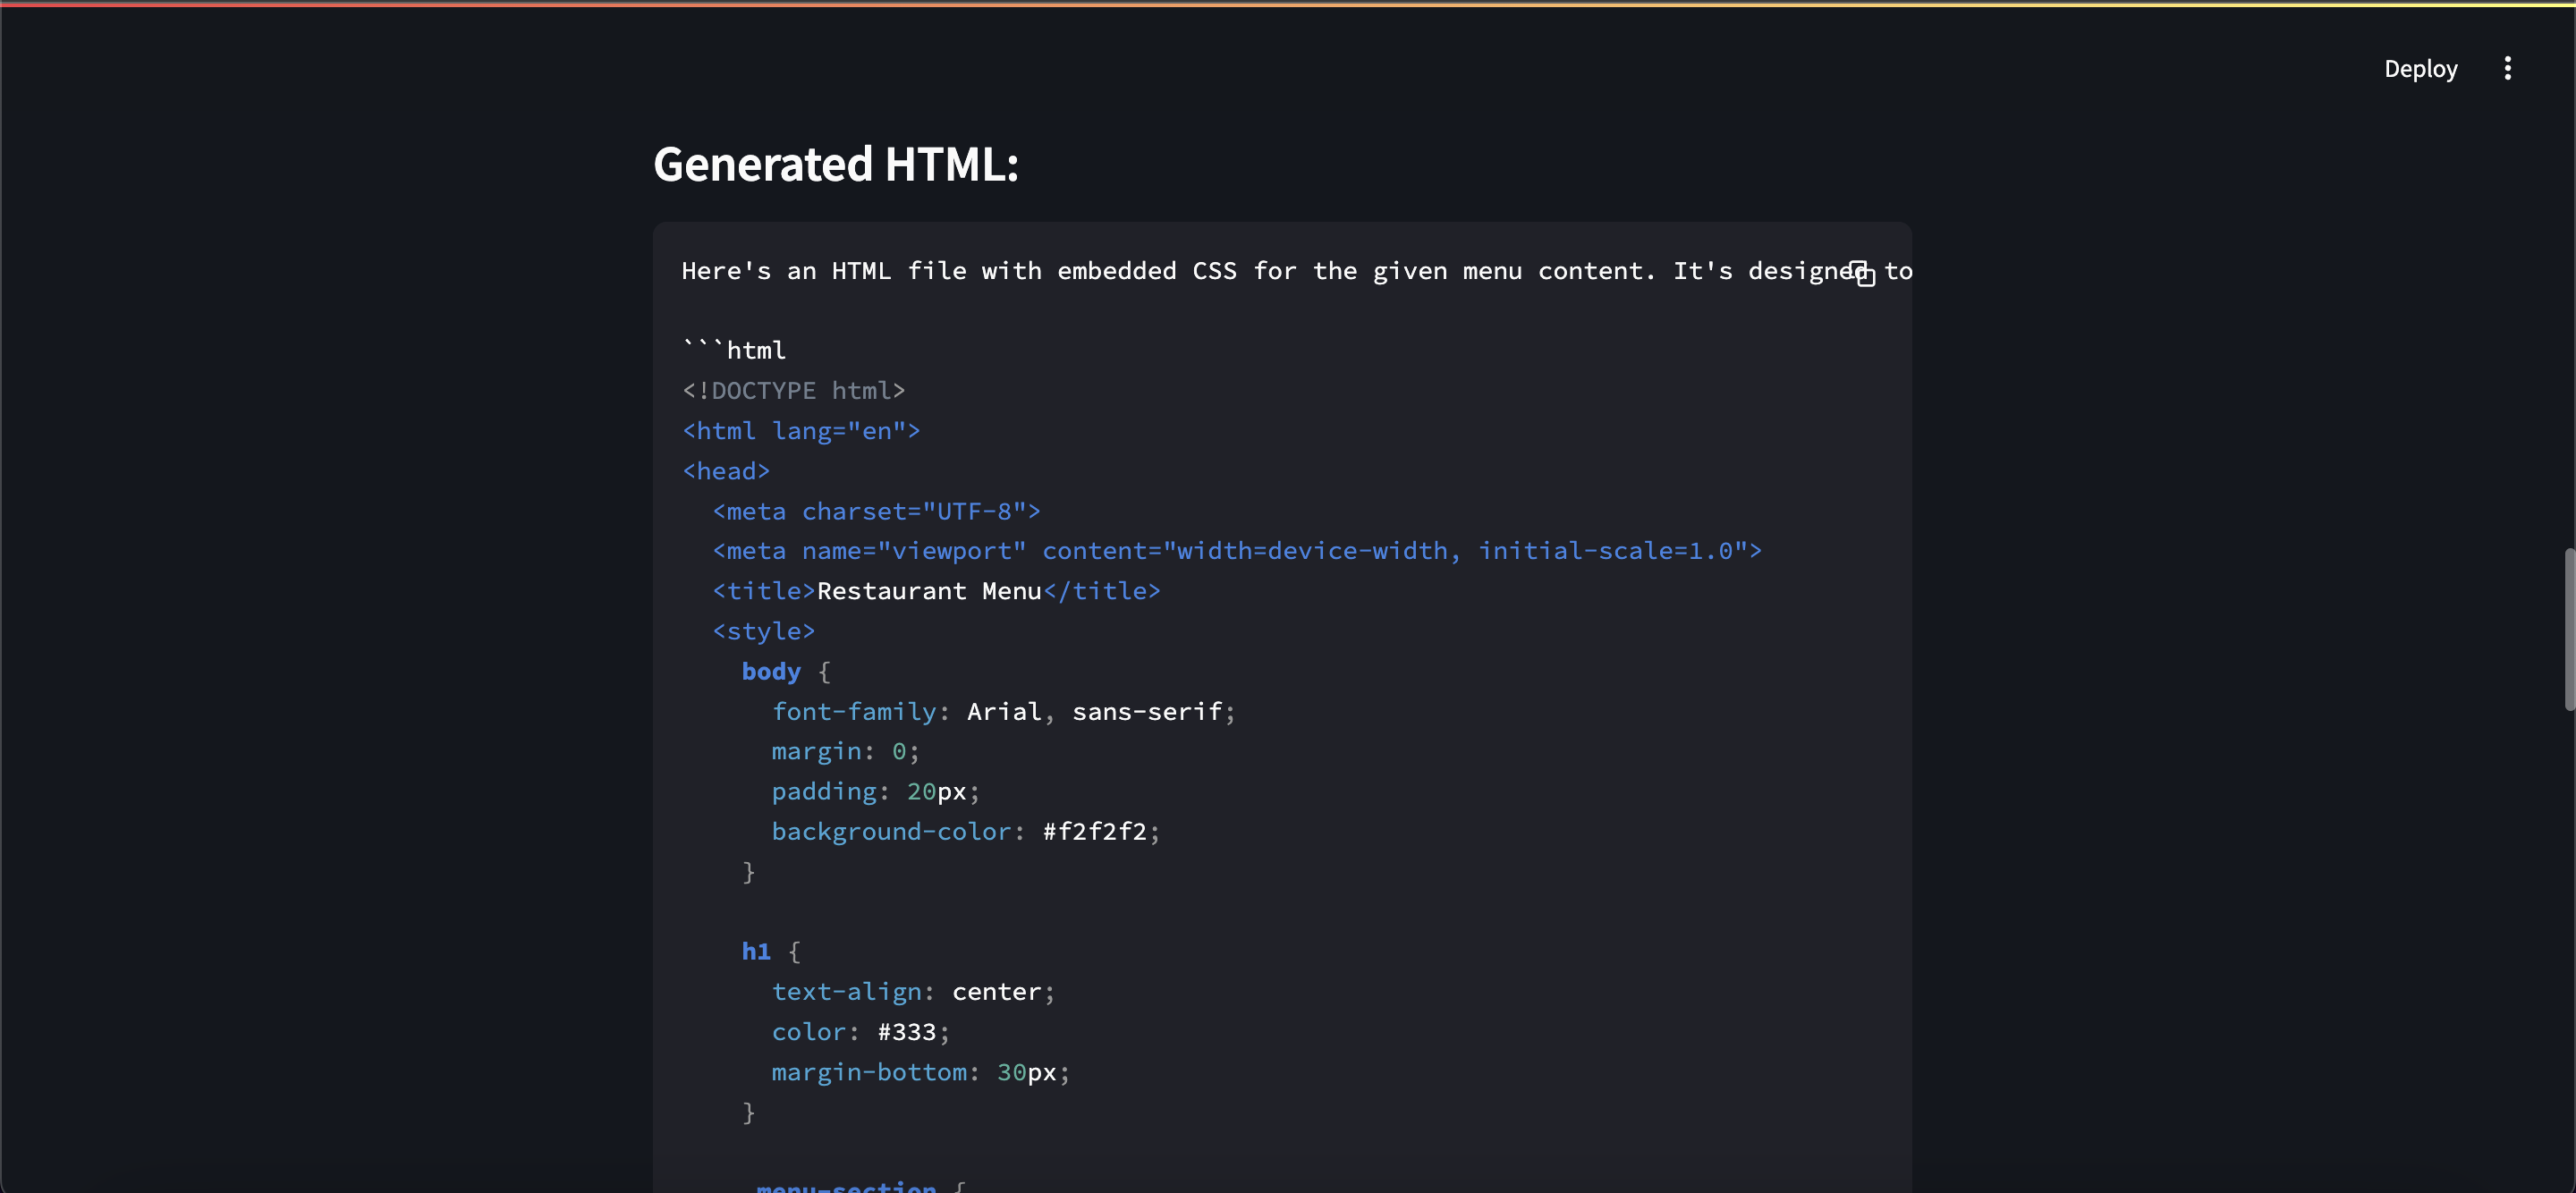
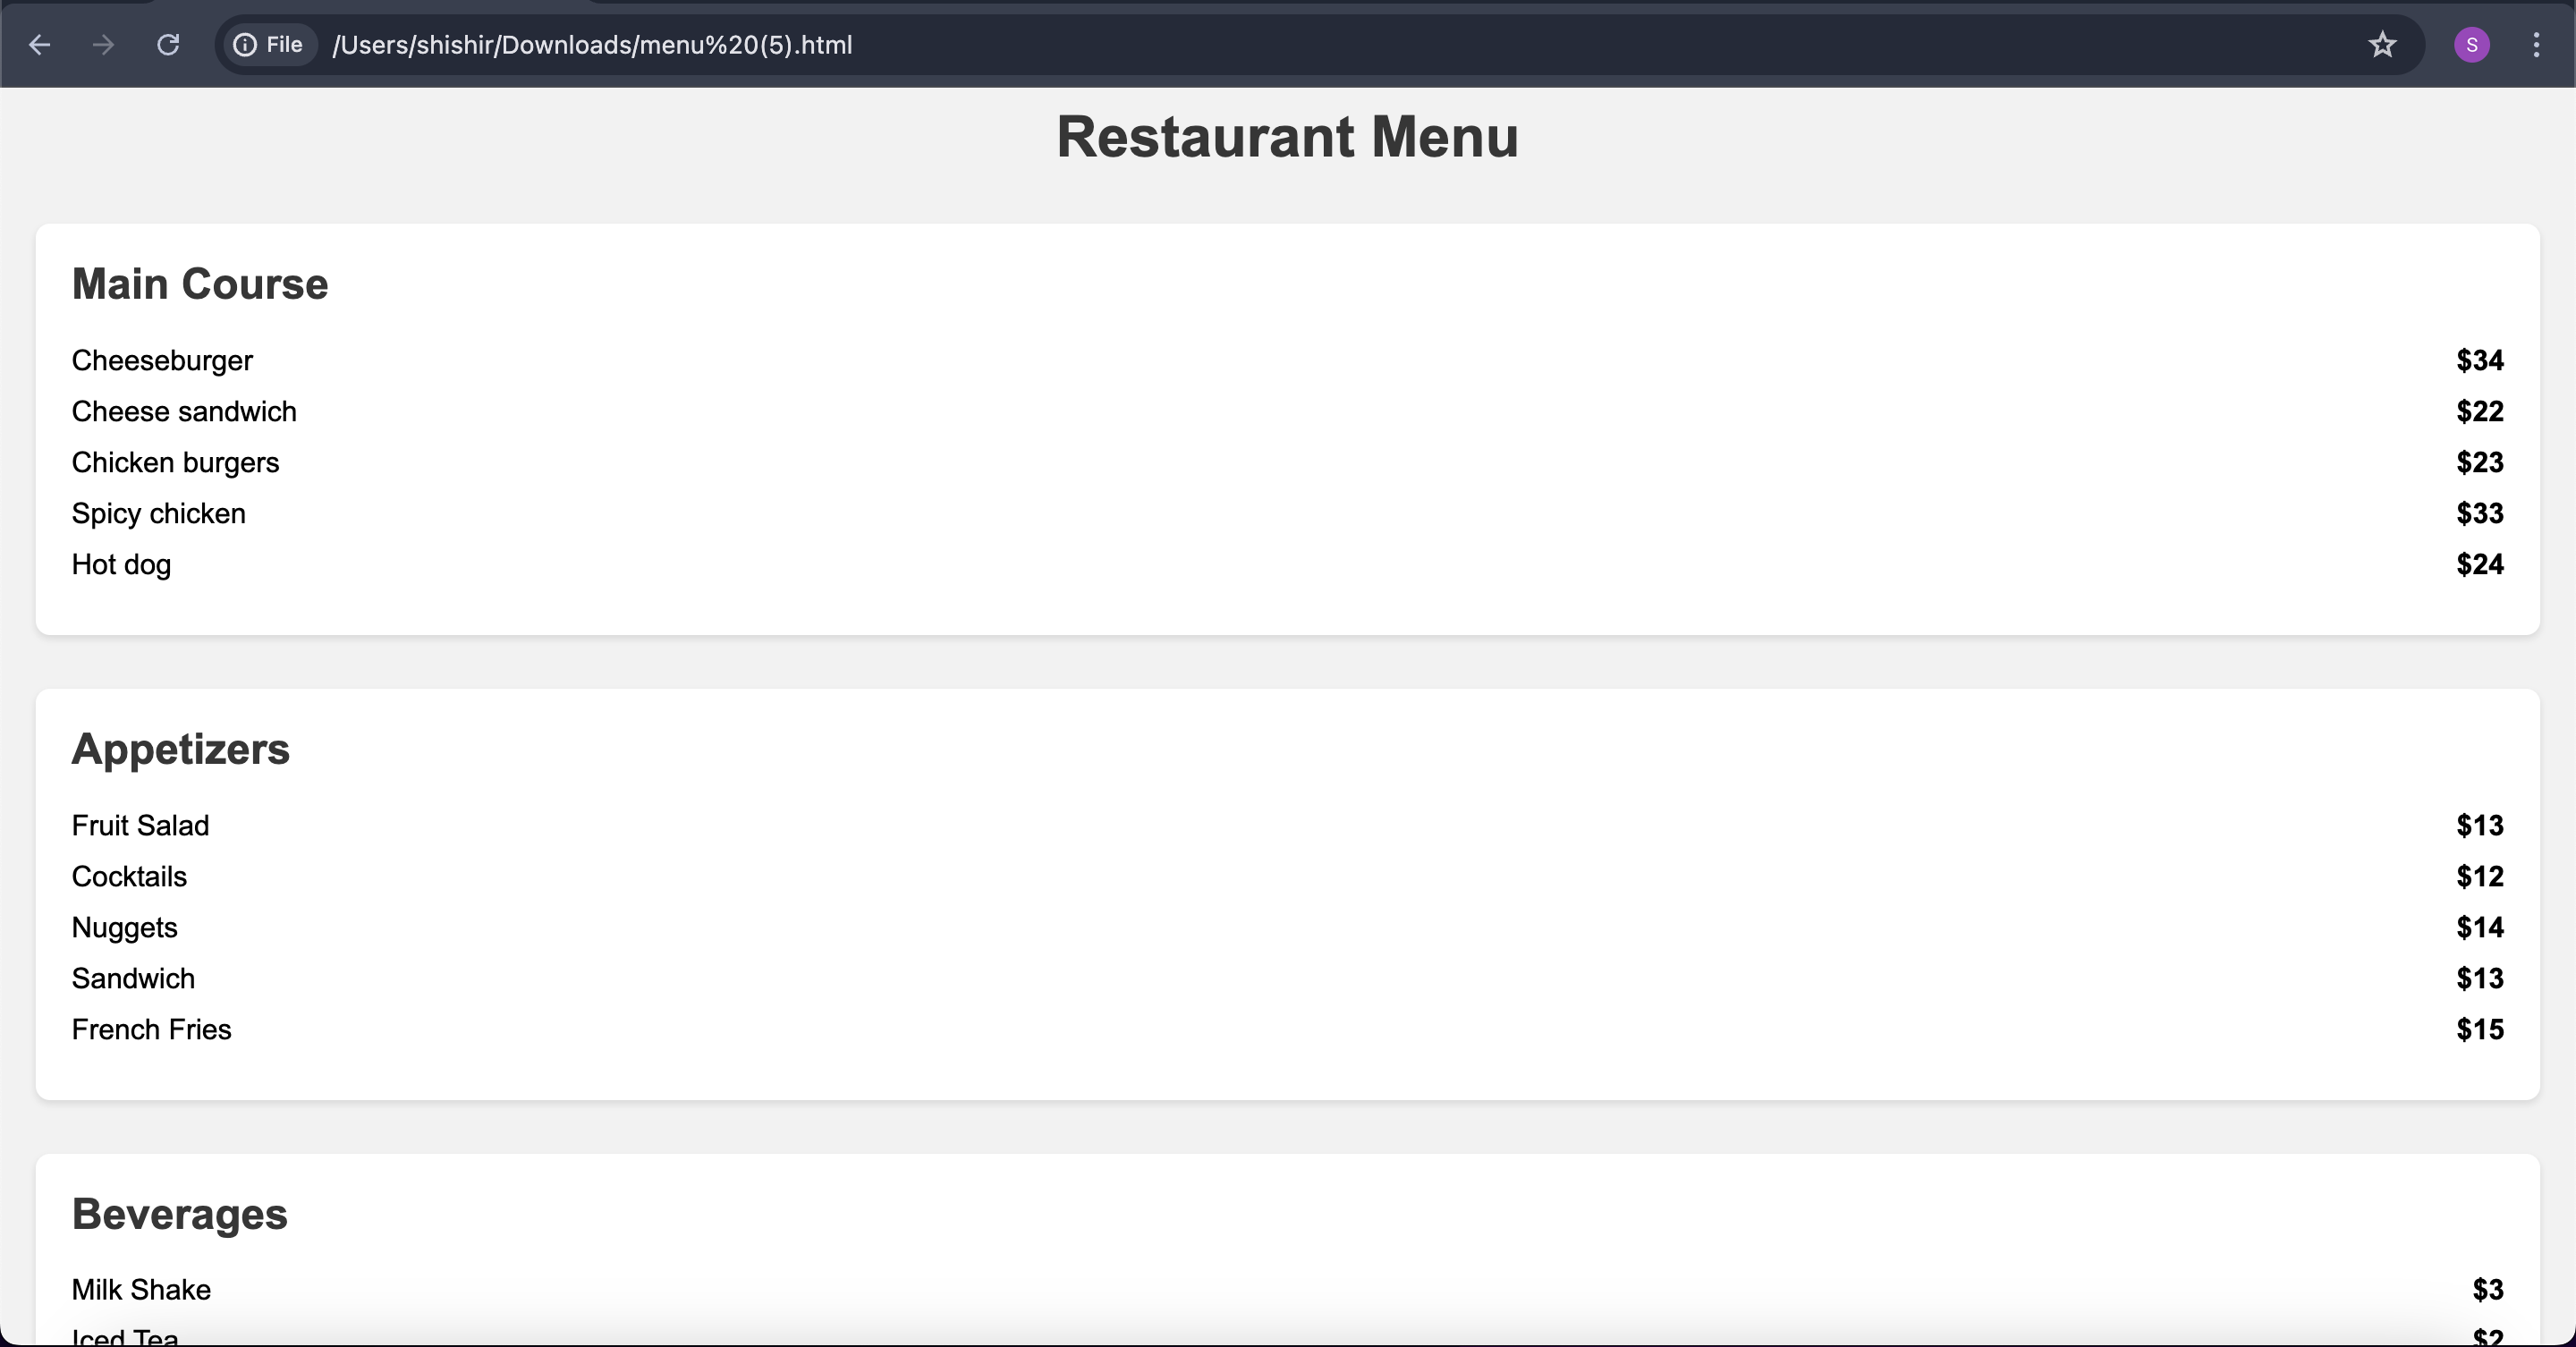
And just like that, your HTML is created, you can preview and regenerate it if you want, or download it to use as a webpage using the 'Preview' and 'Download HTML file' buttons, respectively.
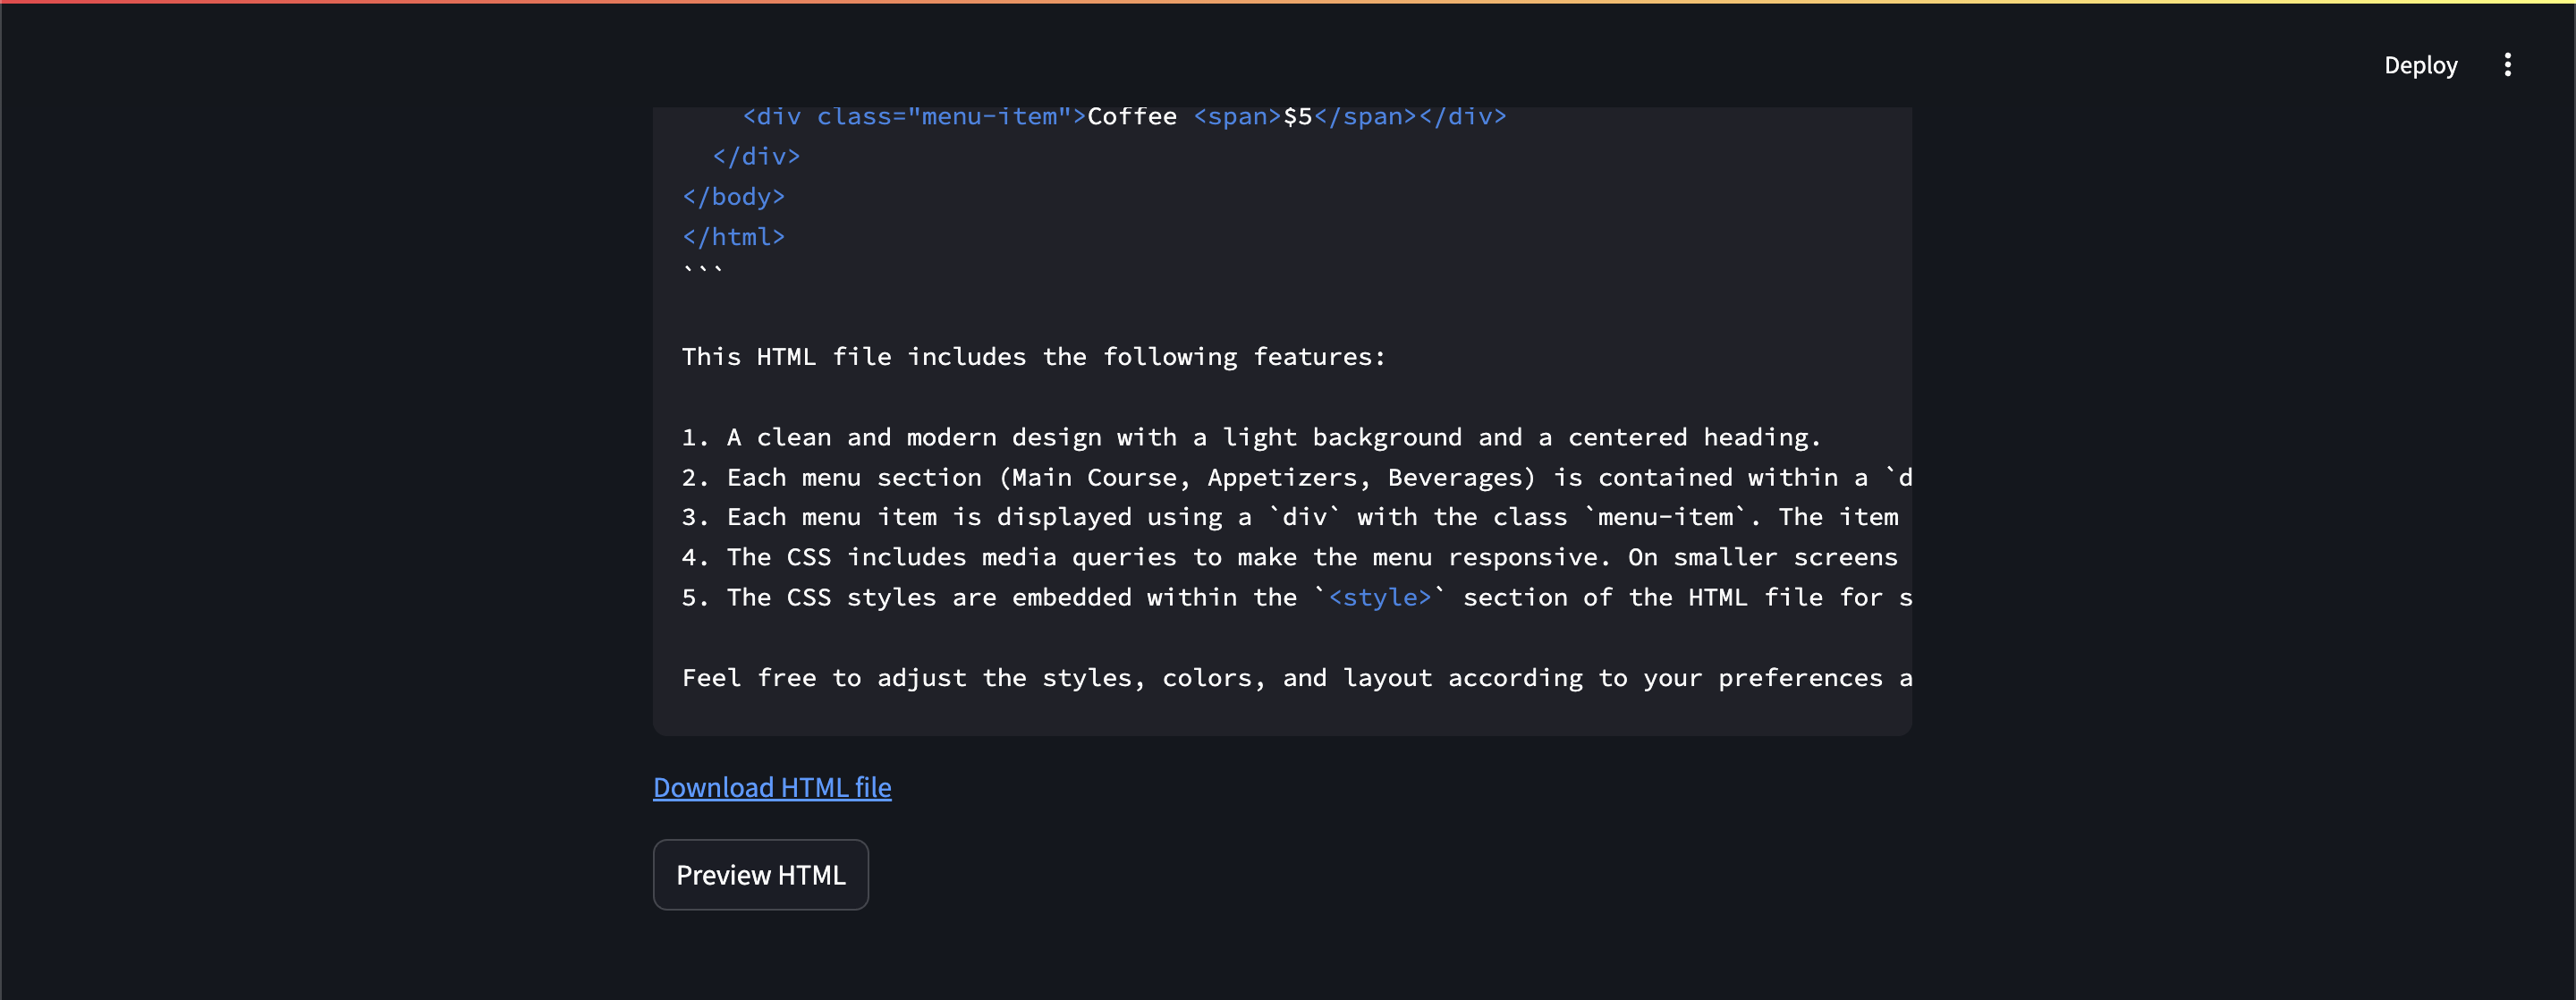
Output of Preview HTML.
You can download and open the webpage to review as well.
Step 5: Deployment.
We are not covering deployment as of now for this project. However, Streamlit provides community hosting, so you can probably check that out.
For Streamlit Cloud deployment, add your AWS credentials in the Streamlit Cloud dashboard under the "Secrets" section.
For other deployment options, ensure to set the AWS credentials as environment variables securely.
Closure:
You have now successfully used AWS Bedrock and the Claude 3 Sonnet AI model for an image to create an HTML page creation application.
This application uses AWS Bedrock, which may incur costs. Please review AWS pricing before extended use.
Ensure your AWS credentials have the necessary permissions to access Bedrock services.
Thanks for coming this far in the article. I hope I was able to explain the concept well enough. If you face any issues, please feel free to reach out to me; I'd be happy to help.
🔗 Let’s stay connected!
🌐 Linktree| 🐦 X| 📸 Instagram| ▶️ YouTube ✍️ Hashnode| 💻 GitHub| 🔗 LinkedIn| 🤝 Topmate 🏅 Credly
© 2024 Shishir Srivastav. All rights reserved.
Subscribe to my newsletter
Read articles from shishir srivastav directly inside your inbox. Subscribe to the newsletter, and don't miss out.
Written by

shishir srivastav
shishir srivastav
Developer, Exploring the world online. I write logical code in IT and talk Illogically in reality.