How to install Node.js on cPanel : A Simple Step-by-Step Guide
 Joan
Joan
Are you looking to set up Node.js on your cPanel hosting account? Whether you're developing a new web application or just experimenting with Node.js, this guide will help you through the installation process in simple, easy-to-follow steps. Let's get started!
Step 1: Access Your cPanel Account
First things first, log in to your cPanel account. You can usually do this by visiting yourdomain.com/cpanel and entering your username and password.
Step 2: Navigate to the "Software" Section
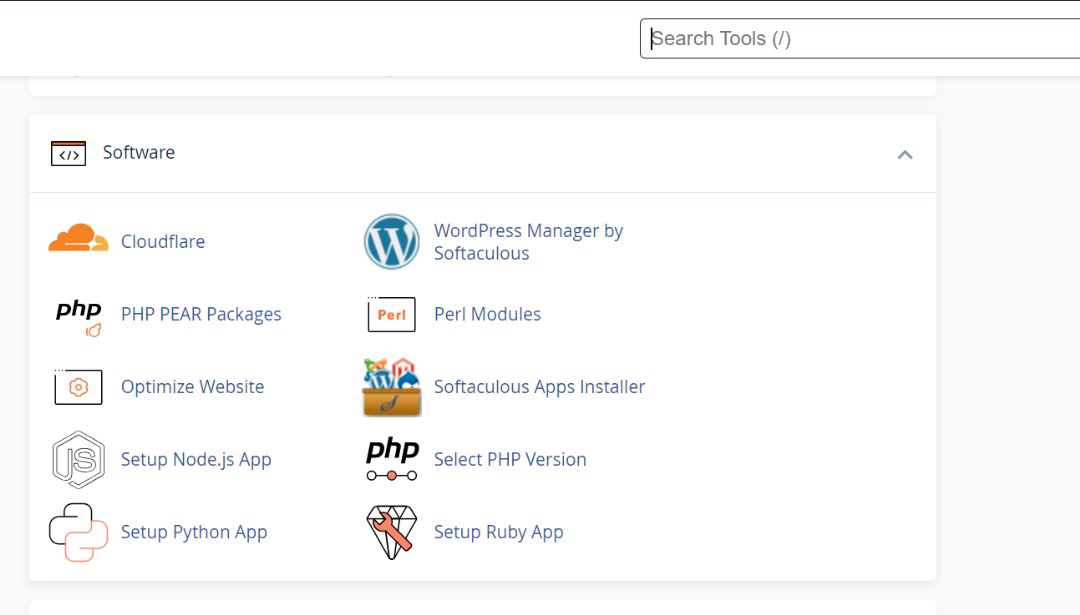
Once you're logged in, scroll down to the "Software" section of the cPanel dashboard. Here, you'll find various tools to manage your software installations.

Step 3: Find the "Setup Node.js App" Option
In the "Software" section, look for an icon or link labeled "Setup Node.js App" or simply "Node.js".
This is the tool cPanel provides for managing Node.js applications.
Step 4: Configure Your Node.js Environment
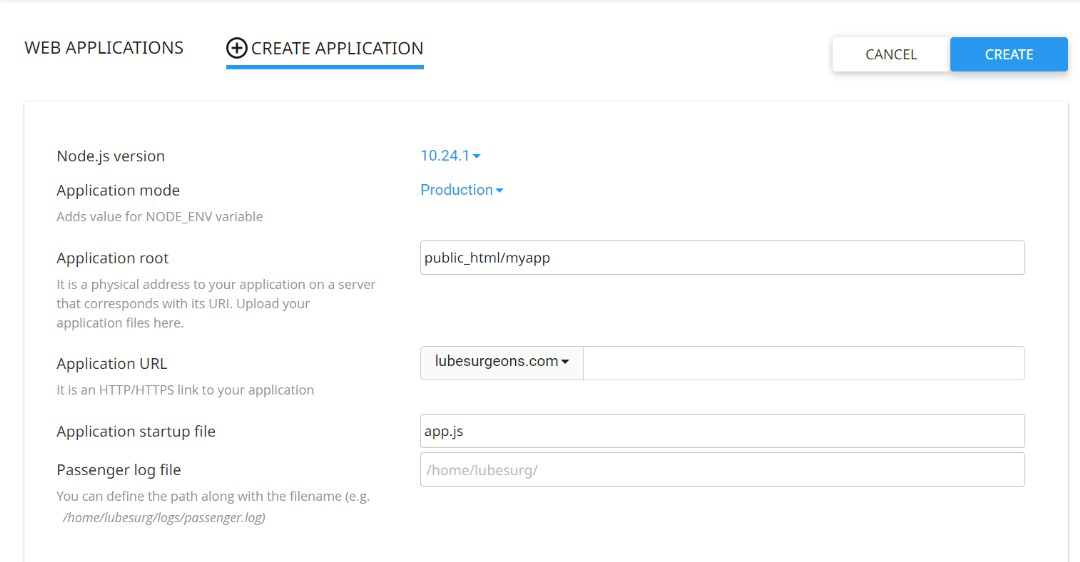
Clicking on the "Node.js" icon will take you to a new screen where you can create a new Node.js application. Here’s what you need to do:


Version: Select the version of Node.js you wish to install. It's generally best to go with the latest LTS (Long Term Support) version for better stability and security.
Application Root: Specify the directory where your Node.js app will live. This could be something like public_html/myapp.
Application URL: This field will automatically fill based on your application root, showing you the URL where your app will be accessible.
Application Startup File: Enter the name of the file that will serve as the entry point for your Node.js application, such as app.js.
Step 5: Start the Node.js Application
Start the Node.js Application In the Node.js app configuration page on cPanel look for a "Start" button or similar option to get your app running.
Once you click on the create button, the system detects your package.json file and installs the modules.

Step 7: Verify the Installation
To ensure everything is set up correctly, open your web browser and go to the application URL you specified earlier. If your Node.js app is set up correctly, you should see your app running.
Step 8: Manage Your Application
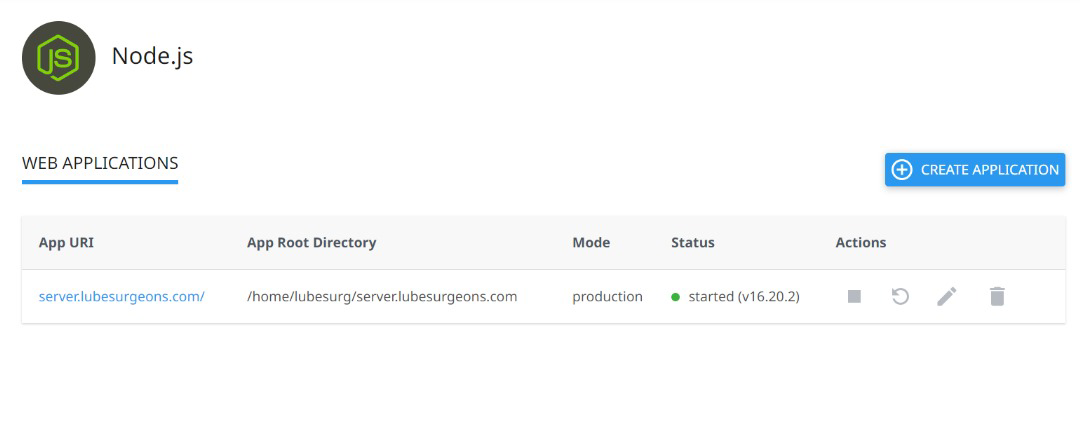
cPanel’s Node.js interface typically allows you to manage your app directly from the dashboard.
You can restart your app, change Node.js versions, modify environment variables, and more, all from within cPanel.
Conclusion
Installing Node.js on cPanel doesn't have to be complicated. With these straightforward steps, you can have your Node.js application up and running in no time. If you also want to learn how to buy a domain, we’ve also created an article to guide you. Whether you're a beginner or a seasoned developer, cPanel’s built-in tools make it easy to manage your Node.js environments efficiently. Happy coding!
Subscribe to my newsletter
Read articles from Joan directly inside your inbox. Subscribe to the newsletter, and don't miss out.
Written by
