mapstruct를 활용해 spring boot에서 gRPC 쉽게 사용하기
 sangminLee
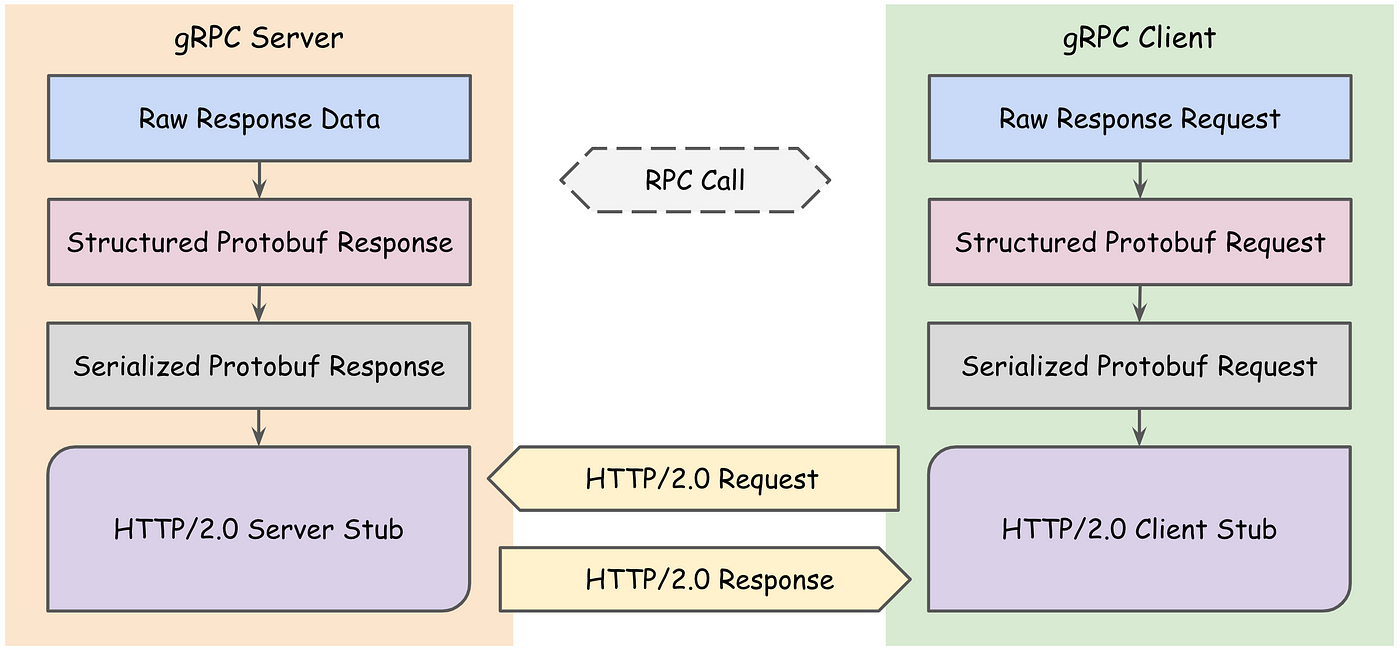
Enpoint API → Recommend API 로 많은 요청
응답 속도가 느림
gRPC 도입
dto의 멤버변수가 많기 때문에 gRPC message에 매핑하는 로직이 지저분
이를 해결하기 위한 mapstruct 사용
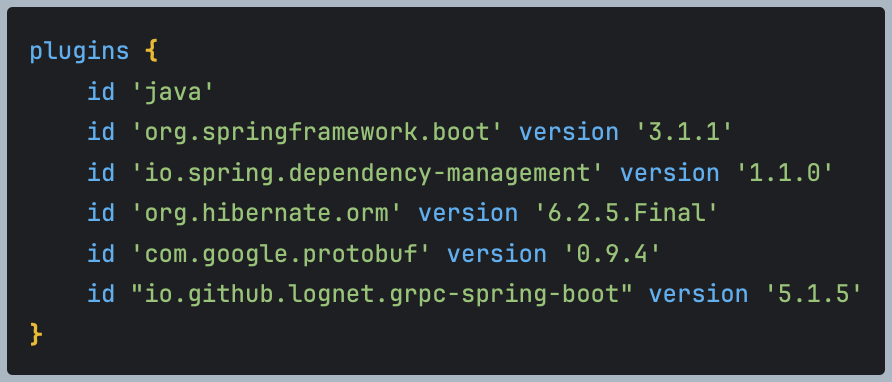
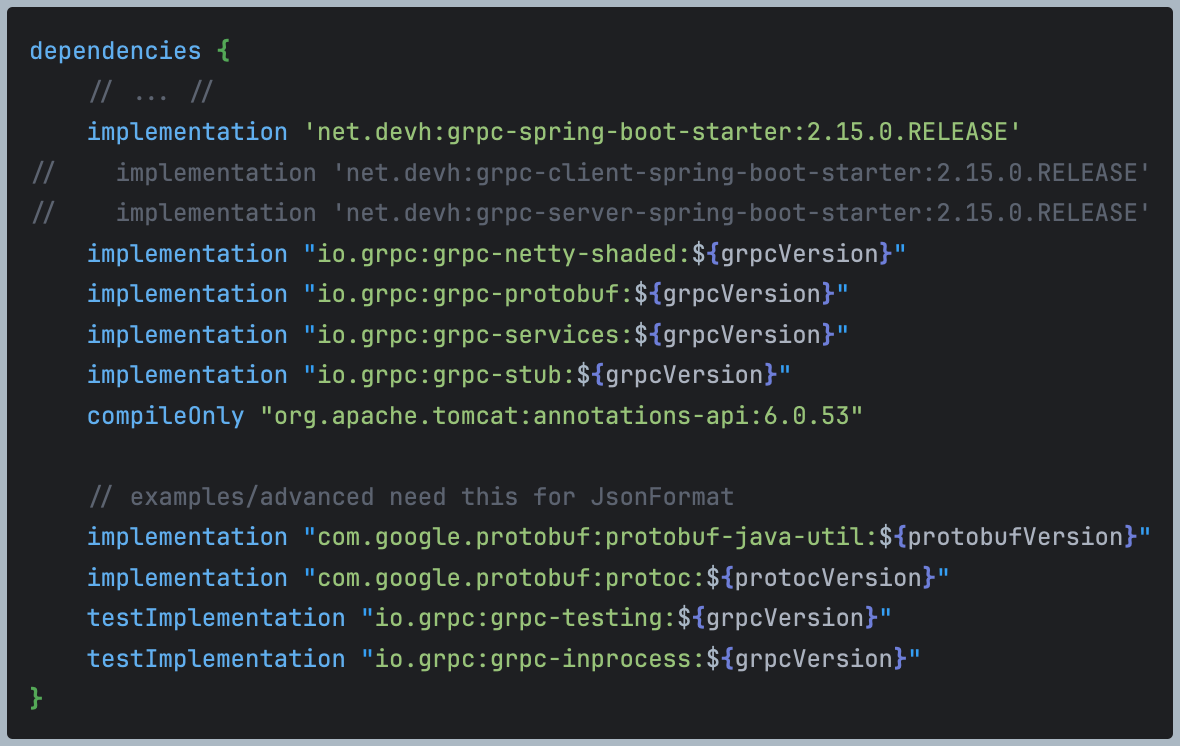
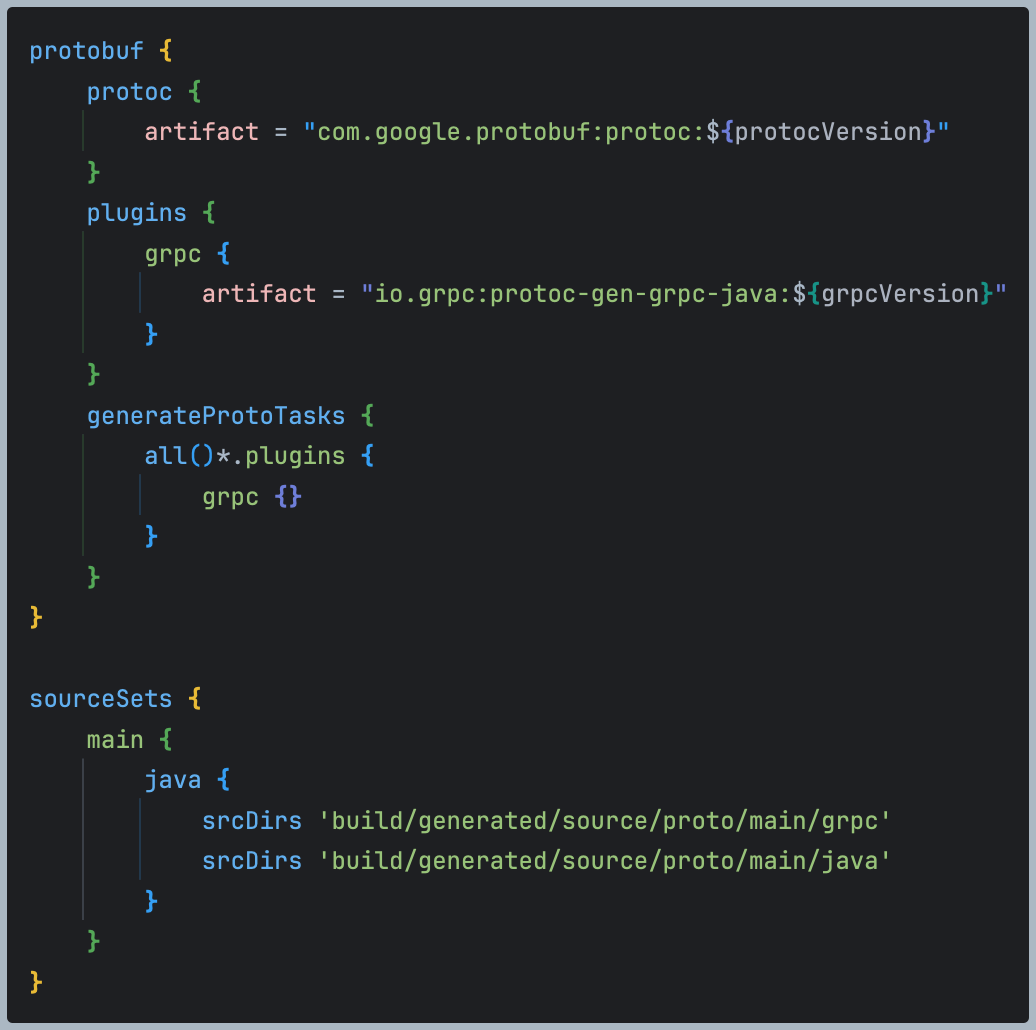
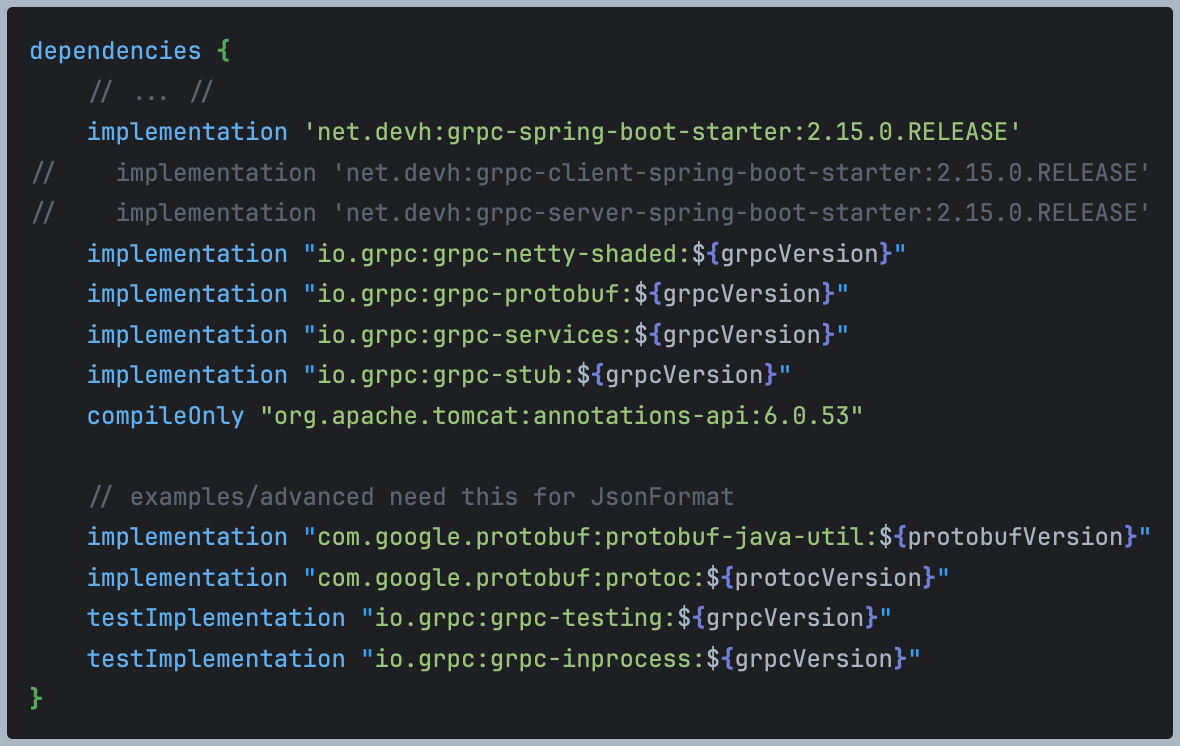
- gradle 설정
gRPC

mapstruct

public class ItemResultRequest {
  @NotBlank
  private String query;
  private String siteNo;

  private String mbrId;

  @NotNull
  private UserParameter userInfo;
}

public class UserParameter {
  private String siteNo;
  ...
  private String remoteAddress;
  private String mbrId;
  private String mbrType;
  private String mbrCoId;
  private String chnlId;
}
public class KeyInItemResponse {

  @JsonInclude(value = JsonInclude.Include.NON_EMPTY)
  private List<AdvertItemResult> advertItems = new ArrayList<>();
  @JsonInclude(value = JsonInclude.Include.NON_EMPTY)
  private List<InventoryResult> regularItems = new ArrayList<>();
  @JsonIgnore
  private Map<String, List<AdvertItemResult>> searchAdvertItemMap = new ConcurrentHashMap<>();
  @JsonIgnore
  private Map<String, List<InventoryResult>> regularItemMap = new ConcurrentHashMap<>();
  private int totalCnt;
}

public class AdvertItemResult implements Cloneable {
  private String advertAcctClsId;
  ...
  private String exusItemDtlCd;
  private String itemNm;
  private String itemId;
}

public class InventoryResult {
  String itemId;
  String siteNo;
  String salestrNo;
  String rcmdVenId;
  String itemNm;
  String brandNm;
  ...
}
예시로 위와 같은 Request, Response가 있을 때, proto는 다음과 같이 정의한다.
syntax = "proto3";

package com.sangmin.search.keyin;

// Request
message KeyInItemResultRequestProto {
  string query = 1;
  string site_no = 2;
  string mbr_id = 3;
  UserParameterProto user_info = 4;
}

message UserParameterProto {
  string site_no = 1;
  string em_salestr_no = 2;
  string em_rsvt_shpp_psbl_yn = 3;
  string tr_salestr_no = 4;
  string tr_rsvt_shpp_psbl_yn = 5;
  string em_dual_salestr_no = 6;
  string dept_salestr_no = 7;
  string gm_salestr_no = 8;
  string remote_address = 9;
  string mbr_id = 10;
  string mbr_type = 11;
  string mbr_co_id = 12;
  string chnl_id = 13;
  double exchange_rate = 14;
}

// Response
message KeyInItemResponseProto {
  repeated AdvertItemResultProto advert_items = 1;
  repeated InventoryResultProto regular_items = 2;
  int32 total_cnt = 3;
}

message AdvertItemResultProto {
  string advert_acct_cls_id = 1;
  string advert_acct_id = 2;
  string advert_bid_id = 3;
  string advert_bilng_type_cd = 4;
  string advert_disp_tgt_cnt = 5;
  string advert_extens_tery_div_cd = 6;
  string advert_kind_cd = 7;
  string adult_item_type_cd = 8;
  string brand_id = 9;
  string brand_keyword_yn = 10;
  string brand_nm = 11;
  string bspl_item_div_cd = 12;
  string disp_psbl_acct_cnt = 13;
  string exus_item_div_cd = 14;
  string exus_item_dtl_cd = 15;
  string item_nm = 16;
  string item_id = 17;
  string item_reg_div_cd = 18;
  string item_sell_type_cd = 19;
  int32 min_onet_ord_psbl_qty = 20;
  int32 max_onet_ord_psbl_qty = 21;
  string model_info = 22;
  string query = 23;
  string salestr_lst = 24;
  string salestr_no = 25;
  string sellprc = 26;
  string shpp_main_cd = 27;
  string shpp_mthd_cd = 28;
  string shpp_type_cd = 29;
  string shpp_type_dtl_cd = 30;
  string site_no = 31;
  string ven_id = 32;
}

message InventoryResultProto {
  string item_id = 1;
  string site_no = 2;
  string salestr_no = 3;
  string rcmd_ven_id = 4;
  string item_nm = 5;
  string brand_nm = 6;
  string adult_item_type_cd = 7;
  string sellprc = 8;
  string shpp_type_cd = 9;
  string shpp_type_dtl_cd = 10;
  string item_sell_type_cd = 11;
  string bspl_item_div_cd = 12;
  int64 min_onet_ord_psbl_qty = 13;
  int64 max_onet_ord_psbl_qty = 14;
  int64 b2b_max_onet_ord_psbl_qty = 15;
  string model_info = 16;
  string b2_member_lst = 17;
  string disp_ctg_lst = 18;

}

// Service
service KeyInItemService {
  rpc RecommendationSetItem (KeyInItemResultRequestProto) returns (KeyInItemResponseProto);
}
이제 그러면 DTO와 gRPC message Class 간의 매핑이 필요한데, 저 많은 필드들을 일일이 세팅하기엔 매우 귀찮고 실수가 나오기 쉽다.
그럼 이제 mapstruct를 활용해보자
@Mapper(
  componentModel = "spring",
  collectionMappingStrategy = CollectionMappingStrategy.ADDER_PREFERRED,
  nullValueCheckStrategy = NullValueCheckStrategy.ALWAYS)
public interface KeyInItemRequestProtoMapper {

  KeyInItemResultRequest mapToDto(KeyInItem.KeyInItemResultRequestProto proto);

  UserParameter mapToDto(KeyInItem.UserParameterProto proto);

  KeyInItem.UserParameterProto mapToDto(UserParameter parameter);
}
@Mapper(
  componentModel = "spring",
  collectionMappingStrategy = CollectionMappingStrategy.ADDER_PREFERRED,
  nullValueCheckStrategy = NullValueCheckStrategy.ALWAYS)
public interface KeyInItemResponseProtoMapper {

  @Mapping(source = "advertItems", target = "advertItemsList")
  @Mapping(source = "regularItems", target = "regularItemsList")
  KeyInItem.KeyInItemResponseProto mapToProto(KeyInItemResponse request);

  List<AdvertItemResult> mapAdvertItemResultProtoListToAdvertItemResultList(
    List<KeyInItem.AdvertItemResultProto> protoList);

  List<InventoryResult> mapInventoryResultProtoListToInventoryResultList(
    List<KeyInItem.InventoryResultProto> protoList);

  AdvertItemResult mapToDto(KeyInItem.AdvertItemResultProto proto);

  KeyInItem.AdvertItemResultProto mapToProto(AdvertItemResult advertItemResult);
}
@Mapper(componentModel = "spring" …)를 통해 Spring의 @Component 어노테이션이 생성된 구현 클래스에 추가되어, Spring의 컴포넌트 스캔 메커니즘에 의해 자동으로 감지되고 주입될 수 있게 된다.ADDER_PREFERRED옵션은 대상 객체에 adder 메소드(예:addItem())가 있다면 그것을 사용하고, 없다면 setter를 사용하라는 의미다.ALWAYS설정은 모든 소스 프로퍼티에 대해 null 체크를 수행하도록 해서 npe를 방지할 수 있다!
mapstruct를 활용하여 인터페이스 메서드를 만들면 필드명이 같은 것들은 알아서 매핑하는 객체가 만들어진다.
여기서 유의깊게 봐야하는 것은 List 형식의 요소이다.
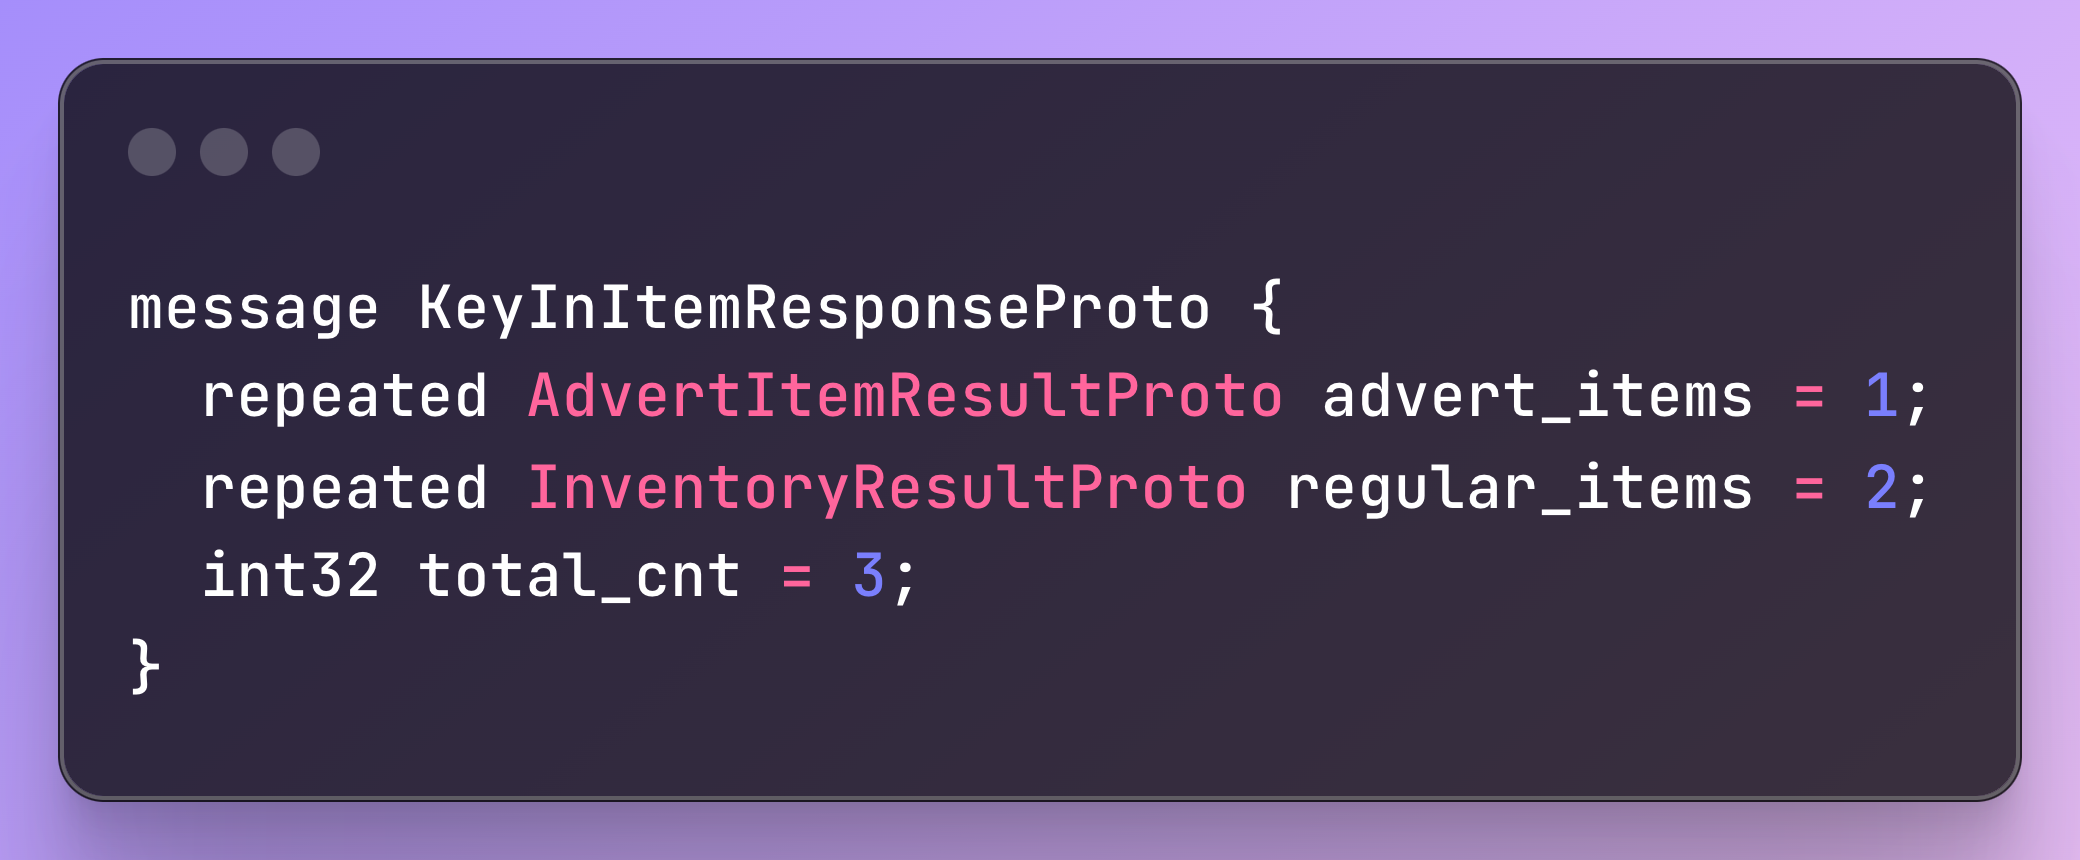
분명 advert_items와 regular_items로 선언하고 repeated로 List을 만들었지만 실제 generated 된 클래스는

XXXList가 되기 때문에 gRPC message 객체를 매핑하는 필드값에 List를 추가적으로 붙여야한다.
  @Mapping(source = "advertItems", target = "advertItemsList")
  @Mapping(source = "regularItems", target = "regularItemsList")
그래서 Mapping 할때 proto message에서 정한 advert_items가 아닌 advertItemsList 가 되어야한다.
gRPC 서버 서비스
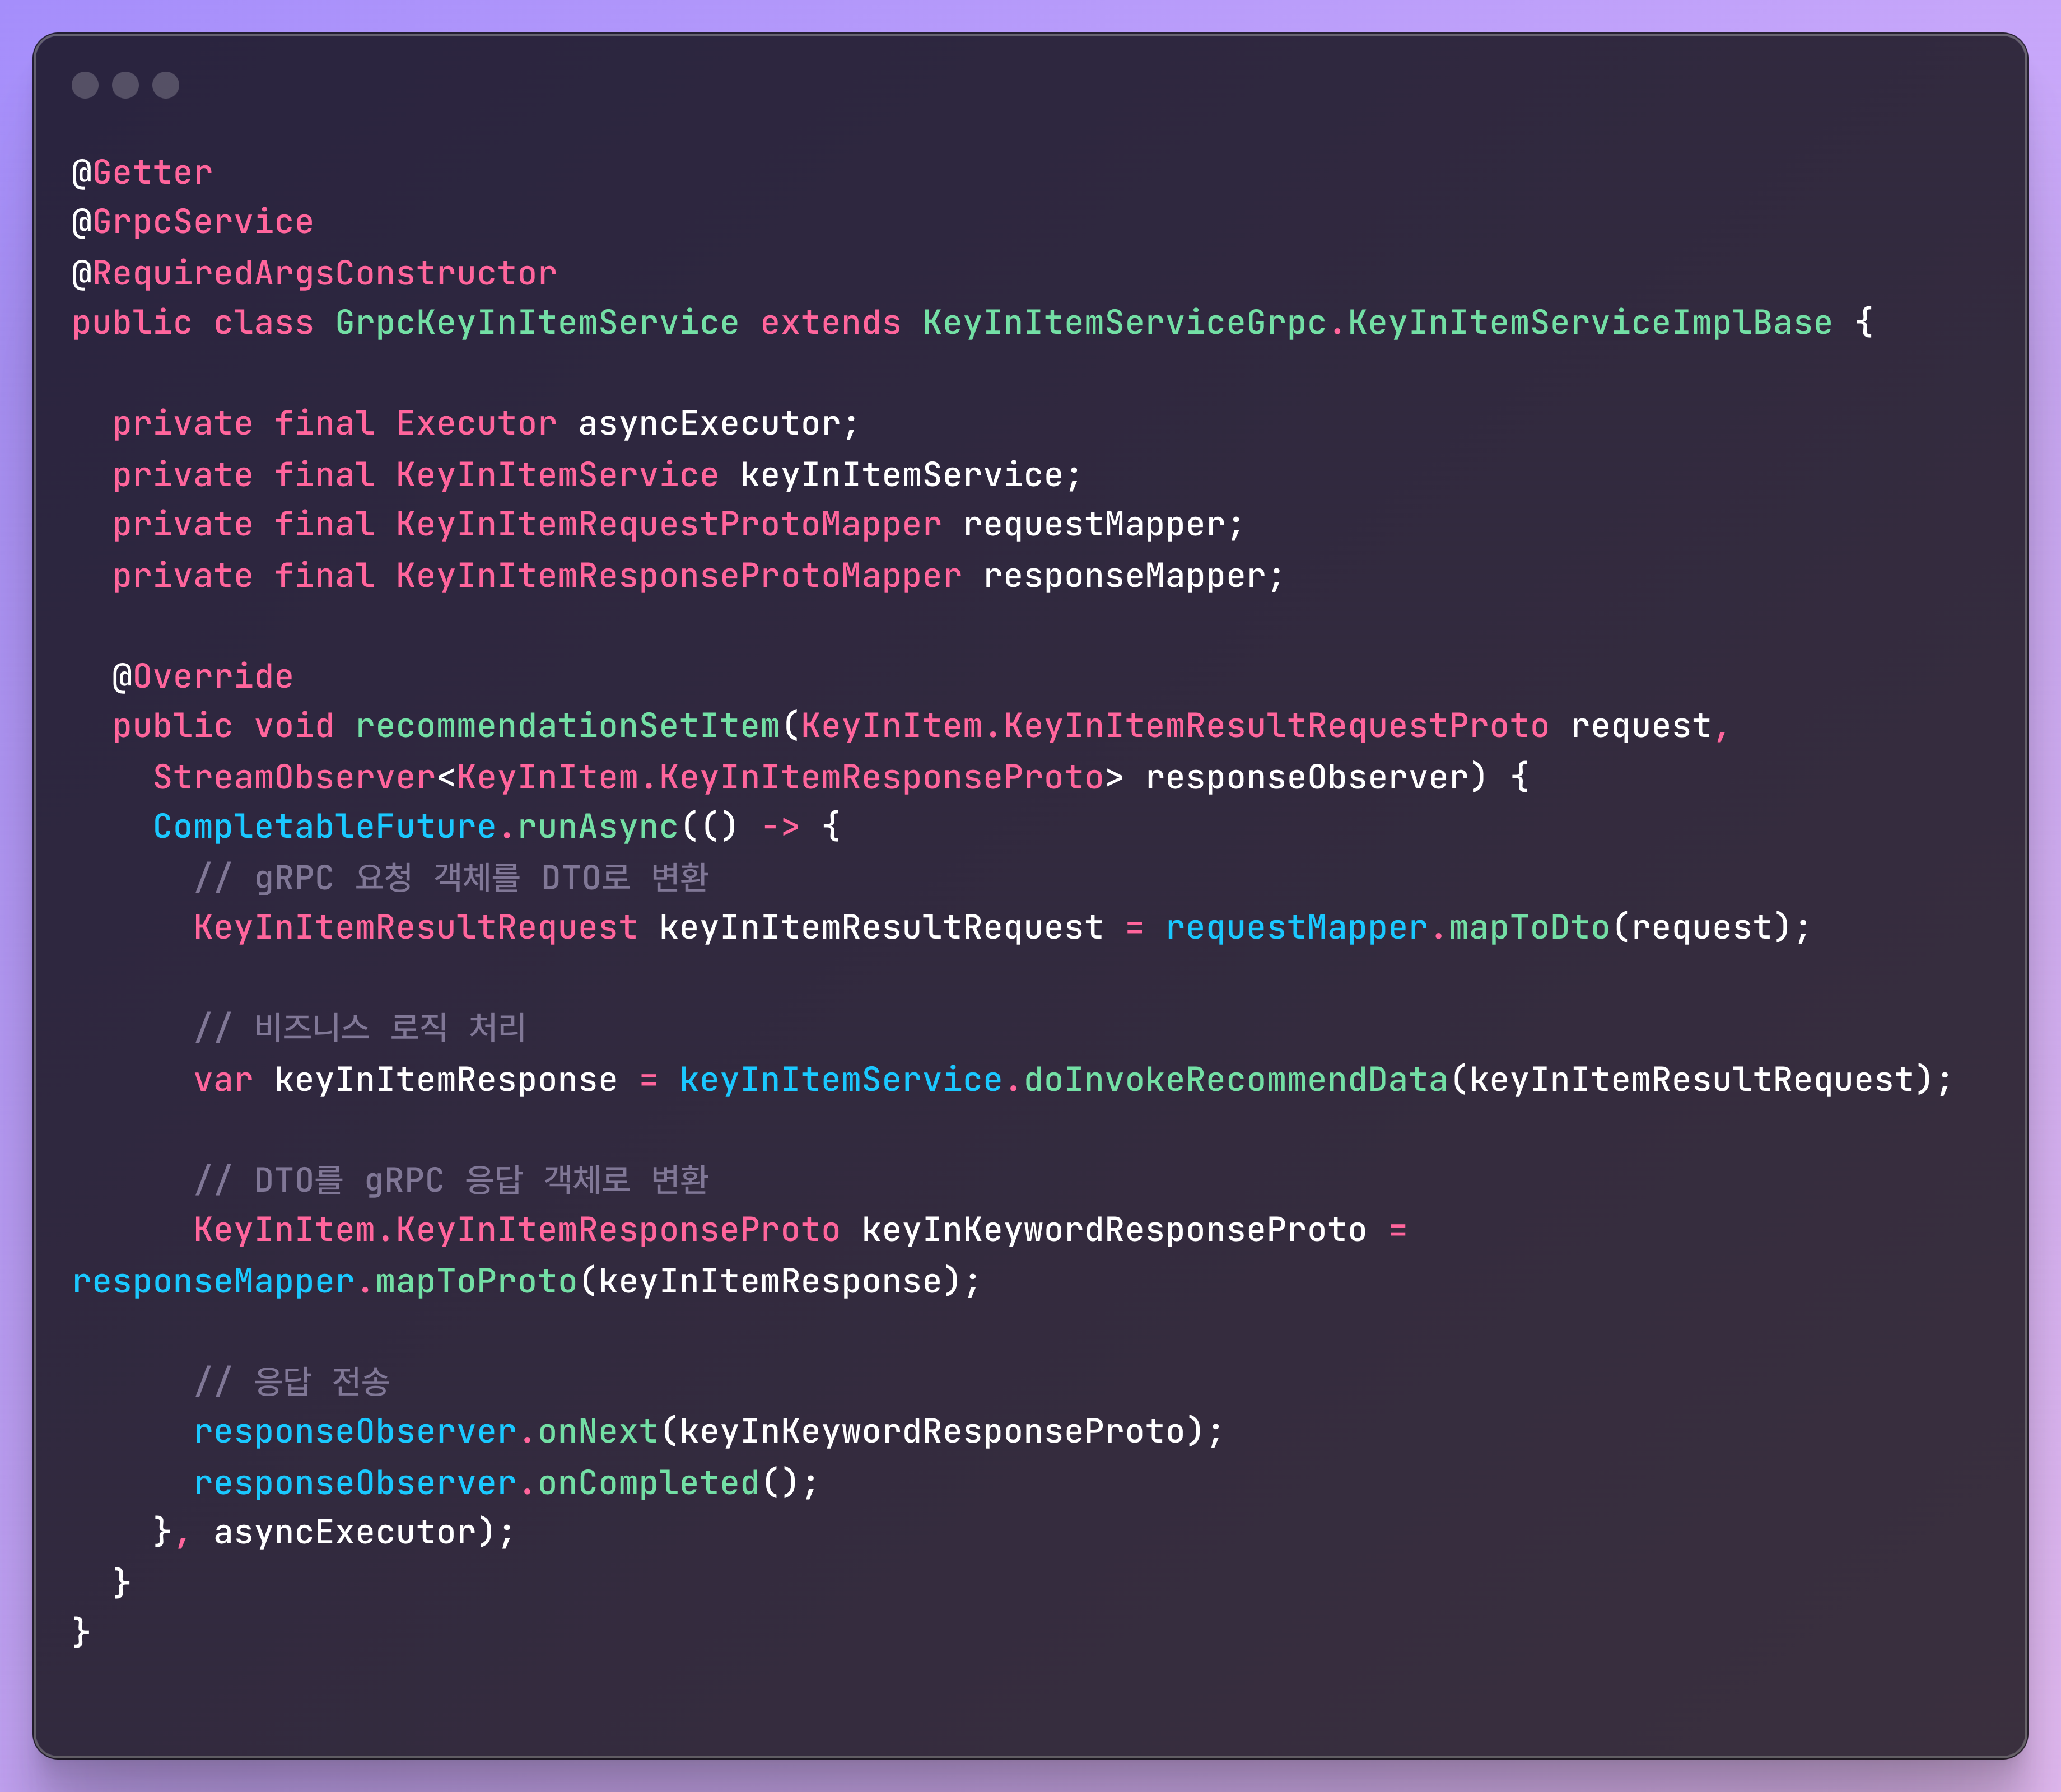
mapstruct로 gRPC서버 서비스의 로직은 간단해졌다.
서버는 다음과 같은 4가지 과정을 거치면 된다.
gRPC 요청 객체를 만든 mapper를 통해 DTO로 변환
비즈니스 로직 처리
DTO를 만든 mapper를 통해 gRPC 응답 객체로 변환
응답 전송
gRPC 클라이언트 mapper
@Mapper(
  componentModel = "spring",
  collectionMappingStrategy = CollectionMappingStrategy.ADDER_PREFERRED,
  nullValueCheckStrategy = NullValueCheckStrategy.ALWAYS)
public interface KeyInItemRequestProtoMapper {

  KeyInItem.KeyInItemResultRequestProto mapToProto(KeyinRecomItemParameter request);

  UserParameter mapToDto(KeyInItem.UserParameterProto proto);

  KeyInItem.UserParameterProto mapToDto(UserParameter parameter);
}
- gRPC 클라이언트 쪽에서도 유사한 mapper를 만들어준다.
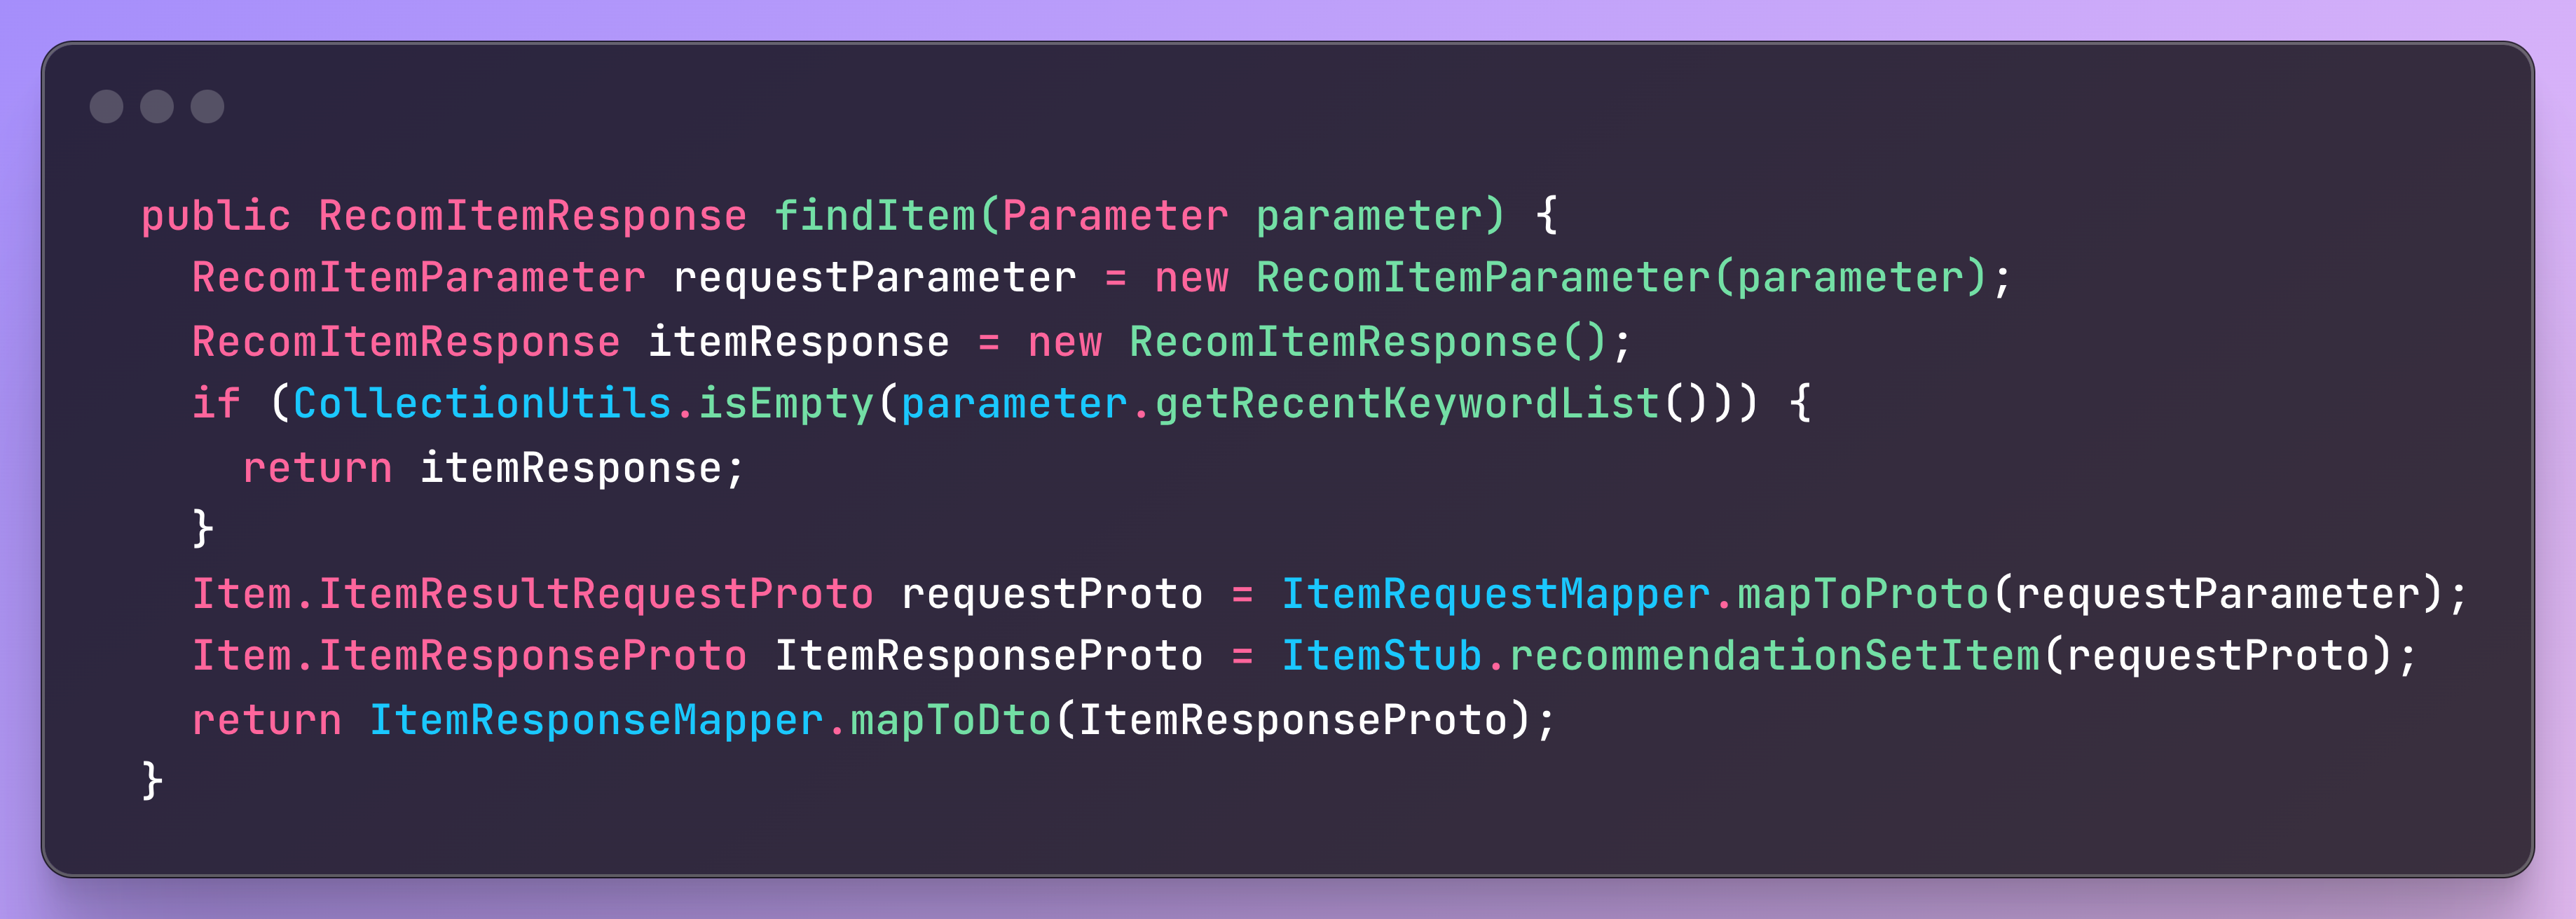
클라이언트는 다음과 같은 과정을 거치면 된다.
DTO를 mapper를 통해 gRPC 요청 객체로 변환
stub을 통해 gRPC unary 응답
gRPC 요청 객체를 mapper를 통해 DTO로 변환
spring cloud discovery와 연동
yaml 작성시 eureka discovery의 application name으로 discovery와 lb가 가능하다.
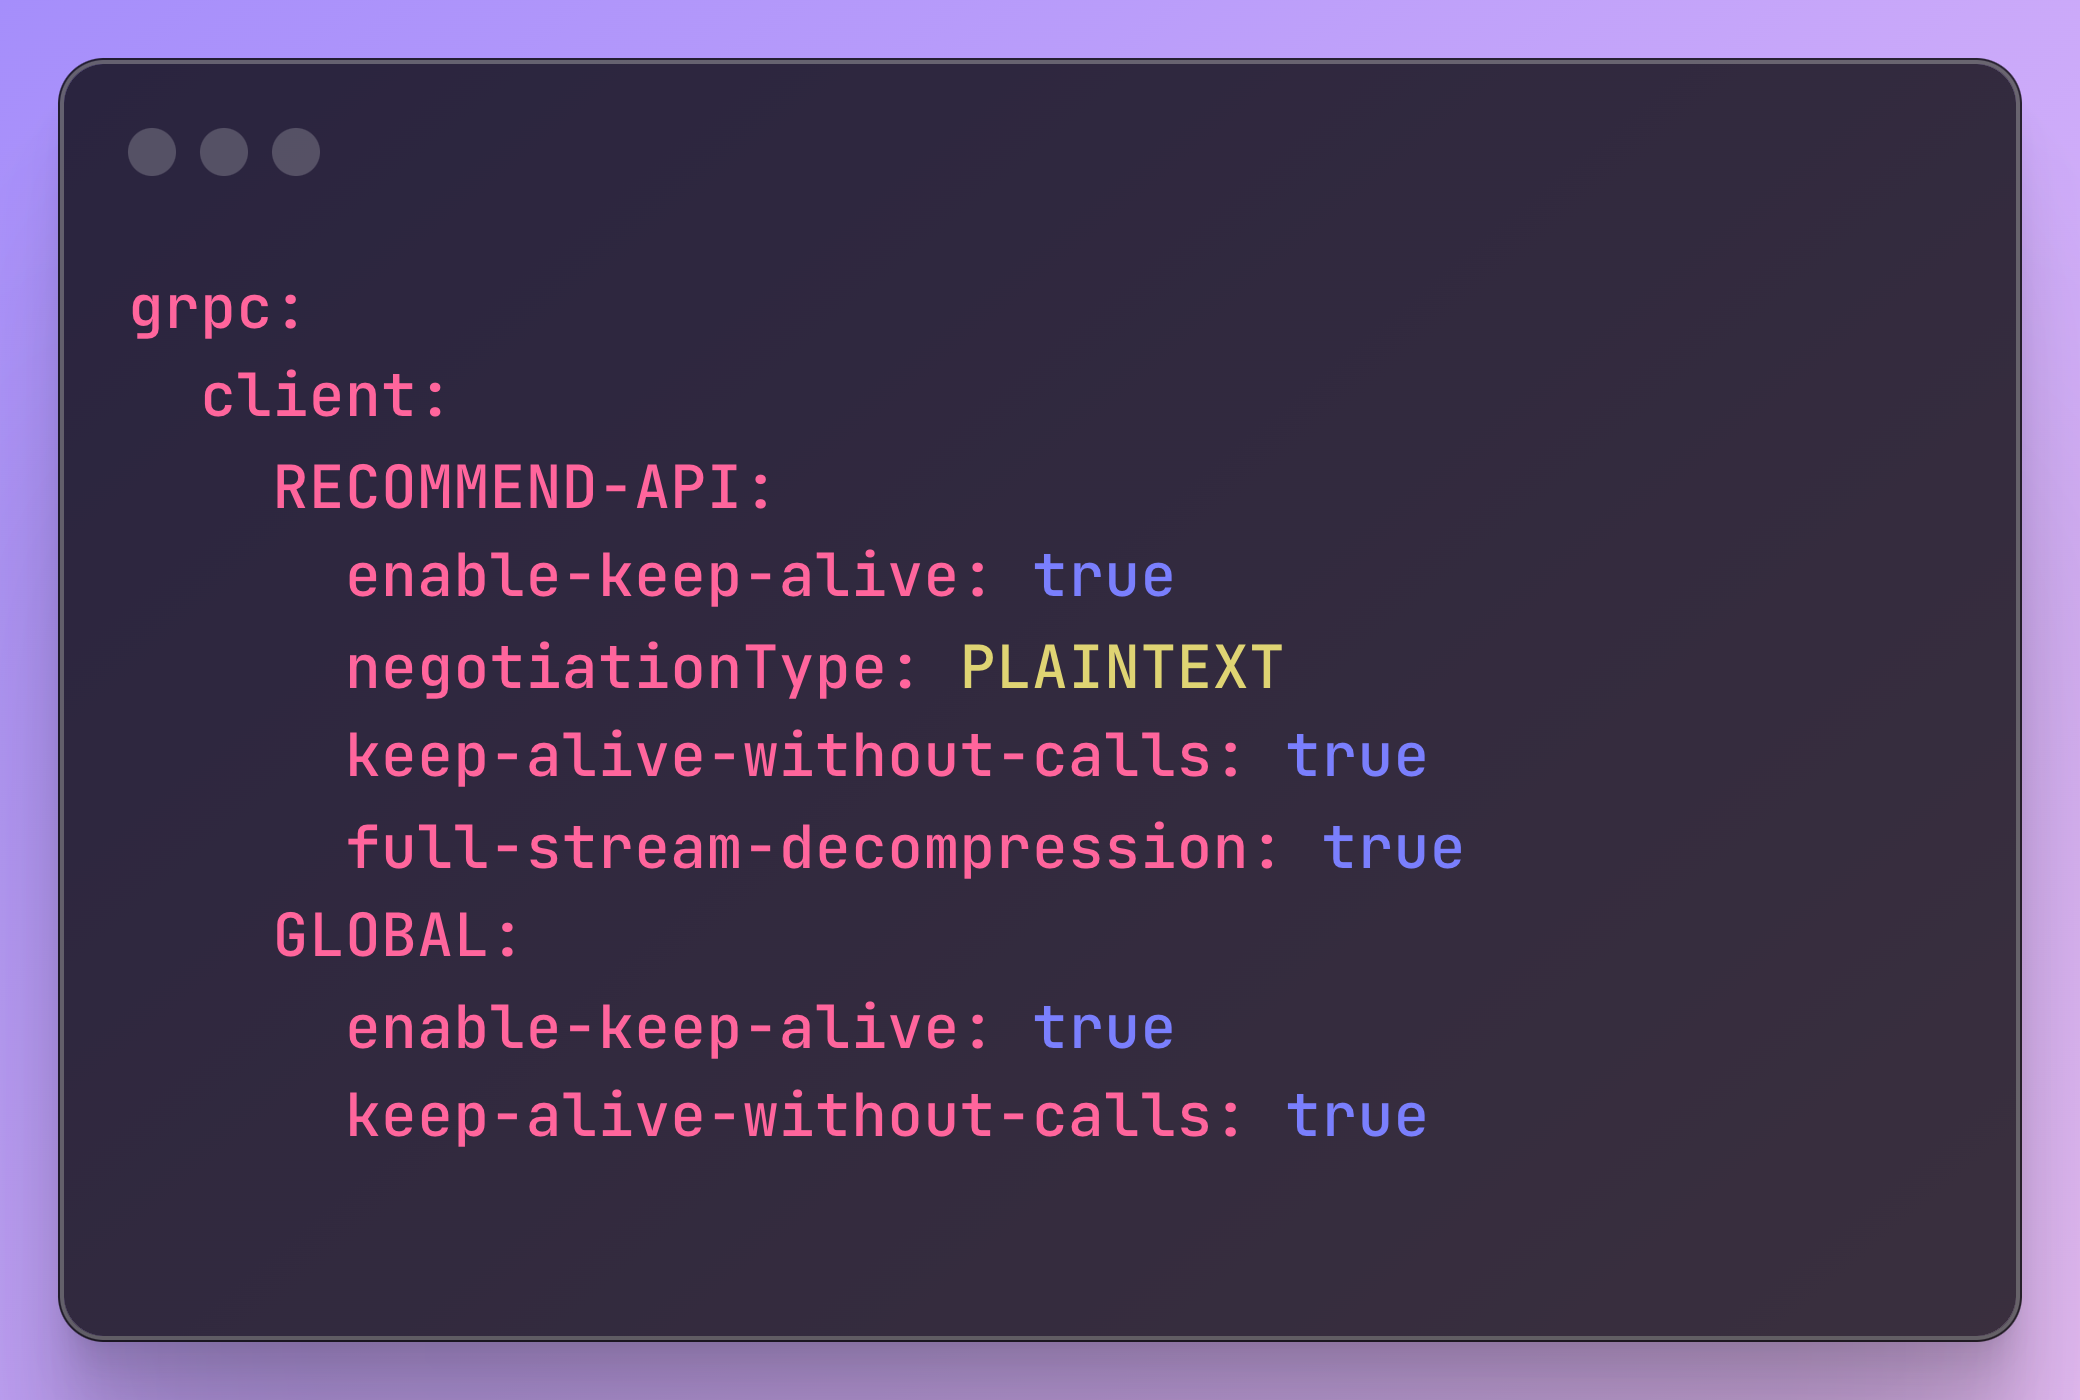
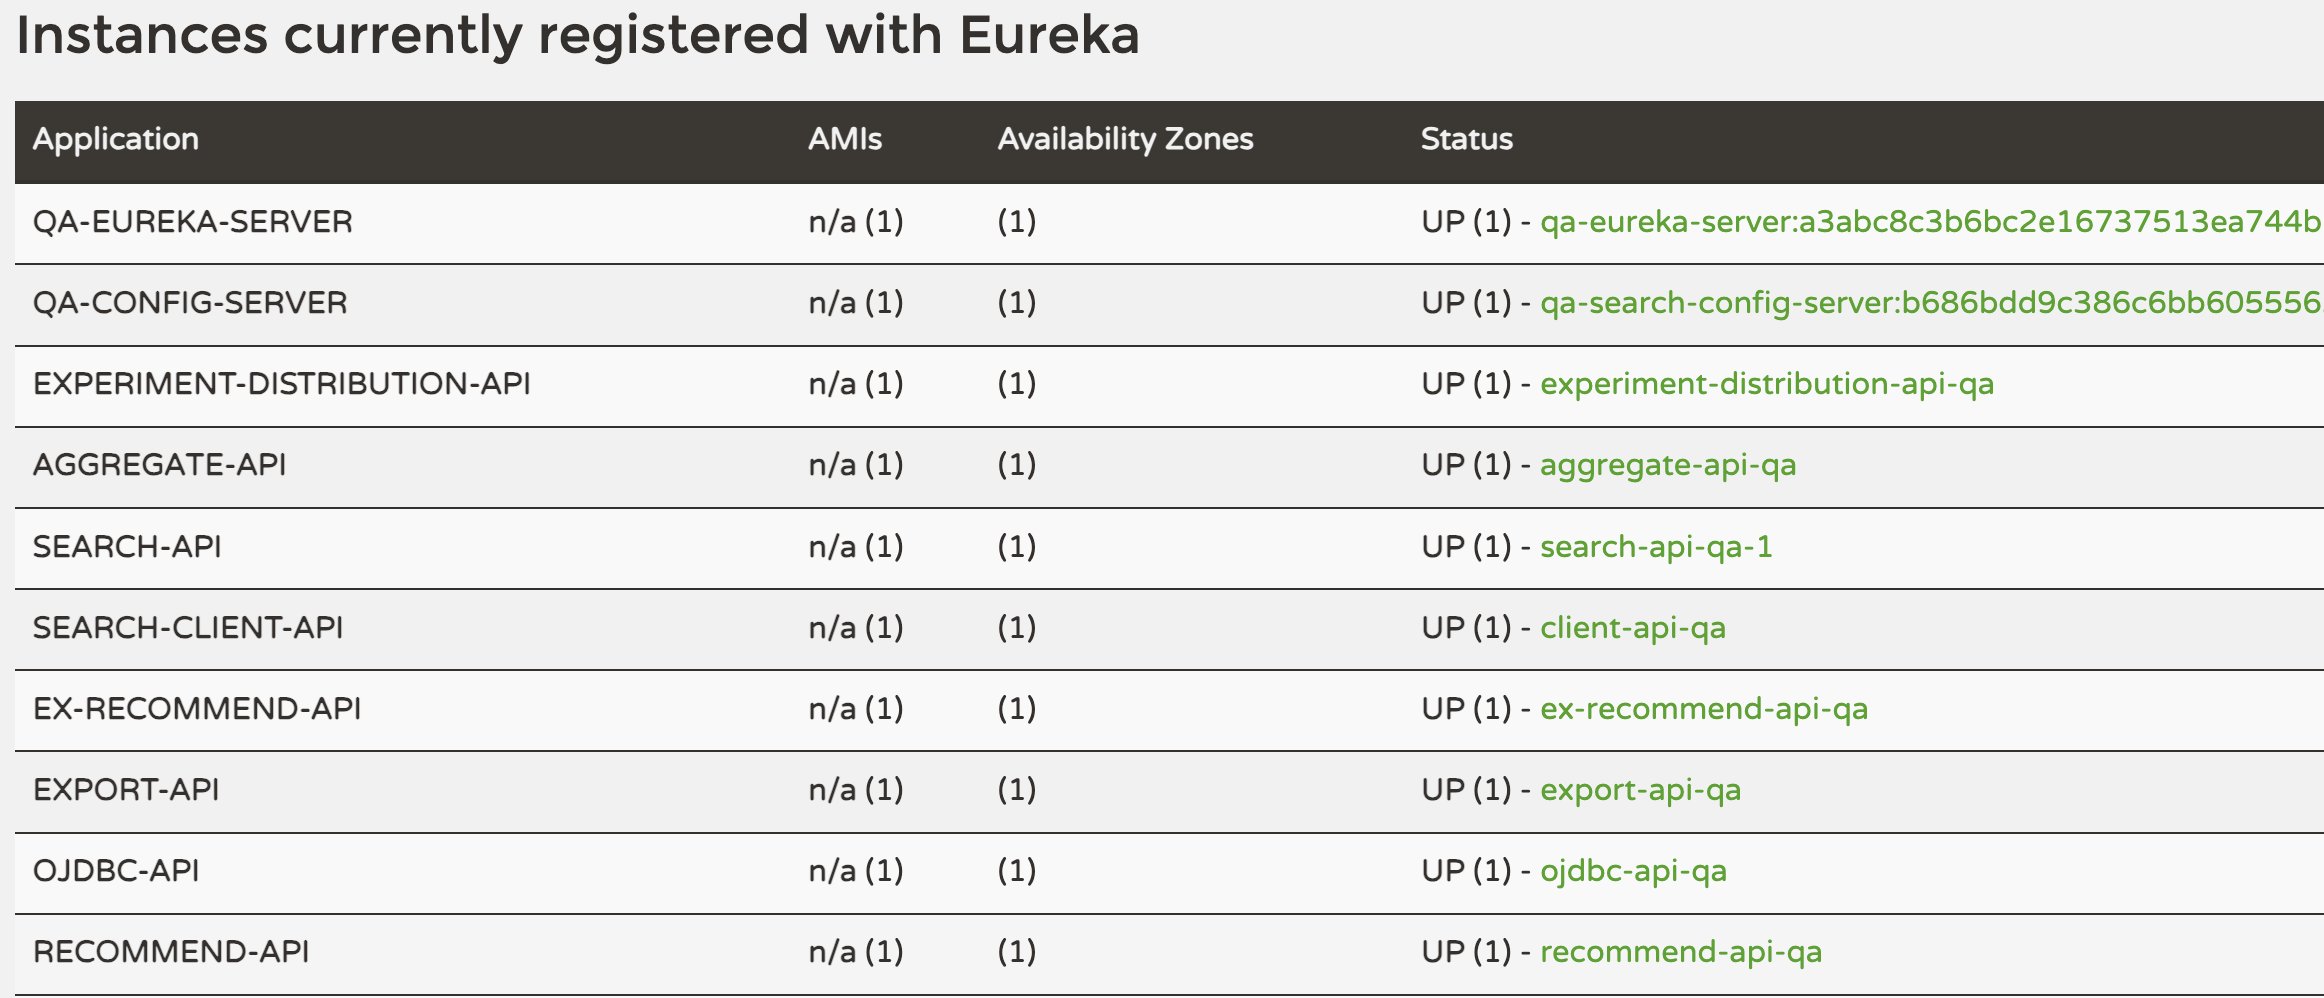
- 이렇게 되면 별도의 adress 지정을 하지 않고 명시적으로 Application name만 지정할 수 있다.
가능한 이유
net.devh.boot.grpc.client.autoconfigure.GrpcDiscoveryClientAutoConfiguration
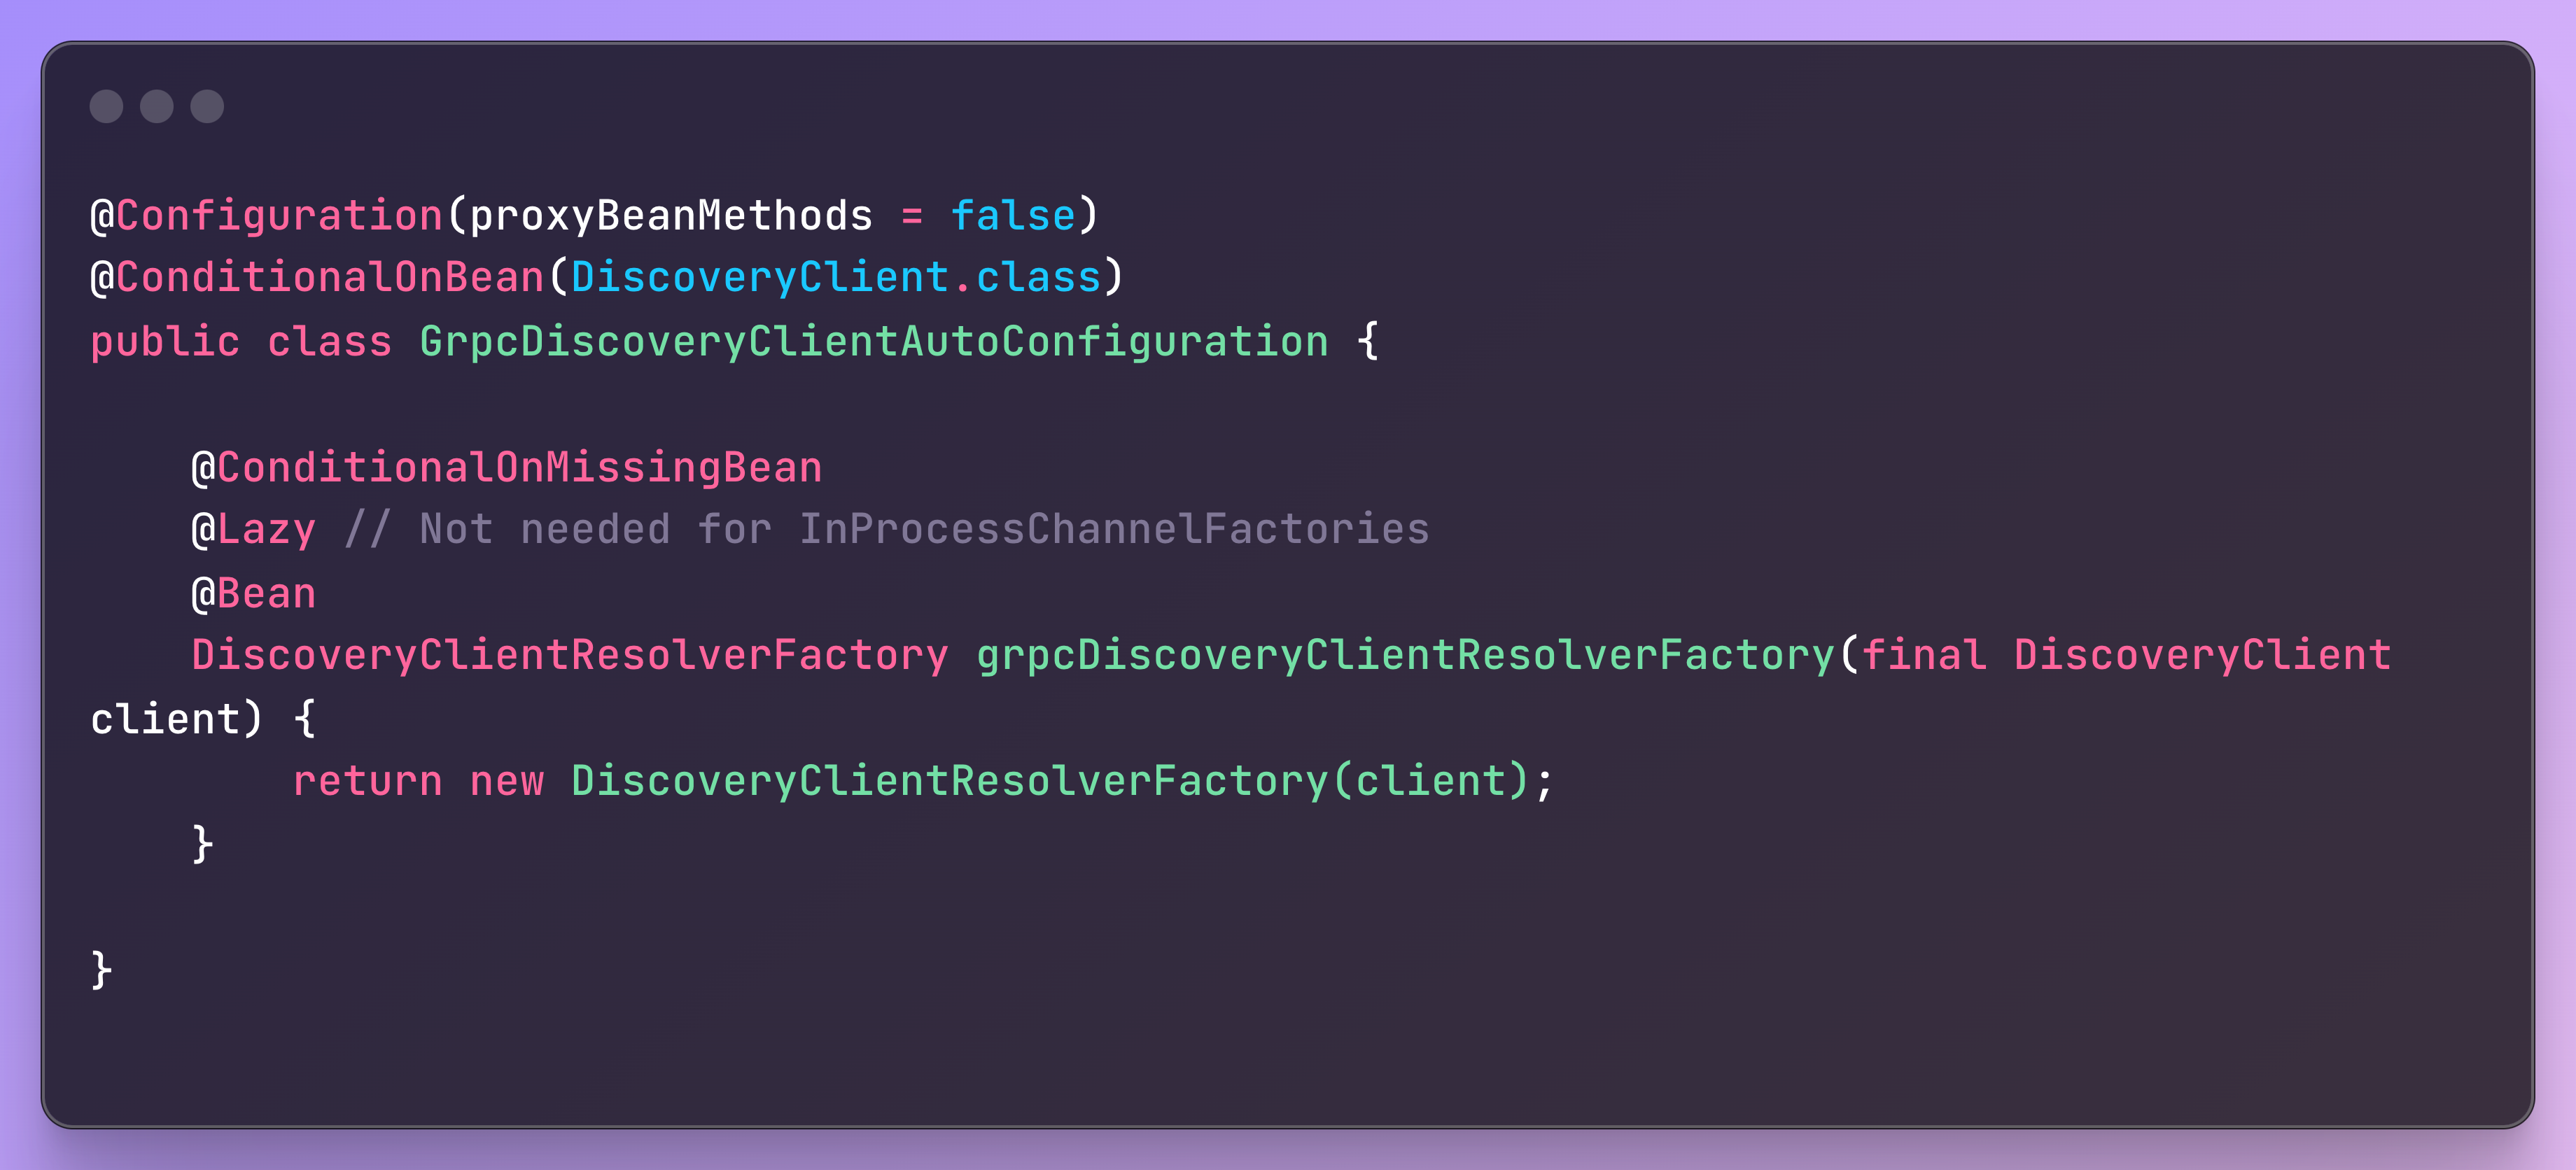
가능한 이유는 의존성을 추가한 grpc-spring-boot-starter 에 있다.
GrpcDiscoveryClientAutoConfiguration객체 내부를 살펴보면 내부적으로DiscoveryClientResolverFactory를 이용해 discovery를 수행하는 것을 볼 수 있다.
Subscribe to my newsletter
Read articles from sangminLee directly inside your inbox. Subscribe to the newsletter, and don't miss out.
Written by
