Creating a Virtual Environment in Python with Pipenv
 Chijiuba Victory
Introduction
When starting a new Python project, it's essential to manage dependencies and ensure that the project's environment is isolated from other projects and the system-wide Python installation. One of the best ways to achieve this is by using virtual environments. In this article, we will discuss how to create a virtual environment using Pipenv and why it's crucial to use virtual environments for your Python projects.
Why Use Virtual Environments?
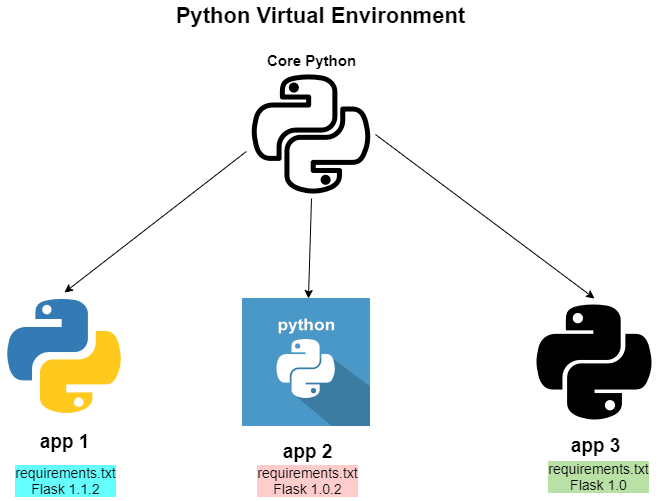
Dependency Management: Different projects often require different versions of the same packages. Virtual environments allow each project to have its own dependencies, avoiding conflicts and ensuring compatibility.
Isolation: A virtual environment isolates the project’s dependencies from the system Python installation and other projects. This prevents issues where a global package update might break your project.
Reproducibility: Using virtual environments makes it easier to share your project with others. By including a Pipfile (or requirements.txt), others can recreate the exact environment needed to run your project, ensuring consistency across different setups.
Setting Up Pipenv
Pipenv is a popular tool for managing Python project dependencies. It combines the functionality of pip and virtualenv into a single tool, simplifying the process of managing project environments and dependencies.
Step 1: Install Pipenv
First, you need to install Pipenv. You can do this using pip:
pip install pipenv
Step 2: Create a Project Directory
Create a new directory for your project and navigate into it:
mkdir my_project
cd my_project
Step 3: Create a Virtual Environment
To create a virtual environment and initialize a Pipfile in your project directory, run:
pipenv install
If you want to specify a particular Python version, you can use:
pipenv --python 3.8
Replace 3.8 with the version of Python you want to use.
Step 4: Installing Packages
To install packages using Pipenv, use the following command:
pipenv install package_name
For example, to install Flask:
pipenv install flask
Step 5: Activating the Virtual Environment
To activate the virtual environment, use:
pipenv shell
This command opens a new shell with the virtual environment activated, allowing you to run your project with its isolated dependencies.
Step 6: Deactivating the Virtual Environment
To deactivate the virtual environment, simply type:
exit
or press Ctrl+D.
Conclusion
Creating a virtual environment is a best practice when starting a new Python project. It ensures that your project's dependencies are managed efficiently, prevents conflicts, and provides a reproducible setup for other developers. Pipenv simplifies the process by combining dependency management and virtual environment creation into a single tool. By using Pipenv, you can ensure that your Python projects are organized, maintainable, and free from dependency issues.
Subscribe to my newsletter
Read articles from Chijiuba Victory directly inside your inbox. Subscribe to the newsletter, and don't miss out.
Written by

Chijiuba Victory
Chijiuba Victory
Hello, I'm Victory a Software Engineer . I work as backend developer and I love exploring the world of technology. I build interactive web apps while also writing on tech related topics to help others.