3-Tier DevSecOps CICD Pipeline Ultimate Real-Time Project
 Shazia Massey
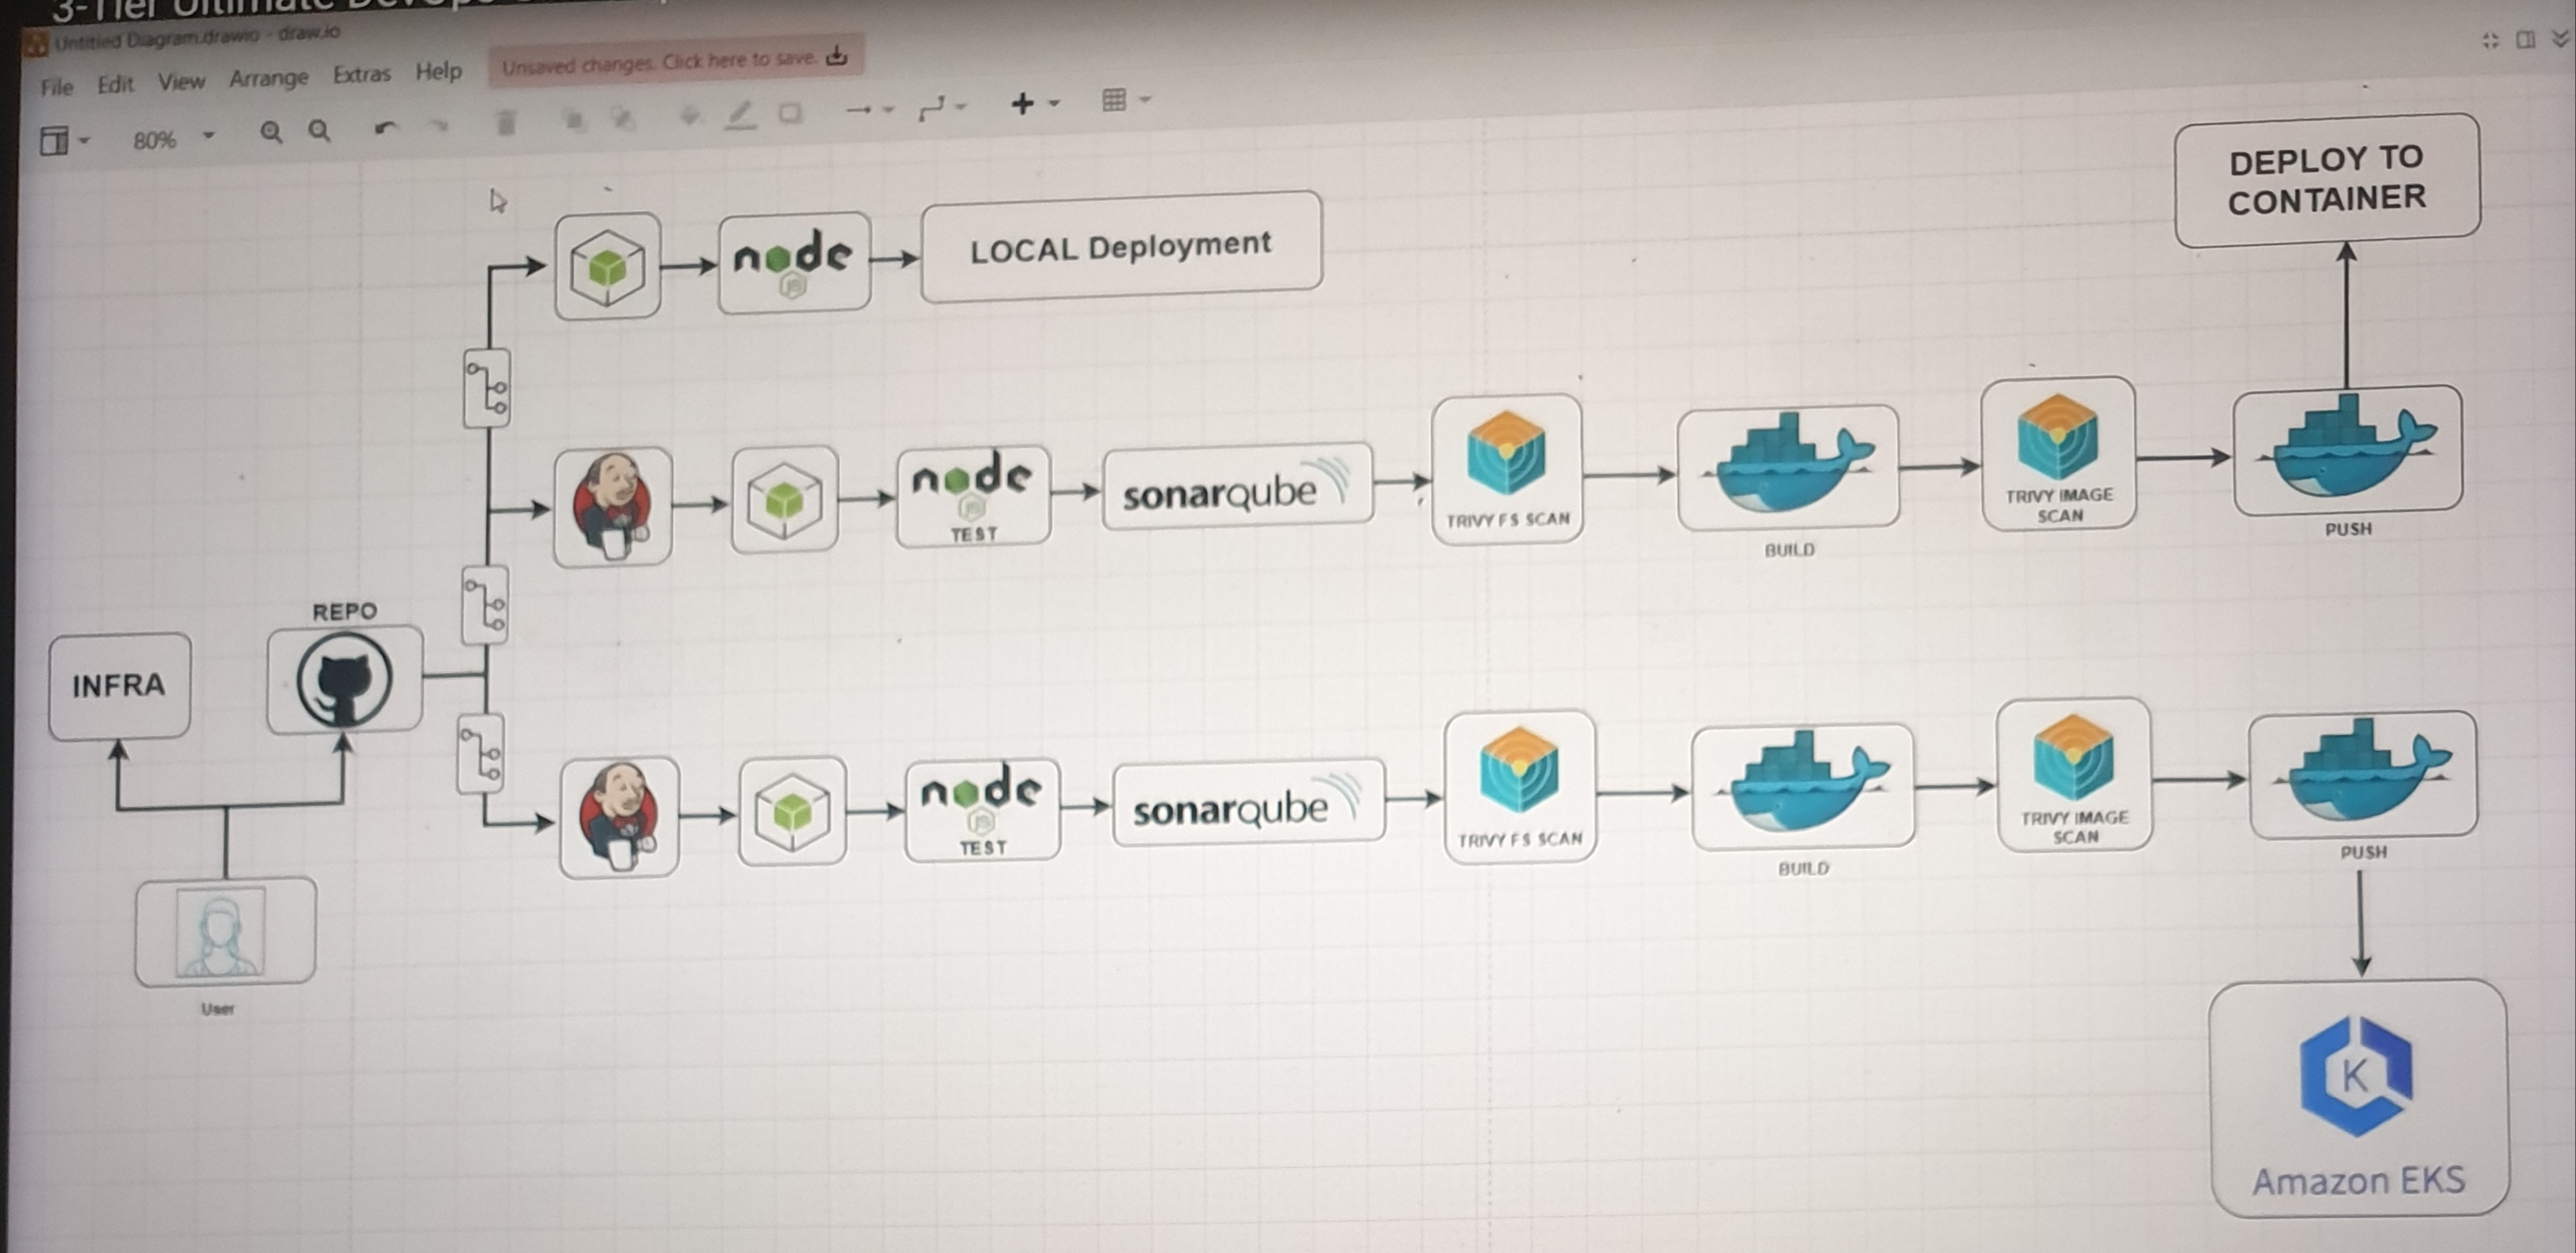
The pipeline automates code deployment both locally and to Amazon EKS, including steps for building, testing, code quality analysis, security scanning, containerization, and deployment, ensuring that both local and cloud deployments follow a robust and secure process.
Part 1 : Local Deployment:
EC2 instance type t2.medium
First Install Nodejs (v21.7.3):
#sudo apt update
# git clone https://github.com/shazia-massey/3-Tier-Full-Stack.git
# cd 3-Tier-Full-Stack


# installs nvm (Node Version Manager):
curl -o- https://raw.githubusercontent.com/nvm-sh/nvm/v0.39.7/install.sh | bash

#here we need to run these three commands:
export NVM_DIR="$HOME/.nvm"
[ -s "$NVM_DIR/nvm.sh" ] && \. "$NVM_DIR/nvm.sh"  # This loads nvm
[ -s "$NVM_DIR/bash_completion" ] && \. "$NVM_DIR/bash_completion"

# download and install Node.js (you may need to restart the terminal):
nvm install 21

# verifies the right Node.js version is in the environment:
node -v # should print `v21.7.3`

# verifies the right NPM version is in the environment:
npm -v # should print `10.5.0`


Create an account on Cloudinary, Mapbox and MongoDB.
Environment Variables for the Project:

# ls
# npm install
# vi .env
CLOUDINARY_CLOUD_NAME=douufwsul
CLOUDINARY_KEY=725142993528572
CLOUDINARY_SECRET=Uuw2bUzjhs7Drxh636ueYr9WxY
MAPBOX_TOKEN=sk.eyJ1IjoibWFzc2V5cyIsImEiOiJjHlhOGphanQwNTFpMnFyMnY3Yn4eG04In0._OiMQW_KuN4xgmMTuJS3w
DB_URL="mongodb+srv://masseyss123:jZAnLvXzEFLeYC0B@shazia-ds.q5uagqp.mongodb.net/?retryWrites=true&w=majority&appName=Shazia-DS"
SECRET=devops
# npm start
<IP: 3000>
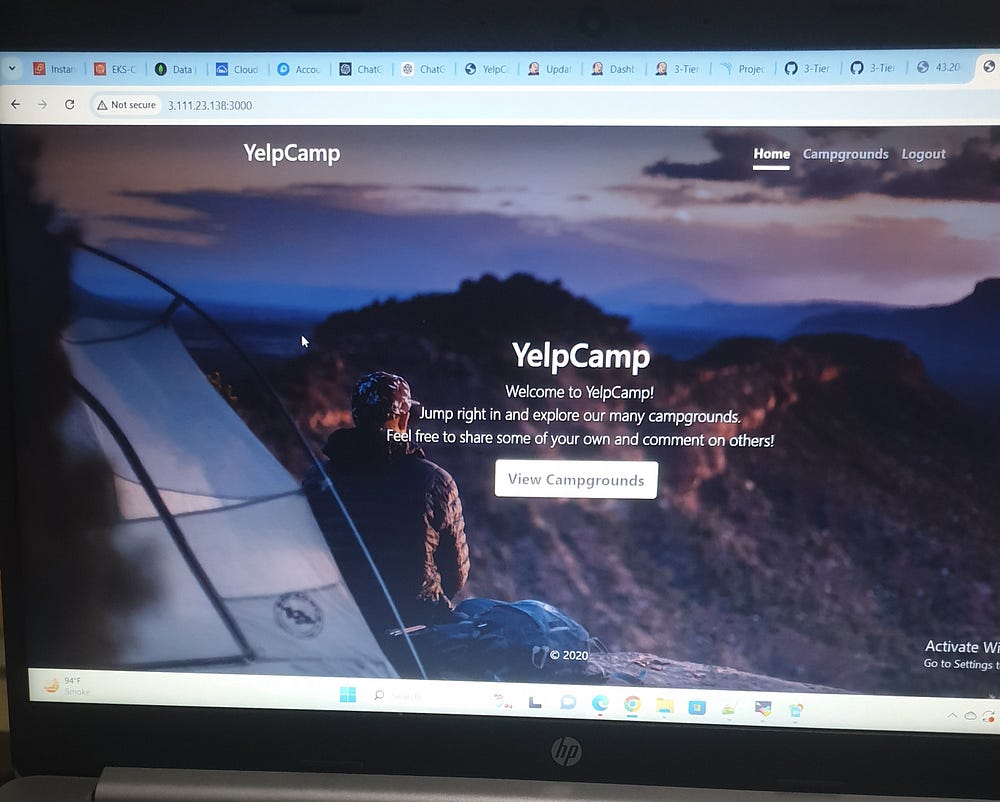
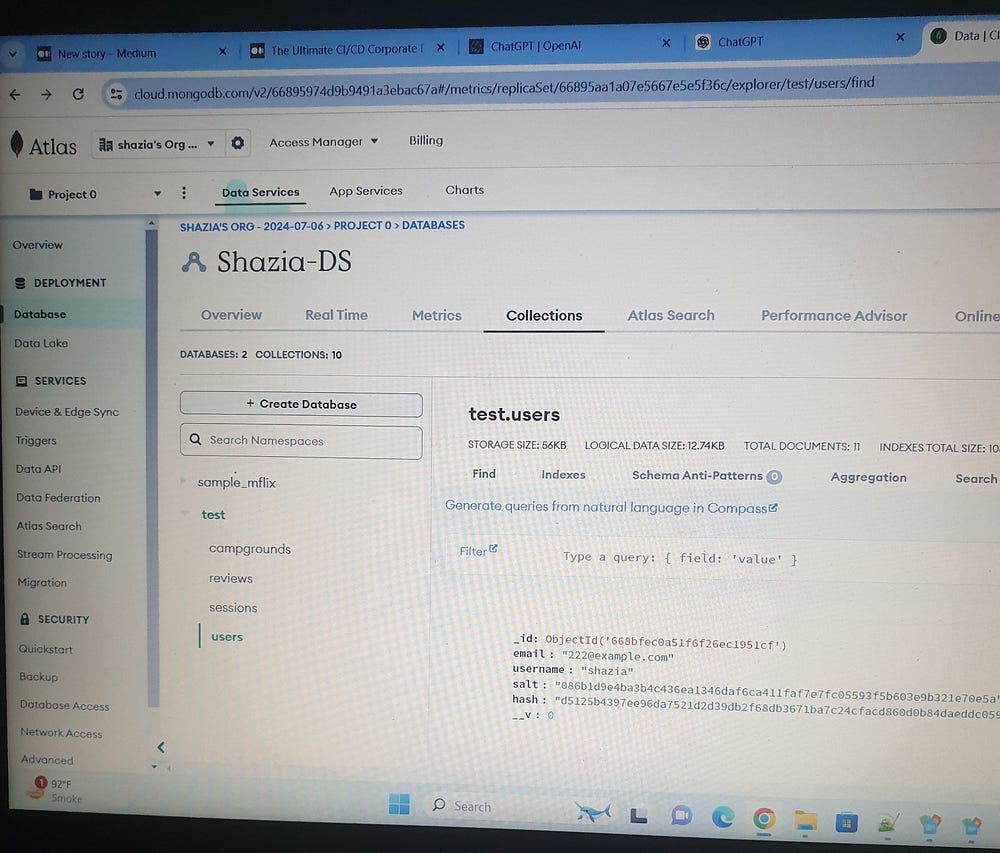
App Deployment On DEV Environment:
Part 2: Install Jenkins instance type t2.large (ubuntu server 22.04 LTS )
In order to set up Jenkins, we need Java as a prerequisite.
# java
# sudo apt install openjdk-17-jre-headless -y

Install Jenkins:
# mkdir script
# cd script
#  vi jen.sh

sudo wget -O /usr/share/keyrings/jenkins-keyring.asc \
  https://pkg.jenkins.io/debian/jenkins.io-2023.key
echo "deb [signed-by=/usr/share/keyrings/jenkins-keyring.asc]" \
  https://pkg.jenkins.io/debian binary/ | sudo tee \
  /etc/apt/sources.list.d/jenkins.list > /dev/null
sudo apt-get update
sudo apt-get install jenkins -y

# sudo chmod +x jen.sh
# ./jen,sh

Check if Jenkins is installed
<ip:8080>
# sudo cat /var/lib/jenkins/secrets/initialAdminPassword

We need to install Docker for Jenkins usage and Trivy for later use in the pipeline.

# docker
# sudo apt install docker.io -y
# sudo chmod 666 /var/run/docker.sock

# trivy
# cd script
# vi trivy.sh

sudo apt-get install wget apt-transport-https gnupg lsb-release
wget -qO - https://aquasecurity.github.io/trivy-repo/deb/public.key | sudo apt-key add -
echo deb https://aquasecurity.github.io/trivy-repo/deb $(lsb_release -sc) main | sudo tee -a /etc/apt/sources.list.d/trivy.list
sudo apt-get update
sudo apt-get install trivy -y
Install SonarQube VM (instance type t2.medium):
# sudo apt update
# docker
# sudo apt install docker.io -y

Changing the permissions of /var/run/docker.sock to 666 allows applications and users to communicate with the Docker daemon without requiring root privileges
# sudo chmod 666 /var/run/docker.sock
Install SonarQube:
# docker run -d --name sonar -p 9000:9000 sonarqube:lts-community
Check if SonarQube is installed
# <ip:9000>
Log in to SonarQube with the admin username and password, then change it later.
Jenkins Plugins Installation:
Manage Jenkins>> Plugins >> Nodejs,SonarQube Scanner, docker, docker pipeline, kubernetes, kubernetes cli.
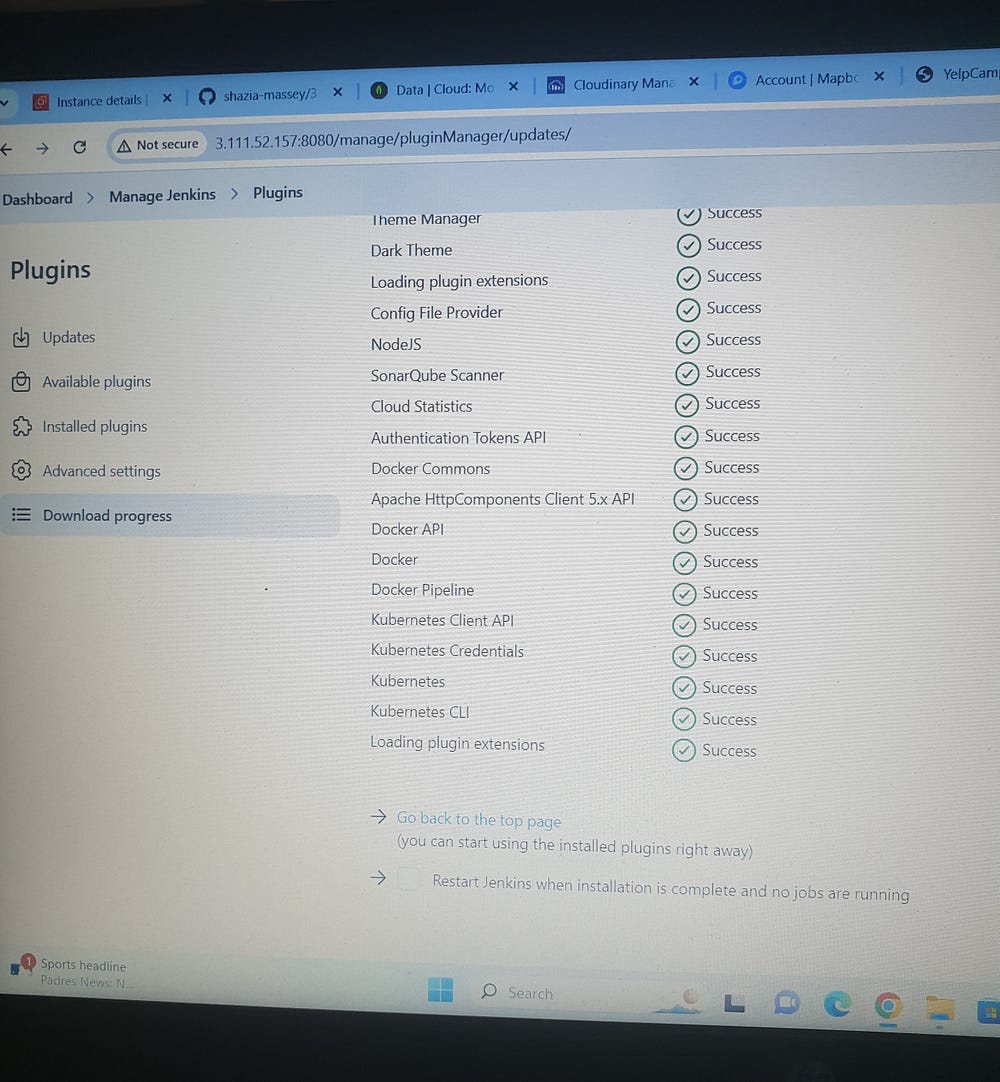
Manage Jenkins>> Tools:
SonarQube Scanner installations\>> Name — — sonar-scanner >> Install automatically( Install from Maven Central, version: SonarQube Scanner 5.0.1.3006)
Nodejs installations\>> Name — node21\>>Install automatically(Install from nodejs.org, version:21.7.0)
Docker installations\>> Name — docker >> Install automatically(Download from docker.com, version: latest)
Manage Jenkins >> System:
- SonarQube installations>> Name — sonar\>> Server URL(http://localhost:9000)>> Server authentication token(SonarQube server>>Administration>>Security>>User>>generate token-Name: sonar-token)
Manage Jenkins >> Credentials:
Git >> Repository URL>>branch>> credential — Git username — instead of password we provide token>> ID git-cred
Docker\>> DockerHub username>> personal access token>> ID>>docker.cred
SonarQube\>> Kind >> secret >>ID>>sonar-token
Kubernetes\>> Kind>> secret>>ID>>k8-token
First we do Lower Environment Deployment:
Jenkins Dashboard >> New Item >> Dev-Deployment
Jenkins pipeline stages for Dev-Deployment are as follows:
pipeline {
    agent any

    tools {
        nodejs 'node21'
    }

    environment {
        SCANNER_HOME= tool  'sonar-scanner'
    }

    stages {
        stage('Git Checkout') {
            steps {
                git credentialsId: 'git-cred', url: 'https://github.com/shazia-massey/3-Tier-Full-Stack.git'
            }
        }

        stage('Install Package Dependencies') {
            steps {
                sh "npm install"
            }
        }

        stage('Unit Tests') {
            steps {
                sh "npm test"
            }
        }

        stage('Trivy FS Scan') {
            steps {
                sh "trivy fs --format table -o fs-report.html ."
            }
        }

         stage('SonarQube') {
            steps {
              withSonarQubeEnv('sonar') {
                sh " $SCANNER_HOME/bin/sonar-scanner -Dsonar.projectKey=Campground -Dsonar.projectName=Campground"
               }
            }
        }

        stage('Docker Build & Tag') {
            steps {
                script {
                    withDockerRegistry(credentialsId: 'docker-cred', toolName: 'docker') {
                        sh "docker build -t masseys/camp:latest ."
                    }
                }
            }
        }

        stage('Trivy Image Scan') {
            steps {
                sh "trivy image --format table -o fs-report.html masseys/camp:latest"
            }
        }

  stage('Docker Push Image') {
            steps {
                script {
                    withDockerRegistry(credentialsId: 'docker-cred', toolName: 'docker') {
                        sh "docker push masseys/camp:latest"
                    }
                }
            }
        }

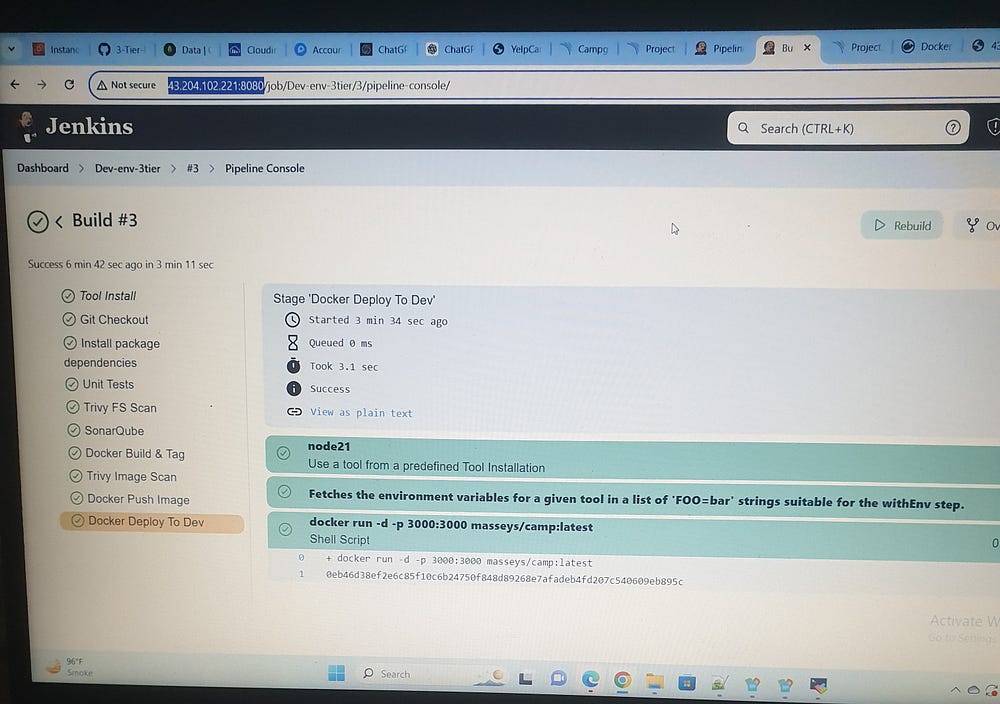
        stage('Docker Deploy To Dev') {
            steps {
                script {
                    withDockerRegistry(credentialsId: 'docker-cred', toolName: 'docker') {
                        sh "docker run -d -p 3000:3000 masseys/camp:latest"
                    }
                }
            }
        }
    }
}
Docker Push Image:

Docker Deploy To Dev:
EKS Cluster Setup (setup tools & cluster):
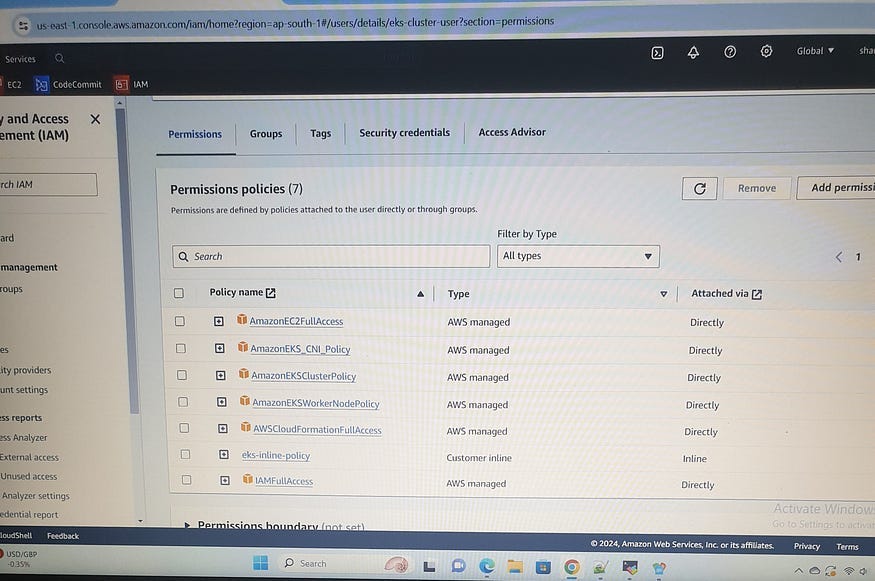
First create AWS IAM user (EKS-user)with attach policies:
\>AmazonEC2FullAccess
\>AmazonEKS_CNI_Policy
\>AmazonEKSClusterPolicy
\>Amazon EKSWorkerNodePolicy
\>AWSCloudFormationFullAccess
\>IAMFullAccess
\>One inline policy (eks-inline-policy)
{
    "Version": "2012-10-17",
    "Statement": [
        {
            "Sid": "VisualEditor0",
            "Effect": "Allow",
            "Action": "eks:*",
            "Resource": "*"
        }
    ]
}
Then install AWSCLI, KUBECTL, EKSCTL on Jenkins, after that aws configure with access key and secret access key.
#sudo apt update
#mkdir scripts
#cd scripts
#vi 1.sh

curl "https://awscli.amazonaws.com/awscli-exe-linux-x86_64.zip" -o "awscliv2.zip"
sudo apt install unzip
unzip awscliv2.zip
sudo ./aws/install

url -o kubectl https://amazon-eks.s3.us-west-2.amazonaws.com/1.19.6/2021-01-05/bin/linux/amd64/kubectl
chmod +x ./kubectl
sudo mv ./kubectl /usr/local/bin
kubectl version --short --client

curl --silent --location "https://github.com/weaveworks/eksctl/releases/latest/download/eksctl_$(uname -s)_amd64.tar.gz" | tar xz -C /tmp
sudo mv /tmp/eksctl /usr/local/bin
eksctl version

#sudo chmod +x1.sh
#./1.sh
# aws configure (access key, secret access key, region)
Create EKS Cluster:
eksctl create cluster --name=EKS-Cluster \
                      --region=ap-south-1 \
                      --zones=ap-south-1a,ap-south-1b \
                      --version=1.30 \
                      --without-nodegroup
OpenID Connect(OIDC) identity providers — a method to authenticate user to the cluster.
eksctl utils associate-iam-oidc-provider \
    --region ap-south-1 \
    --cluster EKS-Cluster\
    --approve
A node group in Amazon EKS is a collection of Amazon EC2 instances that are deployed in a Kubernetes cluster to run application workloads. These worker nodes run the Kubernetes workloads, including applications, services, and other components.
eksctl create nodegroup --cluster=Cluster-EKS \
                       --region=ap-south-1 \
                       --name=node2 \
                       --node-type=t3.medium \
                       --nodes=3 \
                       --nodes-min=2 \
                       --nodes-max=4 \
                       --node-volume-size=20 \
                       --ssh-access \
                       --ssh-public-key=DevOps \
                       --managed \
                       --asg-access \
                       --external-dns-access \
                       --full-ecr-access \
                       --appmesh-access \
                       --alb-ingress-access
To open inbound traffic in an additional security group on an EKS cluster, navigate to EKS > Networking > additional security group > Inbound rules, and add an inbound rule with the source 0.0.0.0/0.
Production Deployment:
First for Production deployment we need to create Service Account
RBAC (role base access control)
Bind the role to service account
# cd script
# kubectl get nodes
# vi svc.yml


apiVersion: v1
kind: Secret
type: kubernetes.io/service-account-token
metadata:
  name: mysecretname
  annotations:
    kubernetes.io/service-account.name: myserviceaccount

# kubectl create namespace webapps
# kubectl apply -f svc.yml
# vi role.yml


apiVersion: rbac.authorization.k8s.io/v1
kind: Role
metadata:
  name: app-role
  namespace: webapps
rules:
  - apiGroups:
        - ""
        - apps
        - autoscaling
        - batch
        - extensions
        - policy
        - rbac.authorization.k8s.io
    resources:
      - pods
      - secrets
      - componentstatuses
      - configmaps
      - daemonsets
      - deployments
      - events
      - endpoints
      - horizontalpodautoscalers
      - ingress
      - jobs
      - limitranges
      - namespaces
      - nodes
      - pods
      - persistentvolumes
      - persistentvolumeclaims
      - resourcequotas
      - replicasets
      - replicationcontrollers
      - serviceaccounts
      - services
    verbs: ["get", "list", "watch", "create", "update", "patch", "delete"]

# kubectl apply -f role.yml
# vi rb.yml
# kubectl apply -f rb.yml
# vi svc-secret.yml


apiVersion: v1
kind: Secret
type: kubernetes.io/service-account-token
metadata:
  name: mysecretname
  annotations:
    kubernetes.io/service-account.name: jenkins

# kubectl apply -f svc-secret.yml -n webapps
# kubectl describe secret mysecretname -n webapps
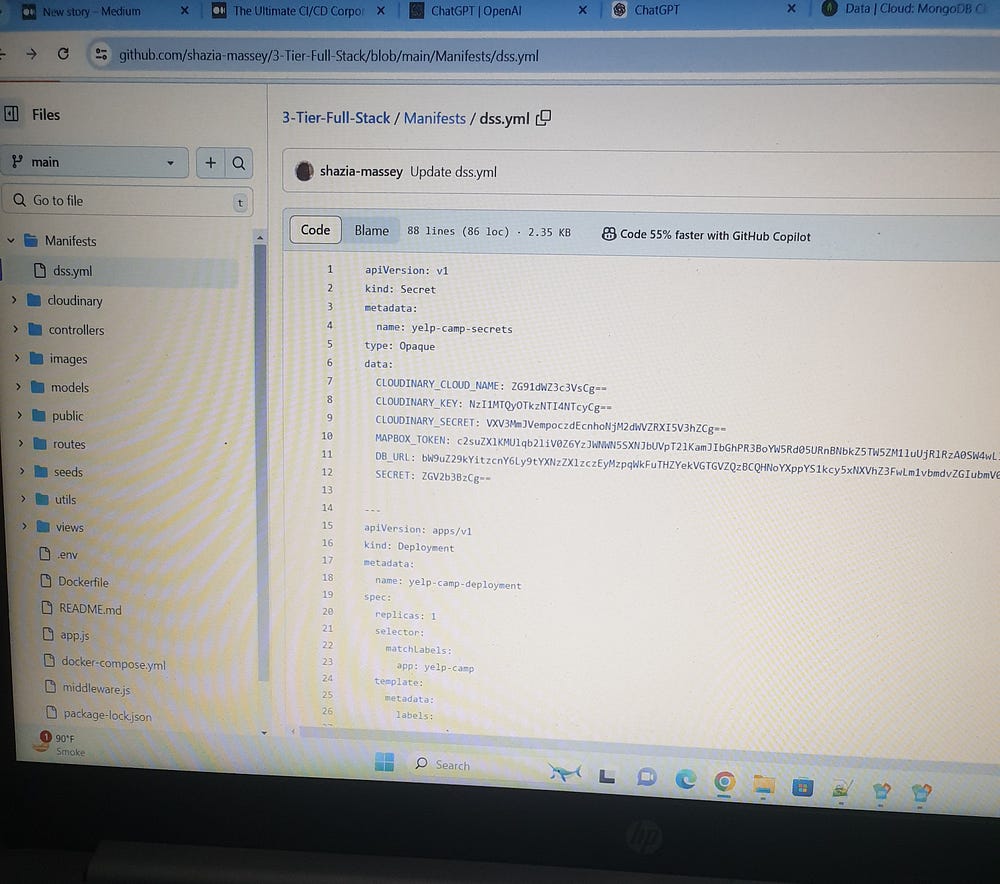
Encode the values of the environment variables and incorporate them into the Manifests/dss.yml file in the Git repository.
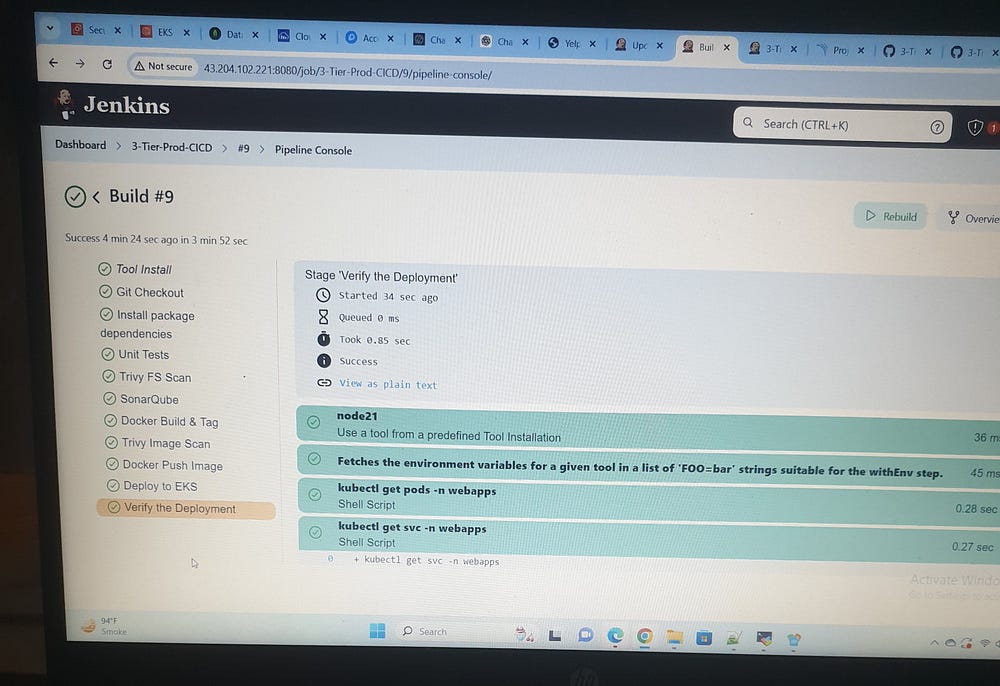
Jenkins pipeline stages for production Deployment are as follows:
Pipeline {
    agent any

    tools {
        nodejs 'node21'
    }

    environment {
        SCANNER_HOME= tool  'sonar-scanner'
    }

    stages {
        stage('Git Checkout') {
            steps {
                git credentialsId: 'git-cred', url: 'https://github.com/shazia-massey/3-Tier-Full-Stack.git'
            }
        }

        stage('Install Package Dependencies') {
            steps {
                sh "npm install"
            }
        }

        stage('Unit Tests') {
            steps {
                sh "npm test"
            }
        }

        stage('Trivy FS Scan') {
            steps {
                sh "trivy fs --format table -o fs-report.html ."
            }
        }

         stage('SonarQube') {
            steps {
              withSonarQubeEnv('sonar') {
                sh " $SCANNER_HOME/bin/sonar-scanner -Dsonar.projectKey=Campground -Dsonar.projectName=Campground"
               }
            }
        }

        stage('Docker Build & Tag') {
            steps {
                script {
                    withDockerRegistry(credentialsId: 'docker-cred', toolName: 'docker') {
                        sh "docker build -t masseys/camp:latest ."
                    }
                }
            }
        }

        stage('Trivy Image Scan') {
            steps {
                sh "trivy image --format table -o fs-report.html masseys/camp:latest"
            }
        }

  stage('Docker Push Image') {
            steps {
                script {
                    withDockerRegistry(credentialsId: 'docker-cred', toolName: 'docker') {
                        sh "docker push masseys/camp:latest"
                    }
                }
            }
        }

   stage('Deploy To k8') {
            steps {
                withKubeConfig(caCertificate: '', clusterName: 'EKS-Cluster', contextName: '', credentialsId: 'k8-token', namespace: 'webapps', restrictKubeConfigAccess: false, serverUrl: 'https://BD2E008A180E721142C52C8D7F2AE818.gr7.ap-south-1.eks.amazonaws.com') {
                   sh "kubectl apply -f Manifests/dss.yml"
                   sleep 60
                }
            }
        }

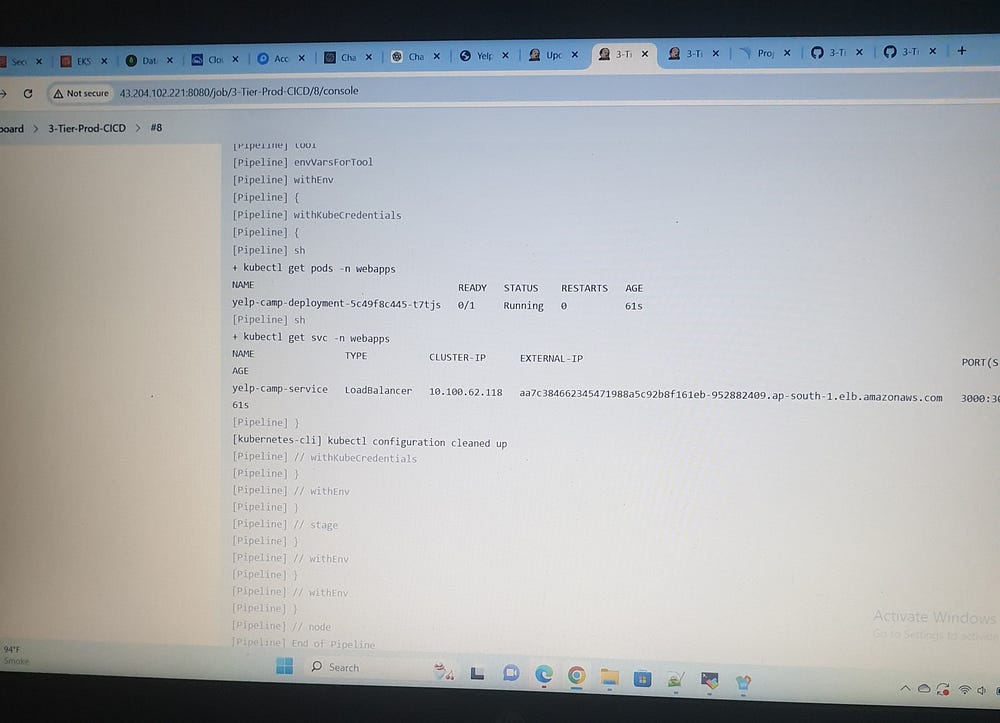
        stage('Verify Deployment') {
            steps {
                withKubeConfig(caCertificate: '', clusterName: 'EKS-Cluster', contextName: '', credentialsId: 'k8-token', namespace: 'webapps', restrictKubeConfigAccess: false, serverUrl: 'https://BD2E008A180E721142C52C8D7F2AE818.gr7.ap-south-1.eks.amazonaws.com') {
                   sh "kubectl get pods -n webapps"
                   sh "kubectl get svc -n webapps"
                }
            }
        }
    }

  }
}
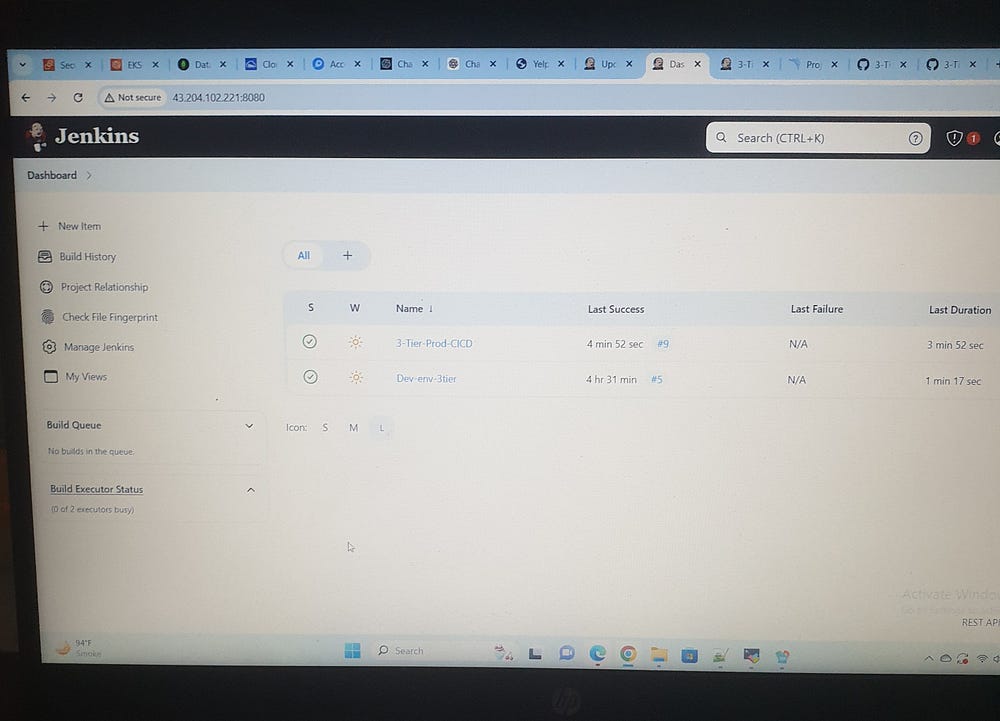
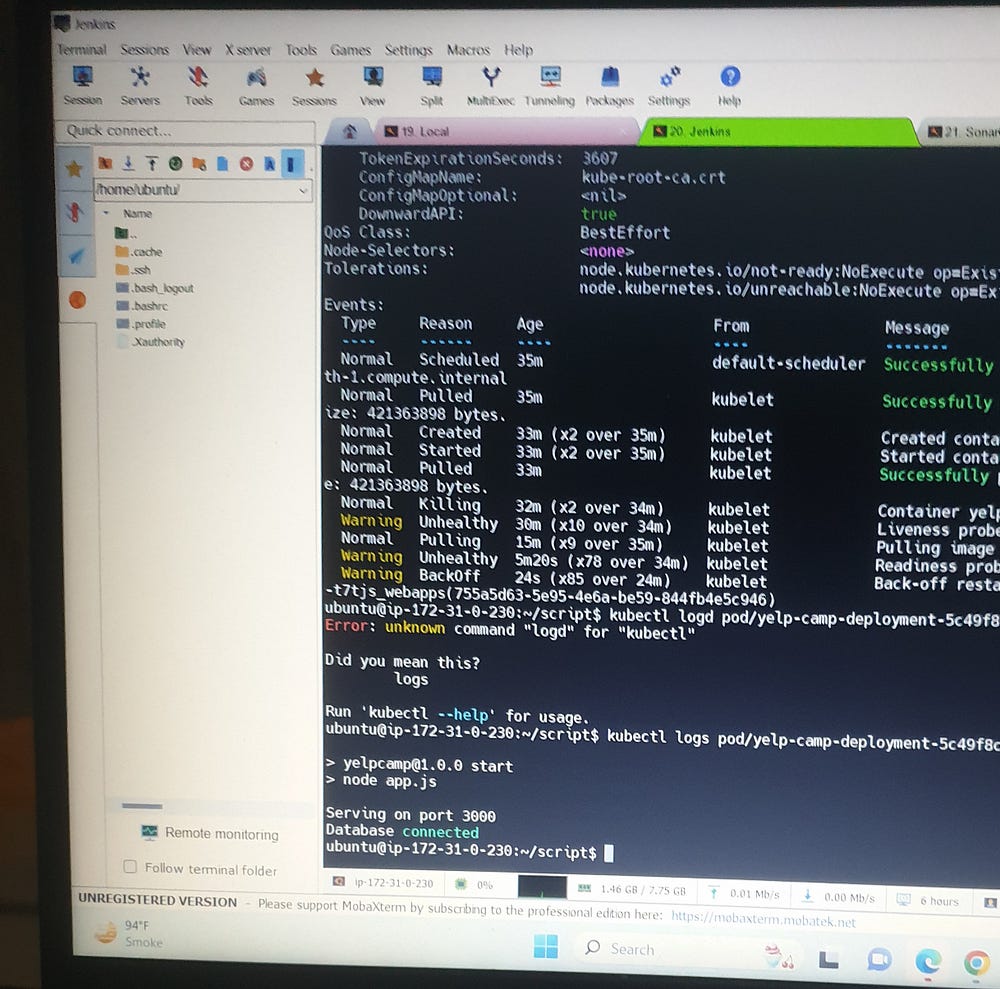
In essence, I was instrumental in creating and implementing the 3-Tier DevSecOps CI/CD pipeline, ensuring seamless automation for local and cloud deployments. I also provided thorough documentation of the process to enhance clarity and accessibility.
Subscribe to my newsletter
Read articles from Shazia Massey directly inside your inbox. Subscribe to the newsletter, and don't miss out.
Written by
