Boost Your AI Workflow: A Guide to Using Ollama, OpenwebUI, and Continue
 Julien.cloud
In a previous article, I discussed how I used Fabric with a local Large Language Model (LLM) to enhance AI prompts and perform tasks like summarizing text, writing Merge Requests, and creating agile user stories.
In this article, we will continue this journey by exploring some other recent discoveries that are truly amazing.
First, we will learn how to run LLM locally using Ollama, an alternative to LM Studio.
Next, we will explore how to use Ollama with a web console to create a local version of ChatGPT/Anthropic.
Finally, we will see how to integrate it with Continue on Visual Studio Code to have a local coding assistant.
Running local models with Ollama
Ollama is a powerful tool designed to help you download and run Large Language Models (LLMs) locally on your machine. It is similar to LM Studio but does not come as software. Instead, it is a tool that runs on your machine, and you interact with it using CLI or API calls.
The installation is straightforward on the website: https://ollama.com/download
Then you can browse the list of available models on the library page at: https://ollama.com/library
To download and run a model, follow the command on the model page, for example: ollama run llama3.1
It will take some time to download the necessary files and then open a prompt that you can use to interact with the model. It is as simple as that.
To interact with the model using API calls, use :curlhttp://localhost:11434/api/generate -d '{ "model": "llama3.1:8b", "prompt": "Why is the sky blue?", "stream": false }'
Once you've downloaded several models, you can see which ones are available to use on your machine: ollama list
Because Ollama dynamically loads and unloads the models to avoid overloading your system, you can also see which models are currently loaded: ollama ps
If you want to see what is happening behind the scenes:
On Mac:
tail -f ~/.ollama/logs/server.logOn Linux:
journalctl -e -u ollama
If you need to write an application that leverages this local LLM, head to https://github.com/ollama/ollama/tree/main/examples to get some examples like:
from langchain.llms import Ollama

input = input("What is your question?")
llm = Ollama(model="llama3")
res = llm.predict(input)
print (res)
Once you've set up and run the model, you can use the Ollama run command or the API. For an enhanced experience, a web interface can be very useful. In the next section, we'll explore how to set up a web console.
Setting Up a Web Console with OpenwebUI
To get the web console up and running, I personally use the Docker version:
docker run -d -p 3000:8080 --add-host=host.docker.internal:host-gateway -v open-webui:/app/backend/data --name open-webui --restart always ghcr.io/open-webui/open-webui:main
You can also use pip, helm, or docker-compose. For all installation methods, visit : https://docs.openwebui.com/getting-started/
Once it is running, you can access it via http://localhost:3000/, sign up to create a (local) account, and log in.
Once logged in, go to Admin Panel / Settings / Connections. Here you will be able to connect it to your local Ollama as well as other LLM providers such as OpenAI, Anthropic, Groq, etc.
As you can see in the following example, I have configured it to use all of these providers:
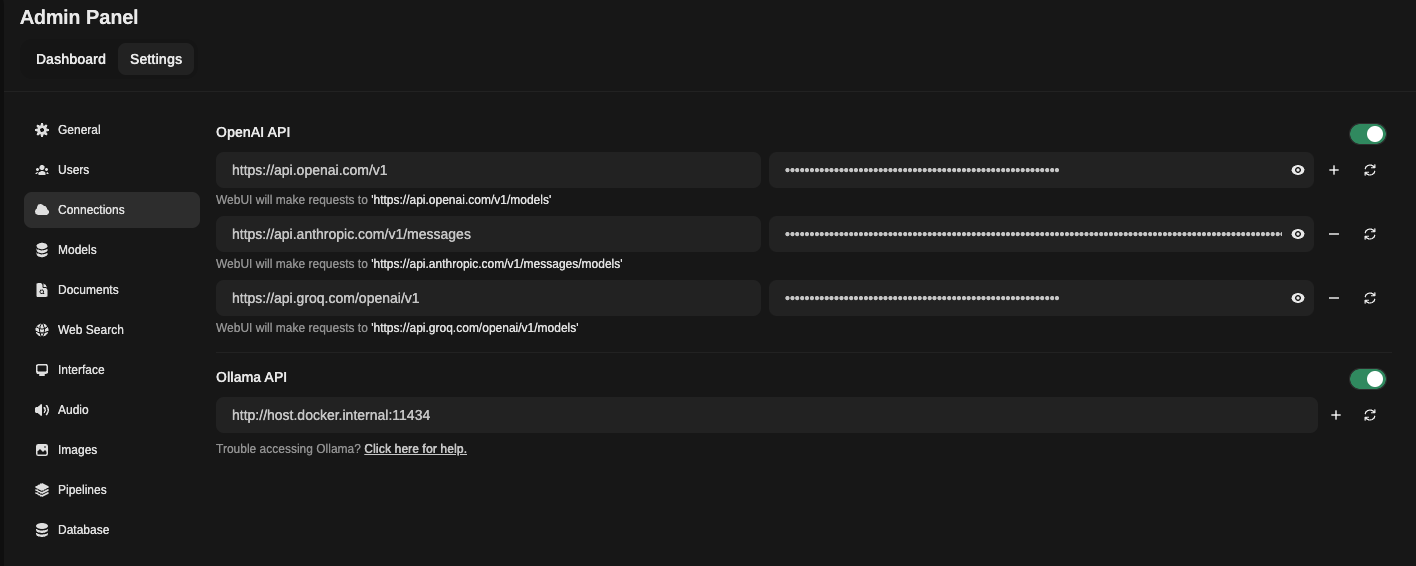
Using the Chat Feature in OpenwebUI
Once this is done, you can start a new chat, select a model from the list, and start using it:
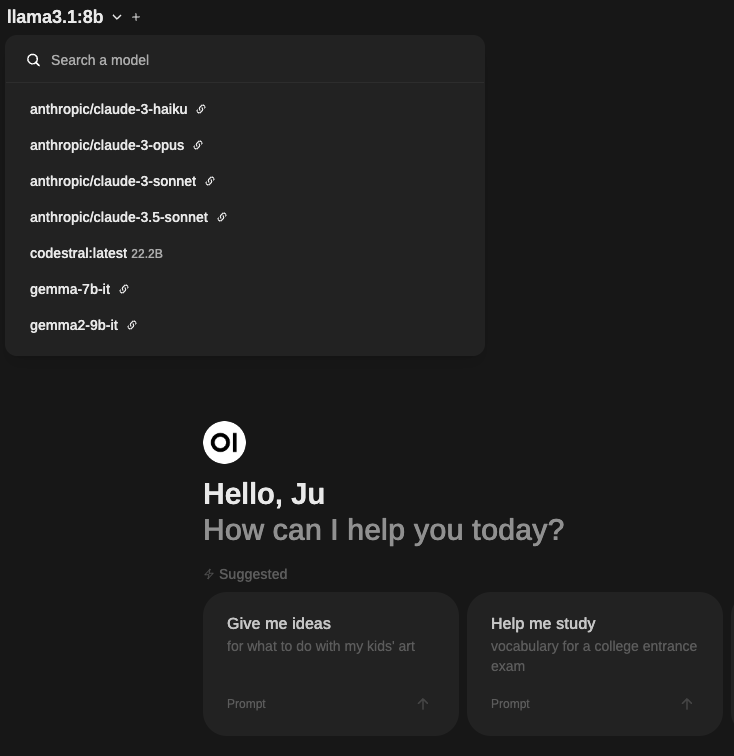
The list will show all available models from the connections you previously configured.
Comparing Models in OpenwebUI
Another interesting feature is that you can compare two models by clicking on the + button next to the model's name:
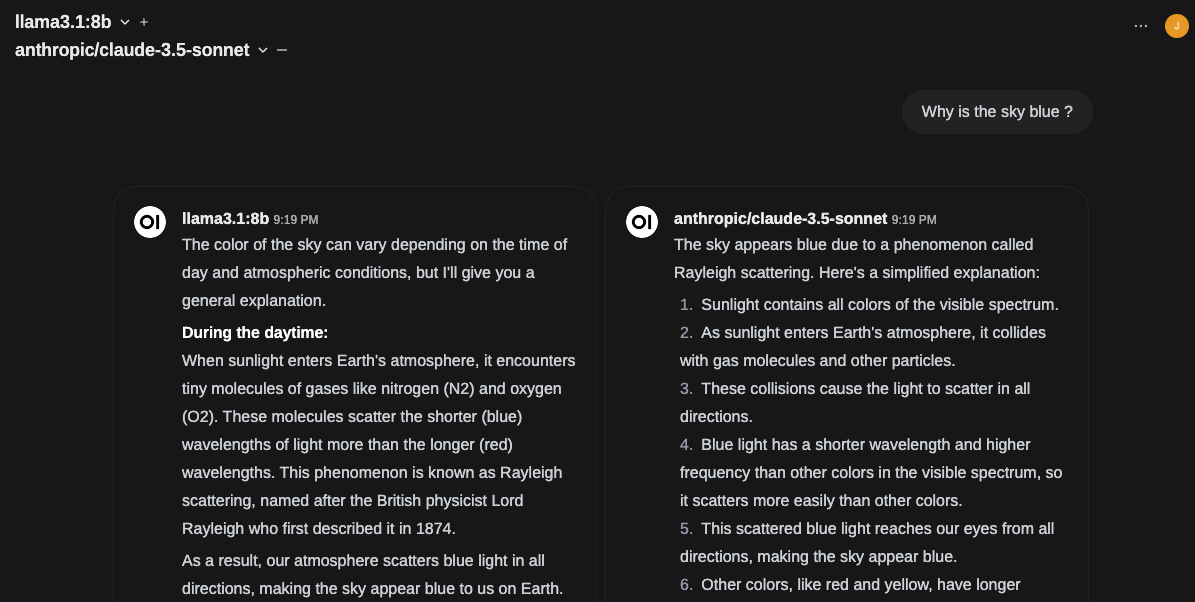
This is an interesting way to compare model outputs and get multiple results to help you make the best decision.
Preconfiguring Prompts in OpenwebUI
When you go to your workspace, you can also preconfigure Prompts. This will help you speed up regular tasks you might ask your model to do, such as writing an email.
You are tasked with improving a draft email. Your goal is to enhance the email's clarity, professionalism, and effectiveness while maintaining its original intent. Here is the draft email:

<draft_email>
{{CLIPBOARD}}
</draft_email>

To improve this email, follow these steps:

1. Correct any grammatical errors, spelling mistakes, or typos.
2. Improve the overall structure and flow of the email.
3. Ensure the tone is appropriate for the intended recipient and purpose.
4. Clarify any vague or ambiguous statements.
5. Remove unnecessary information and add relevant details if needed.
6. Strengthen the call-to-action (if applicable).
7. Ensure the opening and closing are professional and appropriate.

After providing the improved email, briefly explain the main changes you made and why, in 2-3 sentences.

Remember to maintain the original intent and key information of the email while making these improvements.
To use this, I usually write a draft version of the email, copy it to the clipboard, then go to the chat and use the / command to invoke the prompt. It will automatically copy the draft with the prompt and submit it to the selected model.
There are many other features you can explore, such as custom models, document uploads, and various parameters in both personal and admin settings.
To use models and tools from the community: https://openwebui.com/#open-webui-community
Integrating Continue with VS Code
Now that we have a user-friendly web interface for our models, it would be great to use it in our development environment too. For this, I use a tool called Continue: https://www.continue.dev/. You can download the plugin from the VS Code marketplace. After installing it, open the plugin and go to the configuration button.
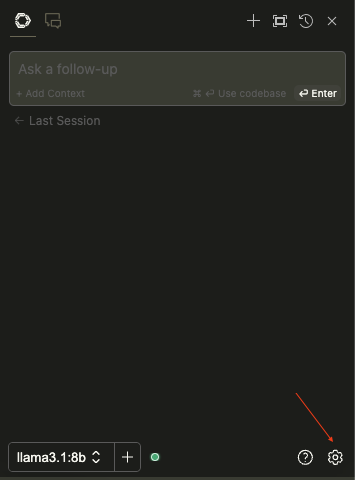
This will open a Config.json file. This is where you will be able to configure all the integrations. There are three important sections:
models: configure integration for the chat
tabAutocompleteModel: configure integration for autocompletion
embeddingsProvider: configure the provider to generate embedding and index your local codebase
Configuring Models in Continue
To use ollama in the continue chat, use the following
  "models": [
    {
      "title": "gemma2",
      "provider": "ollama",
      "model": "gemma2:latest"
    },
    {
      "title": "llama3:8b",
      "provider": "ollama",
      "model": "llama3:8b"
    },
    {
      "title": "llama3.1:8b",
      "provider": "ollama",
      "model": "llama3.1:8b"
    }
You will have to describe each model (you previously downloaded with ollama run) you want to use in the chat. This will give you a nice drop-down in the continue chat interface to interact with different models.
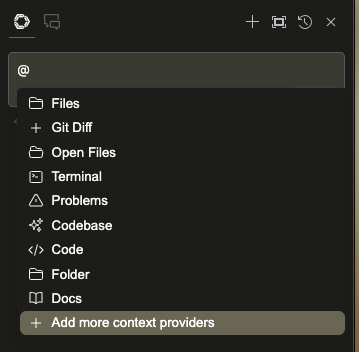
In the chat section, you will be able to ask questions, of course, but also provide more context to your LLM. To do so, use the @ shortcut like:
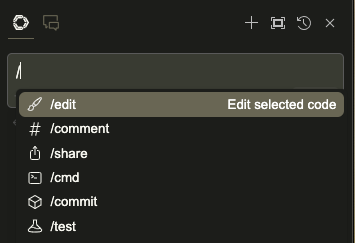
You can also ask Continue to act on your code or terminal with the / command:
You can also select a portion of your code and use cmd + L to send it to the chat as context.
Using Autocomplete in Continue
In the tabAutocompleteModel section, you can only have one model at a time. When using ollama, the documentation recommends using starcoder2:3b.
  "tabAutocompleteModel": {
    "title": "Starcoder 2 3b",
    "provider": "ollama",
    "model": "starcoder2:3b"
  },
The full documentation is on : https://docs.continue.dev/features/tab-autocomplete
Now, when typing code, you should be able to see recommendations and use tab autocompletion.:

Leveraging Embeddings in Continue
Embeddings help "translate" data into a simpler form that computers can understand more easily. It's like translating words from one language to another. Embeddings do this with images, videos, texts, or any other type of complex data, making it easier for AI models to process and compare.
The embedding model will be used by Continue to index your codebase. When you ask a question, you can use @codebase. Continue will then search through your code, retrieve related data, and send it to the model to provide more context and get a better response. This mechanism is similar to RAG but with your local codebase.
For more info: https://docs.continue.dev/features/codebase-embeddings
Creating Custom Prompts in Continue
Another interesting feature is the ability to preconfigure prompts for recurring tasks: https://docs.continue.dev/features/prompt-files
Create a .prompt folder. In this folder, name your custom prompt file custom.prompt.
Here is an example I use to generate Helm unit tests:
temperature: 0.5
maxTokens: 4096
---
<system>
You are an expert programmer
</system>

{{{ input }}}

Write or improve helm unittest for the selected code, following each of these instructions:
- Put the test in a unittest folder
- name files like `function_test.yaml`
- cover all use cases and document your code
Then in the chat use the / shortcut and you should be able to see your custom prompt.
Conclusion: Unlock the Full Potential of Local LLMs
With this setup, you can unlock the full potential of local LLMs for various applications, while also utilizing them as a gateway to access remote providers with paid APIs. This combination will significantly boost your productivity by enabling you to harness the power of AI across multiple tools and services.
Key Takeaways
Ollama is a tool to run LLMs locally; you can interact with it via CLI or API.
OpenwebUI is a web console that can use Ollama and other LLM providers like OpenAI and Anthropic.
Continue is an extension for VS Code that serves as a coding assistant.
Subscribe to my newsletter
Read articles from Julien.cloud directly inside your inbox. Subscribe to the newsletter, and don't miss out.
Written by
