Dual Booting: The full story (Ubuntu X Windows)
 Praise
Table of contents
While there are thousands of articles that establishes this premise, this is meant to be a comprehensive guide to dual booting your PC (inclusive of any and every error you might face).
PS: I noticed that a lot of articles build from Windows and then move on to adding Ubuntu, we are going to be doing the reverse. Call it Ubuntu-First Development(UFB)
PS: Experience level -**Beginner with a simple understanding of what OSes are, reasons for dual booting, system requirements e.t.c.
Installing Ubuntu
Downloading Ubuntu
To begin, you need to download your preferred version of Ubuntu. This should be done based on hardware compatibility and possibly personal preference.
Official Download Source:

Creating a Bootable Device
After downloading the Ubuntu ISO file, you need to create a bootable USB drive. This will allow you to boot from the USB and install Ubuntu.
Recommended Tools:
Rufus: Perfect with Windows. Source: rufus.ie
Etcher: Work across all platform. Source: balena.io/etcher
Step-by-Step Instructions (Using Rufus)
Insert your USB drive into the computer.
Open Rufus and select the USB drive from the device list.
Click on the "SELECT" button and browse to the location of the Ubuntu ISO file you downloaded.
Rufus automatically sets the best option for the ISO. You can make changes as you see fit. Partition scheme: "MBR" and "BIOS or UEFI" for older systems, "GPT" for modern systems.
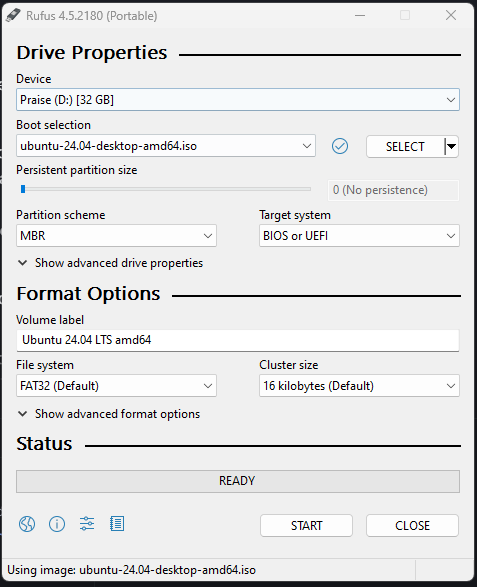
Click "START" and wait for the process to complete.
Installing Ubuntu
Once you have a bootable USB drive, you can proceed with the installation of Ubuntu.
Step-by-Step Installation Process:
Boot from the USB Drive:
Restart your computer and press the appropriate key (often F2, F12, ESC, or DEL) to enter the BIOS/UEFI settings.
Change the boot order to boot from the USB drive first.
Save changes and exit the BIOS/UEFI settings. Your computer should now boot from the USB drive.
Start the Installation:
When the Ubuntu installer starts, select "Install Ubuntu".
Choose your preferred language and keyboard layout.

Manual Partitioning:
Create a partition for Ubuntu by selecting the free space and clicking the "+" button.
Set the partition size (at least 20 GB recommended), use the ext4 filesystem, and mount point as "/".
Optionally, create a swap partition. This is useful if you have limited RAM (e.g., 4 GB or less). Set the size to twice your RAM size.
Continue with the installation and follow the prompts to set up your user account and other settings. You can follow this ubuntu guide for proper installation.
Voila, first steps completed. Installation completed, you can remove USB drive and reboot your PC.

Installing Windows
We would be taking similar approach with a twist.
Step-by-Step Installation Process
Partition disk: You would need to allocate enough storage for Windows to reside on. To do this, you would need to still boot into the USB bootable drive for ubuntu (Doing this unmounts the active drive allowing you to partition the drive).
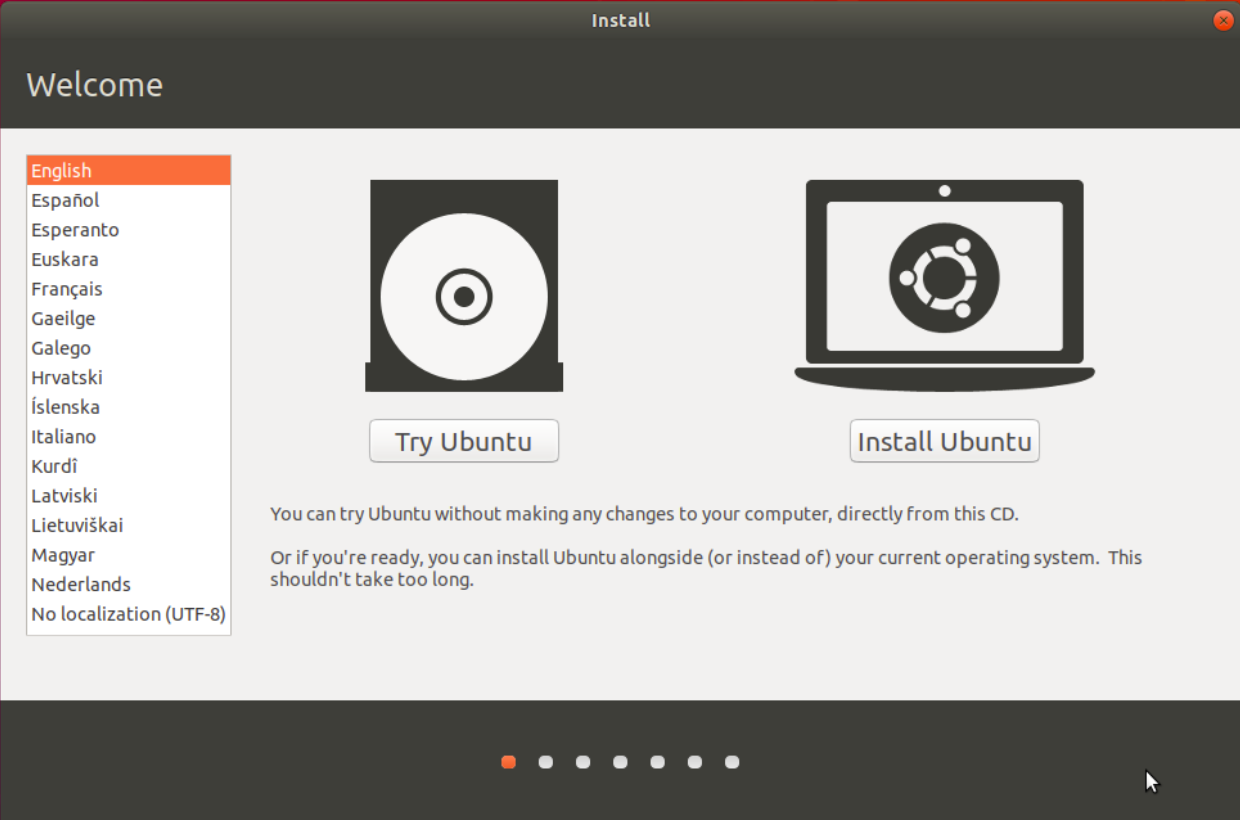
Here, select `Try Ubuntu` and this would boot you into Ubuntu.
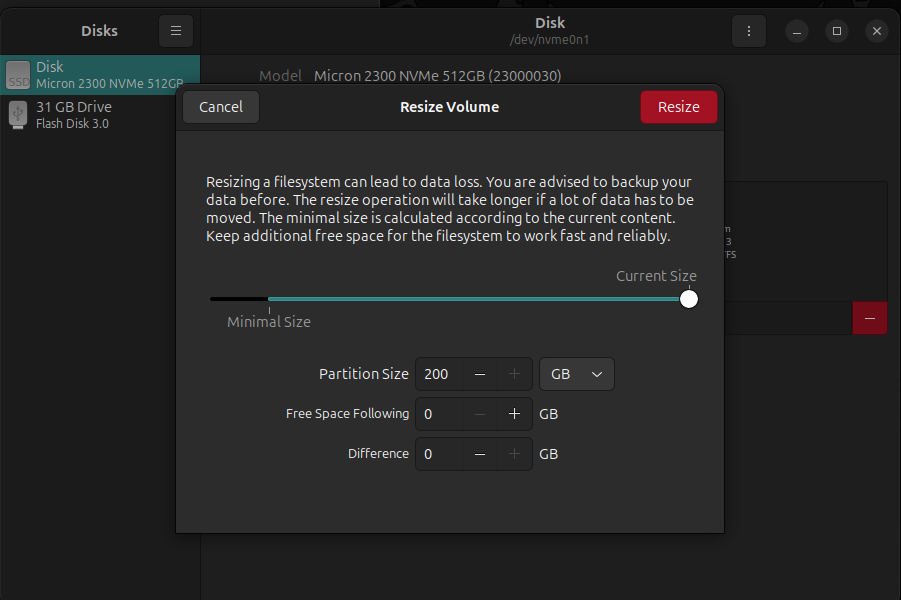
Open the application menu by clicking the grid of dots in the lower-left corner and search for "Disk" and open it.
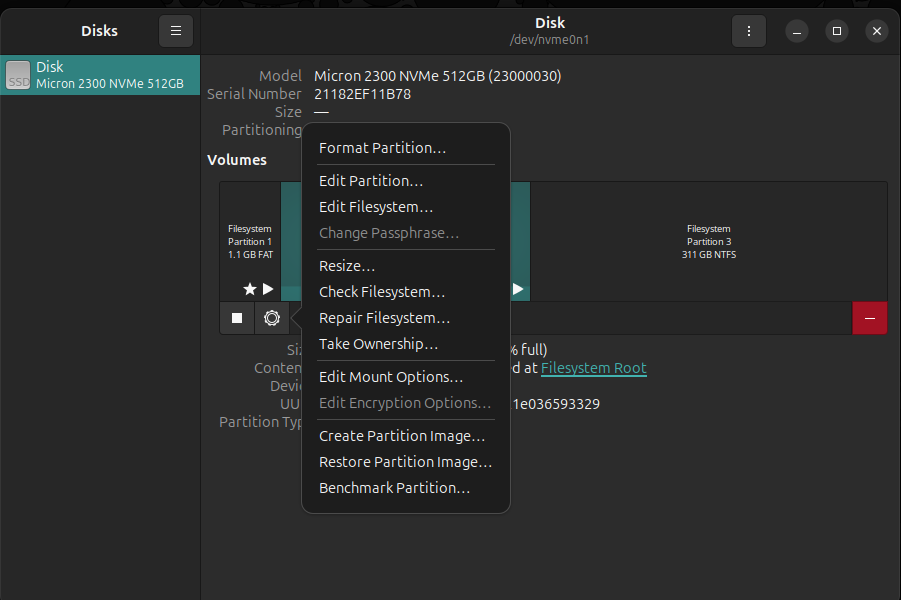
Select your disk, and click on the settings cog below it. Click on Resize.
Partition appropriately in tune with the system requirements for Windows.
Create a Windows Bootable USB Drive:
- Same steps as above but with a Windows ISO.
Boot into drive as discussed above:
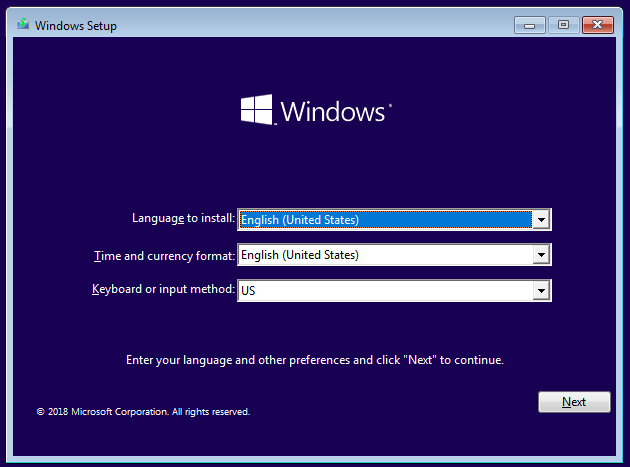
Click on "Next" and Select "Install Now". Go through the policy
or don't😉 and accept it. Select Custom installation.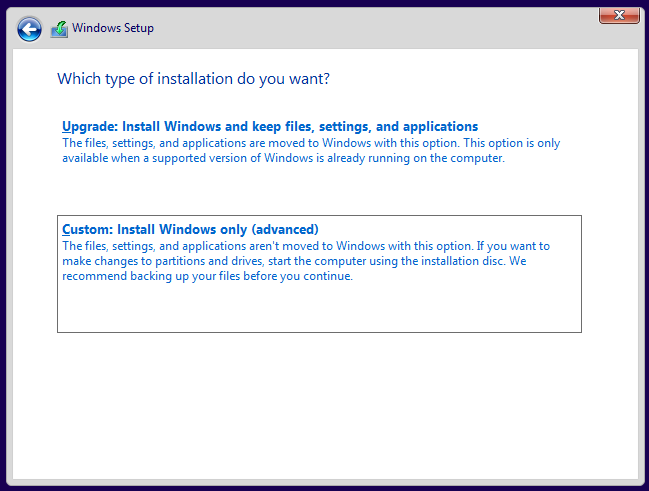
Here is where it gets tricky. More often than not, The installer is unable to find the drivers needed for the installation. This is usually about a missing intel storage driver. If you don't have this issue, then select the newly resized/partitioned storage and continue, skip the next two steps.
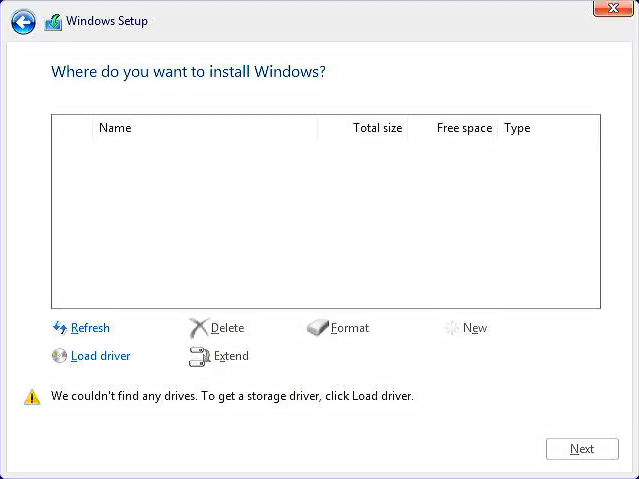
Fixing Cannot find drives/No signed device drivers were found. Make sure that the installation media contains the correct drivers...
First thing would be to update your BIOS. This can be done following your computer's manufacturer's guide. This usually would mean creating a bootable drive for a BIOS update or if possible, an BIOS Remote update.
Next, we would need to install the Intel Rapid Storage Technology Drive. Depending on your intel architecture:
Follow guide to extract the needed device driver.
Connect USB drive with needed driver to your computer and Select Load driver, then Browse. Locate the folder in the USB drive, follow the path to where the VMD folder is located (Usually
SetupRST_extracted\production\Windows10-x64\15063\Drivers\VMD\) and select. Click Ok.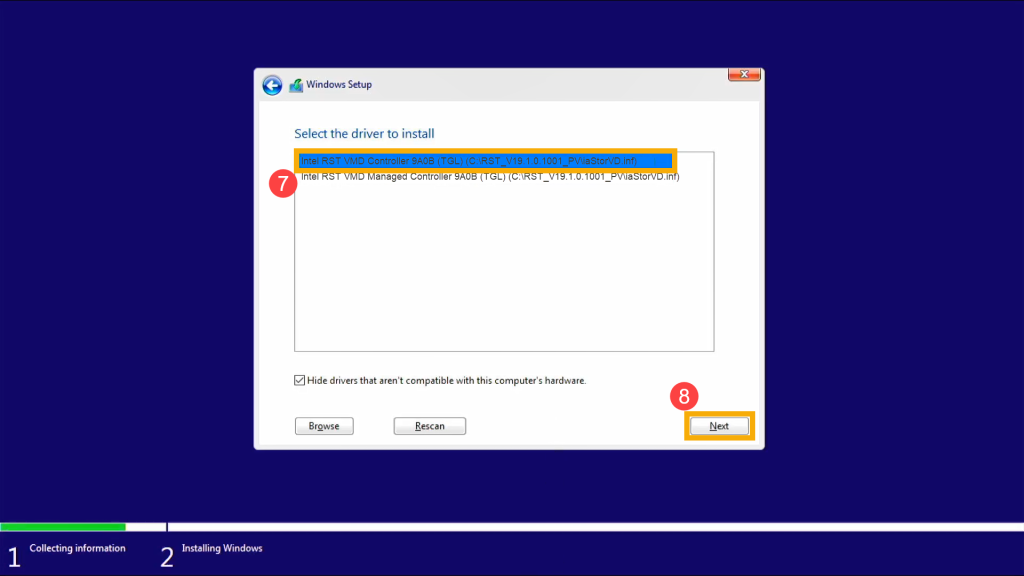
Select the VMD controller. This would install the drivers. After installation is complete, all the drive will appear.
Select newly resized/partitioned storage and continue.
Configuring Bootloader (GRUB)
Now we have both OSes installed, but for some reason, PC boots into Ubuntu/Windows automatically without rendering any menu to select the preferred OS. We can handle this with either the Windows Boot Manager or GRUB.
Step-by-Step
Restart your computer and press the appropriate key (often F2, F12, ESC, or DEL) to enter the BIOS/UEFI settings.
Change the boot order to boot from Ubuntu first.
Once logged in to Ubuntu, Open up cmd(Ctrl + ALT + T) and input following prompt
sudo nano /etc/default/grub. This would require your password and then open up a nano tab with grub's configs.GRUB_TIMEOUT_STYLE=menu GRUB_TIMEOUT=-1 # -1 for indefinite timeout or any integer for # int seconds # Uncomment GRUB_DISABLE_OS_PROBER to allow GRUB probe for other # OSes bootloader available GRUB_DISABLE_OS_PROBER=falseRun
Ctrl + OandCtrl + Xto save the updated config file, then runsudo update-grub
Reboot PC and a grub menu will be displayed to allow your choice of OS.
And that is it. Simple, comprehensive documentation of dual booting Ubuntu x Windows
:-} :() :-)
Subscribe to my newsletter
Read articles from Praise directly inside your inbox. Subscribe to the newsletter, and don't miss out.
Written by

Praise
Praise
Learning | Writing | Problem solving | uniquely with a keyboard is all I do.