How to Connect Your Git Local with GitHub Server 🌐
 ganesh mondal
Connecting your local Git repository with a GitHub server is a key step for collaboration and version control. This guide will take you through the simple steps to link your local code with GitHub, using easy-to-understand language. Let’s get started! 🚀
Why Connect Git with GitHub? 🤔
Version Control: Track changes in your codebase.
Collaboration: Work with others seamlessly online. Very important features like fork and clone to get the copy of the repository with you, so that easy to contribute on any project.
Backup: Keep your code safe on the cloud. Local system can crash and loose the data, whereas if it is hosted / stored online it will be safe.
Privacy: You can optimise your repository, by making them Private or Public. Private repositories are restricted from outsiders who are not authorised, whereas Public repositories are open to all and creates a Collaborative Opensource platform.
Key Difference between Git and GitHub
| S No | Git | GitHub |
| 1 | Git is open source software maintained by Linux | Github is owned by Microsoft and having different pricing. |
| 2 | It is deistributed version control system to manage the version of the code locally. | GitHub is a web-based platform that uses Git for version control and provides a collaborative environment for developers. |
| 3 | It is operated from local machine and commit changes locally | It has a global presence and server maintained, all the repositories are accesible online. |
GitHub is a platform built on top of Git that provides a collaborative environment for developers with additional features and tools. so both the tools are very much important and inter-related.
Step-by-Step Guide to Connect Your Git Local with GitHub
1. Install Git
First, ensure Git is installed on your system. Here’s how to check:
git --version
If you see a version number, Git is installed. If not, download and install it from Git's official website.
2. Create a GitHub Account
Go to GitHub and sign up.
Fill in your details and create your account. Very simple registration📝
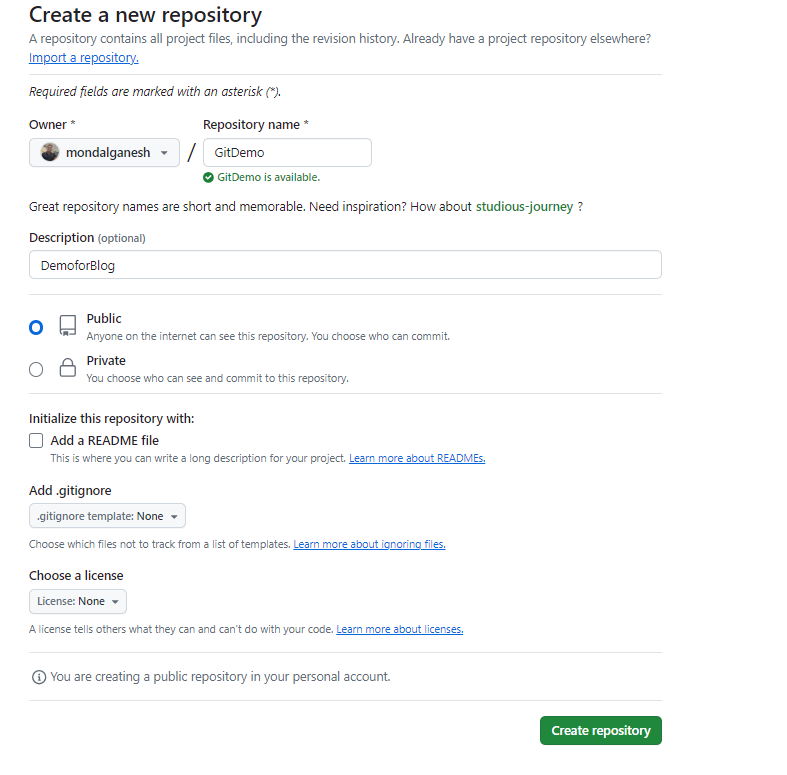
3. Create a New Repository on GitHub
Log in to your GitHub account.
Click on the “New” button under the Repositories tab.
Name your repository, e.g., “MyFirstRepository”.
Choose the repository visibility (Public or Private).
Click “Create repository”. 🎉
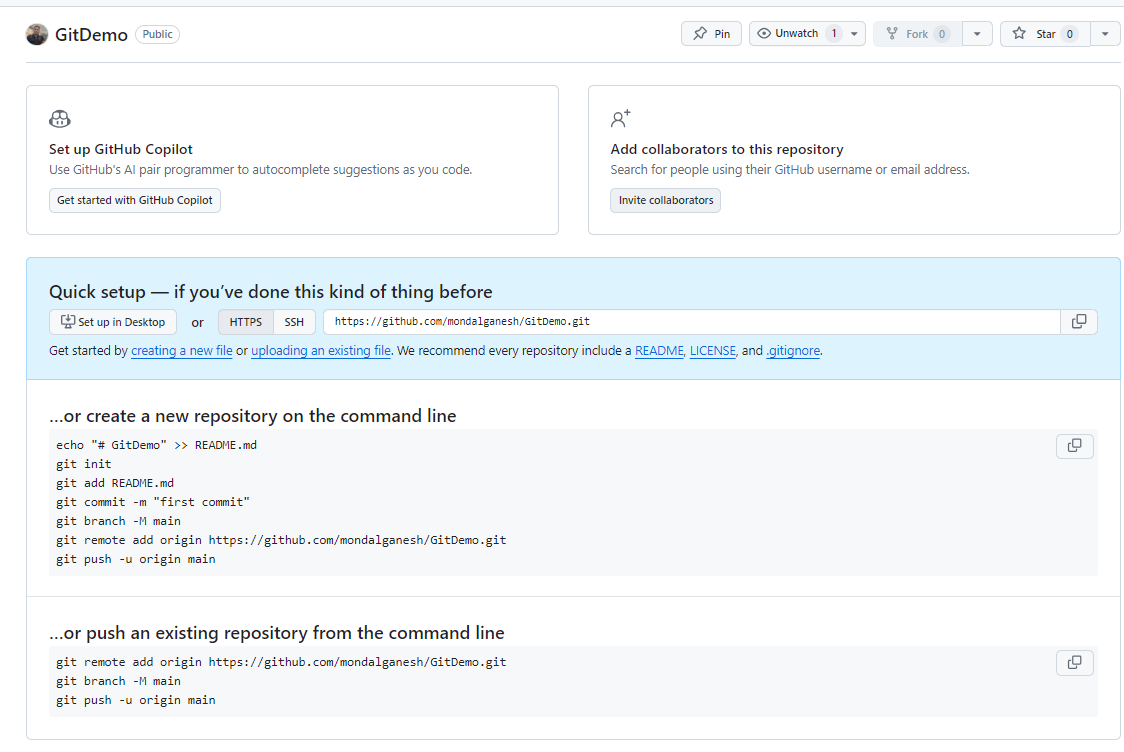
All the instructions to connect your local repository with remote repository will be provided as soon as you create new repository, shown below.
Below git commands need to be executed from local machine (VS Code, Git bash, etc).
Note: Here bydefault branch for Git local is "master" whereas in remote github it is "main". Hence as per the below instructions github is trying to make your local git branch as "main" from "master" before pushing to remote.
4. Initialize Your Local Repository
Navigate to your project directory and initialize Git in VS Code. If you need to know how to connect VS Code with git, then go to Tutorial
cd path/to/your/project
git init
5. Add Your GitHub Repository as a Remote
Copy the repository URL from GitHub. It looks something like this:
Example:
https://github.com/<yourusername>/<MyFirstRepository>.git
Add this URL to your local repository, this command is provided after you create new repository in github.
git remote add origin https://github.com/<yourusername>/<MyFirstRepository>.git
6. Add Files to Your Repository
Stage and commit your files:
git add .
git commit -m "Initial commit"
7. Push Your Changes to GitHub
Push your code to the GitHub repository:
git push -u origin main
You might be prompted to enter your GitHub username and password. Use your GitHub credentials. 🔐
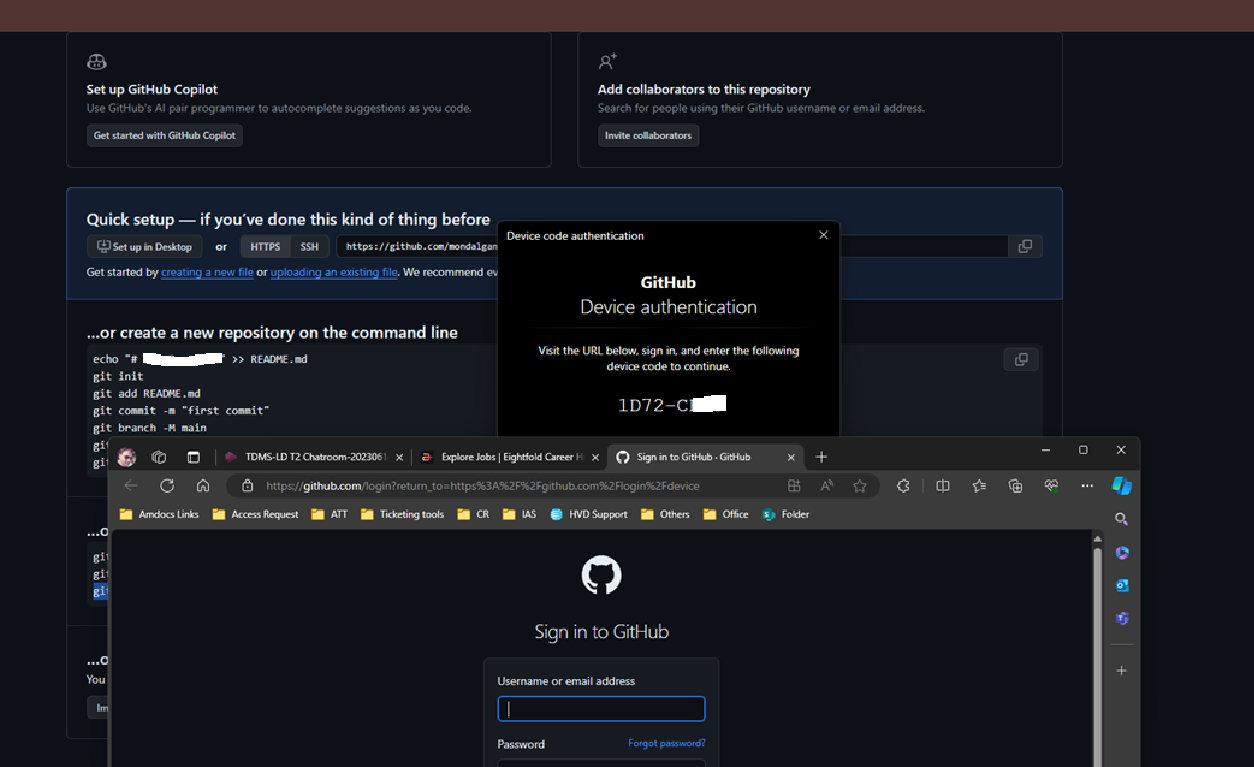
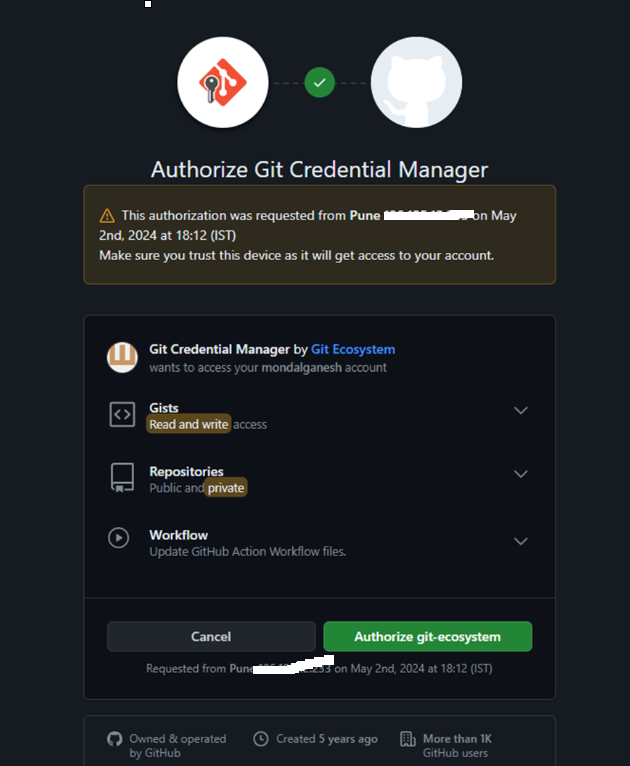
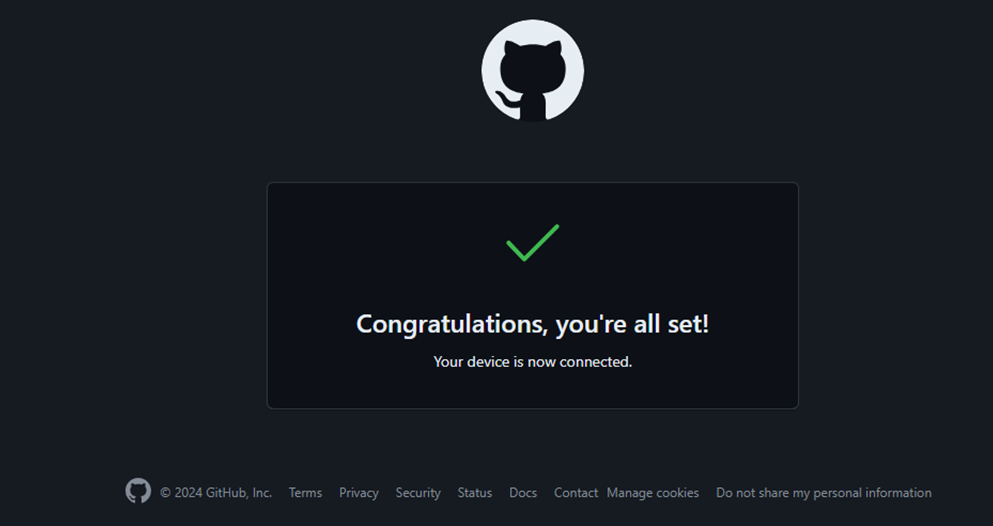
Above authentication is a one time process to connect from local to remote git.
If you are using multiple git accounts, the you may need to flush the git origin and add new, however if you use another machine you need to do fresh configuration.
8. Verify the Connection
Check the remote connection status:
git remote -v
You should see your repository URL listed. For example:
origin  https://github.com/yourusername/MyFirstRepo.git (fetch)
origin  https://github.com/yourusername/MyFirstRepo.git (push)
9. Making Changes and Pushing Updates
Edit Your Code: Make changes to your files.
Stage Changes:
git add .Commit Changes:
git commit -m "Describe your changes here"Push Changes to GitHub:
git push origin main
10. Creating a Branch (Optional)
To work on new features without affecting the main code, create a new branch:
git branch new-feature
git checkout new-feature
Push the branch to GitHub:
git push -u origin new-feature
Troubleshooting Tips 🚧
Authentication Issues: Ensure you’re using the correct username and password. For enhanced security, consider using a Personal Access Token (PAT) instead of a password.
Merge Conflicts: Resolve conflicts by editing the conflicted files and committing the changes.
Conclusion 🎯
Connecting your local Git repository with GitHub is a straightforward process that opens up a world of collaboration and version control. With just a few commands, you can push your code to the cloud, making it easier to work with others and keep your code safe. 🚀
Wonderful! You have successfully made connection between local Git and GitHub remote repository. Learn with simplicity.
What Coming Next
In the upcoming blogs,
We will disscuss more on "impact of Git on an Open source projects".
Why students should adopt this tool early from college days?
How a Git can be useful in crowd sourcing?
Advance Git commands with tutorials.
We will start an open-source mini project for all students to contribute.
and much more in DevOps to explore...
Hope you find this blog informative and helpful. If you have any questions or need further assistance with Git, feel free to drop a comment below! Happy coding! 💻😊
This Blog is sponsored by Khoji Labs, an esteemed organization dedicated to furnishing college students with comprehensive, complimentary guidance to foster their career advancement. For further information, please reach out to them at contact@khojilabs.com.
Subscribe to my newsletter
Read articles from ganesh mondal directly inside your inbox. Subscribe to the newsletter, and don't miss out.
Written by
