BLinks : A Beginner 's guide
 Scriptscrypt
What's a BLink?
Blink is simply Blockchain + Link, so what I mean here is as we are aware of blockchains as a transaction medium and everything onchain is paid by a crypto wallet, Now we are evolving into the spectrum of creating a blockchain transaction just by a link, and the coolest part here is that too where the end users are for example on X (unlike Frames which is similar to Blinks but work only on Farcaster clients if they support)
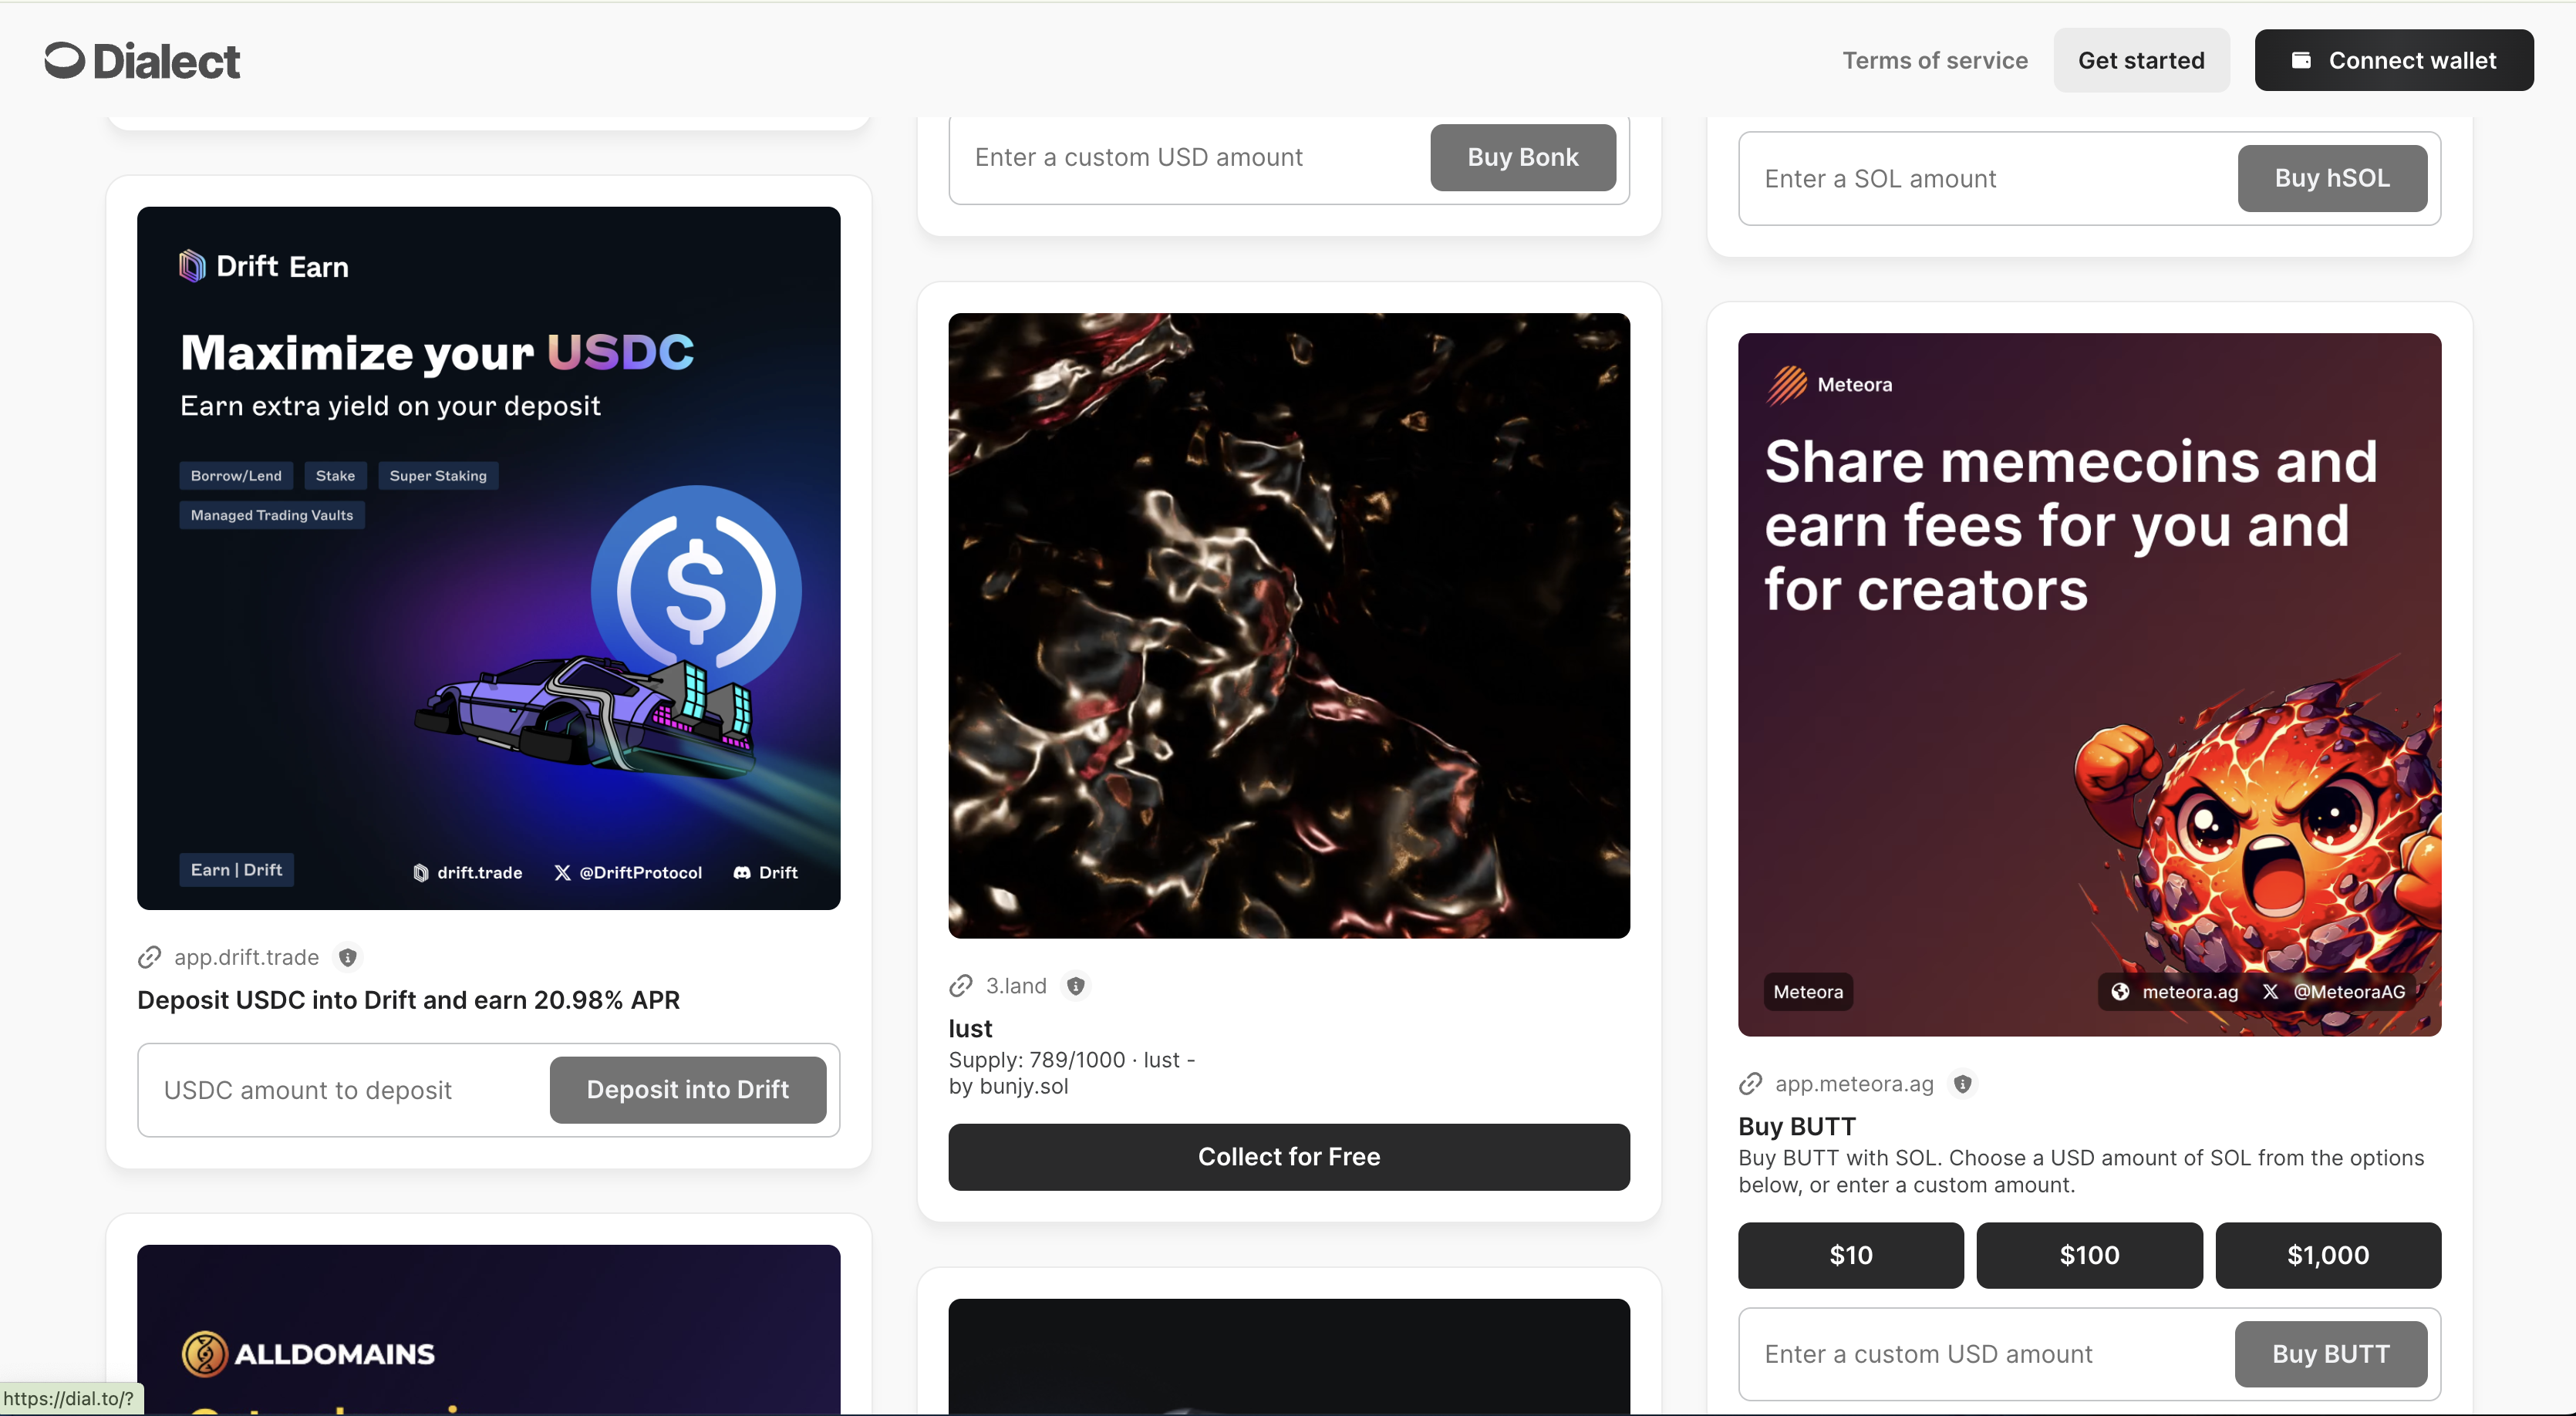
Some examples are :

(above is a screenshot of https://dial.to which maintains Blinks, and mainly used for testing)
How do clients render Blinks?
We know that the evolution of Links on traditional social media
Links used to be blue in colour to separate it from normal texts.
Then, started to display an Image for the link
Now, We have minimal but very effective interactions happening through
LinksBlinks.
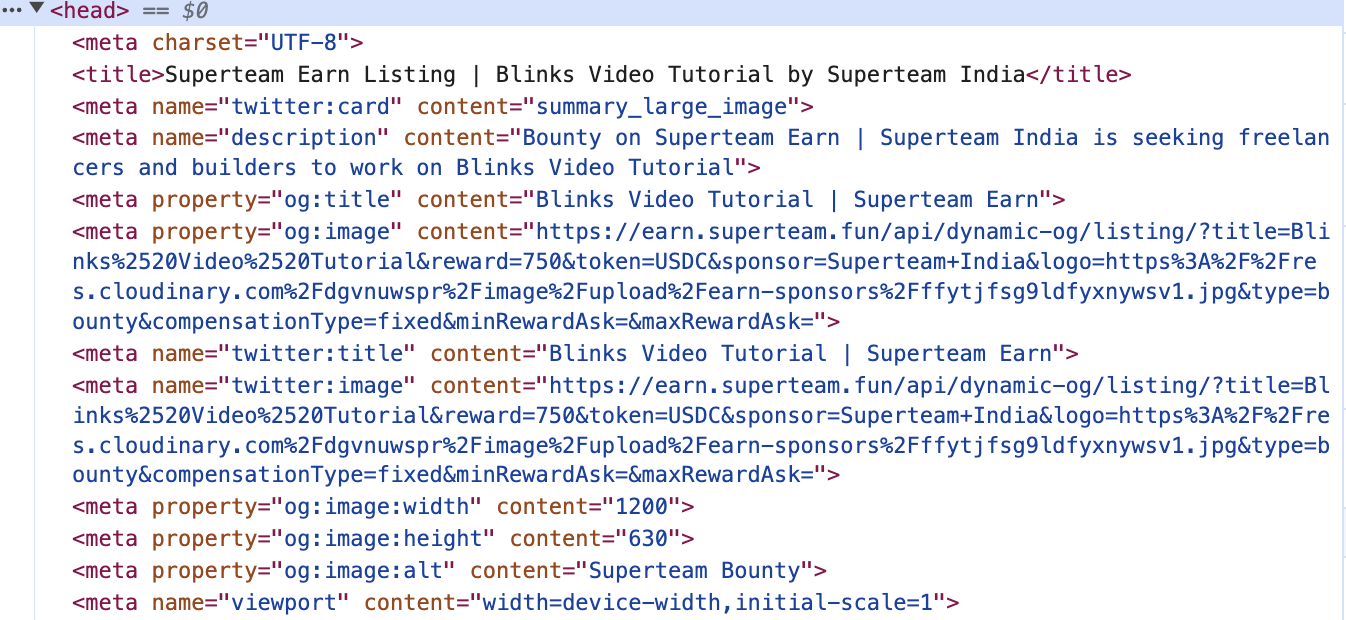
All these happen with what the data a particular Link has in it's meta tags / metadata.

(above is the screenshot of Elements Tab of earn.superteam.fun)
Now, Blinks do exactly the same but has enriched set of metadata so that any client ( like X.com ) can render it.
Now, from where do this Enriched set of Metadata comes from?
Every blink has an action corresponding to it.
Please check https://solana.com/docs/advanced/actions for advanced technical overview.
To keep it simple when a Blink url is hit by the client (X.com), the client fetches it's Blink metadata from corresponding action url.
For example :
https://blinktochat.fun/-4147966016/8UBF11Q8afbnZyFsYyte8CMKTTXJ3v9Am87JeNfogXYB
Client fetches Blink metadata from : https://blinktochat.fun/api/actions/-4147966016/8UBF11Q8afbnZyFsYyte8CMKTTXJ3v9Am87JeNfogXYB
So this config to search the action api url etc, can be done by specifying it in
https://blinktochat.fun/actions.json
Now that we know, how client renders the Blink, it is very necessary to incorporate all the rules when building the Blink.
enough talking,
How do I build one?
You can now build Blinks using
Axum
Expressjs
Nextjs
You can find the sample code examples from the below link : https://github.com/solana-developers/solana-actions/tree/main/examples
We'll use Nextjs for this tutorial, since it's built for easy peasy SSR web apps, and we can leverage that.
Quickly spin up a Nextjs project version 13 or above - APP Router
Let's finish the setup in 3 steps :
This is my setup, feel free to use your app setup

Let's install the necessary dependencies,
yarn add @solana/actions @solana/web3.jsNext, We'll only focus on Building the Blink and it's API,
In the app folder, create an
actions.jsonfolder, and inside that create aroute.tsfile,This will be the contents of route.ts :
   import { ACTIONS_CORS_HEADERS, ActionsJson } from "@solana/actions";

   export const GET = async () => {
     const payload: ActionsJson = {
       rules: [
         // map all root level routes to an action
         {
           pathPattern: "/*",
           apiPath: "/api/actions/*",
         },
         // idempotent rule as the fallback
         {
           pathPattern: "/api/actions/**",
           apiPath: "/api/actions/**",
         },
       ],
     };

     return Response.json(payload, {
       headers: ACTIONS_CORS_HEADERS,
     });
   };

   // DO NOT FORGET TO INCLUDE THE `OPTIONS` HTTP METHOD
   // THIS WILL ENSURE CORS WORKS FOR BLINKS
   export const OPTIONS = GET;
It has a GET request defined, so when a client searches for
example.com/actions.jsonwe return this. It returns an array which has all the rules that the client should follow for the api to work.Create an
apifolder and inside that create aactionsfolder.This is for mapping by the Client (X.com)
Now let's start writing the actual Blink code that 's rendered on the client.
We will code a Blink that gates a Telegram Channel / Group with a Wallet address and a user can generate an inviteLink to join by depositing some SOL to it directly via a BLINK.
We will focus on the functionality of the Blink by taking achatIdandsplAddressas a starting point. (I'll also write a blog and opensource the Telegram Bot and this Blink)
- Install and set up the bot
yarn add grammy
In the
/api/actions/start/[chatId]/[splAddress]route.ts: we'll define GET route handler and POST route handler.The GET handler renders the content on the blink for
/api/actions/start/-1002232395603/8UBF11Q8afbnZyFsYyte8CMKTTXJ3v9Am87JeNfogXYBroute.
export const GET = async (
req: Request,
{ params: { chatId, splAddress } }: { params: any }
) => {
const routeChatId = chatId;
const requestUrl = new URL(req.url);
const chatDetails = await bot.api.getChat(routeChatId);
const chatTitle = chatDetails.title;
const parVarSplAddress = splAddress;
const baseHref = new URL(`/api/actions`, requestUrl.origin).toString();
const payload: ActionGetResponse = {
title: `Blinktochat.fun`,
icon: new URL("/btcLarge.gif", new URL(req.url).origin).toString(),
description: `\nGet access to ${chatTitle?.toUpperCase()}\n \nShare your Telegram alias, Blink some SOL, join the fun!`,
label: "Enter your Telegram userId",
links: {
actions: [
{
label: "Enter the Chat",
href: `${baseHref}/start/${routeChatId}/${parVarSplAddress}?paramTgUserId={paramTgUserId}¶mAmount={paramAmount}¶mTgChatId=${routeChatId}`,
parameters: [
{
name: "paramTgUserId",
label: "Enter your Telegram username",
required: true,
},
{
name: "paramAmount",
label: "Enter the Amount in SOL",
required: true,
},
],
},
],
},
};
return Response.json(payload, {
headers: ACTIONS_CORS_HEADERS,
});
};
// DO NOT FORGET TO INCLUDE THE `OPTIONS` HTTP METHOD
// THIS WILL ENSURE CORS WORKS FOR BLINKS
export const OPTIONS = GET;
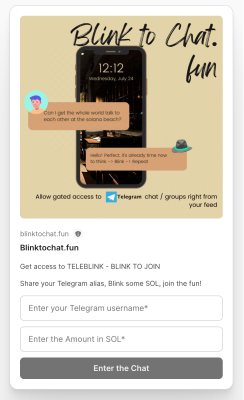
This will render something like this :

href: `${baseHref}/start/${routeChatId}/${parVarSplAddress}?paramTgUserId={paramTgUserId}¶mAmount={paramAmount}¶mTgChatId=${routeChatId}`,
So the action or the href as above is always a POST request to the specified route. So if we define any apis and intend that to be called, we can export a POST request handler from that API.
Since we are targeting the same route, we can define our POST request here itself in the /api/actions/start/[chatId]/[splAddress]route.ts file
export const POST = async (
req: Request,
{ params: { chatId, splAddress } }: { params: any }
) => {
const requestUrl = new URL(req.url);
const tgUserIdIp = requestUrl.searchParams.get("paramTgUserId");
const amountIp = requestUrl.searchParams.get("paramAmount");
const parVarSplAddress = splAddress;
const routeChatId = chatId;
if (!tgUserIdIp || !amountIp) {
return new Response(
JSON.stringify({
error: "Invalid parameters: paramTgUserId or paramAmount",
}),
{
status: 400,
headers: { "Content-Type": "application/json" },
}
);
}
// Please make sure to add you own logic to validate and check the data in the DB
// we are targeting /helpers/route.ts which has a POST handler with all the Logic here
const baseHref = new URL(
`/api/actions/helpers/`,
requestUrl.origin
).toString();
// Check if the Data in DB by the BOT : chatId, splAddress is correct or not :
const validateUrl = `${baseHref}/validateParams?paramTgChatId=${routeChatId}¶mSPLAddress=${parVarSplAddress}`;
const response = await axios.post(validateUrl, {
headers: {
"Content-Type": "application/json",
},
});
if (response.data.message.status === false) {
return new Response(
JSON.stringify({
message: "GroupId or SPLAddress is not correct",
error: response.data.error,
}),
{
status: 400,
headers: { "Content-Type": "application/json" },
}
);
}
// Here according to ActionPostResponse type we should expose a transaction and a message.
// So according to the above code, we can do any computation here
// but we need to prioritise and put that data which should be stored on the solana Blockchain,
// so we need the transaction object from @solana/web3.js library to create a transaction and add that to the solana blockchain.
const connection = new Connection(
process.env.SOLANA_RPC! ||
clusterApiUrl(envEnviroment === "production" ? "mainnet-beta" : "devnet")
);
// Get recent blockhash
const transaction = new Transaction();
// To set the end user as the fee payer
const body: ActionPostRequest = await req.json();
const account = new PublicKey(body.account);
const totalAmount = parseFloat(amountIp) * LAMPORTS_PER_SOL;
const amountToParVar = Math.floor(totalAmount * 0.95); // 95% to parVarSplAddress
const amountToEnvSPL = totalAmount - amountToParVar; // Remaining 5% to envSPLAddress
transaction.add(
SystemProgram.transfer({
fromPubkey: account,
toPubkey: new PublicKey(parVarSplAddress),
lamports: amountToParVar,
})
);
transaction.feePayer = account;
transaction.recentBlockhash = (
await connection.getLatestBlockhash()
).blockhash;
// Please make sure to add you own logic to validate and check the data in the DB
// we are targeting /helpers/saveToDB/route.ts which has a POST handler with all the Logic here
const url = `${baseHref}saveToDB?paramAccount=${account}¶mTgUserId=${tgUserIdIp}¶mAmount=${amountIp}¶mUsername=${tgUserIdIp}¶mTgChatId=${routeChatId}¶mSPLAddress=${parVarSplAddress}`;
try {
const response = await axios.post(url, {
headers: {
"Content-Type": "application/json",
},
});
const inviteLinkfromRes = response?.data?.message;
if (!inviteLinkfromRes) {
throw new Error("Not a valid Group");
}
// Before creating the post response, save the data to the DB
// Get Account from the request body
// We should return this payload to make a Transaction from it.
const payload: ActionPostResponse = await createPostResponse({
fields: {
transaction,
message: inviteLinkfromRes?.inviteLink,
},
});
//These headers are for the Blink to resolve use that from the @solana/actions library
return Response.json(payload, {
headers: ACTIONS_CORS_HEADERS,
});
} catch (error) {
console.error("Error fetching TG data:", error); // Log the error message specifically
return new Response(
JSON.stringify({
error: "Failed to fetch TG data xyz",
originalError: error, // Include the specific error message in the response
}),
{
status: 500,
headers: {
...ACTIONS_CORS_HEADERS,
"Access-Control-Allow-Origin": "*",
}, // Ensure CORS headers are correctly set
}
);
}
};
Full code of the route.ts file can be found below
Testing
You can now go to
https://dial.to/devnet?action=solana-action:http://localhost:3000/api/actions/start/-1002232395603/8UBF11Q8afbnZyFsYyte8CMKTTXJ3v9Am87JeNfogXYB
You will see the Blink appear, this is how it will be rendered on the client like (X.com)
Since this is on
devnet, ensure thatclusteris also ondevnetand also check ifphantom walletis intestnetIf everything works well, Boom! You've now coded a Blink.
You can host it on your personalised domain and apply for dial.to registry ( https://dial.to/register ) to get yourself verified and get this blink whitelisted to be enabled this on X.com.
This opens to multiple use cases for making the users find blockchain right where they are.
We can have Gated chats - unlocking through blinks, Tipping a tweet right from your feed on the blockchain, Using an NFT as a access token to your Dapp, Using a blink to skip onboarding on the app, these are some of the examples of how Blinks can open-up a whole new application flows and make the blockchain journey fun right from the start for a beginner.
Thank you for your time!
If you want something more than this please do drop a comment, let's connect here.
References :
Subscribe to my newsletter
Read articles from Scriptscrypt directly inside your inbox. Subscribe to the newsletter, and don't miss out.
Written by
