Load balancer but ELI5 version
 Khushal Sharma
I believe a lot of tech is unknown to us because we do not know the big tech jargon. I am in the process of simplifying and learning things for myself.
In today's article, I'll be handling terms around the almighty Load Balancer. In the world of distributed systems or system design interviews, you must have heard the term load balancer.
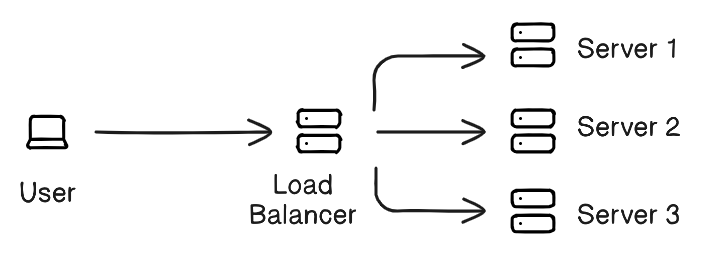
In simple terms, it is just a server that receives requests from users and forwards them to one of the multiple servers available to it. But wait, how do we come to the multiple servers part? Well, distributed systems are all about building systems that can scaled with the increase in users.
Let us just say, we are building a todo application with ReactJS as a frontend and ExpressJS as a backend. Now hypothetically our express server can handle 1000 API requests per second, However, Our todo app went viral on TikTok and now we are receiving 1500 requests per second. Our app will not be able to handle the load and will break.
Pause and think for a moment, how will you handle this?
One solution could be to increase the RAM and CPU of the machine that is running. This is a good solution and is known as vertical scaling. Congratulations, you just learned a new term that you already understood!
The problem with vertical scaling is the cost. Just because you can increase the RAM, it doesn't mean you'll upgrade your RAM indefinitely. Also, let us say, you upgraded your hardware(increase RAM, CPU, etc) to handle 5000 requests per second however, the virality of your app is gone and average requests are around 1000 per second, the cost of extra hardware is useless now.
To tackle these problems, there is another solution: we create replicas of our servers and add a load balancer to evenly distribute traffic across all the servers. This solution is called Horizontal Scaling. Congrats on your learning spree today.
I am sorry, I don't understand replica and load balancer and distributing traffic, etc. No worries, First let's understand, this solution uses multiple servers of the same service and tries to distribute the requests evenly to all servers.

Let us take a look at the above diagram, Here server 1, Server 2, and Server 3 are running the same express server with TODO backend. Let us see it in the action, I am adding a code below for the TODO app backend.
const express = require("express");
const bodyParser = require("body-parser");

const app = express();
const port = process.env.PORT || 8000;

// This will be a unique identifier for each server instance
const serverId = Math.random().toString(36).substring(7);

app.use(bodyParser.json());

let todos = [];

// Middleware to add console log
app.use((req, res, next) => {
    console.log(
        `Server ${serverId} handling ${req.method} request to ${req.url}`
    );
    next();
});

app.get("/todos", (req, res) => {
    res.json(todos);
});

app.post("/todos", (req, res) => {
    const newTodo = {
        id: Date.now(),
        text: req.body.text,
        completed: false,
    };
    todos.push(newTodo);
    res.status(201).json(newTodo);
});

app.listen(port, () => {
    console.log(`Server ${serverId} running on port ${port}`);
});
Let us break the above code bit by bit.
The below part is just initializing the express server and defining a variable for a port number.
const express = require("express");
const bodyParser = require("body-parser");

const app = express();
const port = process.env.PORT || 8000;
The next part is a random string for the server name, it is used to identify which server is handling the request. and the next line allows Express to handle JSON objects.
Further down we have an array named todos.
// This will be a unique identifier for each server instance
const serverId = Math.random().toString(36).substring(7);

app.use(bodyParser.json());

let todos = [];
Here we have a middleware function to log info to the terminal, you can skip this part as well.
// Middleware to add console log
app.use((req, res, next) => {
    console.log(
        `Server ${serverId} handling ${req.method} request to ${req.url}`
    );
    next();
});
Next, we have the GET and POST routes and express server listen function to start the app.
app.get("/todos", (req, res) => {
    res.json(todos);
});

app.post("/todos", (req, res) => {
    const newTodo = {
        id: Date.now(),
        text: req.body.text,
        completed: false,
    };
    todos.push(newTodo);
    res.status(201).json(newTodo);
});

app.listen(port, () => {
    console.log(`Server ${serverId} running on port ${port}`);
});
Hopefully, you understood this part, Let us start the server, (assuming you have installed express dependency). We'll start 3 servers of the same TODO app backend. Let's see how to do that.
Go to your Linux/Mac terminal and type this,
PORT=8001 node server.js
This will run your Express app on 8001 PORT. Great now open another terminal and type the same thing with a different PORT Number.
PORT=8002 node server.js
Similarly, start a new server on 8003 PORT. Now we have 3 servers, but how do we send requests to these servers, what URL do we type in Axios from the frontend? Well, that's where the Load Balancer comes in. The load balancer handles this for us, and automatically redirects the request from frontend to backend while equally distributing requests among these servers.
Let us see the code for Load Balancer,
const http = require("http");

const servers = [
    "http://localhost:8001",
    "http://localhost:8002",
    "http://localhost:8003",
];
let currentServer = 0;

const loadBalancer = http.createServer((req, res) => {
    const server = servers[currentServer];
    currentServer = (currentServer + 1) % servers.length;

    console.log(`Load Balancer: Forwarding request to ${server}`);

    // Add a custom header to track which server handled the request
    req.headers["x-forwarded-server"] = server;

    const options = {
        hostname: new URL(server).hostname,
        port: new URL(server).port,
        path: req.url,
        method: req.method,
        headers: req.headers,
    };

    const proxyReq = http.request(options, (proxyRes) => {
        res.writeHead(proxyRes.statusCode, proxyRes.headers);
        proxyRes.pipe(res);
    });

    req.pipe(proxyReq);
});

loadBalancer.listen(8000, () =>
    console.log("Load balancer running on port 8000")
);
Here we are using http package from NodeJS to run the HTTP server and forwarding request coming to us. Then we are adding server URLs in the server's array and setting the default server to the first server.
const http = require("http");

const servers = [
    "http://localhost:8001",
    "http://localhost:8002",
    "http://localhost:8003",
];
let currentServer = 0;
Next, we are creating a server, which listens for requests coming to it and forwards it to one of the available servers. we are choosing the server URL and then increasing the array index by 1 so that next time it goes to the next available server.
const loadBalancer = http.createServer((req, res) => {
    const server = servers[currentServer];
    currentServer = (currentServer + 1) % servers.length;

    console.log(`Load Balancer: Forwarding request to ${server}`);

    ...
The below code injects the header in the request, so you can see server in the network tab.
...

// Add a custom header to track which server handled the request
    req.headers["x-forwarded-server"] = server;

...
Next, we make an HTTP request to the server selected and send it with the below options. The error and status code is returned to the user so it can see and add a response to it.
...

const options = {
        hostname: new URL(server).hostname,
        port: new URL(server).port,
        path: req.url,
        method: req.method,
        headers: req.headers,
    };

    const proxyReq = http.request(options, (proxyRes) => {
        res.writeHead(proxyRes.statusCode, proxyRes.headers);
        proxyRes.pipe(res);
    });

    req.pipe(proxyReq);

...
And finally, we tell the server to listen on the 8000 PORT.
loadBalancer.listen(8000, () =>
    console.log("Load balancer running on port 8000")
);
So all you have to do is send the request to http://localhost:8000 and the load balancer will handle the rest.
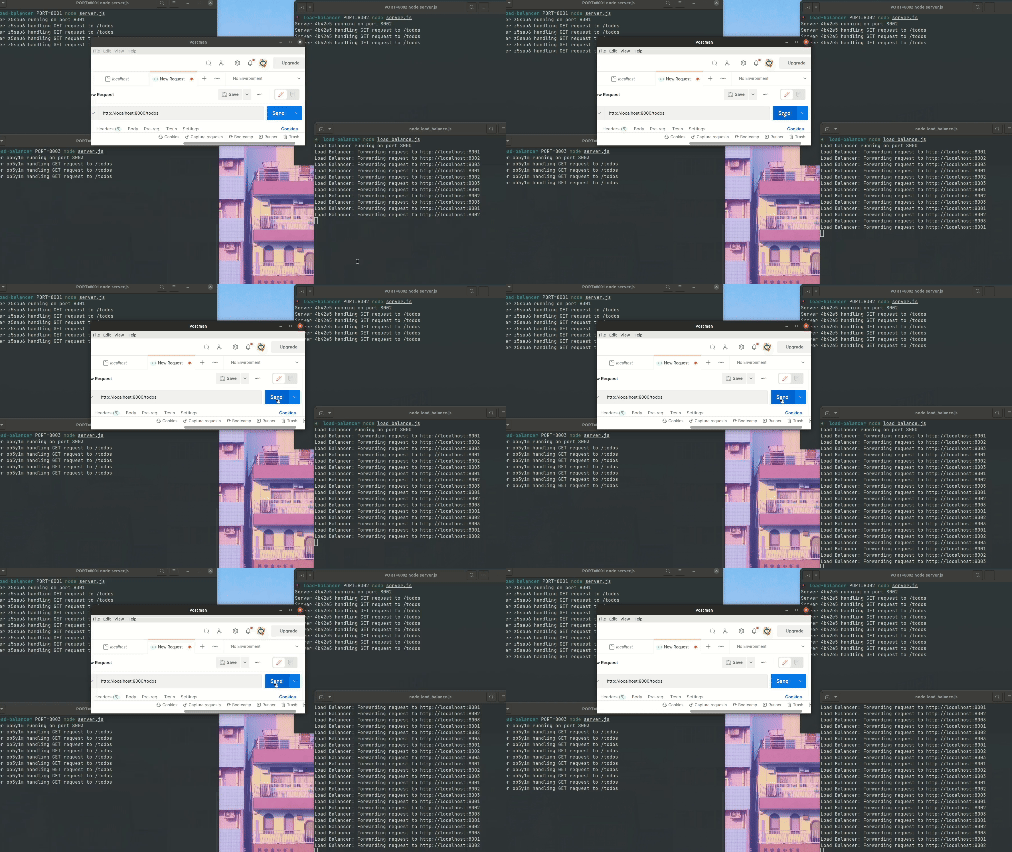
Let us test it out. Below is a video of me simulating requests on the load balancer.

So this was the load balancer everyone was hyping about. Now that you have learned it, let us ask, will it solve all our problems? Will we be able to scale our website now? I think we still have more things to talk about. I'll read up on database scaling and priority queues and post another article on it. Till then have fun and reach out to me if you have any questions or want something to build together. And remember, You are a great hooman :)
Subscribe to my newsletter
Read articles from Khushal Sharma directly inside your inbox. Subscribe to the newsletter, and don't miss out.
Written by

Khushal Sharma
Khushal Sharma
Developer who likes to tinker with everything.