A Beginner's Guide to Docker: Building, Running, and Managing Containers
 Yagya Goel
Lets learn about docker and how it works that will help you understand docker.
To get started, let's first understand what Docker is, why we need it, and why it's so important.
So, Docker helps us containerize our applications. It isolates them from the outer environment, giving us a consistent environment that remains the same across all machines. Docker is lightweight and starts up in just a few seconds.
One of the main benefits is that it allows us to run multiple versions of the same software on the same machine. For example, if app1 requires version 1 of a software and app2 requires version 2, we can now run both thanks to Docker and containerization.
It also provides security and isolation for our applications on the machine. Plus, it helps us allocate the resources we want the Docker container to use. You can check out my blog (https://yagyagoel1.hashnode.dev/my-week-in-tech-devops-basics-virtual-machines-shell-scripting-and-more) where I talk about virtual machines and how we evolved from deploying on bare metal to using Docker.
Now that we understand why Docker is important and why we need it, I won't go into how to install Docker locally since there are plenty of tutorials out there. Instead, let's dive into how Docker works internally.
Let's first talk about the basic fundamentals that make a container possible:
Namespaces
cgroups
overlayfs
Namespaces: In a Linux system, there are multiple namespaces. So, what are namespaces? They are a fundamental feature of the Linux kernel that provides isolation and partitioning of system resources for processes.
To put it simply, what Docker helps us achieve using namespaces is that each container will have its own set of namespaces. For example, the PID namespace (process ID namespace) in a container means the container will only know about its own processes and won't be able to see the processes on the host machine.
Cgroups: In a Linux kernel, cgroups help manage and monitor system resources. They are essential because they allow us to allocate resources to each container and the host machine. This way, we can prevent one container or process from using up all the resources and starving other processes.
Overlayfs: It allows one filesystem to be overlaid on another, with a read-only layer on the bottom and a writable layer on top. This setup ensures that only the data that needs to be changed is modified, while the rest remains the same and doesn't need to be reprocessed.
Now, you might be wondering, "Yagya, you mentioned the Linux kernel over and over, but Docker also runs on Mac and Windows. What about them?"
This brings us to the internals of Docker and how it works.
Docker Internals
So, internally, Docker runs on a virtual machine on Mac or Windows using a hypervisor. This ensures it has the same environment as Linux. Inside this virtual machine, we have the server/host for Docker. Within this host, there's the Docker daemon (dockerd), which is responsible for starting, stopping, and managing containers and images (we'll cover this in the next section).
Now, how do we communicate with it? We, or the client, can communicate in multiple ways. It can be through the Docker CLI or Docker GUI, which initiates a Docker command to the Docker API. The Docker API acts as the middleman between the client and the Docker daemon. Daemon then process the request of the User.
Docker Images
Docker images are essentially executable pieces of code or software that include everything needed to run, such as the code, runtime libraries, environment variables, and configuration files. They are usually used to start a container and contain all the instructions for the Docker daemon on how to make the container run. Think of a Docker image as a template for the container to run on.
But you might be wondering, how do we create these templates or images? How do we store all the information in these templates?
Dockerfile is the answer.
Dockerfile
We have a file known as Dockerfile which is nothing but a set of command which have the instruction on how the container should be what content should it have what permission it should it have etc The dockerfile generally have a base image on which we execute multiple command and set permission and folder and copy the code which we want to execute and tell the command which we need to run once container runs.
Now, here's the cool part: each instruction in the Dockerfile acts as a layer. When you build the image, each layer only runs once. If you build the image again and nothing has changed, those layers won't run again. This makes the process faster and more efficient!
Here is an basic example of a dockerfile that trying to run a javascript using nodejs base image in isolation.

First, we use the FROM command to specify the base image we want to use. The WORKDIR command sets the directory where we want to run the upcoming commands in the container.
Next, we copy the package.json files, specifying the path from where to where. Then, we use the RUN command to execute instructions inside the container. Here, we're running npm install to install all the dependencies.
After that, we copy the rest of the content. You might wonder why we copy the package.json first. It's because npm install takes a lot of time and bandwidth. If we change the code, we don't want to install dependencies again, so we specify it after npm install, which acts as the next layer.
Finally, we use the CMD command to run a command when the container starts. Here, we're starting a server.
Now, you might be thinking, "Where does the Node.js image come from?" It's pulled from a container registry, most likely Docker Hub, which is Docker's official container registry. We can push our images there and pull other images by specifying their names.
Docker Build
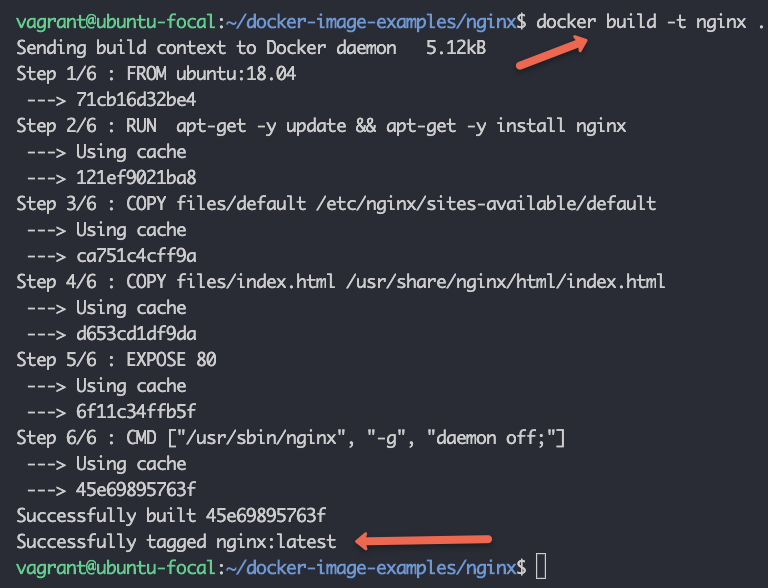
We can now turn this Dockerfile into a Docker image by building it. This is done using the docker build command. Here's how the command looks:
docker build -t tag .
There can be multiple option but these options are required. So, to build our current image, we can use:
docker build -t node-app:latest .
You might be wondering why we added "latest" at the end. On a Docker registry, there can be multiple versions of the same software. To differentiate between them, we give each version a tag. Here, we're using "latest" to indicate that this image is the most recent version.
Yagya, you've explained how to build an image, but we're still unsure about how to run a container from an image.
Lets learn how to run a container start a container.
Start A Container
To start a container, we first need to make sure the image is built properly. Let's begin with the basic command, and then we'll explore more options.
docker run image imagename
Yes, it's that simple! But there are multiple options you can use with it. Let's say we're running a server like before. Since containers are isolated, we need to map a port to expose it to the outside world so everyone can access it. We do this with port mapping using the -p option to specify the outer and container ports. For example:
docker run -d -p 3000:3000 node-app
What's the -d option? It allows us to run the container in detached mode, meaning it runs in the background without showing logs.
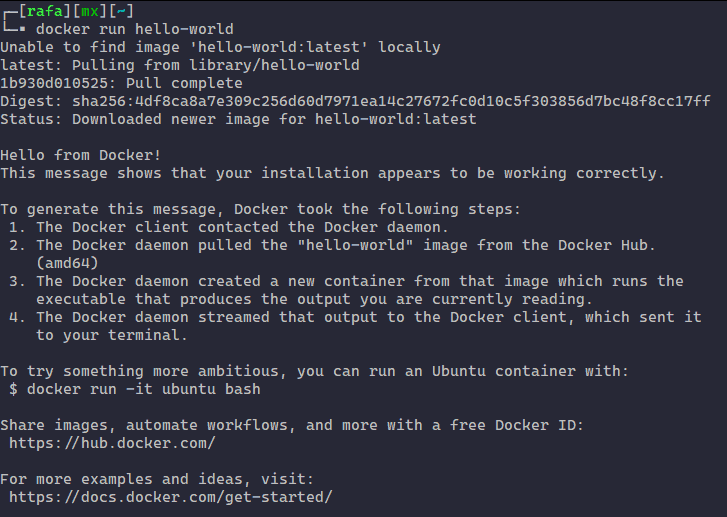
But how do we access the logs if we need to? For that, we need the container ID. To get it, we can run docker ps, which shows all running containers and their IDs. Once we have the ID, we can use:
docker logs <container_id>
There is a option for volumes also They are super handy for managing data in your containers. When you use the -v option, you can specify a path on your host machine and map it to a path inside the container. This way, any changes you make to the data in the container can be reflected on your host, and vice versa.
For example, you can run:
docker run -d -p 3000:3000 -v /path/on/host:/path/on/container node-app
This command maps /path/on/host on your machine to /path/on/container inside the container. It's a great way to persist data or share files between your host and the container.
There are also plenty of other options you can use, like --restart on-failure, which will automatically restart the container if it crashes. This can be really useful for ensuring your applications stay up and running smoothly.
Docker Volumes
Docker containers don't save data created while they're running; it gets deleted when the container is removed.
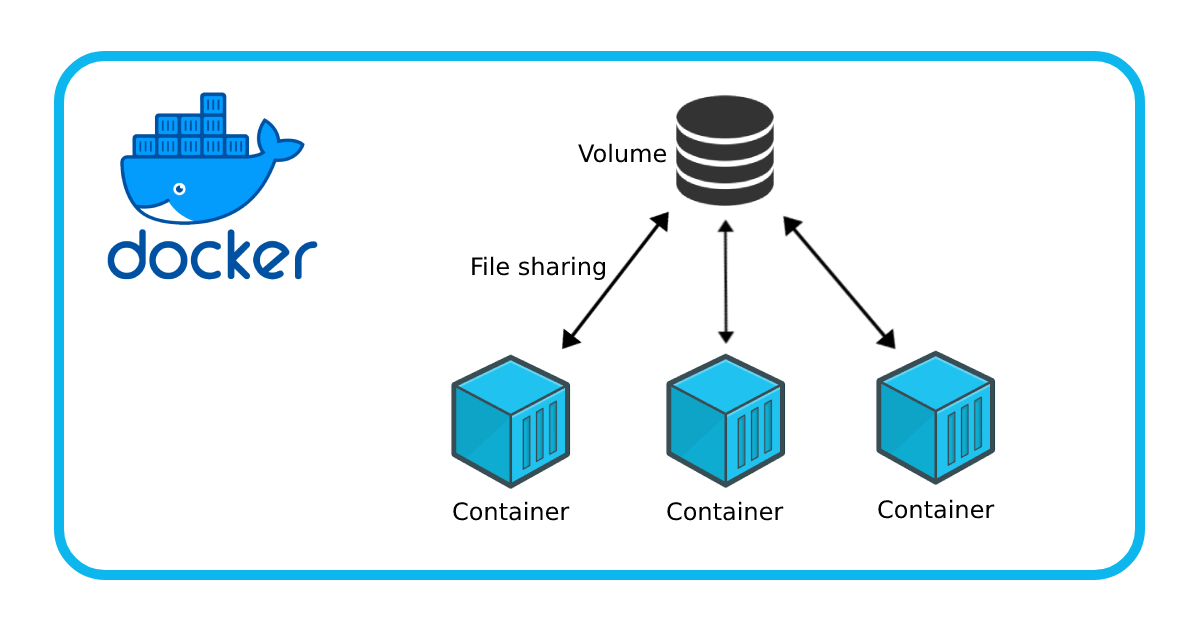
To fix this, we use Docker volumes. Volumes are separate from the container's lifecycle, so the data in the volume is saved. There are three types of volumes:
Anonymous Volumes: These are created for temporary storage, don't have a name, and are usually created by Docker itself.
Named Volumes: These are...e the volume which are usually created by the user explecitly and can be eeasily referemced by other containers also .
Bind Mounts: These types of volumes let you map a file or directory on your host to a directory or file in the container. This way, any changes made in the file or folder can be shared between the host and the container.
To create a volume, you can use:
docker volume create nameforthevolume
Then, you can mount this volume on a container using the -v option:
docker run -d -v nameforthevolume:/data/you/want/persistent my-image
To mount a folder directly, you can run:
docker run -d -v /path/on/host:/path/in/container image
Now you're all set with data persistence!
Some Important Topics Left to Cover:
Docker Compose
Docker Networks
Docker Best Practices
These topics are also important, and I'll be covering them soon. Stay tuned!
Feel free to follow me on social media and share your feedback. I'd love to hear from you and provide more great content!
Happy Dockering!
Yagya Goel
Subscribe to my newsletter
Read articles from Yagya Goel directly inside your inbox. Subscribe to the newsletter, and don't miss out.
Written by

Yagya Goel
Yagya Goel
Hi, I'm Yagya Goel, a passionate full-stack developer with a strong interest in DevOps, backend development, and occasionally diving into the frontend world. I enjoy exploring new technologies and sharing my knowledge through weekly blogs. My journey involves working on various projects, experimenting with innovative tools, and continually improving my skills. Join me as I navigate the tech landscape, bringing insights, tutorials, and experiences to help others on their own tech journeys. You can checkout my linkedin for more about me : https://linkedin.com/in/yagyagoel