Day 23 Task: Jenkins Freestyle Project for DevOps Engineers.
 Pooja Bhavani
What is CI/CD?
CI or Continuous Integration is the practice of automating the integration of code changes from multiple developers into a single codebase. It is a software development practice where the developers commit their work frequently into the central code repository (Github or Stash). Then there are automated tools that build the newly committed code and do a code review, etc as required upon integration. The key goals of Continuous Integration are to find and address bugs quicker, make the process of integrating code across a team of developers easier, improve software quality and reduce the time it takes to release new feature updates.
CD or Continuous Delivery is carried out after Continuous Integration to make sure that we can release new changes to our customers quickly in an error-free way. This includes running integration and regression tests in the staging area (similar to the production environment) so that the final release is not broken in production. It ensures to automate the release process so that we have a release-ready product at all times and we can deploy our application at any point in time.
What Is a Build Job?
A Jenkins build job contains the configuration for automating a specific task or step in the application building process. These tasks include gathering dependencies, compiling, archiving, or transforming code, and testing and deploying code in different environments.
Jenkins supports several types of build jobs, such as freestyle projects, pipelines, multi-configuration projects, folders, multi-branch pipelines, and organization folders.
What is Freestyle Projects ?? 🤔
A freestyle project in Jenkins is a type of project that allows you to build, test, and deploy software using a variety of different options and configurations. Here are a few tasks that you could complete when working with a freestyle project in Jenkins:
Task-01
create an agent for your app. ( which you deployed from docker in the earlier task and the link ishttps://github.com/nallabellisriparthu/django-todo-cicd)
- Step 1: Click on a new item, and then you will have a page on which you have to give your name to your job and choose ‘freestyle project’ or any other option according to your need and then click ‘ok’

Step 2: After this, you will reach a page where you have different options(like build, build triggers, and source code management) that help you manage your job.
Step 3: Now, we will give some description of our job.
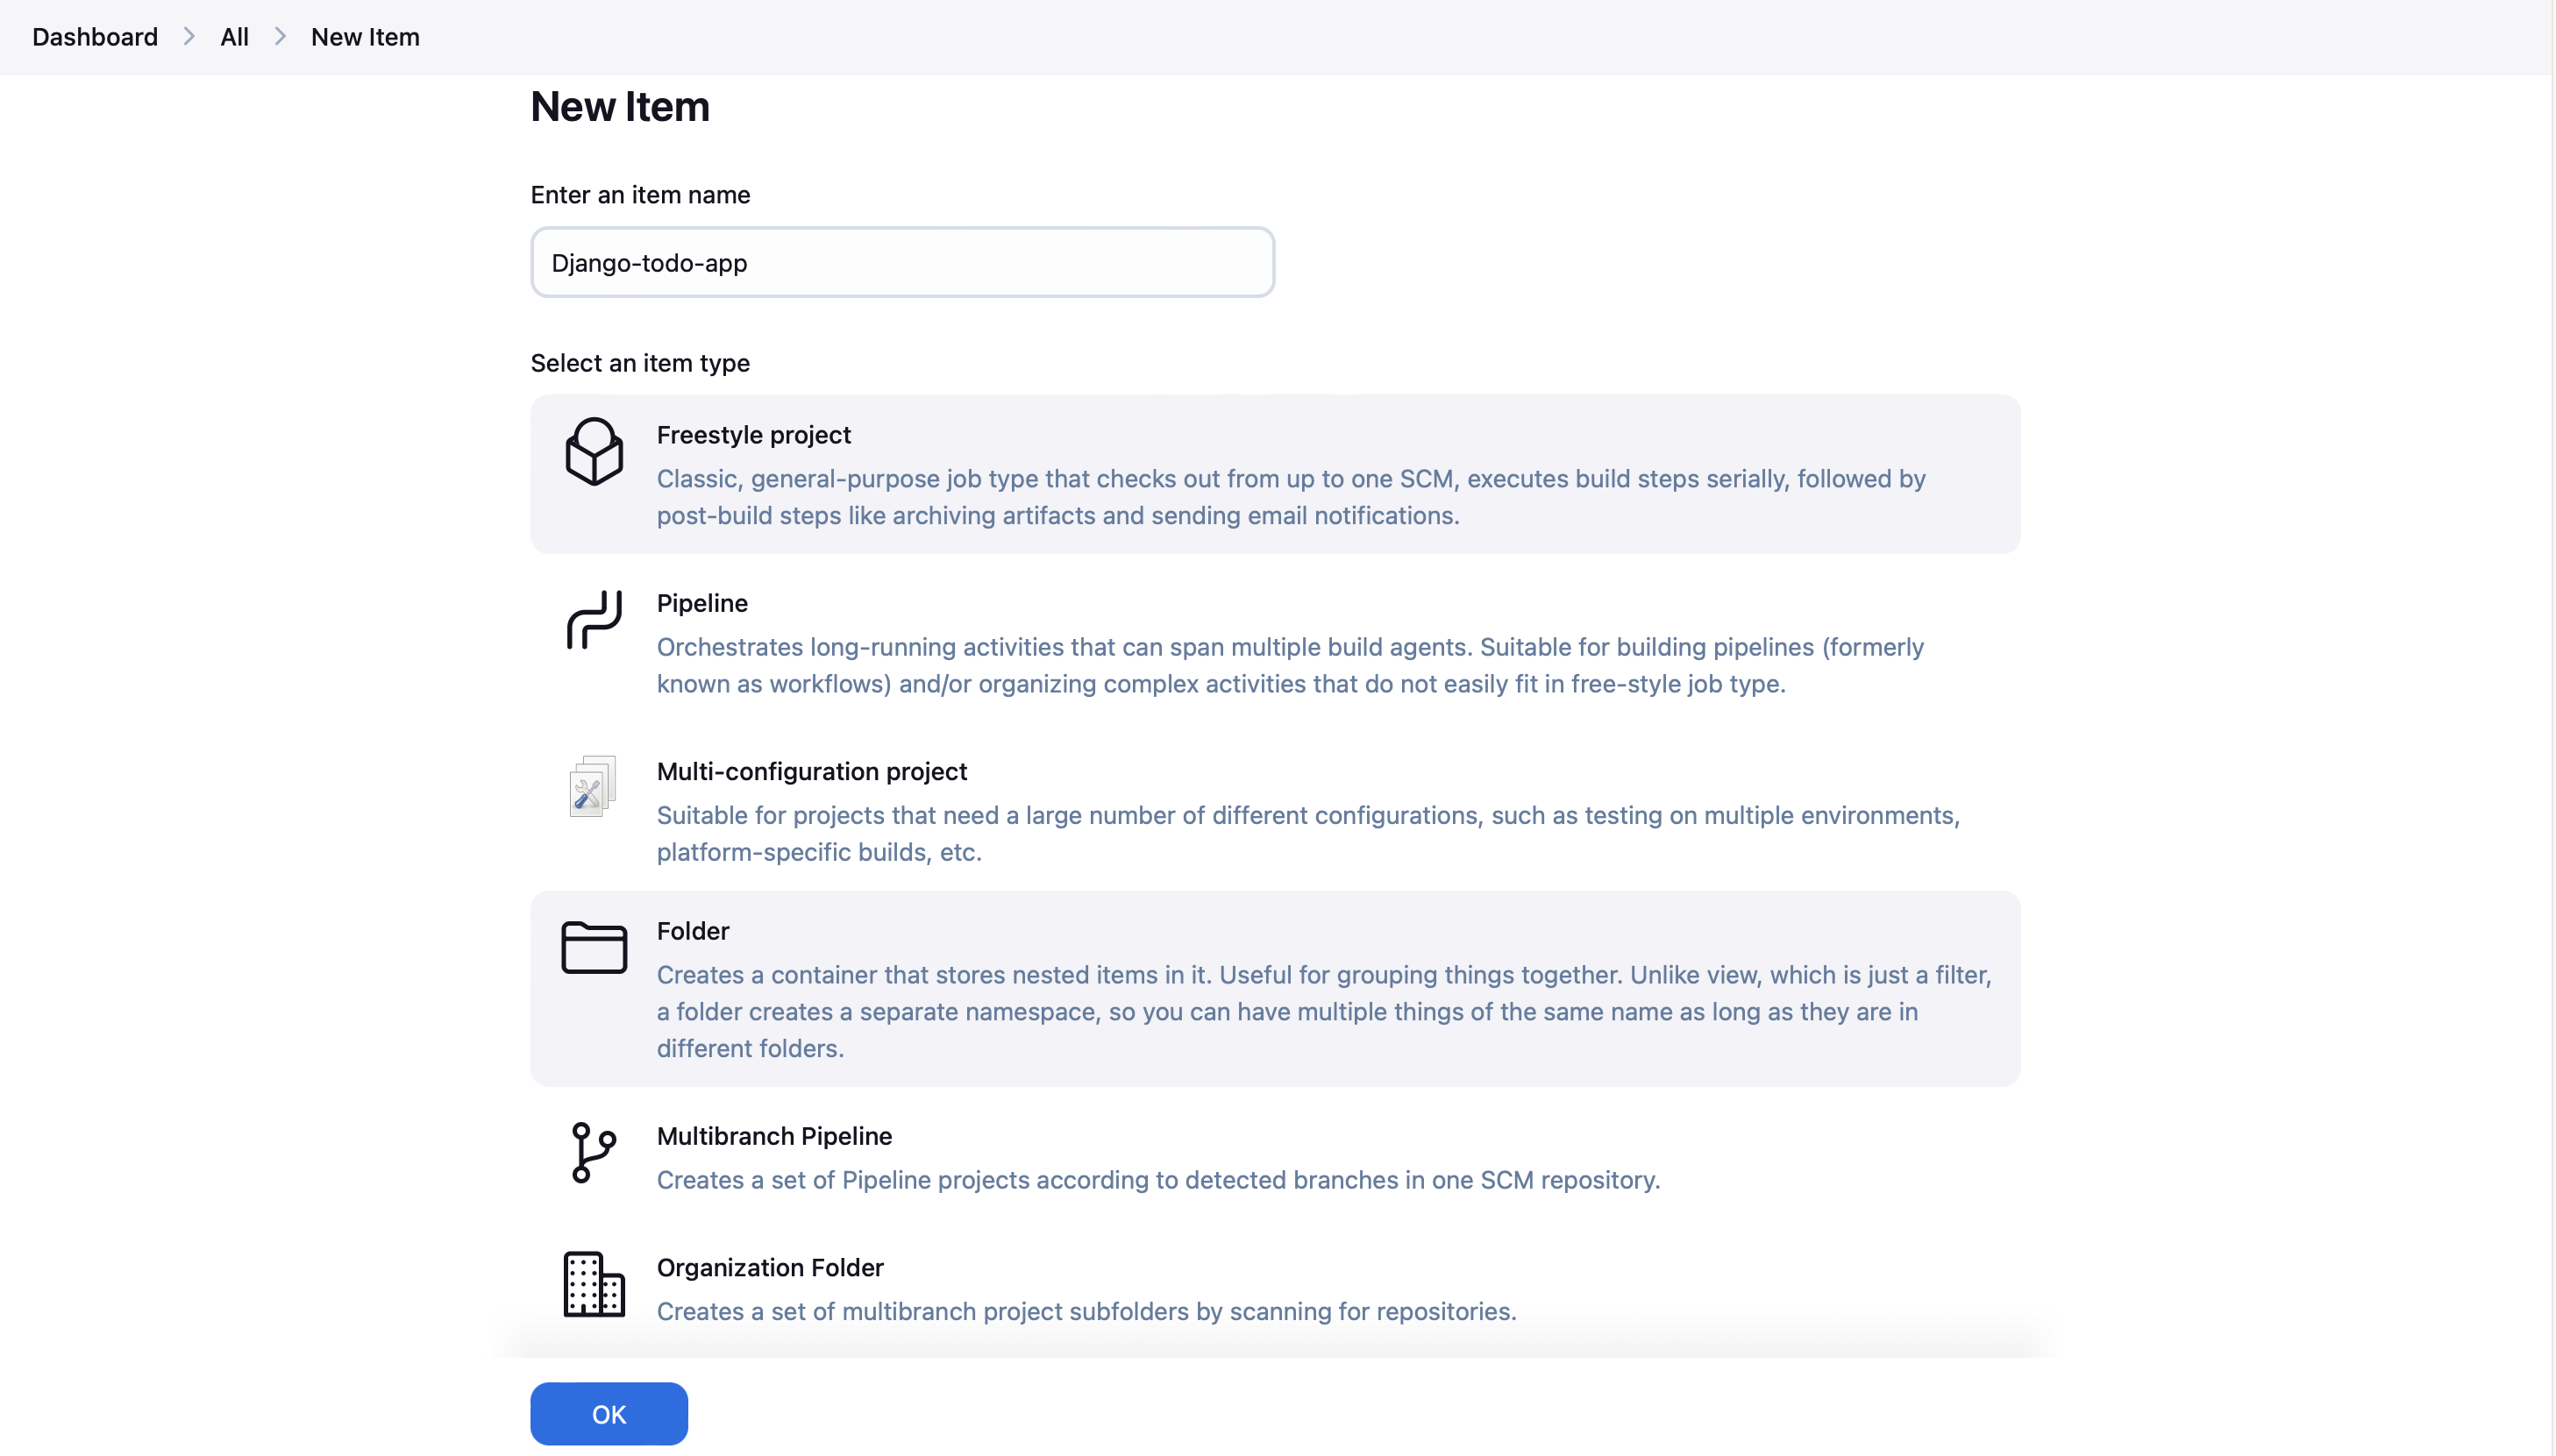
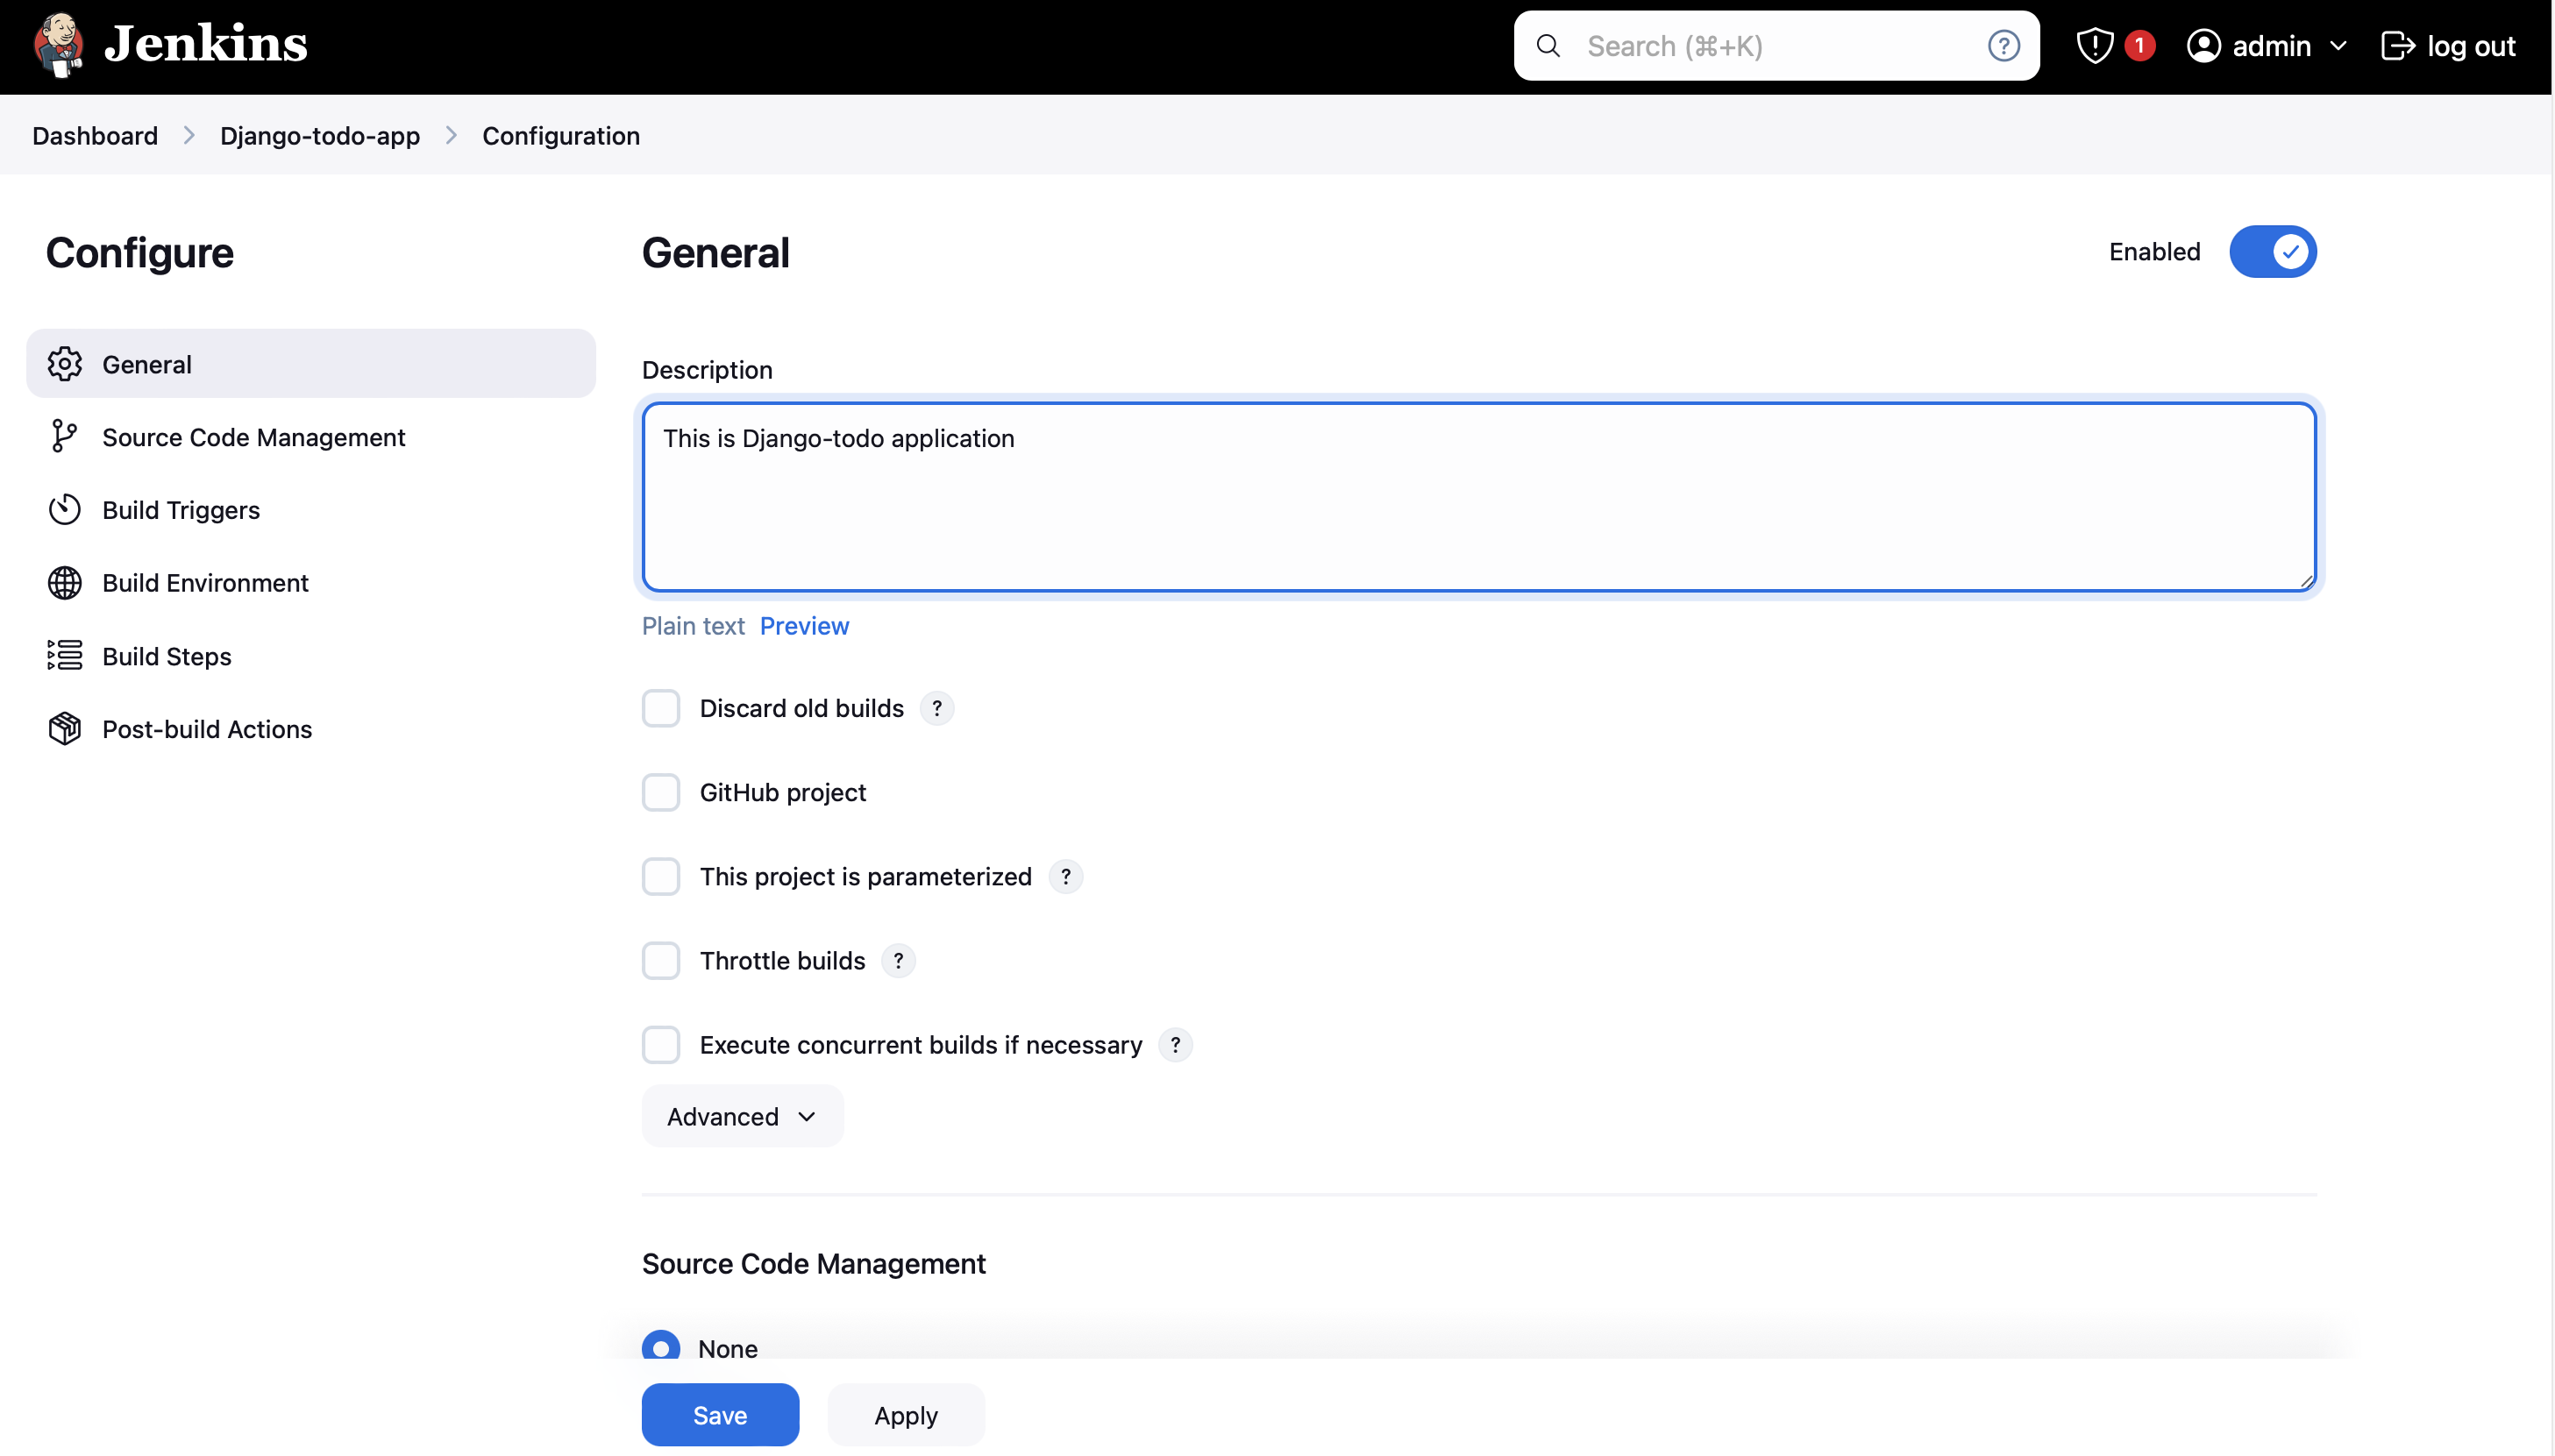
- Step 4: Now, select the source code management tool, which in our case is Git. Paste your application URL in the Repository URL field, and ensure that the branch specified for building in Jenkins matches the branch in your GitHub repository.
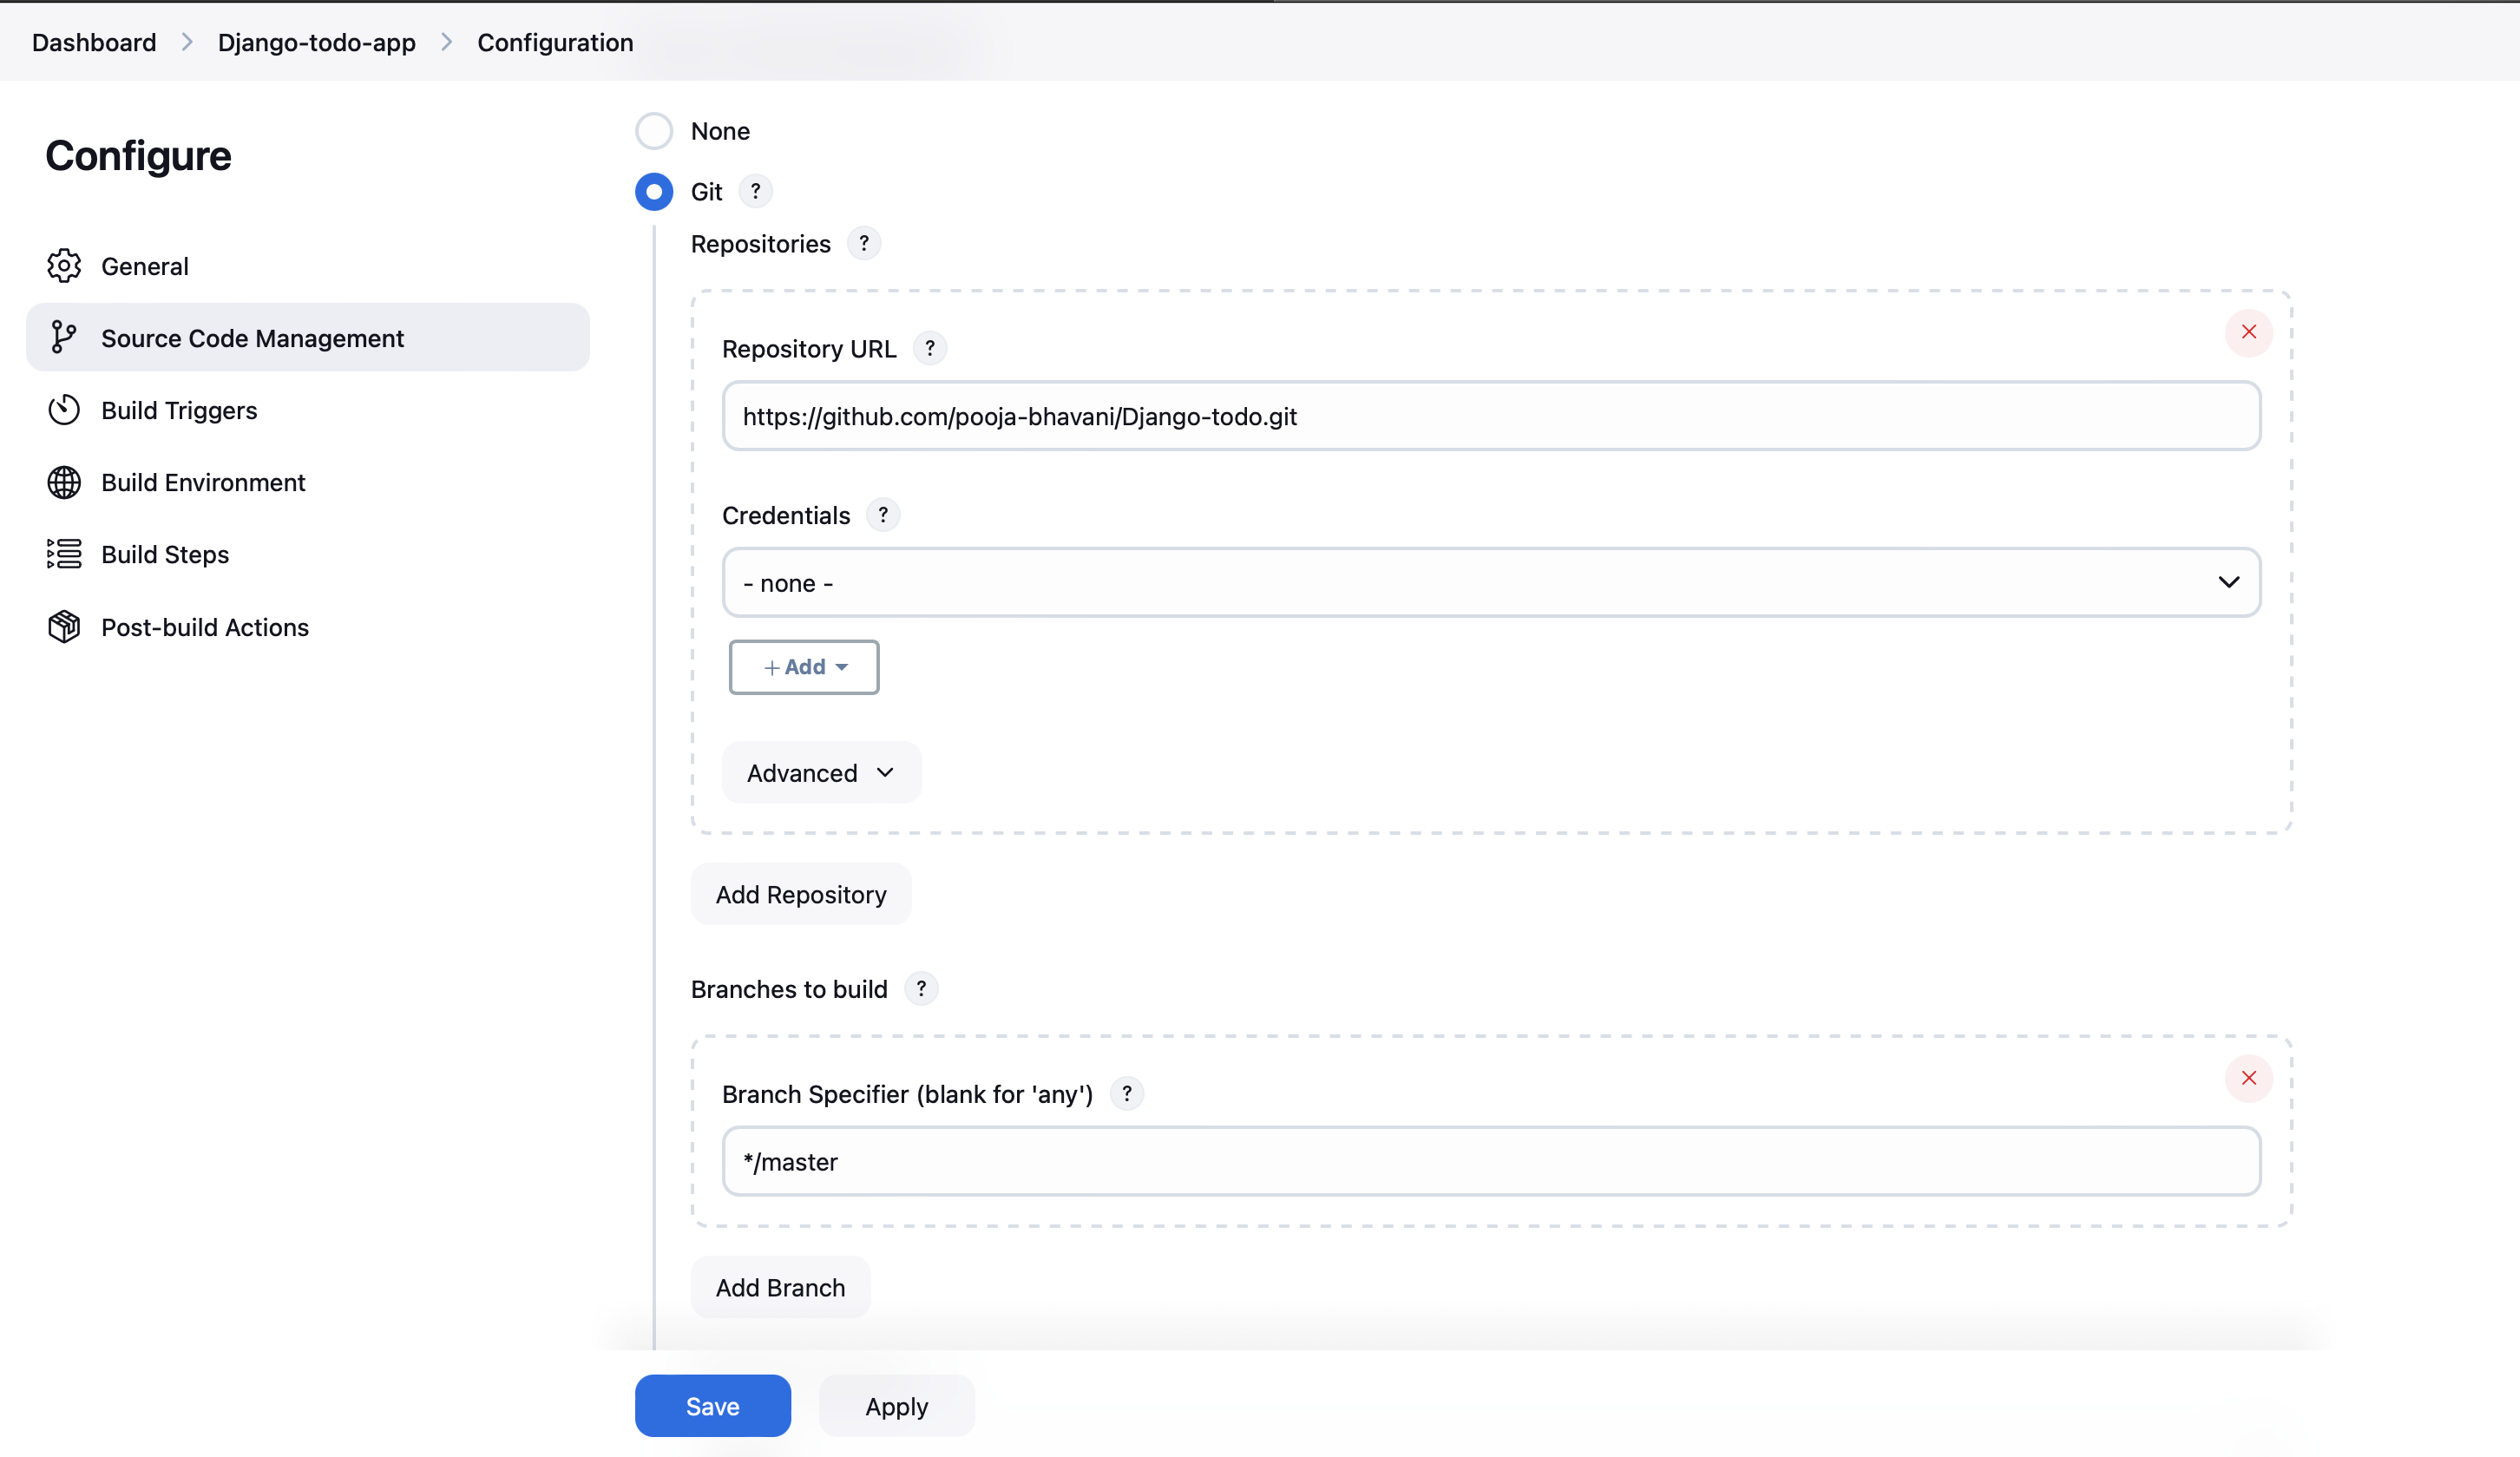
Step 5: After this, if you want to give some triggers then you can choose accordingly even Jenkins provides us scheduled triggers. And you can choose to build an environment also accordingly. But, here we are making a simple job, so we are not using any triggers and build environment options.
Step 6: In the build section we have an option ‘Execute shell’ by which we can write some command or code.

- Step 7: Now, issue the command as per your requirements. Make sure Docker is installed on your system and permissions are set to build your project.
sudo apt-get install docker.io -y # in your system
sudo usermod -aG docker $USER && sudo reboot
- Again login to your Jenkins server and in your terminal use this command
sudo usermod -aG docker jenkins
- Use these commands in the Jenkins server in the Execute shell
echo "code build..."
docker build . -t django-app

echo "code run..."
docker run -d -p 8000:8000 django-app
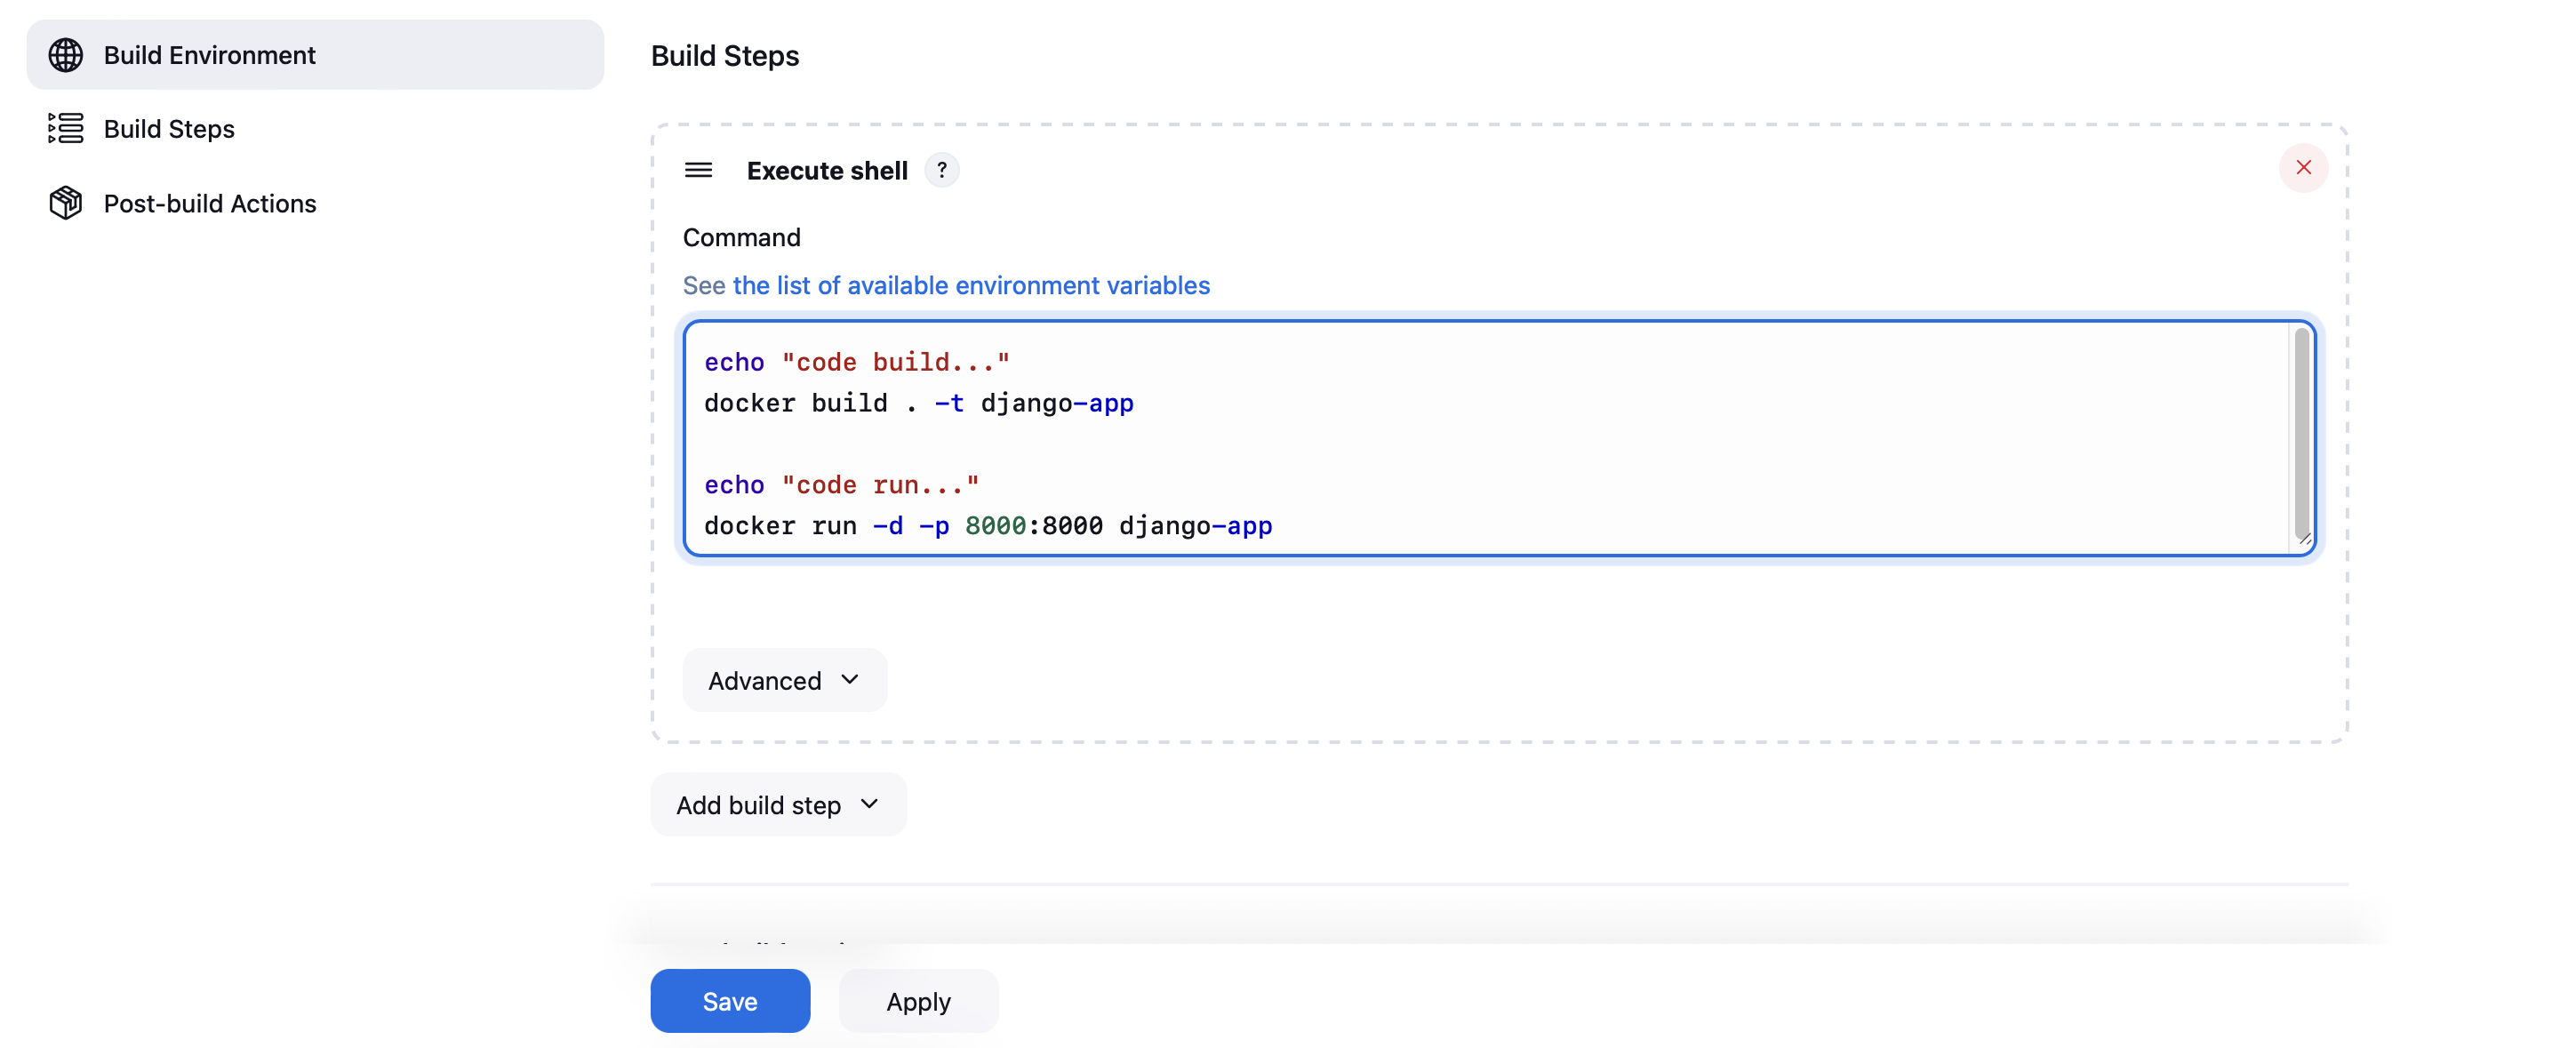
Then click apply and save. So, your job is created.
- Step 8: Now, we will run it for which click the ‘build now’ option and a building history will be created then click on it.

- Step 10: Now, open AWS, navigate to your instance, select 'Security', click on the security group, and choose 'Edit inbound rules'. Click on 'Add rule', set the port range as 8000, select 'anywhere-ipv4' in the source, and save the rules.

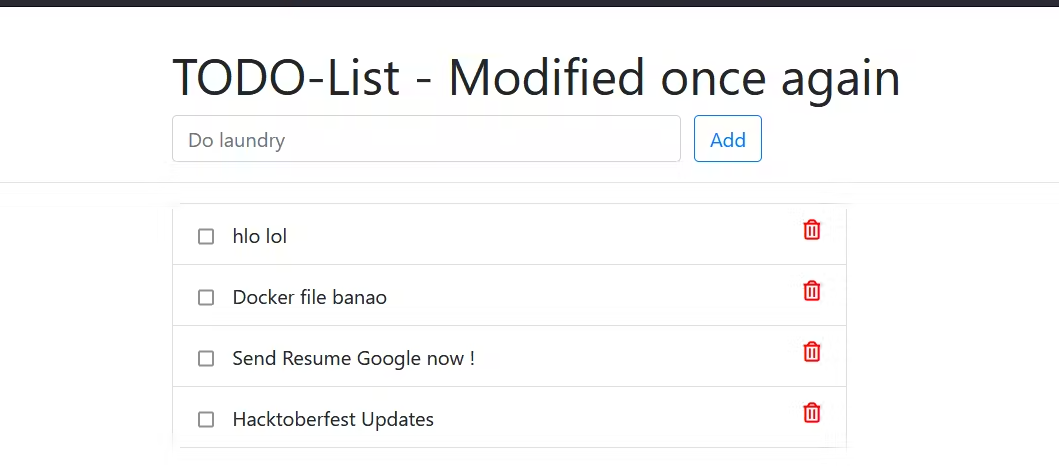
Select the IP address of your AWS instance, copy it, and paste it into a new tab followed by port number 8000.
Task-02
create Jenkins project to run the "docker-compose up -d" command to start the multiple containers defined in the compose file
- Similar to task 1, but you'll need to install Docker Compose on your system. Replace the 'execute shell' step with Docker Compose commands.
sudo apt-get install docker-compose -y
echo "code composed..."
docker-compose up -d

click on apply and save
In your system kill and remove the container of Task1 and then follow the below steps
Now, we will run it for which click the ‘build now’ option and a building history will be created then click on it.

Set up a cleanup step in the Jenkins project to run the "docker-compose down" command to stop and remove the containers defined in the compose file.
echo "code composed down..."
docker-compose down
- In your 'execute shell' section, enter the provided command. This will stop your container, making your application inaccessible via your IP address.

Subscribe to my newsletter
Read articles from Pooja Bhavani directly inside your inbox. Subscribe to the newsletter, and don't miss out.
Written by

Pooja Bhavani
Pooja Bhavani
Hi, I am Pooja Bhavani, an enthusiastic DevOps Engineer with a focus on deploying production-ready applications, infrastructure automation, cloud-native technologies. With hands-on experience across DevOps Tools and AWS Cloud, I thrive on making infrastructure scalable, secure, and efficient. My journey into DevOps has been fueled by curiosity and a passion for solving real-world challenges through automation, cloud architecture, and seamless deployments. I enjoy working on projects that push boundaries whether it's building resilient systems, optimizing CI/CD pipelines, or exploring emerging technologies like Amazon Q and GenAI. I'm currently diving deeper into platform engineering and GitOps workflows, and I often share practical tutorials, insights, and use cases from my projects and experiences. ✨ Let’s connect, collaborate, and grow together in this ever-evolving DevOps world. Open to opportunities, ideas, and conversations that drive impactful tech!