Steps to Enable Horizontal Auto Scaling for AWS Web Applications
 Arish Ahmad
Introduction
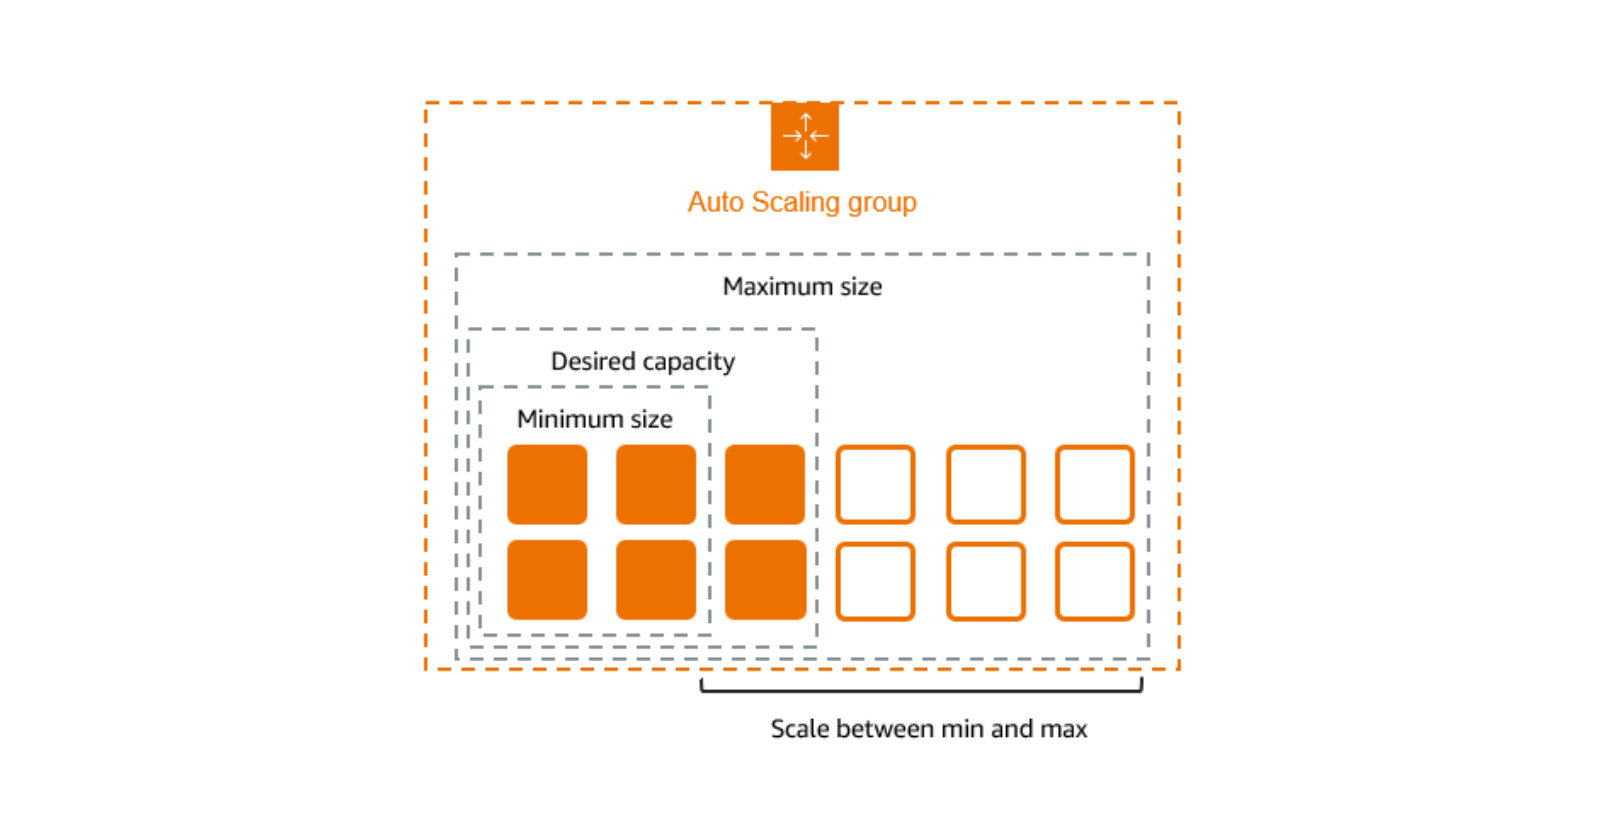
AWS Auto Scaling monitors your applications and automatically adjusts capacity to maintain steady, predictable performance at the lowest possible cost. Using AWS Auto Scaling, it’s easy to setup application scaling for multiple resources across multiple services in minutes.
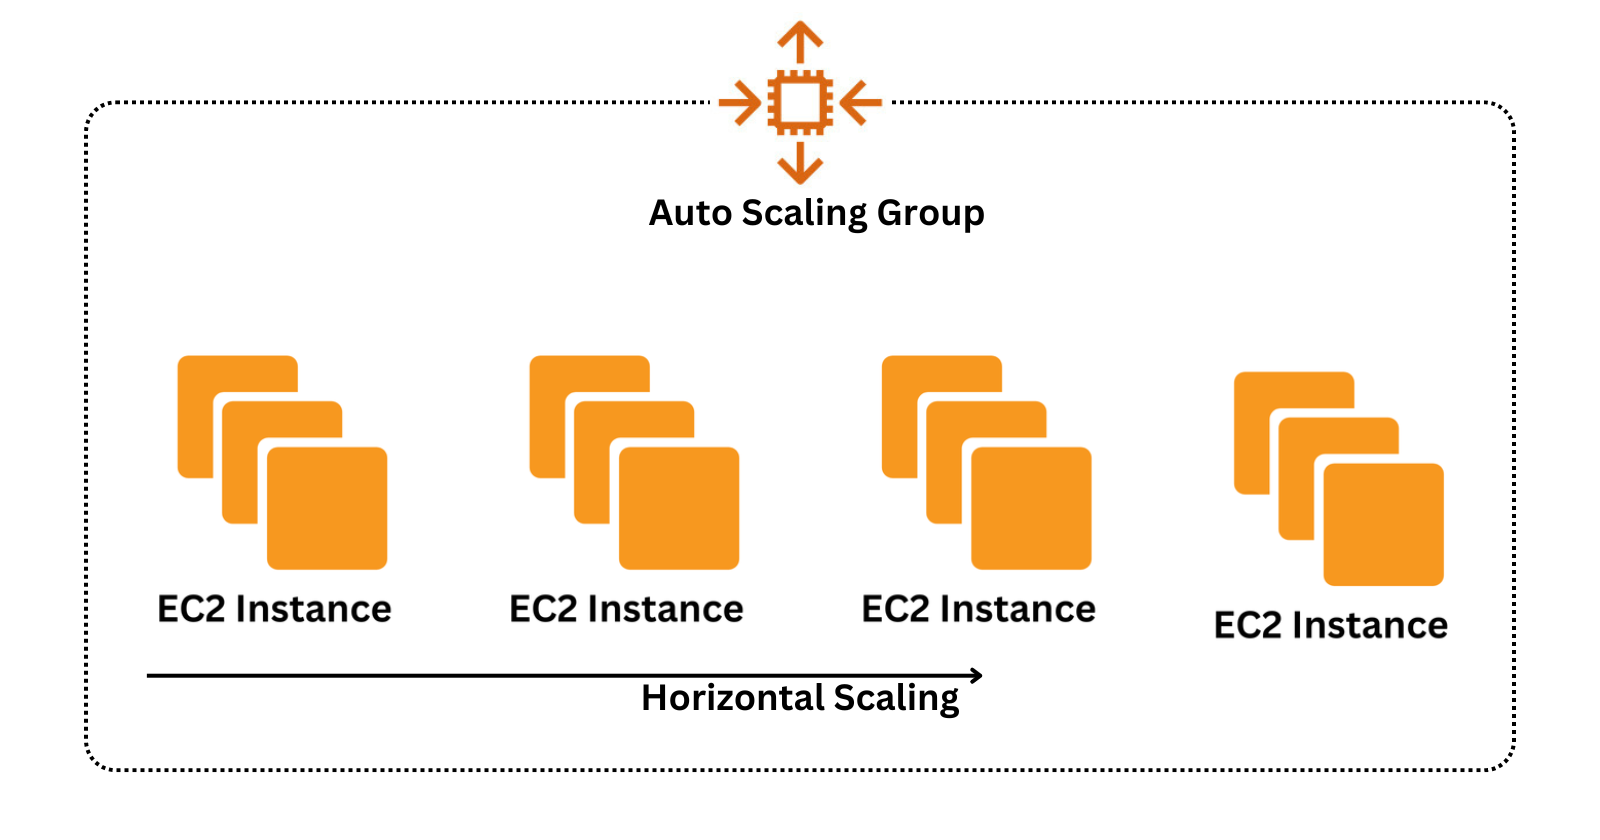
Horizontal auto scaling in AWS is a way to scale a system by adding more machines or servers to an auto scaling group.
Follow these steps to horizontally auto scale an AWS web application
Open the AWS Management Console and navigate to the EC2 dashboard.
Create an instance and host a website, you can use an EC2 instance with Windows or an EC2 instance with Linux.
Create an Image of this instance, you can use Create AMIs from EC2 Instances.
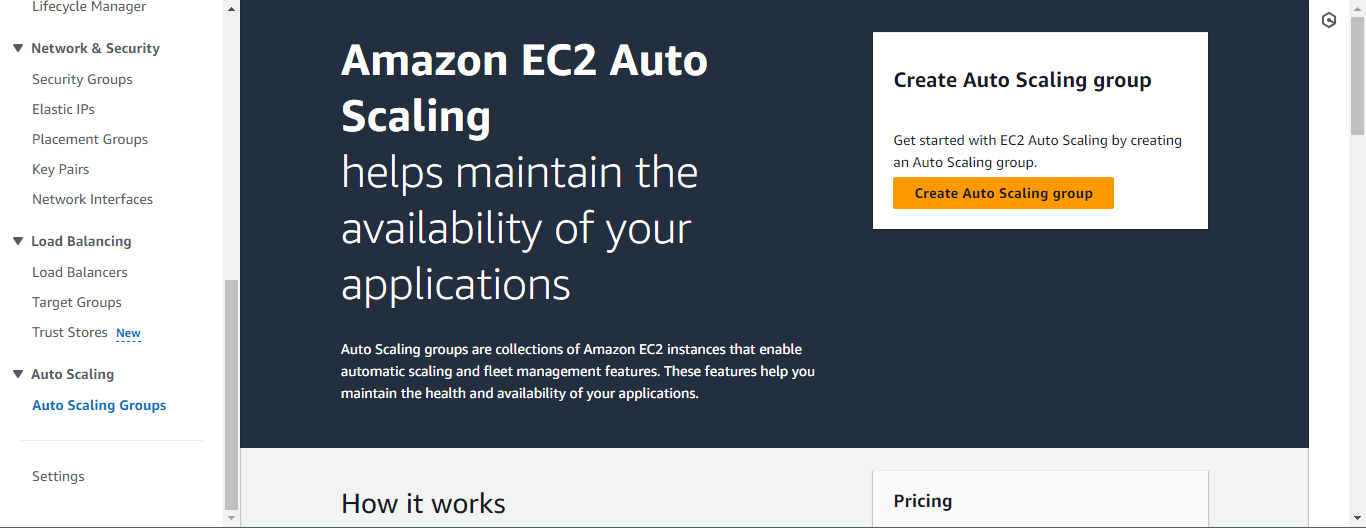
In the left navigation panel, choose Auto Scaling Groups under Auto Scaling.
Click Create Auto Scaling group.
Write a suitable name for the Auto scaling group.
Scroll down and click Create a launch template. A new tab will open up.
Write a suitable name for the template.
Scroll and click on My AMIs under Application and OS Images (Amazon Machine Image).
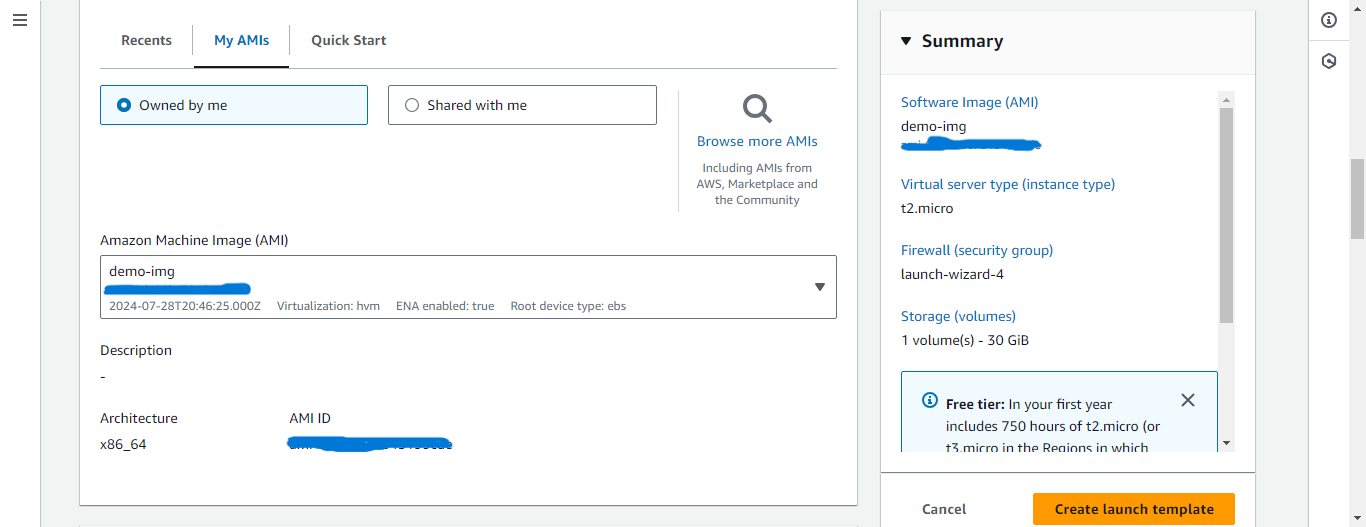
Select the newly created AMI.
Select any free tier instance type (Example: t2.micro).
Select any Key pair.
Select any Security group under Network settings
Now click on Create the launch template.
Please go ahead and return to the previous tab and refresh the launch template.
Now you can select the newly created launch template from the drop-down.
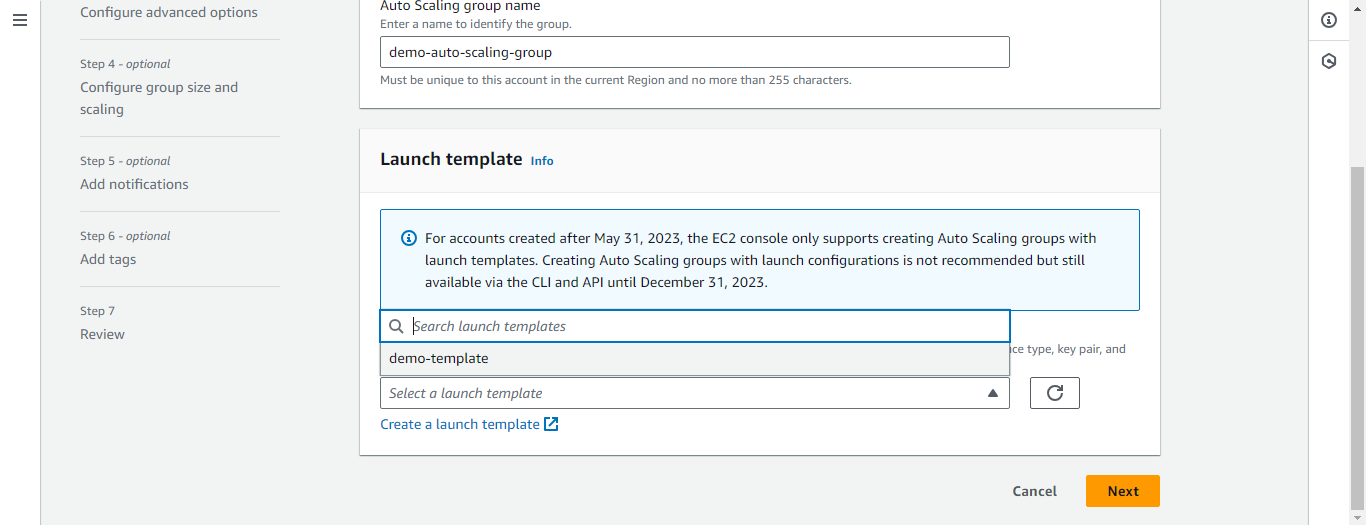
Click Next.
Under Network select all the availability zones in which you want your instances.
Now click Next.
Scroll and hit Next.
Under the Group Size set Desired capacity to 3.
Desired capacity: Represents the initial capacity of the Auto Scaling group at the time of creation. An Auto Scaling group attempts to maintain the desired capacity. It starts by launching the number of instances that are specified for the desired capacity, and maintains this number of instances as long as there are no scaling policies or scheduled actions attached to the Auto Scaling group.
Under Scaling set Min desired capacity to 2 and Max desired capacity to 5.
Minimum desired capacity: This represents the minimum group size. When scaling policies are set, they cannot decrease the group's desired capacity lower than the minimum capacity.
Maximum desired capacity: Represents the maximum group size. When scaling policies are set, they cannot increase the group's desired capacity higher than the maximum capacity.
Now click on the Target tracking scaling policy.
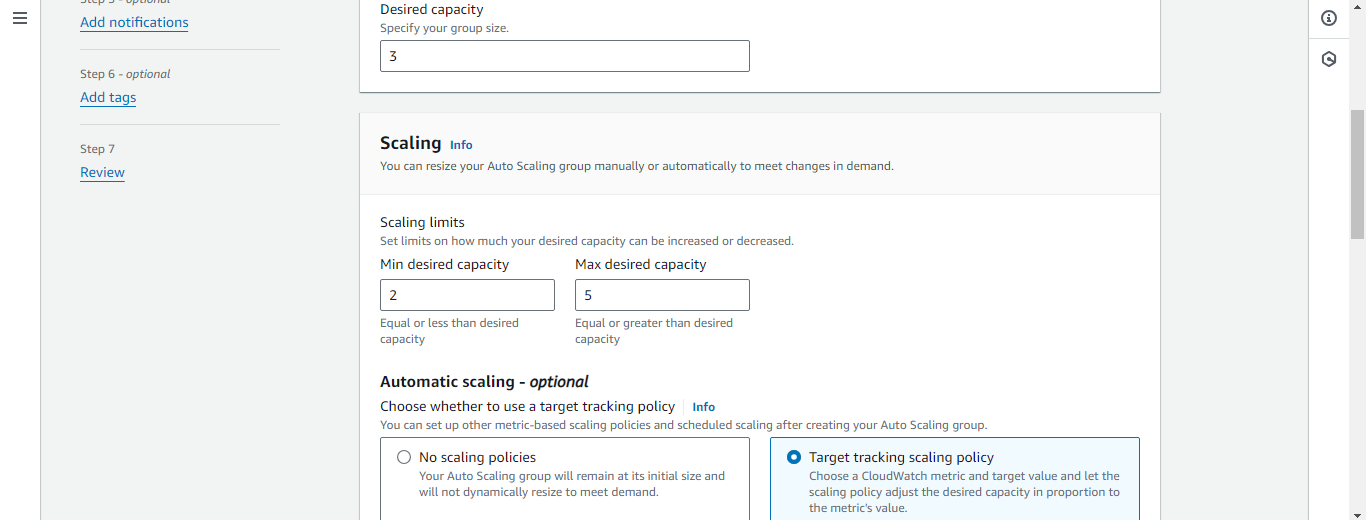
Now scroll and hit Next.
Now click Next -> Next.
Review all the changes made.
Click on Create auto scaling group.
You can go to the instances to check the creation on the EC2 instance with the same hosted website. To check, hit the Public IPv4 address of all the new instances.
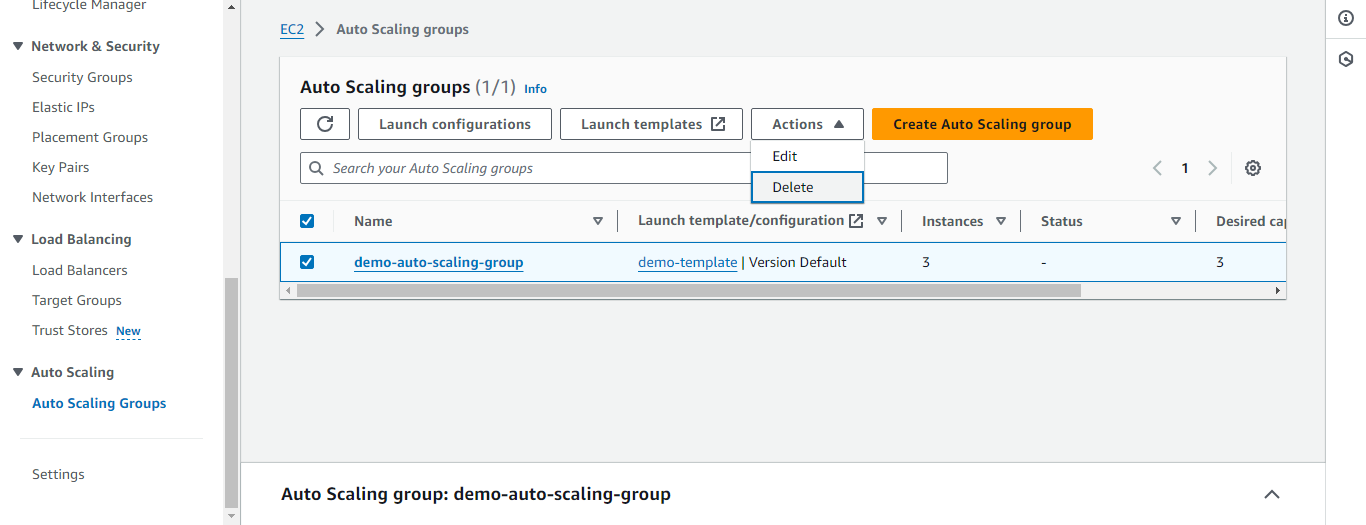
To delete the auto-scaling group, select the group -> Actions -> Delete -> type delete -> Delete.
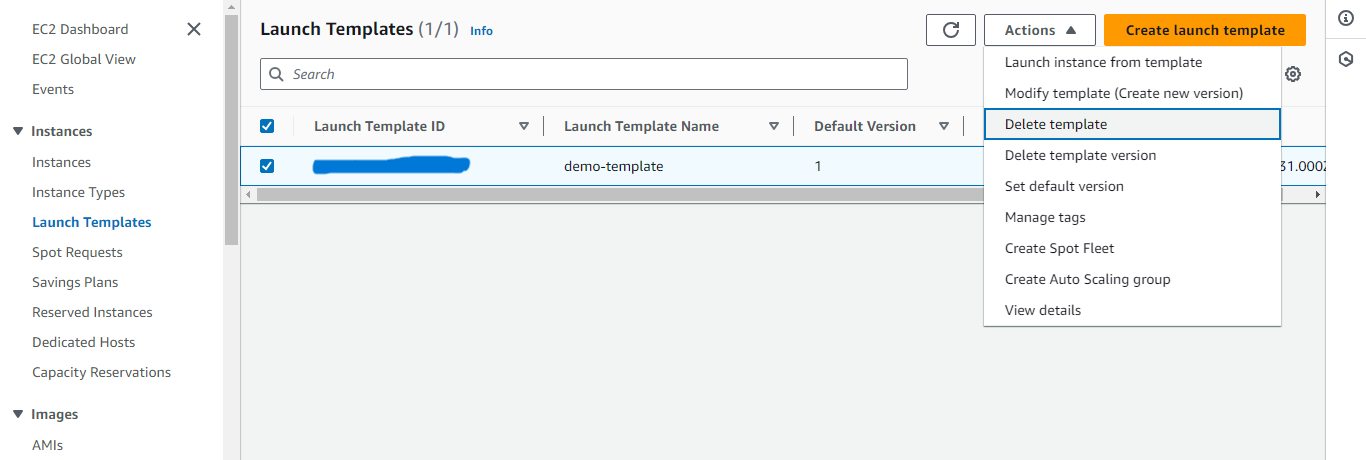
To delete the template, select the launch template -> Actions -> Delete template -> type delete -> Delete.
Subscribe to my newsletter
Read articles from Arish Ahmad directly inside your inbox. Subscribe to the newsletter, and don't miss out.
Written by

Arish Ahmad
Arish Ahmad
Final-year BTech student specializing in software development. Completed a Flutter internship and amassed three years of project experience, crafting Threads clone, Stream Arbiter, Ticketify, and Google Docs. Proficient in C++, having successfully solved 250+ LeetCode questions.