Implementing a CI/CD Pipeline for Building and Deploying a 10-Microservices Application Using Azure DevOps
 Shazia Massey
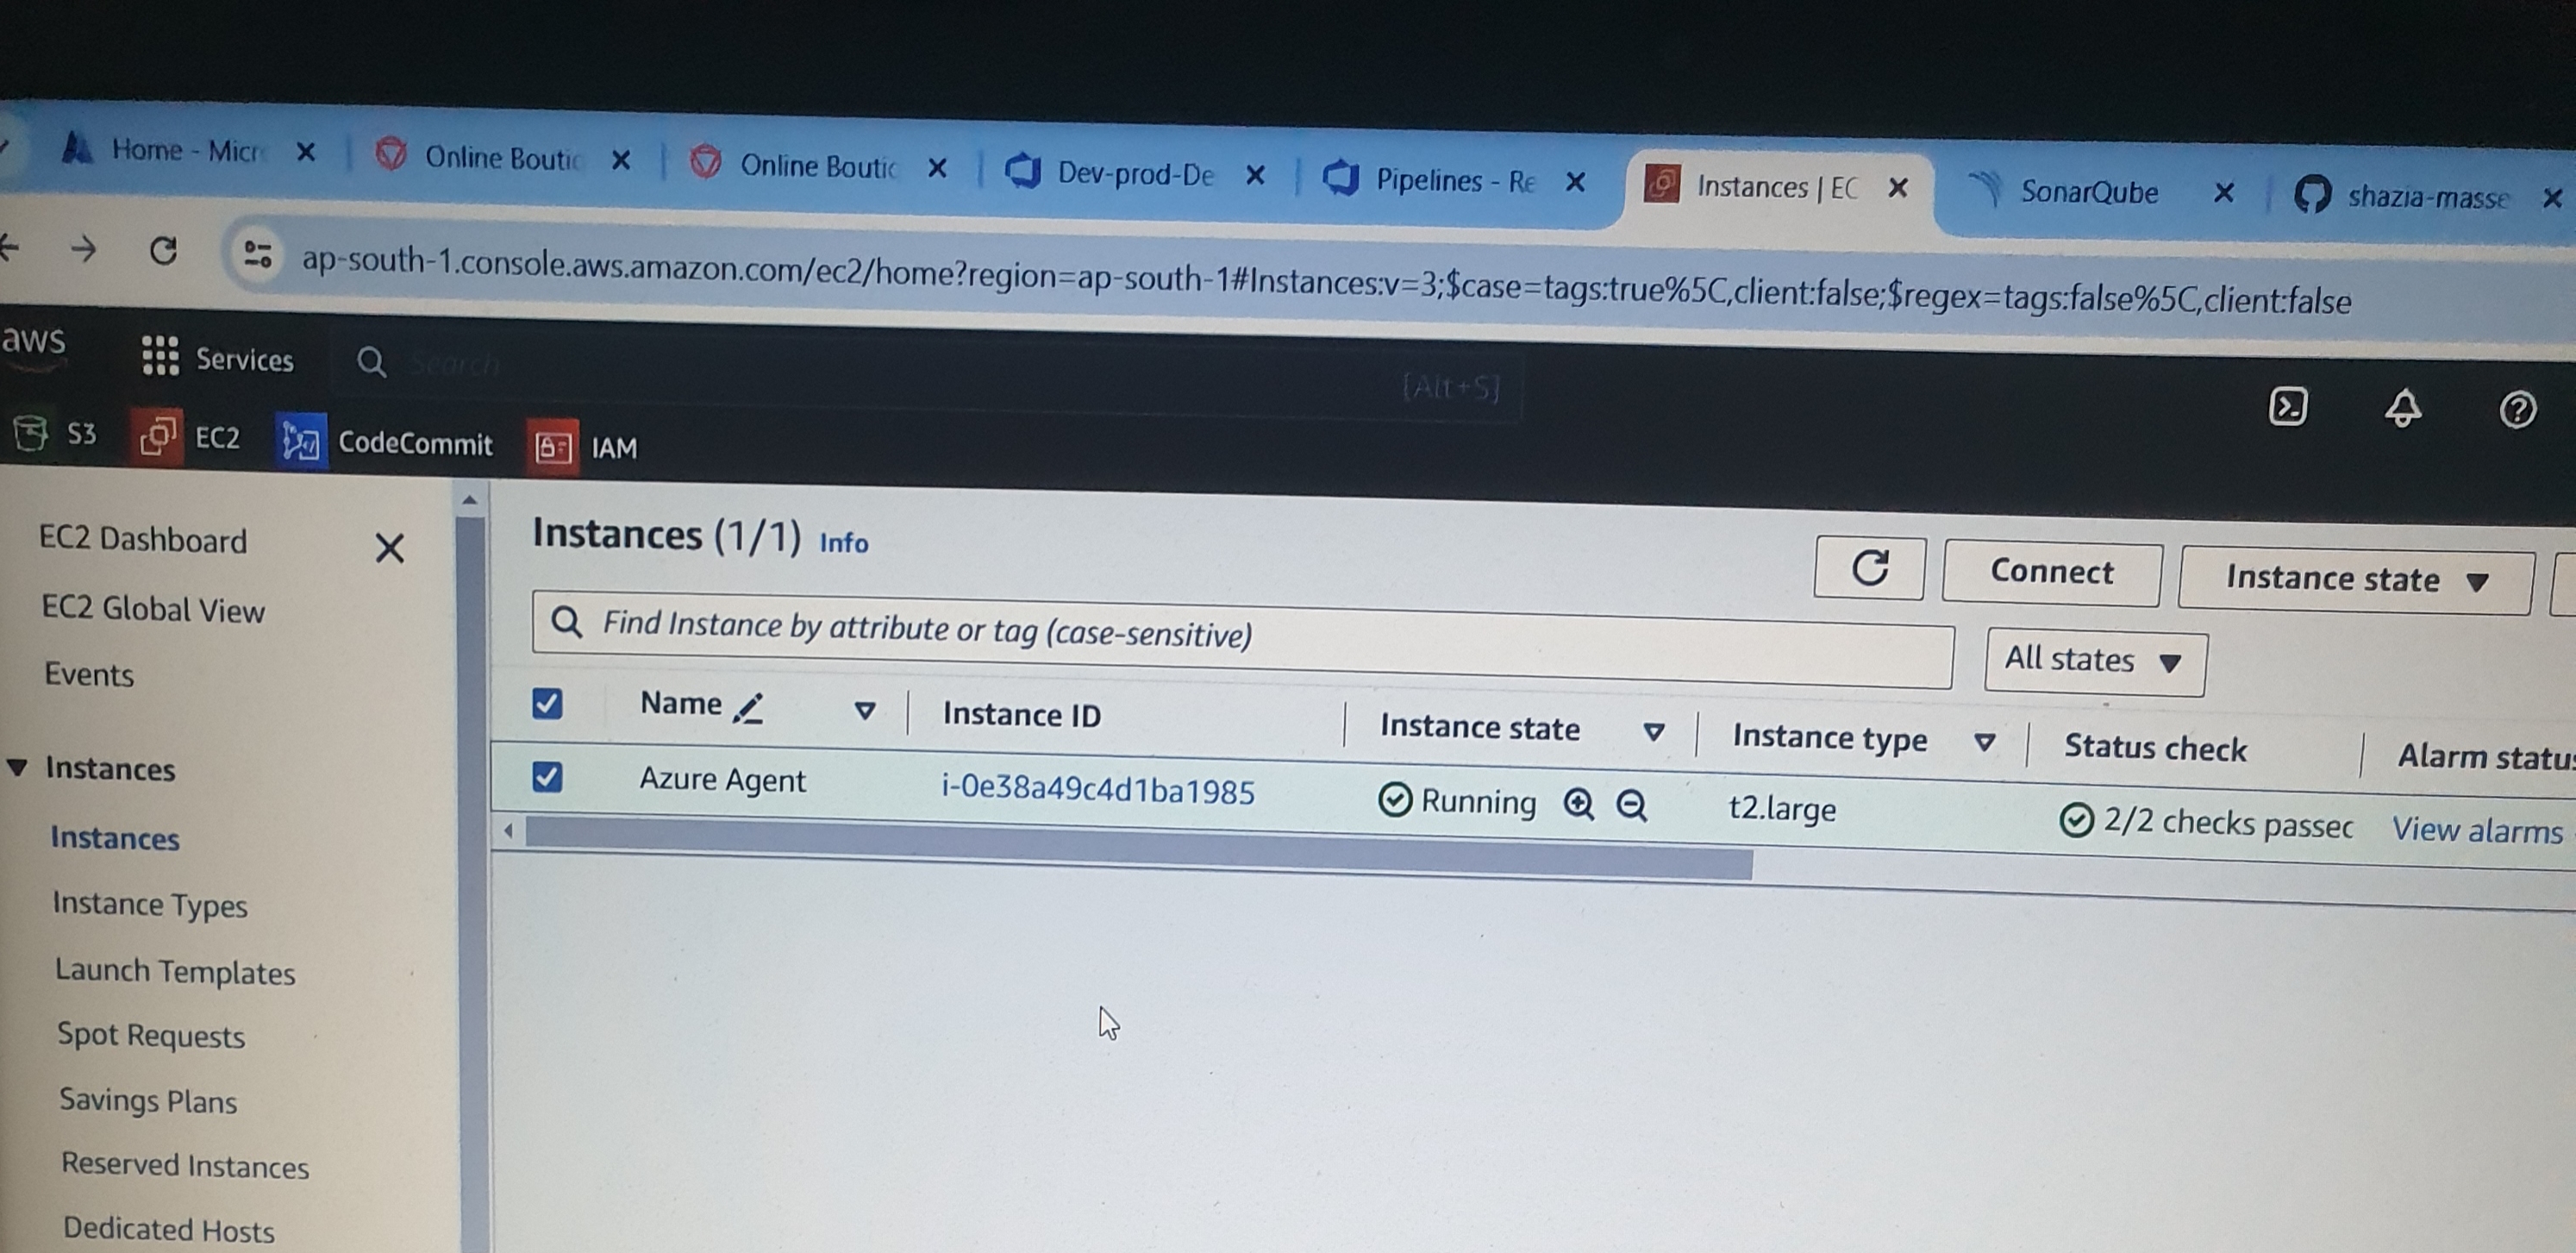
First, we need to create an AWS EC2 instance of type t2.large, which we will name 'Azure Agent'. Then, we will install Java, Docker, and SonarQube on it.
# sudo apt update

----Install Java
# java
# sudo apt install openjdk-17-jre-headless -y

-----Install docker
# sudo apt install docker.io  -y
# sudo chmod 666 /var/run/docker.sock

-----Install Sonarqube
>>>> mc1arke/sonarqube-with-community-branch-plugin
---A distribution of Sonarqube Community Edition with sonarqube-with-community-branch-plugin to enable scanning of branches and the
decoration of pull requests without having to upgrade to Sonarqube Developer Edition.

# docker run -d -p 9000:9000 mc1arke/sonarqube-with-community-branch-plugin
# <IP:9000>
# Login to sonarQube
Create Kubernetes Cluster:
Next, set up an Azure account and log in to portal.azure.com. First, create an Azure DevOps organization named ‘masseys’. Meanwhile, start creating a Kubernetes cluster with the following essential configurations: cluster name, node pool, and resource group. This will be a small cluster with validation.
To set up an agent pool for the project “10-Microservice-Application”, go to the organization settings, and select “Pipelines” followed by “Agent Pools.” Create a new agent pool type self-hosted, name it and then Auto-provision this agent pool in all project.
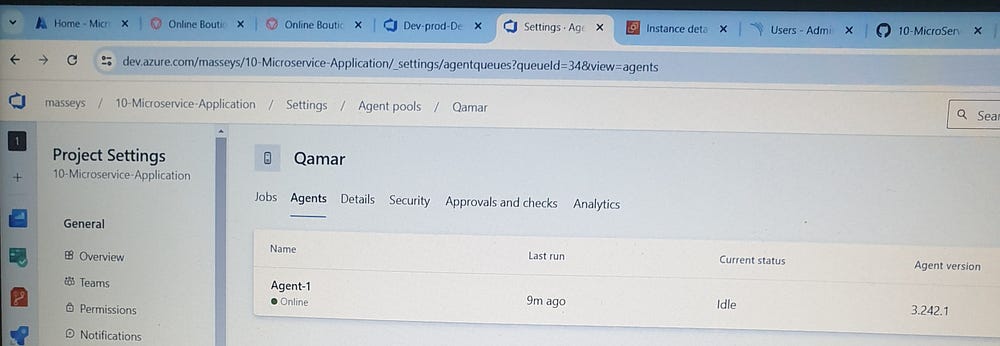
Now we need to add this agent in our Linux VM
# wget https://vstsagentpackage.azureedge.net/agent/3.232.3/vsts-agent-linux-x64-3.232.3.tar.gz
# mkdir myagent && cd myagent
# tar -zxvf /home/ubuntu/vsts-agent-linux-x64-3.232.3.tar.gz
# ls
bin  config.sh  env.sh  externals  license.html  run-docker.sh  run.sh
# ./config.sh

We can see Azure Pipelines now; we need to start the configuration
Enter server URL > https://dev.azure.com/masseys
Enter personal access token of Aure > #  Go to user settings on the right side of the Azure DevOps page, select 'PAT' (Personal Access Tokens), then click 'New Token'. Name the token 'Token-1', set it to 'Full Access', and authorize the scope of access associated with this token.
Connecting to server
>> Register Agent >>
# Enter agent pool > Qamar
# Enter agent name > Agent-1
Connecting to the service. Successfully added the agent. Settings saved.

Start the agent
# ./run.sh
Connecting to the server
Listening for job

add user-defined capability
# Go to Agent-1 >> name:java >> value:true
In the settings, turn off “Disable creation of classic build pipelines and release pipelines” since we are creating our own pipeline using the classic approach.
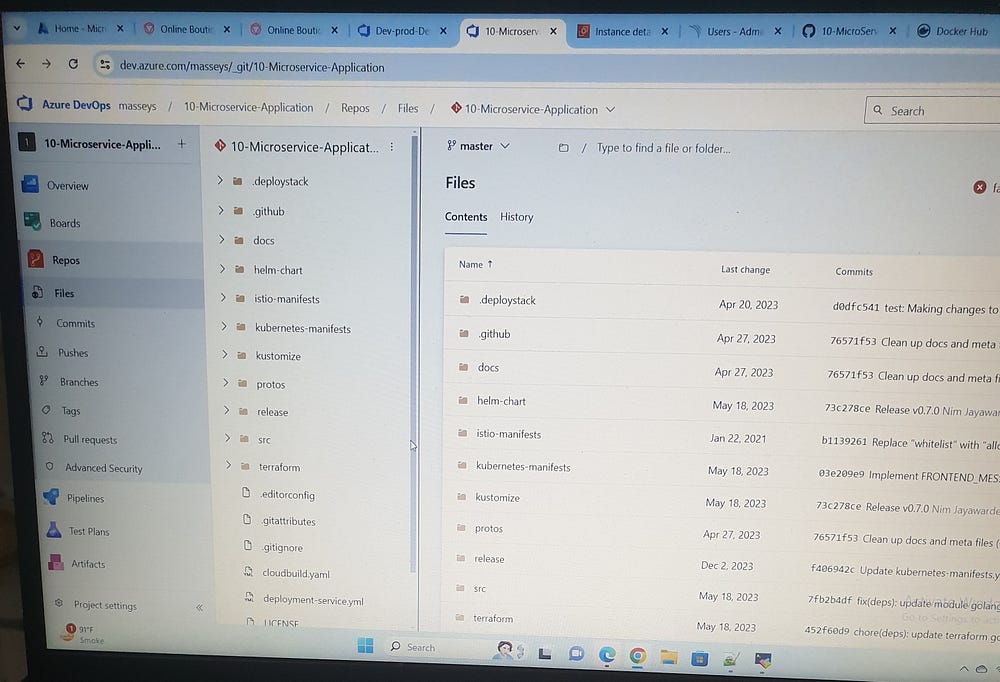
Next, we go to our organization and navigate to the Repos section, where we can import our code from GitHub. We select ‘Git’ as the repository type and enter the clone URL. For private repositories, we need to provide authentication details, including our username and a personal access token from GitHub.
Now, create a pipeline using the classic editor to avoid YAML. Set the branch to ‘Latest’. Start with Empty job , first configure agent pool >> Get sources
To add SonarQube analysis to the pipeline, navigate to the Azure DevOps Marketplace on the right side of the page, select “Extensions for Azure DevOps,” search for “SonarQube,” and click “Get it free” to install the extension. The SonarQube extension will be uploaded to your organization and will be added to the “10-Microservices Application” project in Azure DevOps.
First Stage — Prepare Analysis on SonarQube: Configure the SonarQube Server Endpoint by providing the Server URL and Token (obtain it from SonarQube Server > Administration > Security > Generate Token). Set the Service Connection Name to sonar-con, grant access permissions to all pipelines under Security, and save the configuration. Then, use the standalone scanner to run the analysis, manually configure the mode with the Project Key and Name as 10-MicroserviceApplication, and set the Sources Directory Root to src. In additional Properties
# Additional properties that will be passed to the scanner.
# Put one key=value per line,example:
# sonar exclusions=**/*.bin
sonar.java.binaries=.
sonar.branch.name=latest
Run Code Analysis Stage: Use JAVA_HOME as the source for the code analysis.
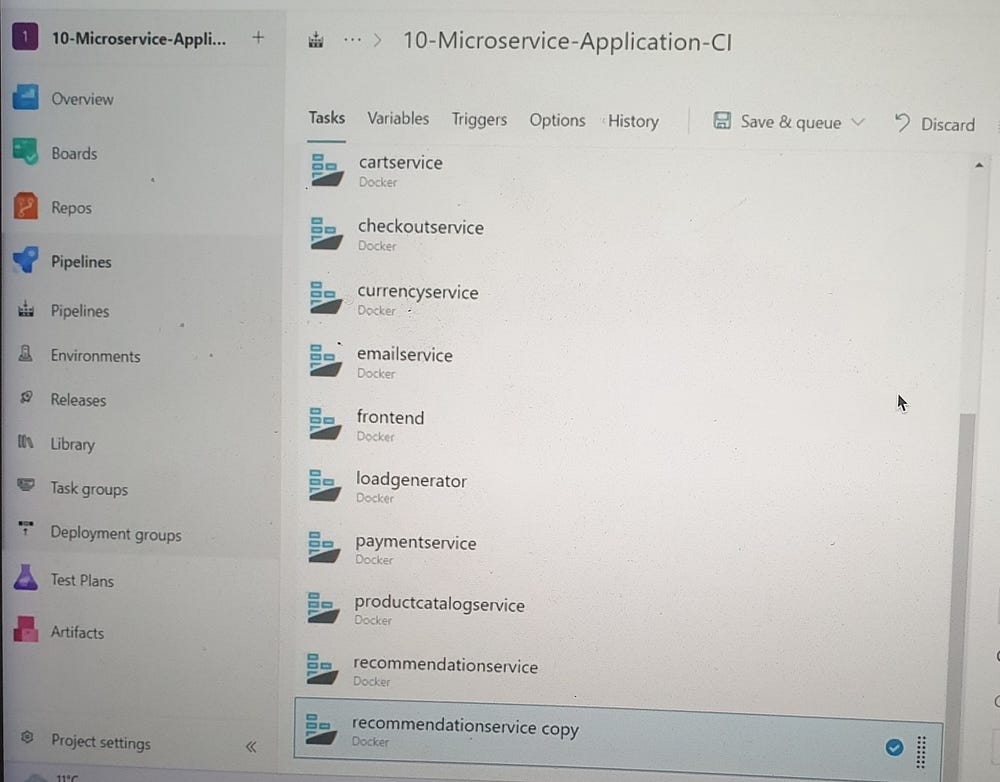
In the Build and Push Stage: For each microservice, such as adservice, configure the Container Registry to use Docker Hub by providing your Docker ID and Password, and verify the credentials. Set the Service Connection Name to sonar-con, grant access permissions to all pipelines under Security, and save the configuration. Provide the Dockerfile located at src/adservice/Dockerfile and tag the image as latest.
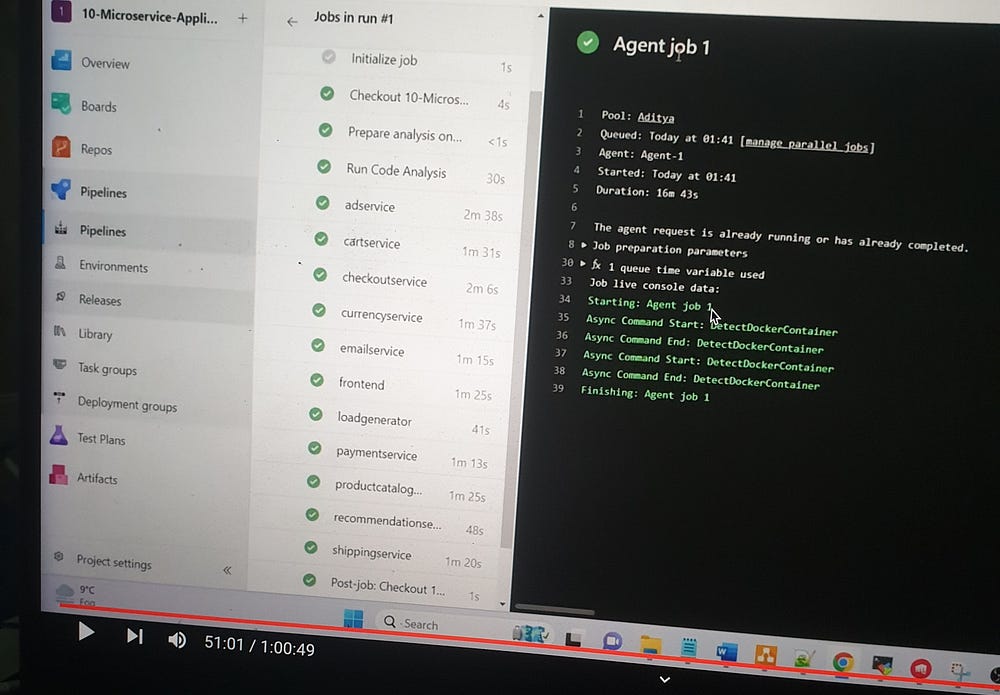
Repeat the same configuration for the other nine microservices, changing the name accordingly for each. Provide the Dockerfile located at src/<microservice name>/Dockerfile and tag each image as latest. The next step is to run the pipeline.
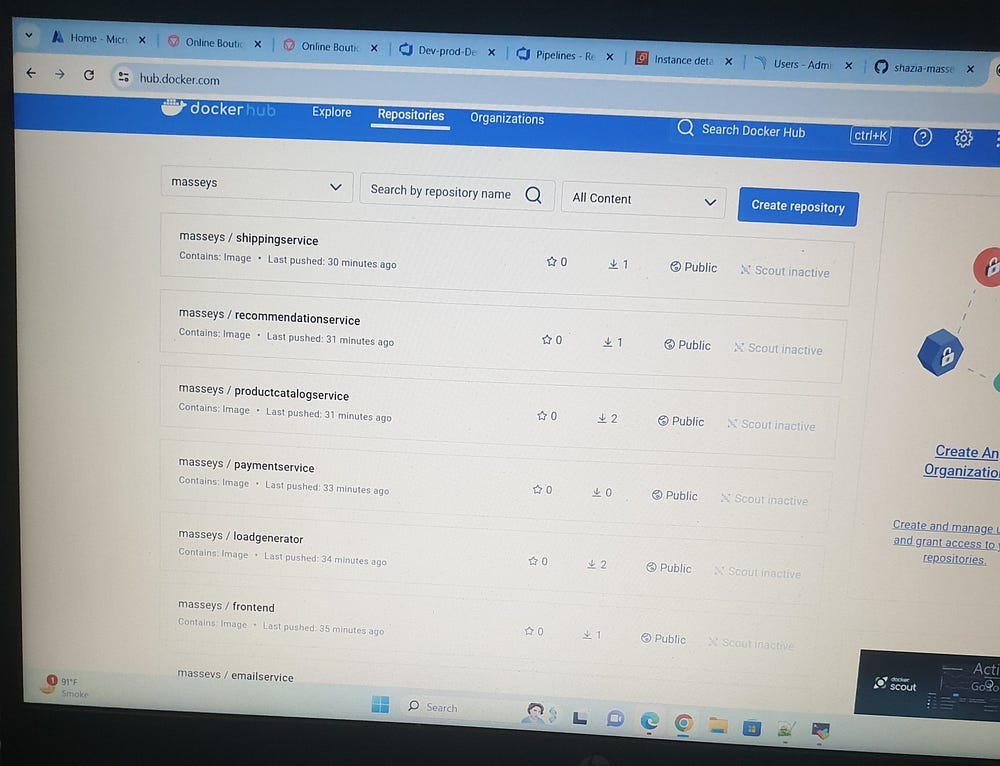
Docker Hub Push Repositories:
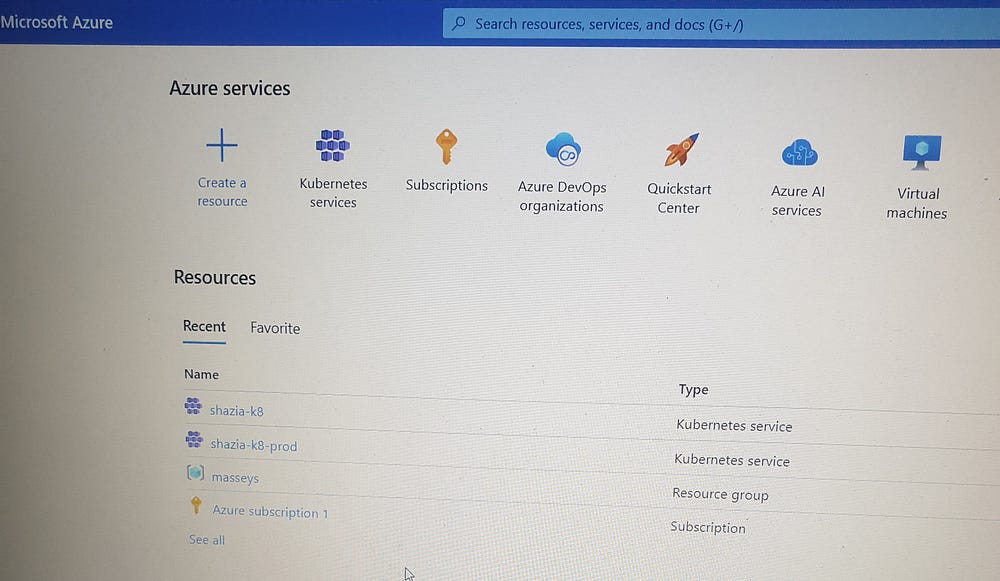
We have created two Kubernetes clusters: one for development and one for production.
Create a Release Pipeline: Start with an empty job, then add an artifact by selecting the Project Name. Set the Source (repository) to 10-Microservice-Application and the Default Branch to latest.
Stage 1: Set the pre-deployment conditions to Manual only and name the stage Dev Deployment.
Stage 2: Set the pre-deployment conditions to Manual only and name the stage Prod Deployment.
In the Dev Deployment stage: Select Agent job and choose our own agent. Install the latest version of kubectl, then configure it by selecting the Kubernetes service connection using the Azure Subscription and choosing the dev cluster named shazia-k8. Set the Namespace to default, use cluster admin credentials, and name the service connection dev-k8-con. Under Security, grant access permissions to all pipelines.
After configuring the Kubernetes service connection, in the command section, select apply for the command. Set the Configuration Type to File Path(10-Microservice-Application/deployment-service.yaml).
$(System.DefaultWorkingDirectory)/_10-Microservice-Application/deployment-service.yml
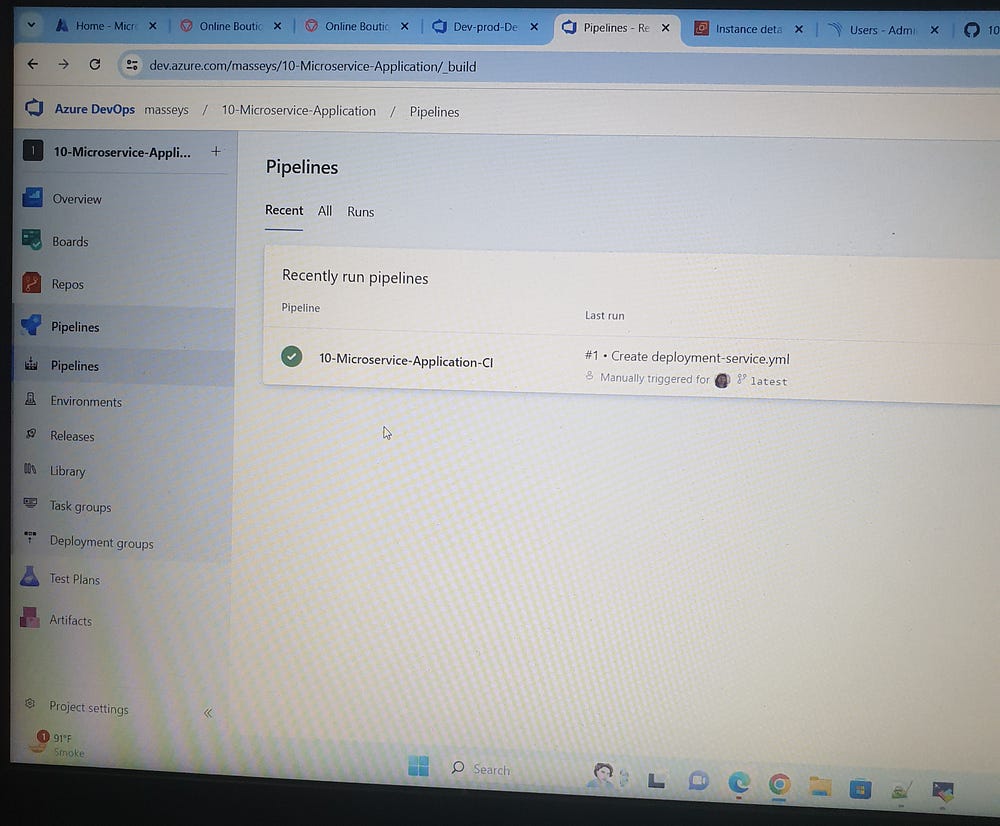
In the Prod Deployment stage: Select Agent job and choose our own agent. Install the latest version of kubectl, then configure it by selecting the Kubernetes service connection using the Azure Subscription and choosing the dev cluster named shazia-k8-prod. Set the Namespace to default, use cluster admin credentials, and name the service connection prod-k8-con. Under Security, grant access permissions to all pipelines.
After configuring the Kubernetes service connection, in the command section, select apply for the command. Set the Configuration Type to File Path (10-Microservice-Application/deployment-service.yaml).
$(System.DefaultWorkingDirectory)/_10-Microservice-Application/deployment-service.yml
First, create a release in the Dev Deployment stage and click Deploy.
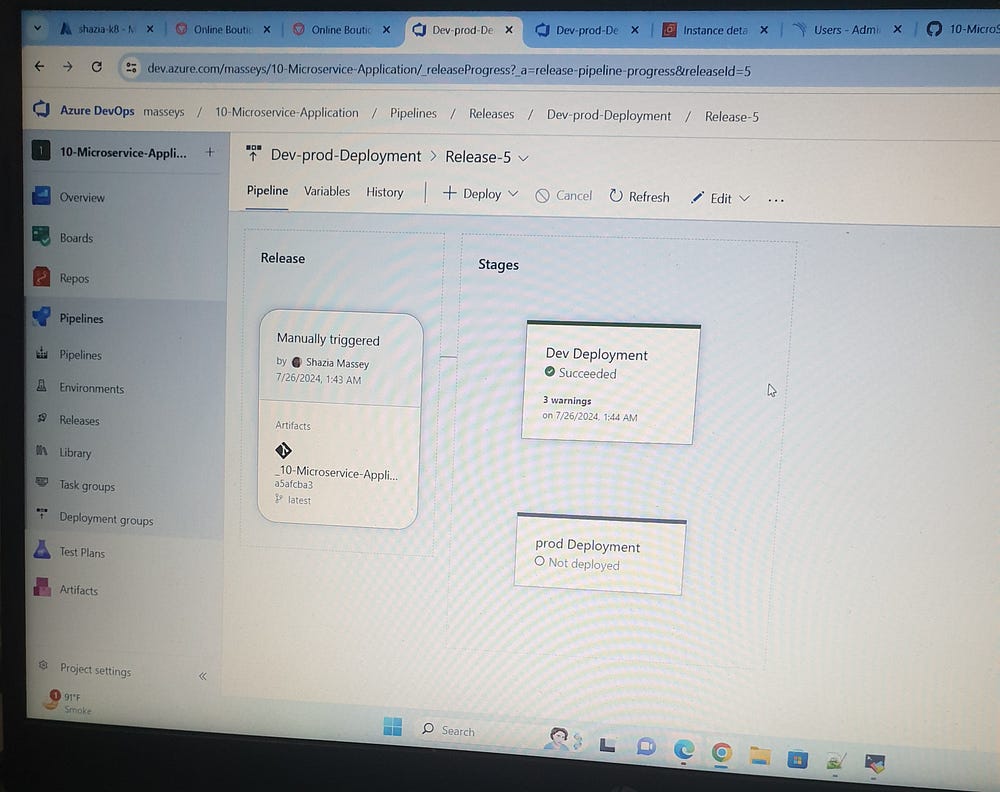
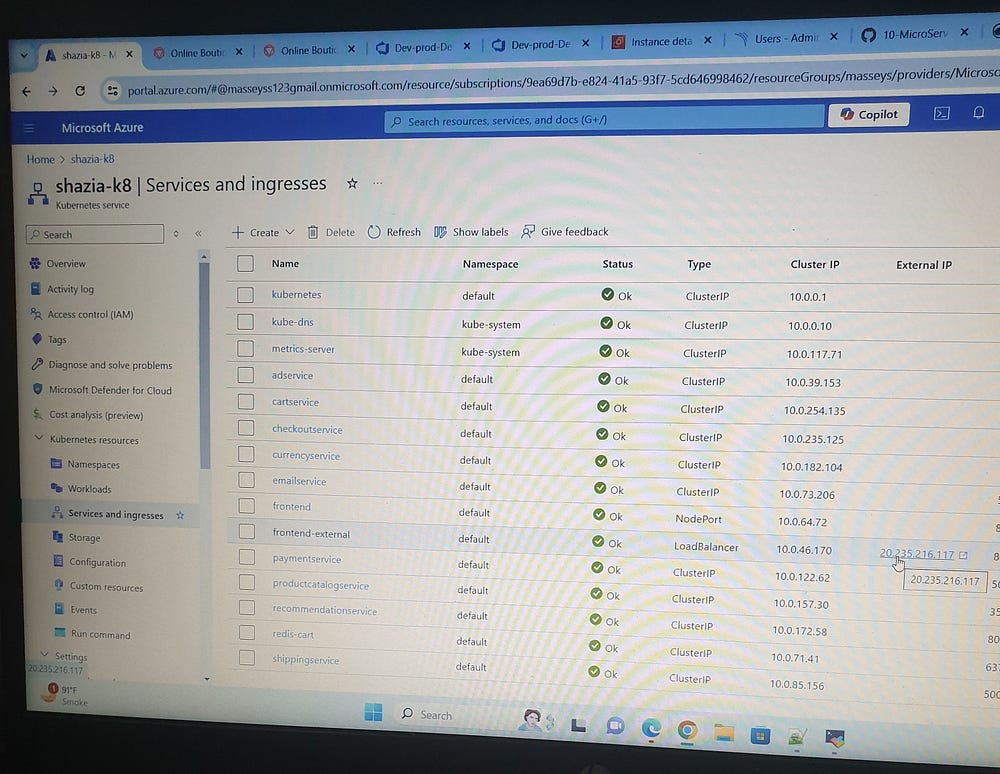
Click on the Dev Deployment LoadBalancer IP (20.235.216.117):
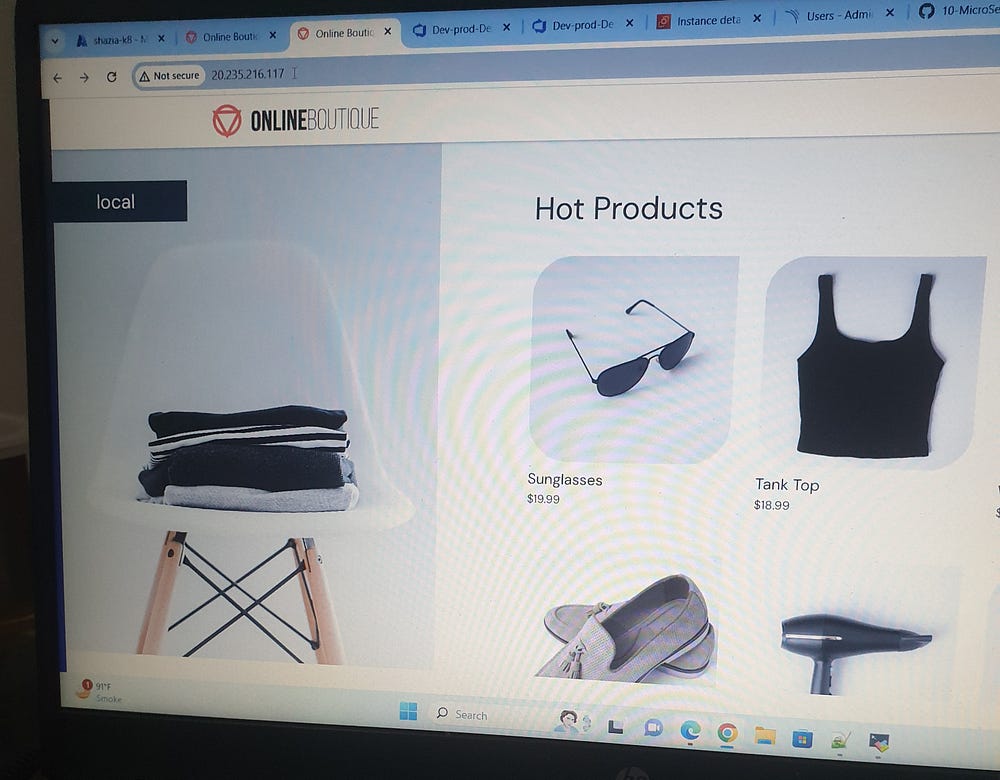
After the success of the Dev Deployment, we will now deploy the application to the Prod Deployment as well.
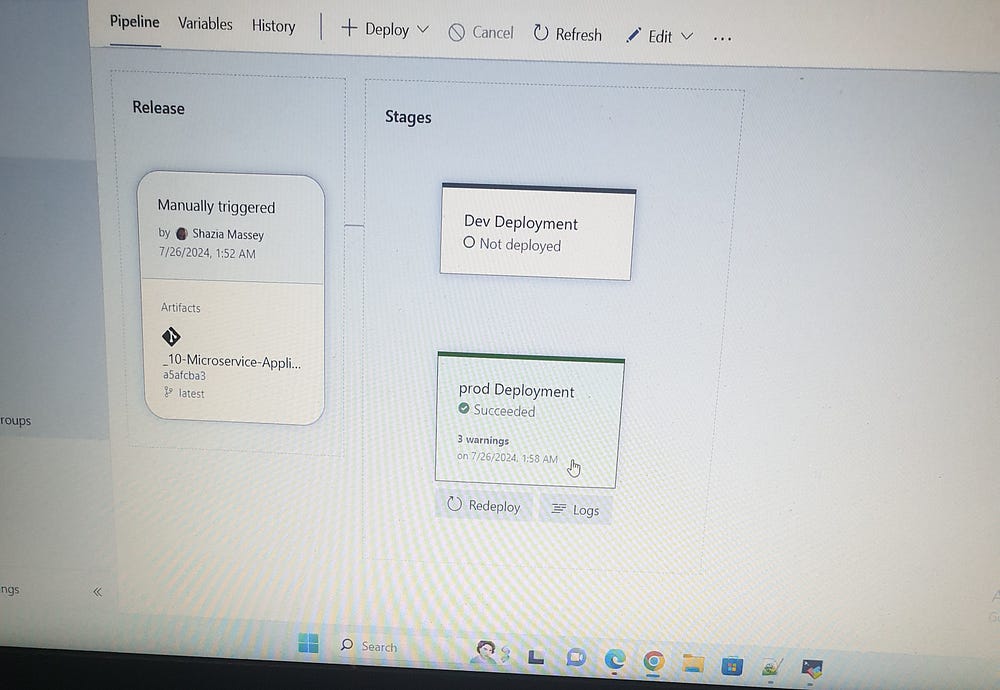
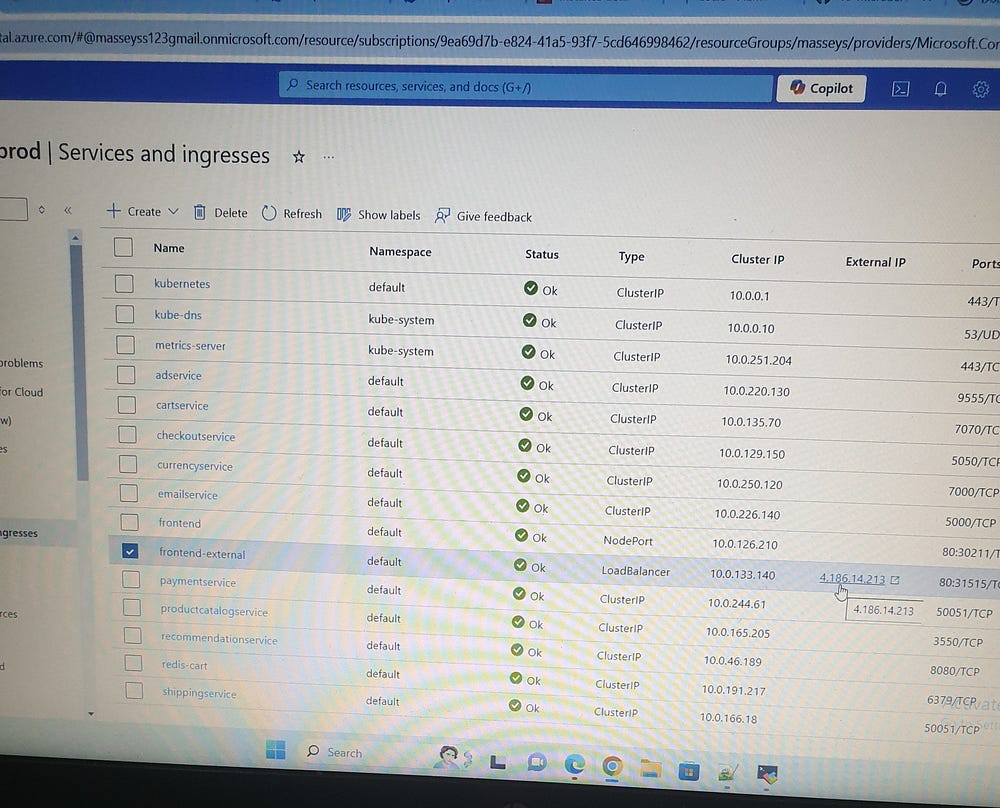
Click on the ProdDeployment LoadBalancer IP (4.186.14.213):
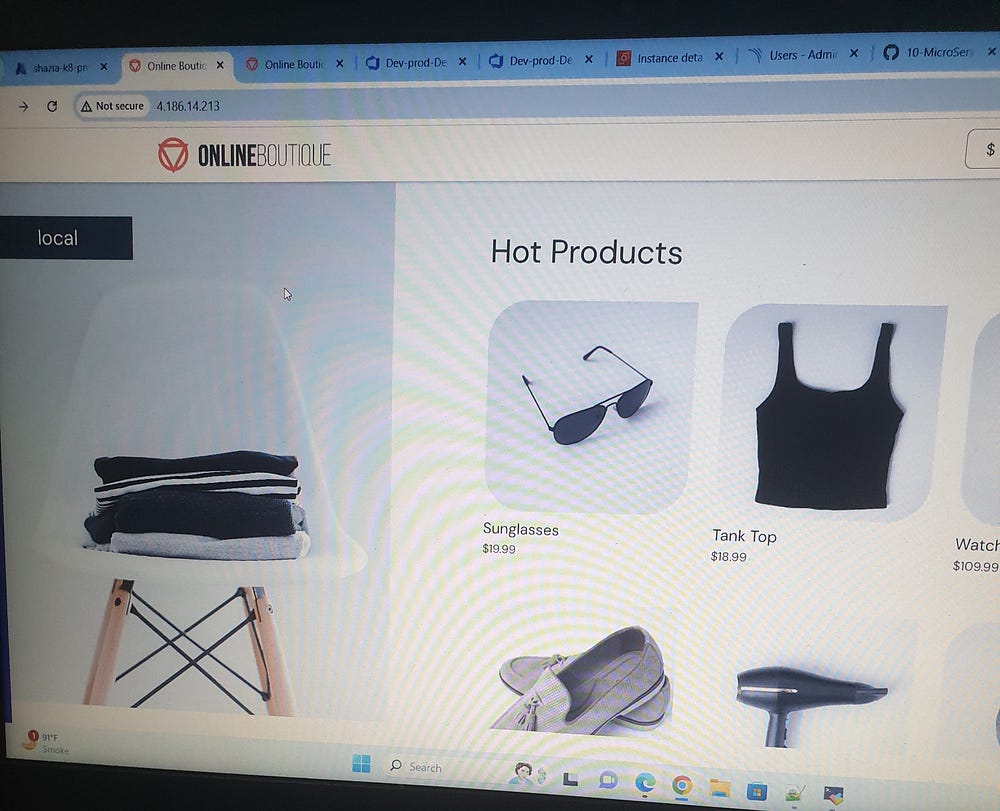
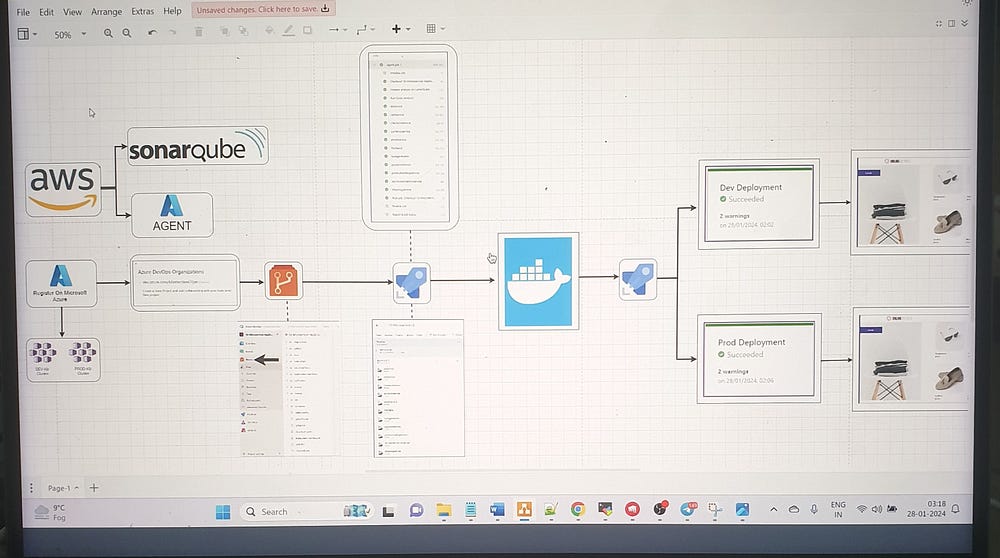
After successfully deploying the application to development and then to production, I finalized the pipeline setup, ensuring operational readiness in both environments. Leveraging Azure DevOps features, I streamlined pipeline processes, enhancing both automation and efficiency. This project provided me with valuable experience in integrating Azure DevOps with various tools and services, optimizing CI/CD workflows, and managing end-to-end deployments effectively. I hope this blog adds value to your Azure DevOps journey as well.
Subscribe to my newsletter
Read articles from Shazia Massey directly inside your inbox. Subscribe to the newsletter, and don't miss out.
Written by
