Day 28 : Jenkins Agents
 Sahil Kaushal
Table of contents
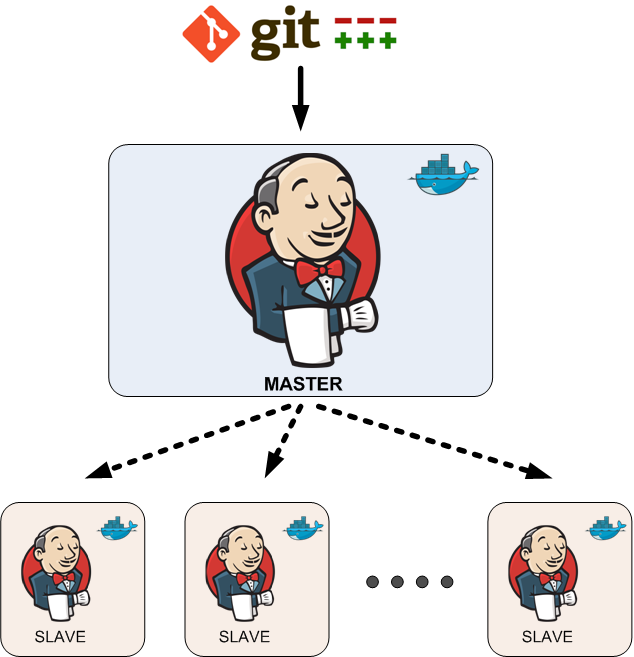
Jenkins Agents?
Jenkins Master (Server):
Imagine Jenkins as a central control room for your software development process.
The Jenkins master server holds all the important settings and instructions.
It’s like the conductor of an orchestra, coordinating everything.
For example, it schedules when tasks should run (like a daily backup) and keeps an eye on ongoing work (like monitoring a production website).
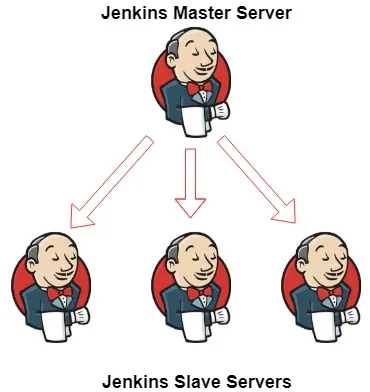
Jenkins Agent:
Think of agents as specialized workers in the Jenkins factory.
An agent can be a real machine (like a computer) or a virtual one (like a Docker container).
When you create a task (called a job) in Jenkins, you assign it to an agent.
The agent is the one doing the actual work—building code, running tests, deploying software, etc.
It’s like having a team of experts who follow your instructions and get things done.
Scaling Up with Agents:
Imagine your Jenkins master as the main office, and agents as remote offices or branches.
As your software projects grow, you can add more agents.
Each agent handles specific tasks efficiently.
This way, Jenkins can handle multiple projects simultaneously.
It’s like having a big team working together across different locations.
Remember, Jenkins is like your project manager—it assigns tasks, coordinates work, and ensures everything runs smoothly. So whether you’re building websites, apps, or even rocket software, Jenkins keeps it all organized! 🚀
Task:
Deploy a Web App Using Jenkins Master and Worker Node.
**Pre-requisites:**To get an agent working make sure you install Java ( same version as Jenkins Master server ),Docker and Docker-compose on it.
Generate SSH keys on the "Jenkins Master" by running the following command.
ssh-keygen -t ed25519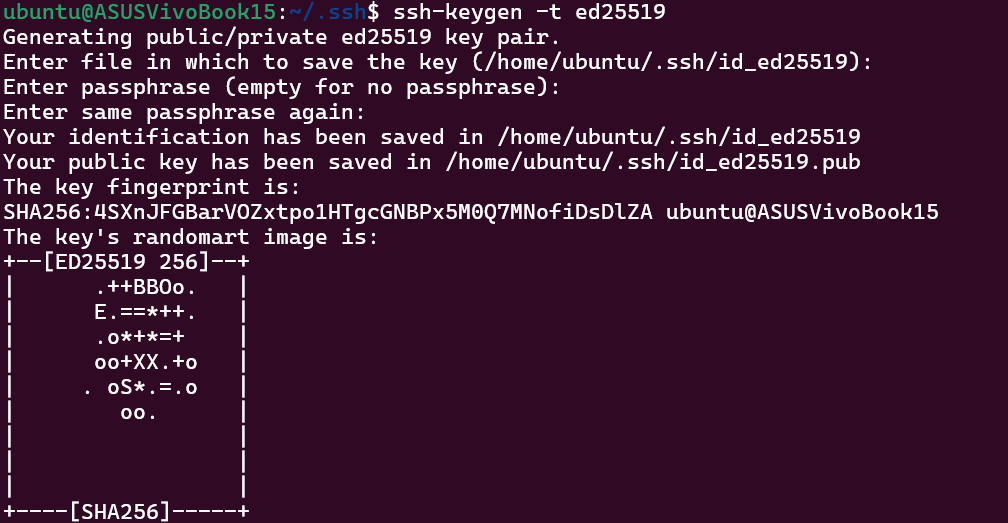
In the ".ssh" folder, you will find a public and private key on the Jenkins Master.

Add the public key from the "Jenkins Master" to the "Jenkins Agent" under the location ".ssh/authorized_keys".

Go to the Jenkins dashboard and click on "Manage Jenkins".
Now, click on Nodes -> + New Node.
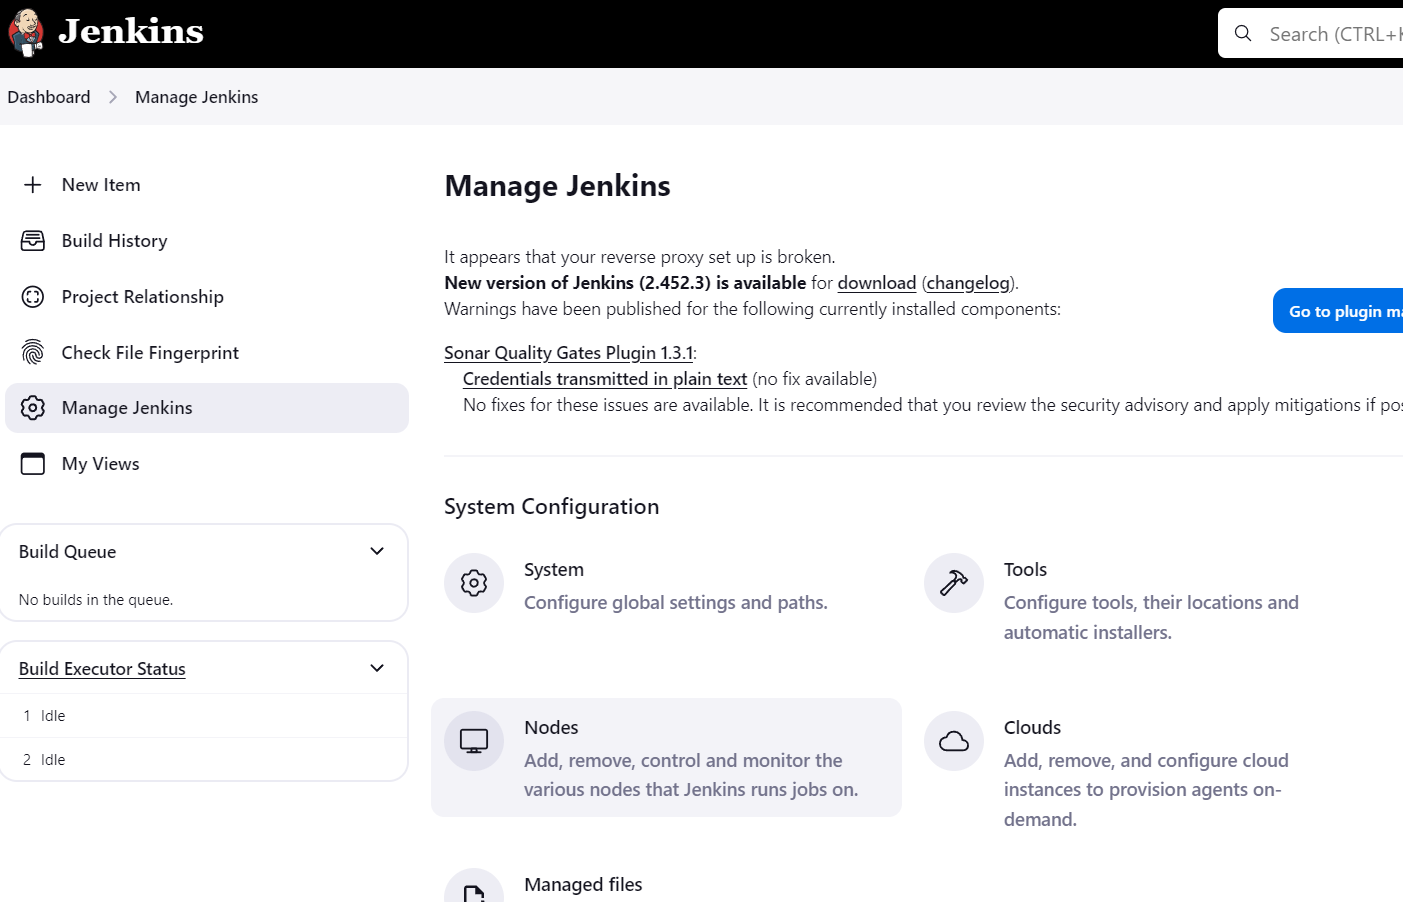
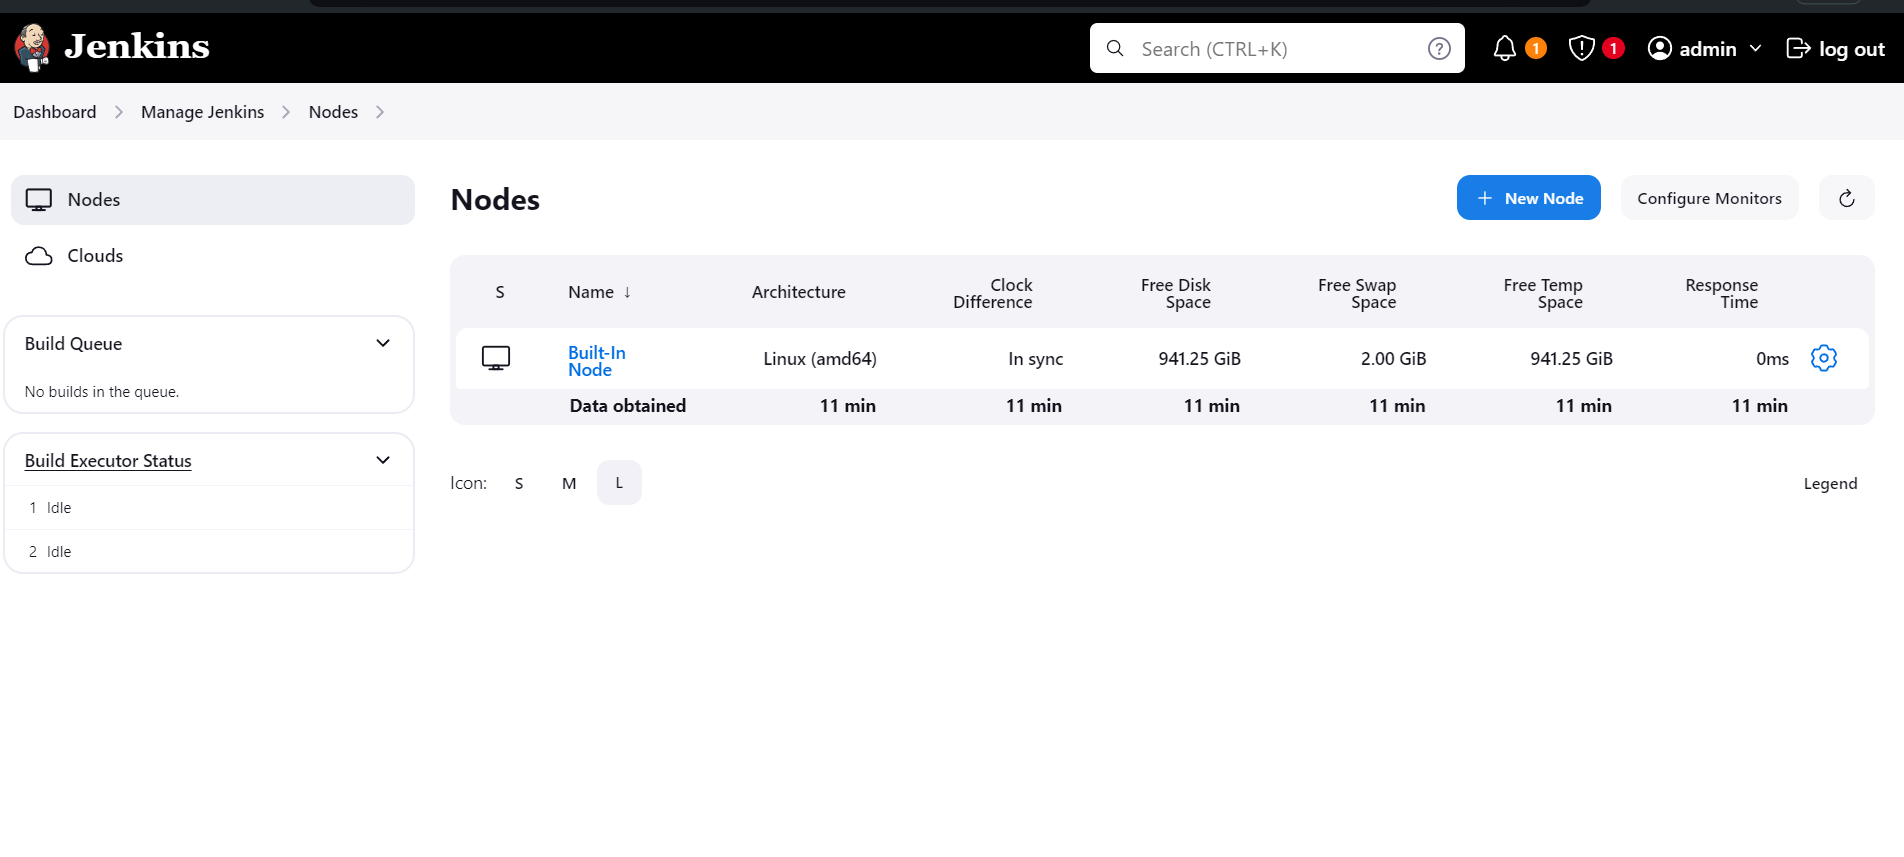
Add details as mentioned.
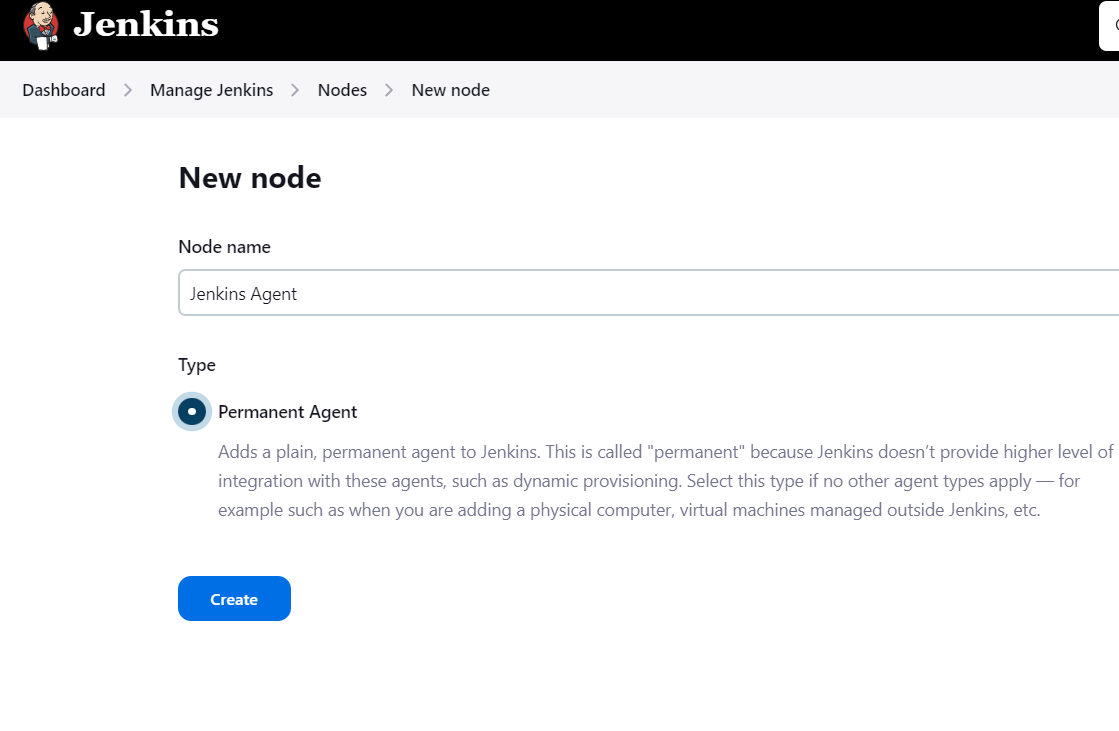
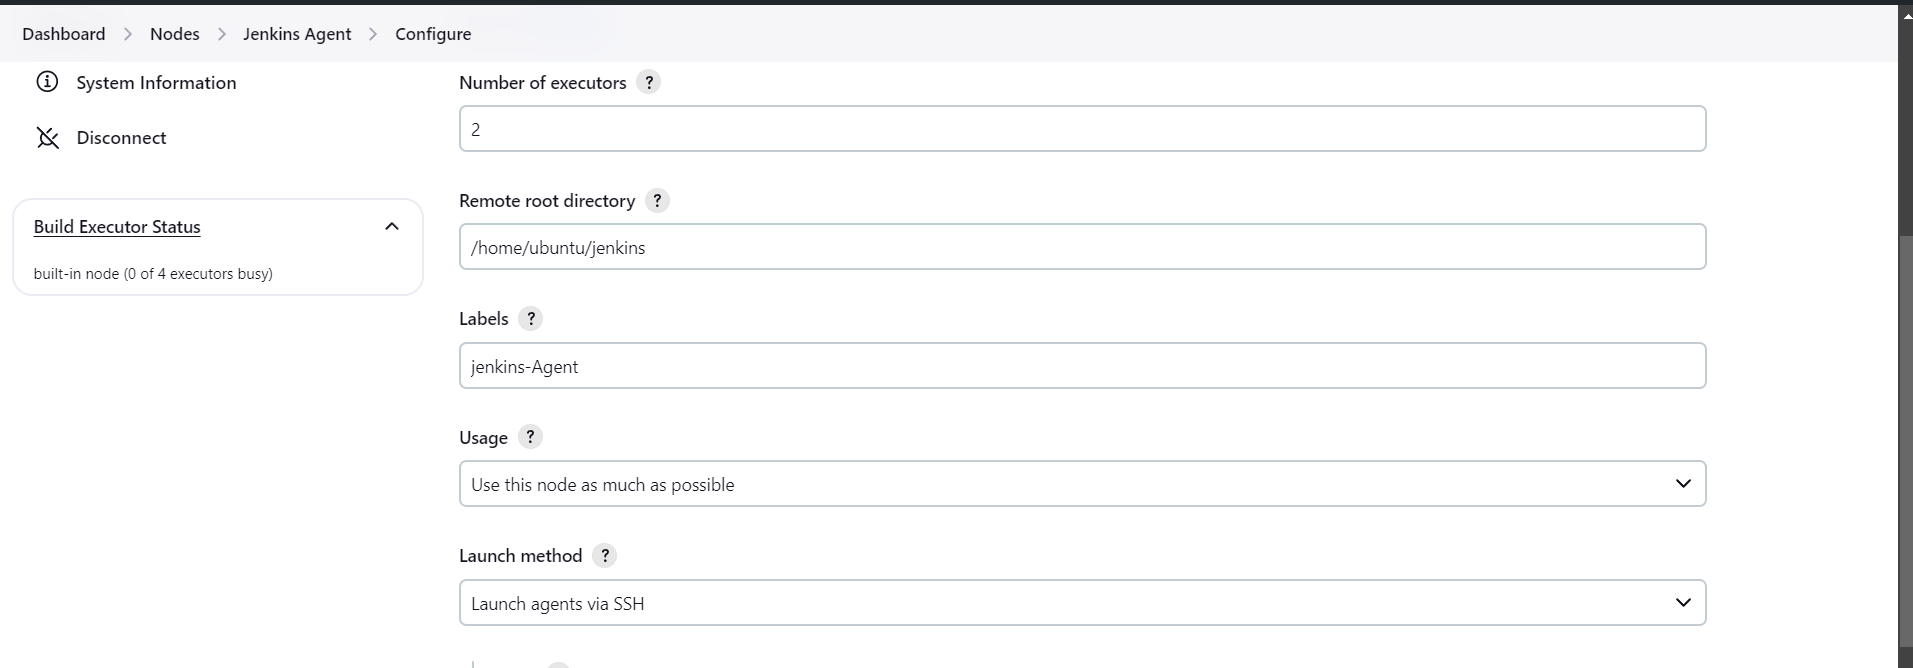
We will use the Labels value later.
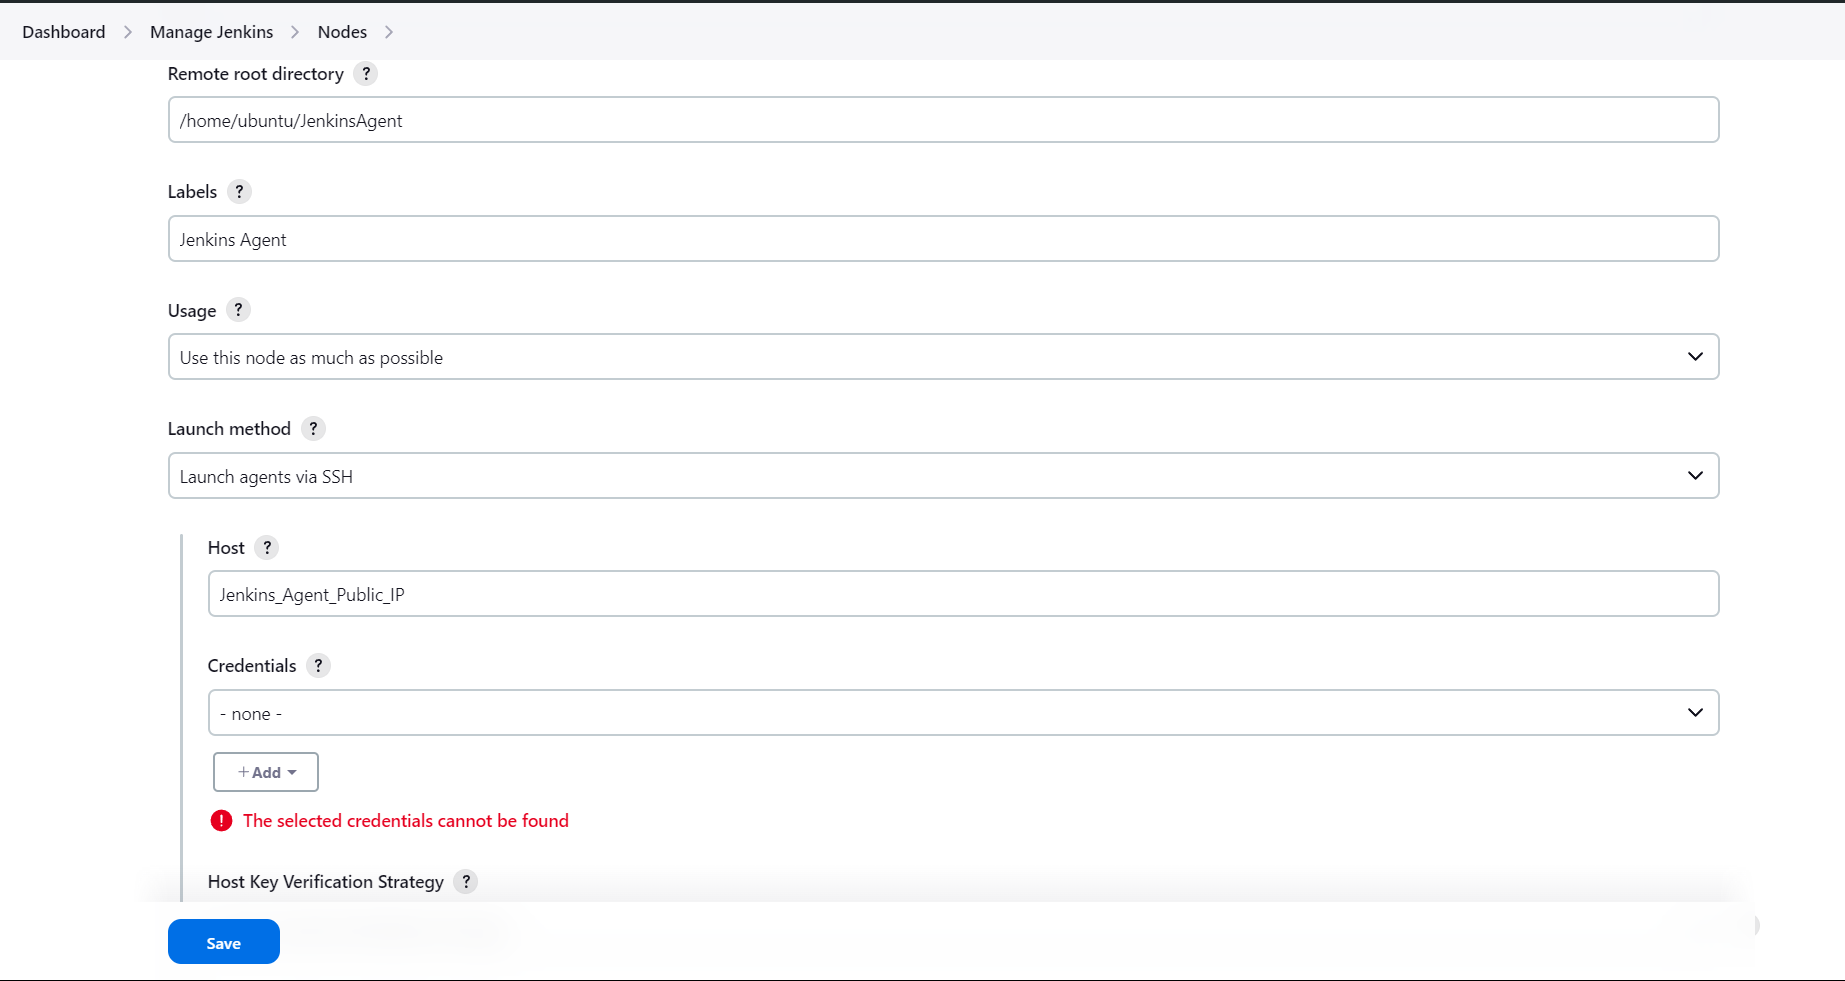
In Credentials, set the following:
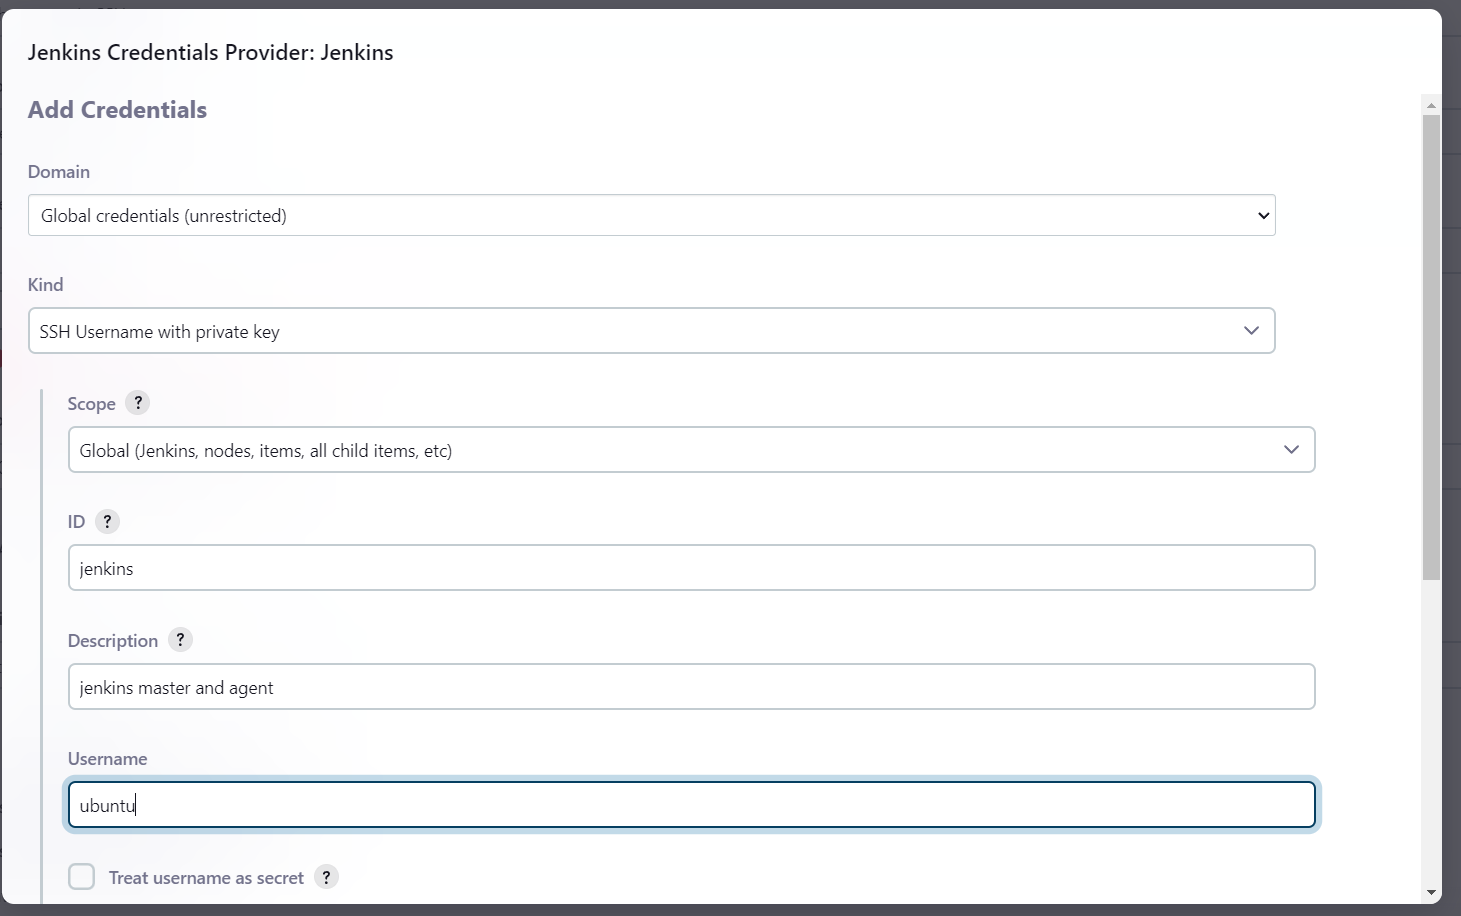
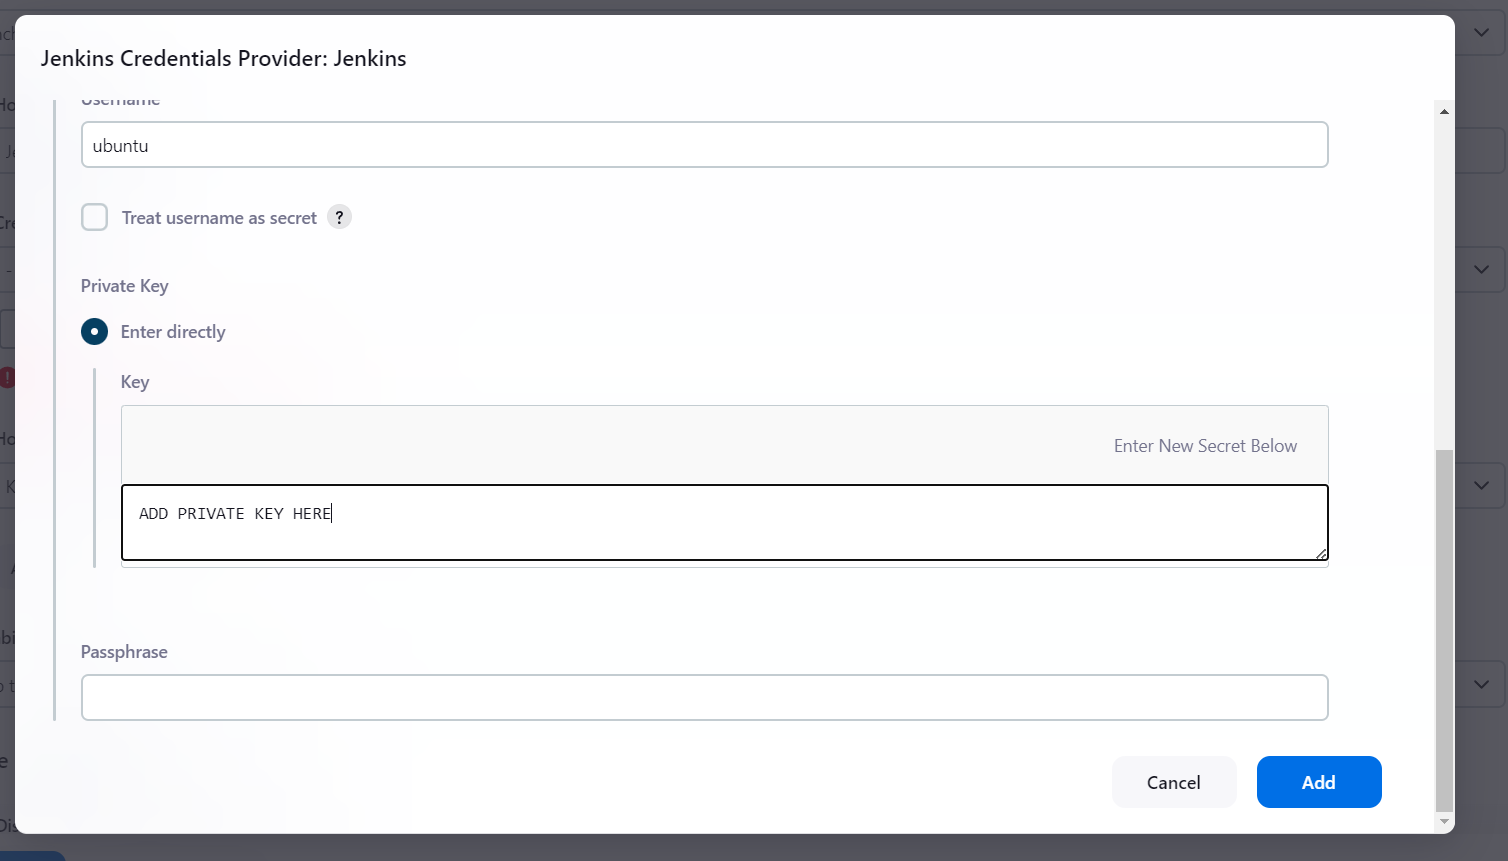
Click Add, then Save.
You may encounter this issue.
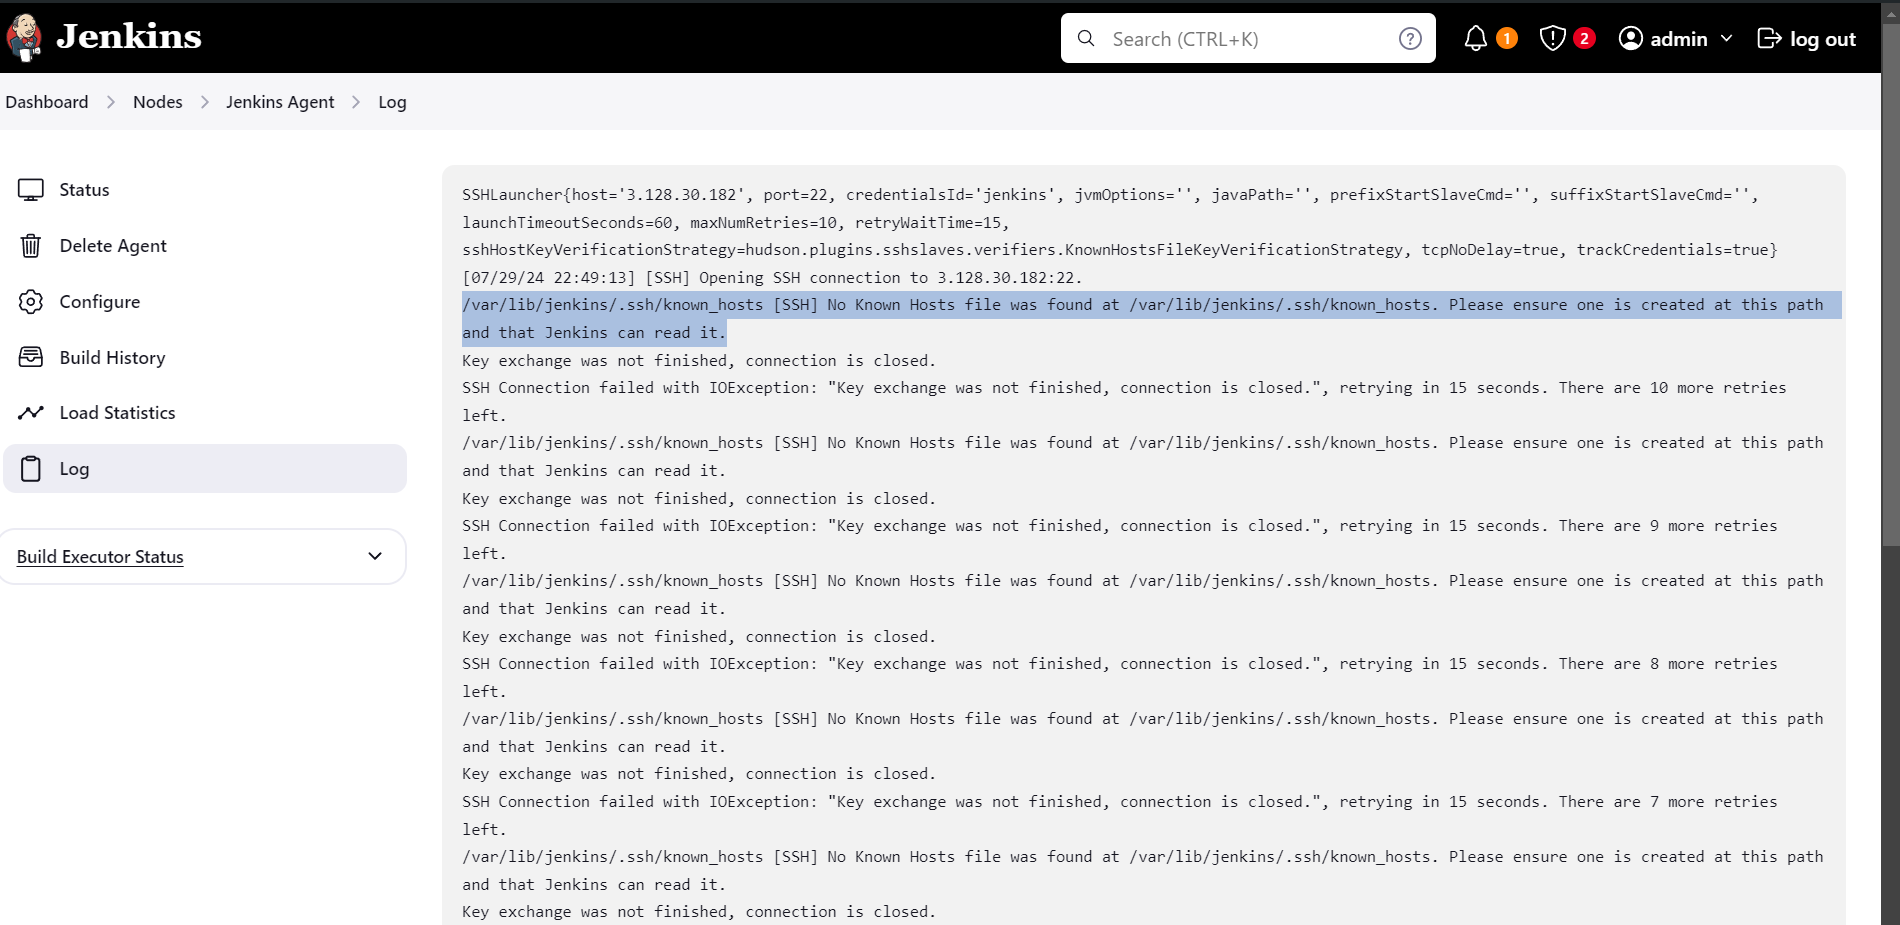
In that case, you need to create a file at this path: /var/lib/jenkins/.ssh/known_hosts.
To add host IP in the known_hosts file, try this command.
ssh-keyscan JENKINS_AGENT_IP >> /path_to_your/.ssh/known_hosts
Agent should be successfully connected and online.
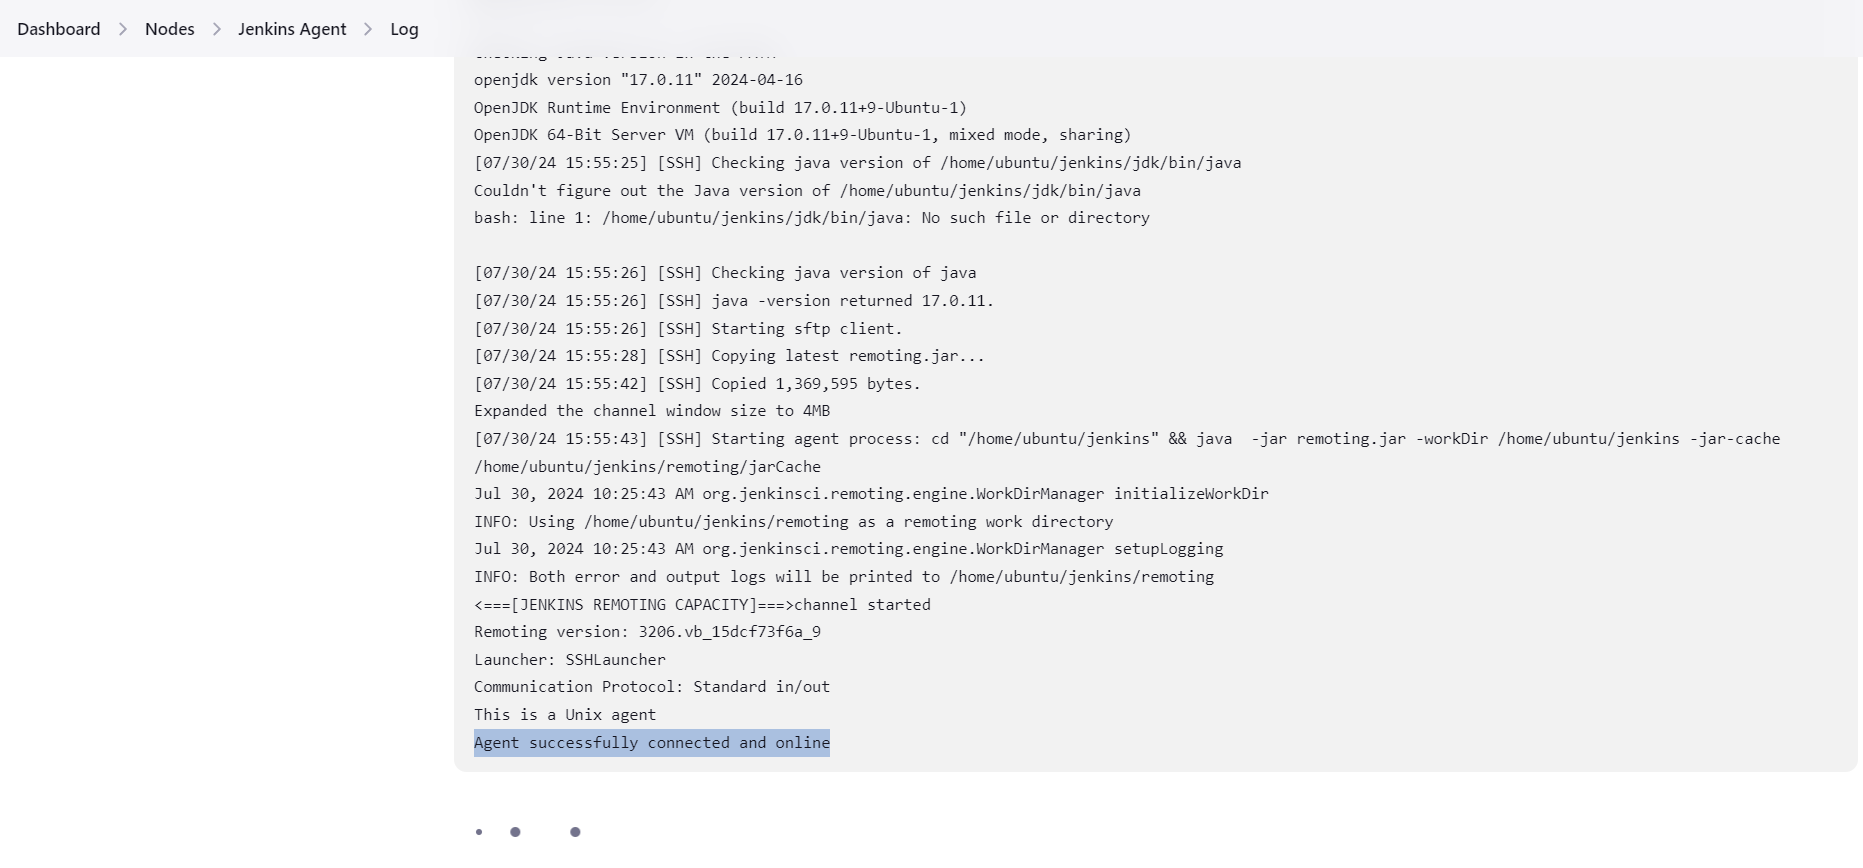

Here you can check whole discussion regarding this issue.
Now it's time to use this agent.
Go to your Jenkins Dashboard, and select build [todo_node_app] which we have build on Day-25.
- Dashboard -> todo_node_app -> Configuration -> General -> Restrict where this project can be run.
Add the node's label here, and save.
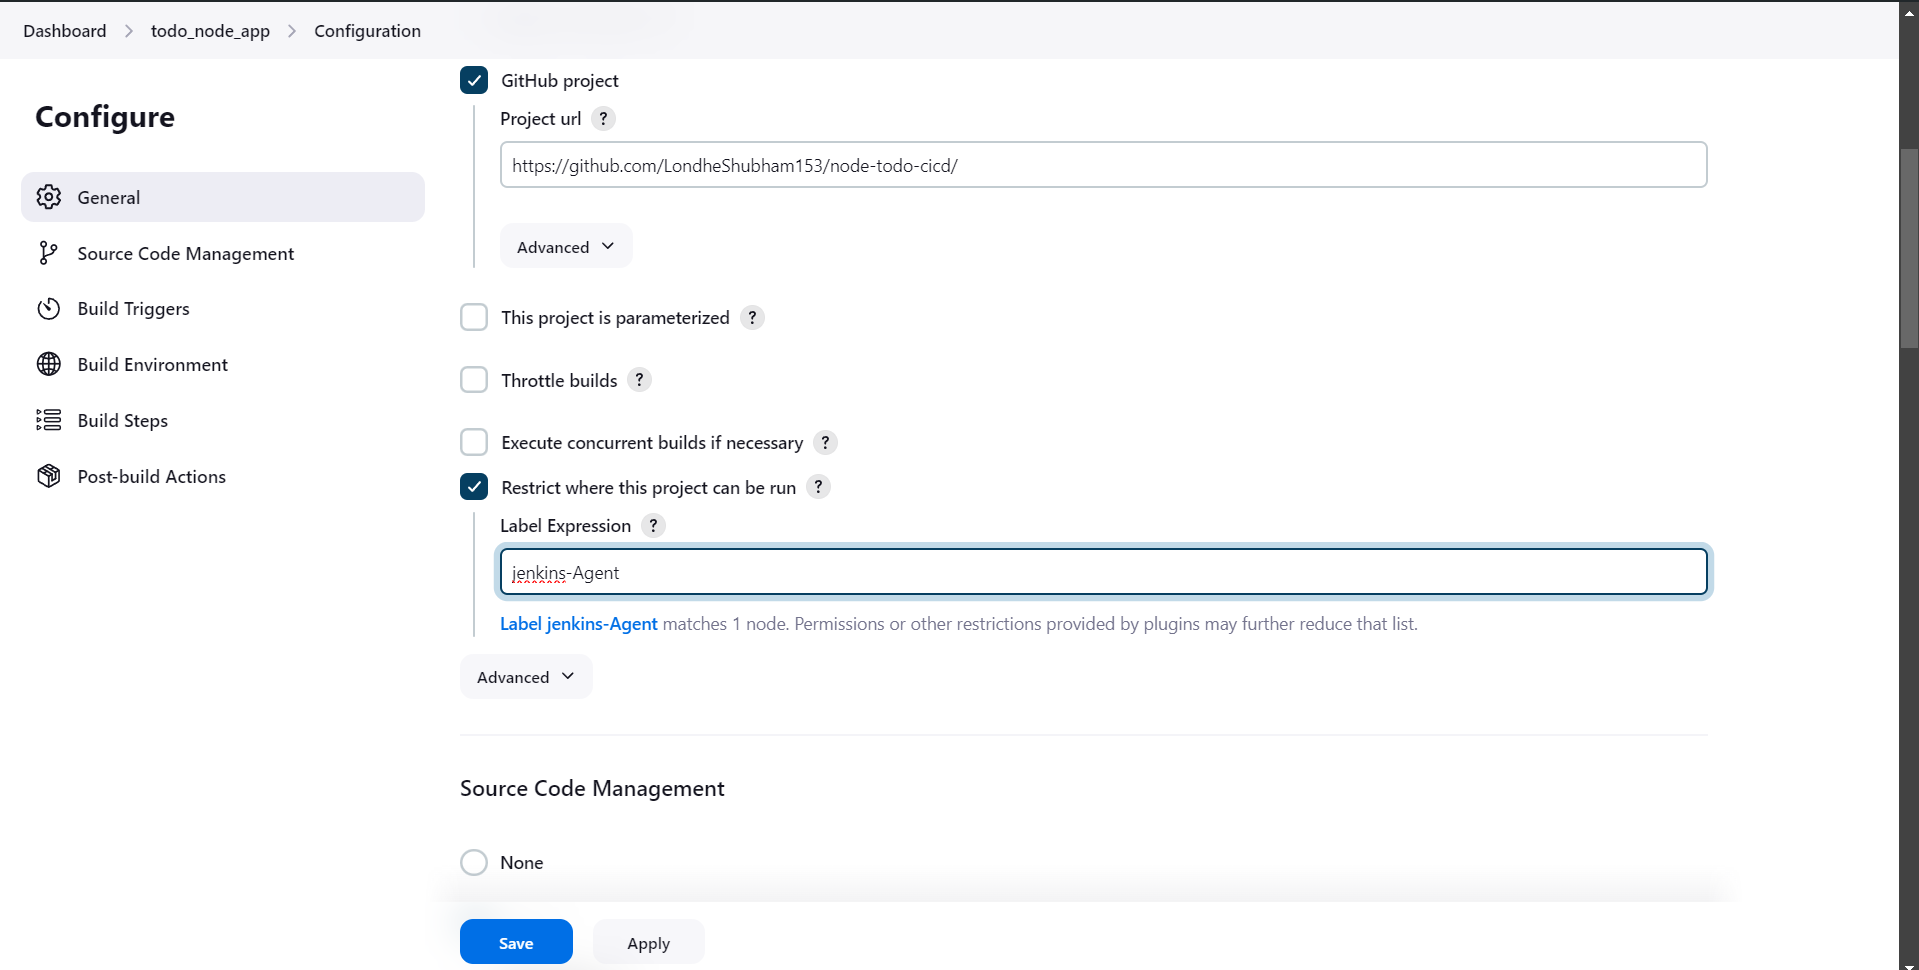
Click on Build Now.
(Optional) If you encounter this issue, run the following command.
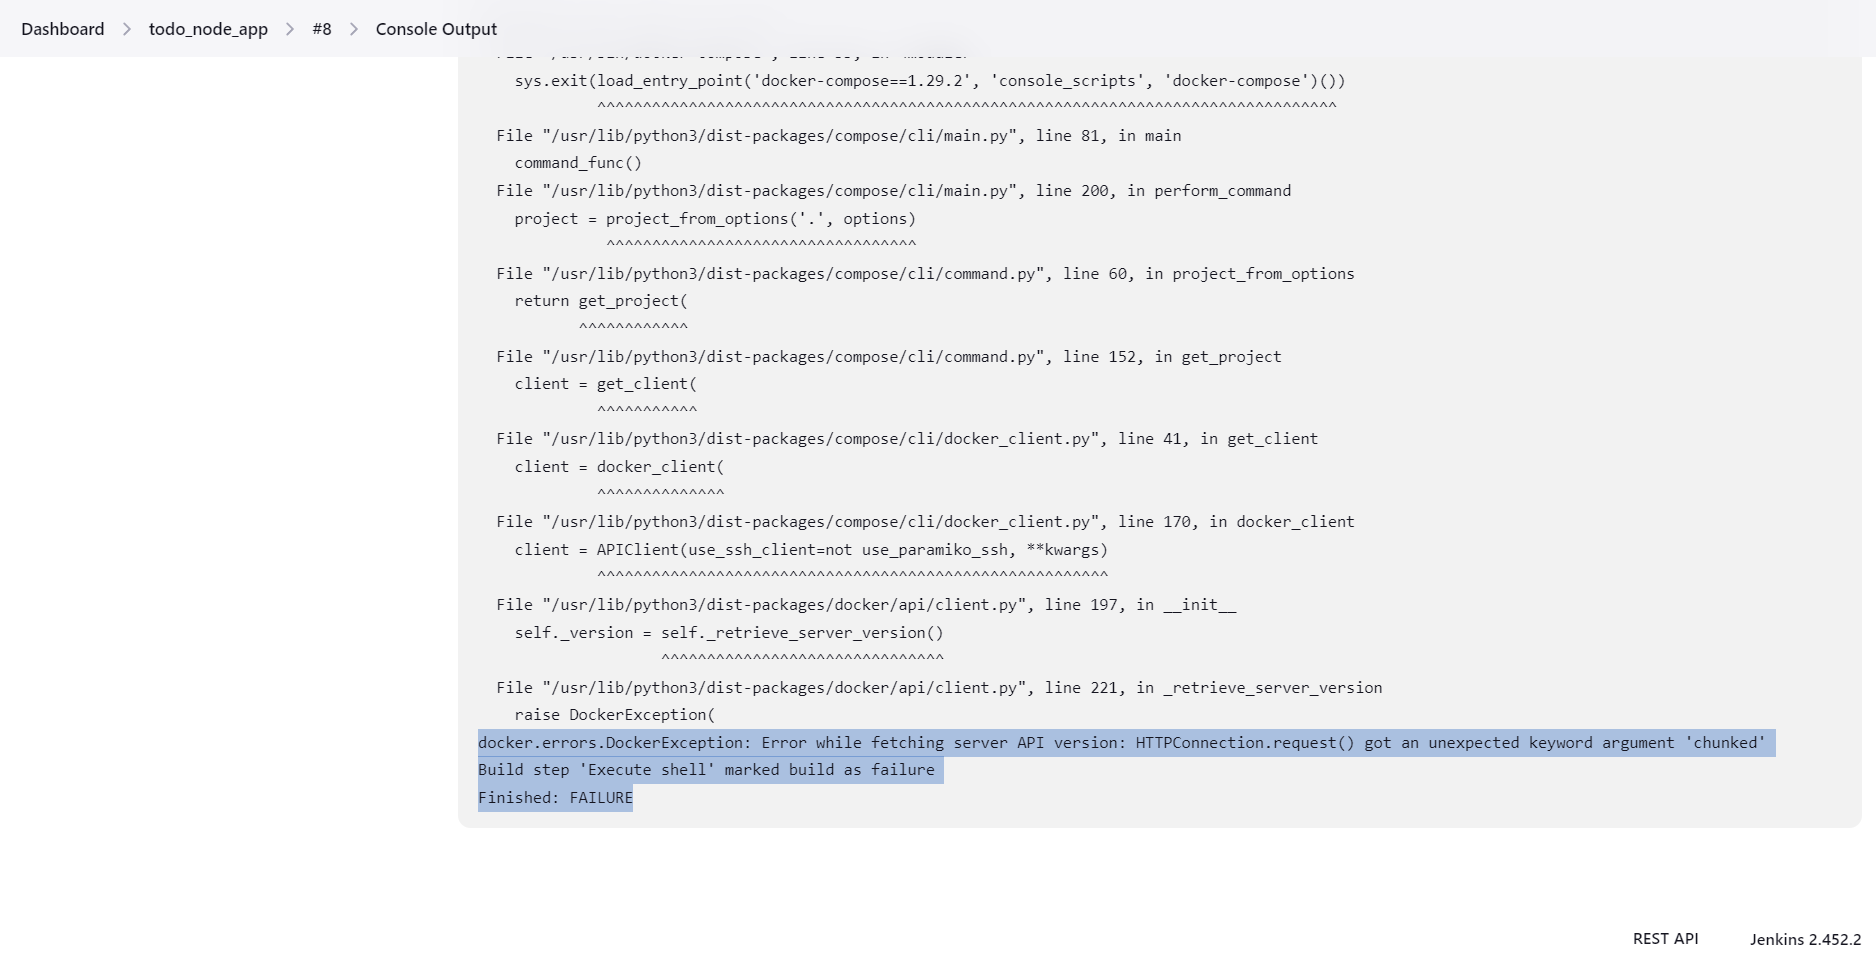
sudo chmod 666 /var/run/docker.sockor you can install docker-compose-v2
sudo apt install docker-compose-v2and then use, Instead docker-compose up -d in Jenkins Execute shell.
docker compose up -d
Here you can check whole discussion regarding this issue.
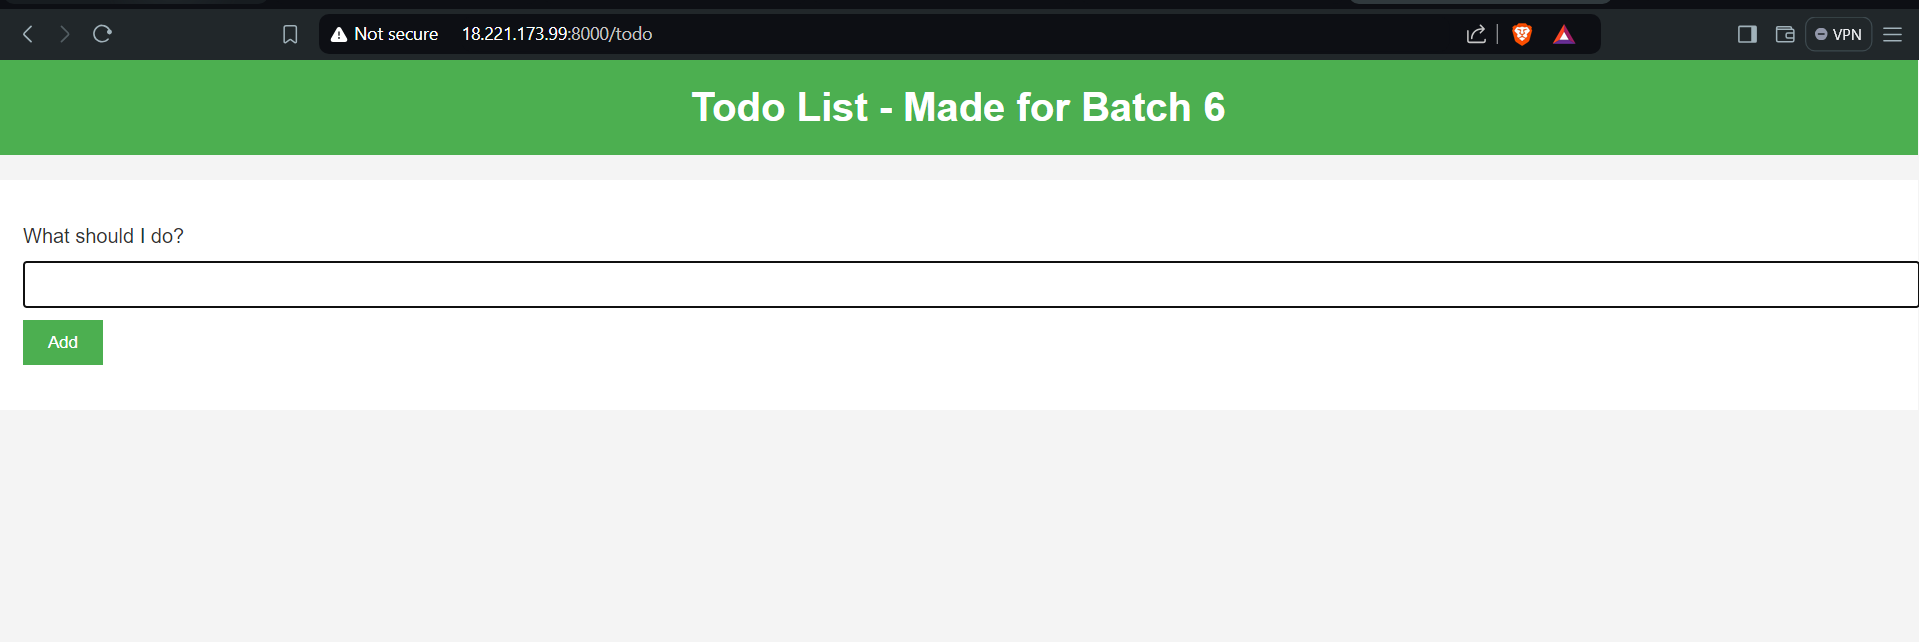
The build should be successful, and you should see the results.
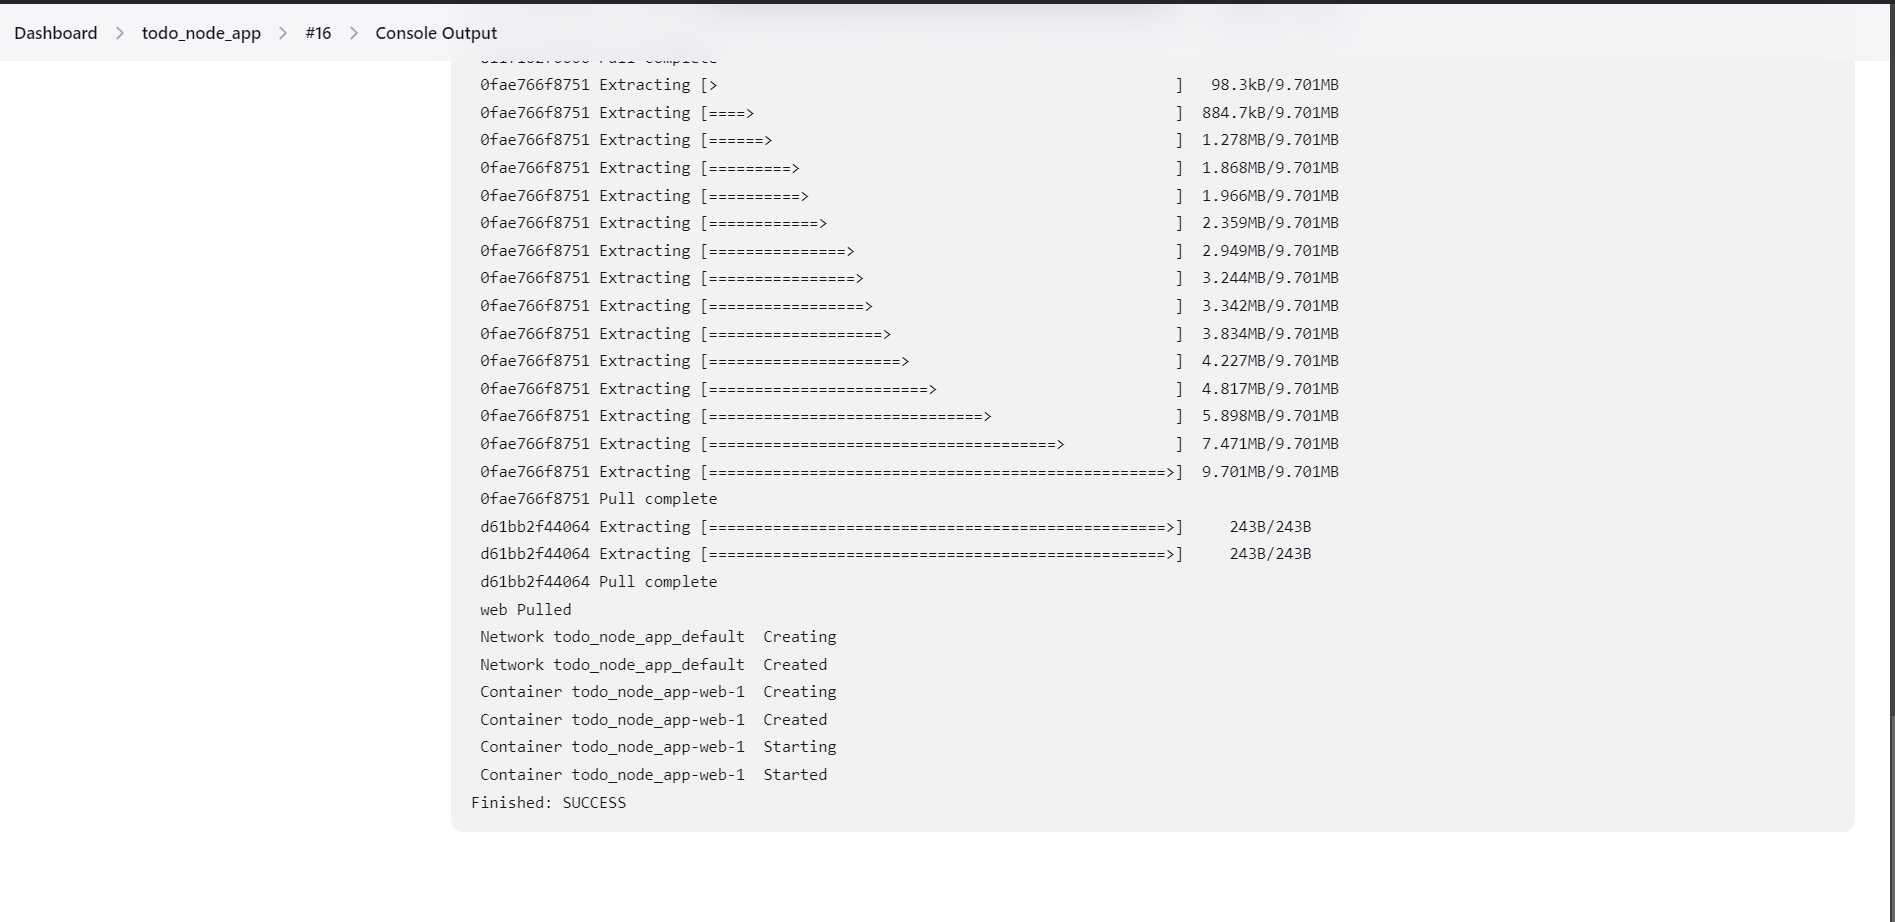
Make sure, port 8000 is open in your instance or you can add it into your EC2 security groups.
Thank you for reading😉.
Subscribe to my newsletter
Read articles from Sahil Kaushal directly inside your inbox. Subscribe to the newsletter, and don't miss out.
Written by
