Linux Administration: Process Management, Networking, and Security
 Rabiatu Mohammed
Process Management
Managing processes is crucial for maintaining system performance and stability. Here are key commands and concepts:
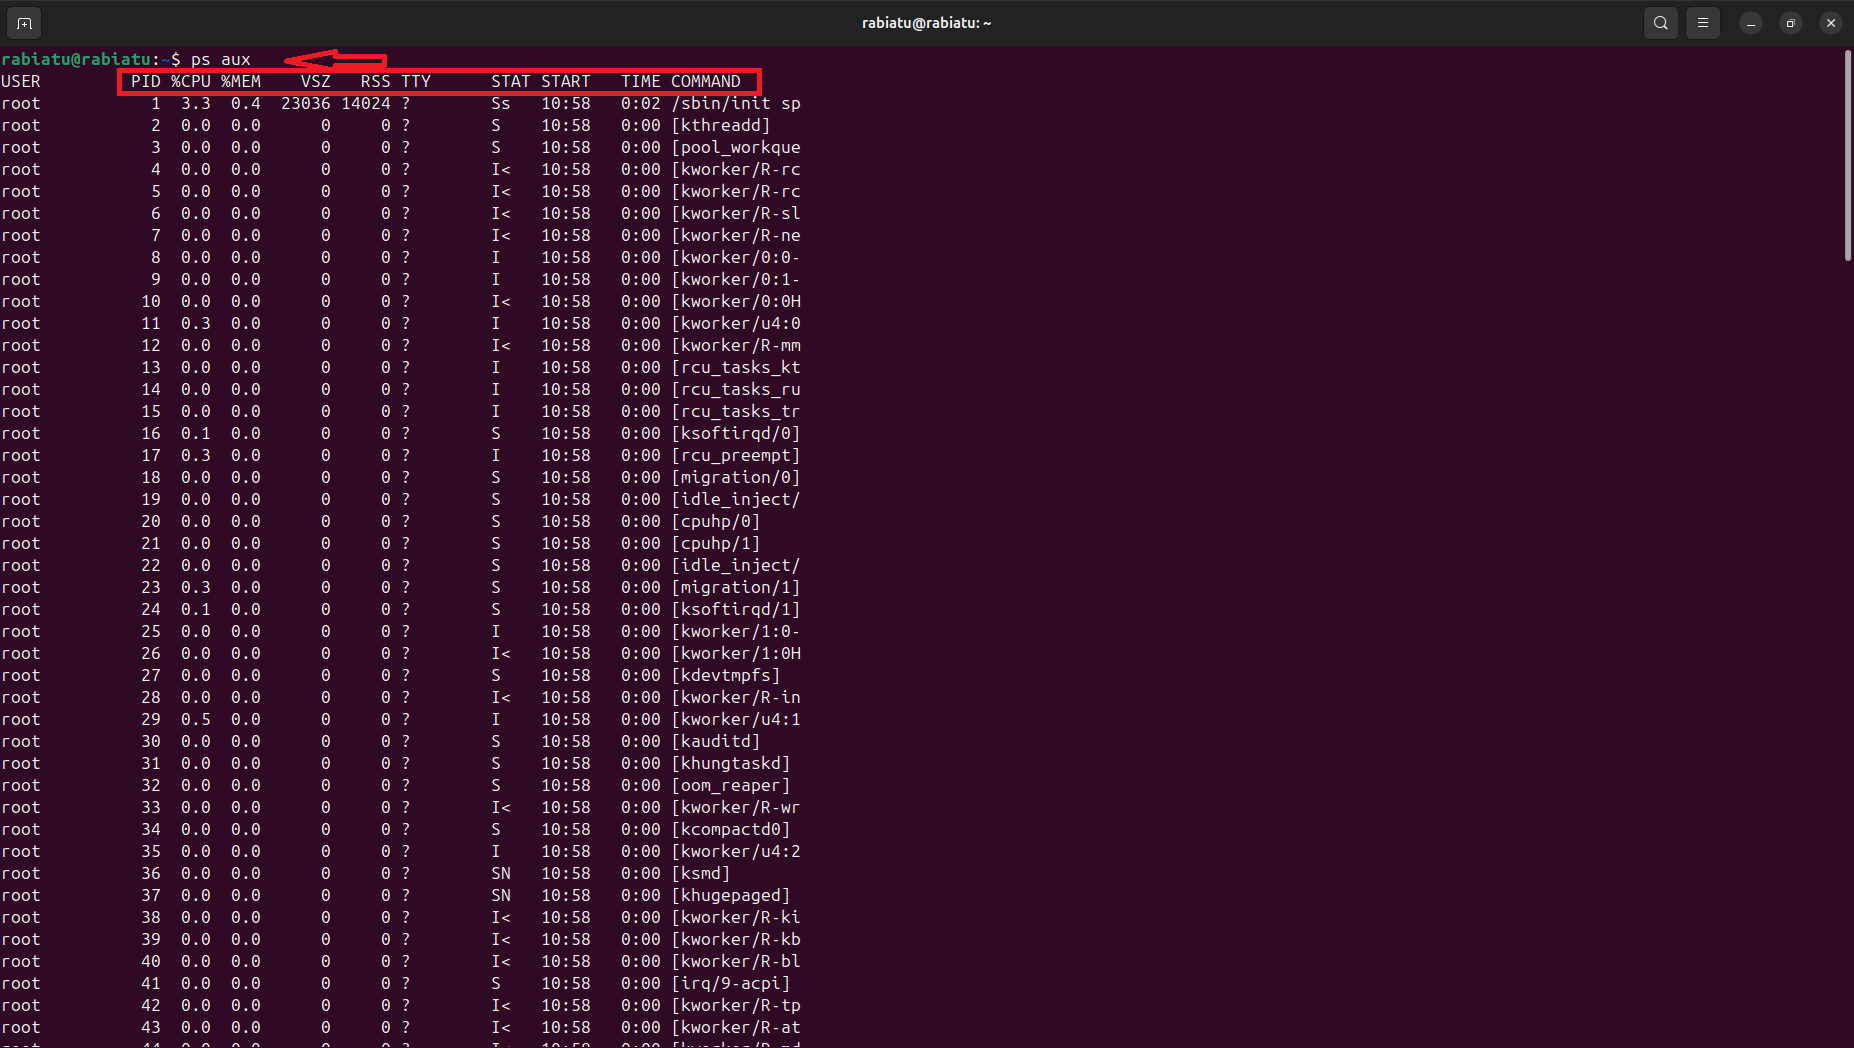
Viewing Active Processes with
ps aux
This command lists all running processes with detailed information such as user, process ID (PID), CPU usage, memory usage, and the command that started the process.
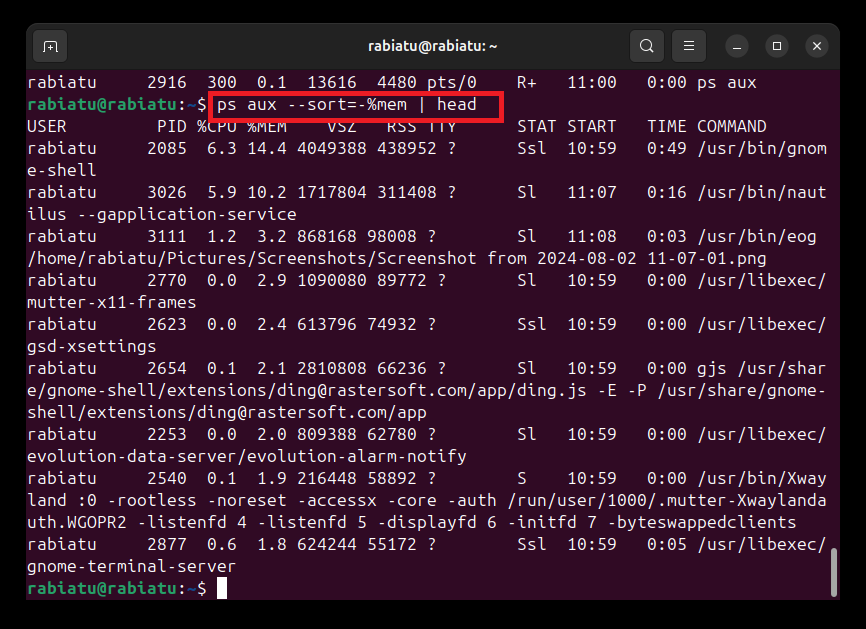
Sorting Processes by Memory Usage:
ps aux --sort=-%mem | headThis command is used to list all running processes and sort them by their memory usage, displaying the top ones. This is useful for identifying processes that are consuming the most memory.
Sorting Processes by CPU Usage:
ps aux --sort=-%cpu | headThis command sorts the processes by CPU usage in descending order and displays the top entries. It's useful for identifying which processes are consuming the most CPU resources.

Listing Signal Numbers with
kill -lThis command lists all available signals that can be sent to processes. Signals are used to instruct processes to perform specific tasks, such as stopping or restarting.
The command displays a list of all signals that can be sent to processes, such as SIGTERM, SIGKILL, and SIGHUP.

Starting a Process
We started a process by launching Firefox from the terminal.

The browser opens up, ready for use.

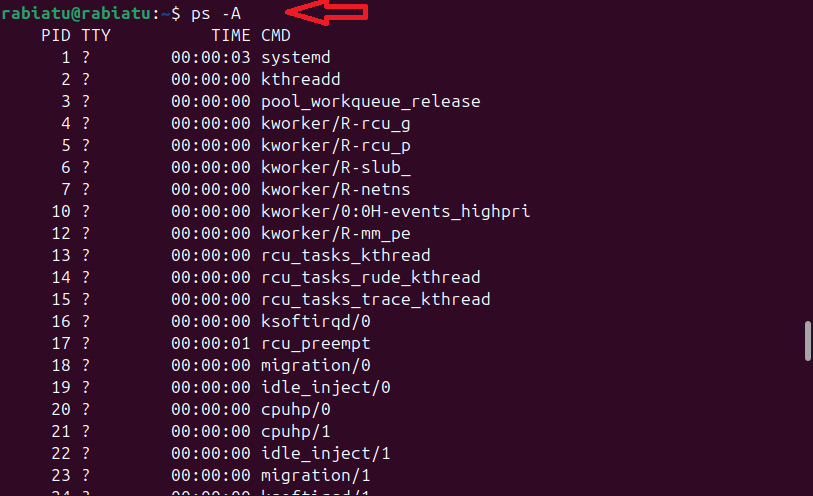
Viewing All Processes:
ps -AUsed again here to find the process ID (PID) of the Firefox browser we opened earlier. The PID is required to manage or terminate the process

Killing a Process
kill -15 5059This command sends the SIGTERM signal to the process with PID 5059, gracefully terminating it.

Networking
- Installing net-tools
When I tried to use the ifconfig command to check my network interfaces, I received an error message saying the command wasn't found. This happens because the ifconfig tool is part of the net-tools package, which wasn't installed on my system.
The computer didn't recognize the command because the
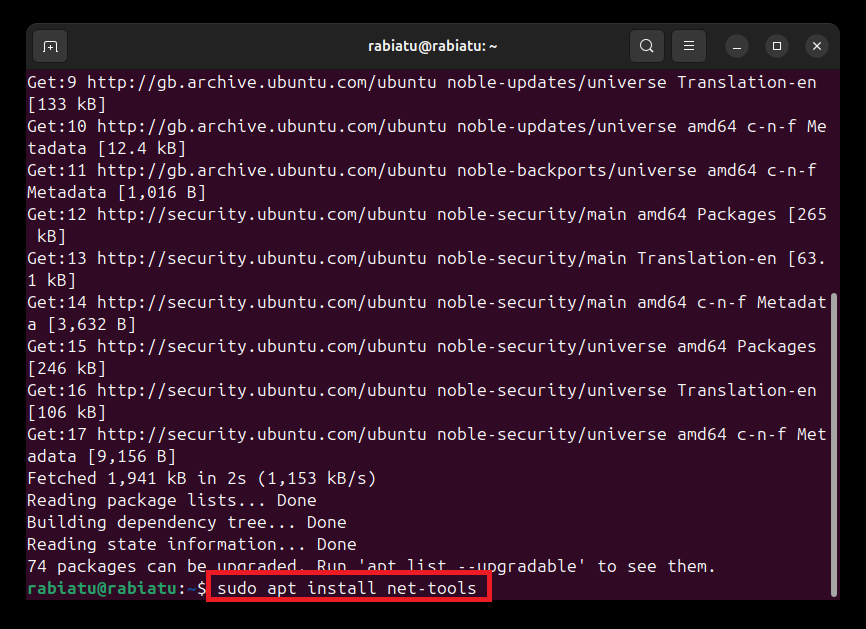
net-toolspackage was not installed.To resolve this, I installed the
net-toolspackage by running the following command in the terminal.

- Checking Network Interfaces
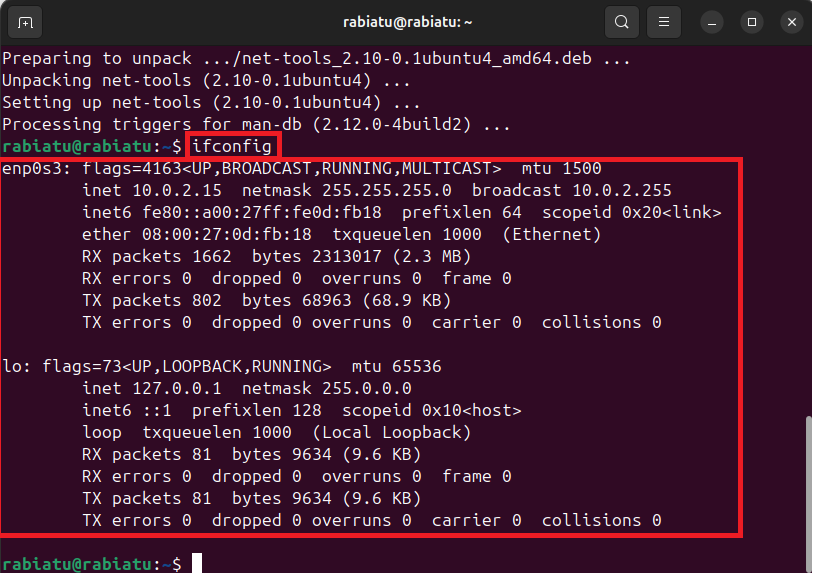
After installing net-tools, I used the ifconfig command to view my network interfaces. This command provides information about all the network interfaces on your system.
ifconfig
This command displays detailed information about each network interface, including its IP address, netmask, and more.
- Viewing IP Addresses with
ip a
I also used the ip a command to view the IP addresses assigned to my network interfaces. This command is often preferred over ifconfig as it provides more detailed information.
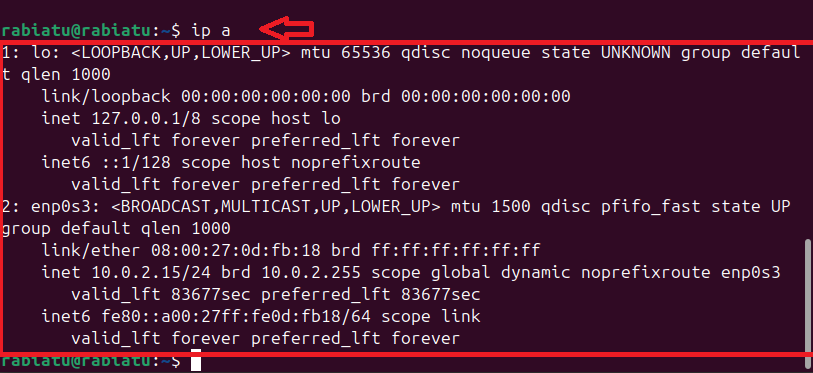
- The
ip acommand displays information about all the network interfaces, including their IP addresses, status, and more. This is particularly useful for troubleshooting network issues.
- Testing Connectivity with
ping
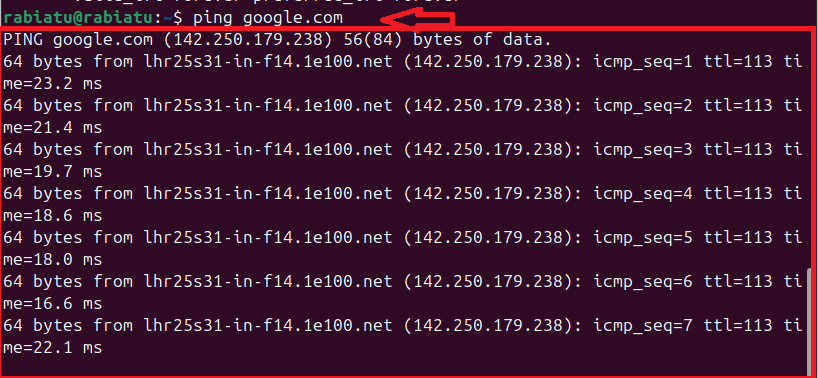
To ensure my network connection was working, I used the ping command to check connectivity to Google.
Command:
pinggoogle.comThis command sends packets of data to Google's server and waits for a response. It's a simple way to check if your computer is connected to the internet. I entered
Ctrl + Cto stop the ping process after verifying the connection.
- Viewing Routing Table with
netstat -rn
Next, I used the netstat -rn command to view the kernel IP routing table. This command helps you understand how data is routed through the network.

- This command displays the routing table, showing which gateway your computer uses to send data to different networks. It helps in understanding the network paths your data takes.
- Viewing Active Internet Connections with
netstat -tuln
Finally, I used the netstat -tuln command to view active internet connections. This command shows all the listening ports and their status.

- This command lists all the active internet connections, including the protocols used (TCP or UDP), local addresses, foreign addresses, and the state of the connections. This is useful for identifying open ports and services running on your machine.
Security
Checking System Security Status
1. Checking Firewall Status
To start, I checked the status of UFW to see if it was active

It showed Status: inactive, meaning the firewall wasn't running
2. Enabling UFW
To enable UFW and ensure it starts on system boot, I used:

Firewall is active and enabled on system startup, this activated the firewall.
3. Allowing SSH Connections
To allow SSH connections through the firewall, we executed

This command allows incoming SSH connections on port 22, which is crucial for remote access to your server.
4. Allowing HTTP and HTTPS Traffic
I also allowed HTTP and HTTPS traffic, necessary for web server functionality.

These commands open ports 80 (HTTP) and 443 (HTTPS) to allow web traffic to your server.
5. Setting Default Policies
It's important to set default policies to deny all incoming connections and allow all outgoing connections.

These commands set the default policy to deny all incoming connections and allow all outgoing connections. This is a secure default, ensuring that only explicitly allowed connections can reach your system.
6. Verifying Firewall Rules
Finally, I verified my rules to ensure everything was configured correctly.
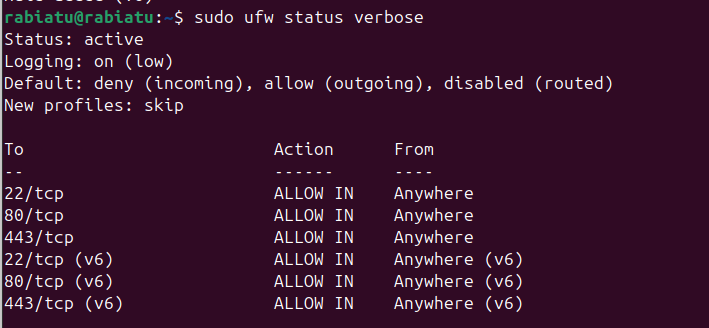
This command provides a detailed output of the UFW status and the current rules in place, helping you verify that your firewall is configured as intended.
Subscribe to my newsletter
Read articles from Rabiatu Mohammed directly inside your inbox. Subscribe to the newsletter, and don't miss out.
Written by

Rabiatu Mohammed
Rabiatu Mohammed
I work on securing, automating, and improving cloud environments. Always exploring better ways to build reliable, secure infrastructure.