What is Jenkins and Why is it Used?
 vinod chandra
Jenkins is a powerful tool in the DevOps world, designed to automate parts of the software development process. It's an open-source server that runs on Java and helps developers build, test, and deploy their software efficiently.
Why Jenkins?
Jenkins is essential because it helps streamline the continuous integration (CI) and continuous delivery/deployment (CD) processes. Here’s a breakdown of what it does and its benefits:
Automation of Repetitive Tasks: Jenkins automates tasks such as building the code, running tests, and deploying applications. This reduces manual work, minimizes human error, and speeds up the development process.
Continuous Integration (CI): With Jenkins, developers can frequently merge their code changes into a shared repository. Jenkins automatically tests these changes, ensuring they integrate smoothly. This helps catch and fix bugs early, improving software quality.
Continuous Delivery (CD): Jenkins ensures that the software is always in a deployable state. By running additional tests and deploying to a staging environment, it guarantees that new features can be released quickly and reliably.
Extensibility through Plugins: Jenkins has a vast ecosystem of plugins that integrate with other tools and stages of the DevOps lifecycle. For example, there are plugins for Git, Docker, Maven, and many more. This makes Jenkins highly customizable and adaptable to various workflows.
Ease of Use: Jenkins provides an easy-to-use interface for defining and managing jobs (tasks). These jobs can include anything from simple scripts to complex pipelines involving multiple steps and stages.
Community and Support: Being open-source, Jenkins has a large community of users and contributors. This means regular updates, a plethora of resources, and community support are available.
Jenkins in the DevOps Lifecycle
In the DevOps lifecycle, Jenkins plays a crucial role by automating the build, test, and deployment processes. Here’s how it integrates:
Code Integration: Developers commit their code to a version control system (like Git). Jenkins monitors these repositories and triggers automated builds and tests whenever changes are detected.
Testing: Jenkins runs automated tests to ensure that the new code doesn’t break existing functionality. It can integrate with various testing tools and frameworks.
Deployment: Once the code passes all tests, Jenkins can deploy it to different environments (e.g., staging, production). This can be done using various plugins and integrations, such as Docker, Kubernetes, or cloud platforms.
Monitoring and Feedback: Jenkins provides real-time feedback on the status of builds, tests, and deployments. This helps developers quickly identify and resolve issues.
Jenkins Installation Guide
Step 1: Create a Server on AWS
Launch an EC2 Instance: Go to the AWS Management Console, navigate to the EC2 Dashboard, and launch a new instance.
Connect to the Instance: Once the instance is running, connect to it using SSH.
Step 2: Jenkins Installation
Download Jenkins Key and Add Repository:
 sudo wget -O /usr/share/keyrings/jenkins-keyring.asc \
   https://pkg.jenkins.io/debian-stable/jenkins.io-2023.key
echo "deb [signed-by=/usr/share/keyrings/jenkins-keyring.asc] \ https://pkg.jenkins.io/debian-stable binary/" | sudo tee \ /etc/apt/sources.list.d/jenkins.list > /dev/nullUpdate and Upgrade Packages:
 sudo apt-get update
 sudo apt-get upgrade
Install Jenkins:
sudo apt-get install jenkinsInstall Java:
 sudo apt install fontconfig openjdk-17-jre -y
 java -version
Enable and Start Jenkins:
 sudo systemctl enable jenkins
 sudo systemctl start jenkins
 sudo systemctl status jenkins
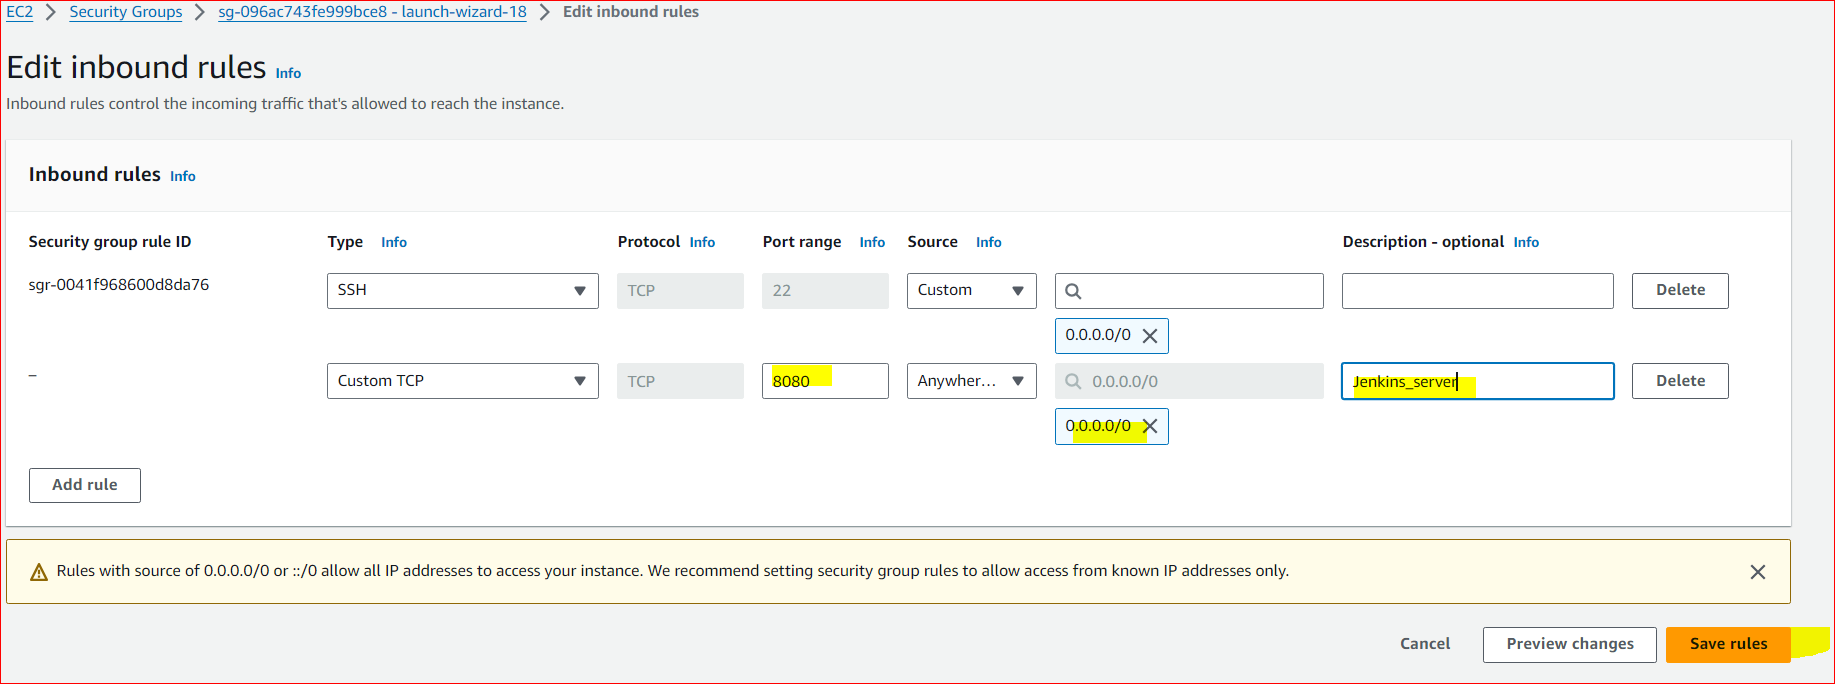
Step 3: Configure Security Group
Open Port 8080:
Go to the Security Groups section in your EC2 Dashboard.
Select your security group (e.g., sg-096ac743fe999bce8).
Click on "Edit inbound rules".
Add a rule to allow traffic on port 8080 and save changes.
Step 4: Access Jenkins
Open Jenkins in Browser:
Open your browser and go to
http://<your-instance-ip>:8080.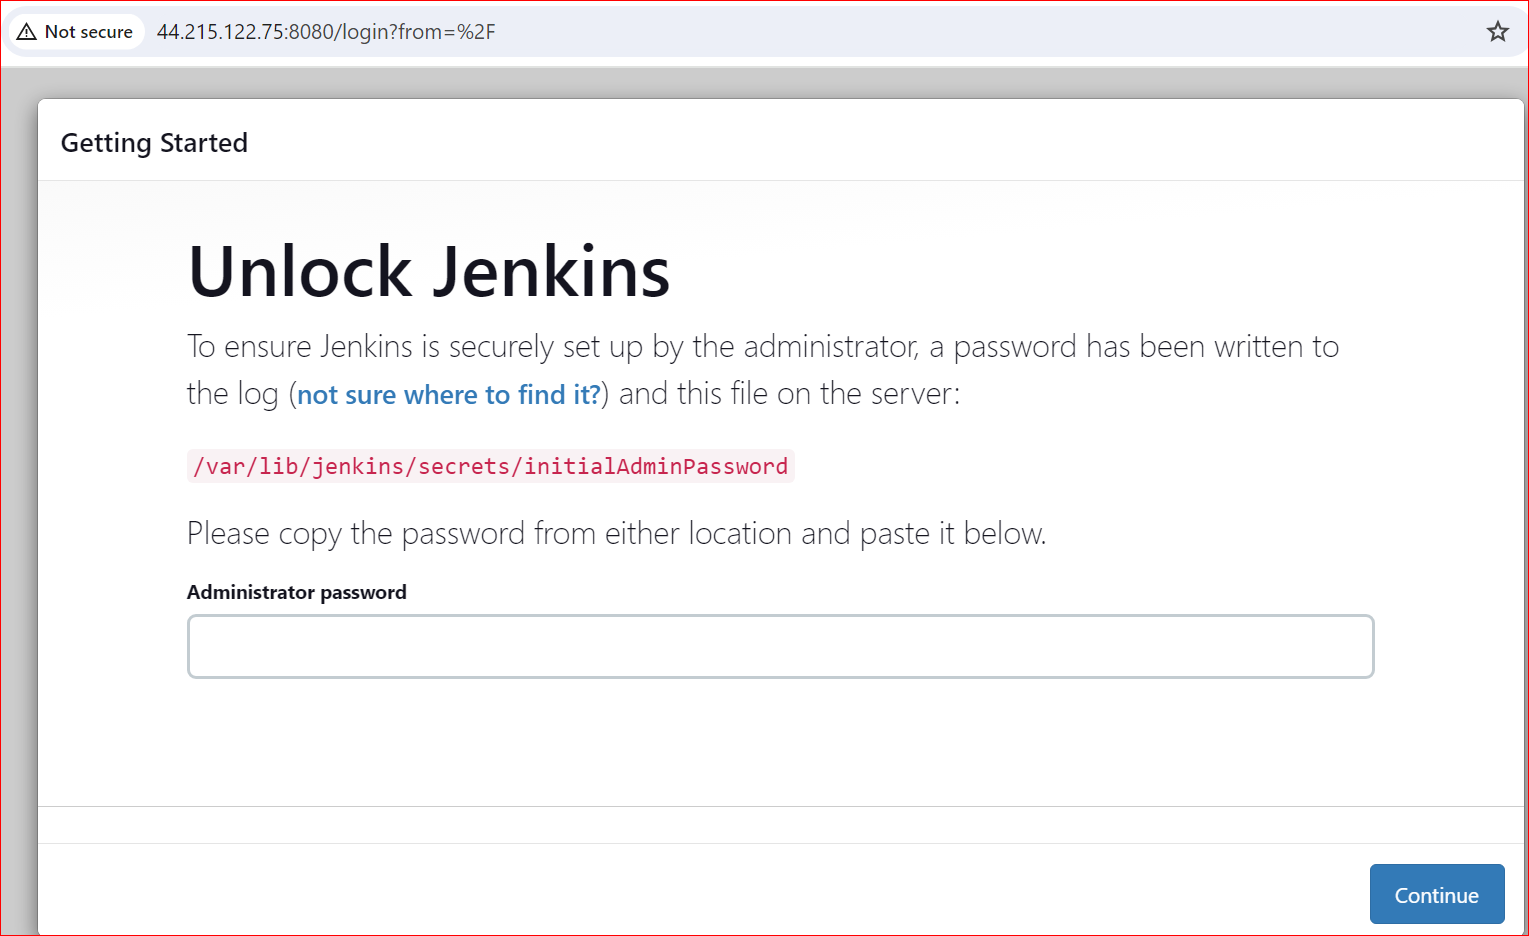
Unlock Jenkins:
Copy the path highlighted in red text on the login page.
Execute the following command on your Jenkins server:
sudo cat /var/lib/jenkins/secrets/initialAdminPassword
Copy the output token and paste it into the Jenkins login page.
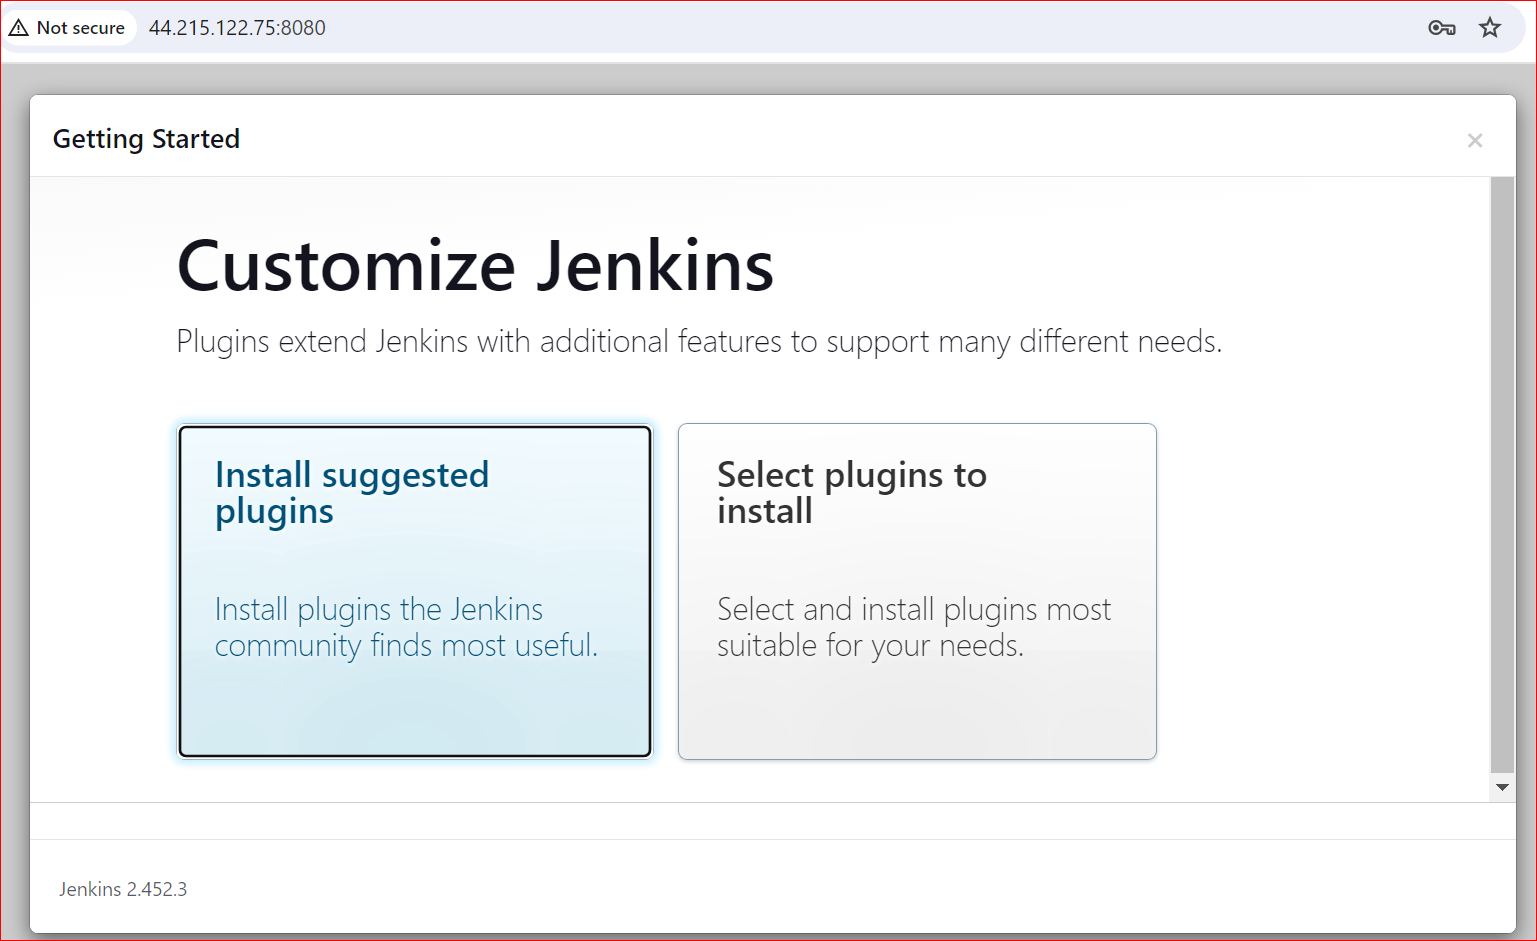
Install Suggested Plugins:
Select "Install suggested plugins" and wait for the installation to complete.
Setup Admin User:
Create a username and password, then save and continue.
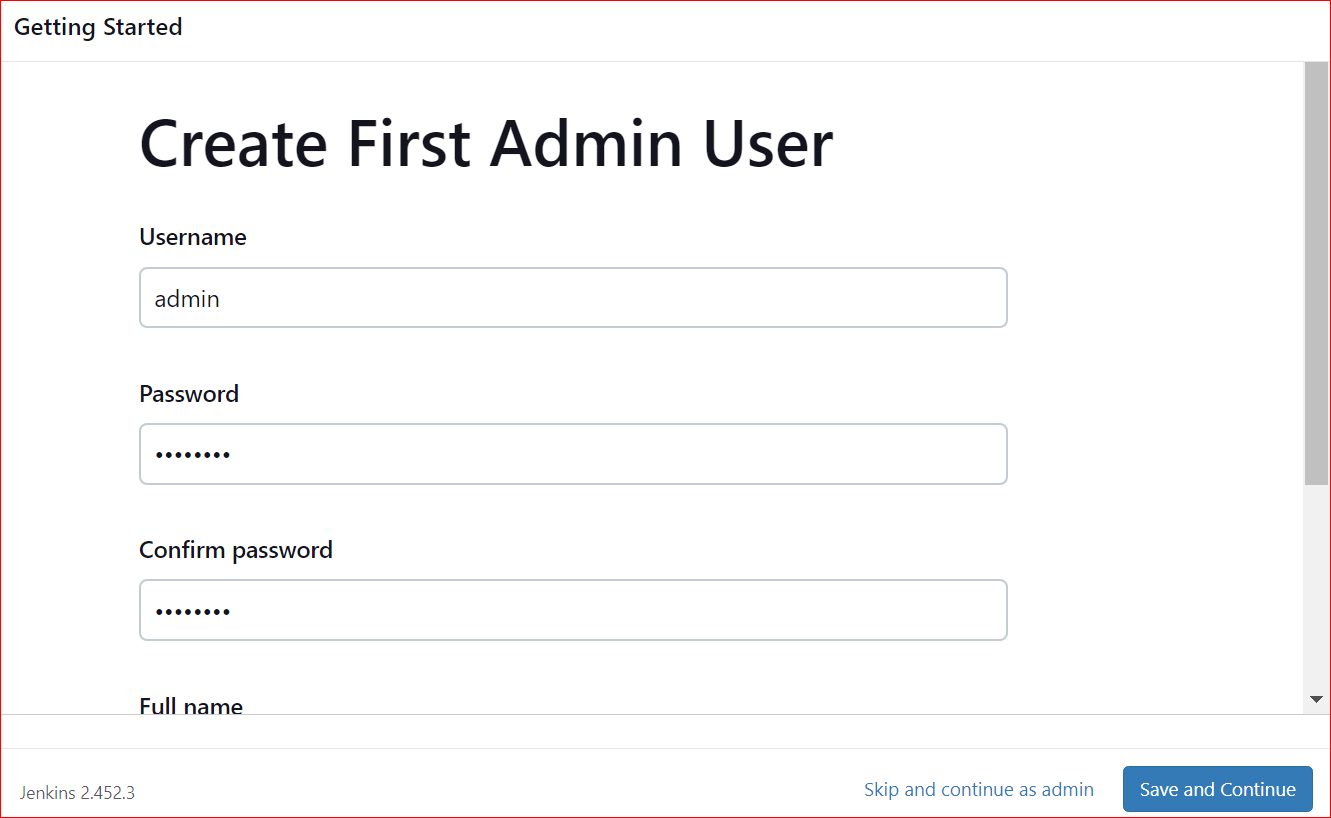
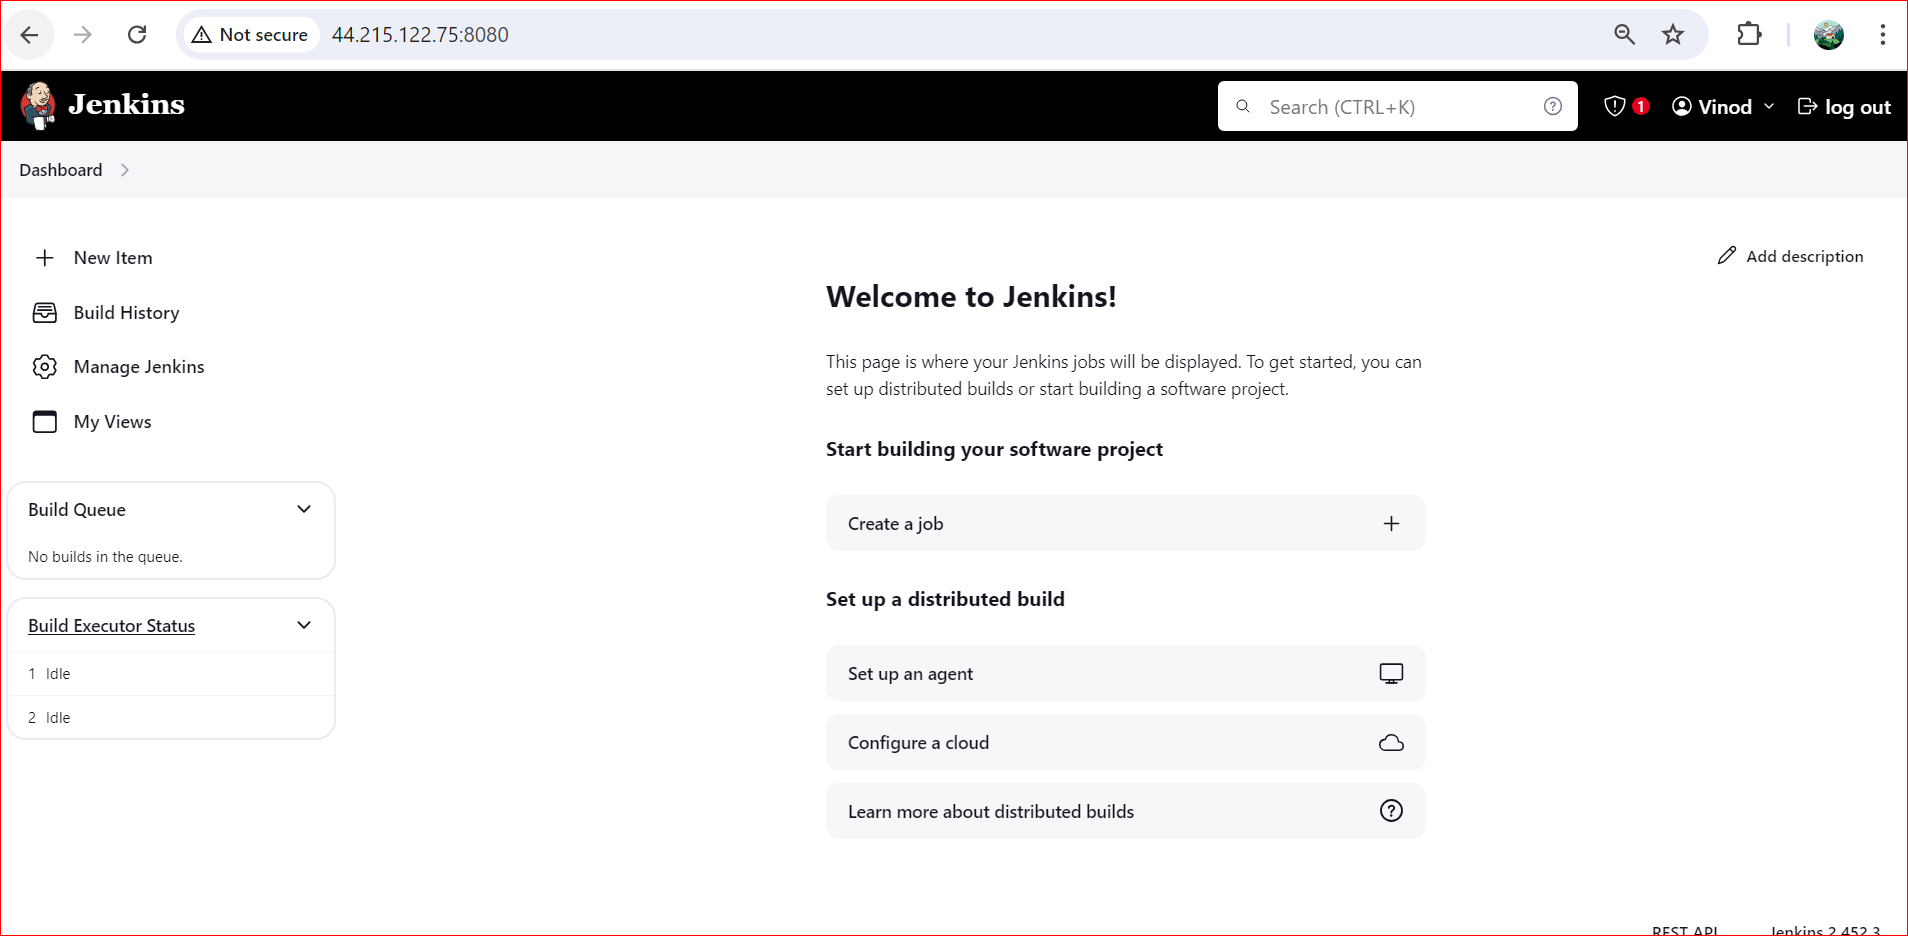
Jenkins installation is now complete. You can start using Jenkins to automate your build, test, and deployment processes.
Let's Build a Jenkins "Hello World" Project
Step 1: Create a New Jenkins Project
Click on the "+" Sign (New Item):
Enter Your Project Name:
Type a name for your project (e.g., "HelloWorldProject").
Select "Freestyle Project".
Click "OK".
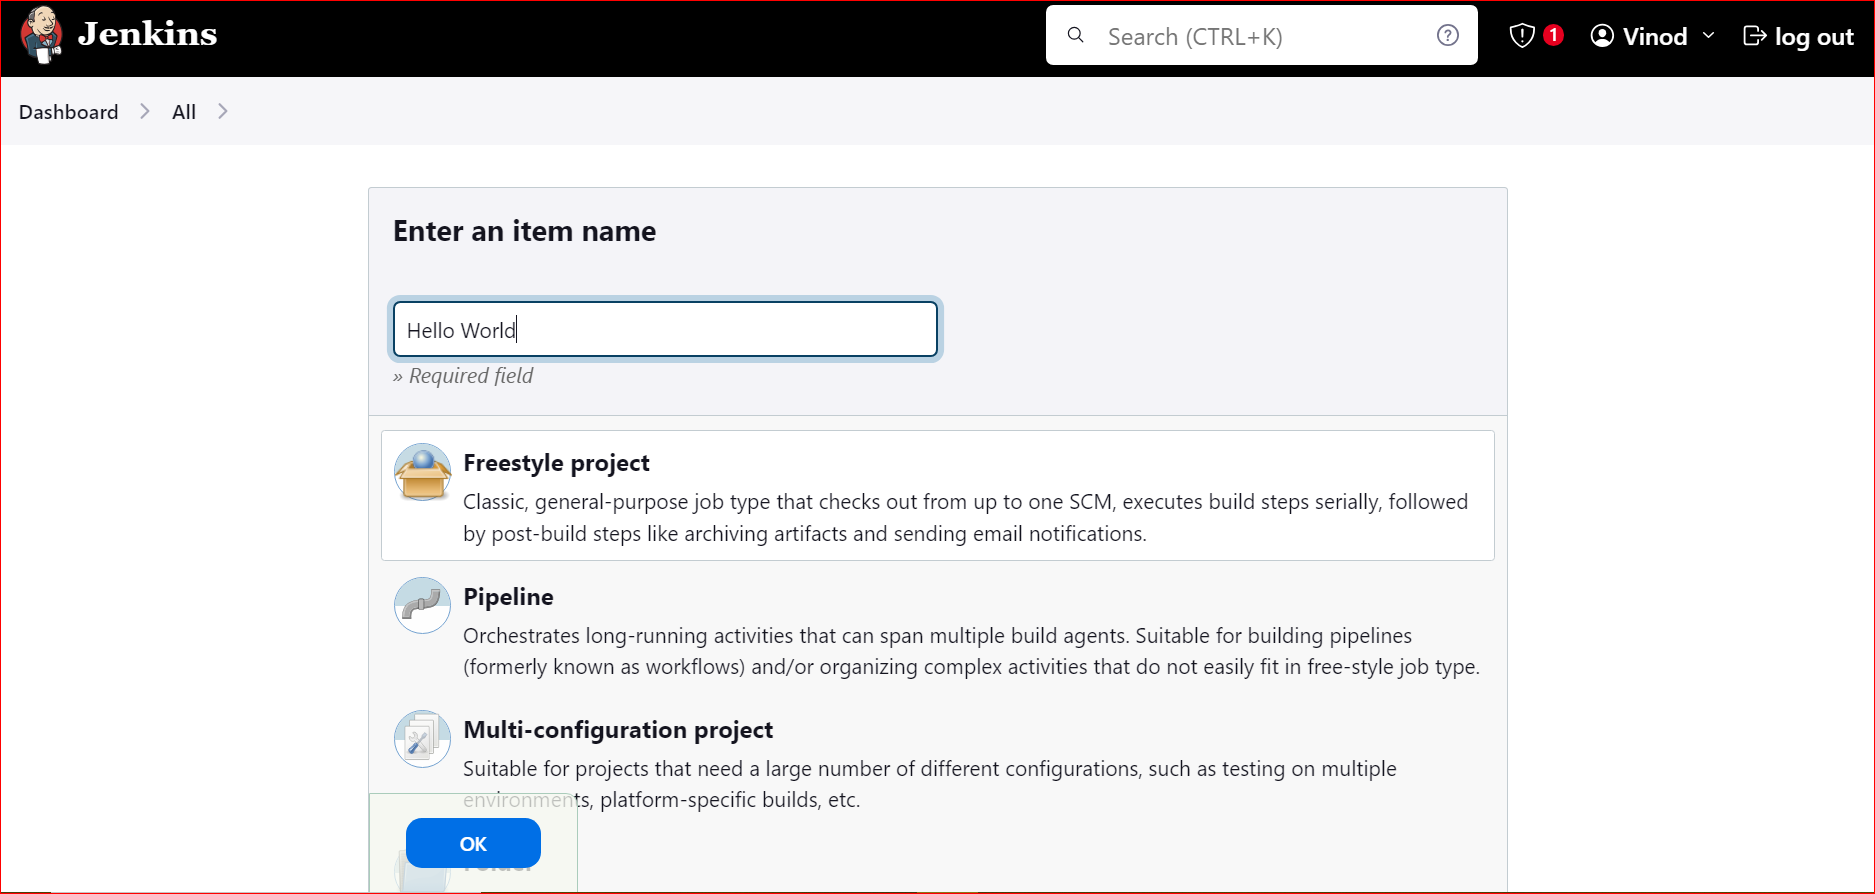
Step 2: Configure the Project
Add a Description:
In the "Description" field, provide a brief description of your project.
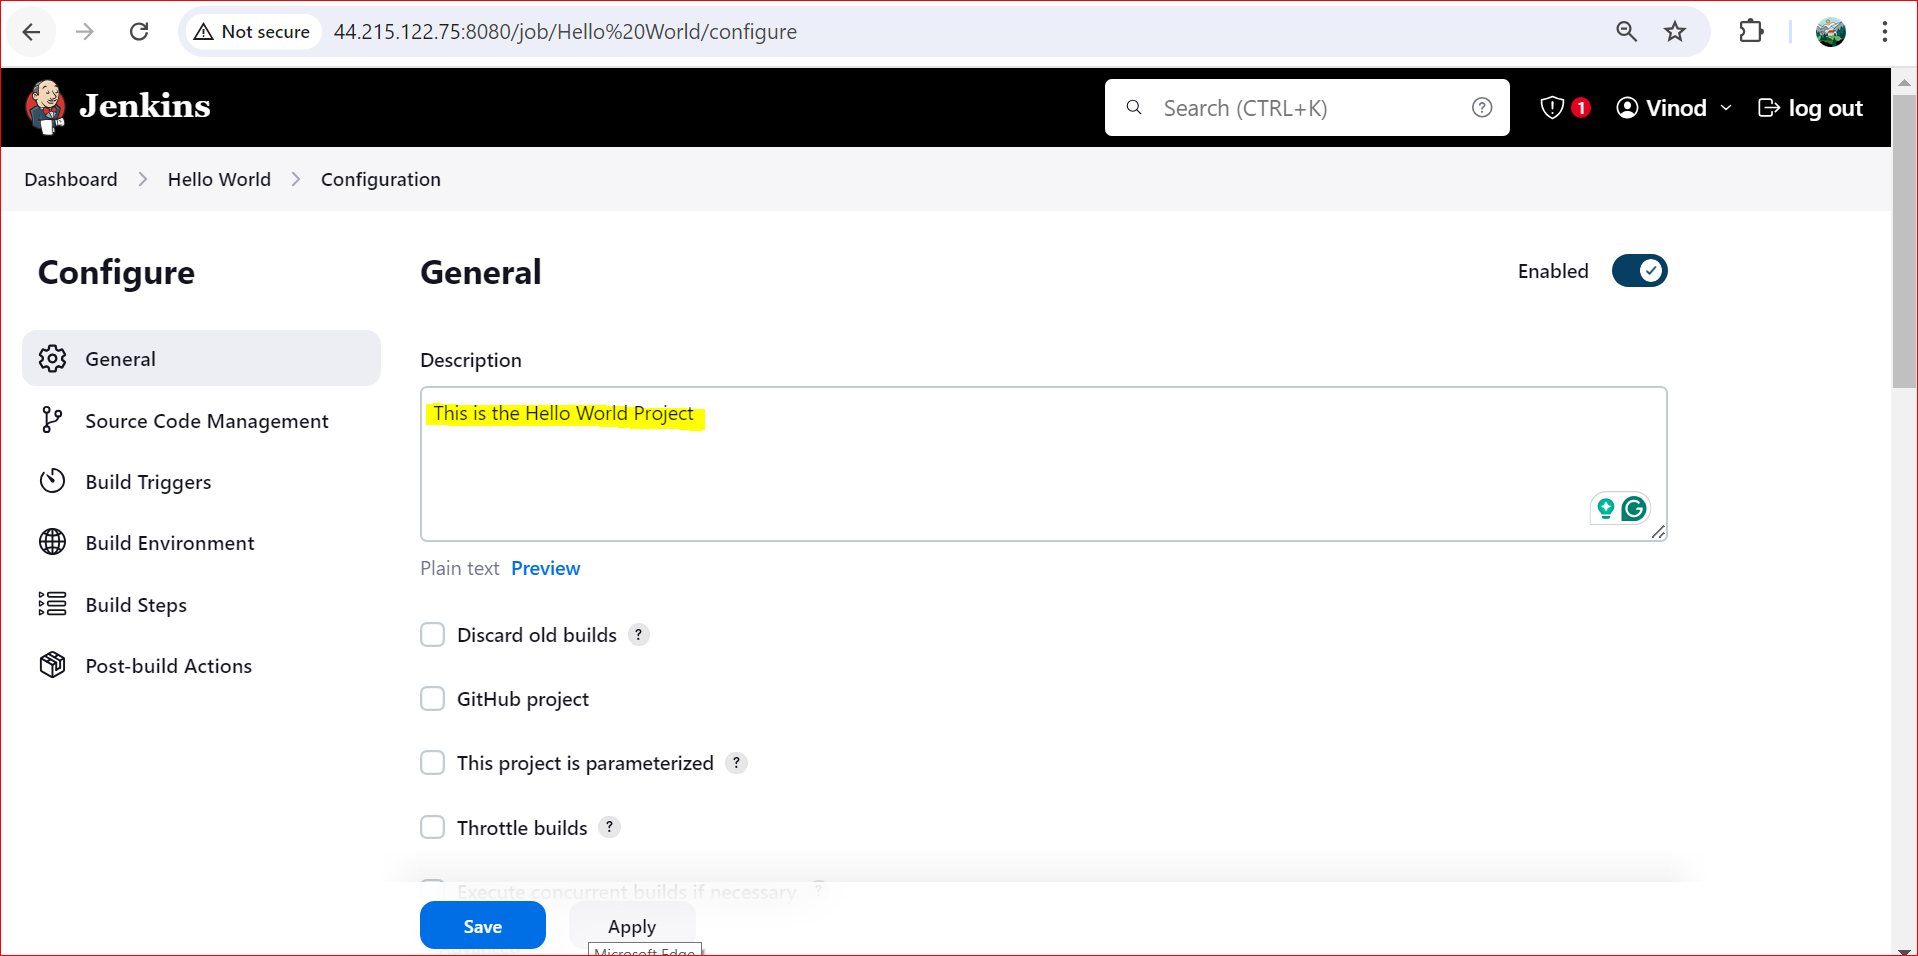
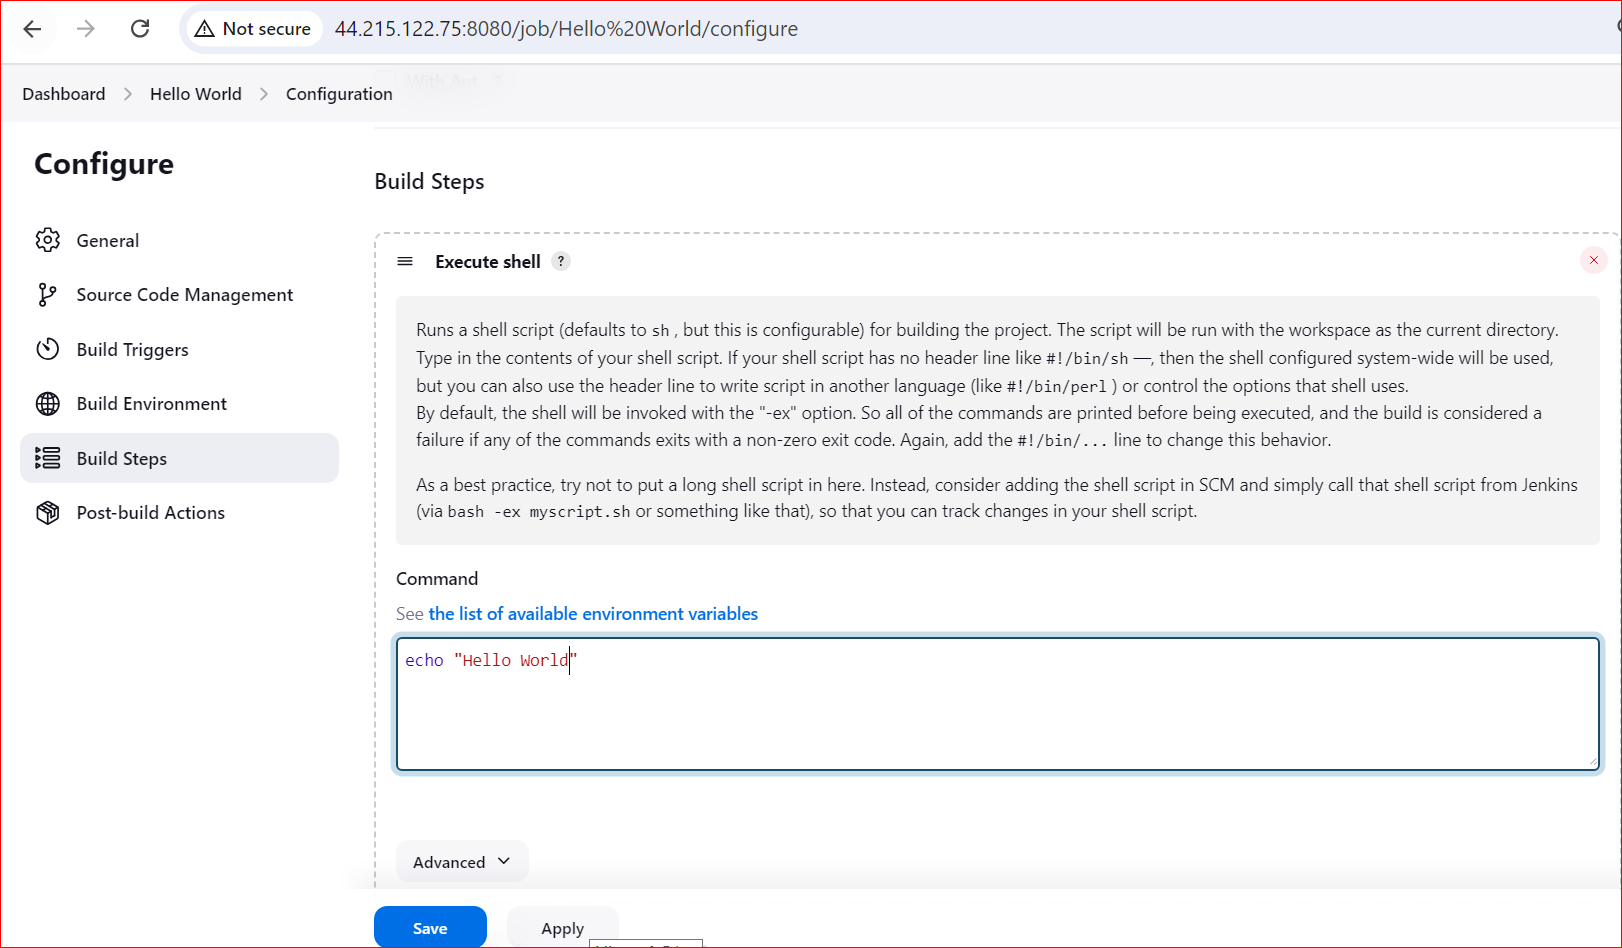
Scroll Down to Build Steps:
Navigate to the "Build" section.
Click on "Add build step" and select "Execute shell".
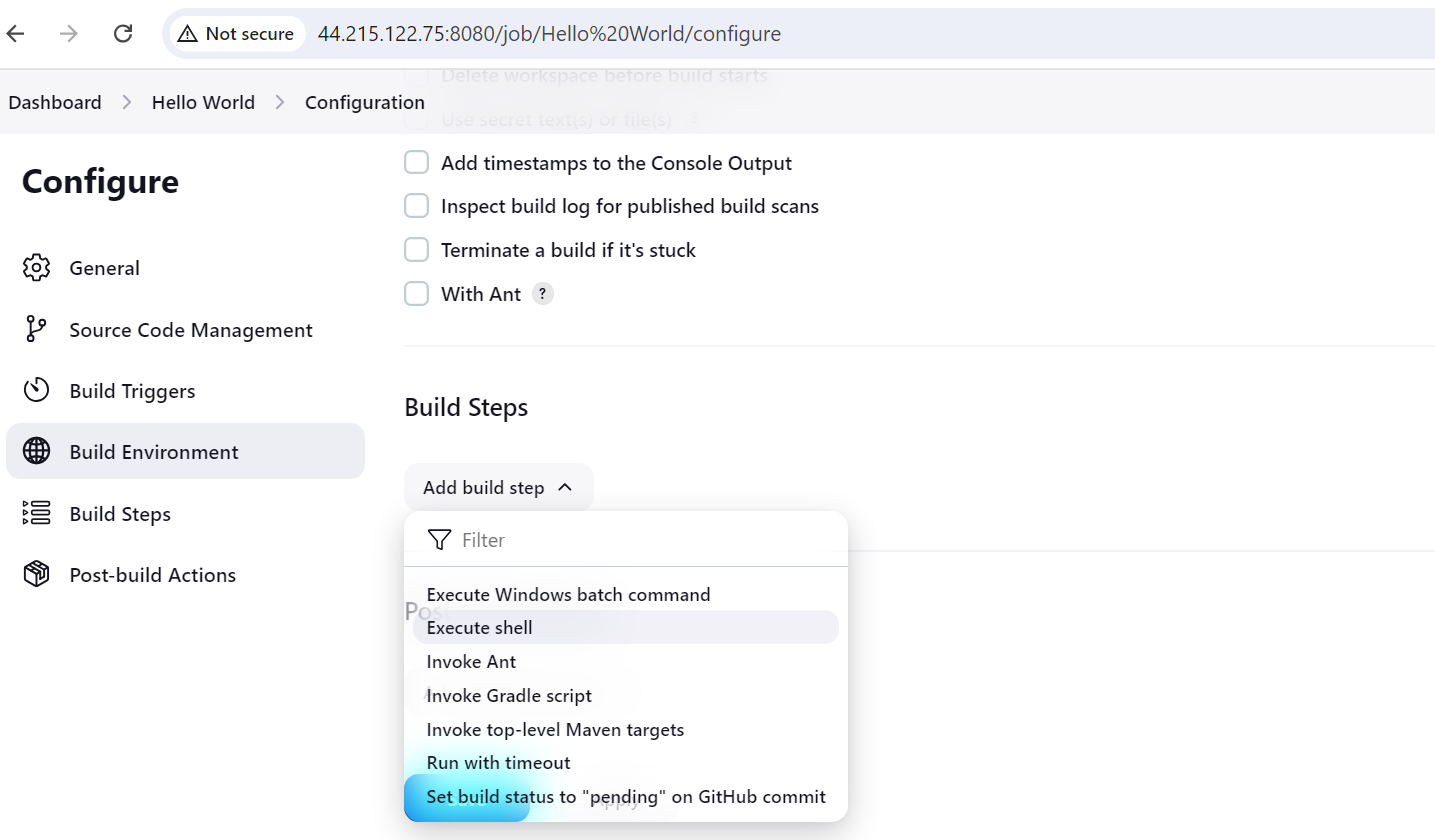
Add the Shell Command:
In the "Command" field, enter the following shell command:
Click "Save" to save the project configuration.
Step 3: Build the Project
Navigate to the Dashboard:
Your project should now be listed on the Jenkins dashboard.
Click on the project name to open it.
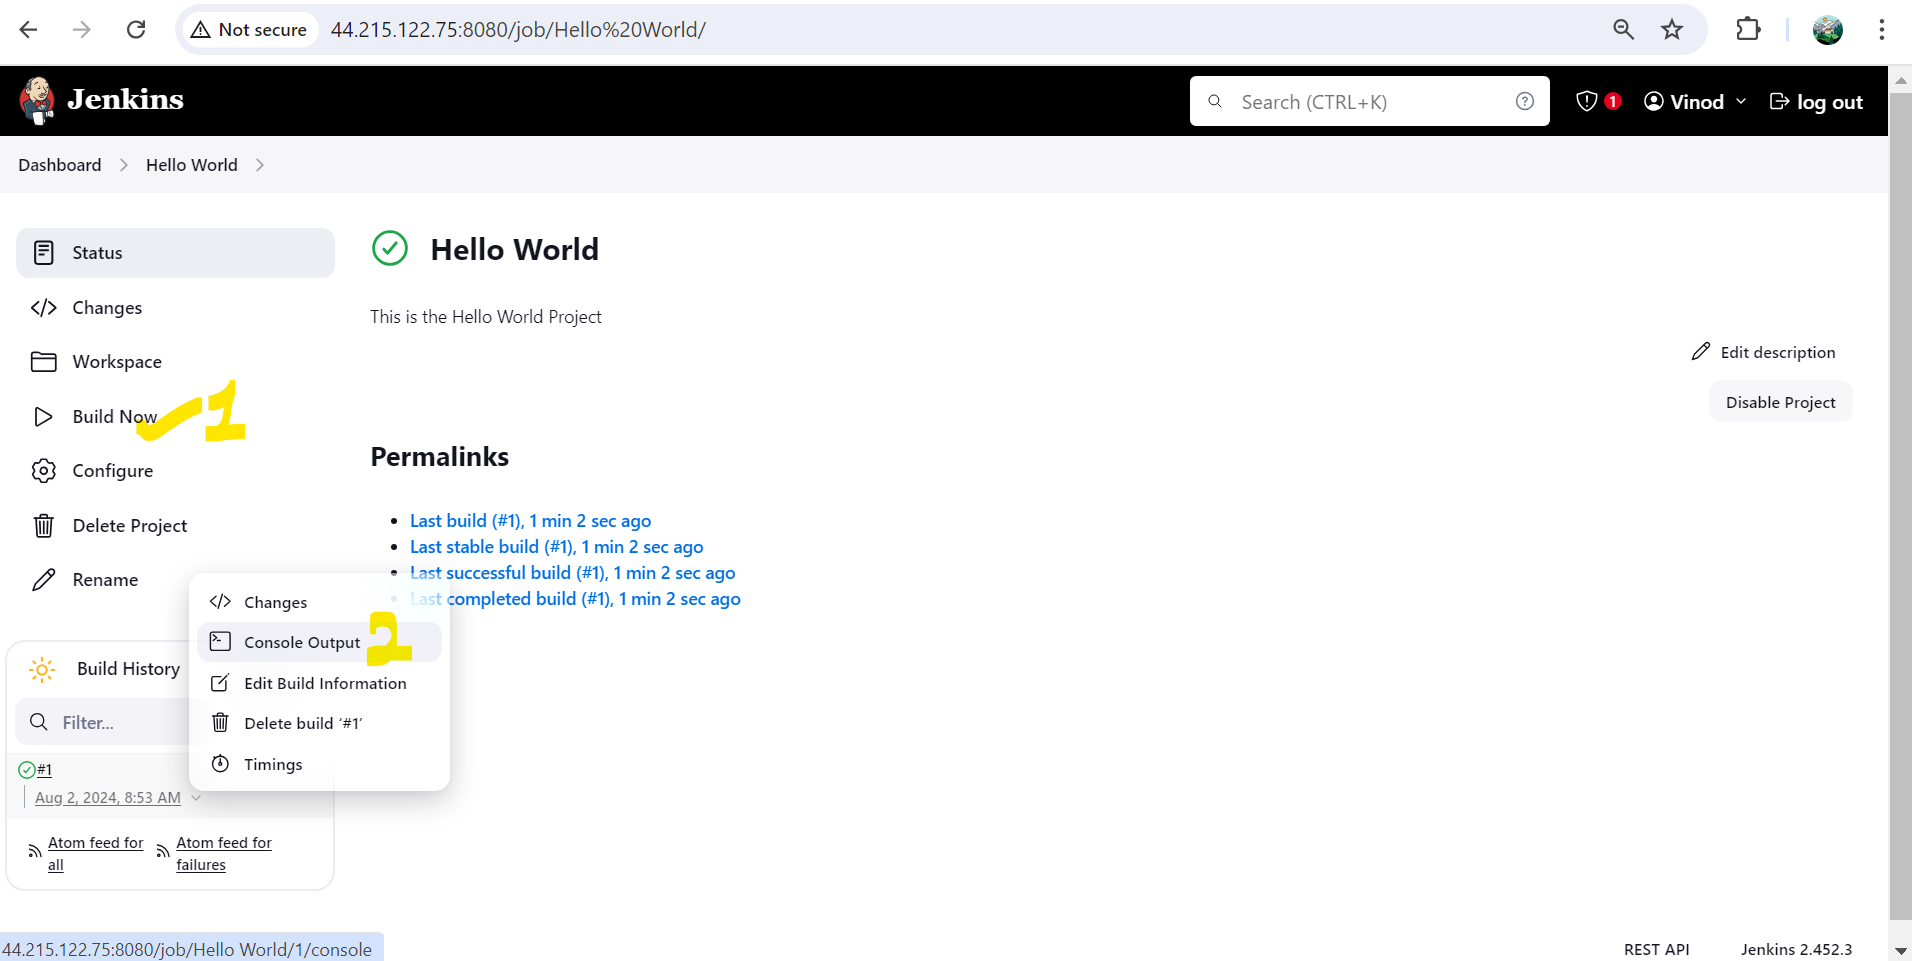
Click "Build Now":
On the left-hand side, click "Build Now" to start the build process.
Step 4: Check the Build Output
Build Started:
- You will see a new build appear under the "Build History" section.
Go to Console Output:
Click on the build number (e.g., #1) in the "Build History" section.
Click on "Console Output" to see the details of the build.
Woohoo!:
You should see the "Hello, World!" message in the console output.
This indicates that your shell command executed successfully and your "Hello World" project is finished!

Congratulations! You've successfully created and executed your first Jenkins project. This simple "Hello World" project is a great way to get started with Jenkins and understand how to create and run jobs.
Subscribe to my newsletter
Read articles from vinod chandra directly inside your inbox. Subscribe to the newsletter, and don't miss out.
Written by
