Mastering CI Pipelines: A Beginner's Guide with Azure DevOps
 Hema Sundharam Kolla
What we will create in this guide?
Azure DevOps Account.
Azure Container Registry.
Cloning the Git repo into the Azure DevOps platform.
Creating a VM.
Writing the Docker files for the cloned repo.
Running the pipelines, ensuring continuous integration.
Let's dive in to create the Azure DevOps account.
How?
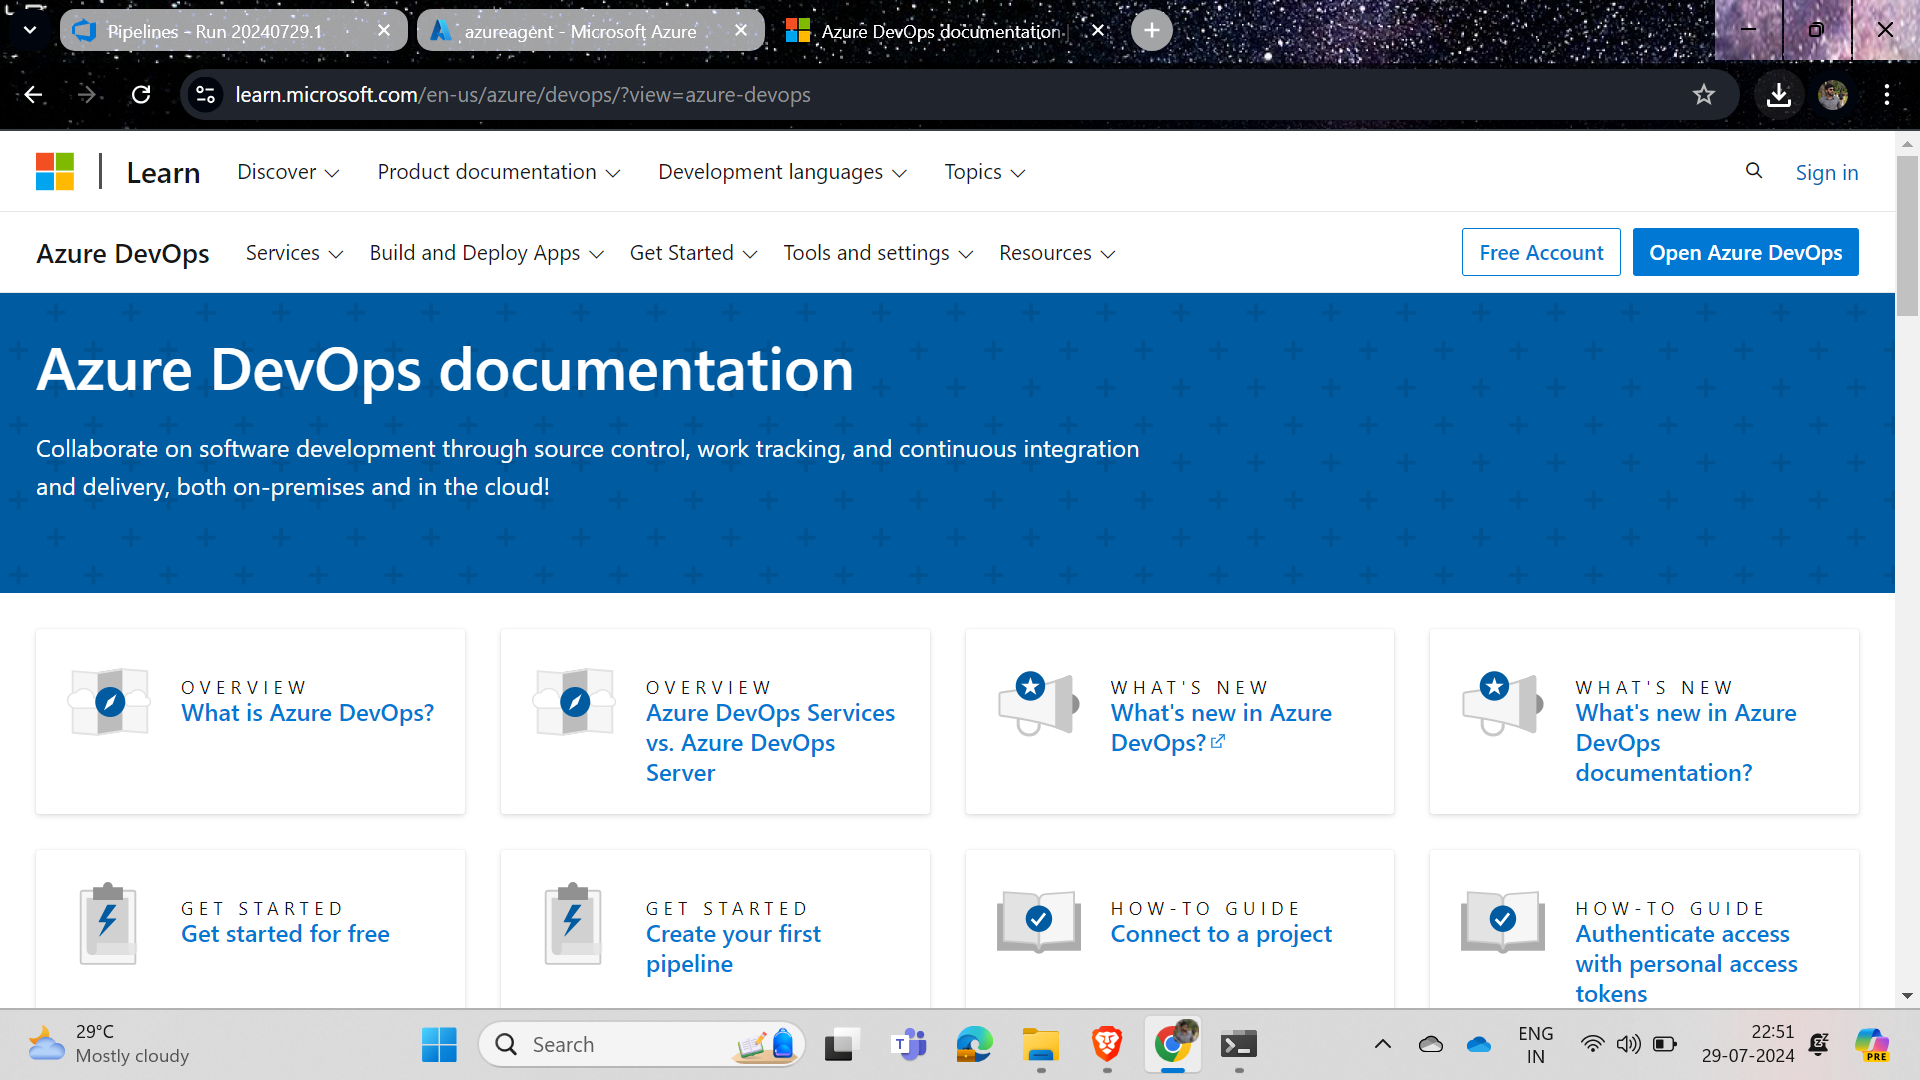
Just Google "Azure DevOps" and you will find the image below.
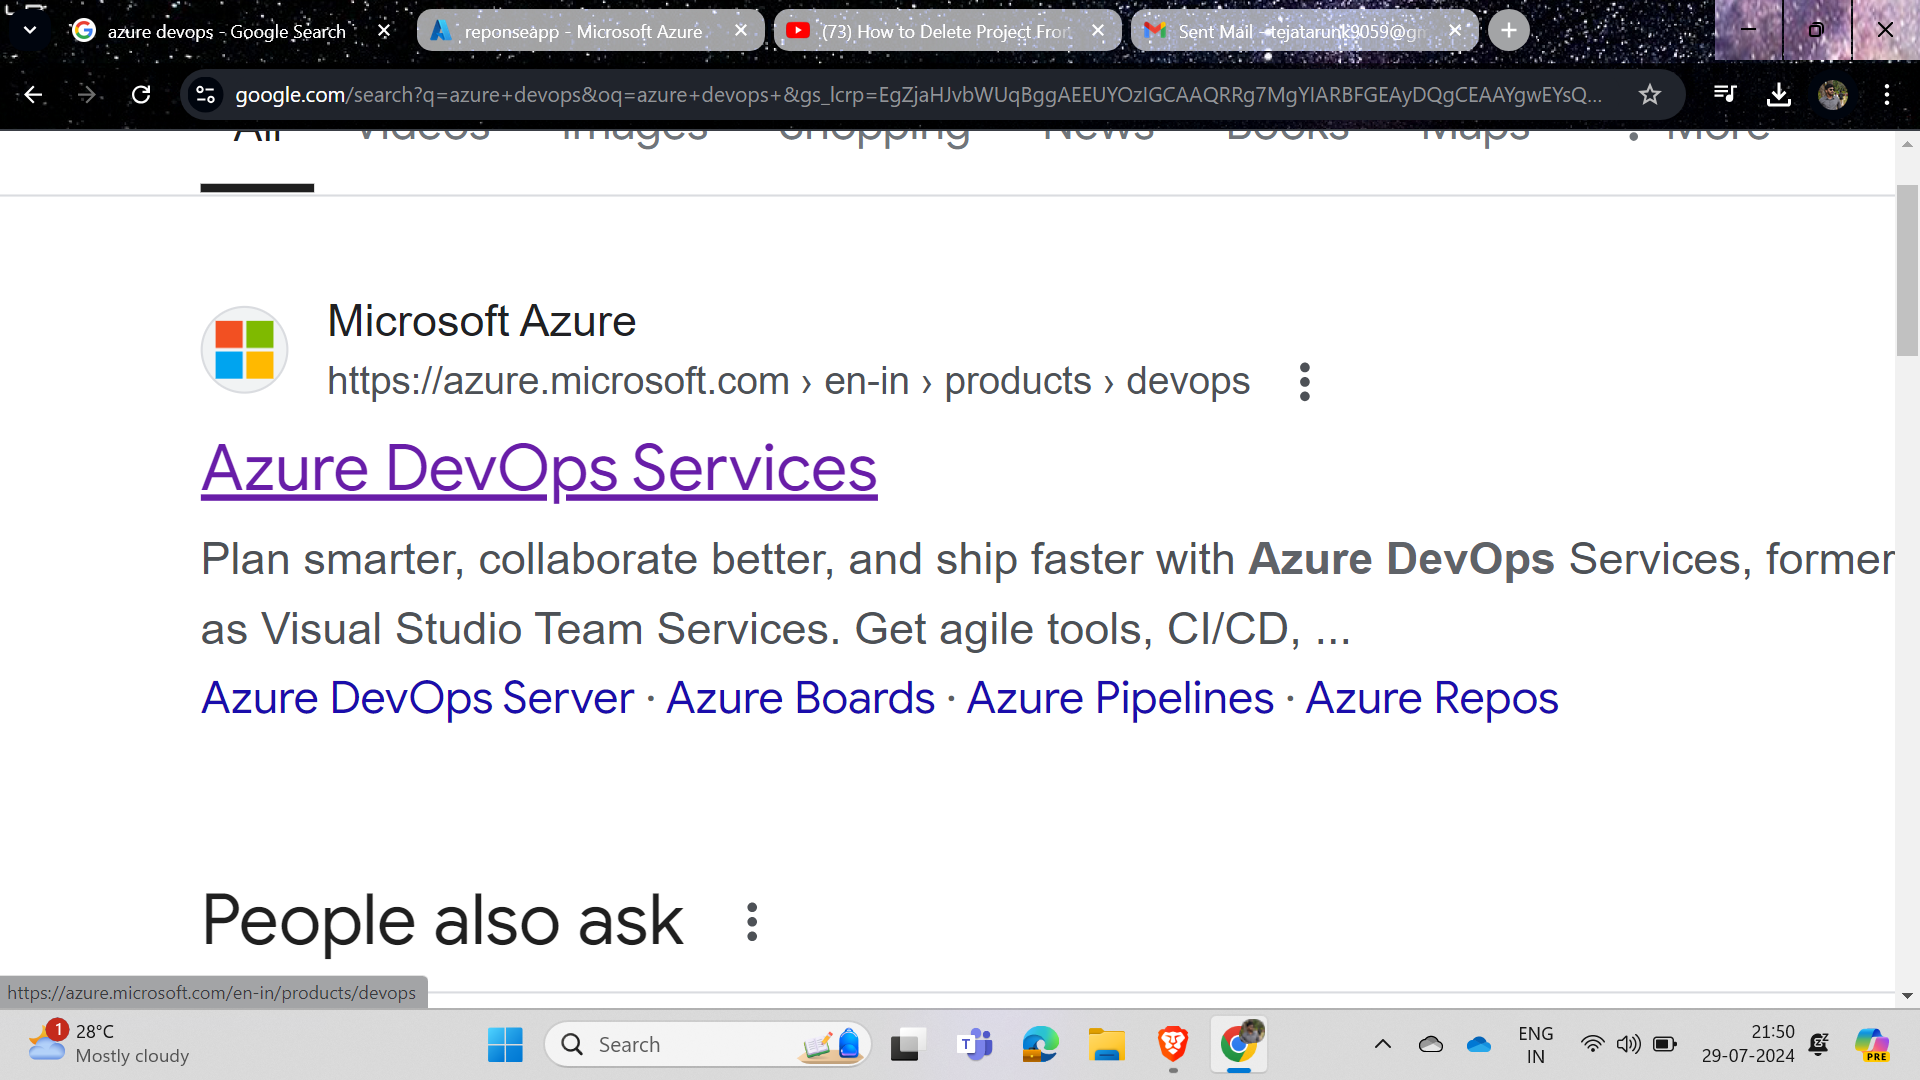
Click and log in with your Azure account to use it for free, then create a project as shown in the image.
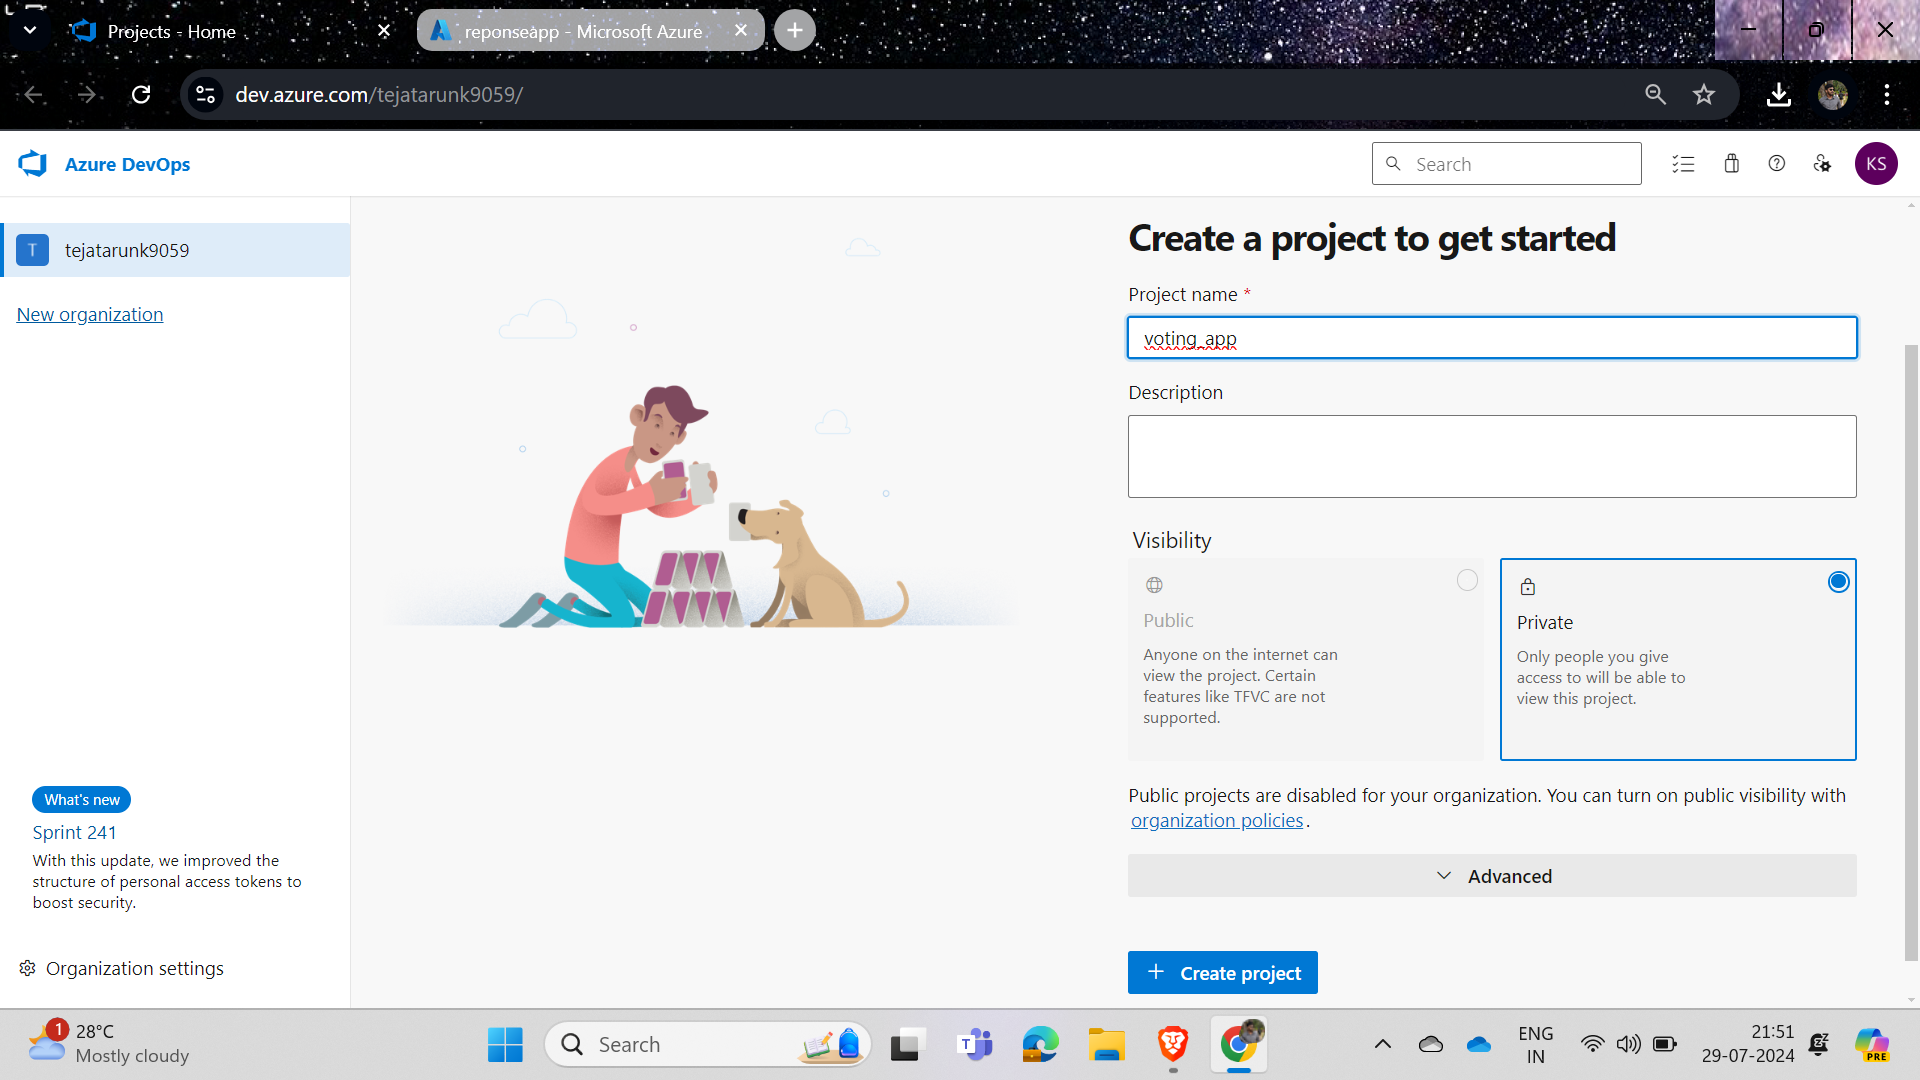
Give the project a name and description based on your requirements, set it to private, and click on "Create project"; now we are done with creating an account and a project in Azure DevOps.
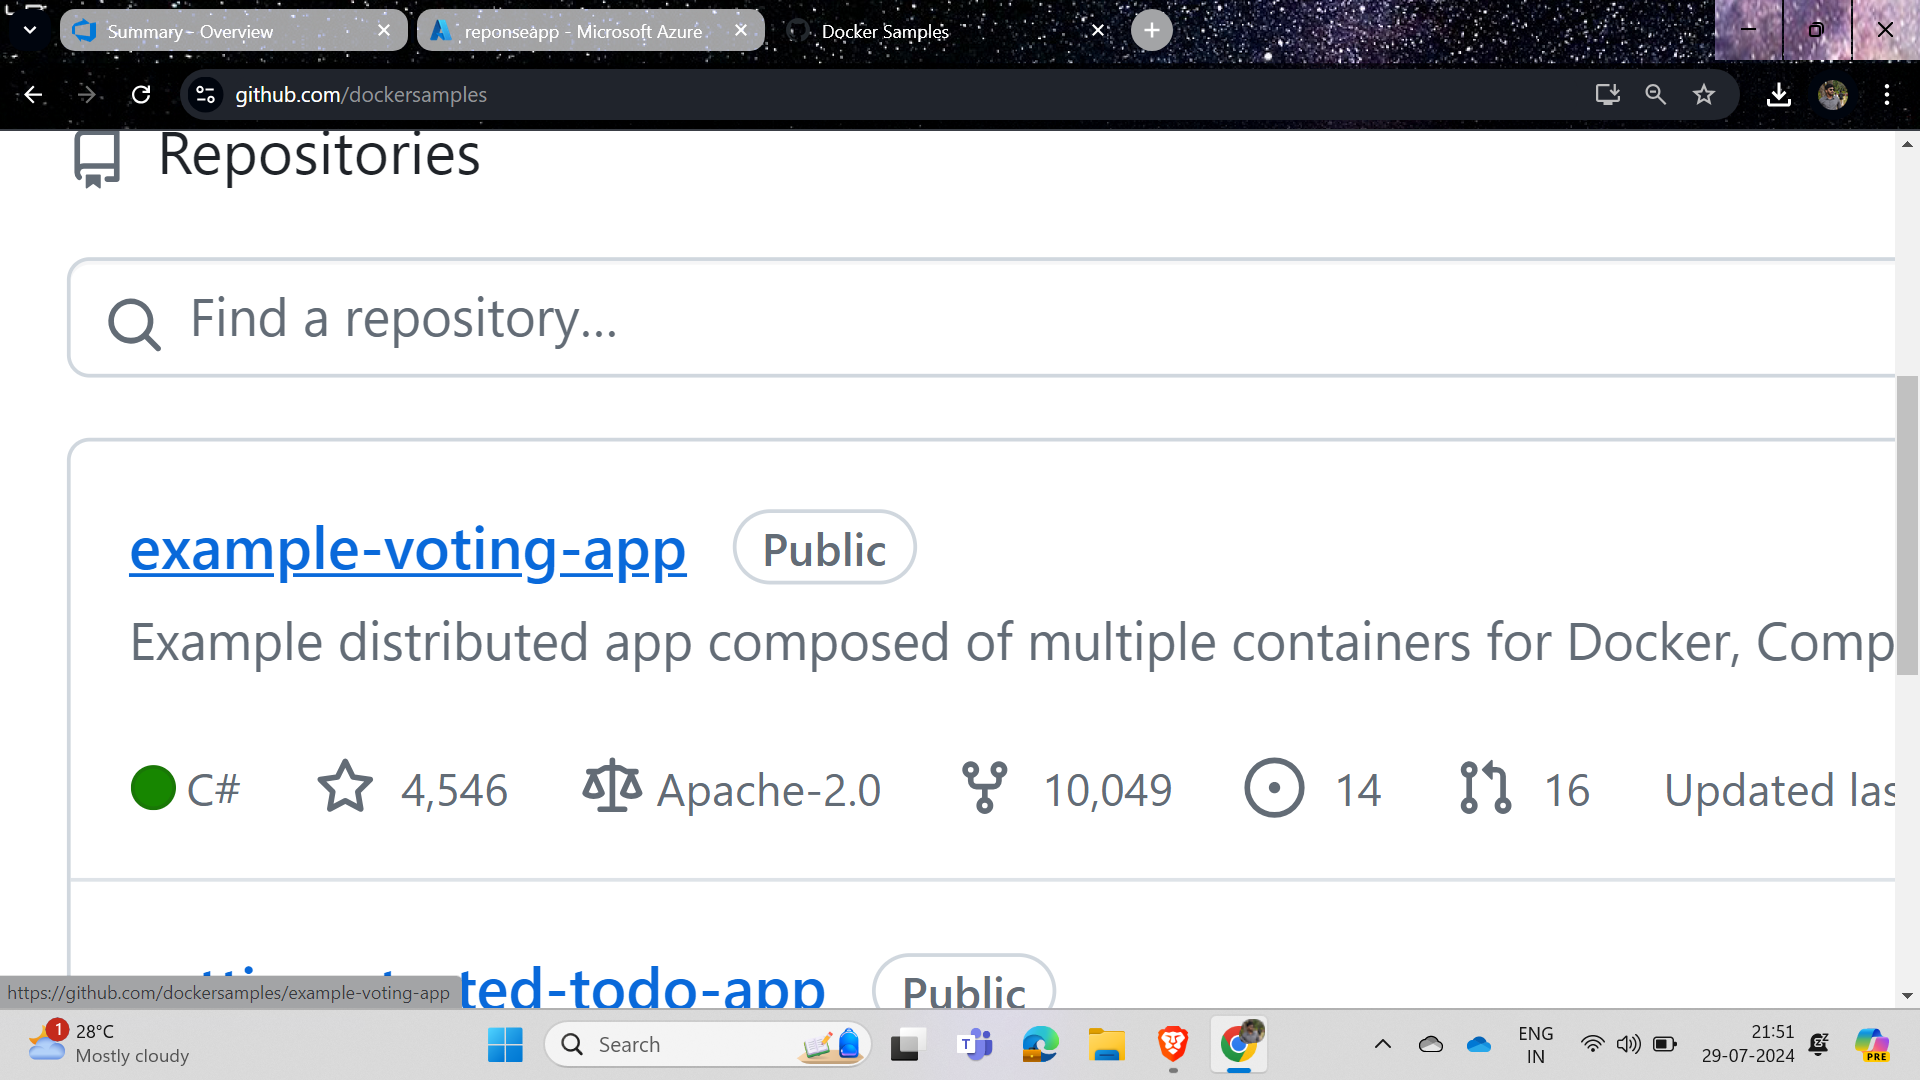
The next step is to select a project for building the pipelines; we will use a basic project from the Docker repo in Git for learning purposes, specifically the example-voting-app in the Docker samples repo.
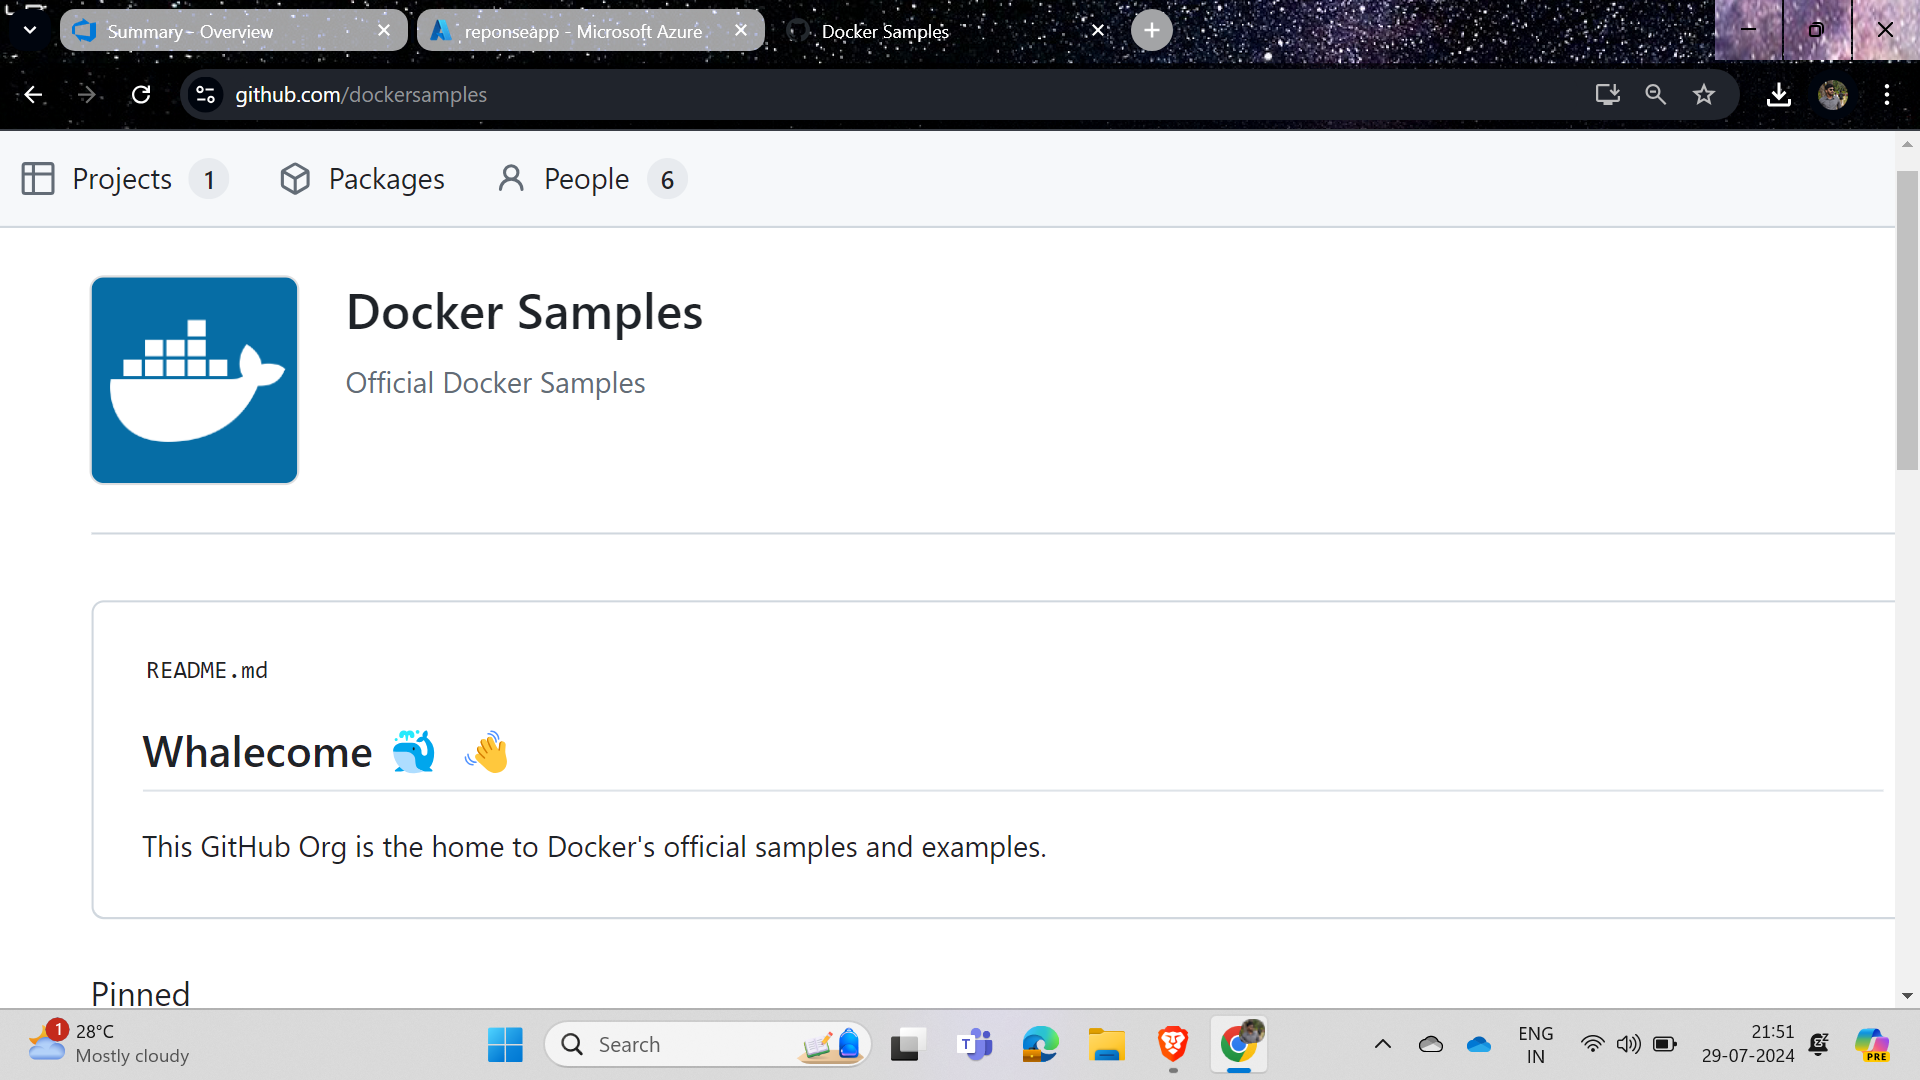
This is the repo and its link: github.com/dockersamples
And in this, we will use the example-voting-app project from the Docker samples repo.
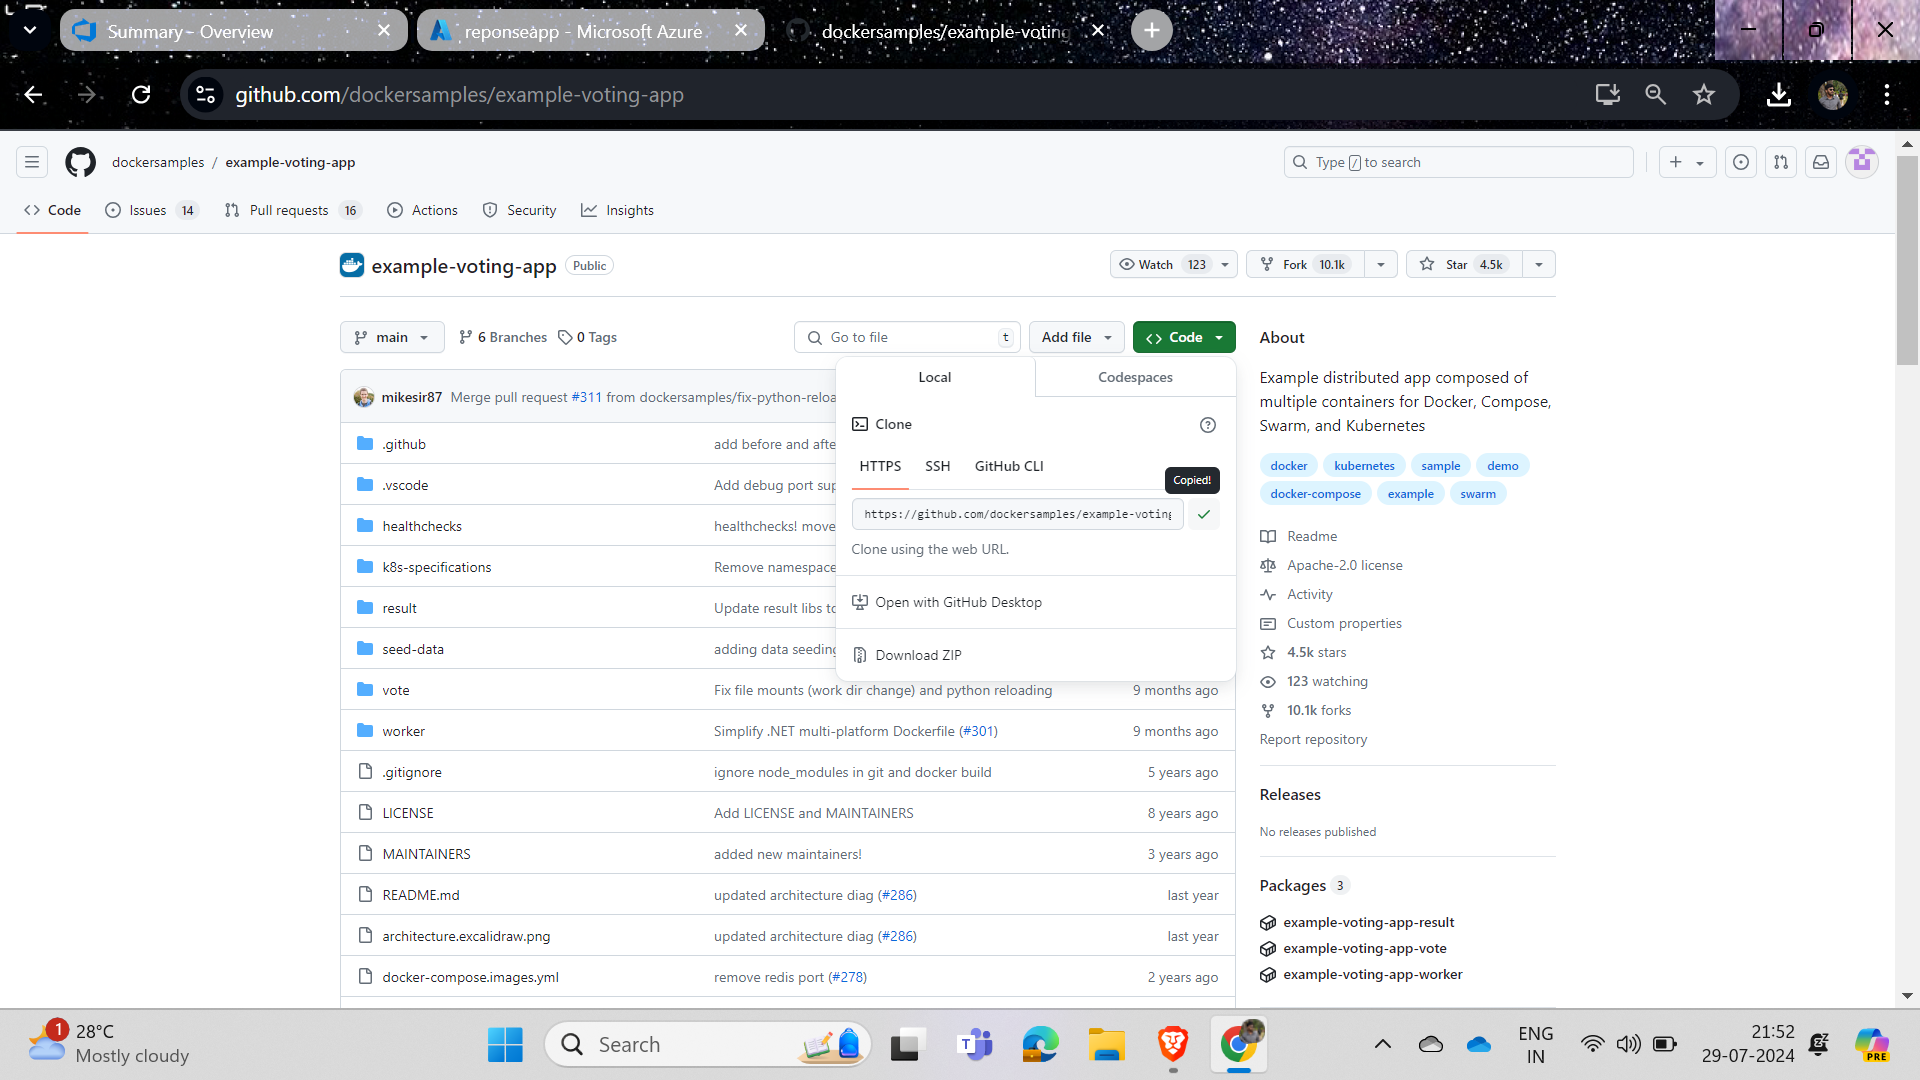
Just copy the HTTPS URL of the repo.
And paste the repo as shown in the image below.
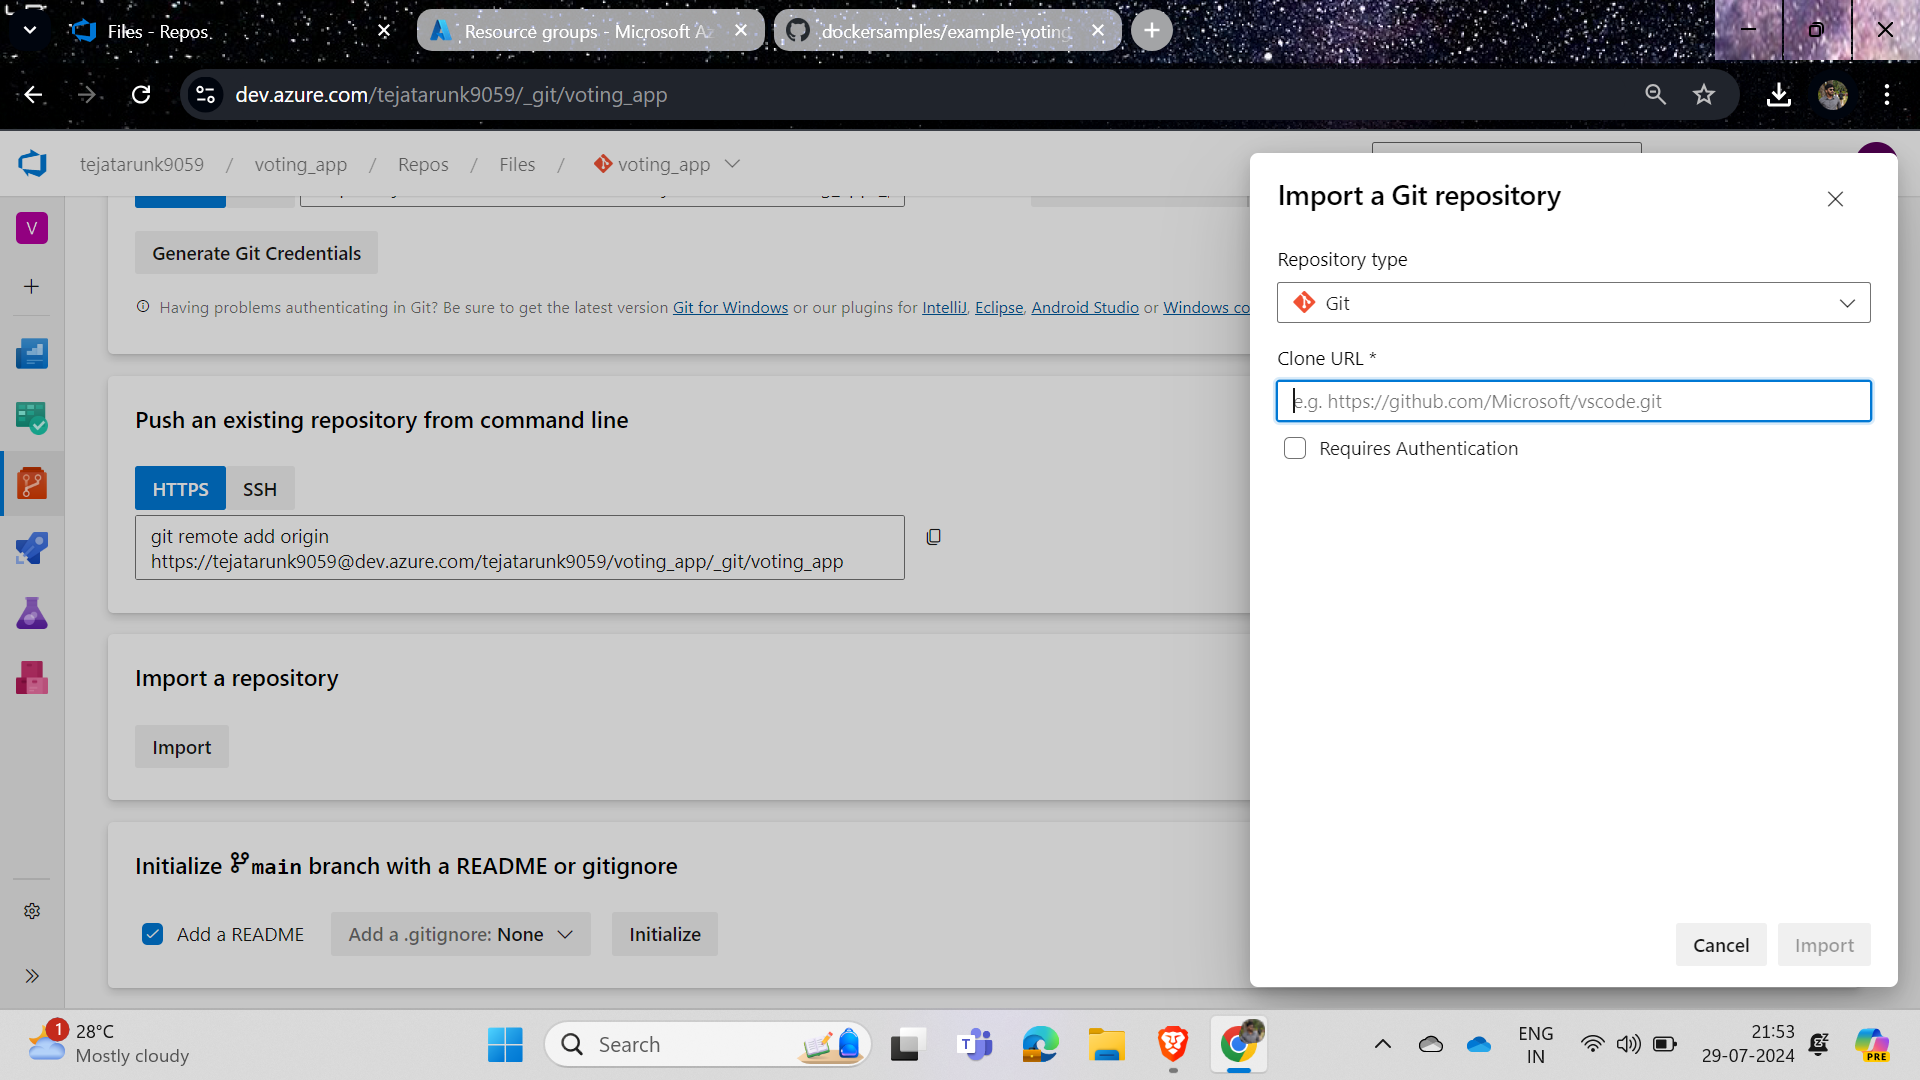
Click on the project you created in Azure DevOps, find and click the repos logo, then in the "Import a Git repo" section, paste the URL you copied from the Docker example.
The repo link : https://github.com/dockersamples/example-voting-app.git
And then you will see the repo cloning into your Azure DevOps account repos.
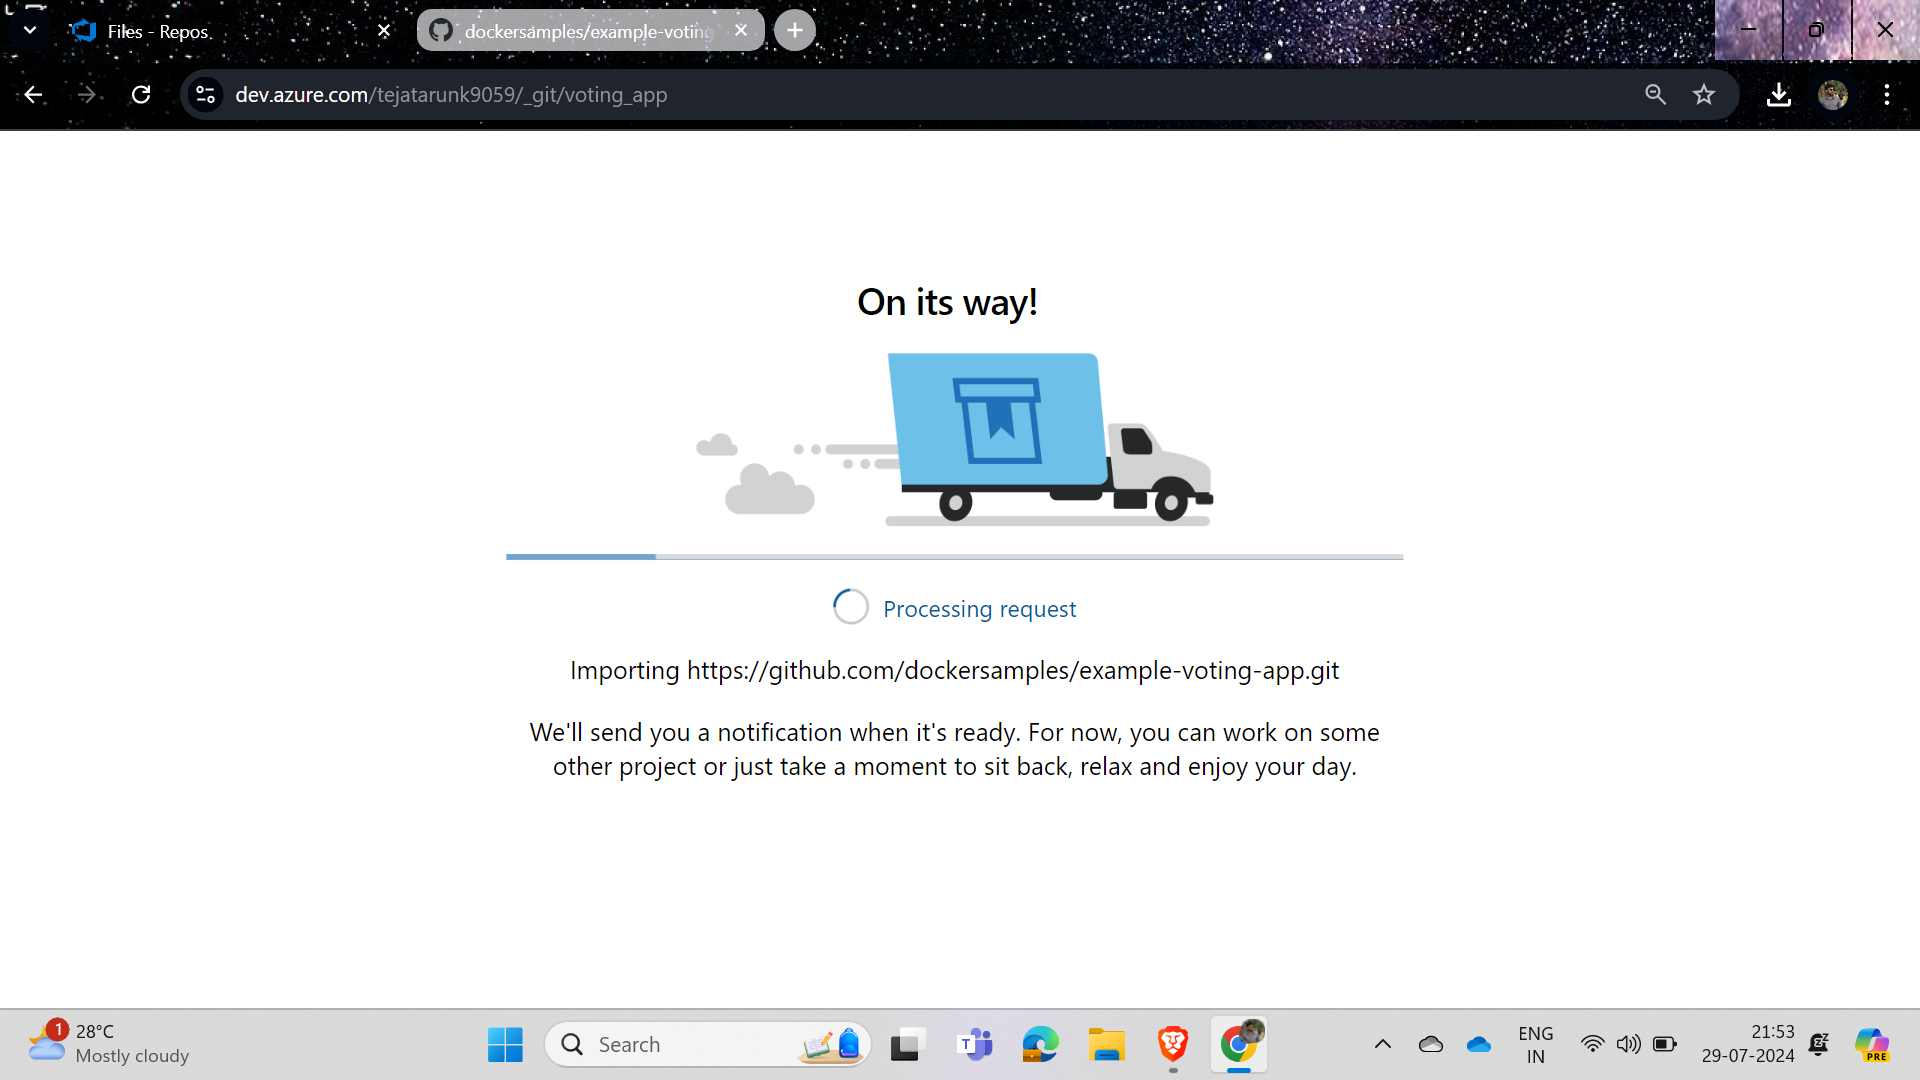
Set the main branch as the default branch because we need to write the pipeline for it.
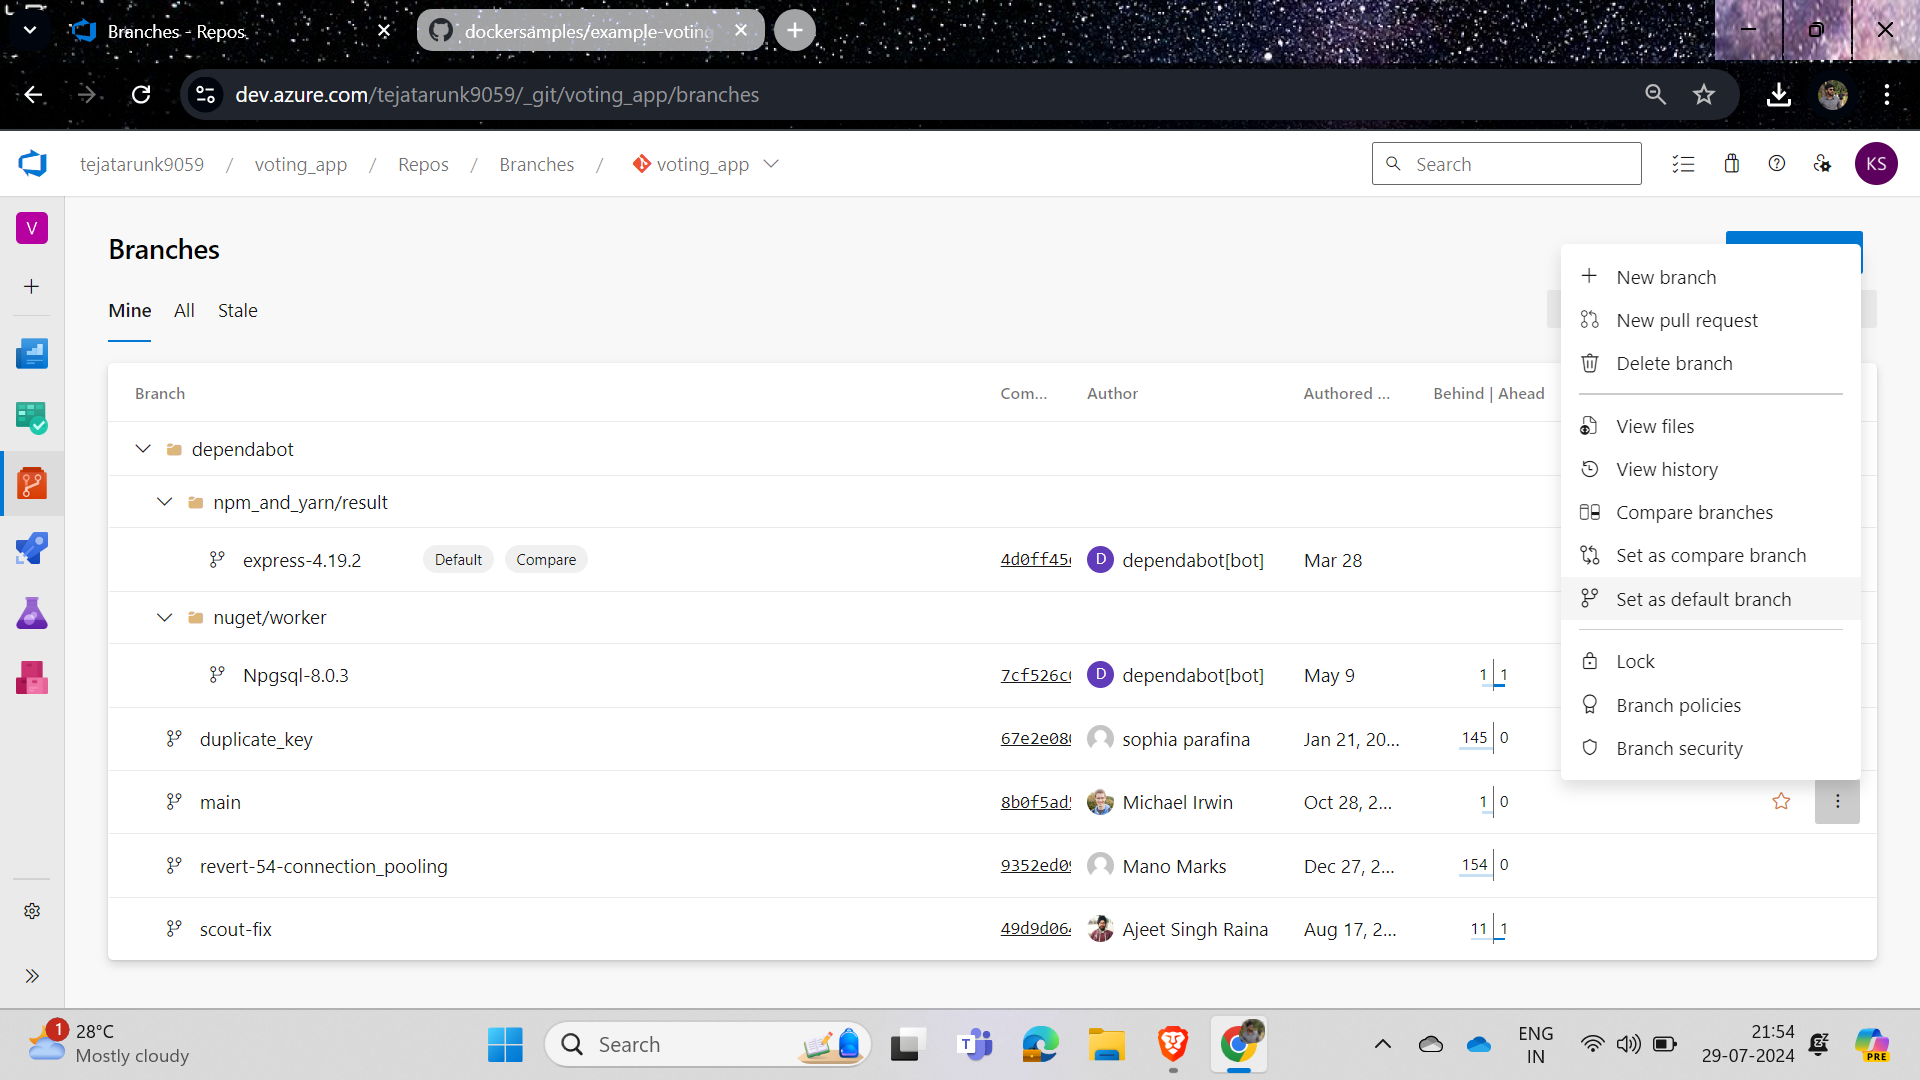
Now we need to create a container registry.
What is a container registry in Azure?
Azure Container Registry (ACR) integrates with Azure DevOps to manage Docker images. It enables secure, scalable storage, and automated image building and pushing. ACR supports seamless deployment to Azure Kubernetes Service (AKS) and other Azure services, enhancing continuous integration and continuous deployment (CI/CD) pipelines in Azure DevOps.
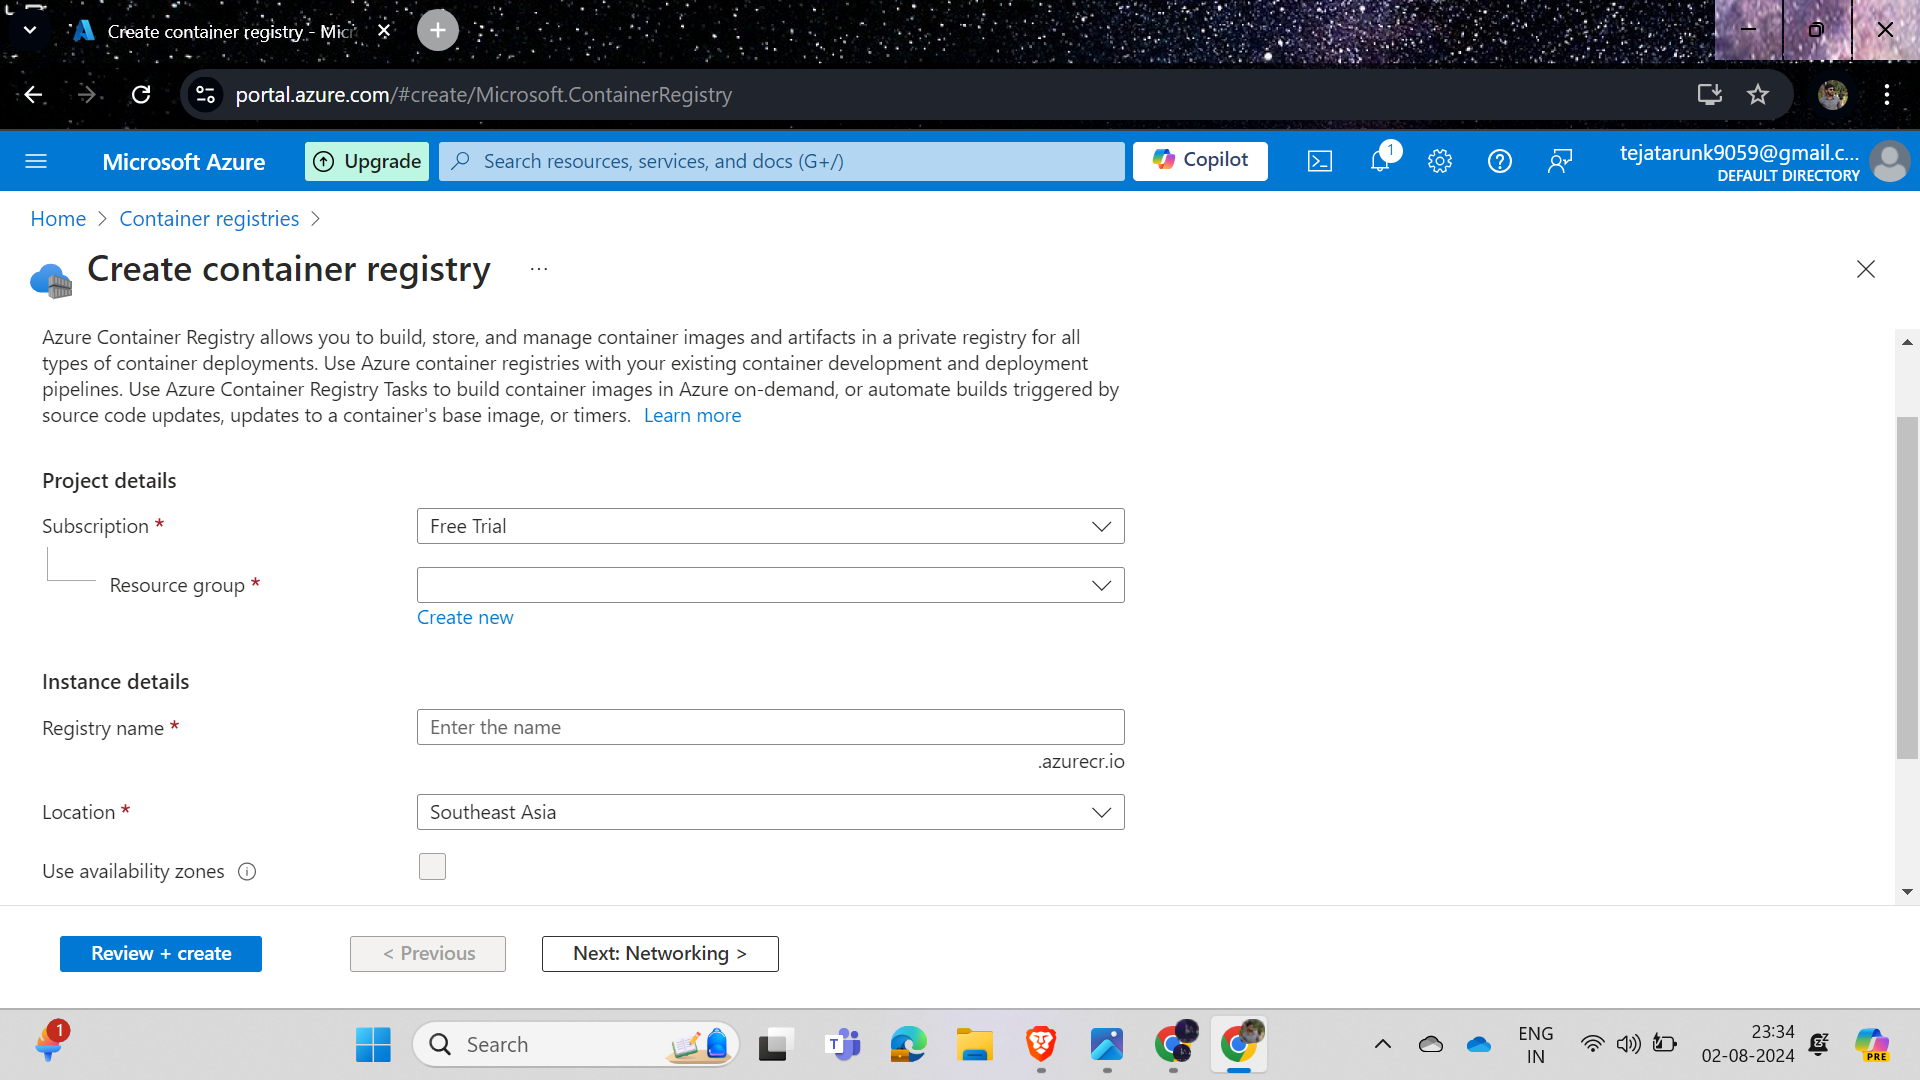
Simply provide the resource group for creating any resource in Azure, then specify the registry name and location according to your needs.
Now we will create a pipeline.
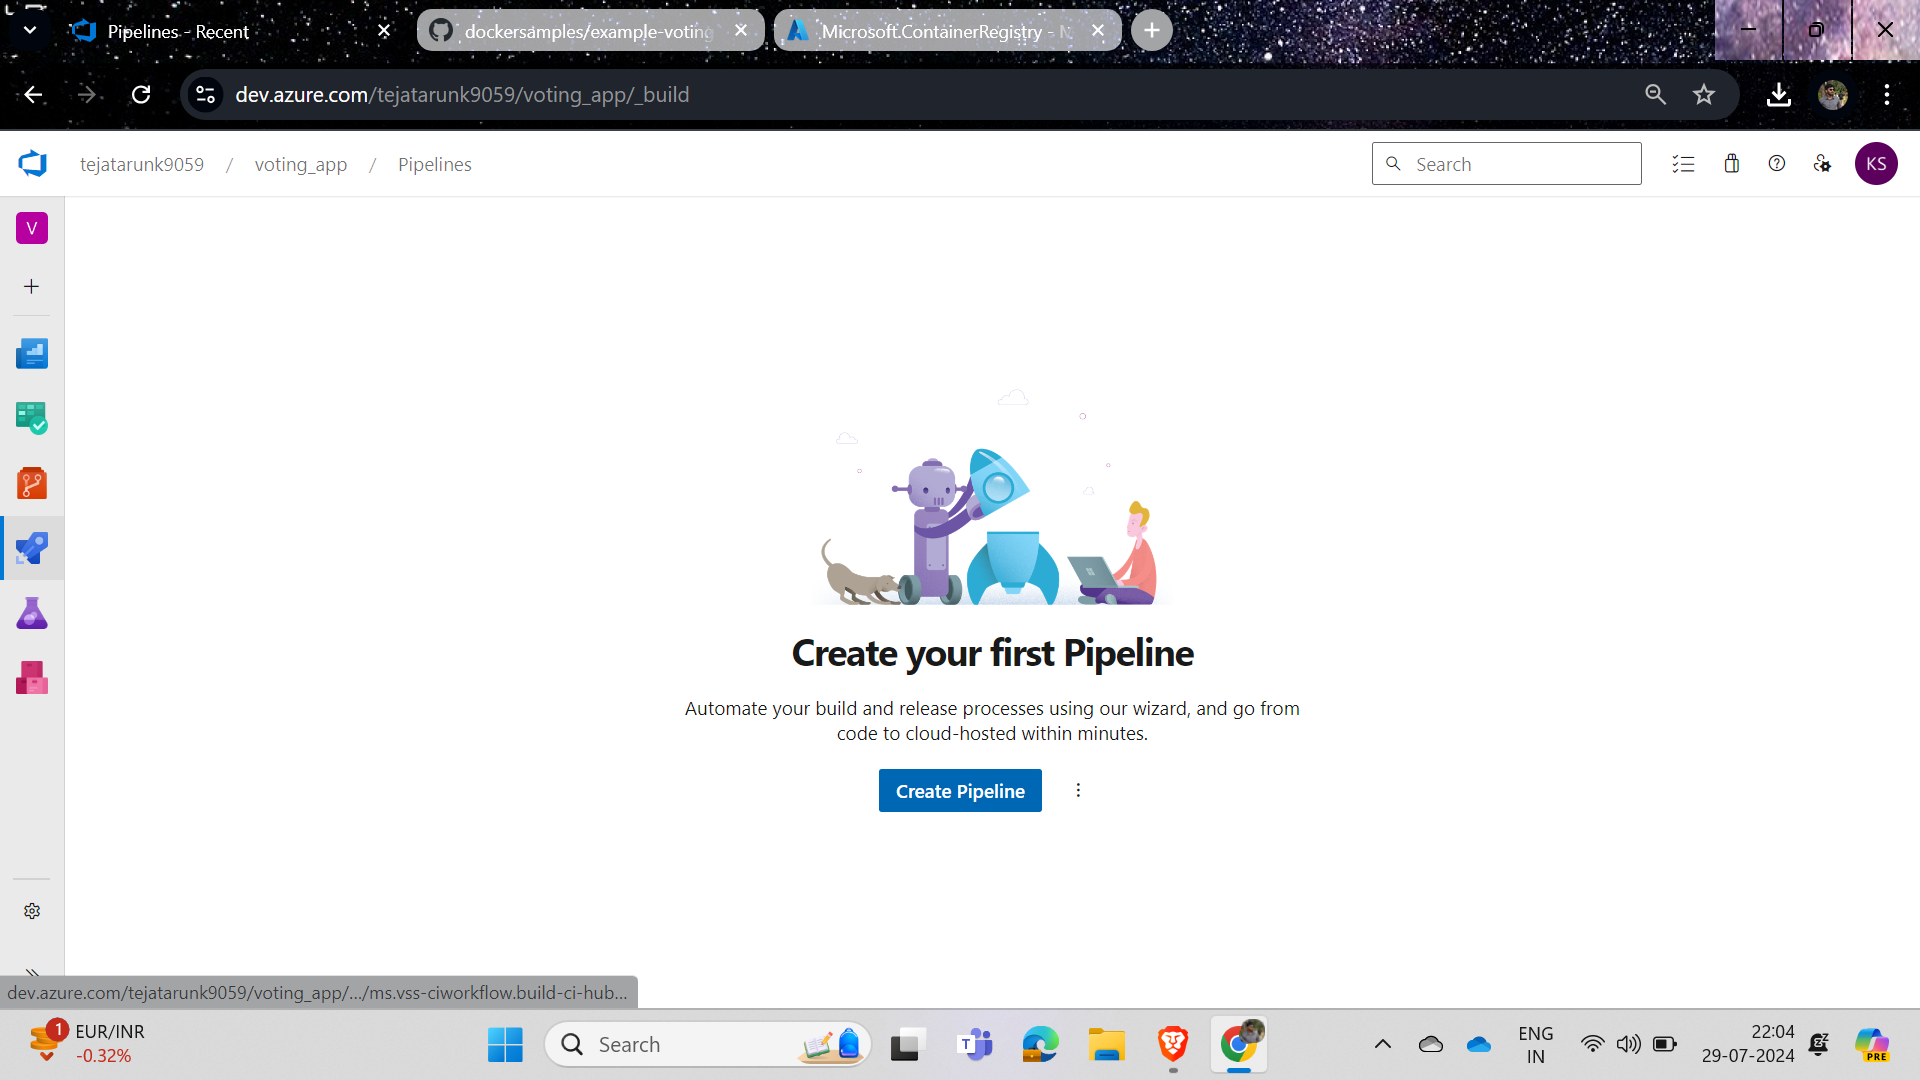
On the left panel, you will see a rocket symbol; right-click on it, select "Create a pipeline," and then click on "Create pipeline."
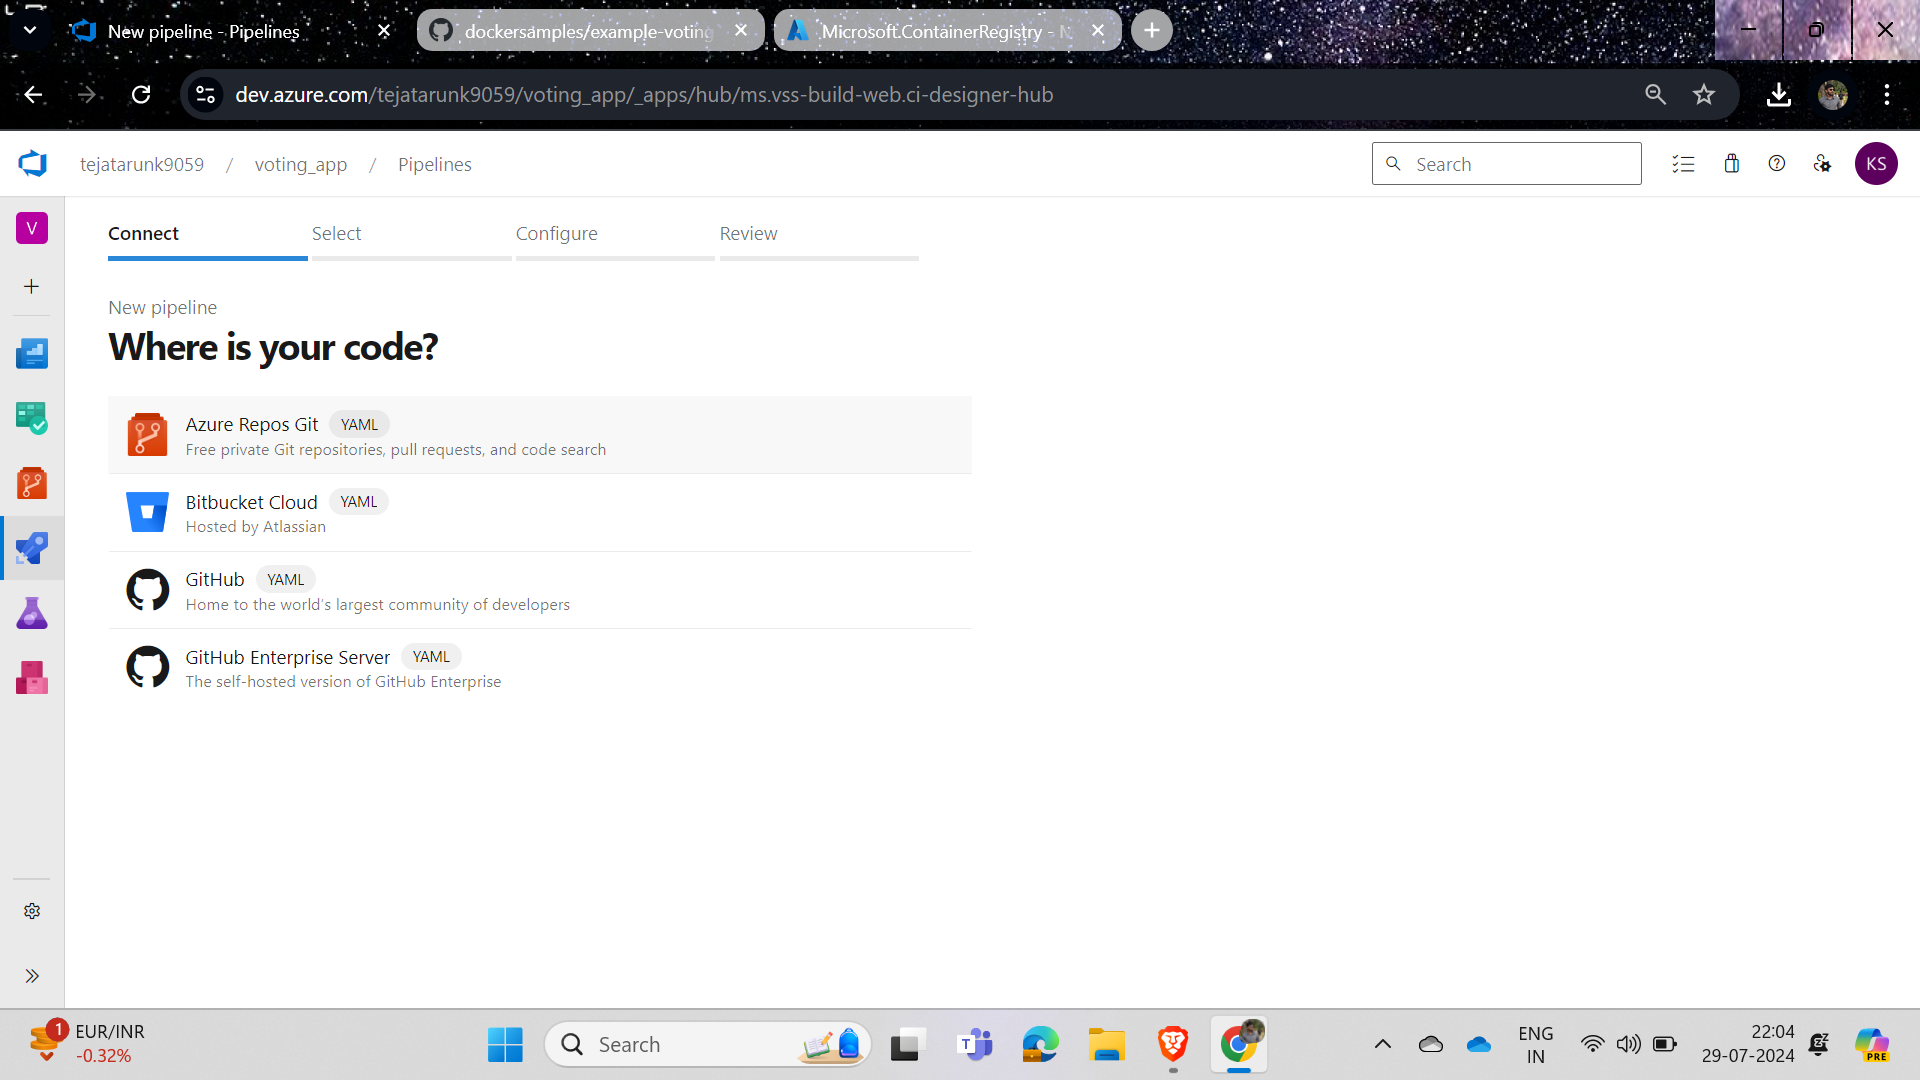
We are creating a pipeline for the Git repo, which is located in Azure Repos Git, so select that.
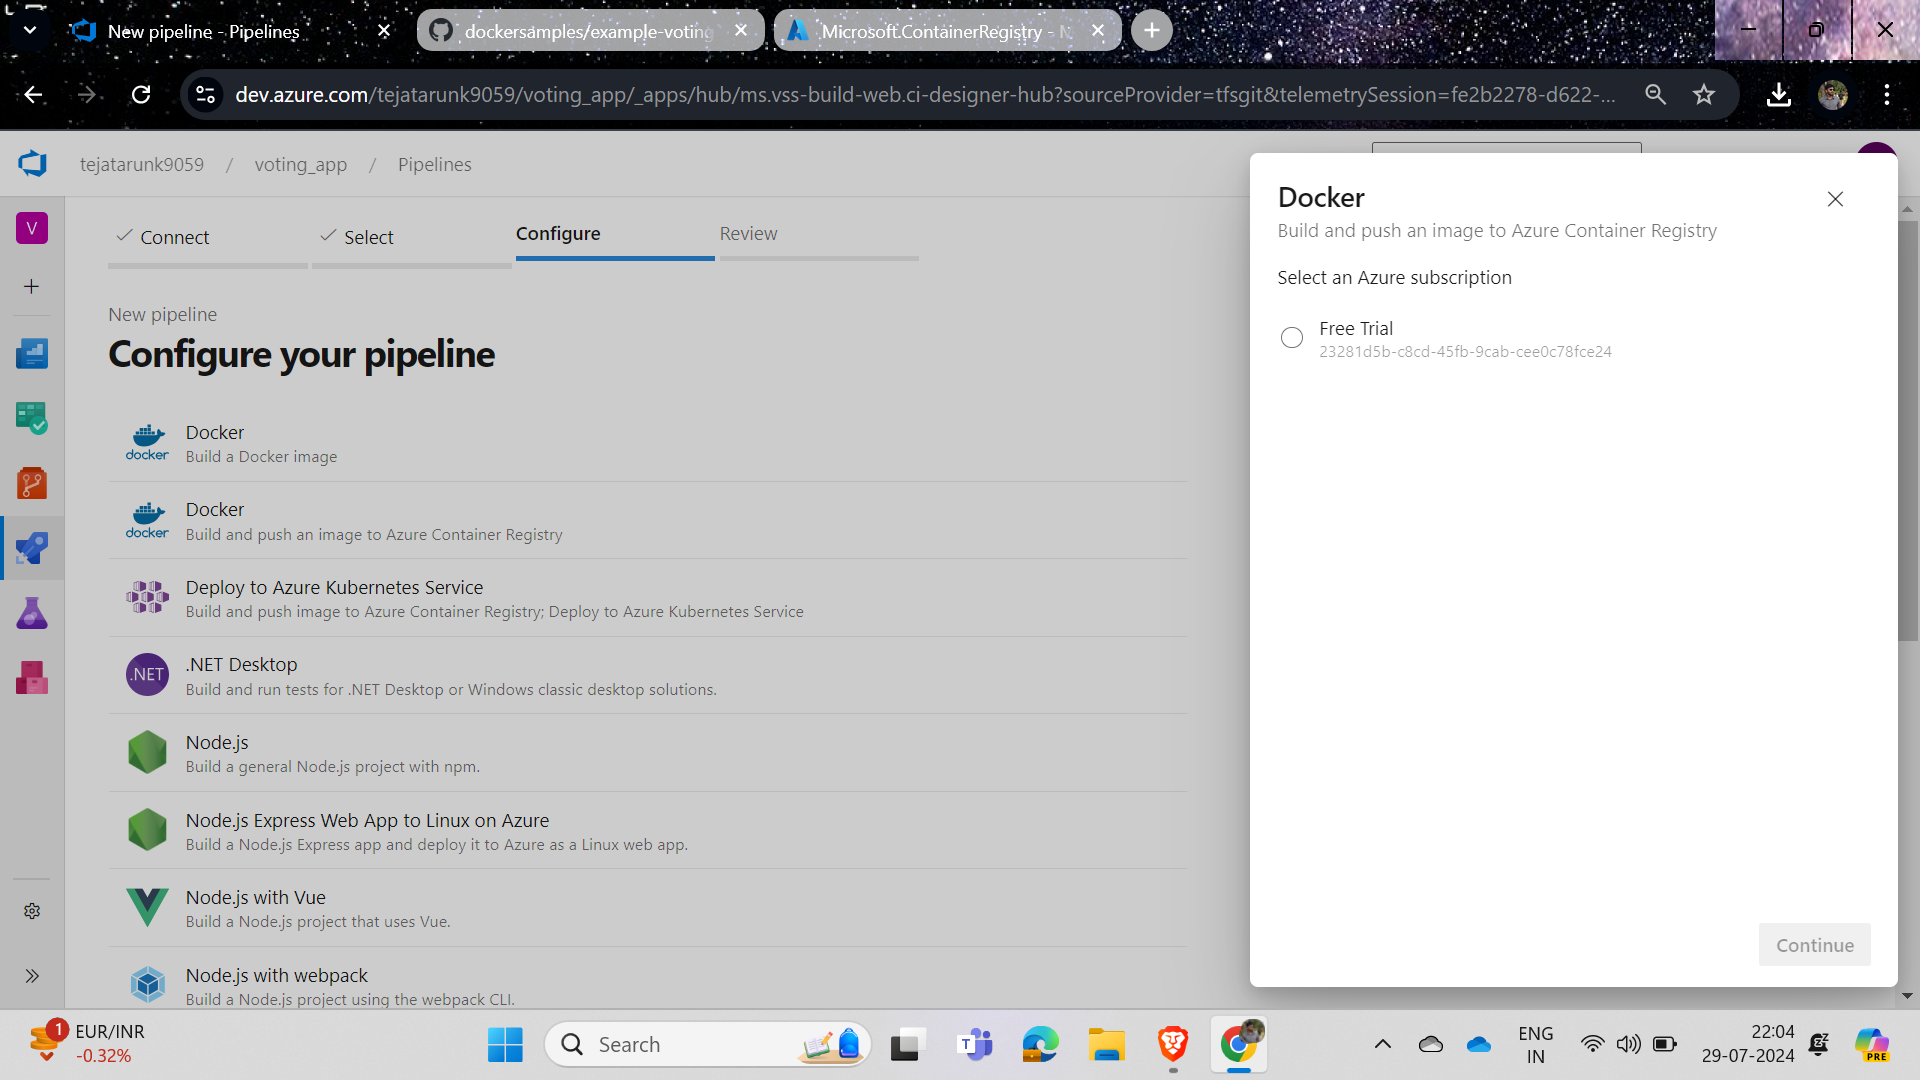
Then select the image for build and push, choose the appropriate Azure subscription (in my case, I will select the free trial), and proceed.
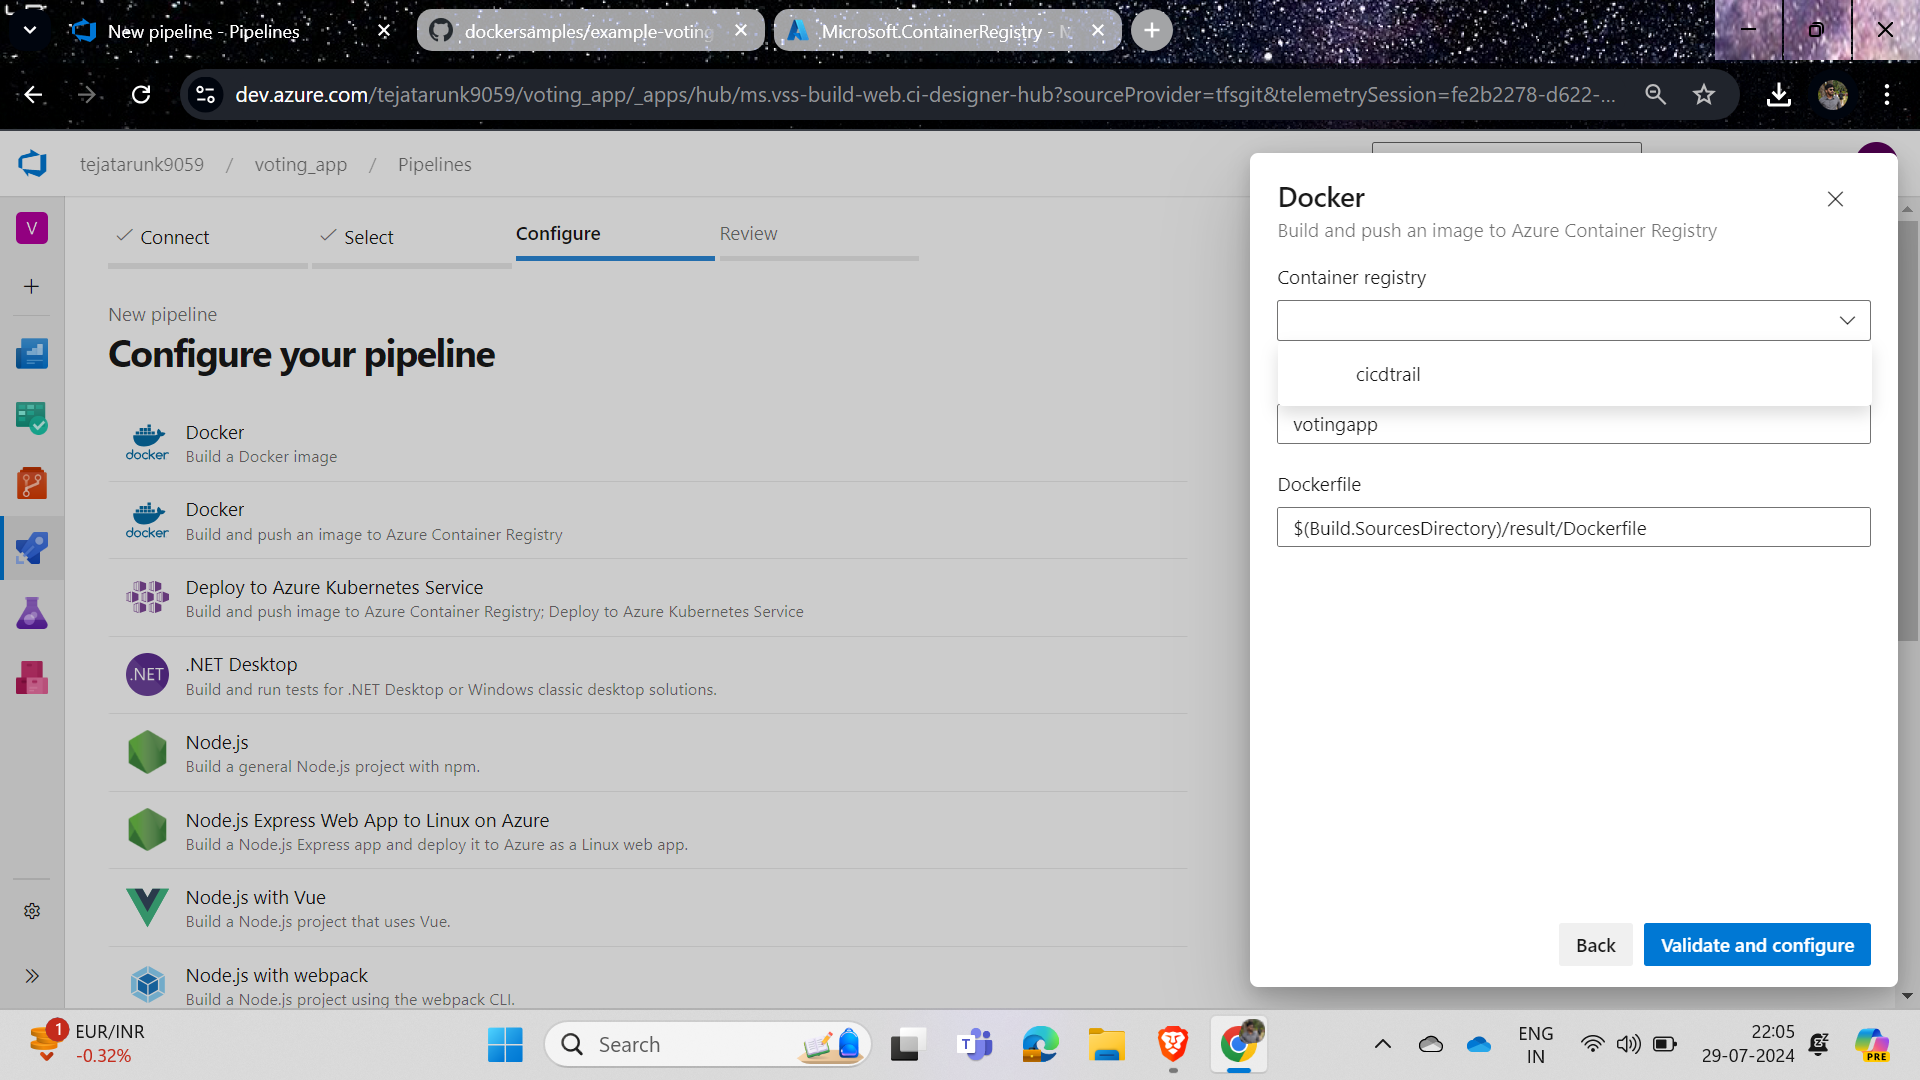
A few steps ago, we created a container registry; select that registry here, leave the other two options as default, and click on validate and configure.
After the successful setup, you will be redirected to the image below.
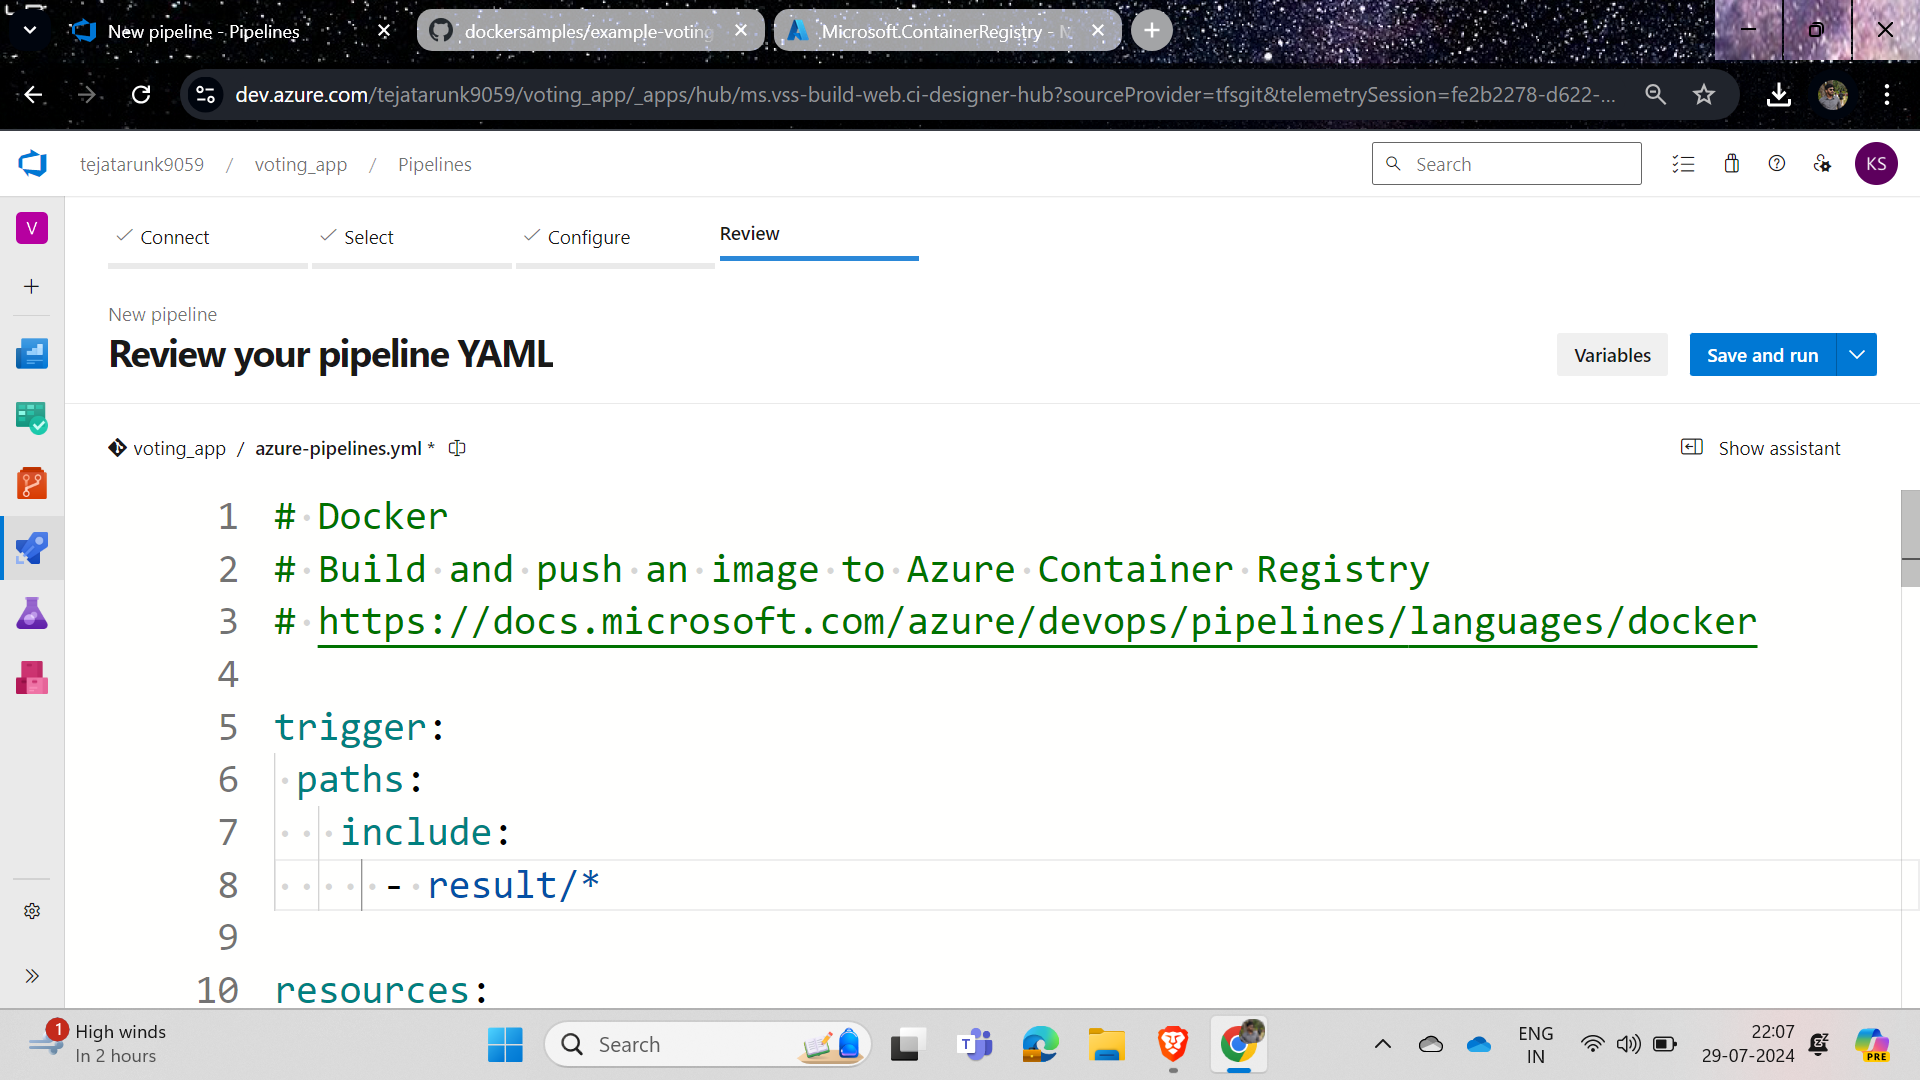
After you are redirected, under the trigger, you will find "main"; if a project has three different applications, you need to write a pipeline for each one, so under the trigger, choose the path of the application you are writing for and include that path, for example, if writing for the results application, include the results path.
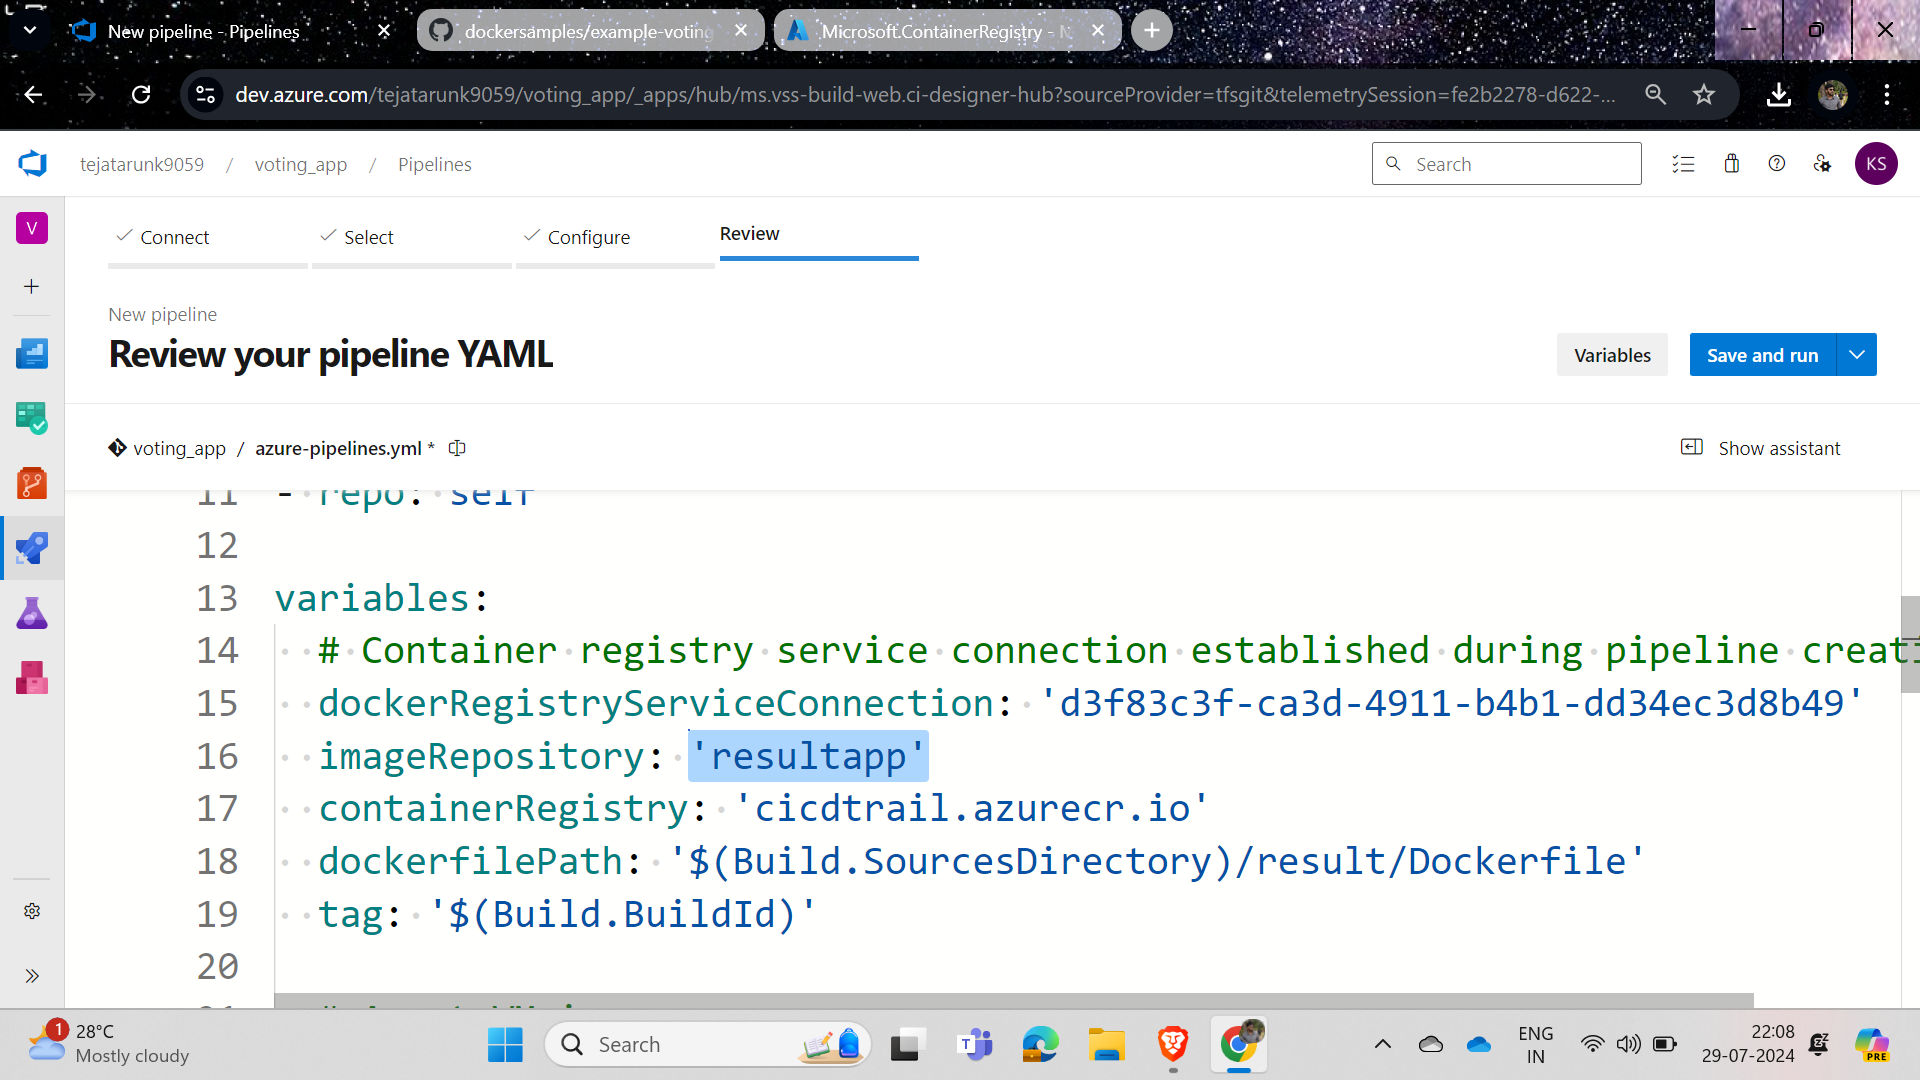
Now, in the image repository tag, if we are writing for the result application, edit it to "result app"; if writing for the worker application, edit it to "worker app."
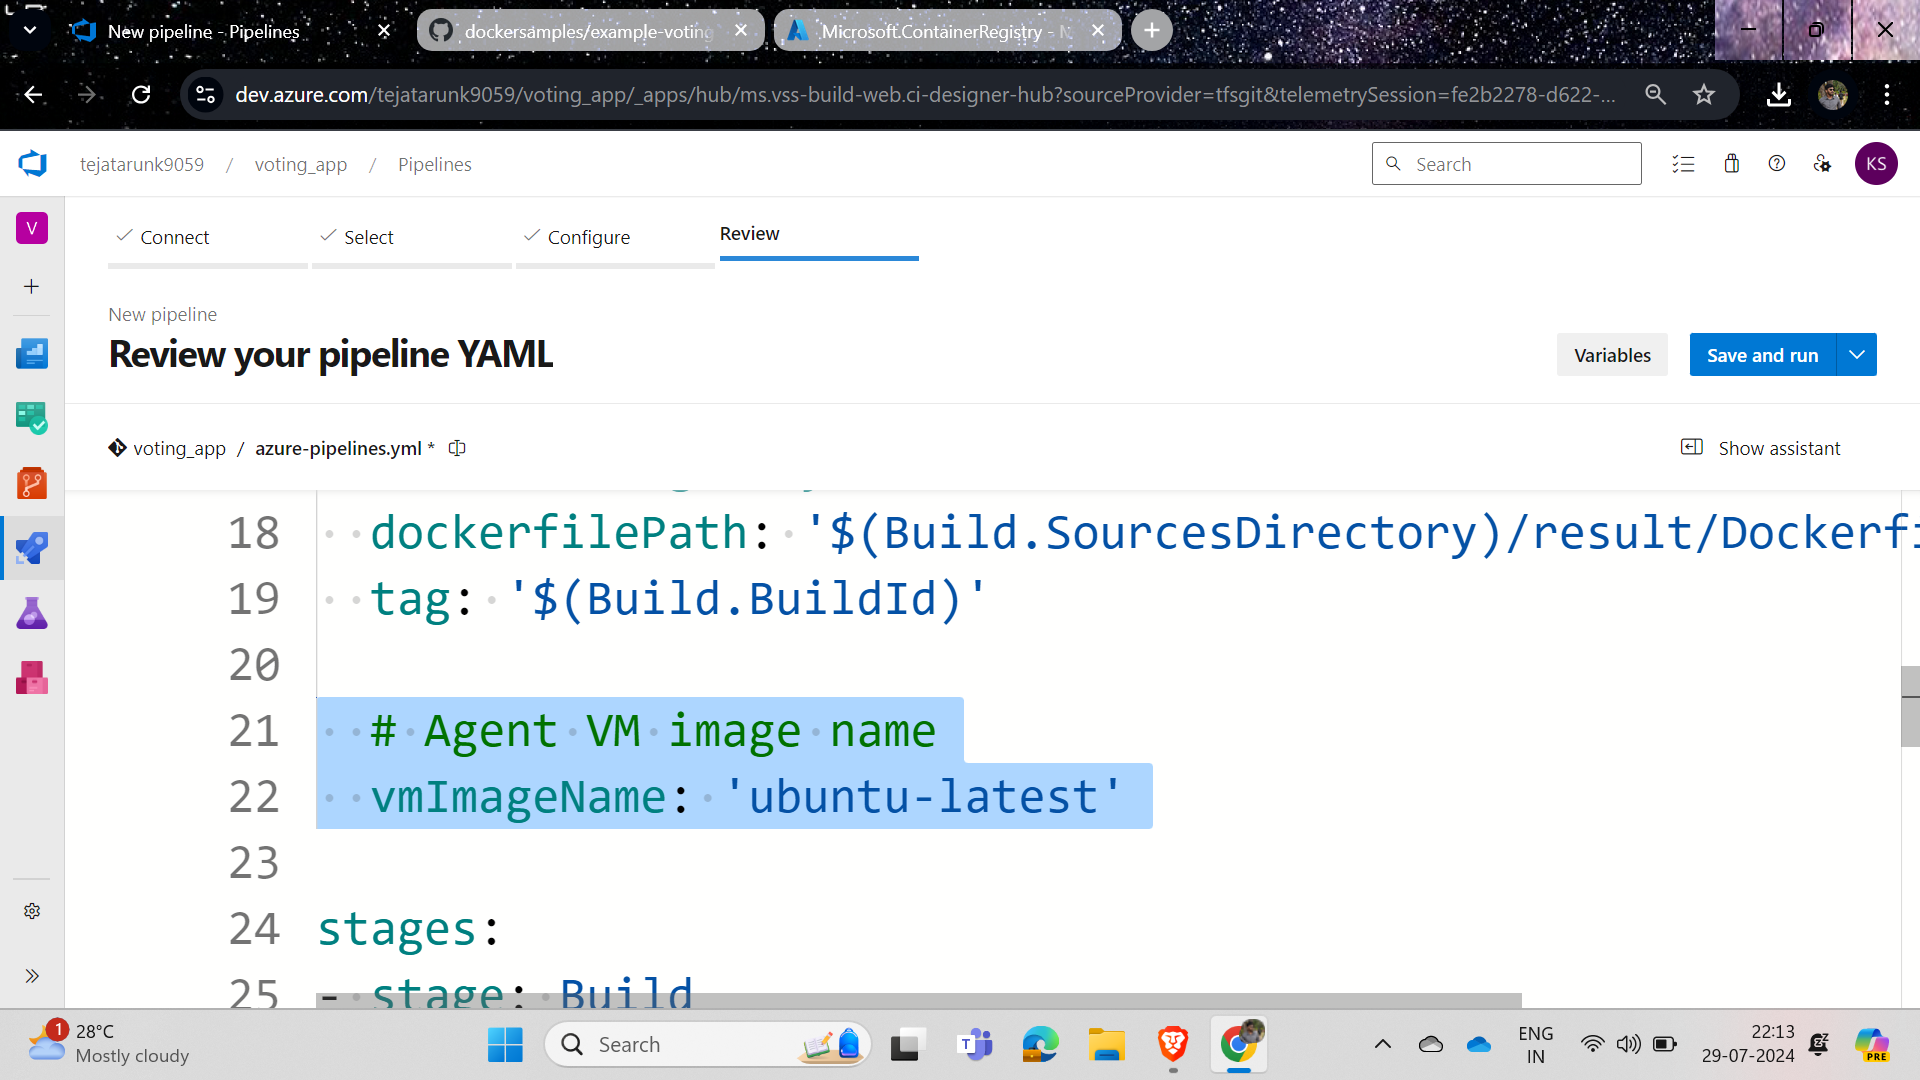
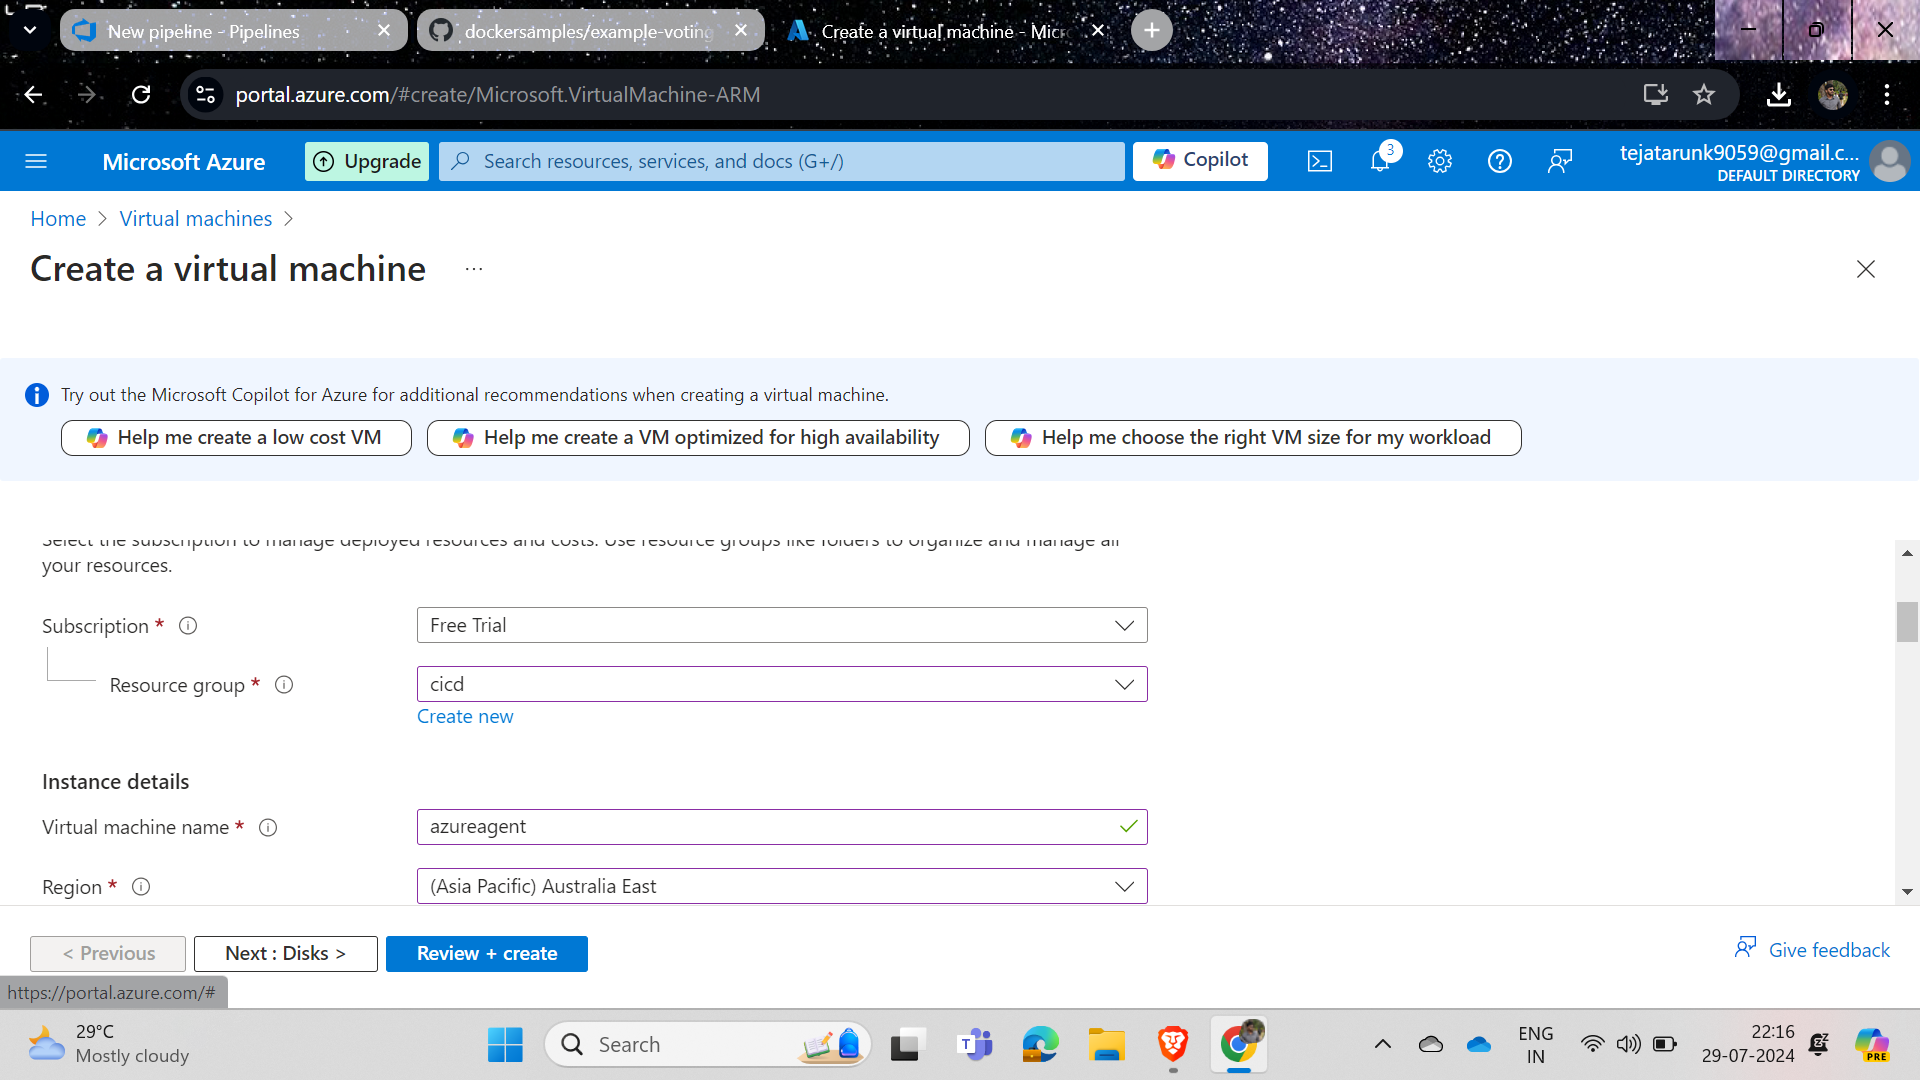
Now we need to run this pipeline on an Azure VM, so edit it with the pool tag, create a VM in Azure, and set the pool and name tags accordingly; for example, if your VM is named "azure agent," use that name.
pool:
name: 'azureagent'
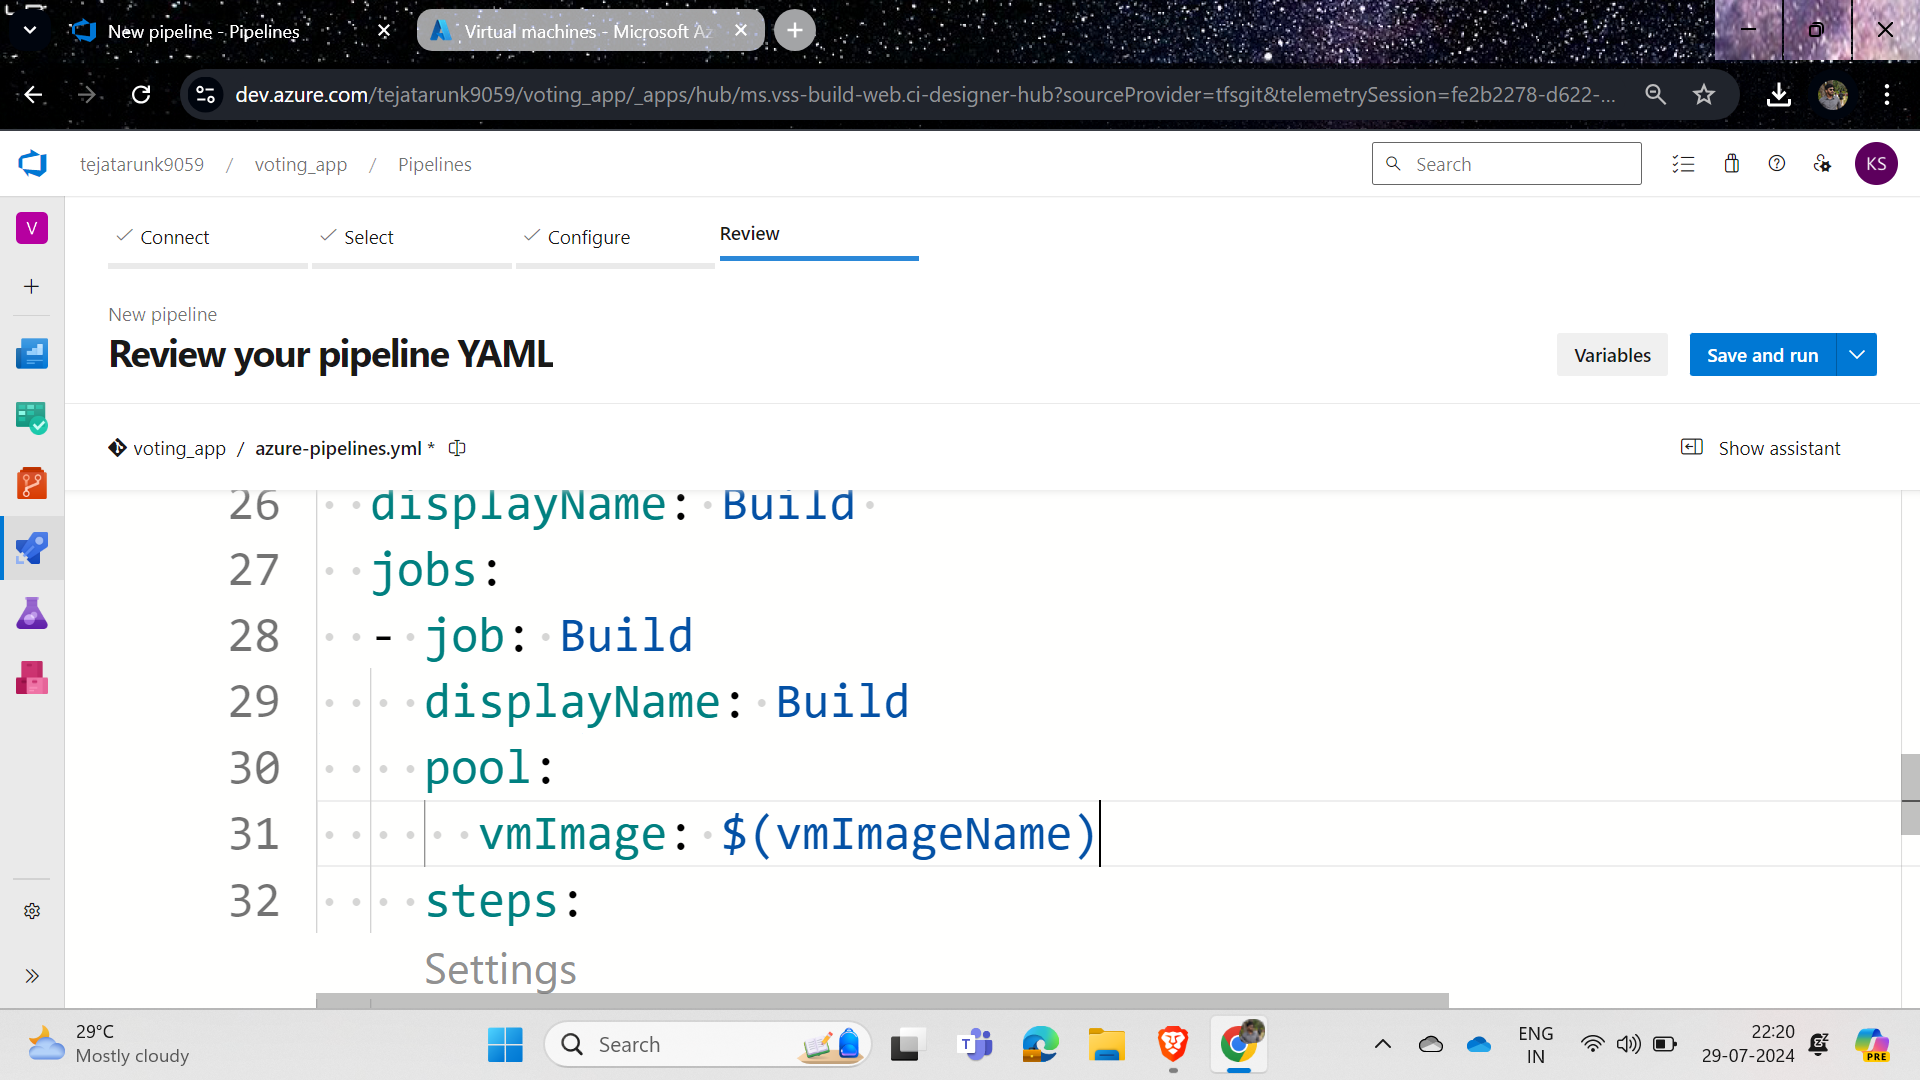
Remove the pool in the code because we are using a VM from Azure.
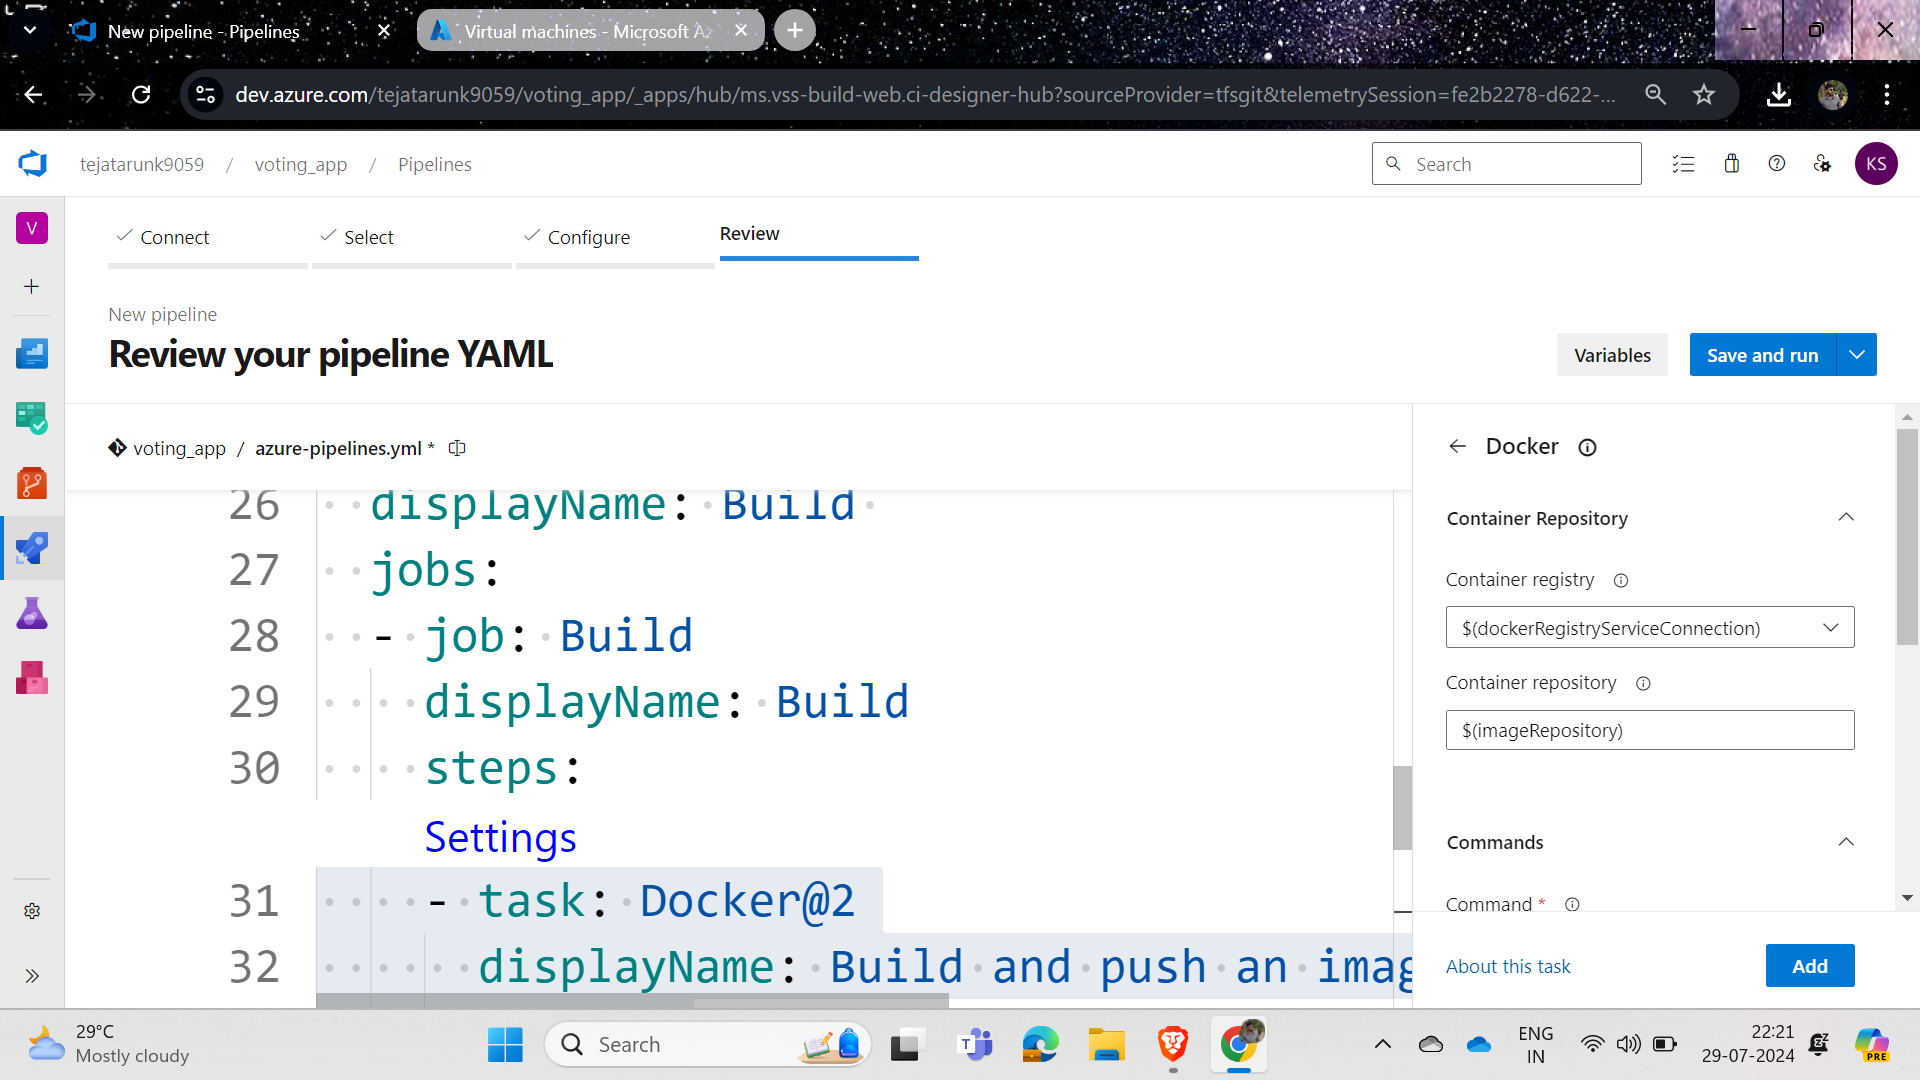
In the display name, you will see "build and push," but I will build once and push separately; you can choose to build and push together or build once and push once, and then click on the settings tab.
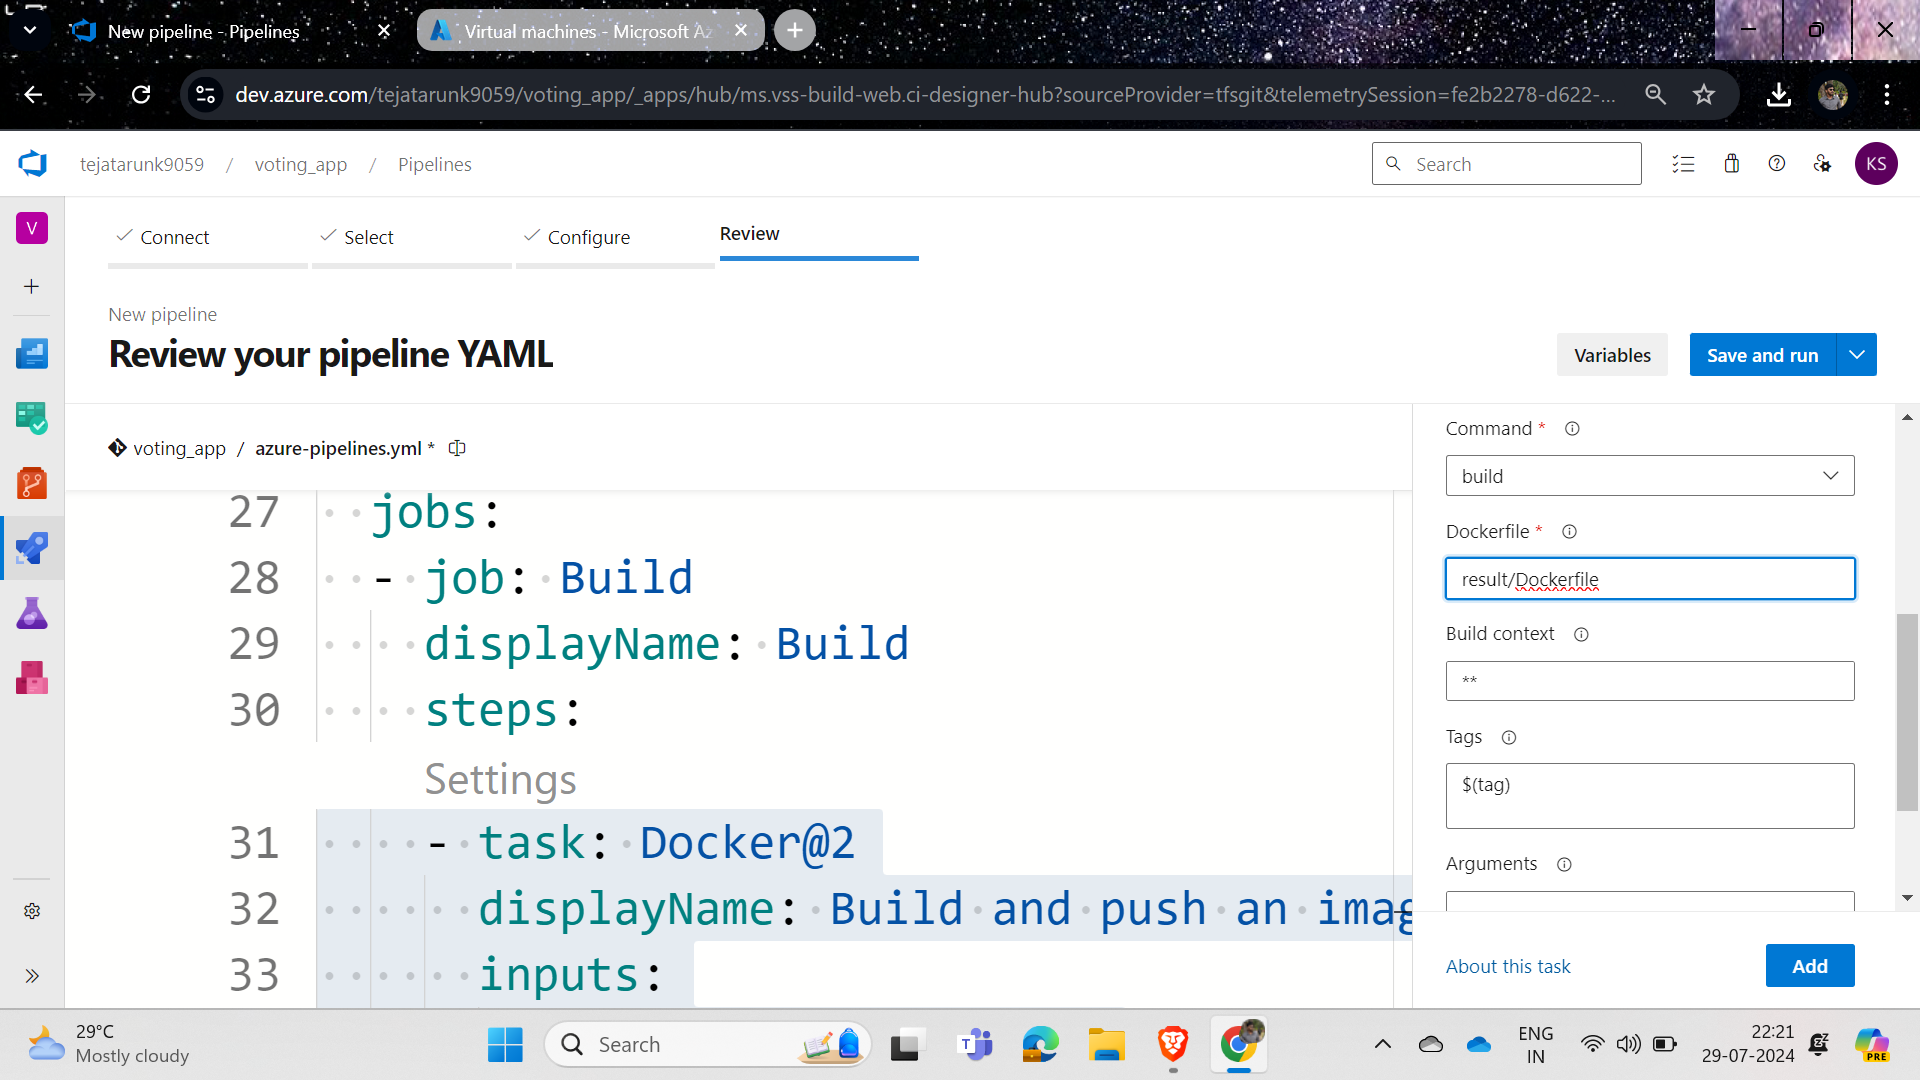
In my case, I am just performing the build, but you can do it as per your requirement, so I will select the build and, in the Docker file tab, edit it to "result" and click on add.Same do for push also as shown in the image
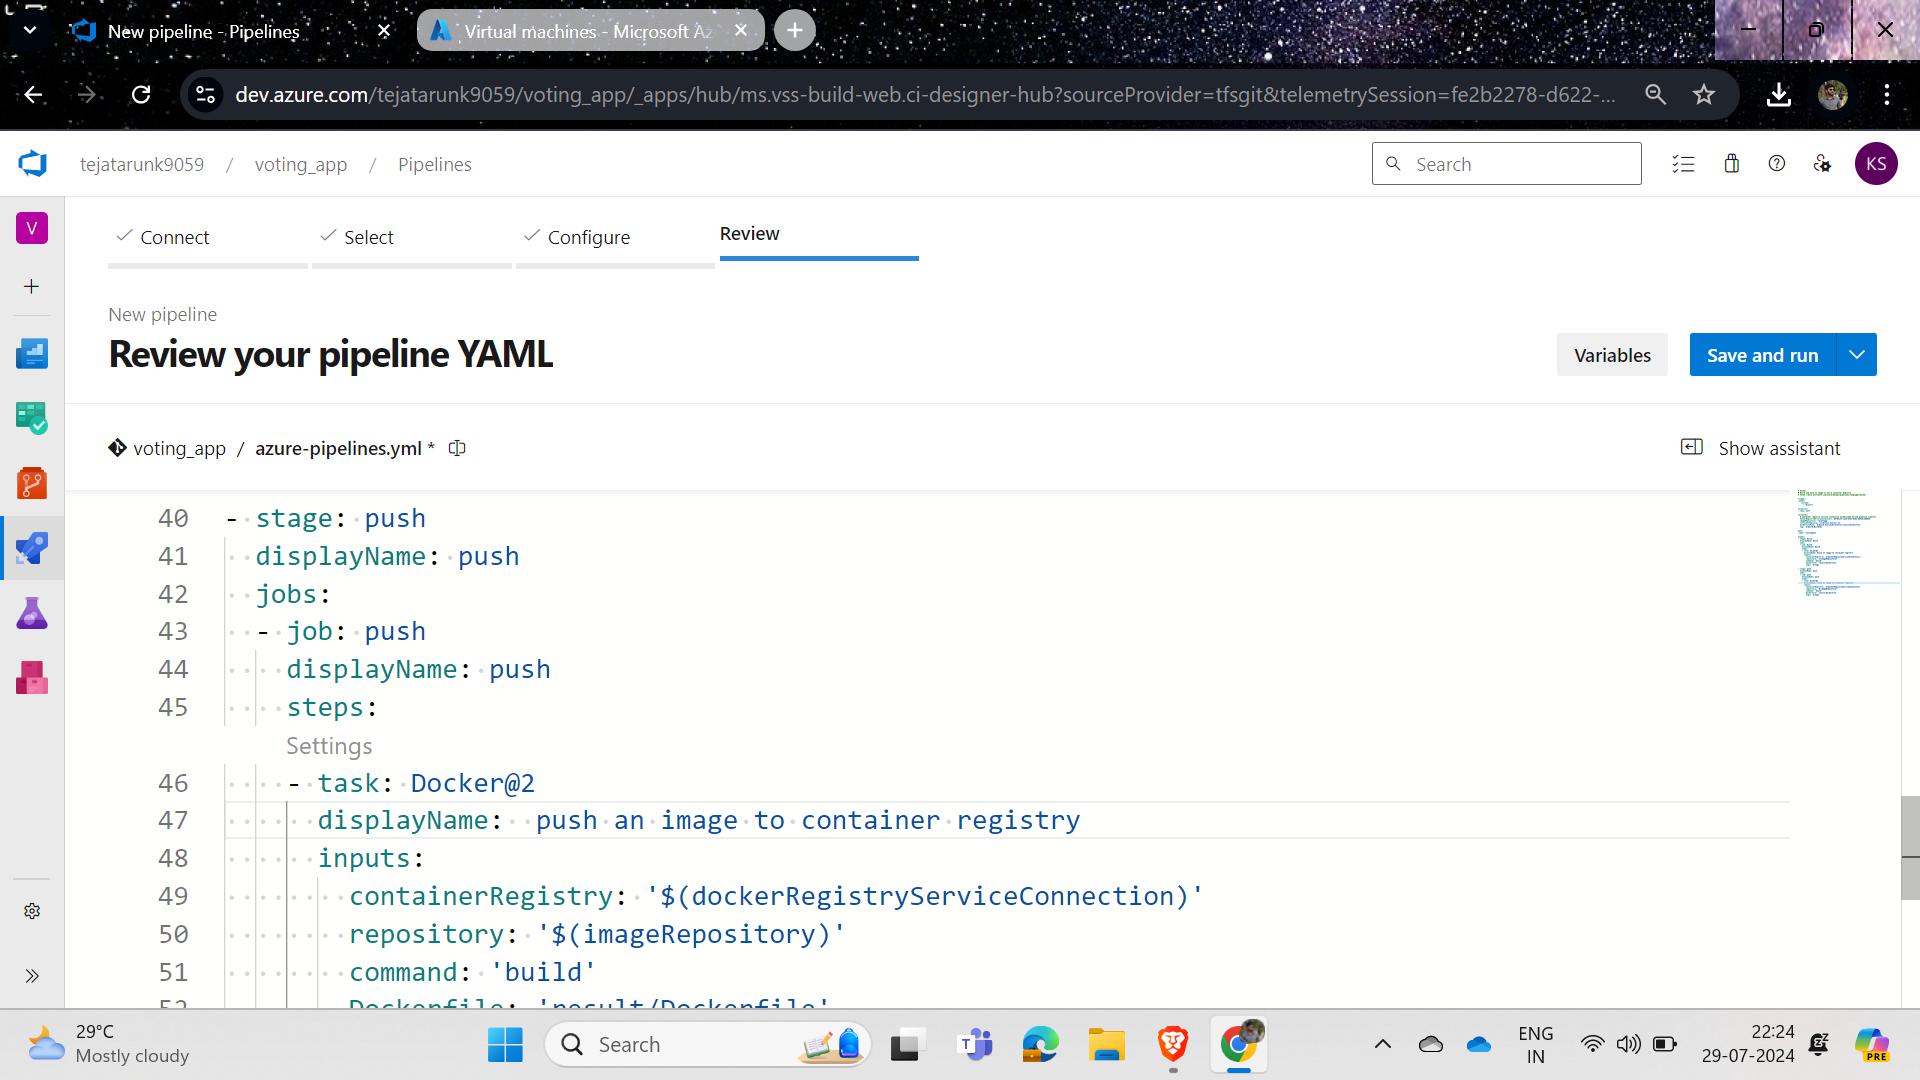
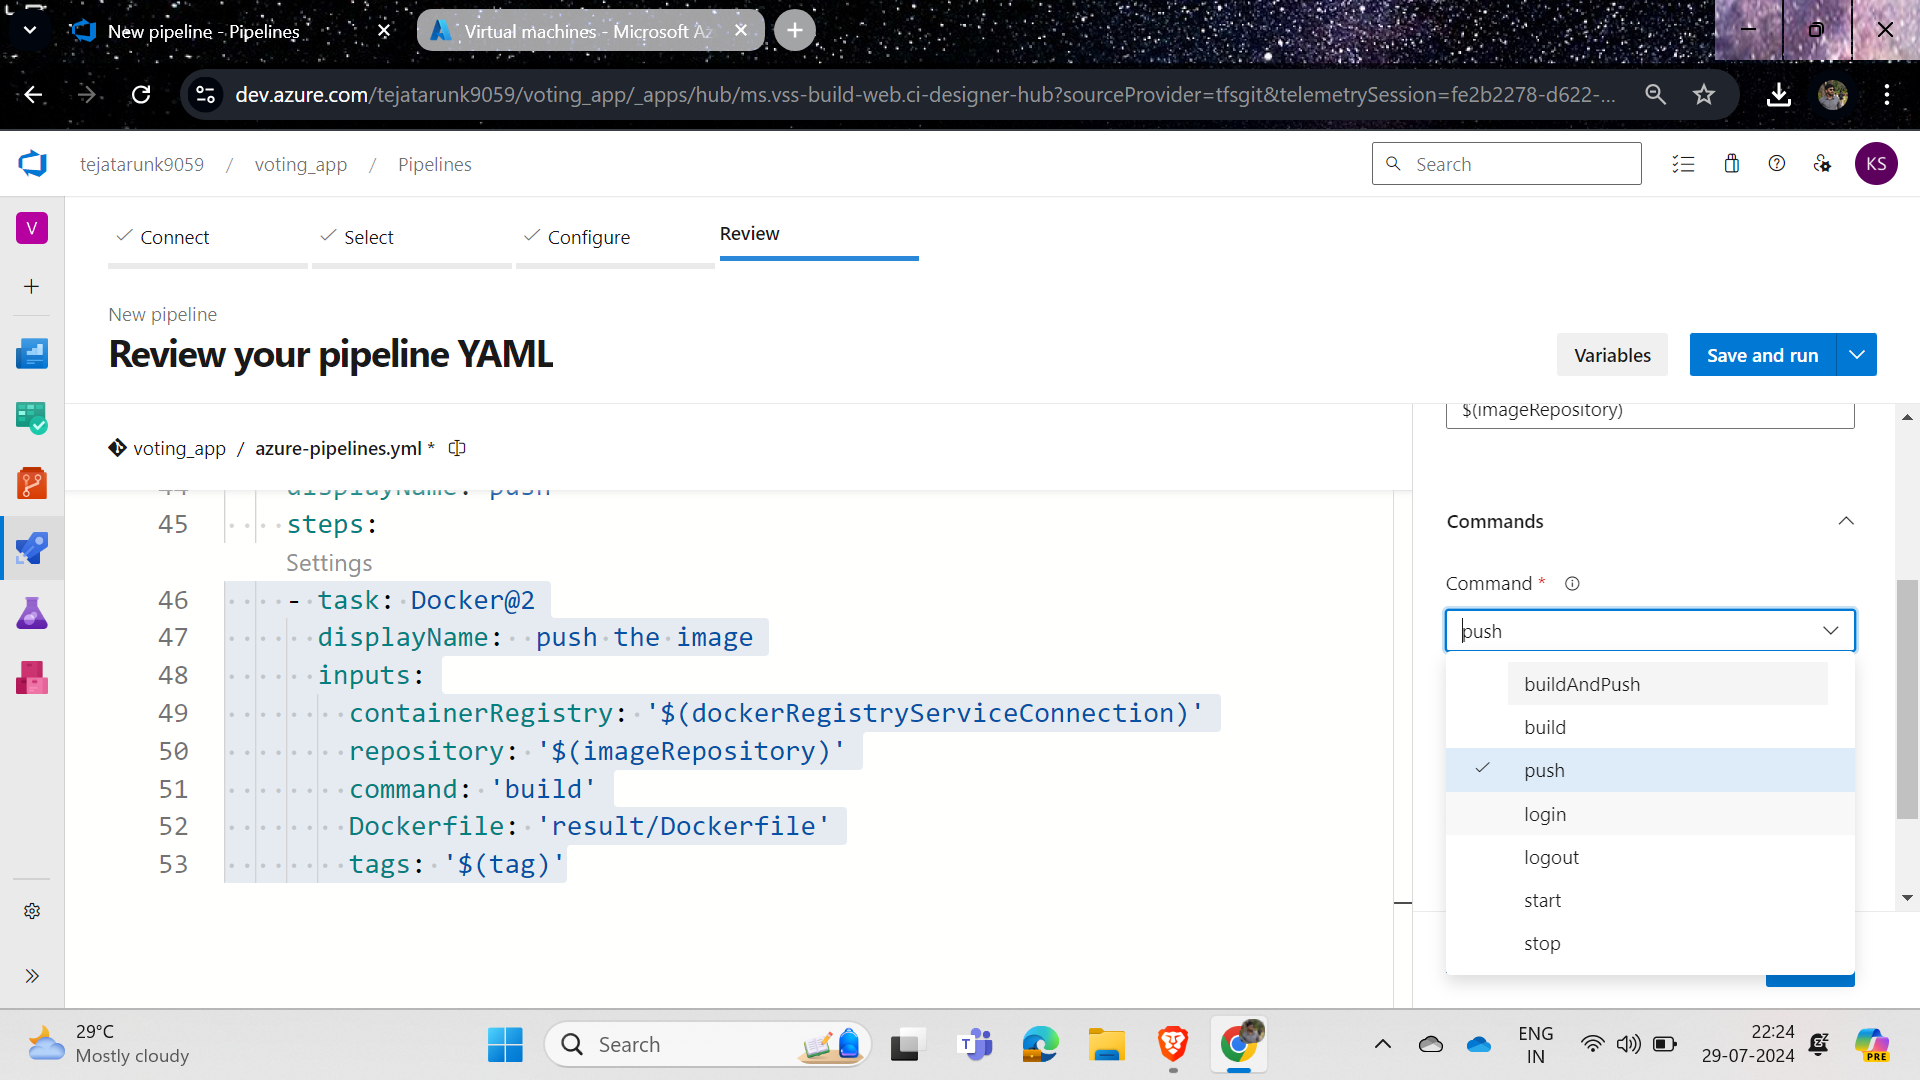
After successfully writing the code, just click on save and run.
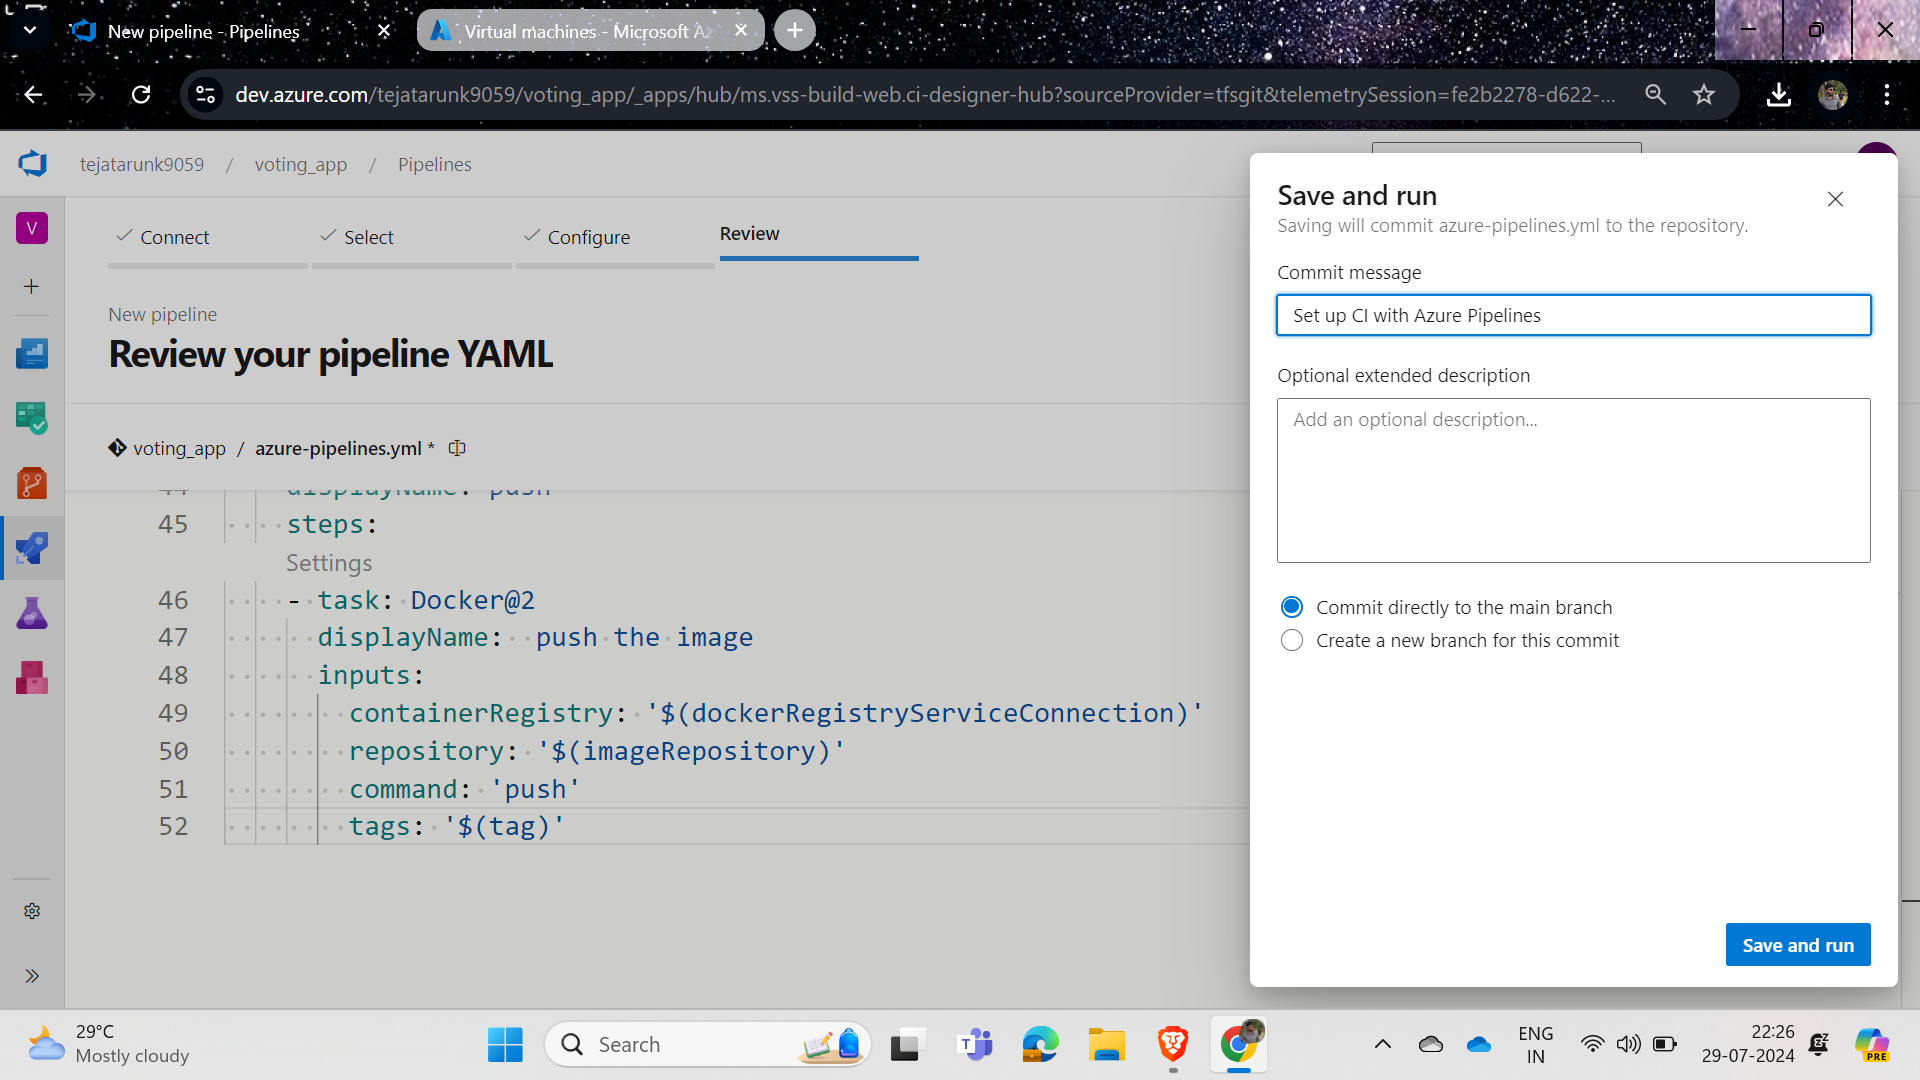
But you will get an error because you have not started the VM for running the pipeline.
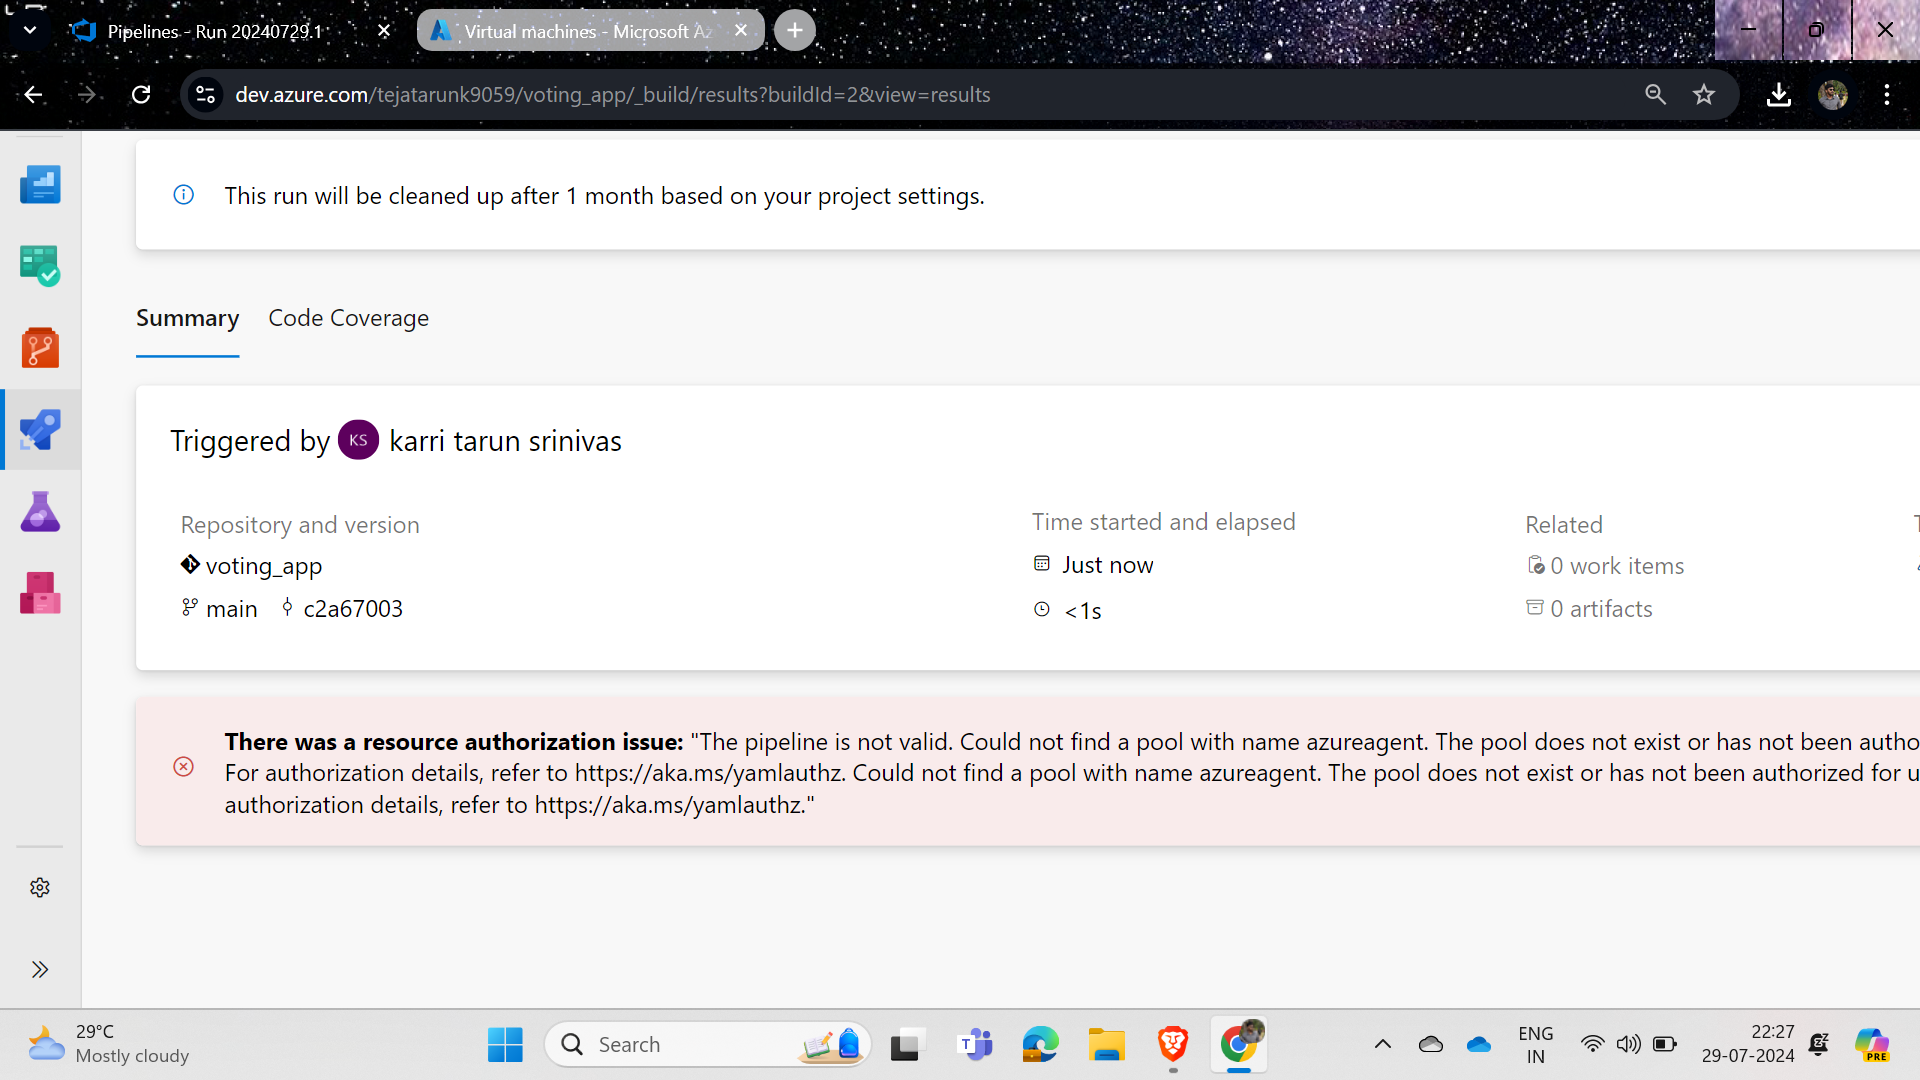
Now log in to your VM, install Docker, and run the YAML code to execute the pipeline, which you can find in the Azure DevOps documentation.
Now we need to create an agent to connect our VM to Azure DevOps, so follow the images below to create it.
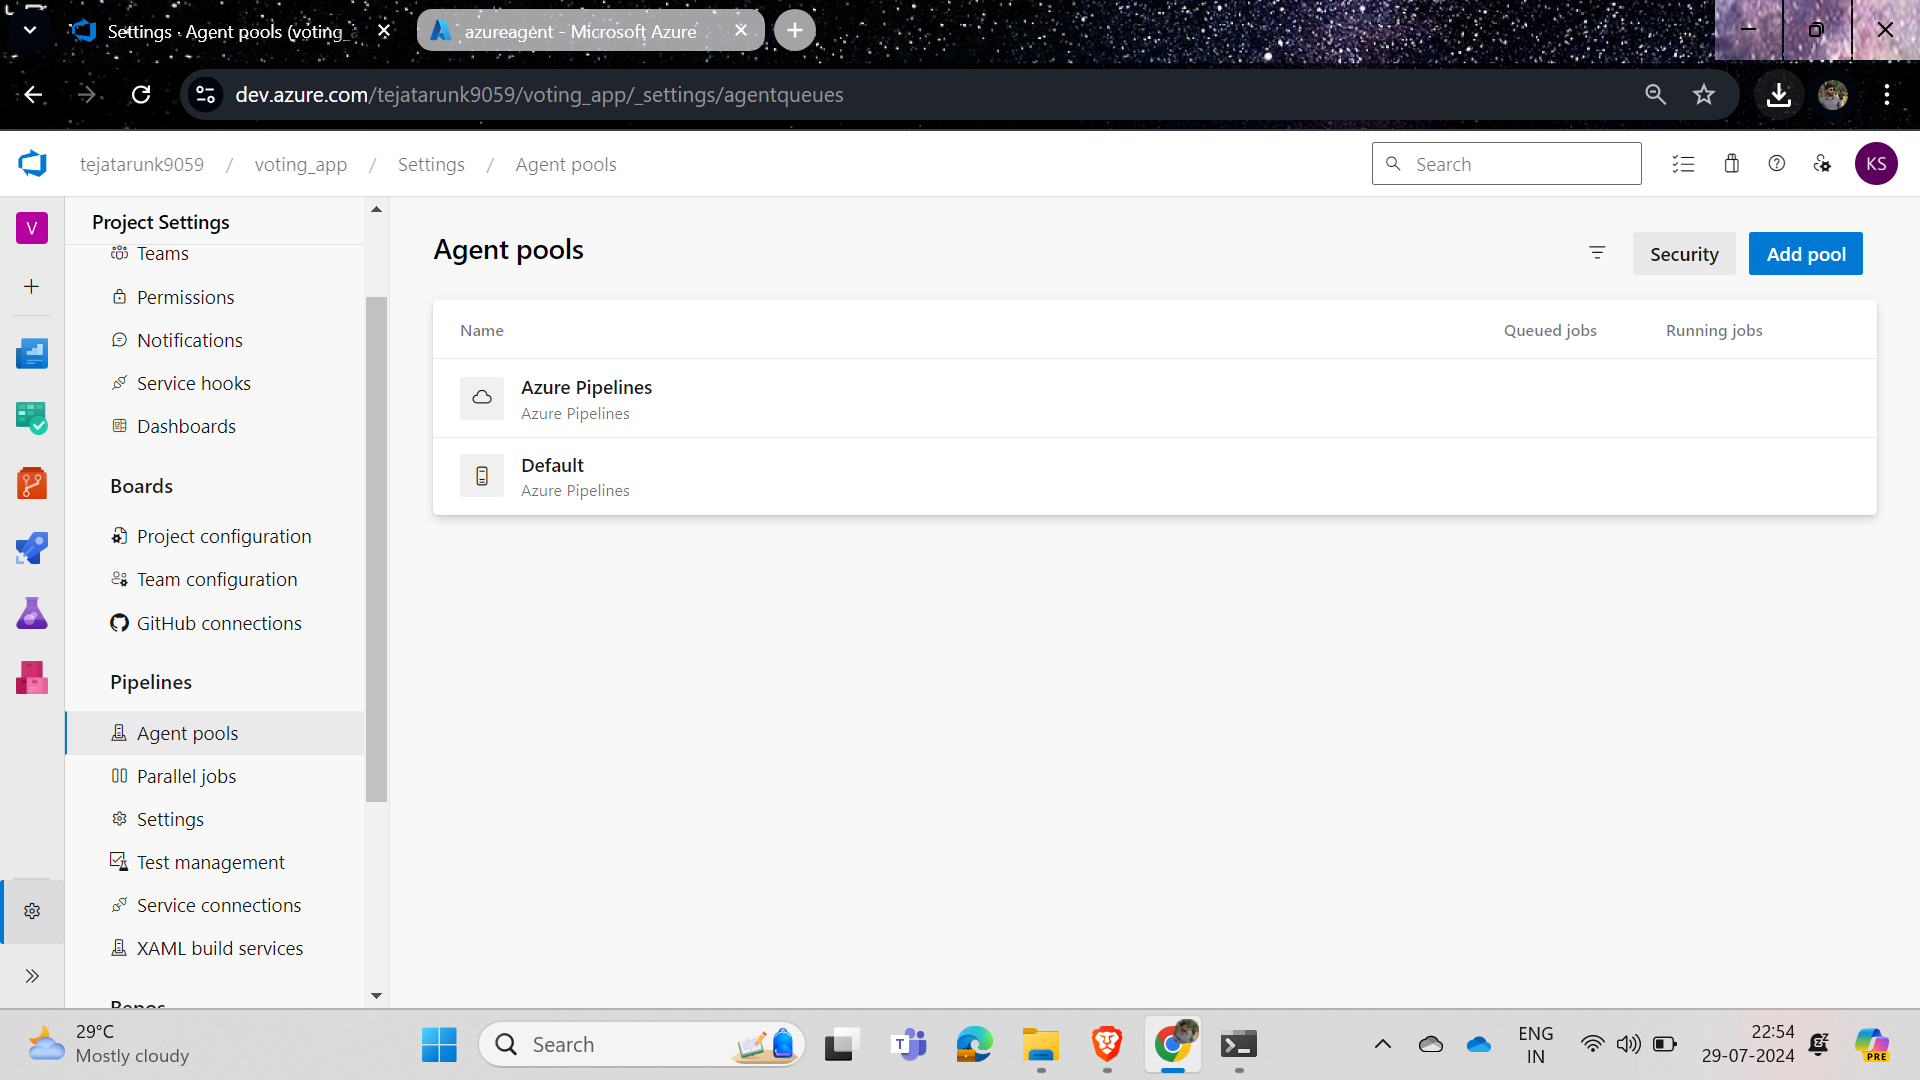
Go to settings, navigate to agent pools, and create a new agent by clicking on add pool.
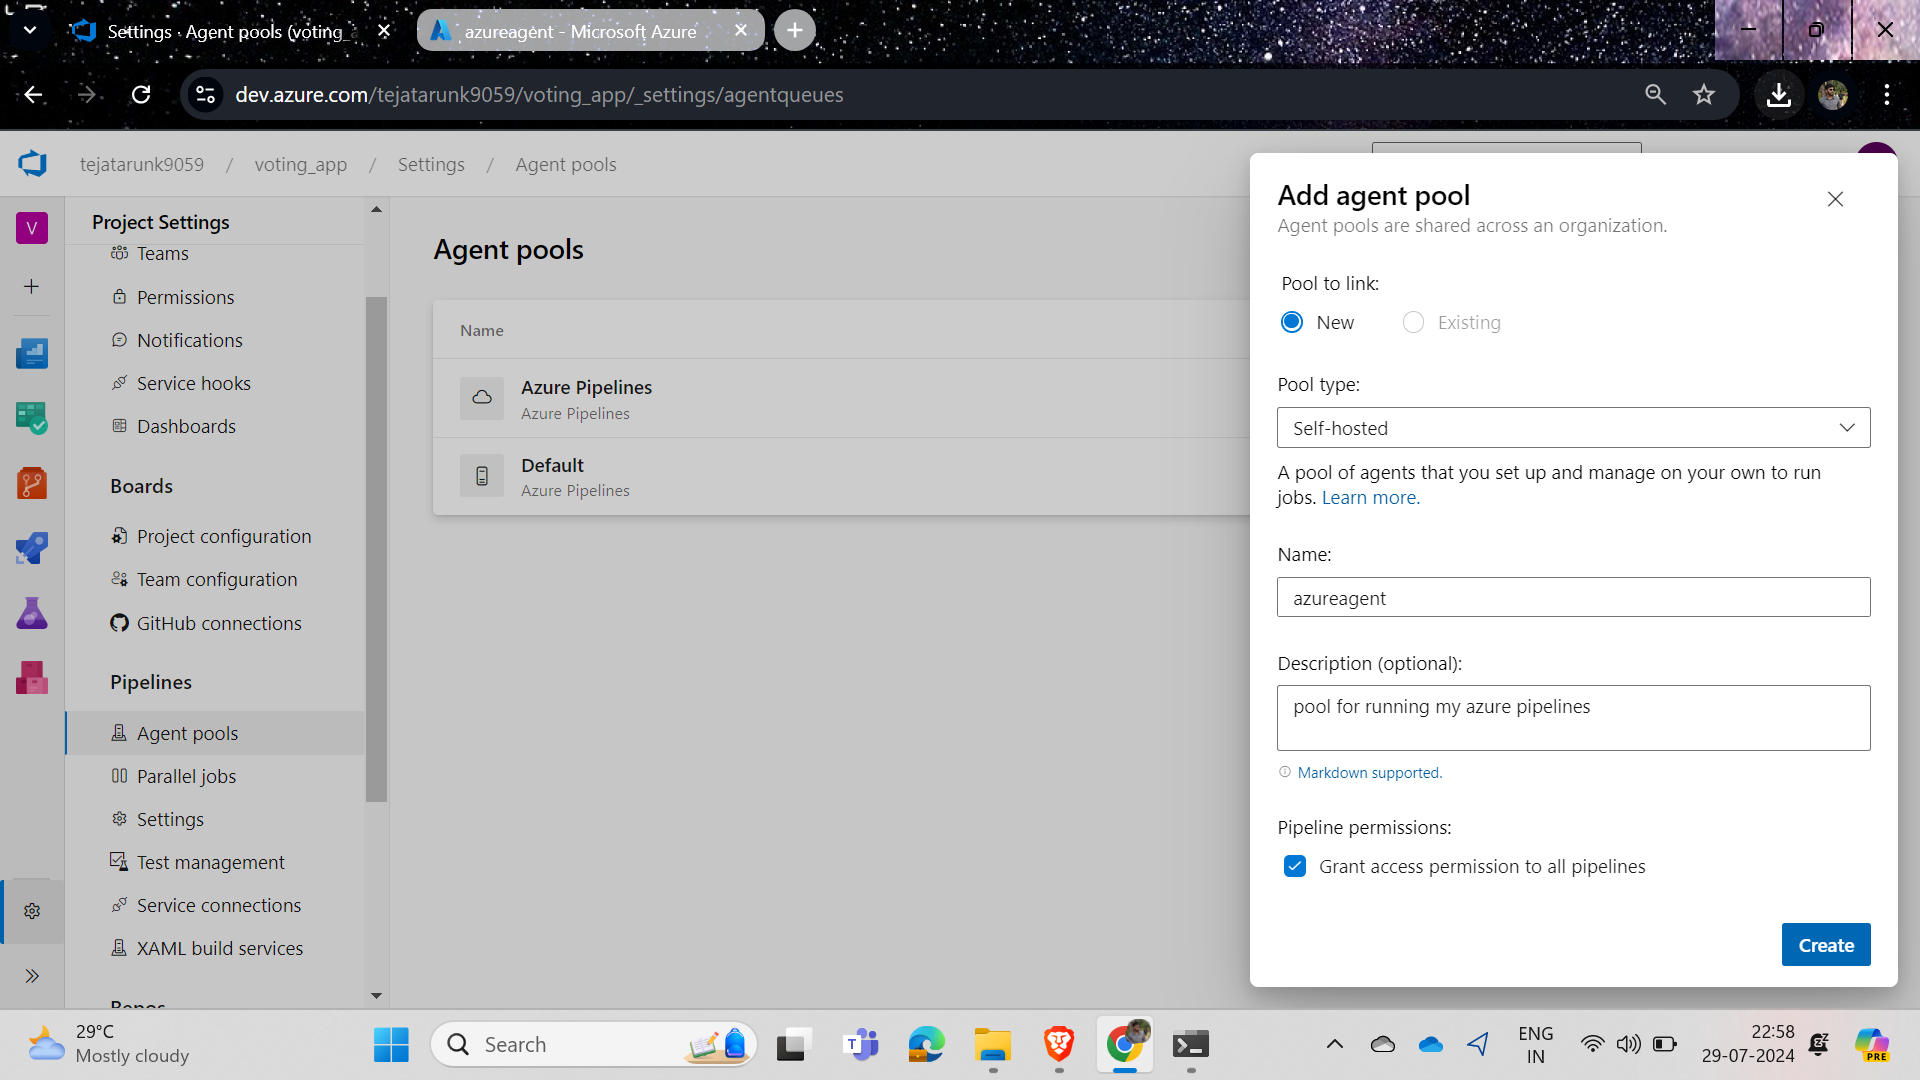
Give the pool type as self-hosted, set the name and description as needed, and click on create.
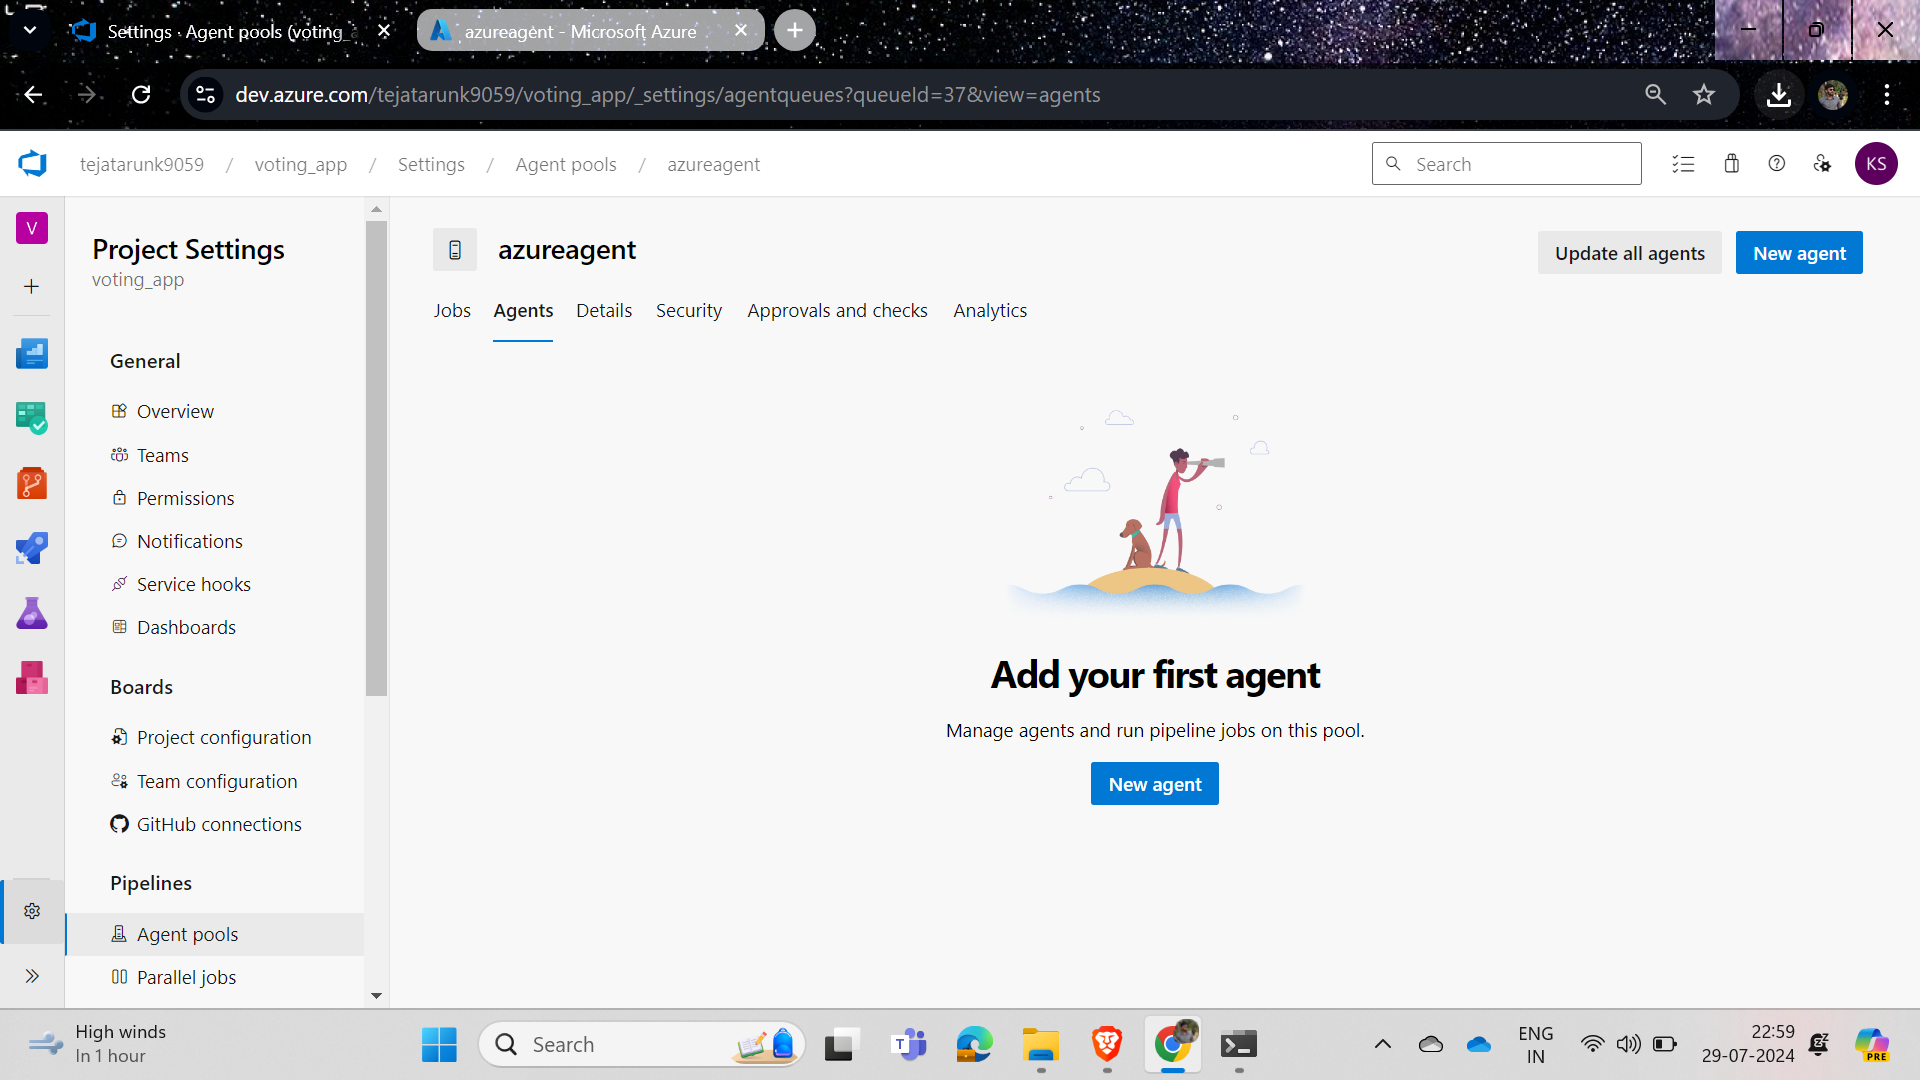
After you are redirected, click on "new agent" to create the agent.
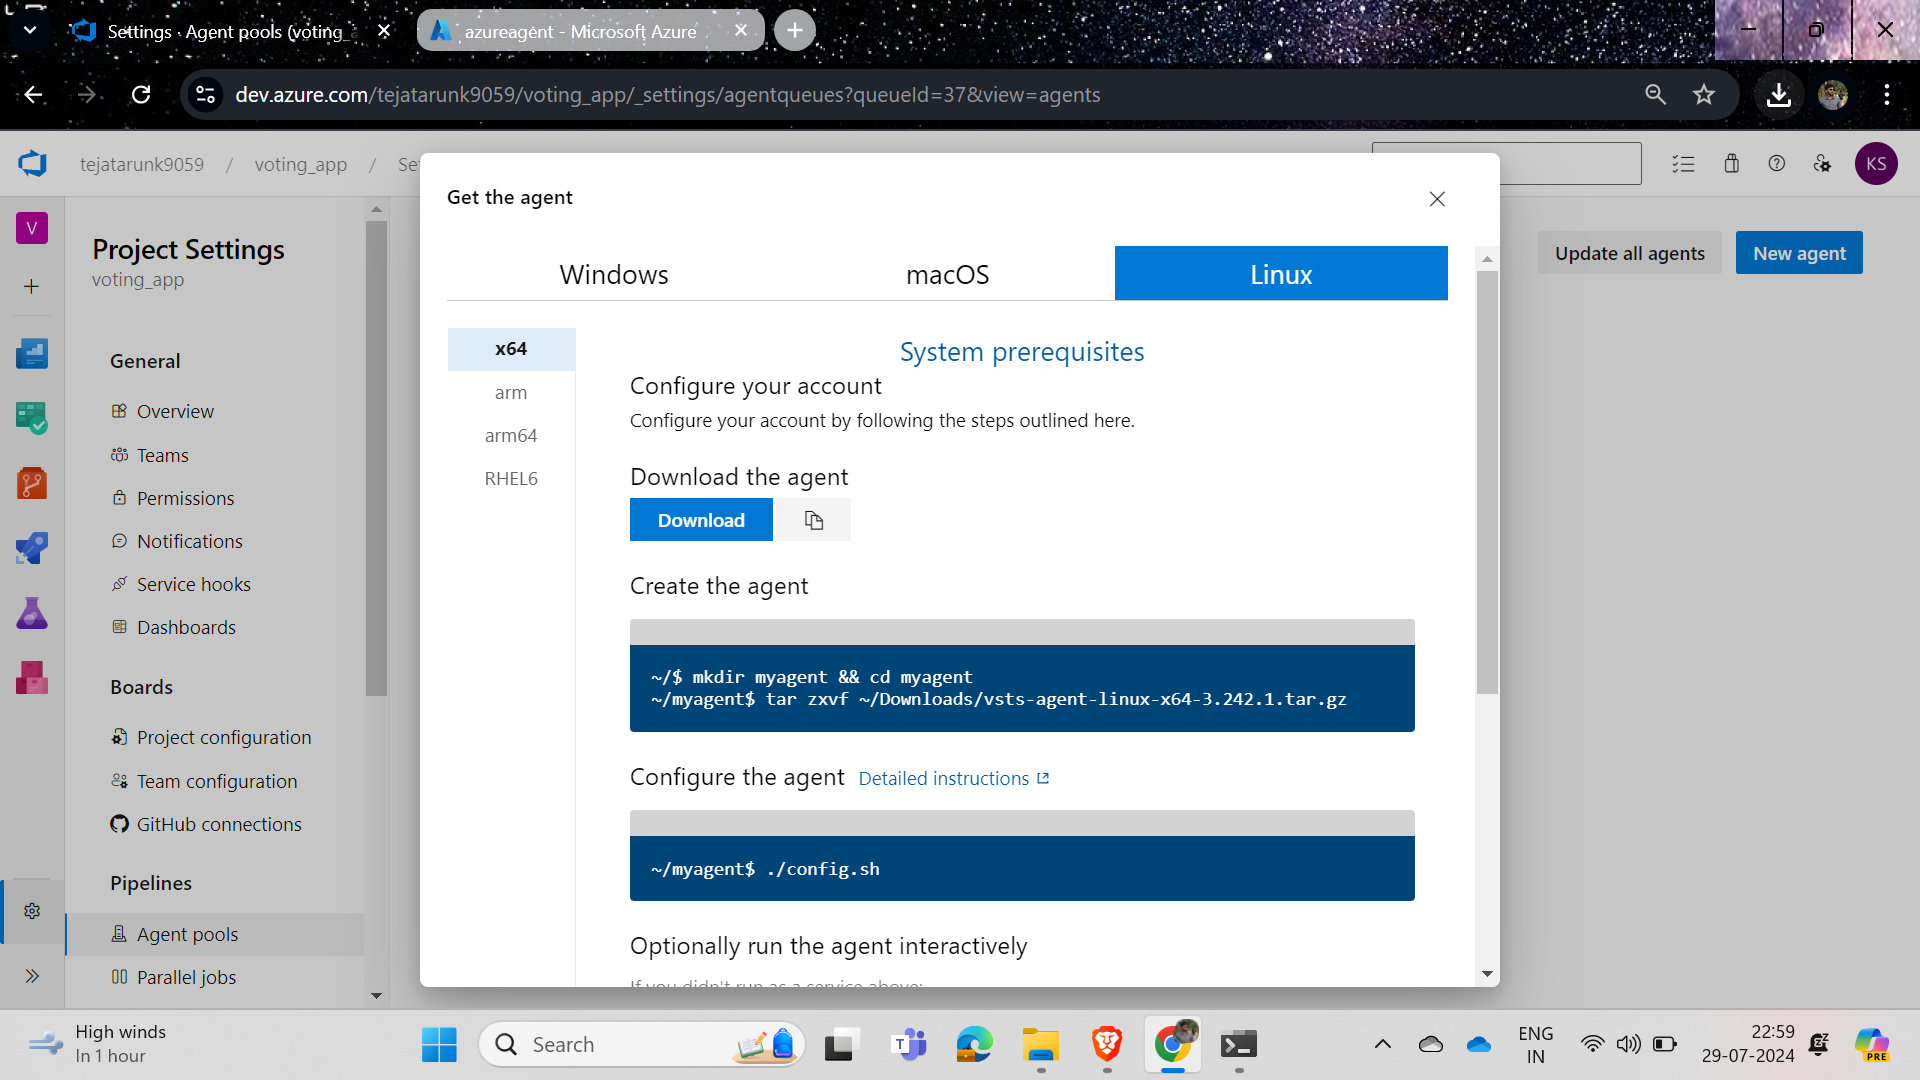
Basically, create the VM image as Linux, so I will select Linux and execute the following commands on my Azure VM.
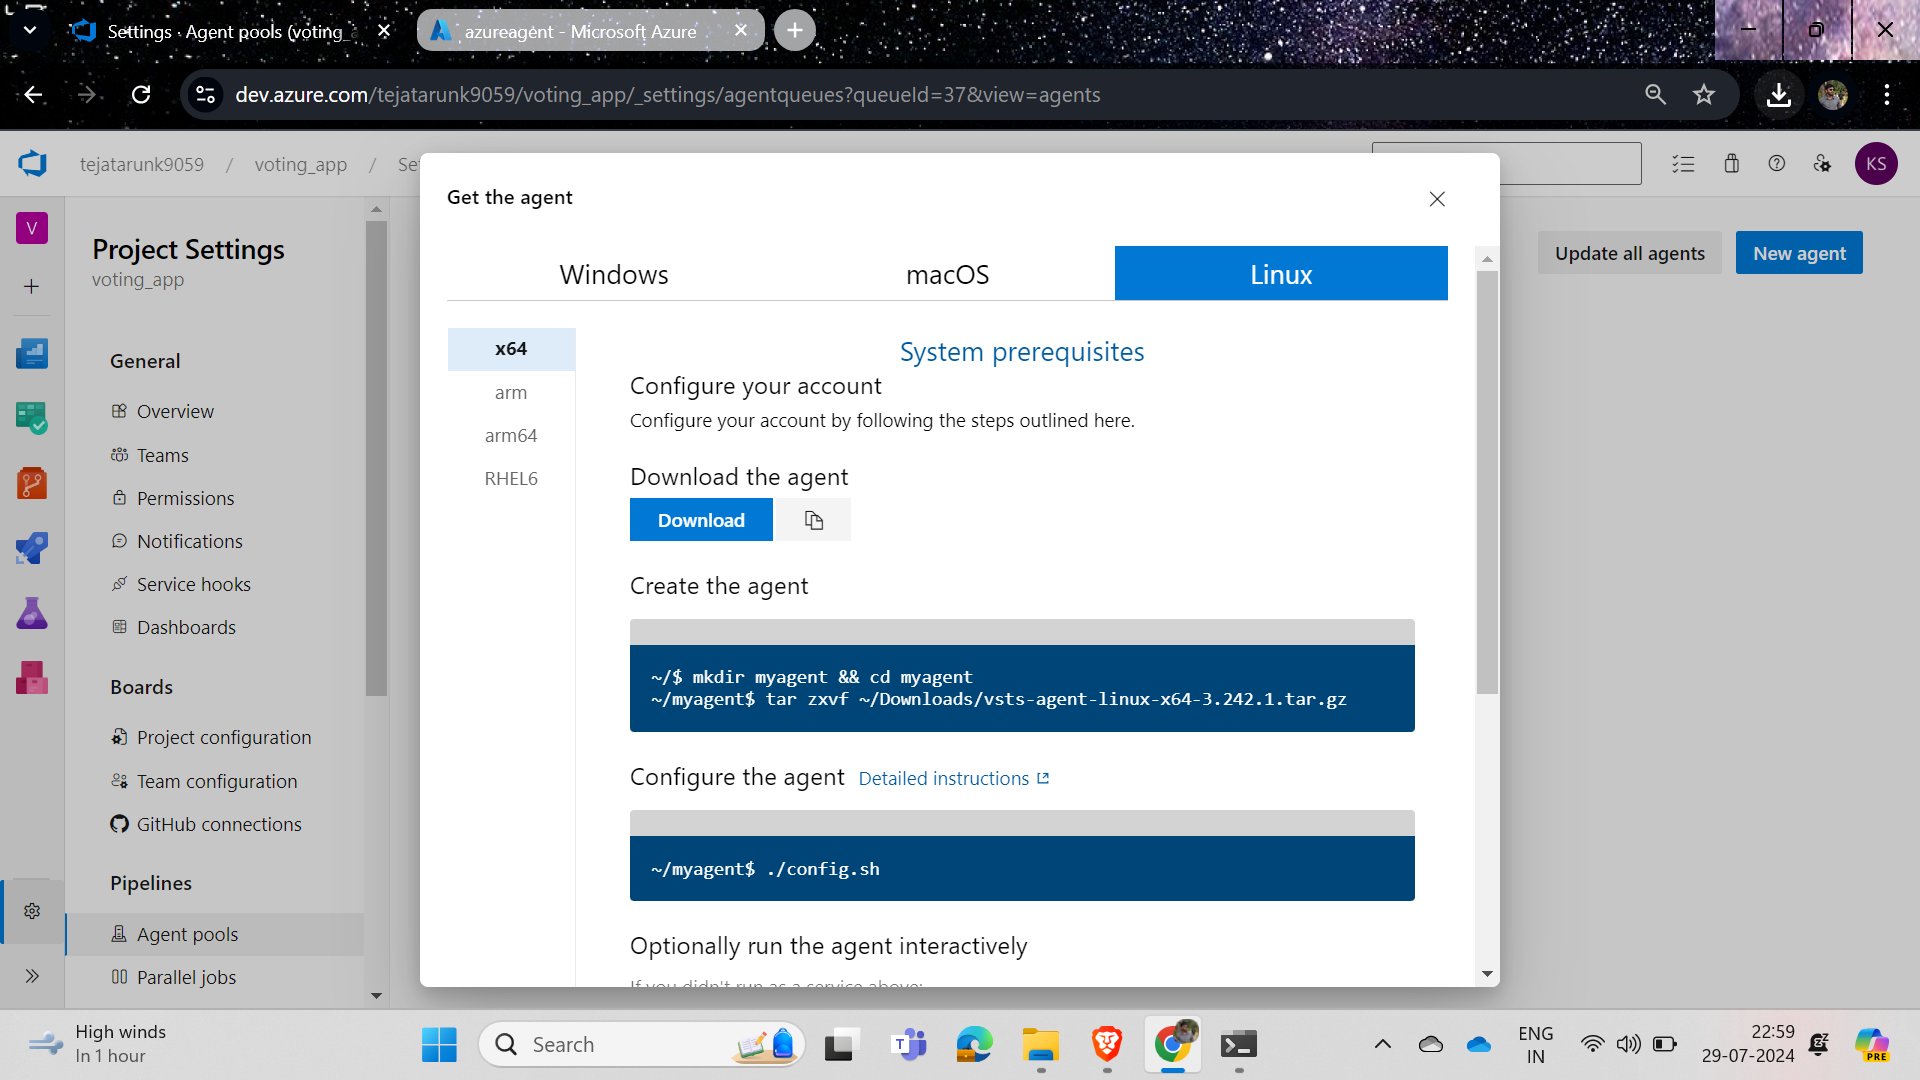
After executing all the commands provided, you will create a tar file for accessing the Azure pipelines
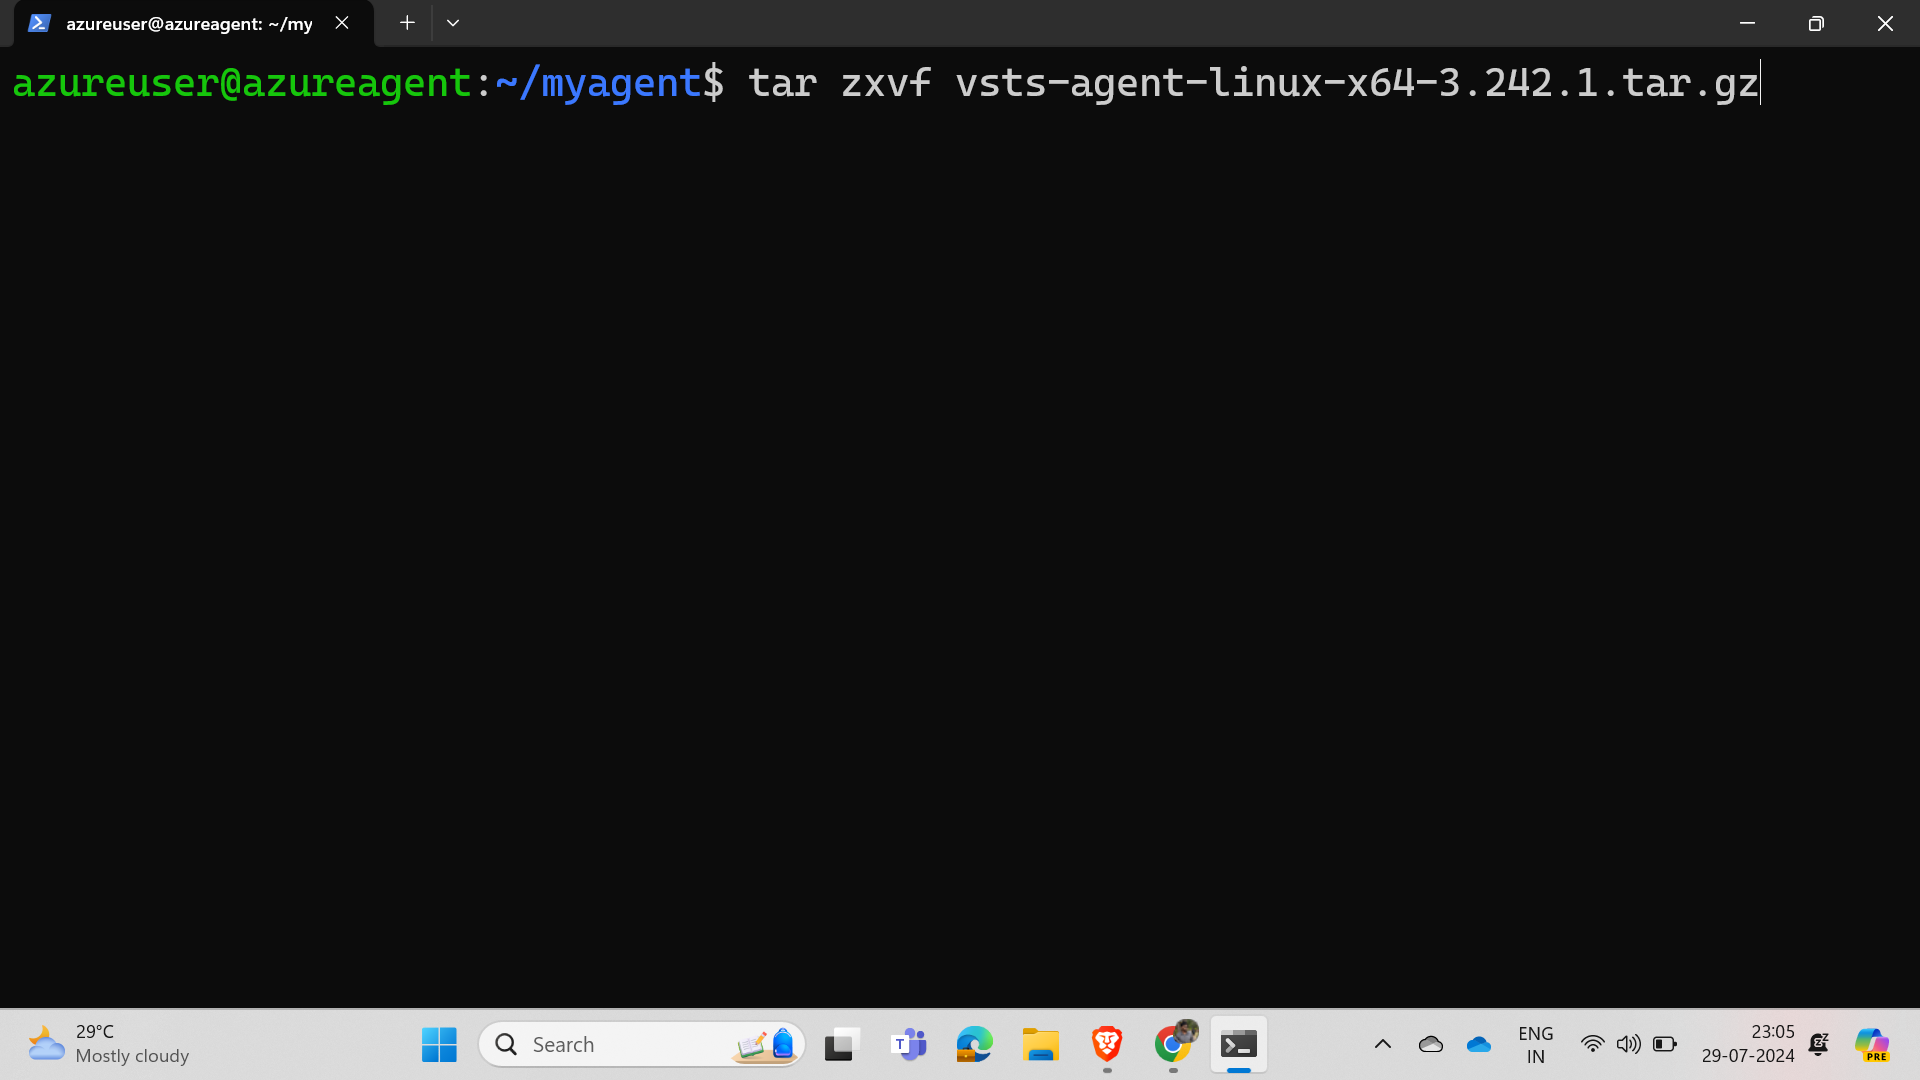
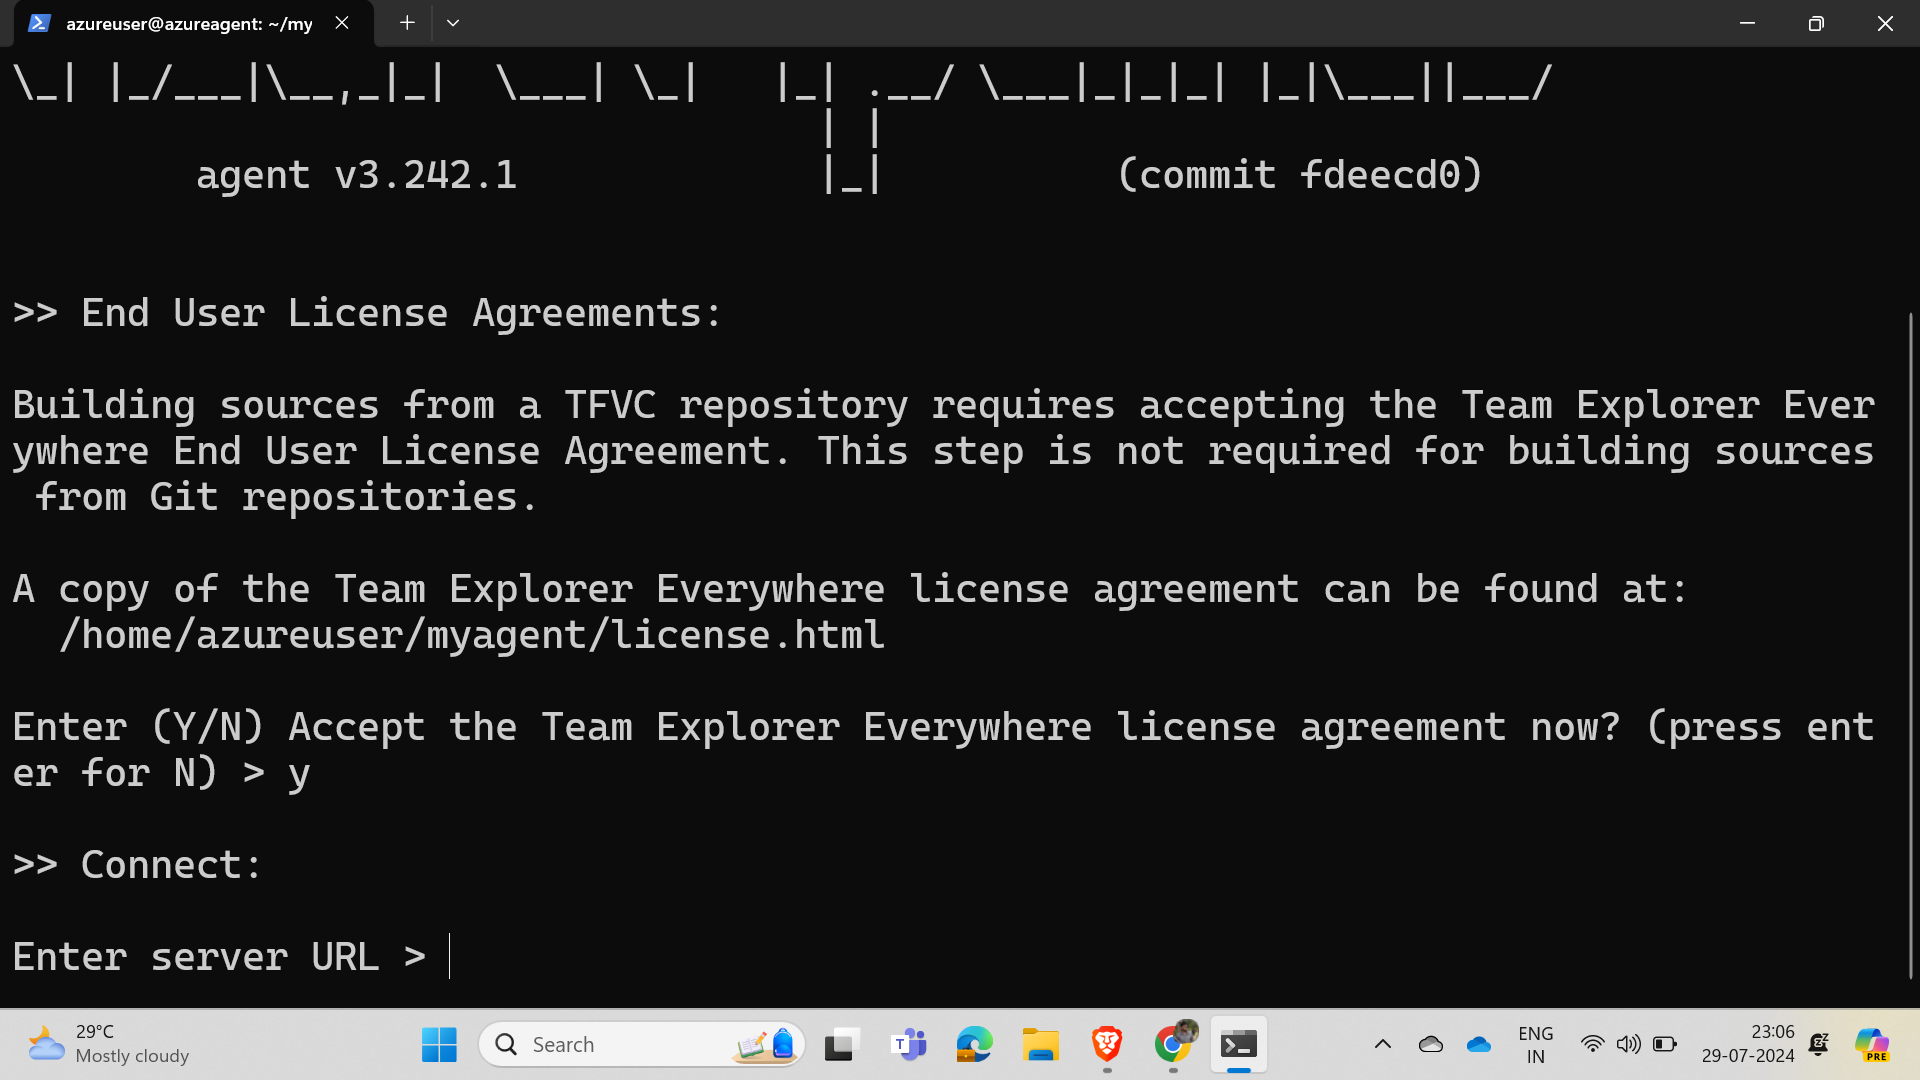
In the URL section, you need to enter the username of the Azure DevOps account as per convention.
In my case : https://dev.azure.com/tejatarunk9059
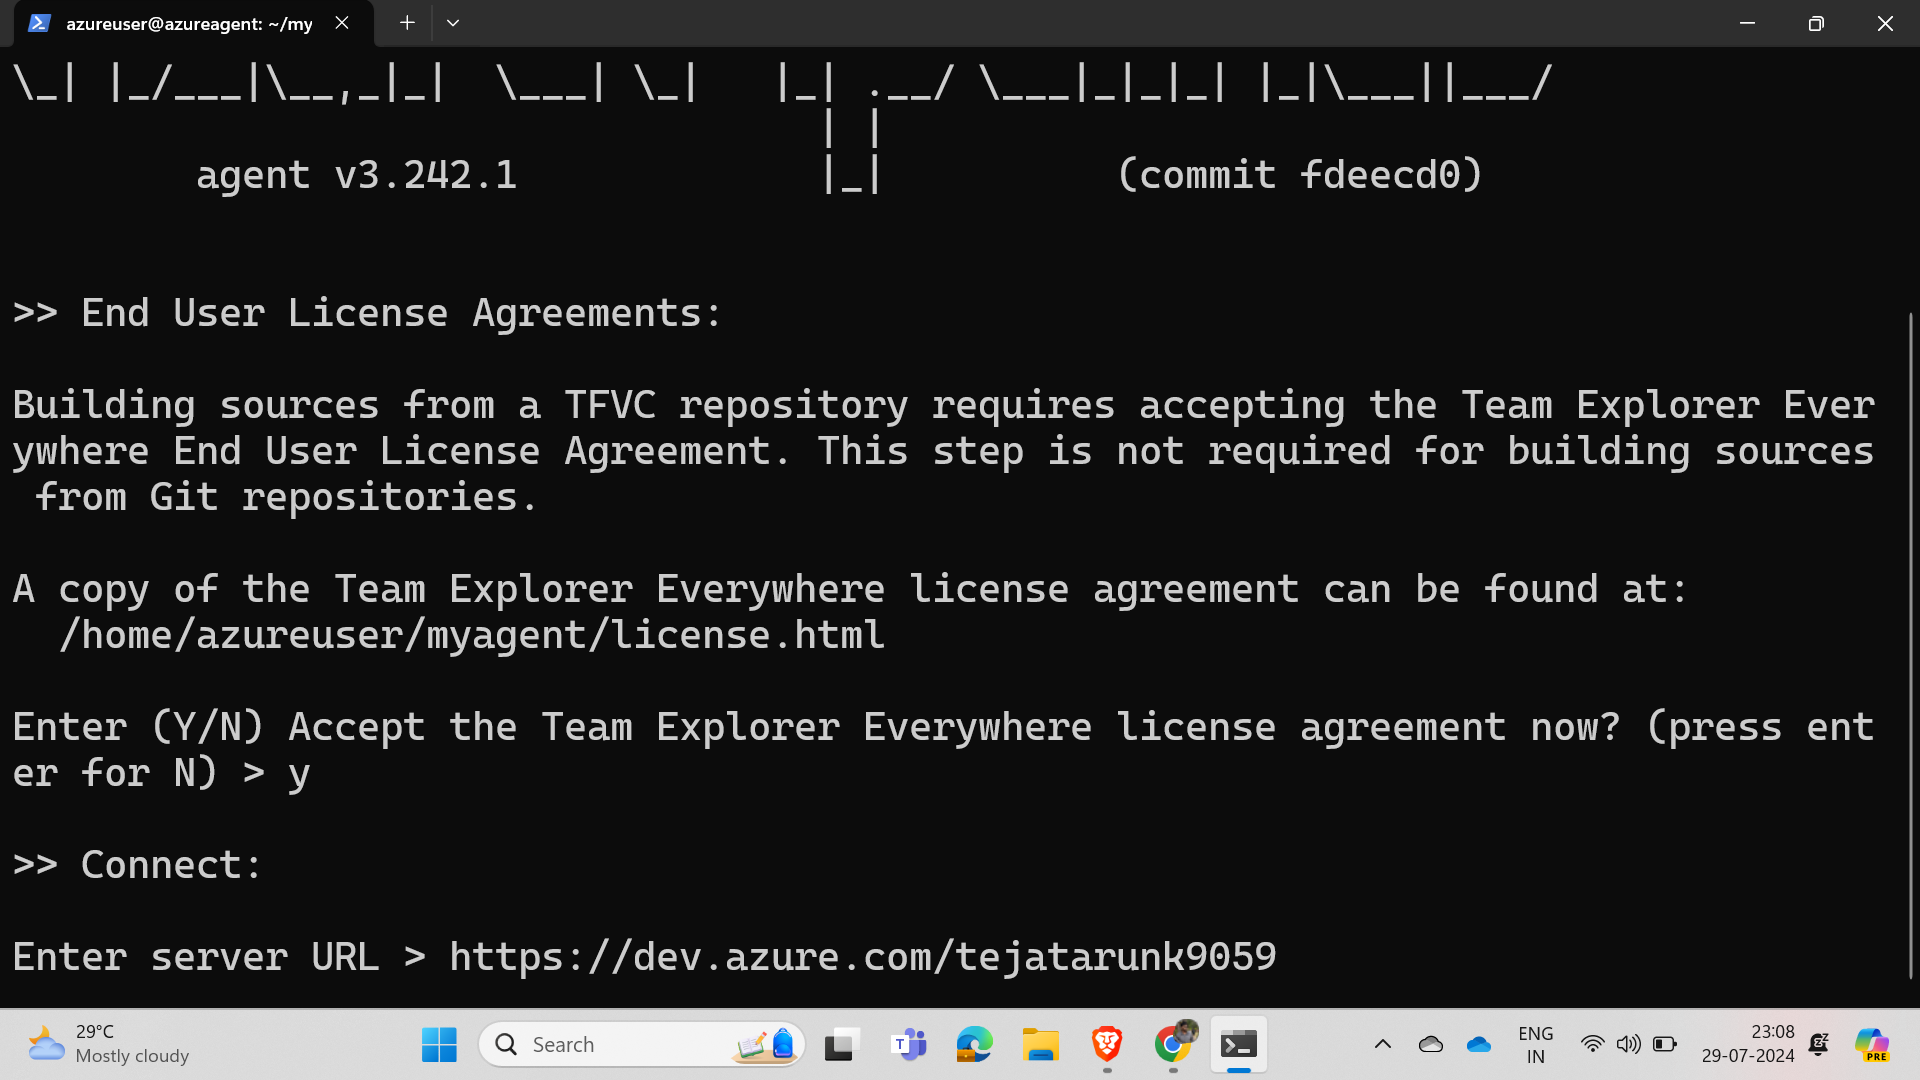
Now, we need to create a token for login by following these steps.
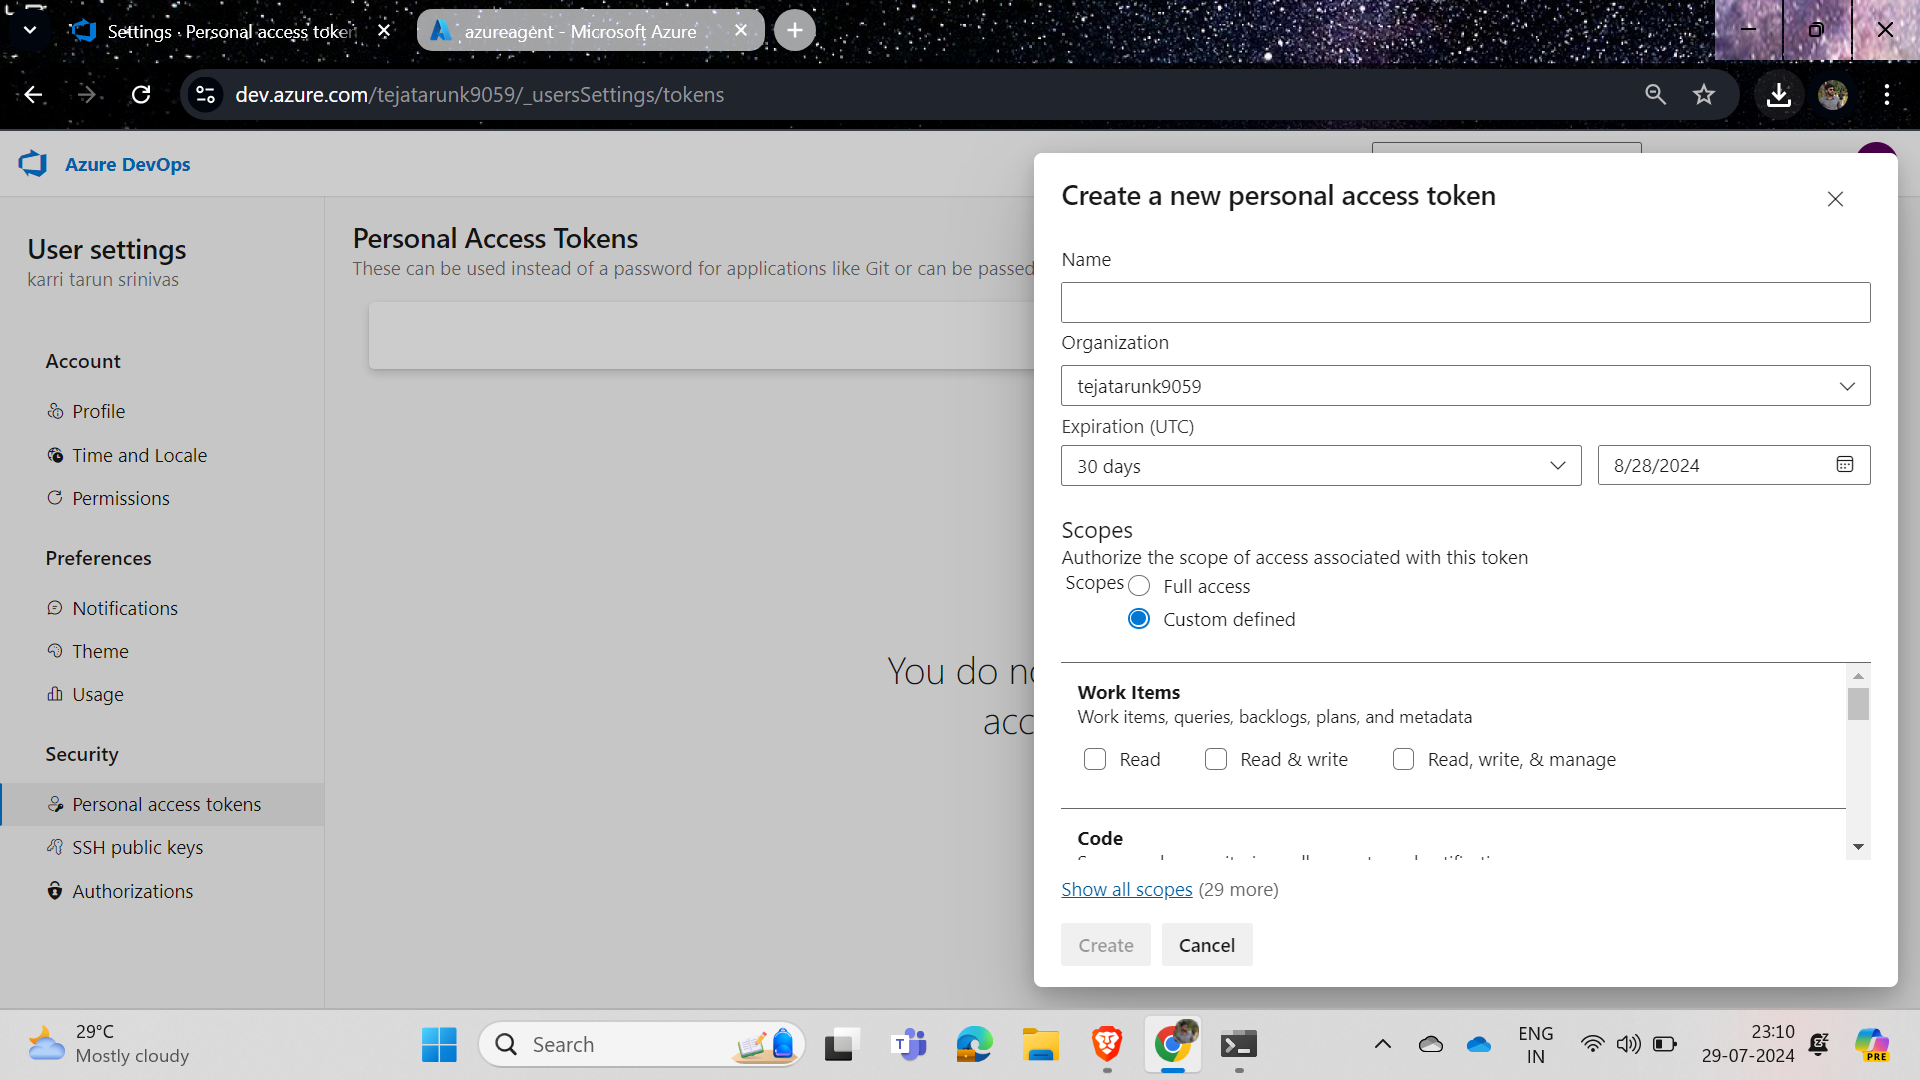
Provide the name as required, set the scopes to custom access, click on create, and then paste the generated token in the field where it asks for the token.
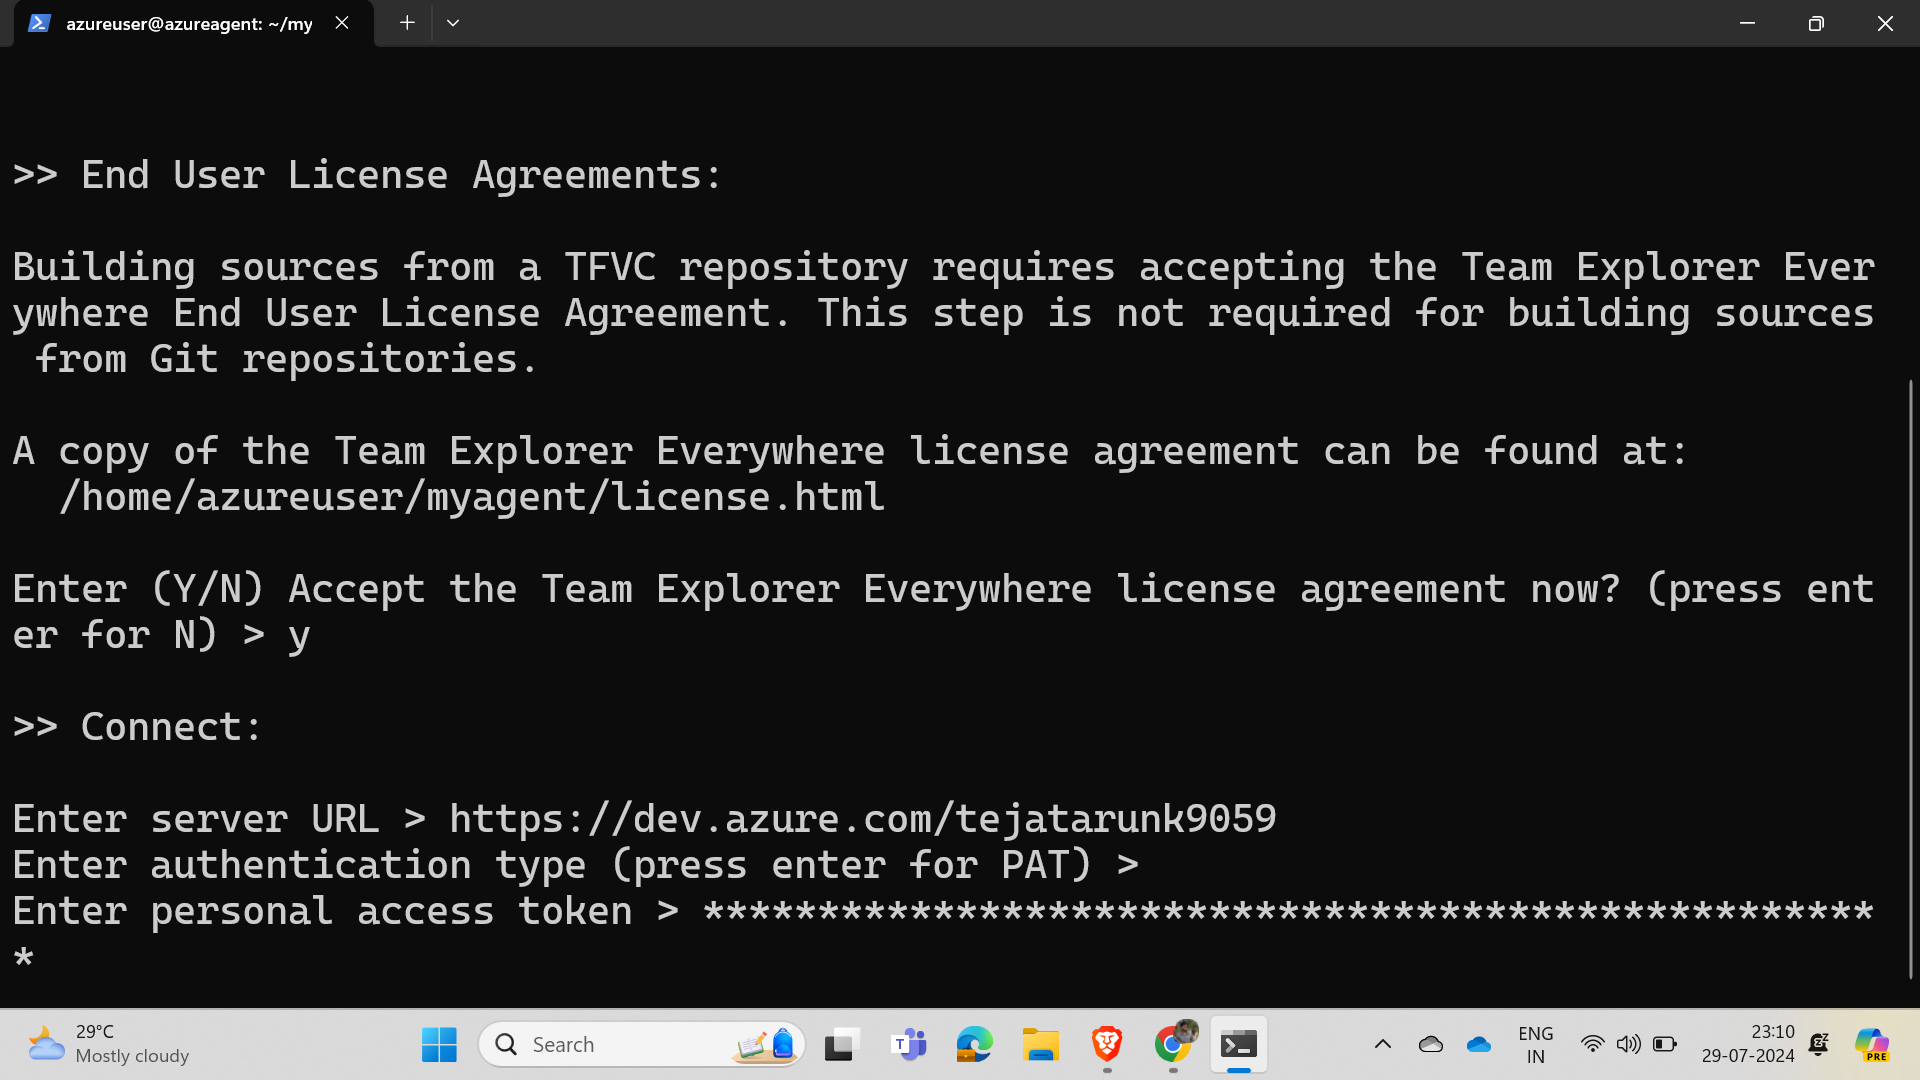
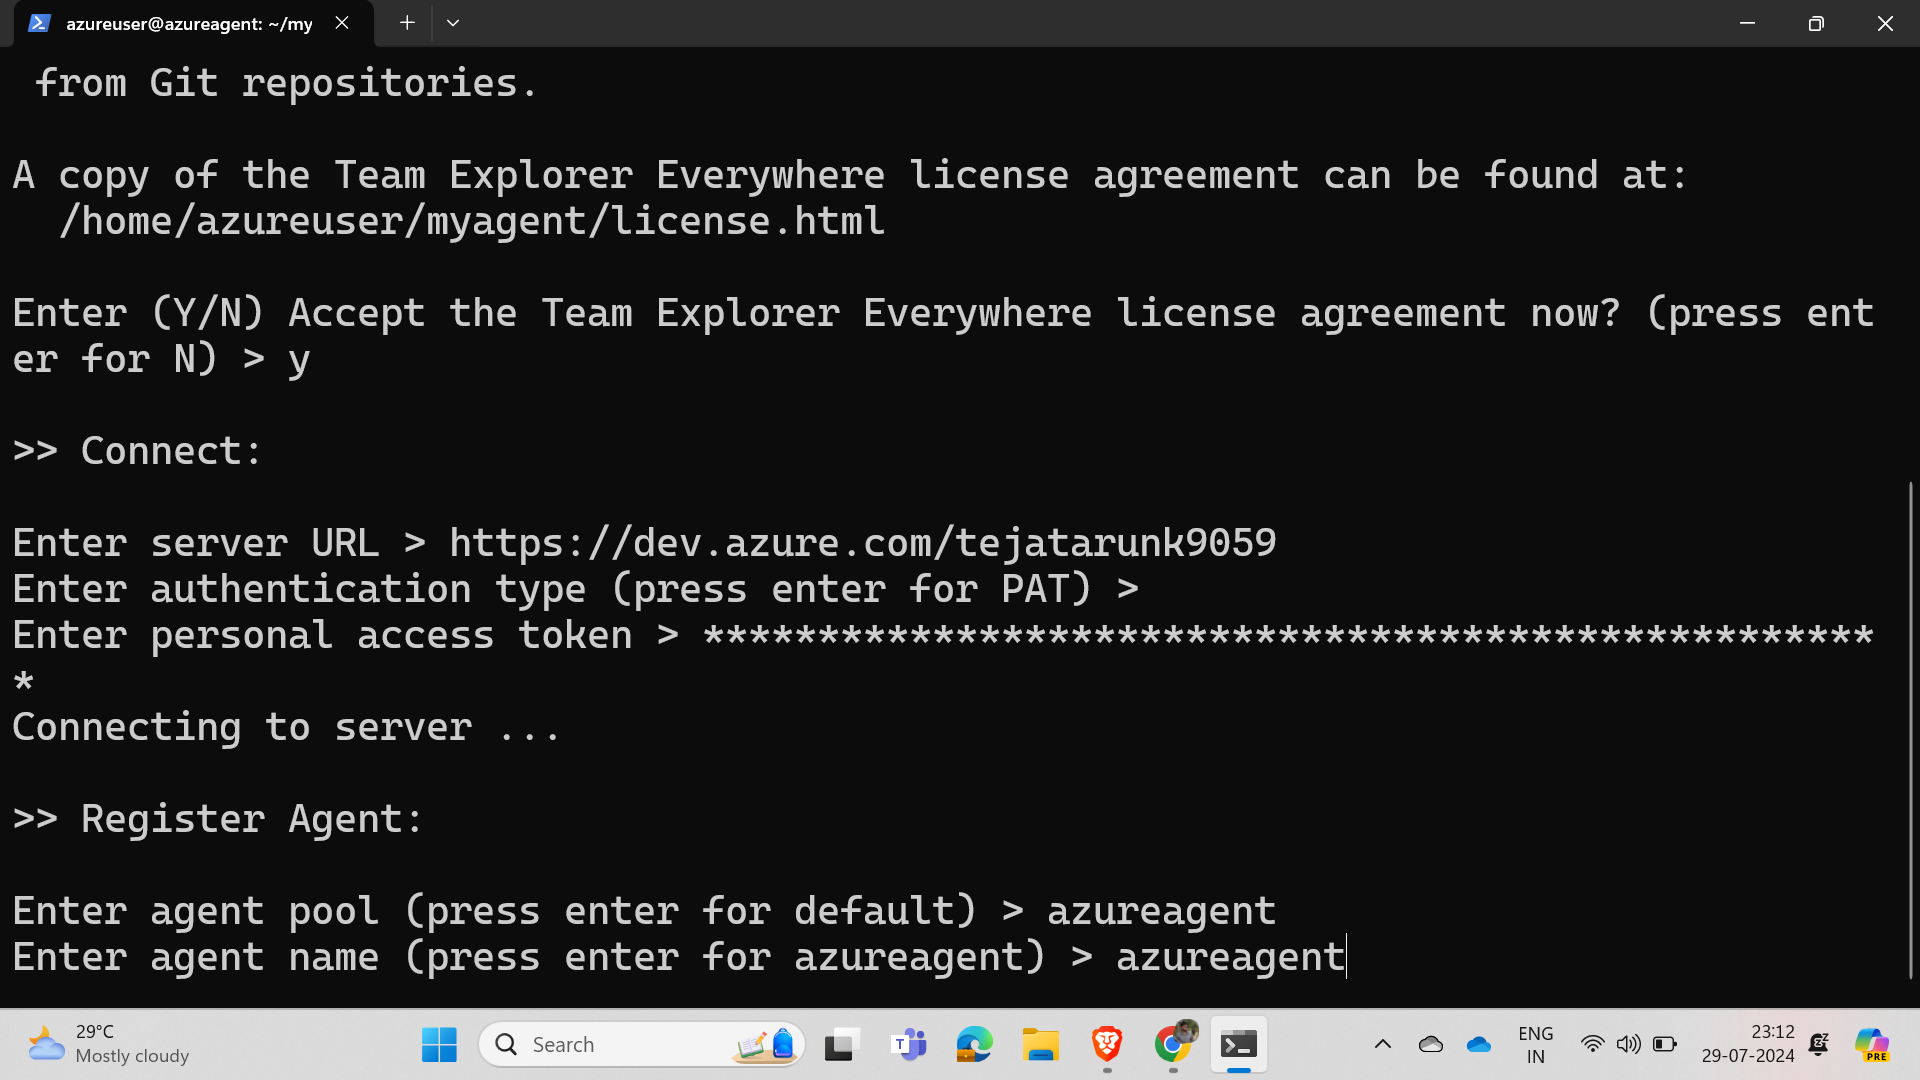
Enter your VM name in the agent pool and the agent name in the code we created, then run the provided connection command to access it.
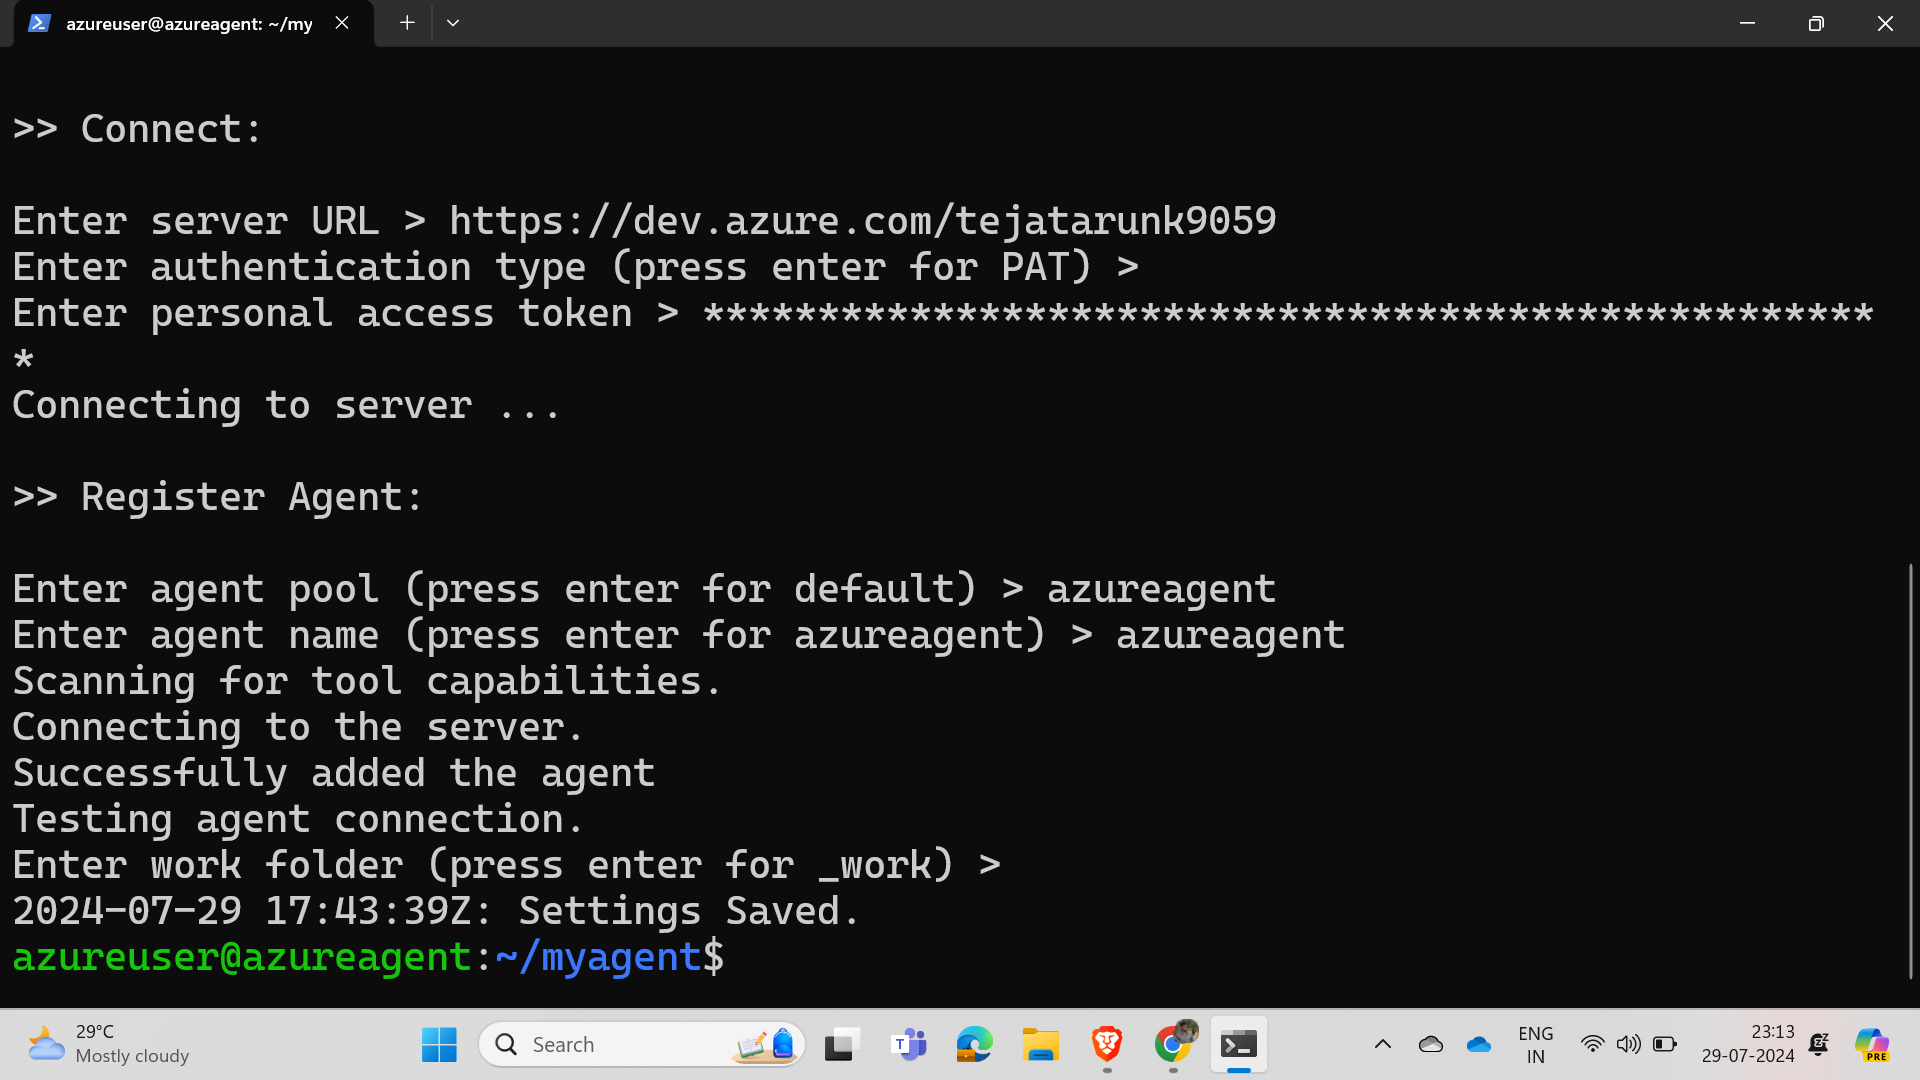
Now we have successfully established the connection.
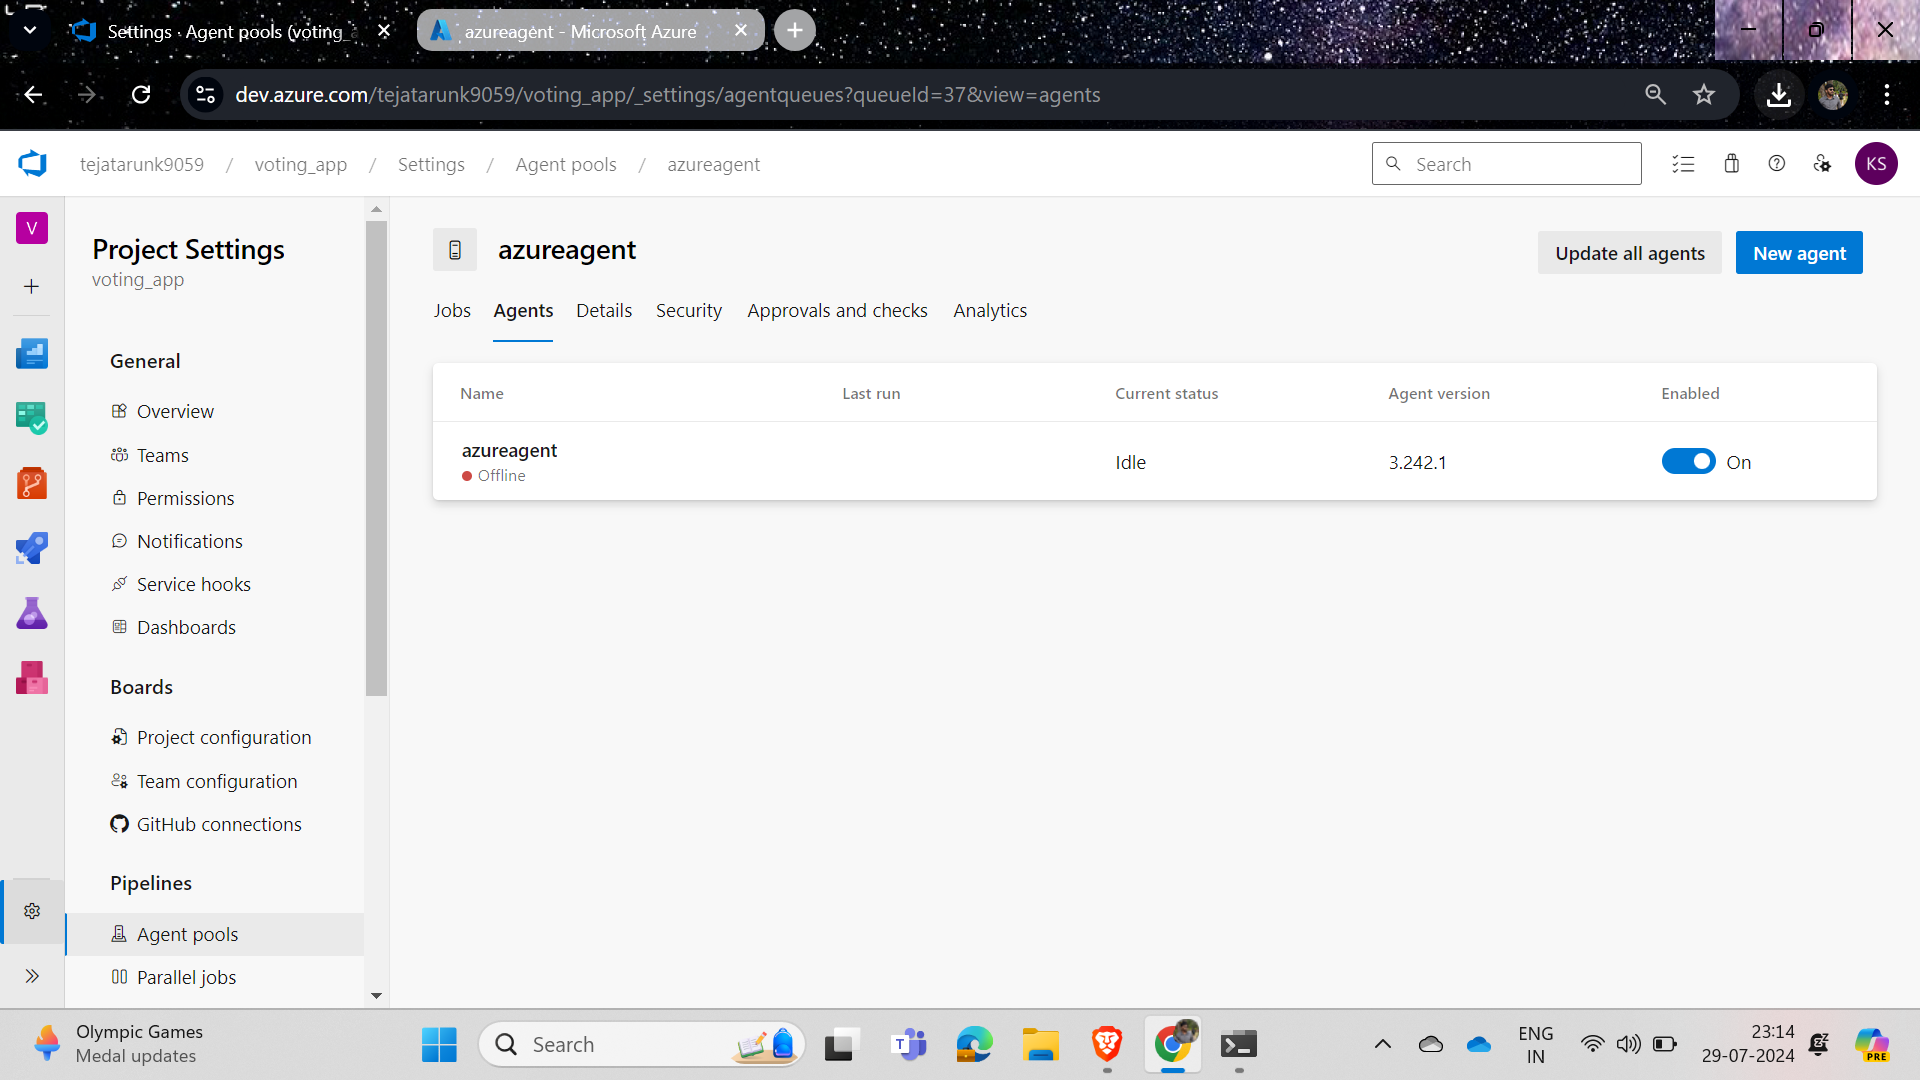
Now our agent is ready to be turned on, but it is offline and needs a command to activate.
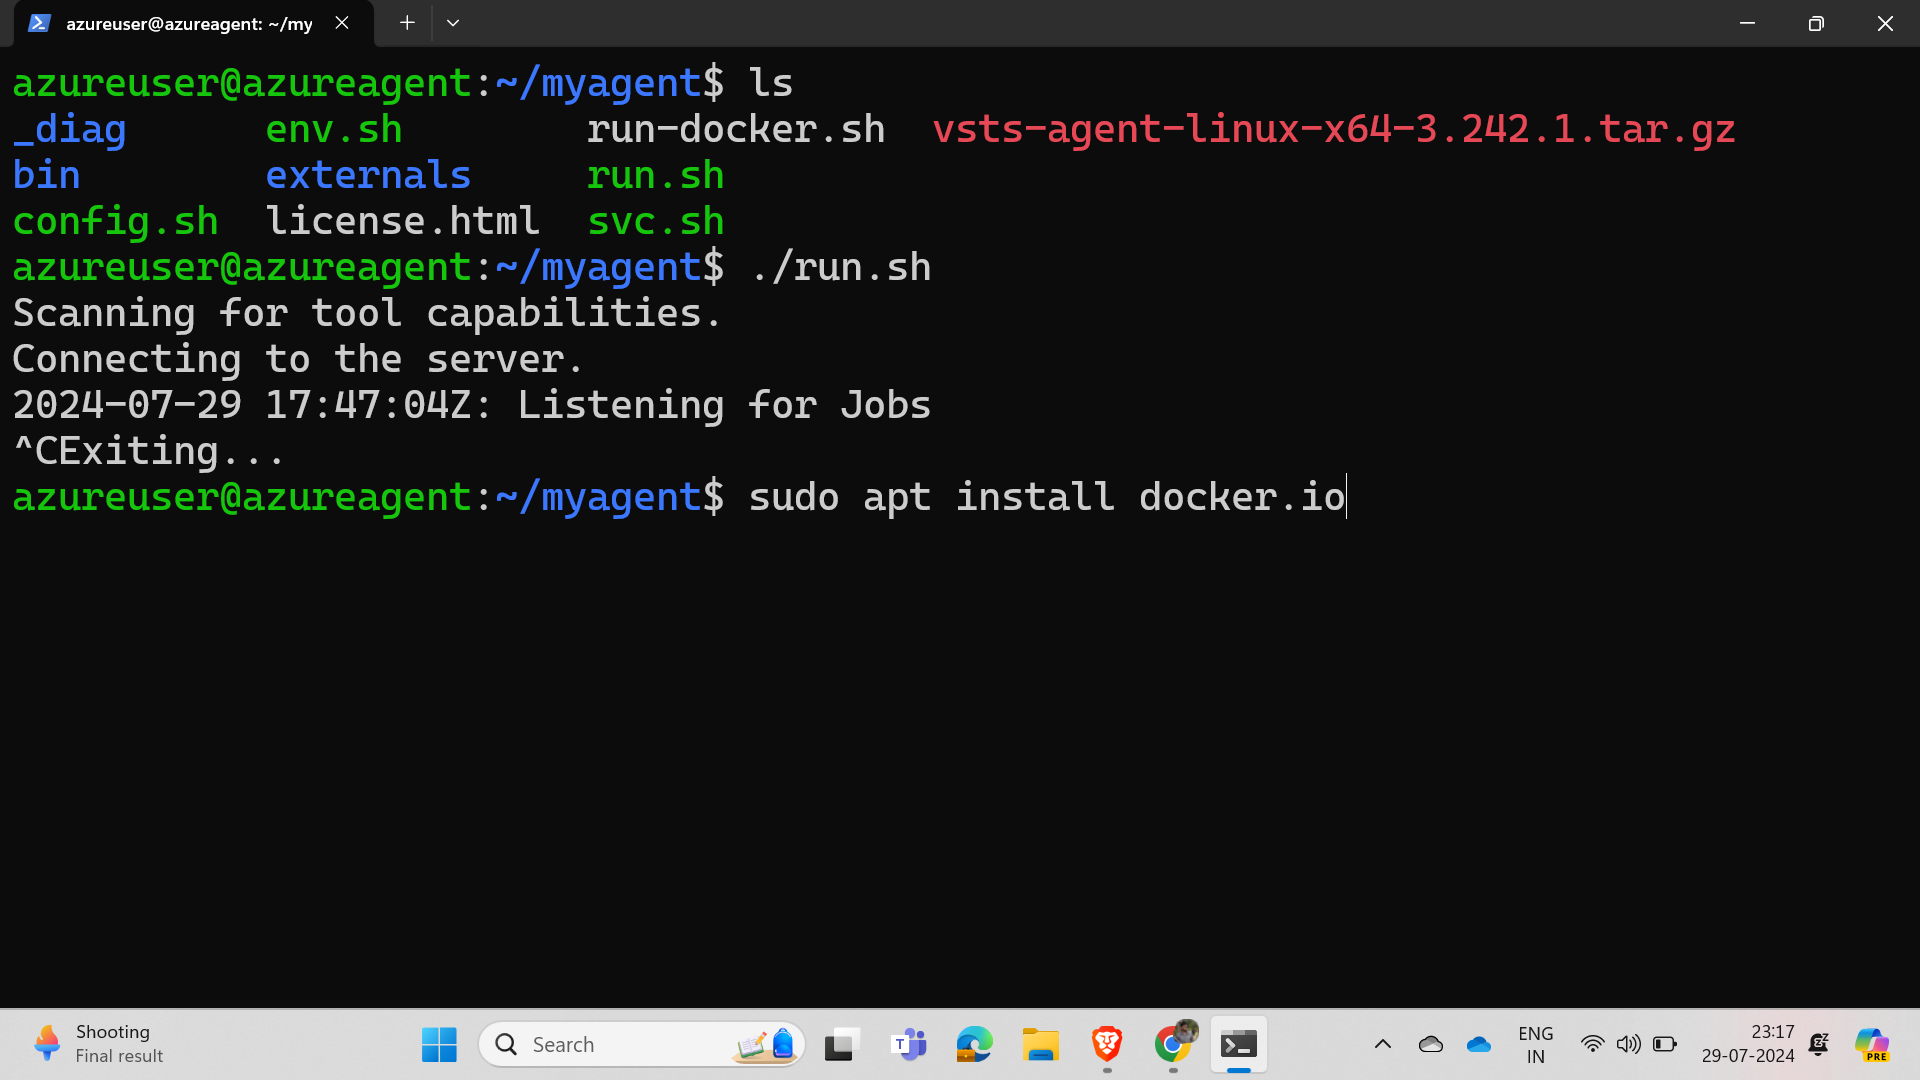
Simply go to the VM, type ls to find run.sh, and then run the command ./run.sh to turn on the agent.
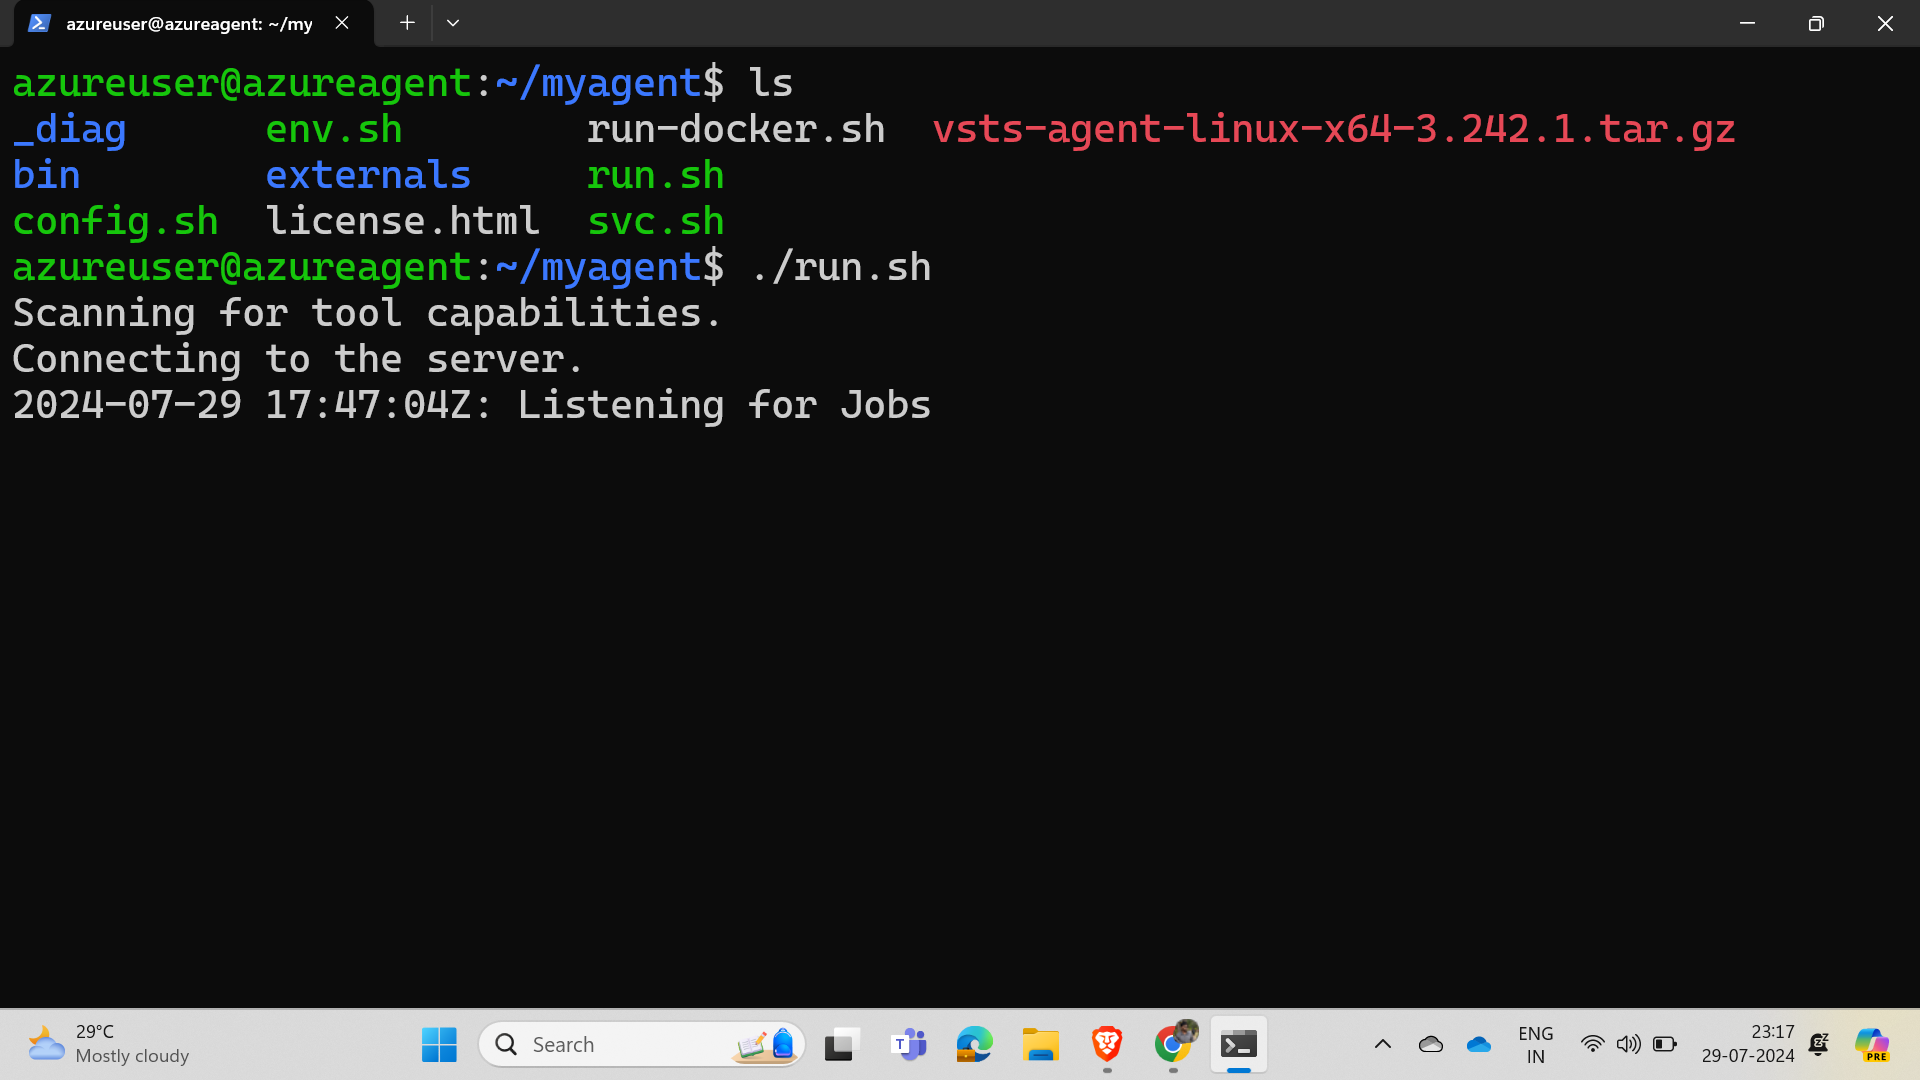
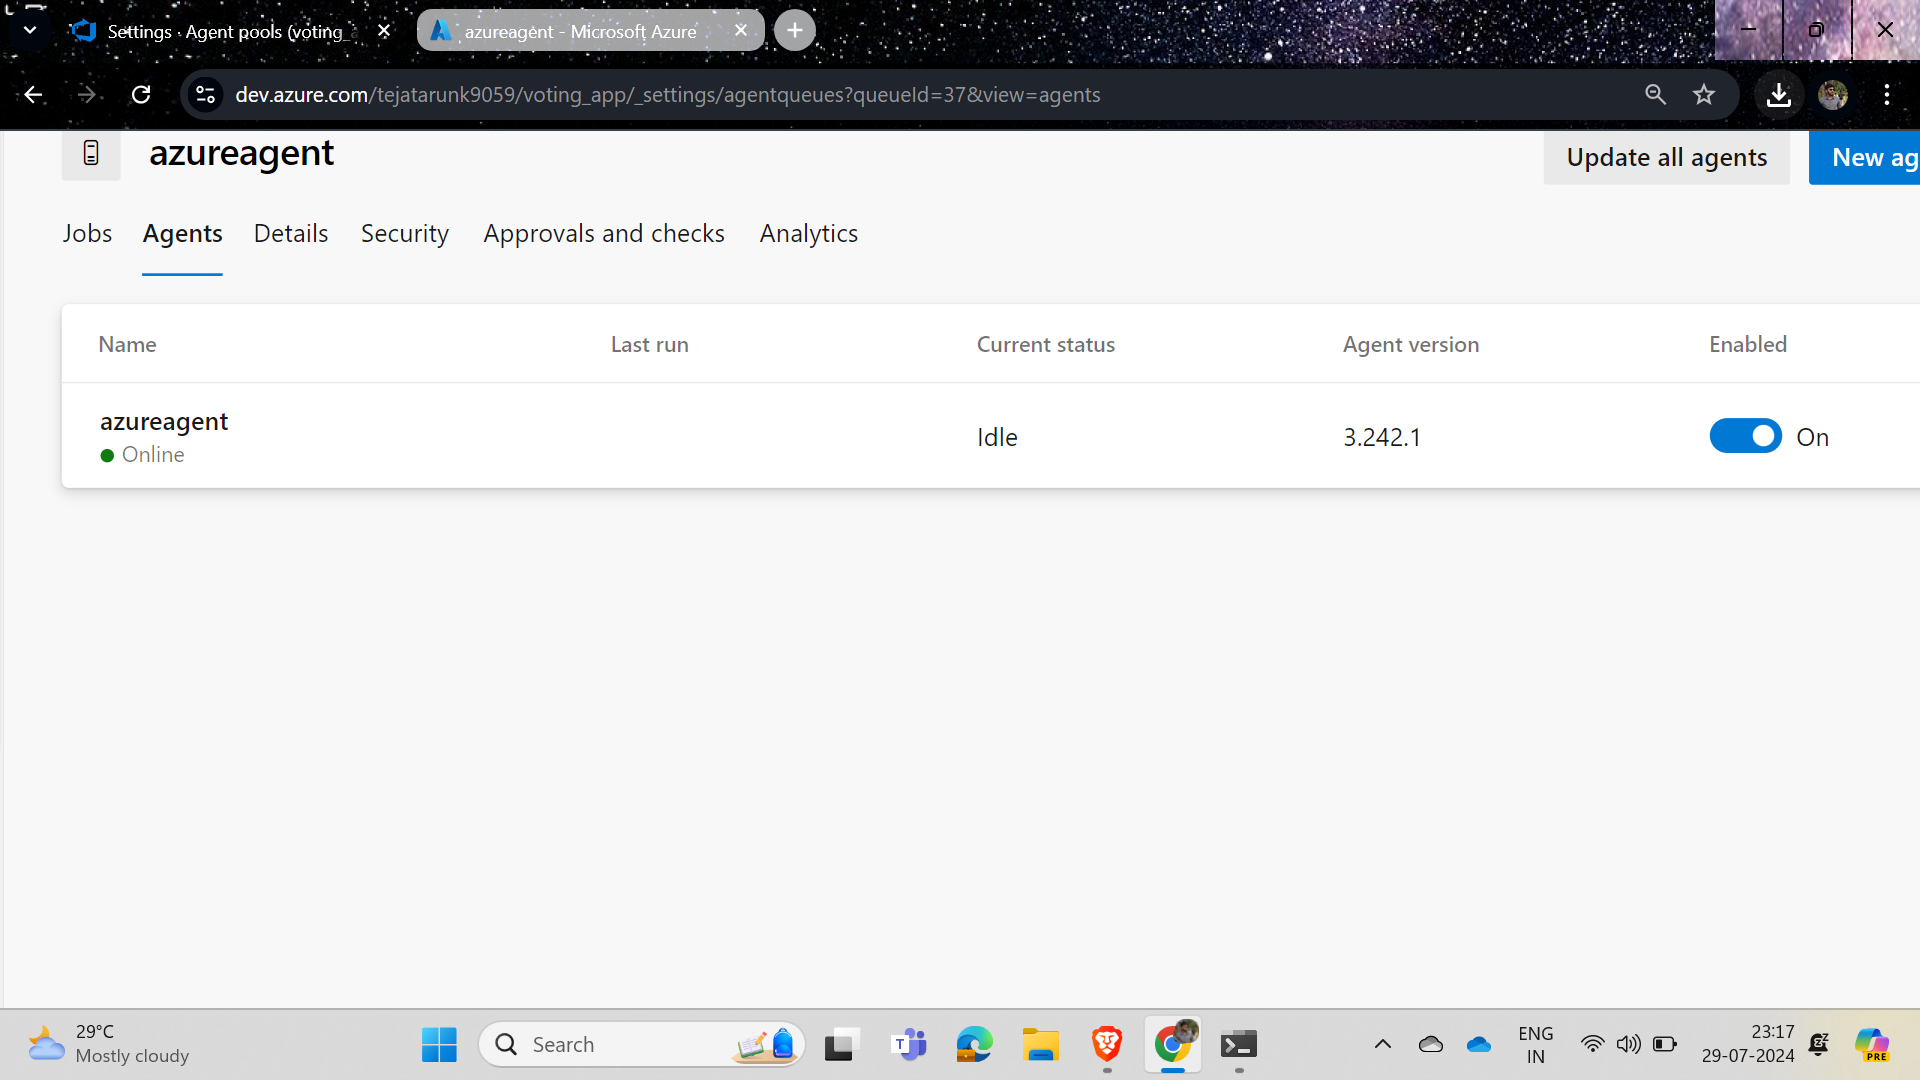
Now that our agent is on, we can run our pipeline.
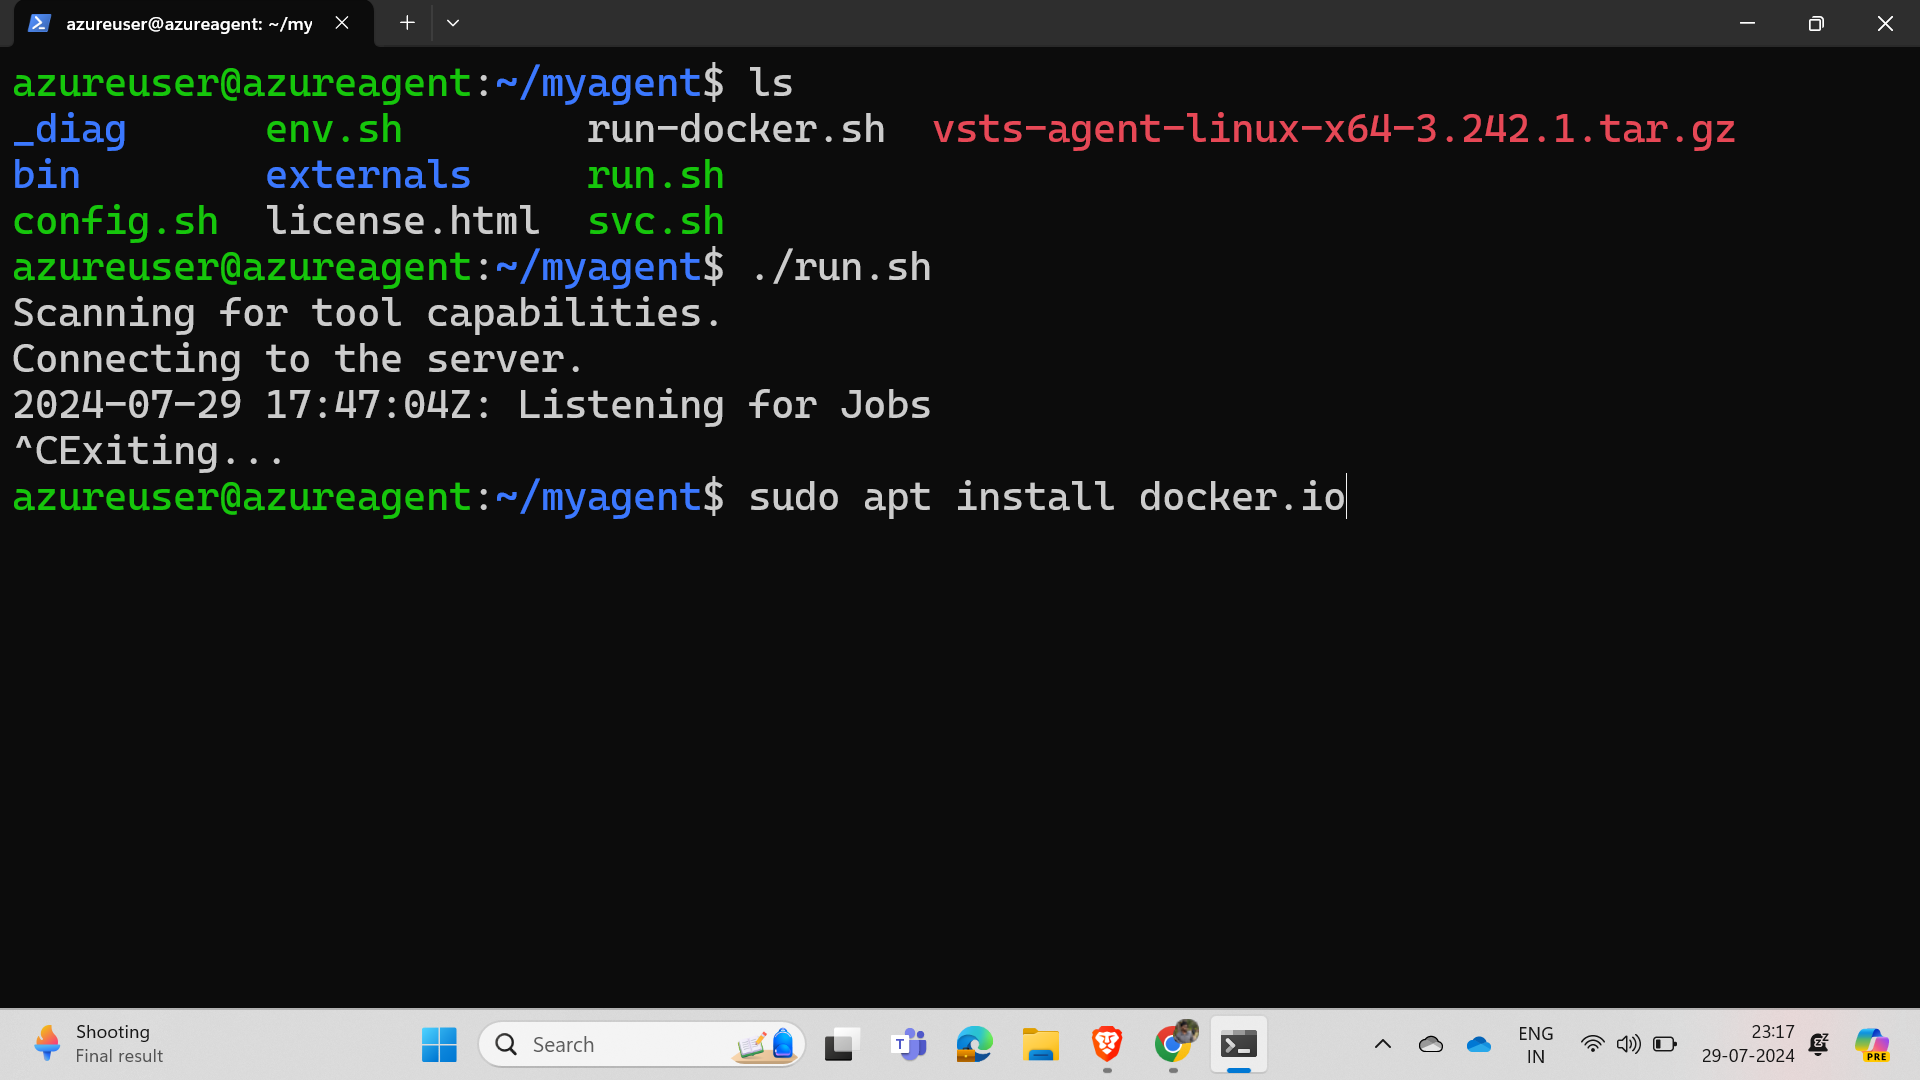
Now install Docker to run the files or pipeline, as Docker is required; to install Docker, follow the steps shown in the images below.
Now go to the pipelines tab, click on run, and you will see the following.
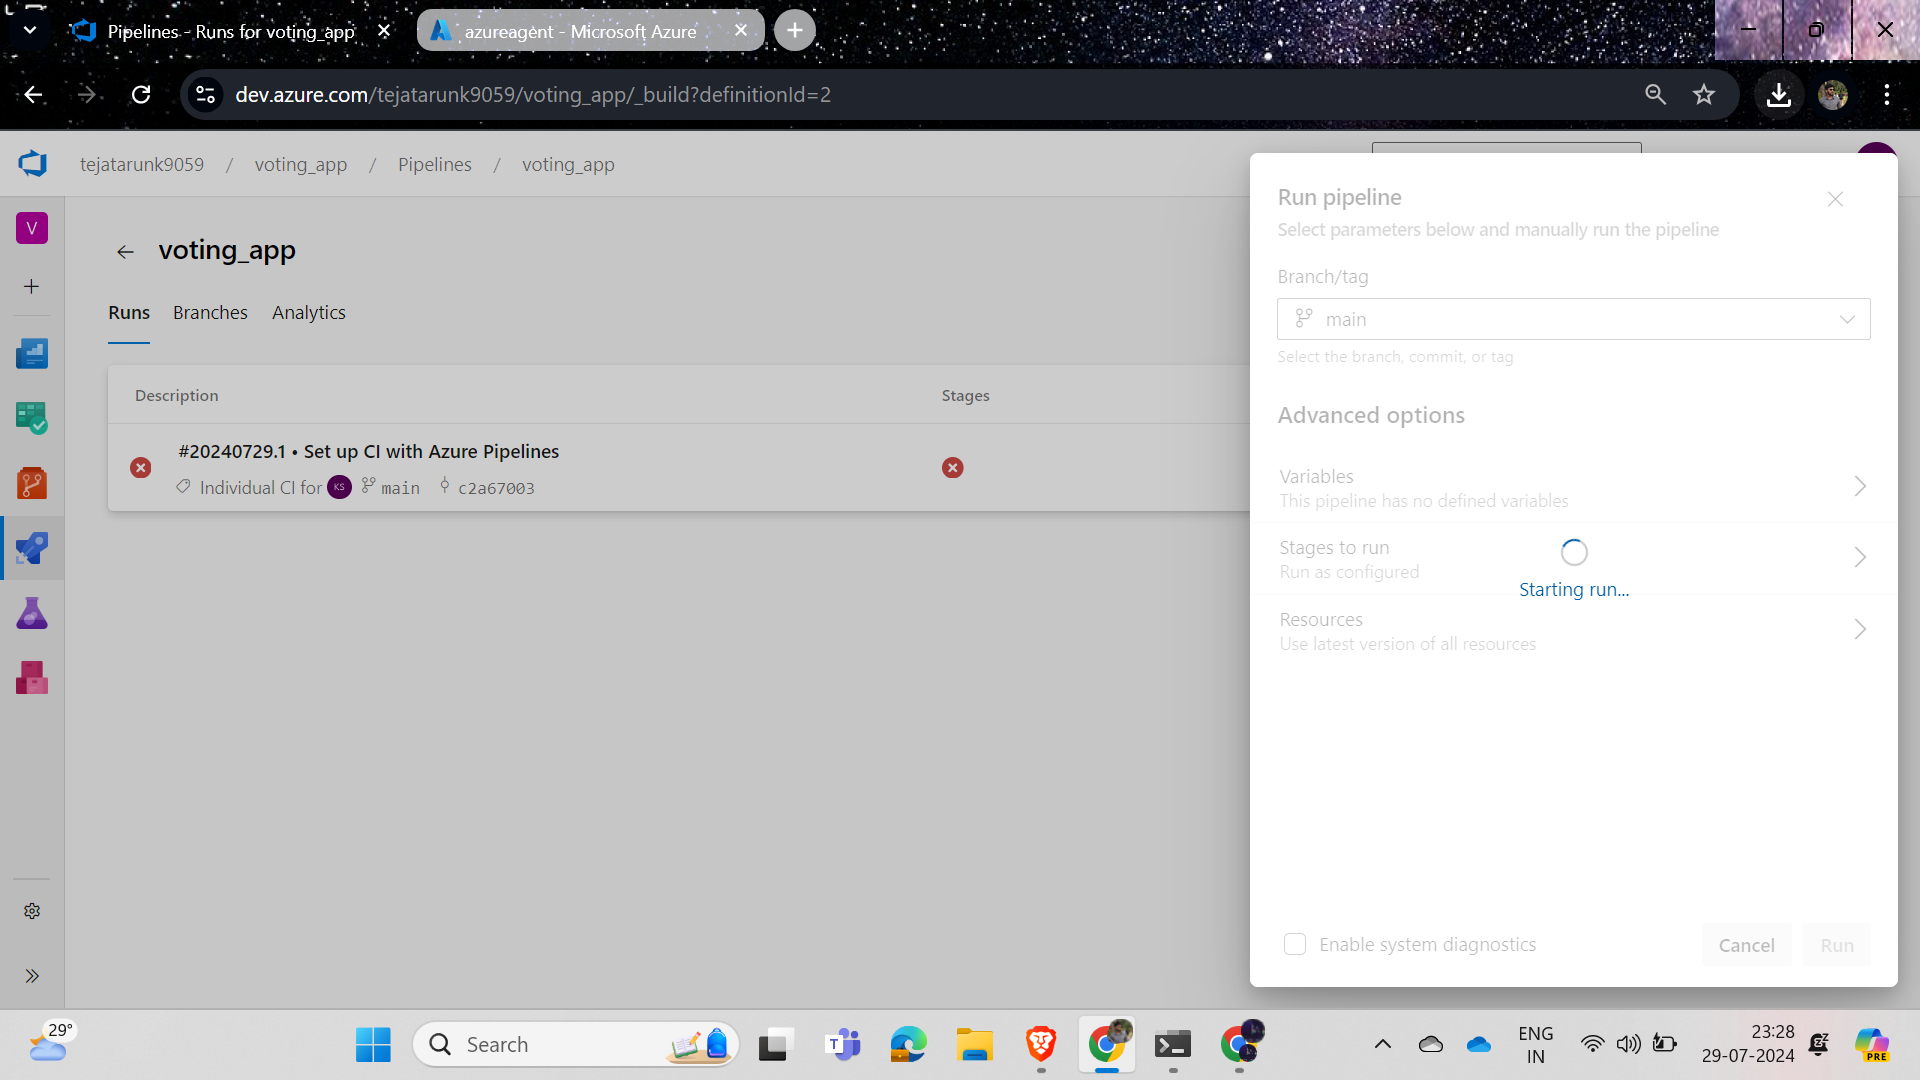
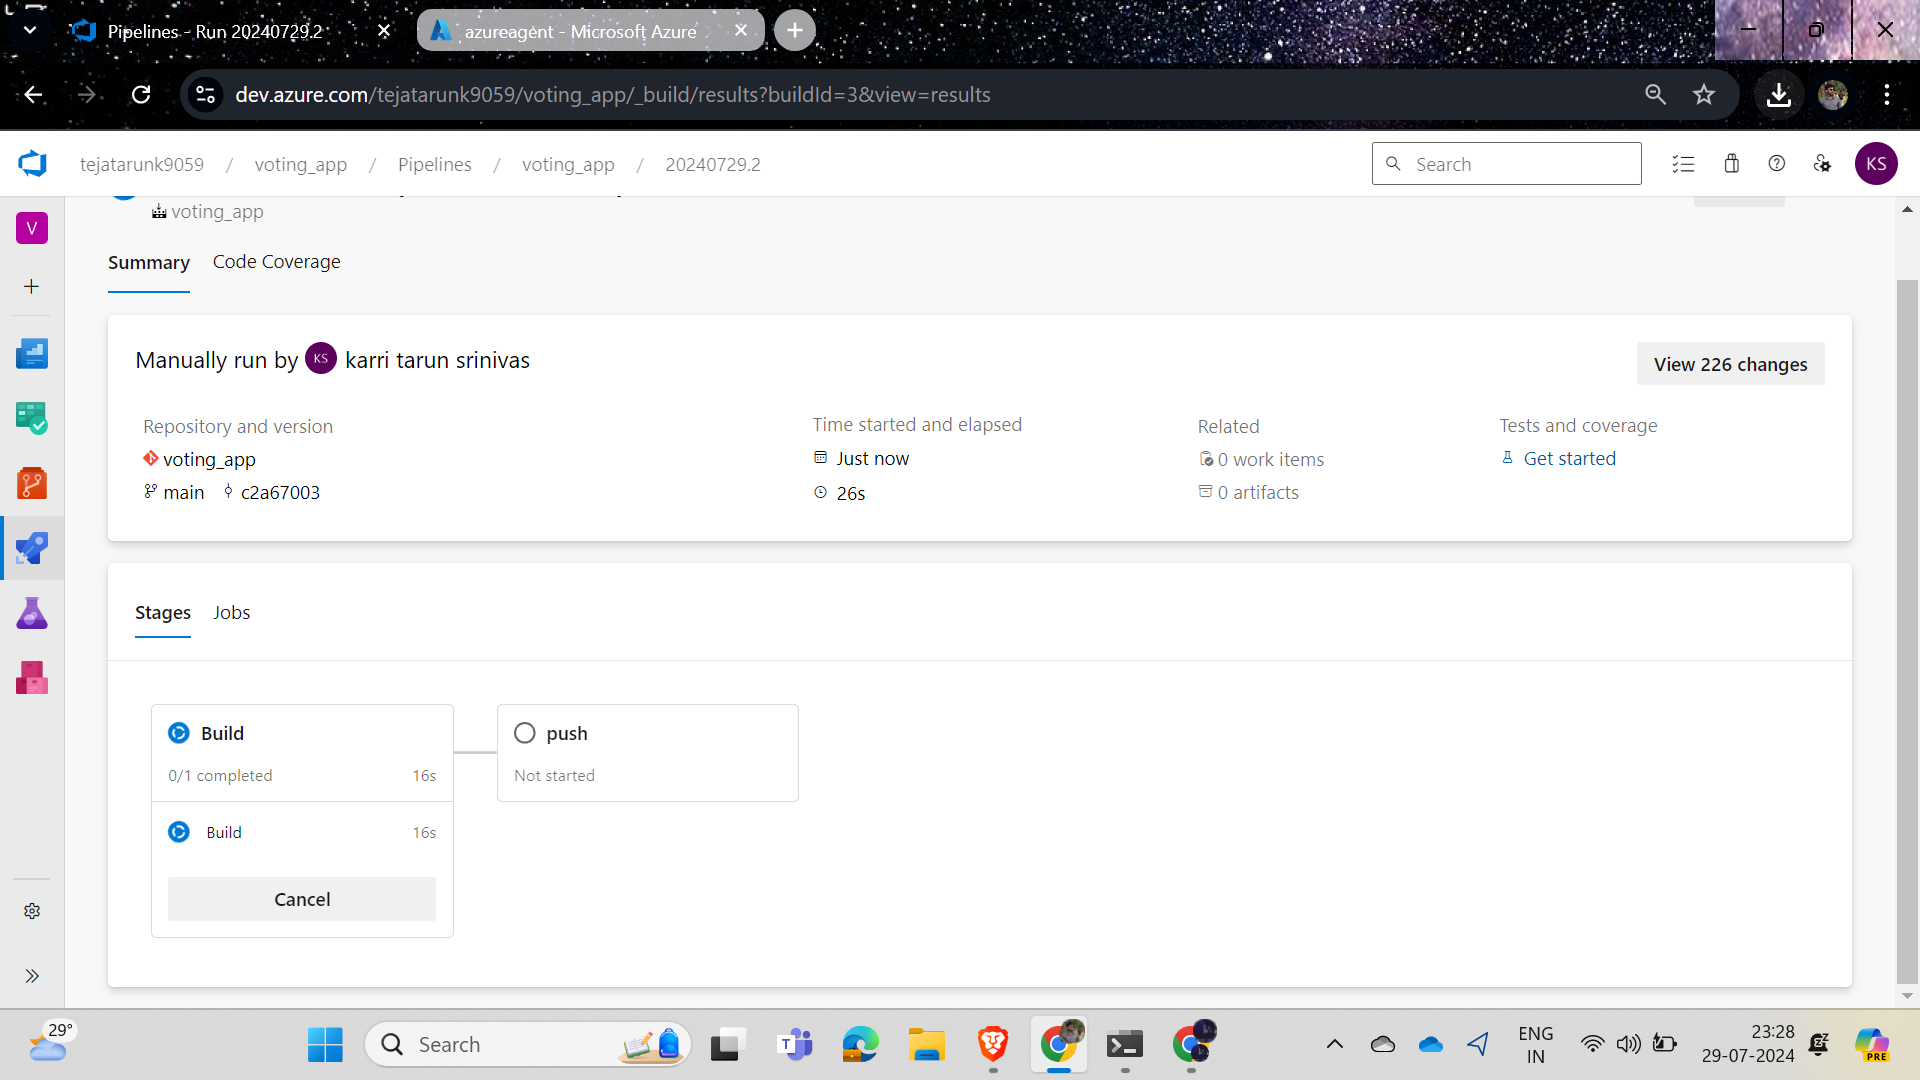
Now click on the build to see what is happening.
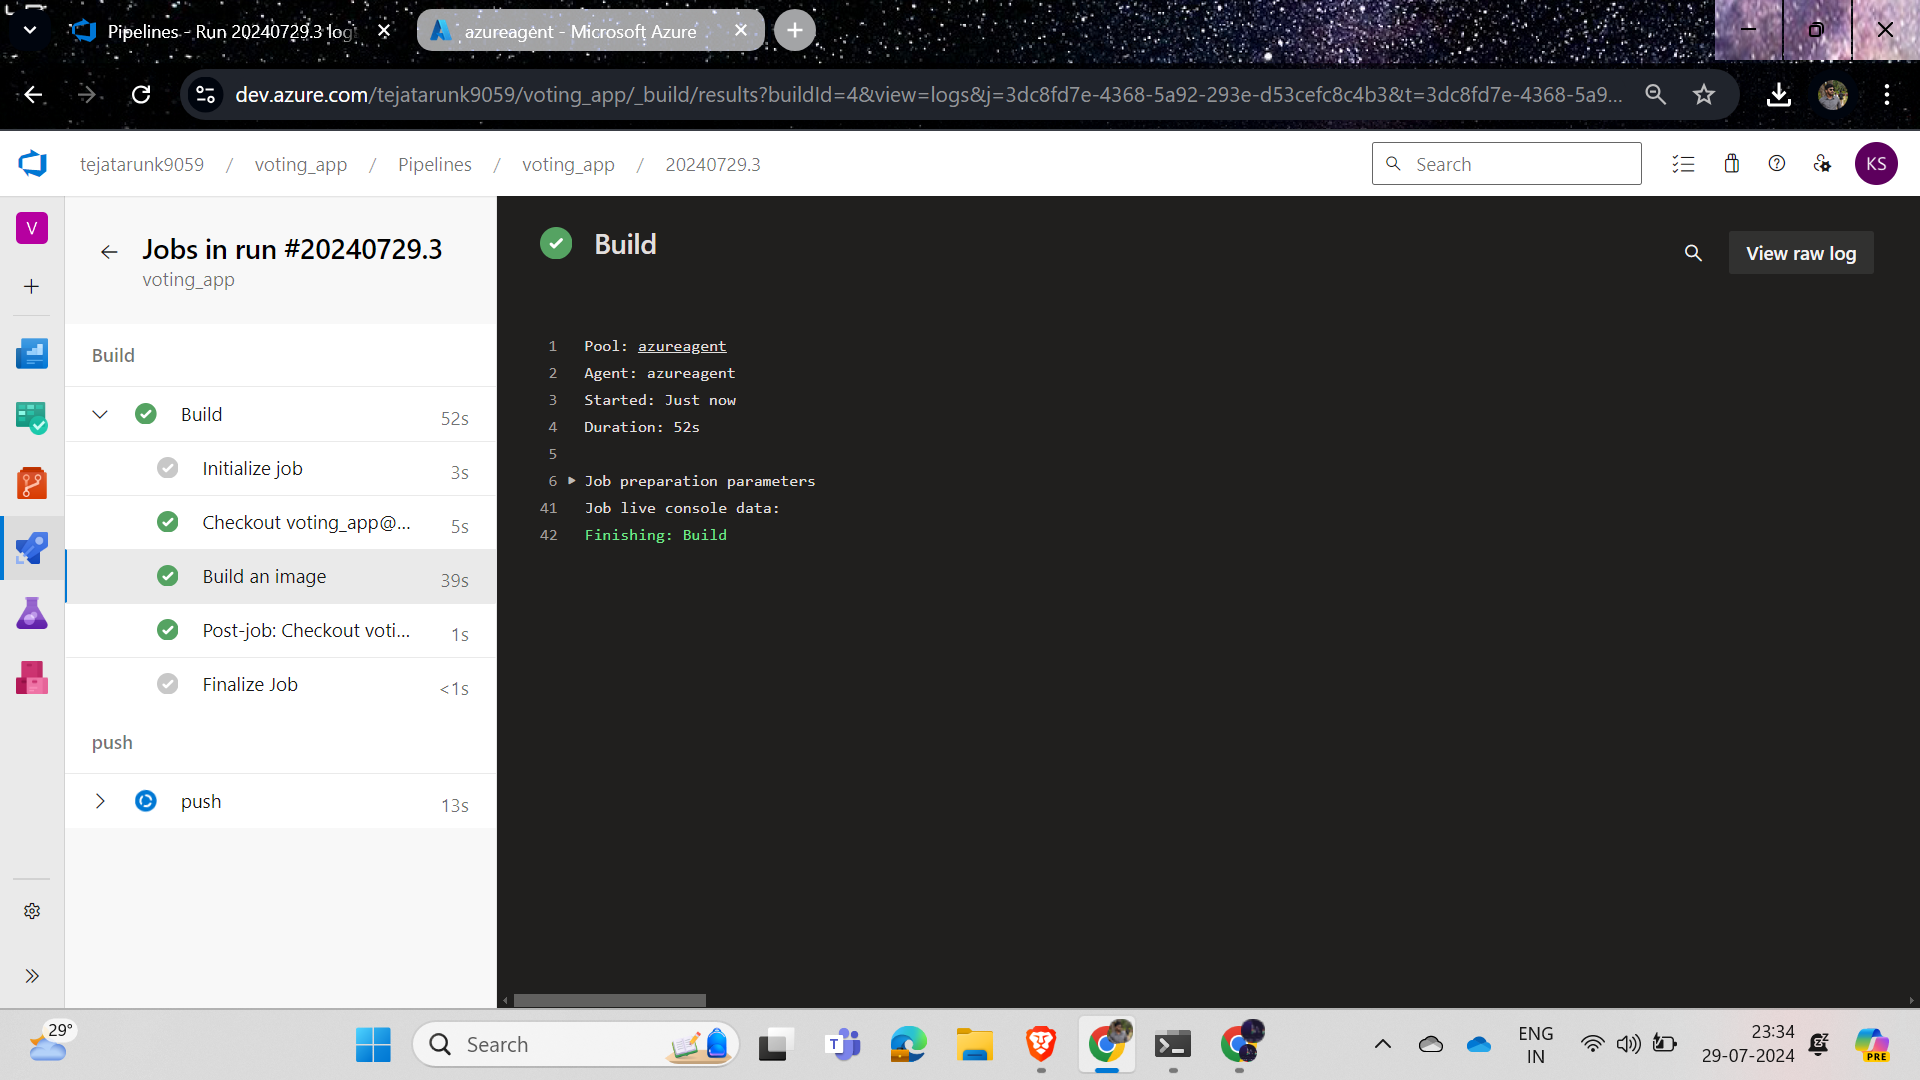
Hurray, we successfully ran the code we had written! Now we need to test if the pipeline is working fine.
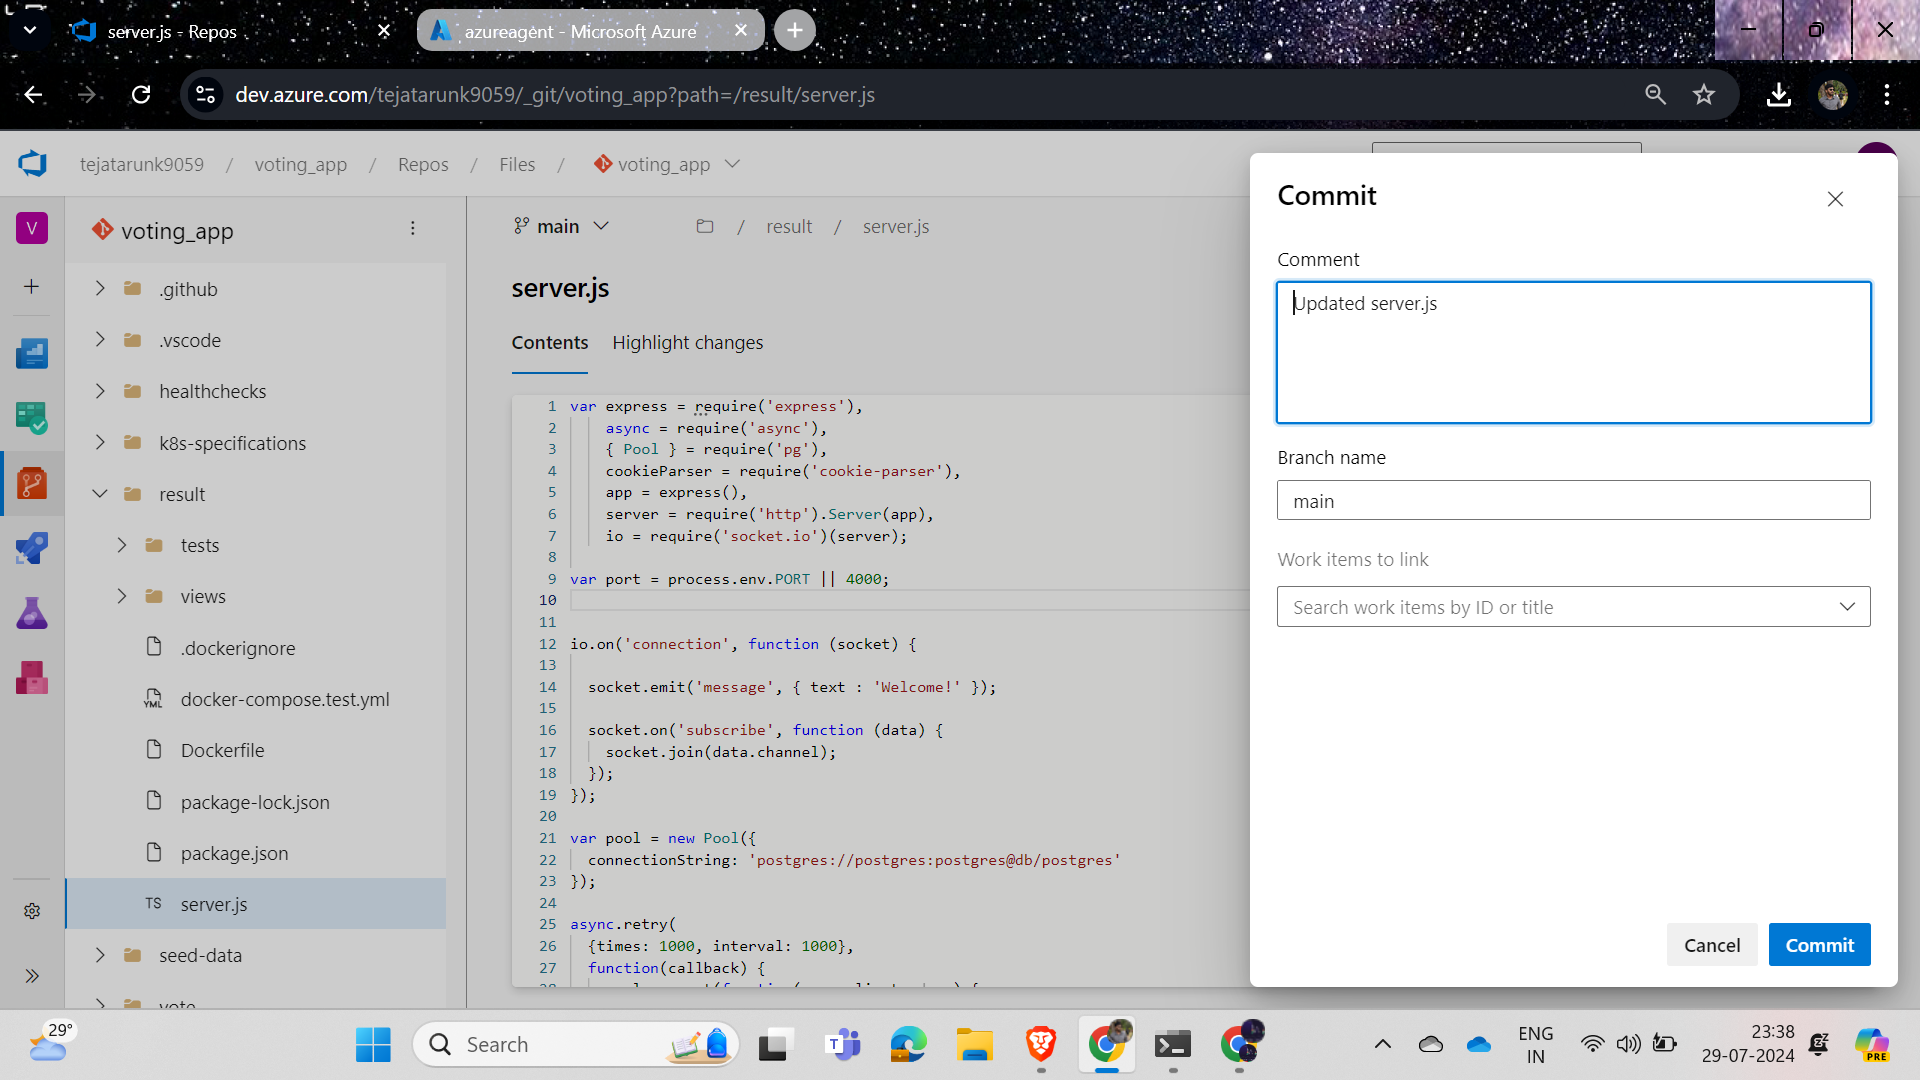
Now go to the git repo and edit any file in the result application, for example, I edited server.js, and the pipeline should trigger to confirm it is working correctly.
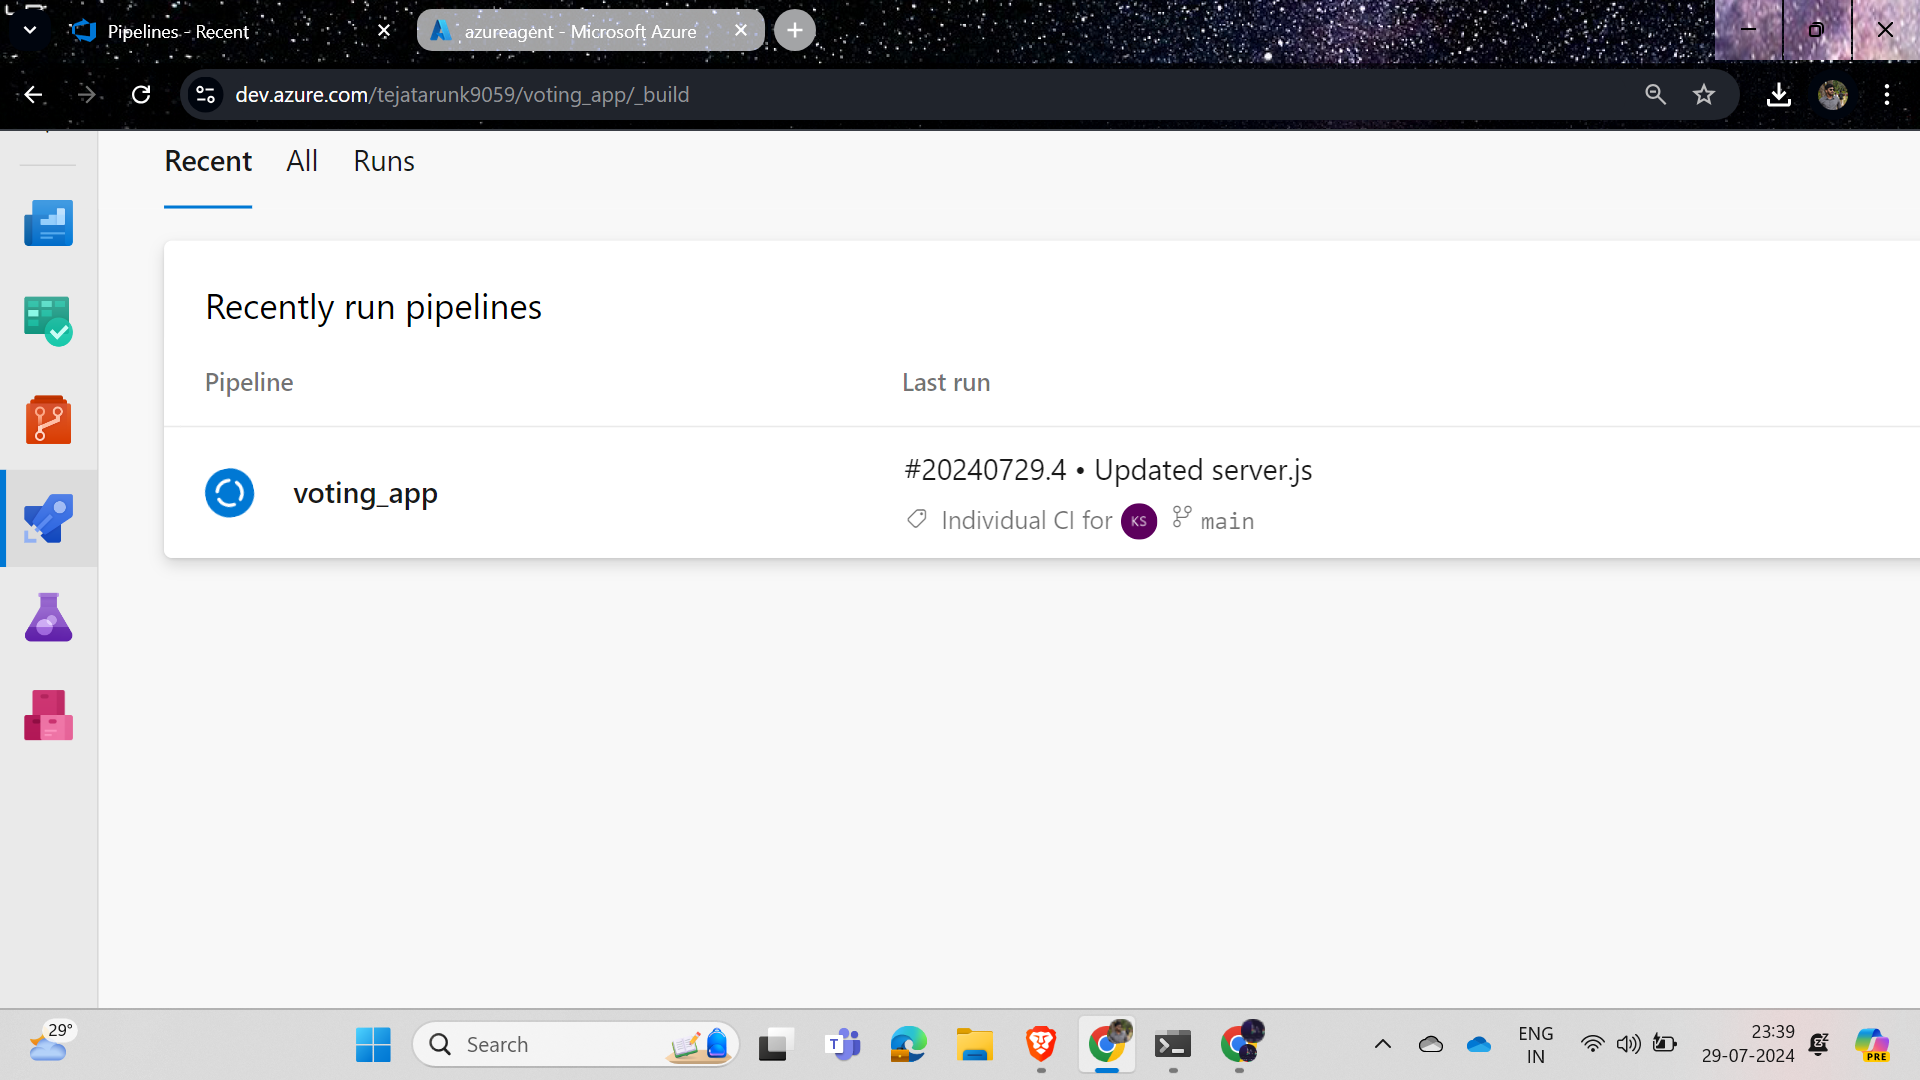
Yes, our pipeline got triggered. And we can see it in our azure vm
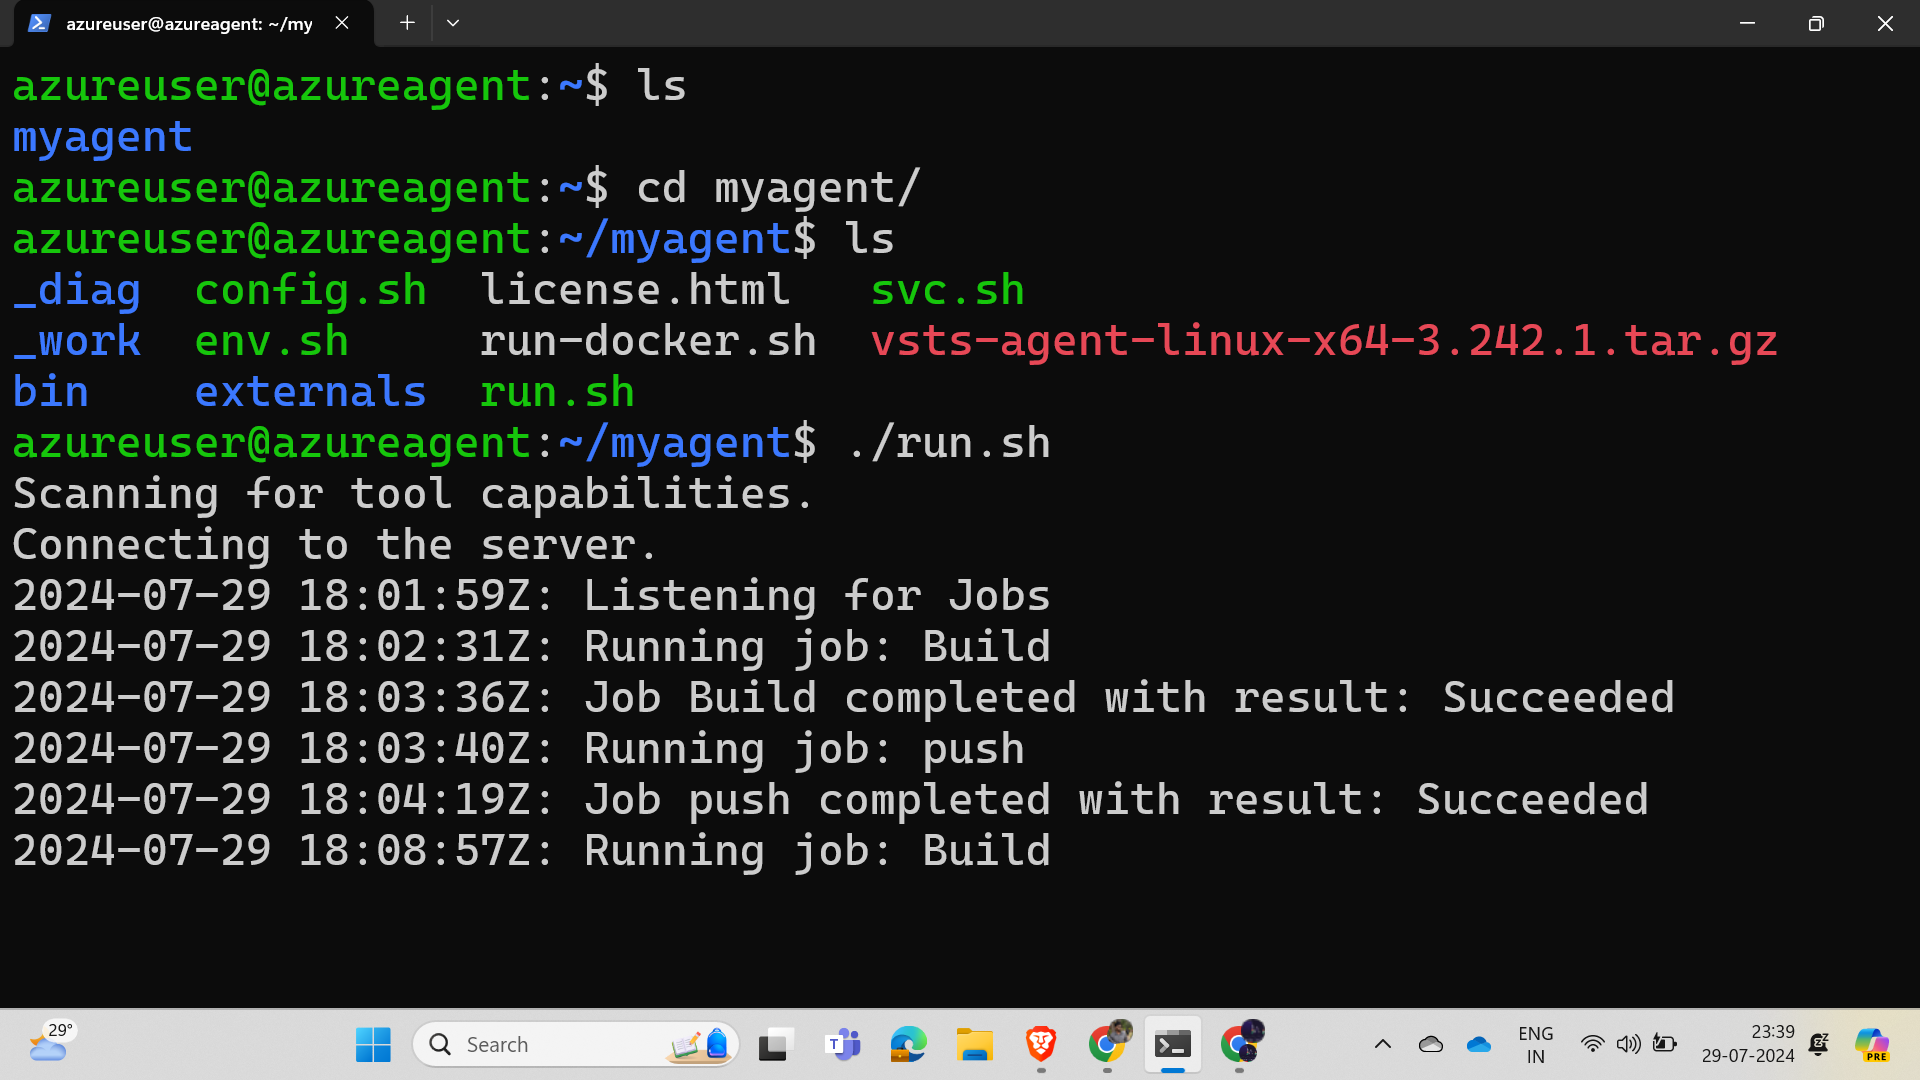
Hurray, we succeeded! Now you try to write for the other two applications, which are the voting and worker applications.

This is an image of our project where we are developing the CI/CD.
Conclusion :
In this guide, we have successfully walked through the process of creating a CI pipeline using Azure DevOps. We started by setting up an Azure DevOps account and creating a project. We then cloned a Git repository into Azure DevOps and created a container registry. Following that, we set up a virtual machine and wrote Docker files for the cloned repository. Finally, we configured and ran the CI pipeline, ensuring continuous integration. By following these steps, you now have a functional CI pipeline that can be adapted and expanded for various applications, enhancing your development workflow with automated builds and deployments. Happy coding!
Subscribe to my newsletter
Read articles from Hema Sundharam Kolla directly inside your inbox. Subscribe to the newsletter, and don't miss out.
Written by

Hema Sundharam Kolla
Hema Sundharam Kolla
I'm a passionate Computer Science student specializing in DevOps, cloud technologies, and powerlifting. I've completed several certifications, including AWS Cloud Practitioner and Google’s Generative AI badge, and I'm currently exploring both AWS and Azure to build scalable, efficient CI/CD pipelines. Through my blog posts, I share insights on cloud computing, DevOps best practices, and my learning journey in the tech space. I enjoy solving real-world problems with emerging technologies and am developing a platform to offer career advice to students. Outside of tech, I'm a competitive powerlifter, constantly striving to improve and inspire others in fitness. Always eager to connect with like-minded individuals and collaborate on projects that bridge technology and personal growth.
