Guide on how to Setup a Vitual Machine (VM) in Microsoft Azure
 Onoja Bishop
Table of contents
- What is a Virtual Machine (VM)?
- How to Create a Virtual machine (VM) in Microsoft Azure
- Step 1: Sign in to Azure Portal
- Step 2: Open Virtual Machine
- Step 3: Configure Basic Settings
- Step 4: Configure Disks
- Step 5: Configure Networking
- Step 6: Configure Management Options
- Step 7: Configure Advanced Settings
- Step 8: Configure Tags
- Step 9: Review and Create
- Step 10: Access Your Virtual Machine

What is a Virtual Machine (VM)?
A virtual machine (VM) is an advanced software-defined environment that emulates a physical computer. It operates as an isolated instance within a host system, enabling multiple VMs to run on a single piece of hardware. Each VM has its own operating system and applications, functioning independently from the host and other VMs. Key features include:
Isolation: Each VM is separated from others, ensuring security and stability.
Resource Allocation: VMs share the host's resources (CPU, memory, storage) but are managed to ensure fair distribution.
Flexibility: VMs can be easily created, modified, moved, or deleted, making them ideal for testing, development, and production environments.
In essence, VMs offer a powerful way to maximize hardware utilization, enhance flexibility, and ensure robust application performance in modern computing environments.
How to Create a Virtual machine (VM) in Microsoft Azure
Creating a virtual machine (VM) can be done using various methods such as Azure portal, Azure CLI and PowerShell.
We would be using the Microsoft Azure to create a Virtual Machine. Creating a VM in Azure involves several steps.
Here's a step-by-step guide to guide you through the process:
Step 1: Sign in to Azure Portal
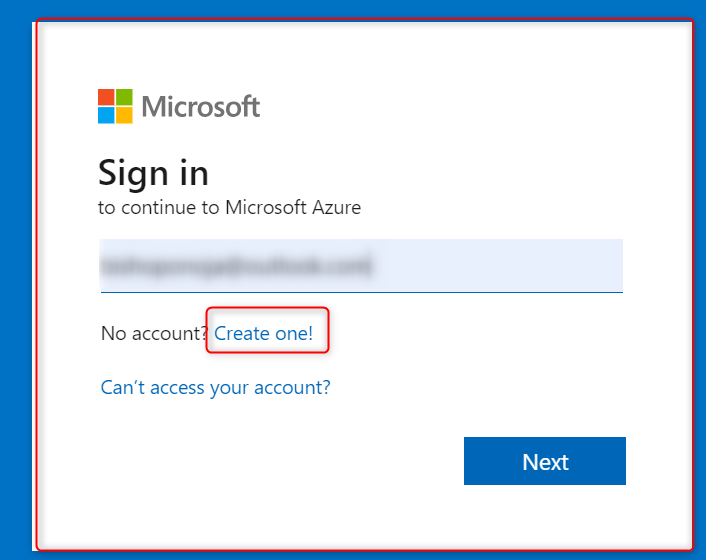
Go to the Azure Portal (portal.azure.com).
Sign in with your Azure account credentials, if you don't have one, use the "Create one" option to set up a new account.
Step 2: Open Virtual Machine
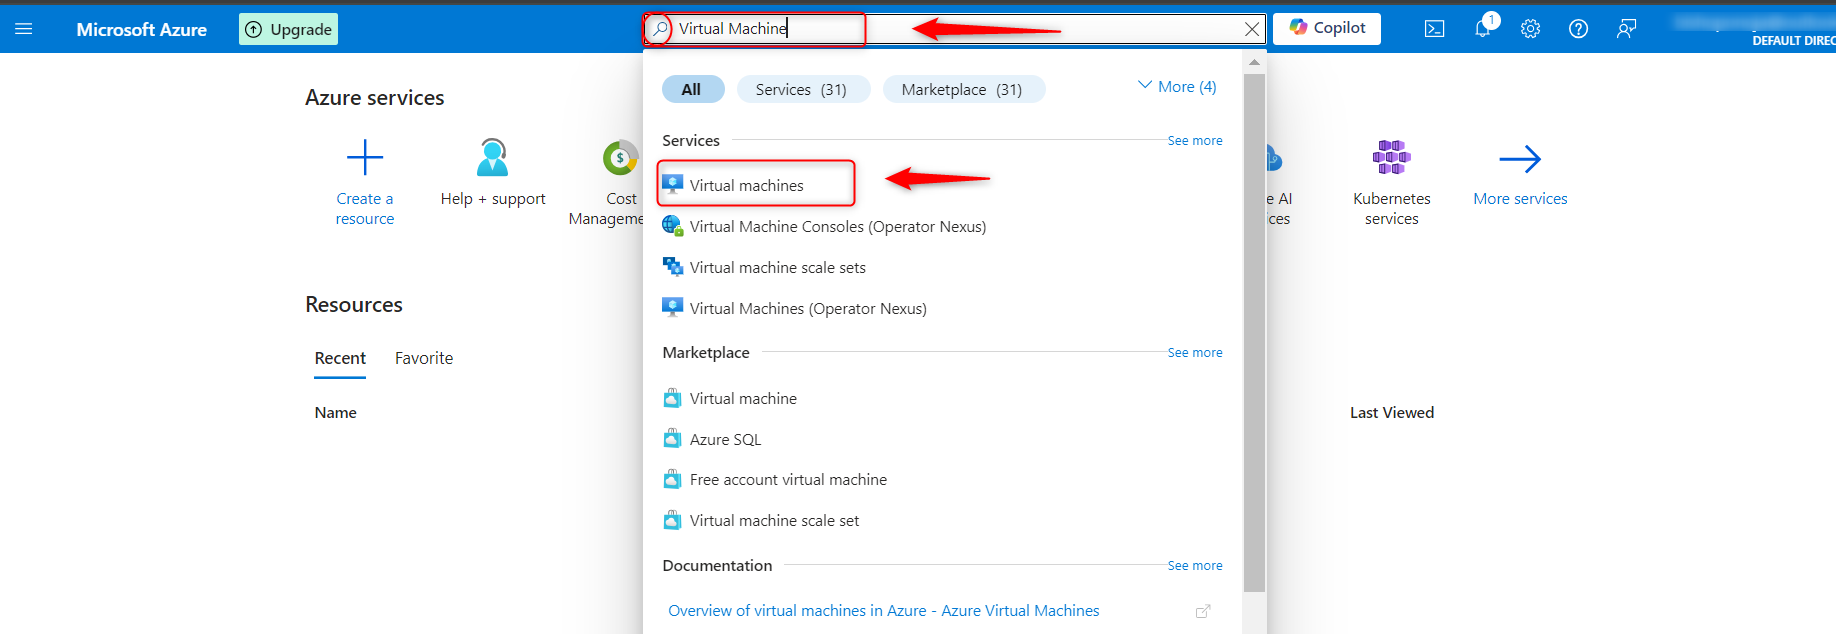
- In the Azure portal, search for Virtual Machine on the search bar at the top, when this is done, click on virtual machine
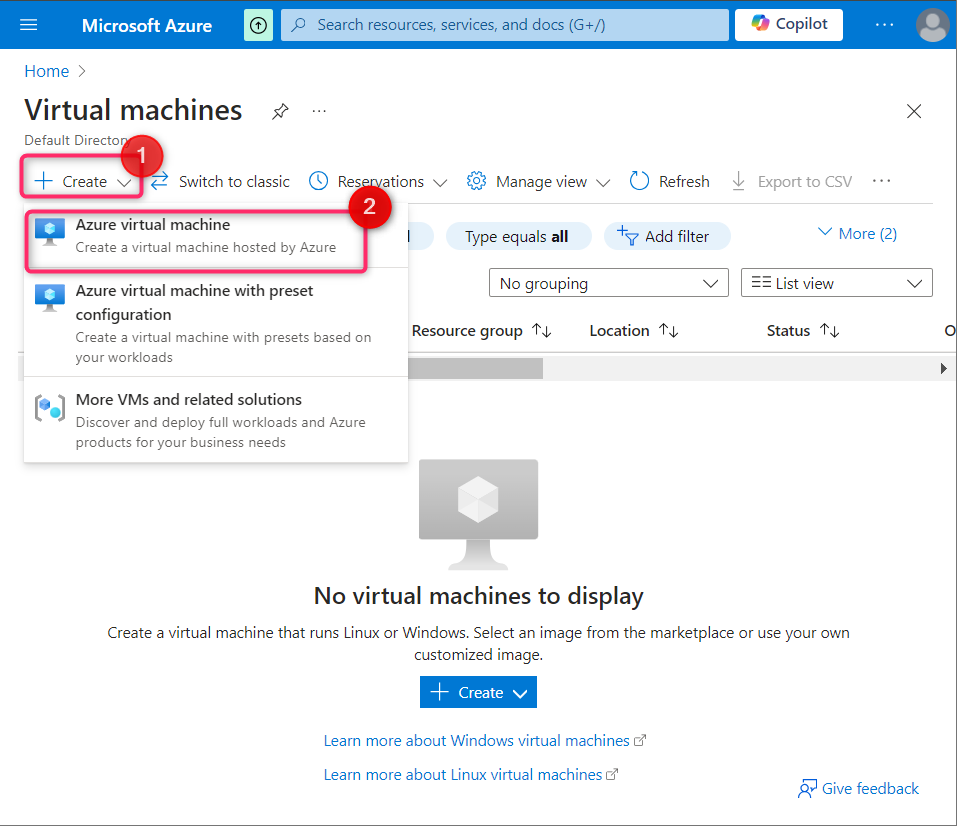
select create option and the choose A"zure Virtual Machine" from the left-hand menu.
Step 3: Configure Basic Settings
Fill in the Basics tab:
- Subscription: Select your subscription.
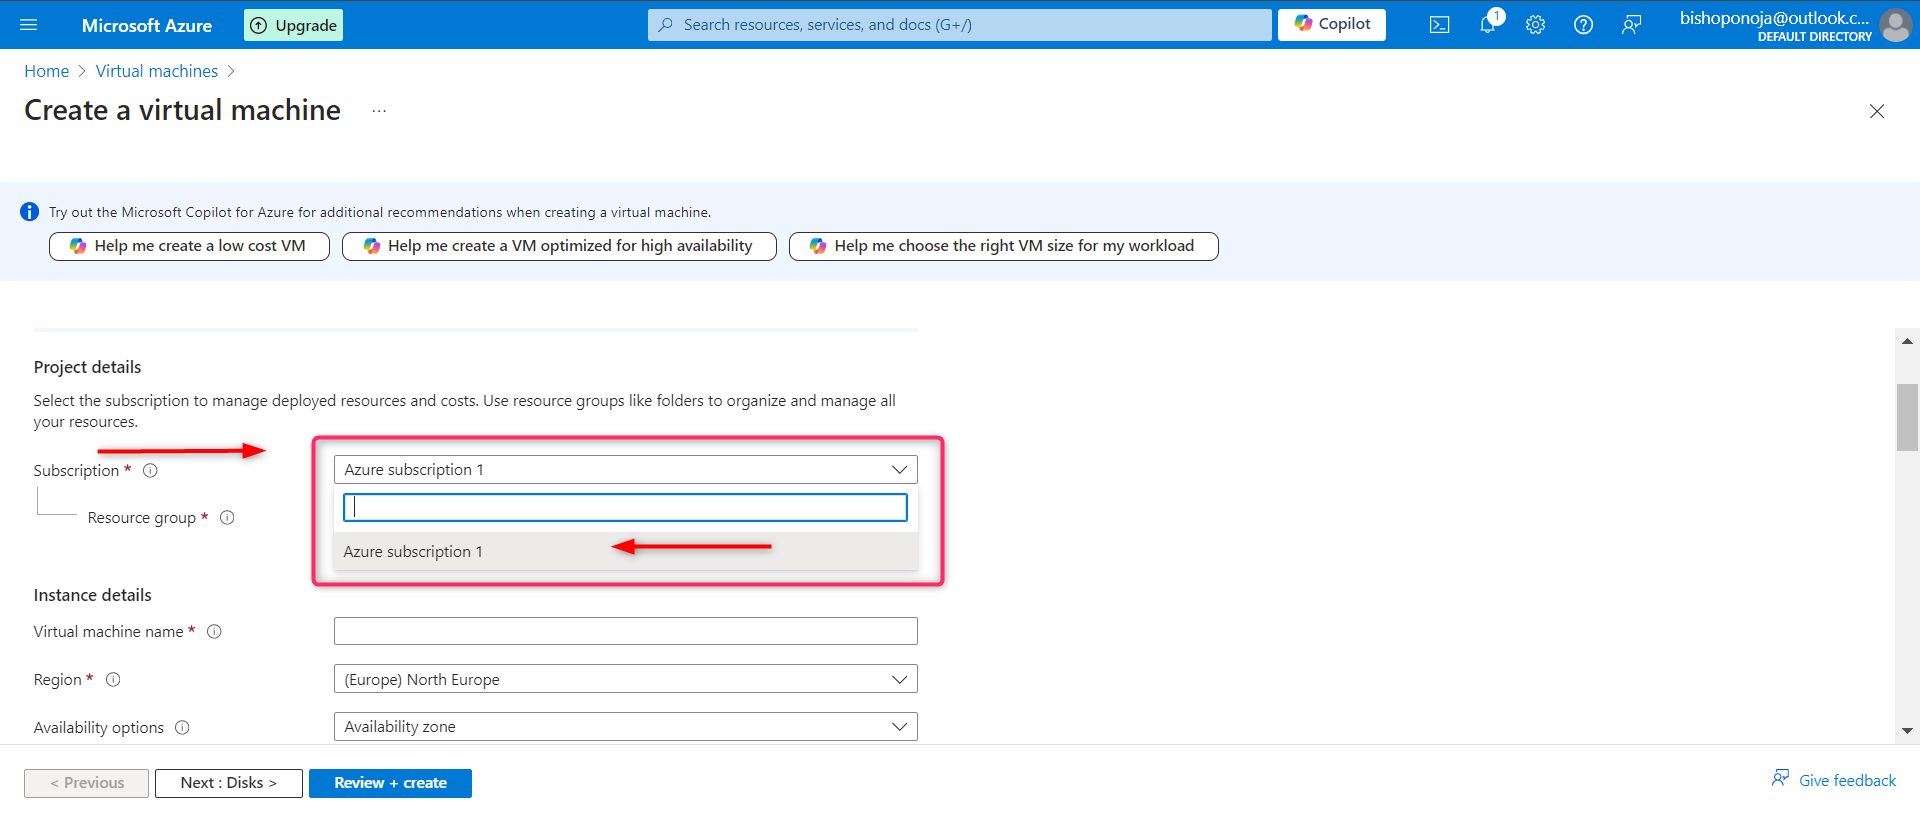
Resource group: Select the resource group you created earlier.
Virtual machine name: Enter a name for your VM.
- Region: Choose the region where you want to deploy the VM.
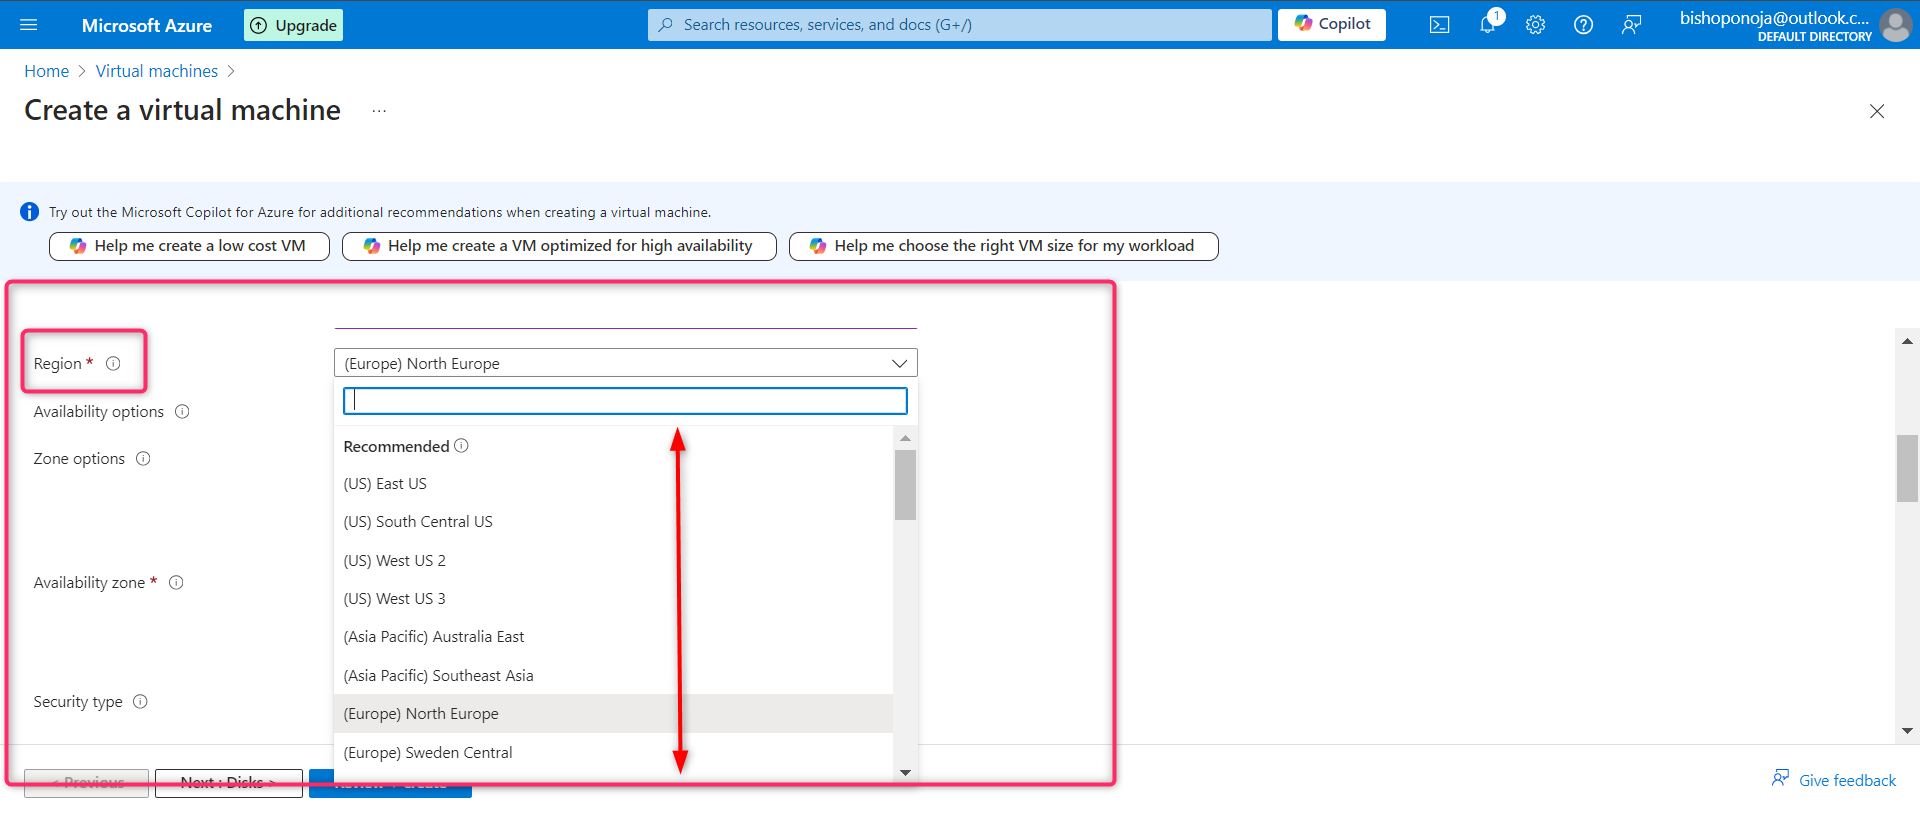
Availability options: Choose an availability option if required.
Image: Select the operating system image for your VM (e.g., Windows Server, Ubuntu).
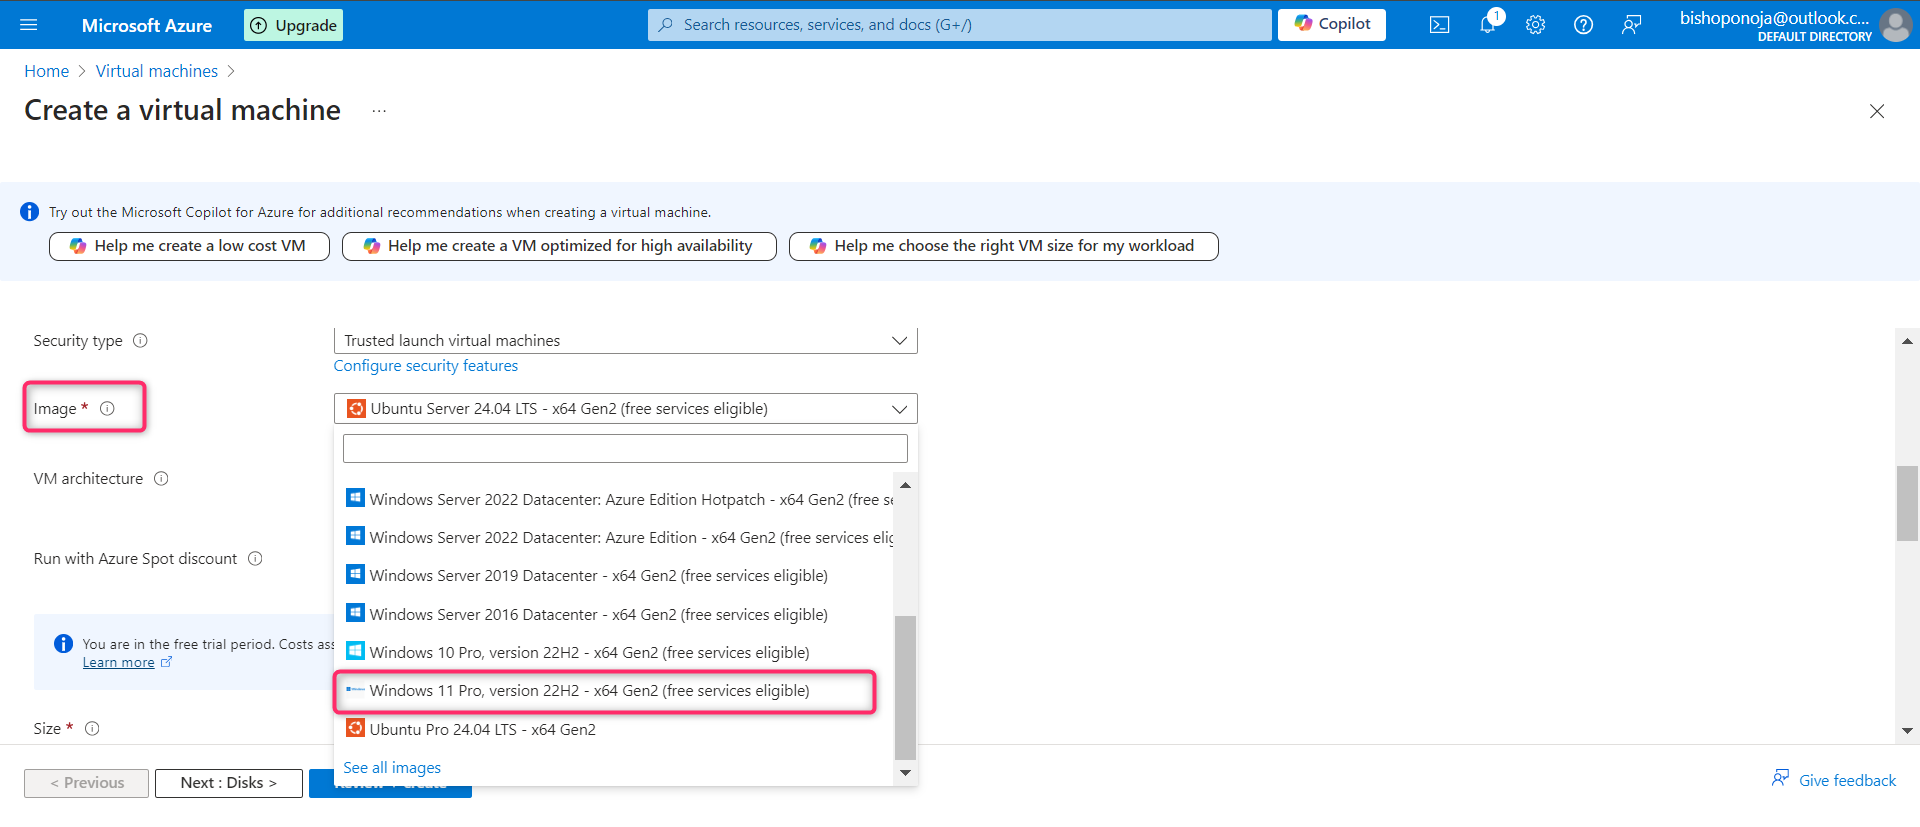
Size: Choose the VM size (CPU, RAM) based on your needs.
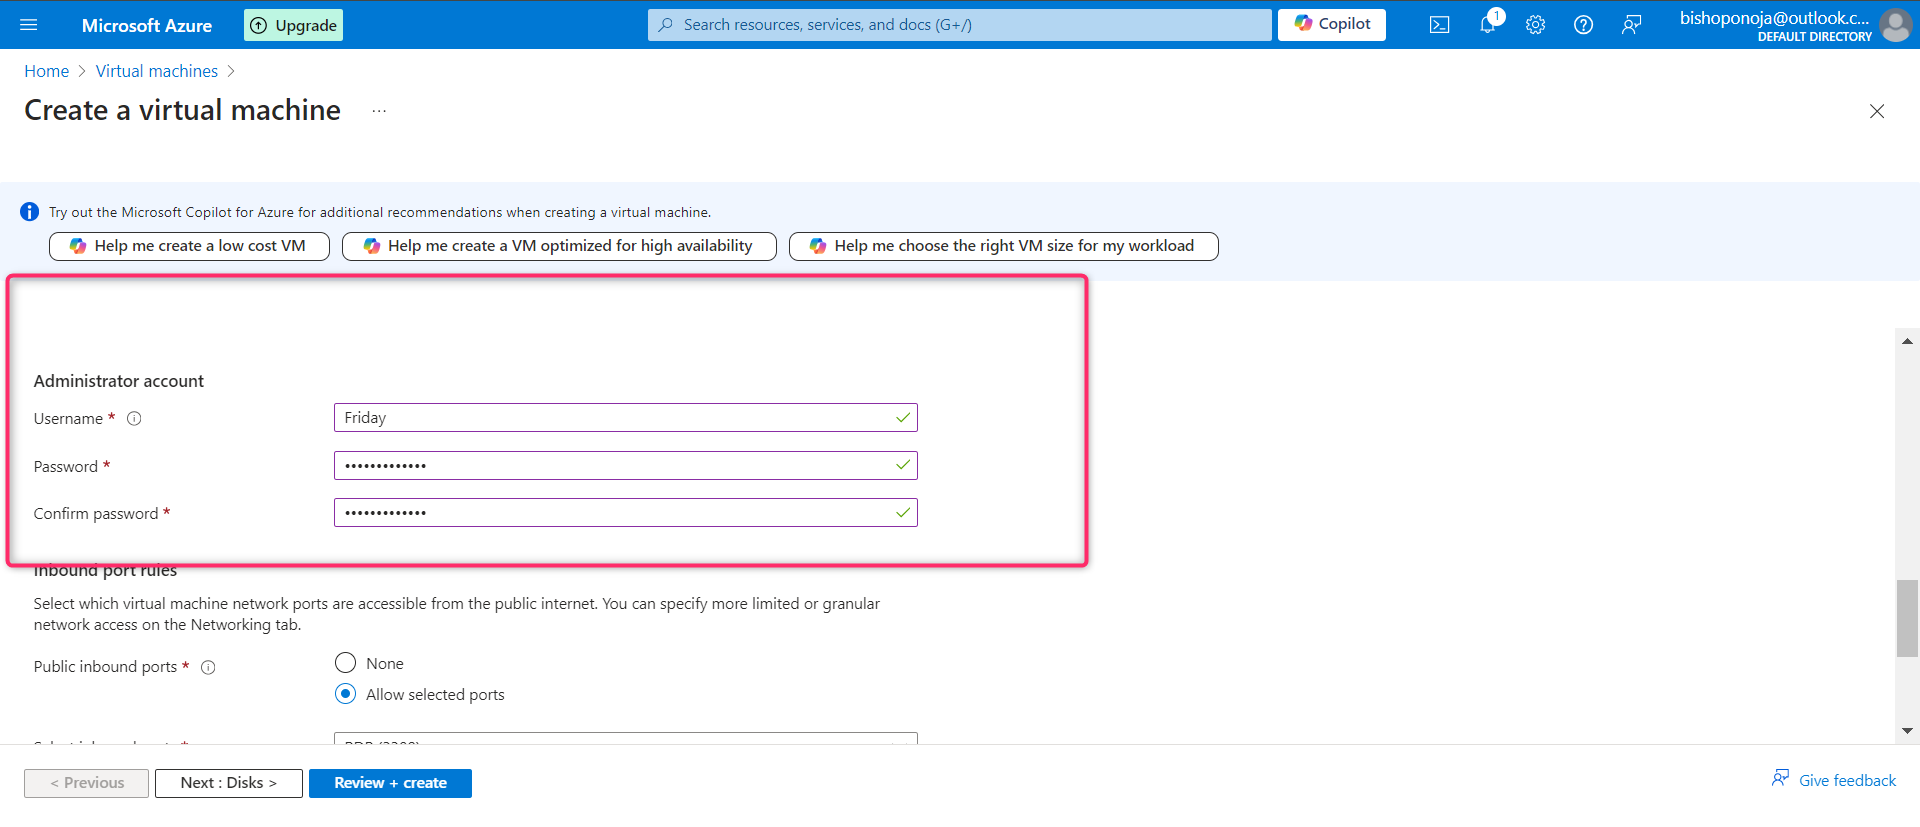
Administrator account: Enter a username and password or SSH public key for the admin account.
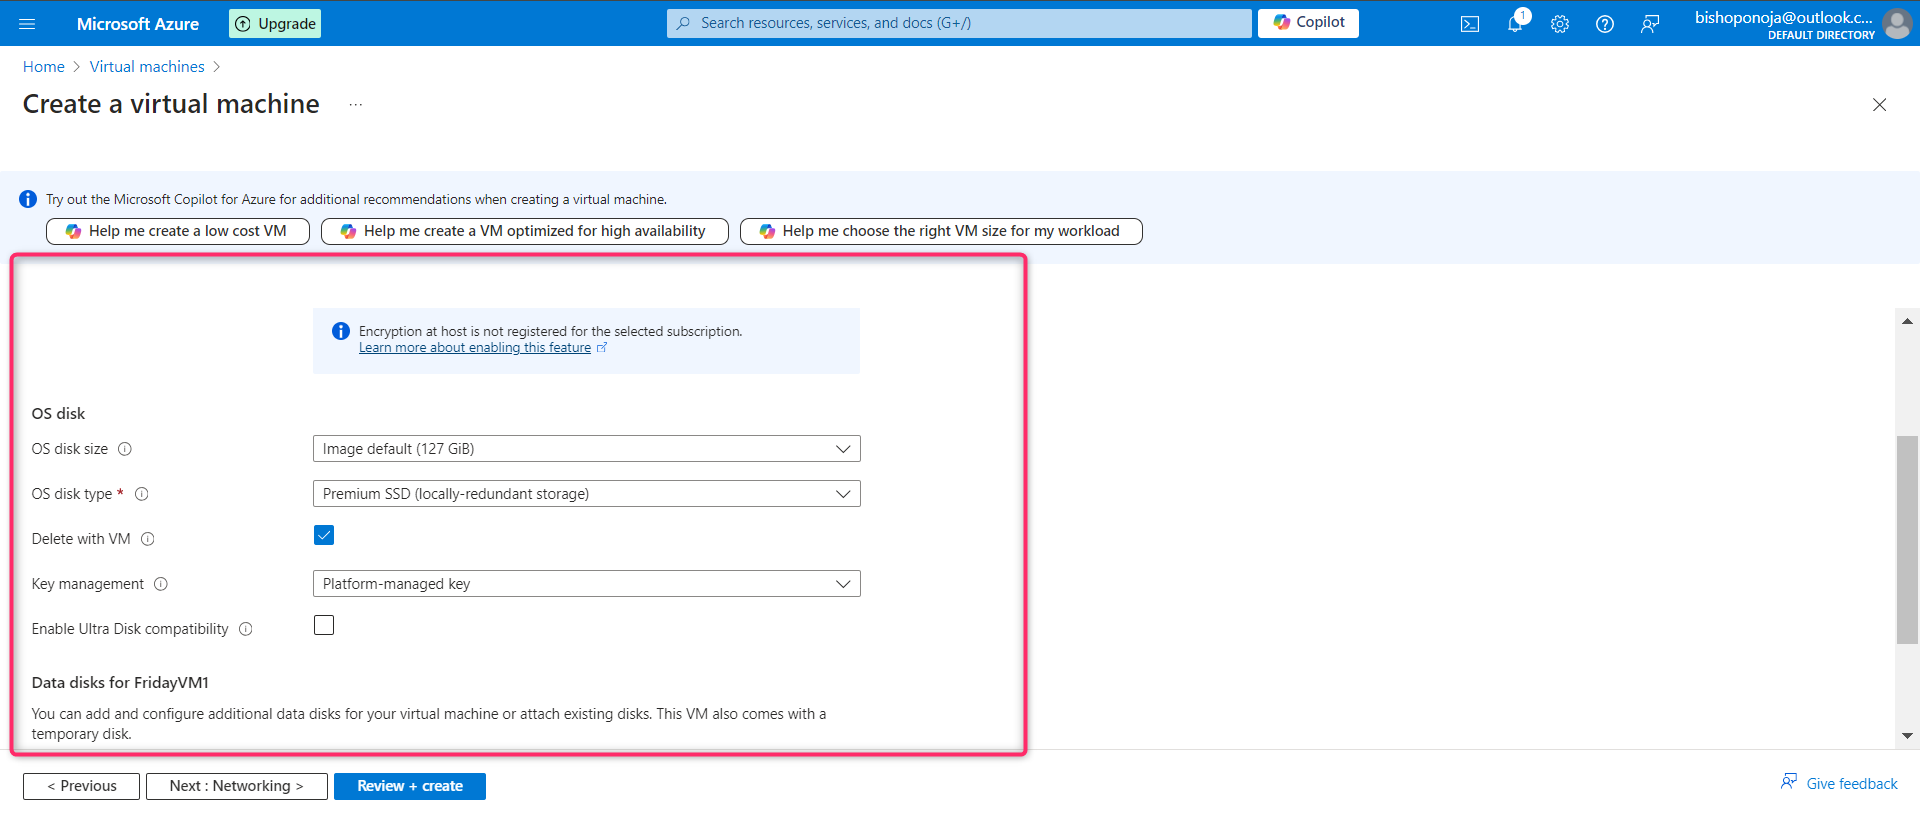
Step 4: Configure Disks
Select the Disks tab.
Configure the OS disk type (Standard SSD, Premium SSD, etc.).
Add any additional data disks if needed.
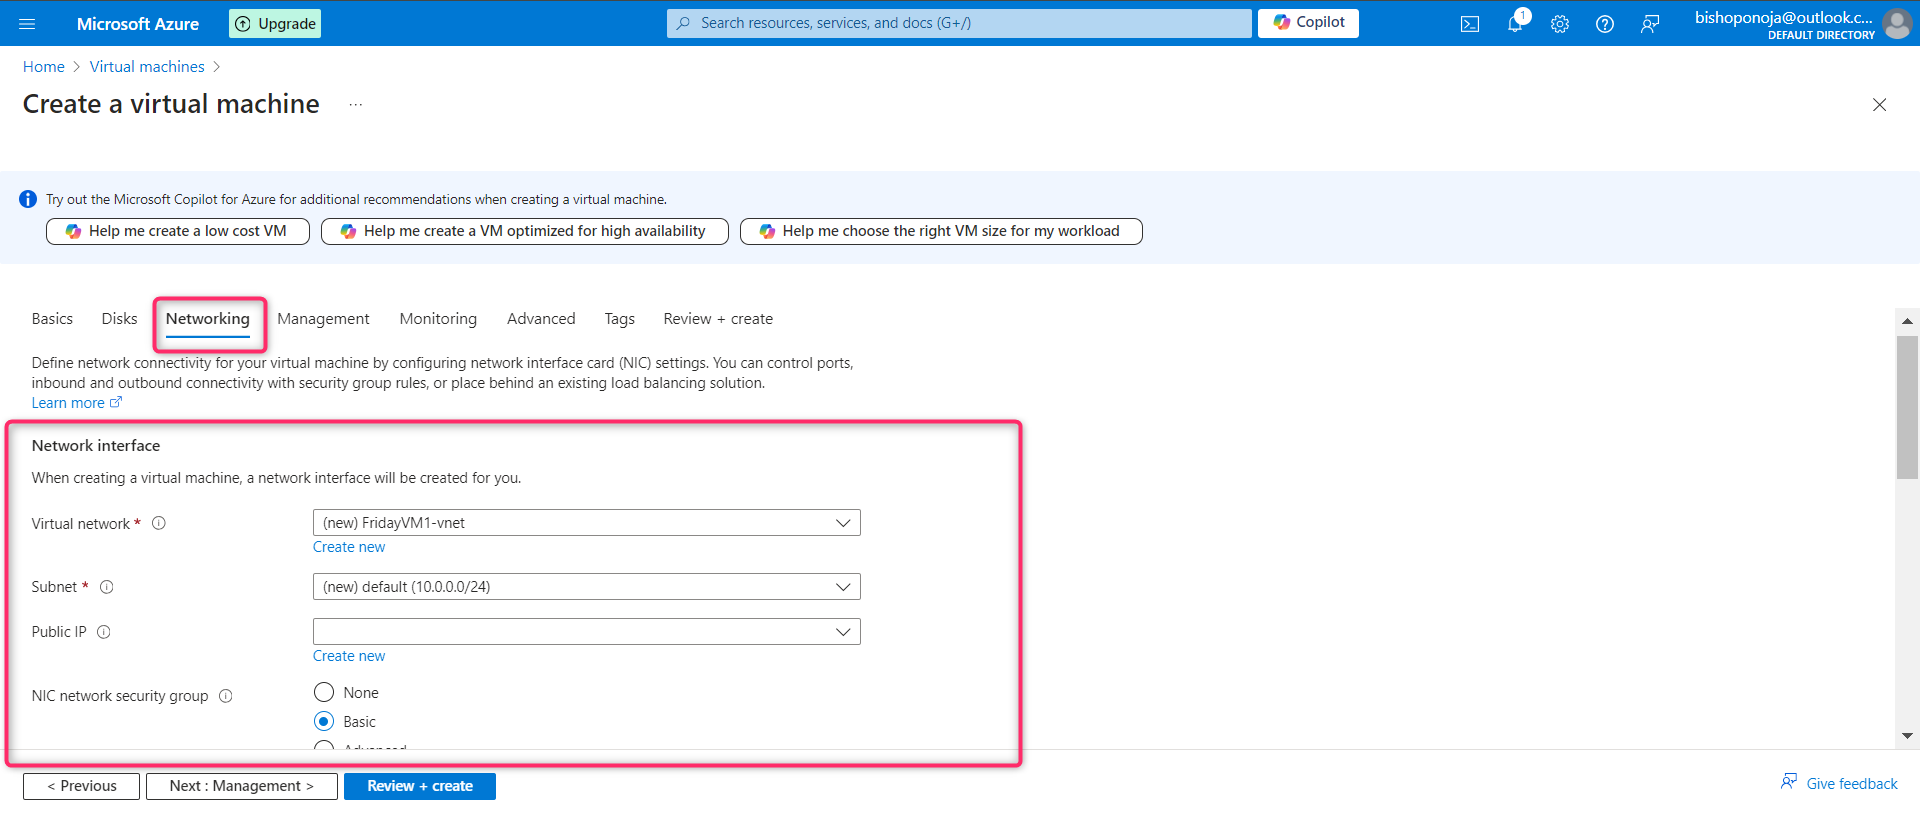
Step 5: Configure Networking
Select the Networking tab.
Choose or create a virtual network (VNet) and subnet.
Configure the public IP address settings.
Select or create a Network Security Group (NSG) to control traffic to the VM.
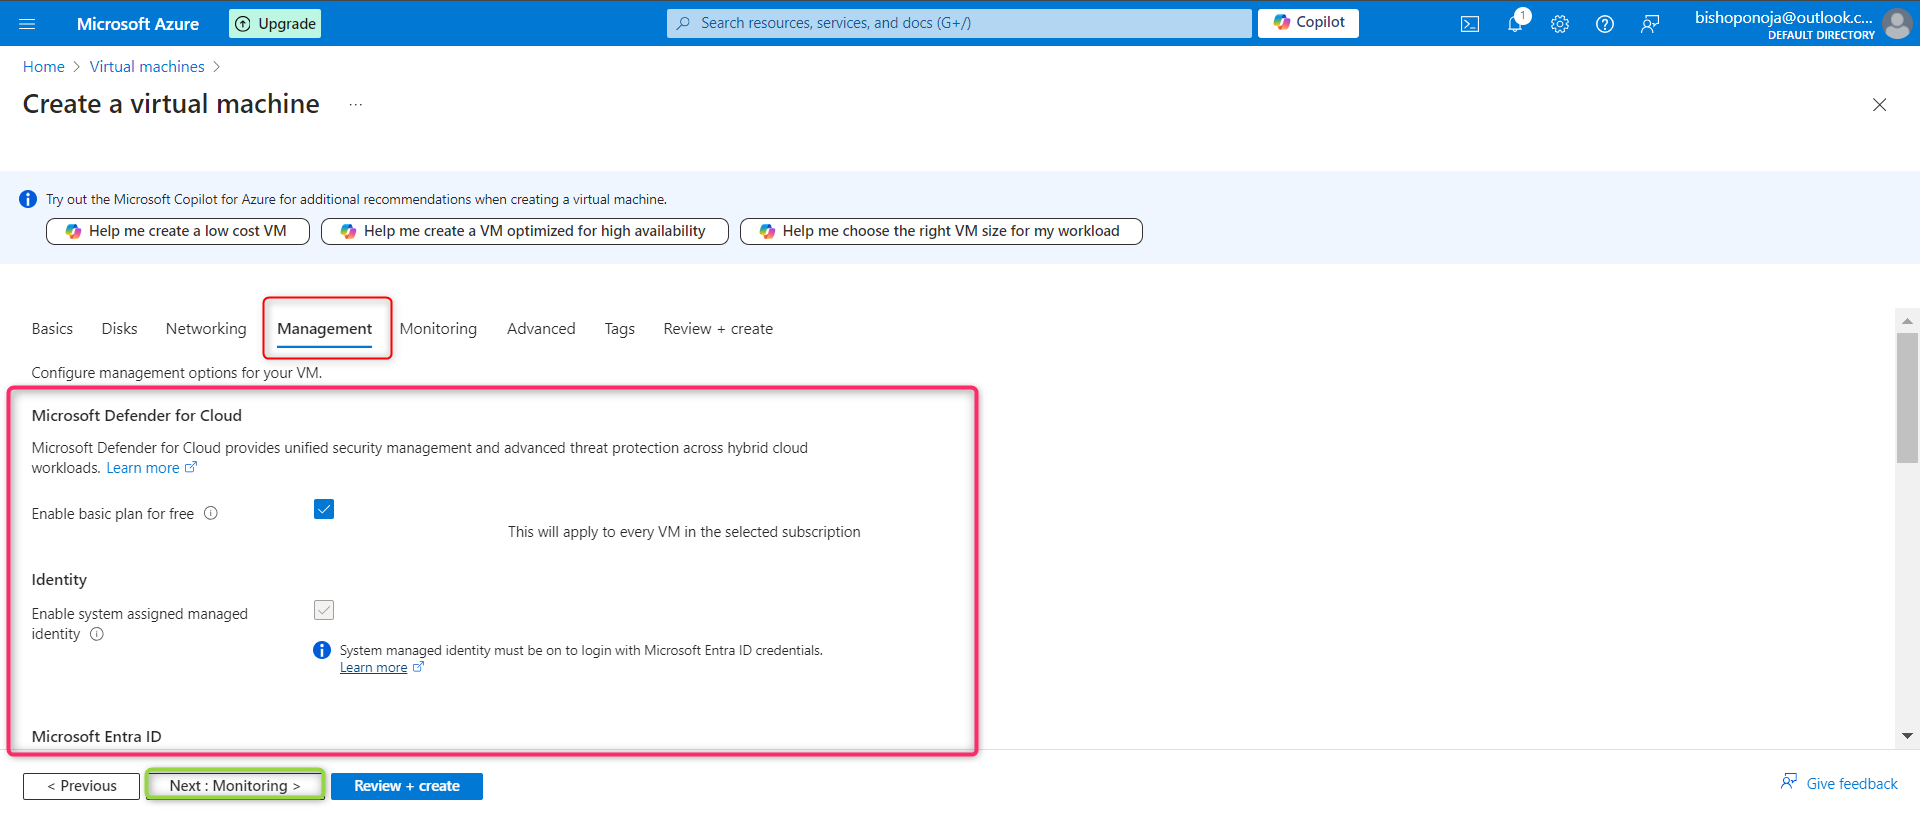
Step 6: Configure Management Options
Select the Management tab.
Configure monitoring and management options like boot diagnostics, OS guest diagnostics, and identity.
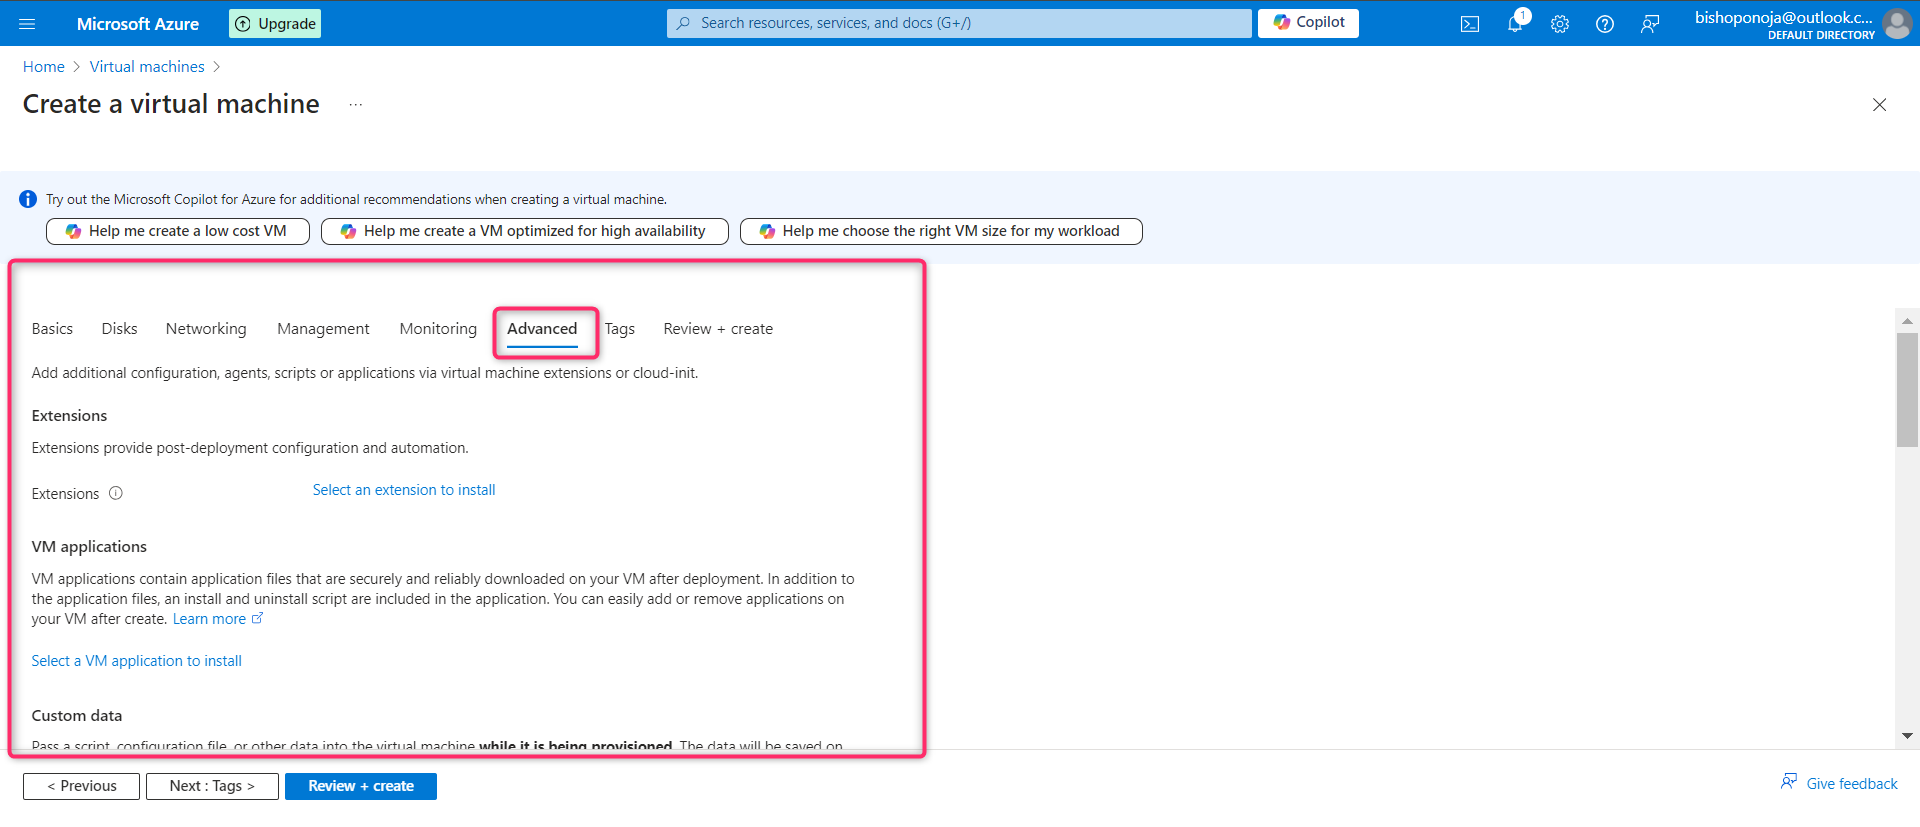
Step 7: Configure Advanced Settings
Select the Advanced tab.
Configure any advanced settings like extensions, custom data, and cloud-init.
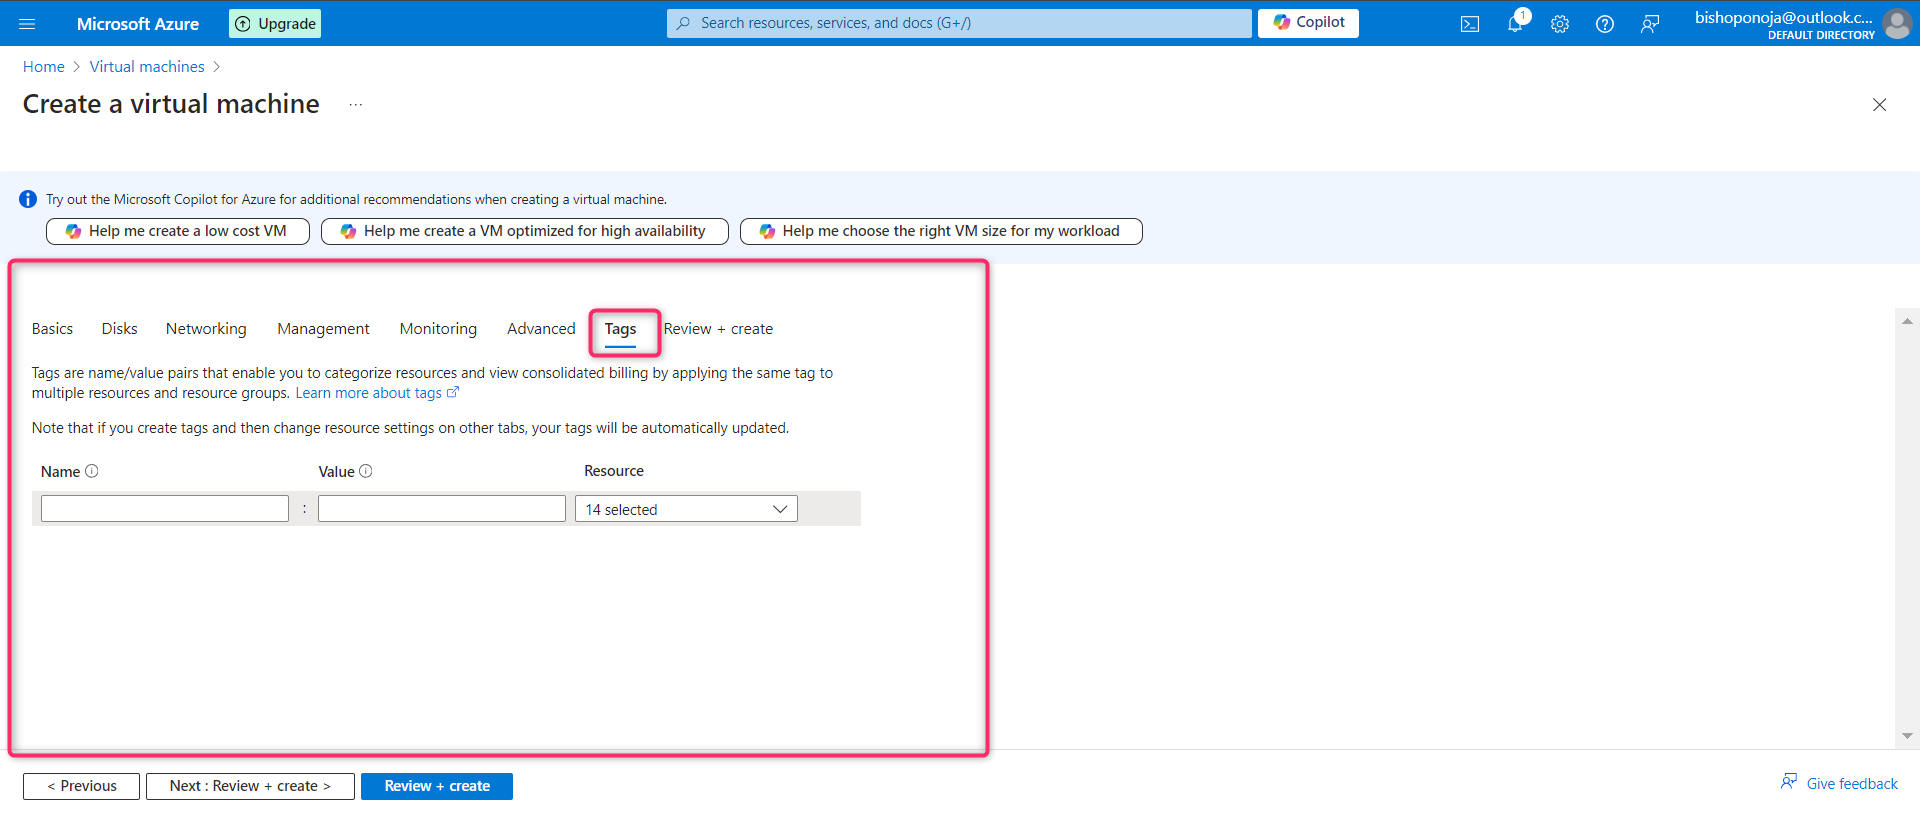
Step 8: Configure Tags
Select the Tags tab.
Add any tags to categorize your resources.
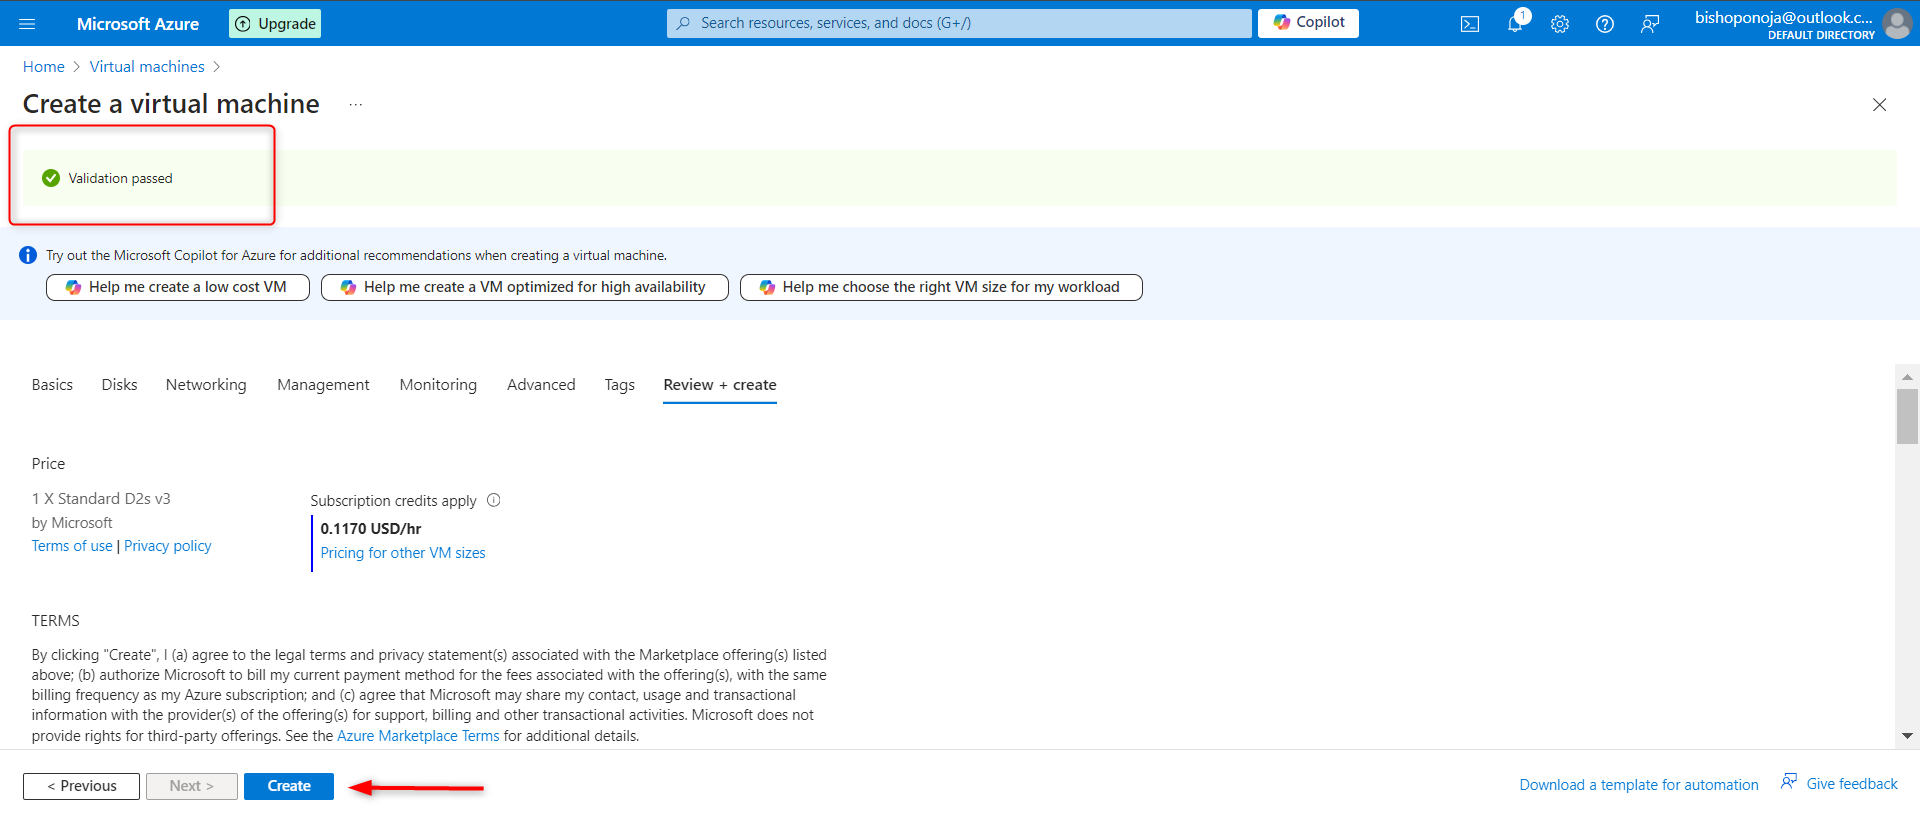
Step 9: Review and Create
Select the Review + create tab.
Review all the settings to ensure they are correct.
Click Create to start the deployment of your VM.
Step 10: Access Your Virtual Machine
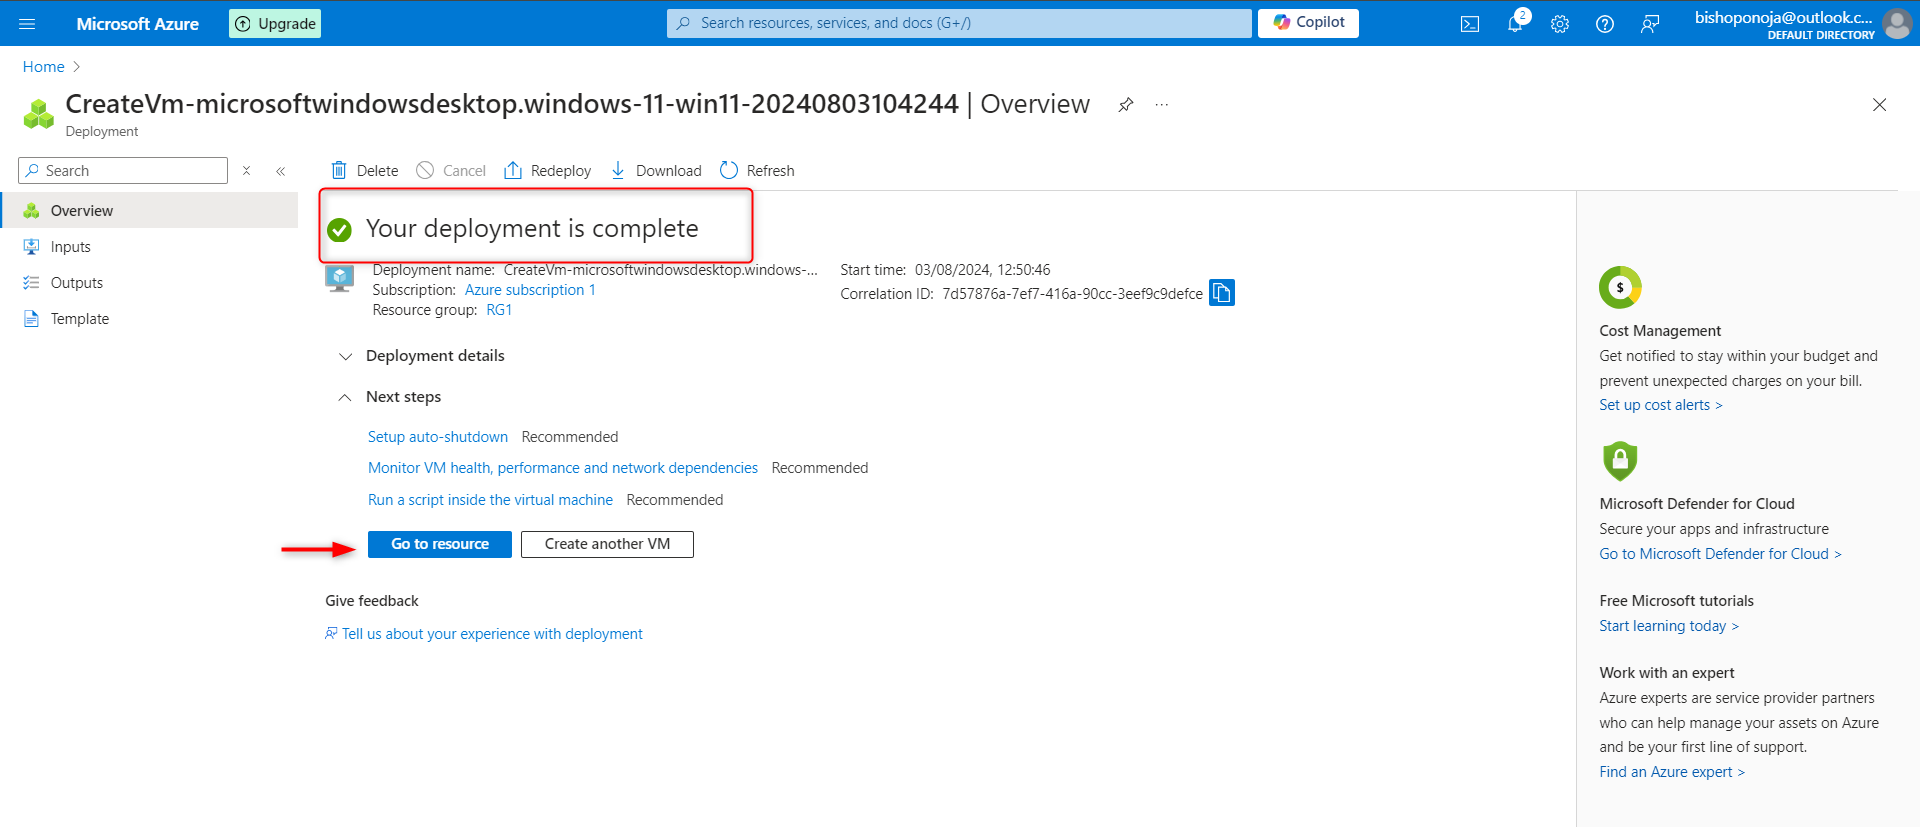
Once the VM deployment is complete, click on "Go to resource" section.
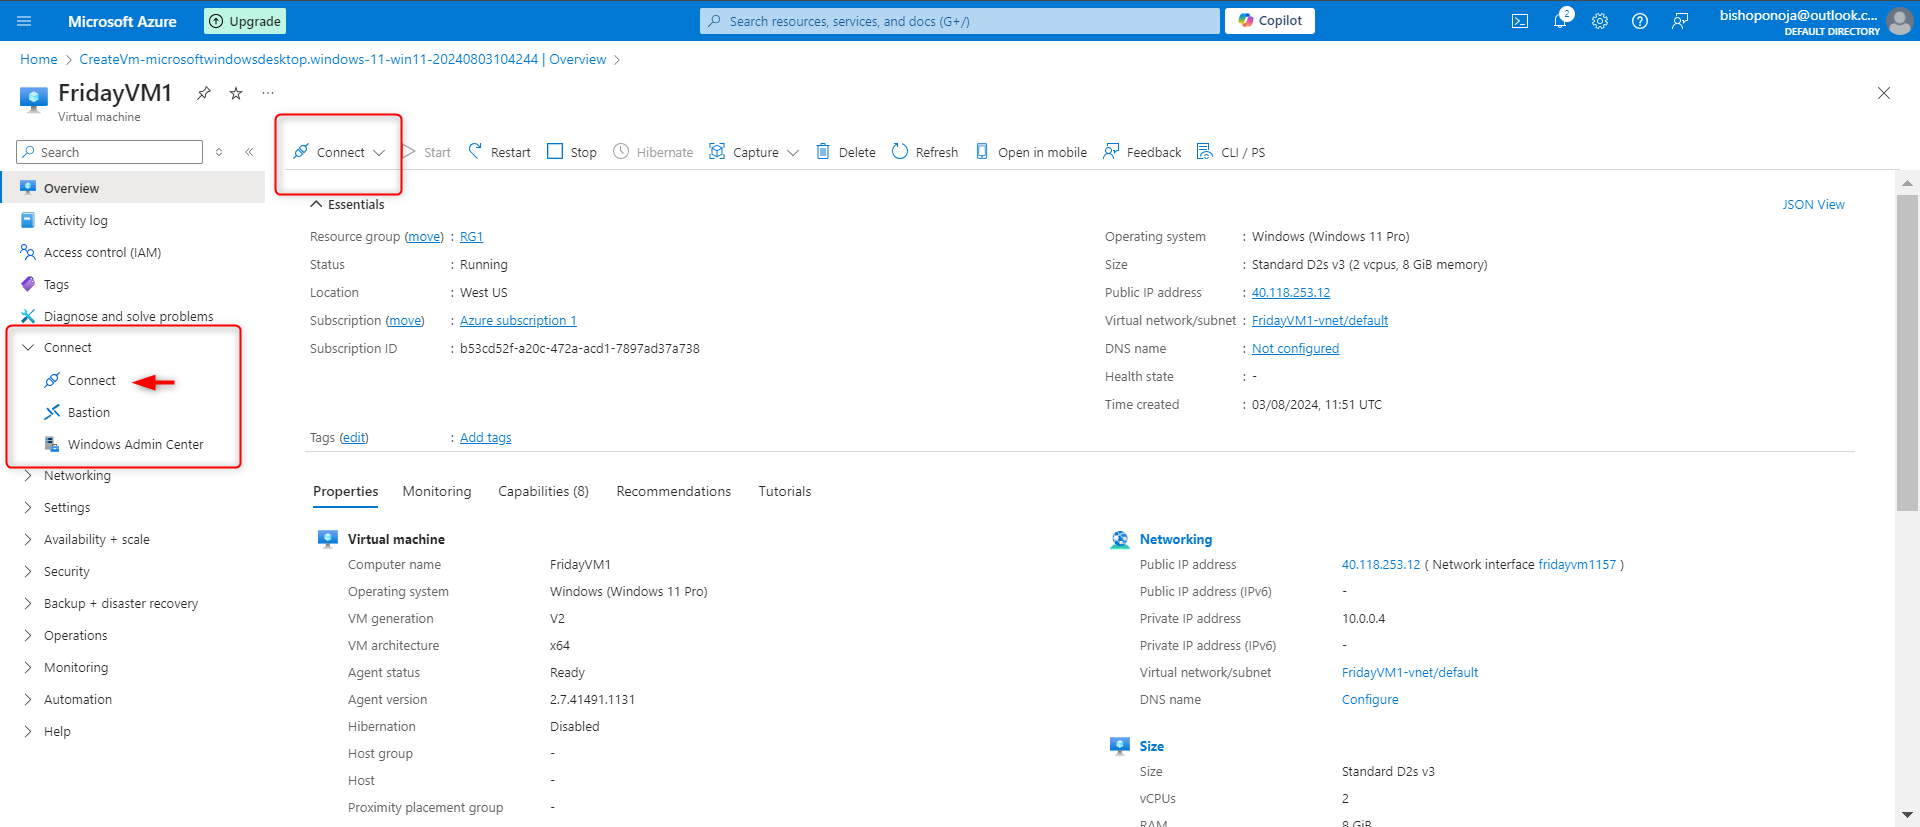
Select your VM from the list.
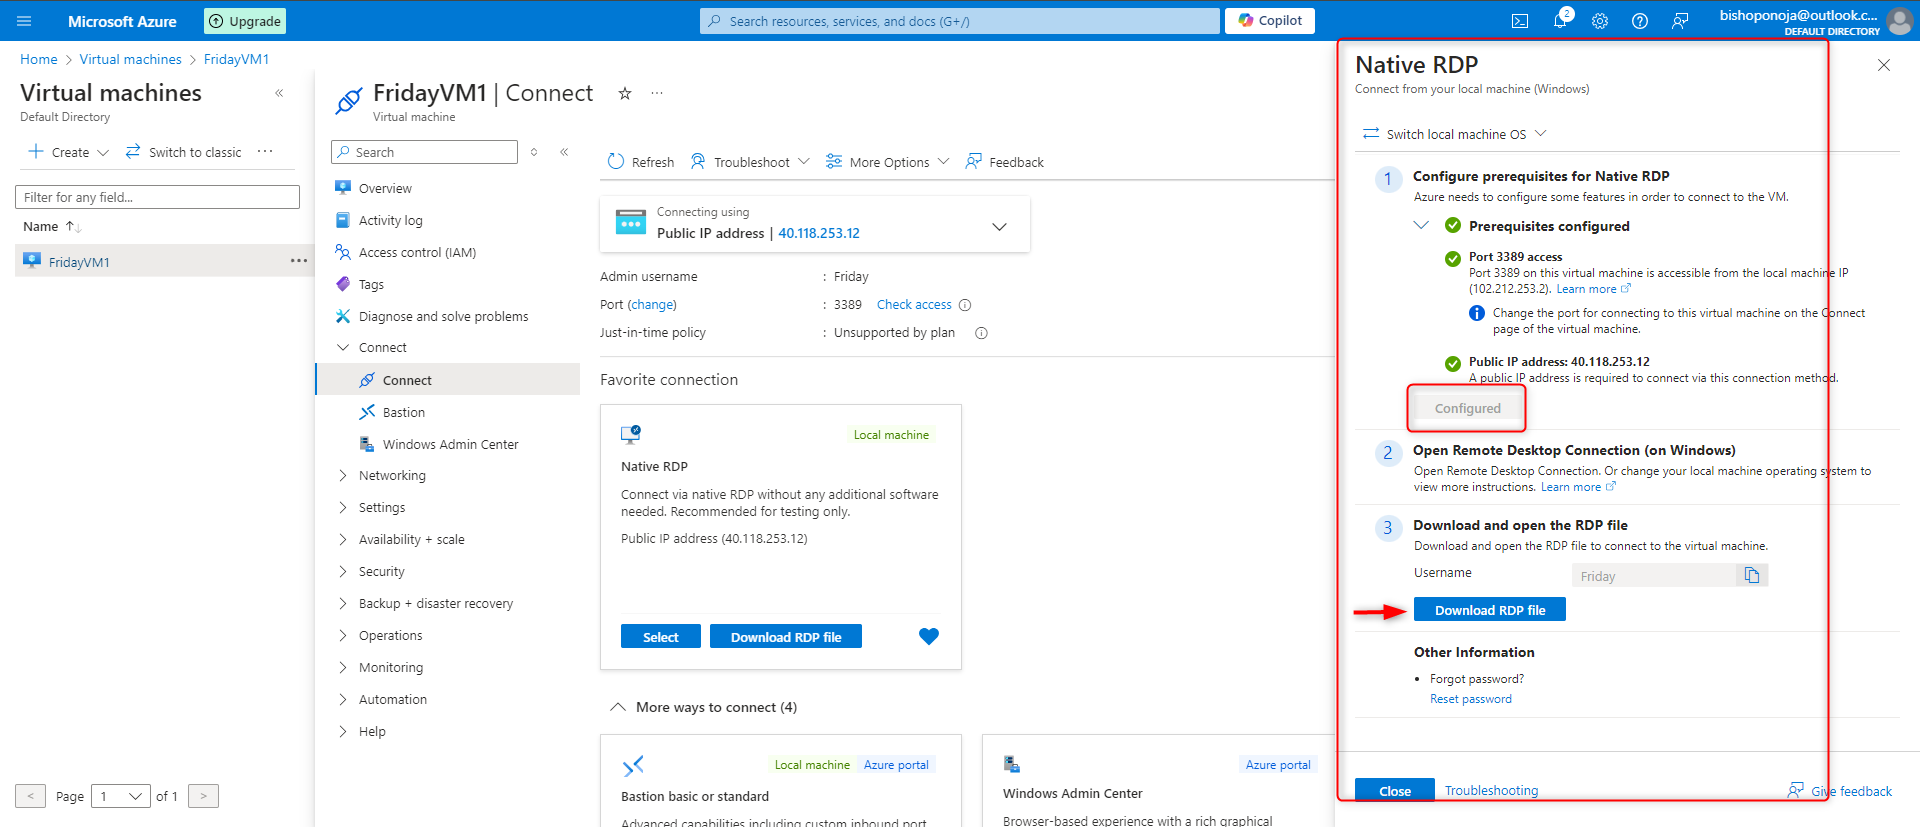
Click Connect and choose the connection method (RDP for Windows, SSH for Linux).
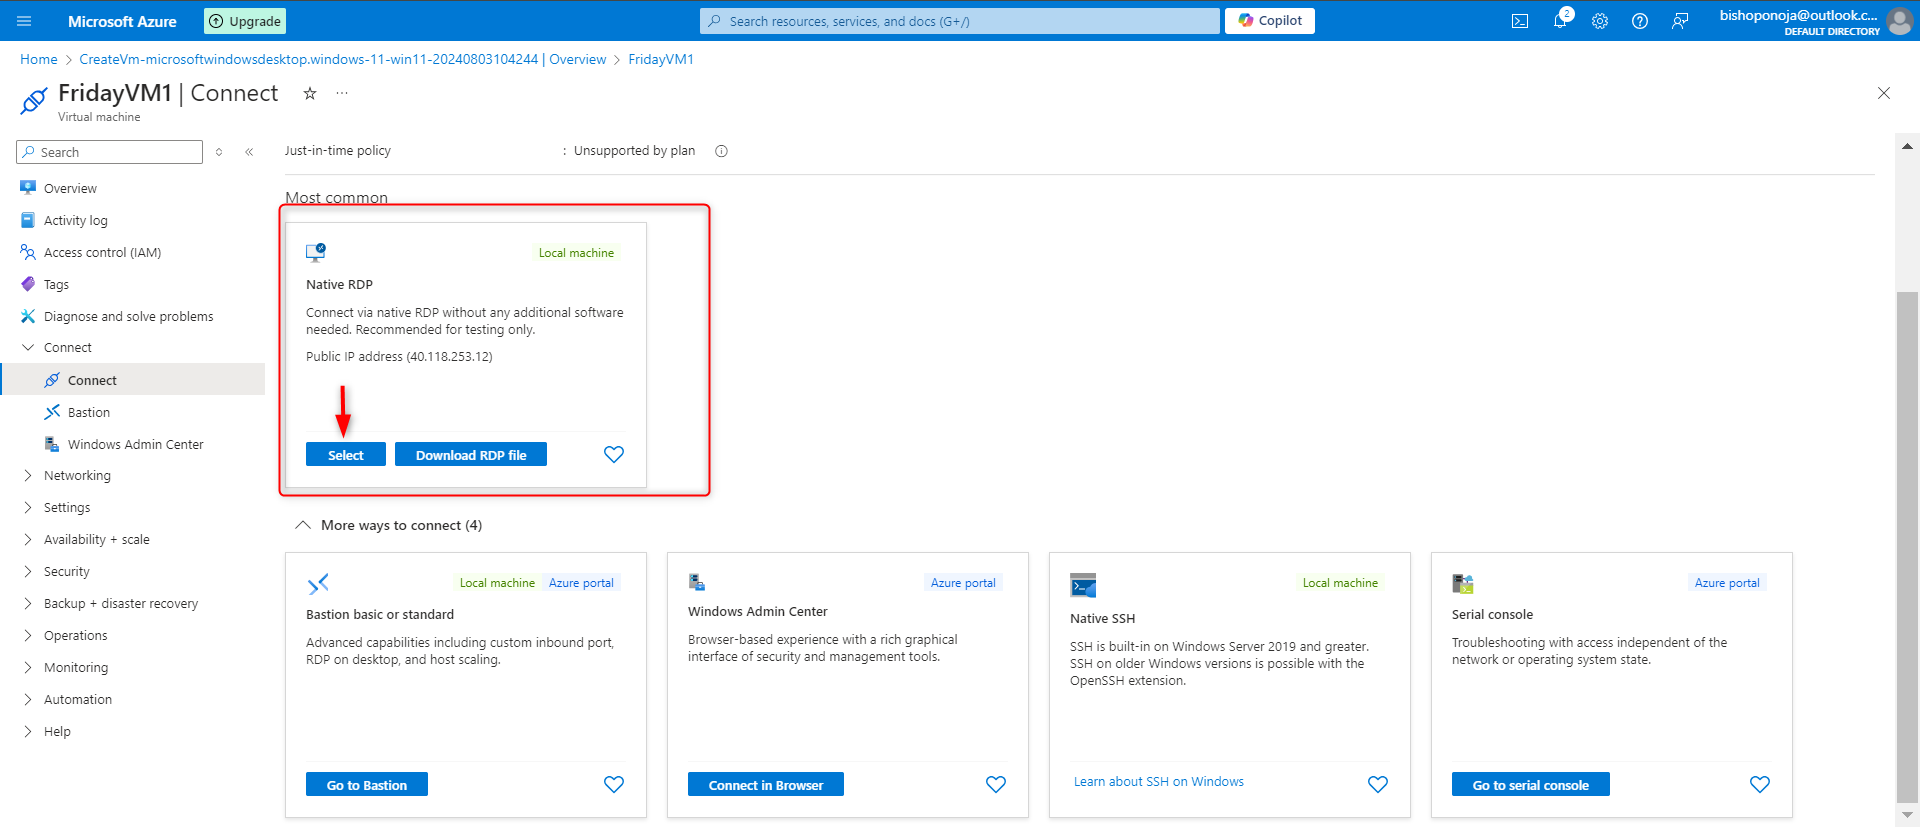
There are 4 ways of connecting to the VM
Click on select (on the Native RDP), this configures the prerequisite for the Native .
- When the RDP configures, it shows configured. Click on Download to get a copy of the RDP File
5. Run the downloaded file and sign in with the Username and password created
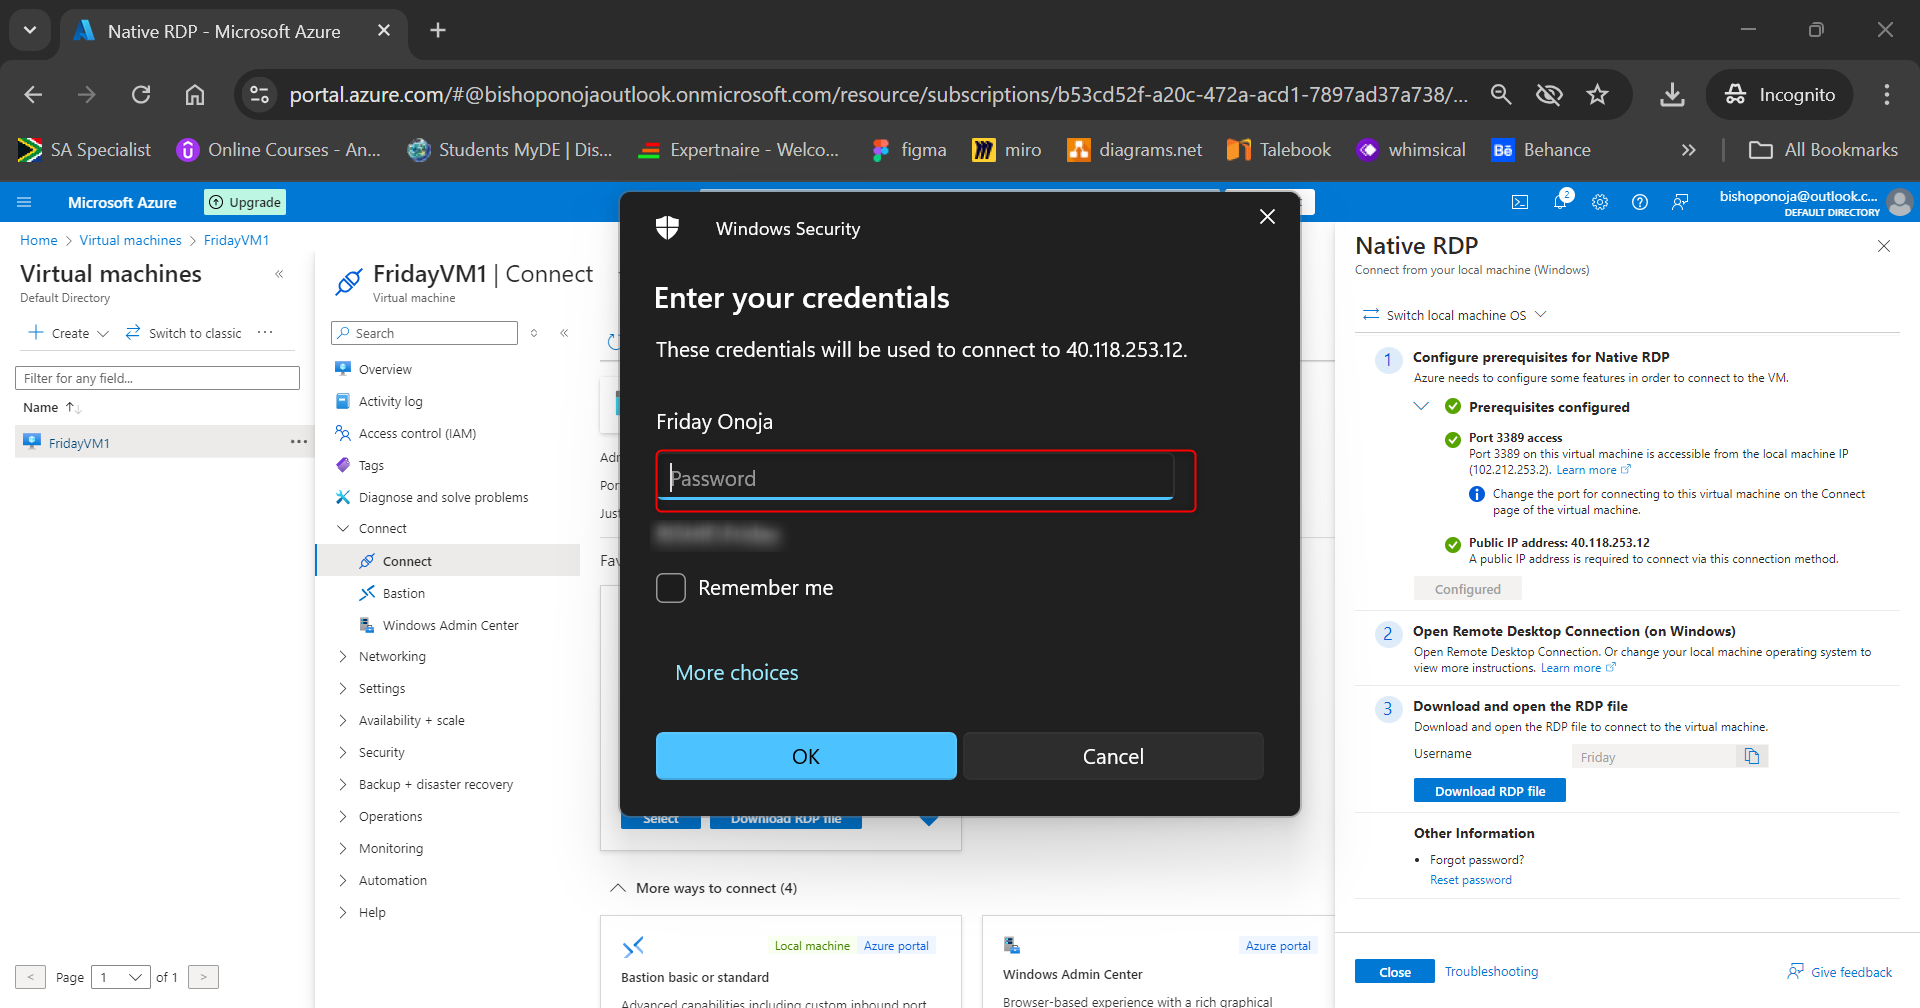
Now your Virtual Machine is ready to use.
You can drop a comment if this helps.
Subscribe to my newsletter
Read articles from Onoja Bishop directly inside your inbox. Subscribe to the newsletter, and don't miss out.
Written by
