Dynamic Webpage: Integrating Contentful CMS With Your Web App
 Rufus Gladness
Introduction
Static web pages are becoming outdated. Users now expect personalized, up-to-date web content that respond to their needs and interests, as opposed to content that is frozen in time. Imagine a website where text, images, and data can be updated without touching a single line of code - this is the reality of modern dynamic web pages.
Power of Decoupling
One principle that is transforming how websites are built is separating content from code. This approach provides several major benefits:
Increased Agility: Content updates are faster as they no longer need developer intervention.
Enhanced Collaboration: Developers and content creators can work simultaneously, each focusing on their expertise.
Improved Scalability: As content grows, the website’s structure remains unaffected, allowing for easy expansion.
Greater Flexibility: Content can be effortlessly reused across different platforms and devices.
Headless CMS
Leading this revolution are headless Content Management Systems (CMS). These tools store and manage content separately from the presentation layer, delivering it via APIs. This setup allows developers to create dynamic web pages that fetch content in real-time, adapting to user preferences and behaviors.
Why This Matters
By separating content from code, we can create websites that are:
Responsive: Adapt not just to different screen sizes but to different user contexts.
Personalized: Tailor content based on user preferences and behavior.
Always Fresh: Update content in real-time without rebuilding the entire site.
Future-Proof: Ready to deliver content to new platforms and technologies as they emerge.
What You'll Learn
In this article, we'll explore how to leverage this powerful approach by integrating a headless CMS into a dynamic webpage. We'll use Contentful, a popular headless CMS, and React, a leading JavaScript library for building user interfaces. You'll learn how to:
Set up a Contentful project to manage your content.
Create a React application that connects to Contentful.
Fetch and display dynamic content in real-time.
Prerequisites
To follow along with this tutorial, you'll need:
Basic JavaScript skills
Familiarity with React (we'll use create-react-app)
What is Contentful CMS?
Contentful CMS is a cloud-based, headless content management system (CMS) that allows users to create content and integrate it into any application or platform through a robust API. Its flexibility makes it suitable for a vast range of businesses and projects.
1. Setting Up a Contentful Project
Visit Contentful and Sign Up for an Account.
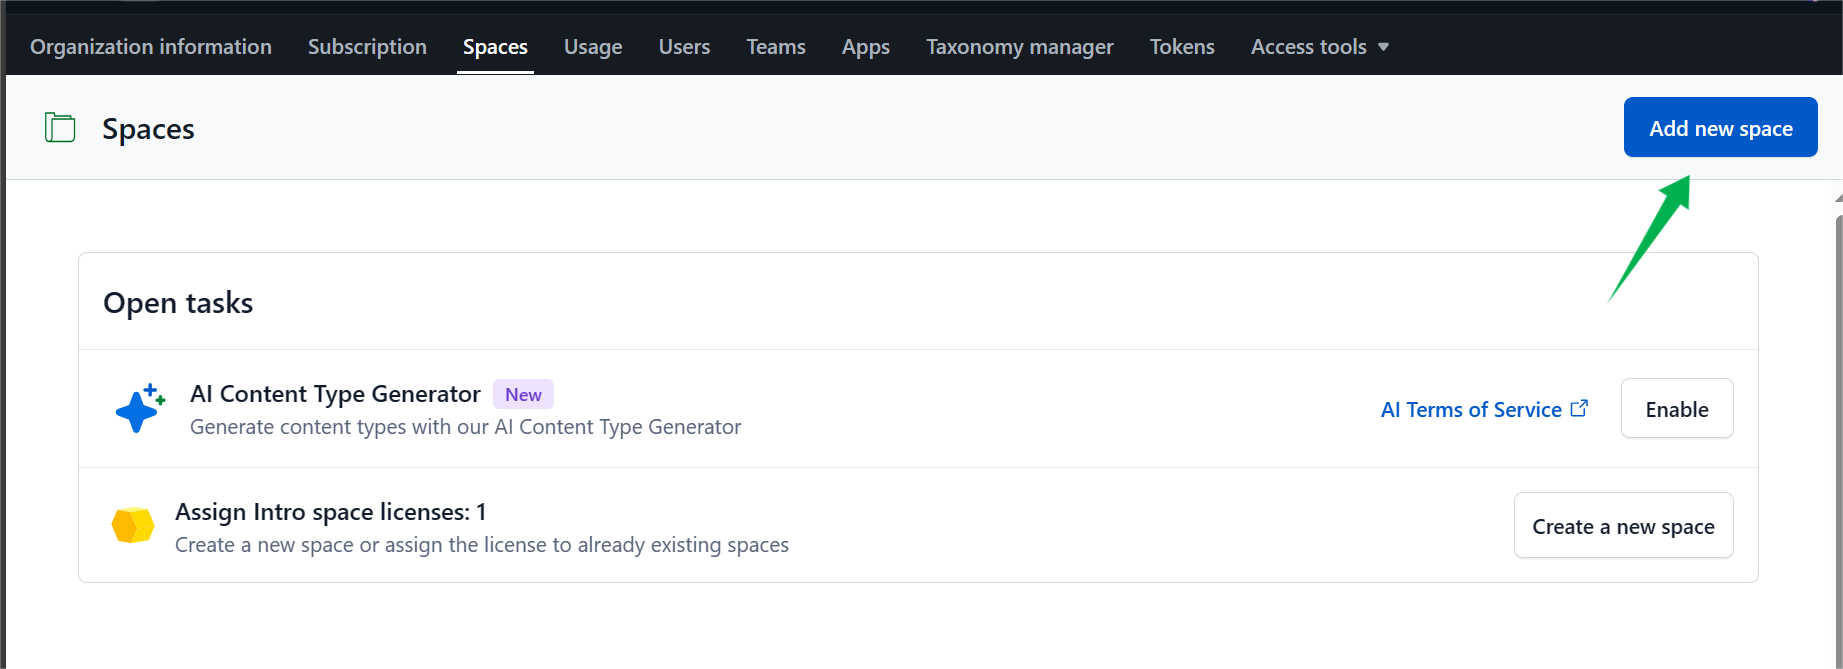
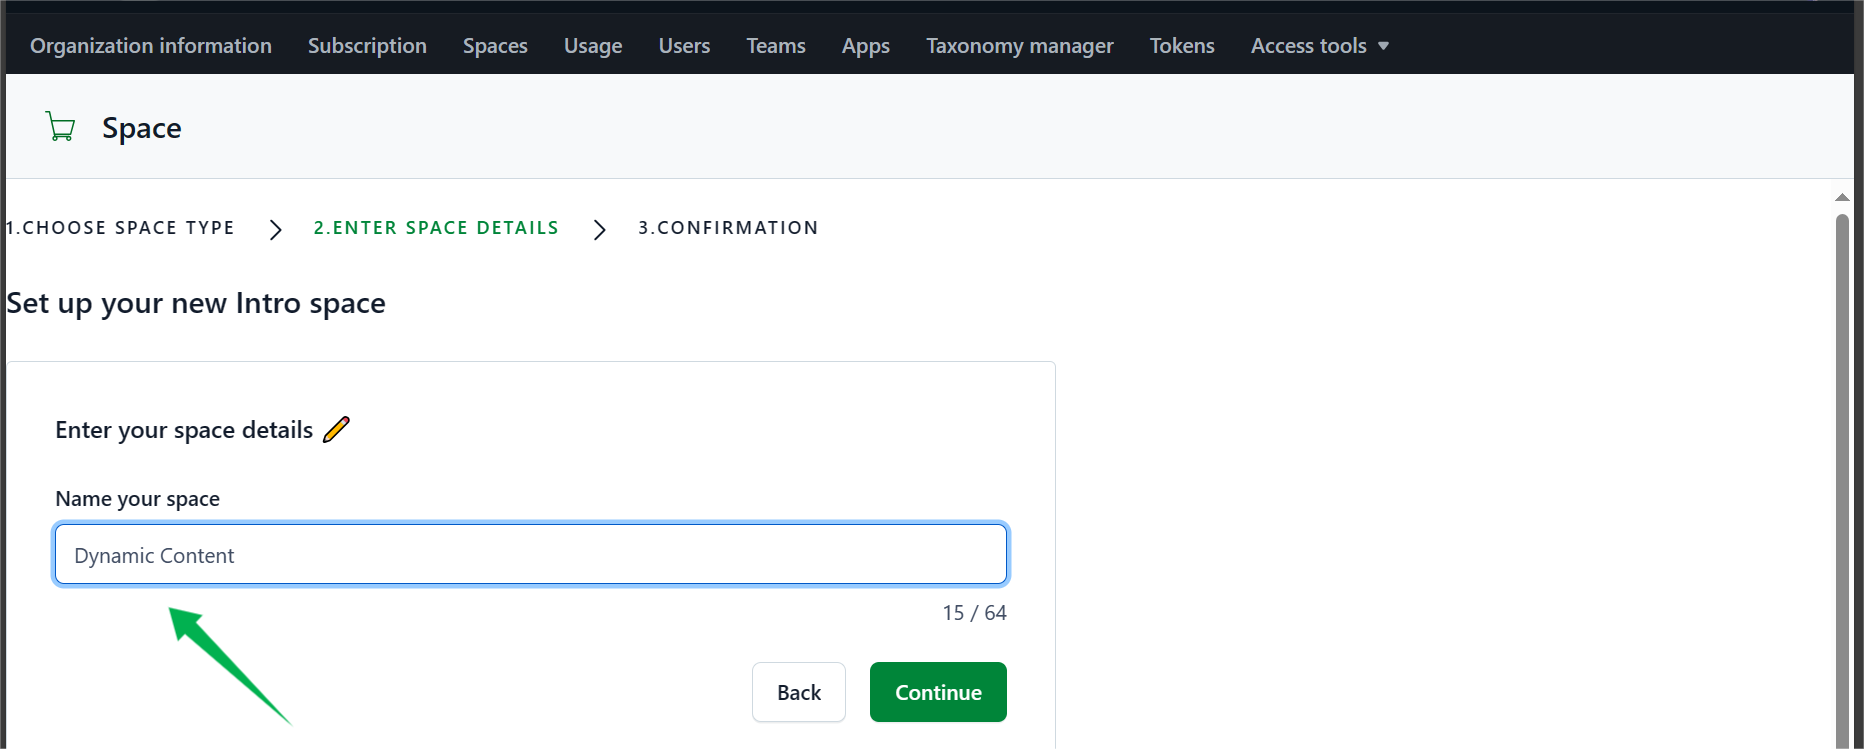
Create a Space
- A space in Contentful is a container for a project. For this tutorial, we will create a new space named "Dynamic Content" using the free plan.
Create a Content Model
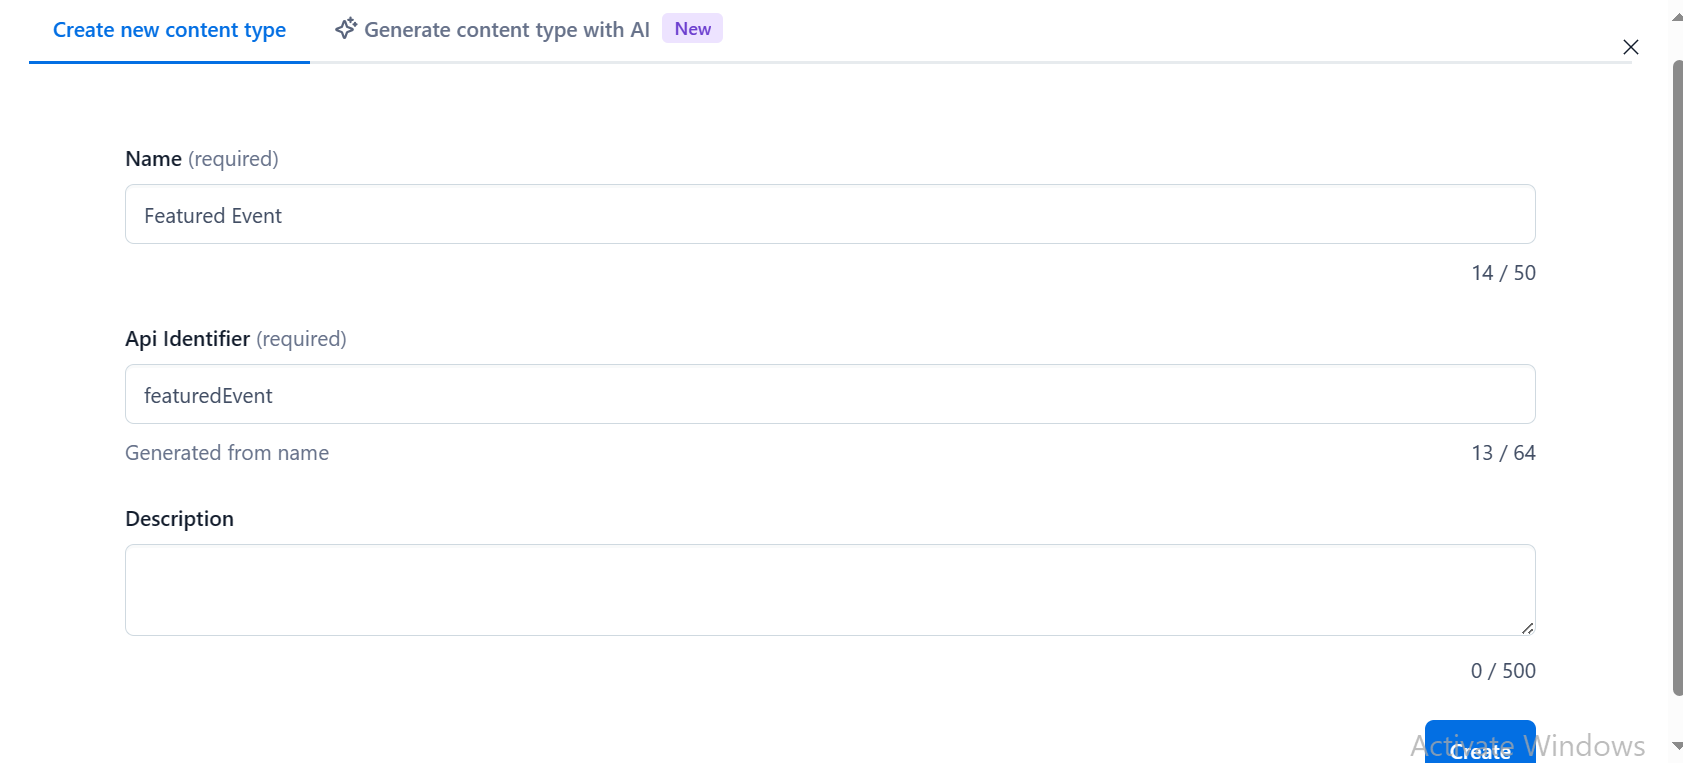
- Once we've established our content space, the next crucial step is to define the structure of our content, referred to as the content model. We will navigate to the Content Model tab and create a new model named 'Featured Event'.
Add Fields to the Content Model
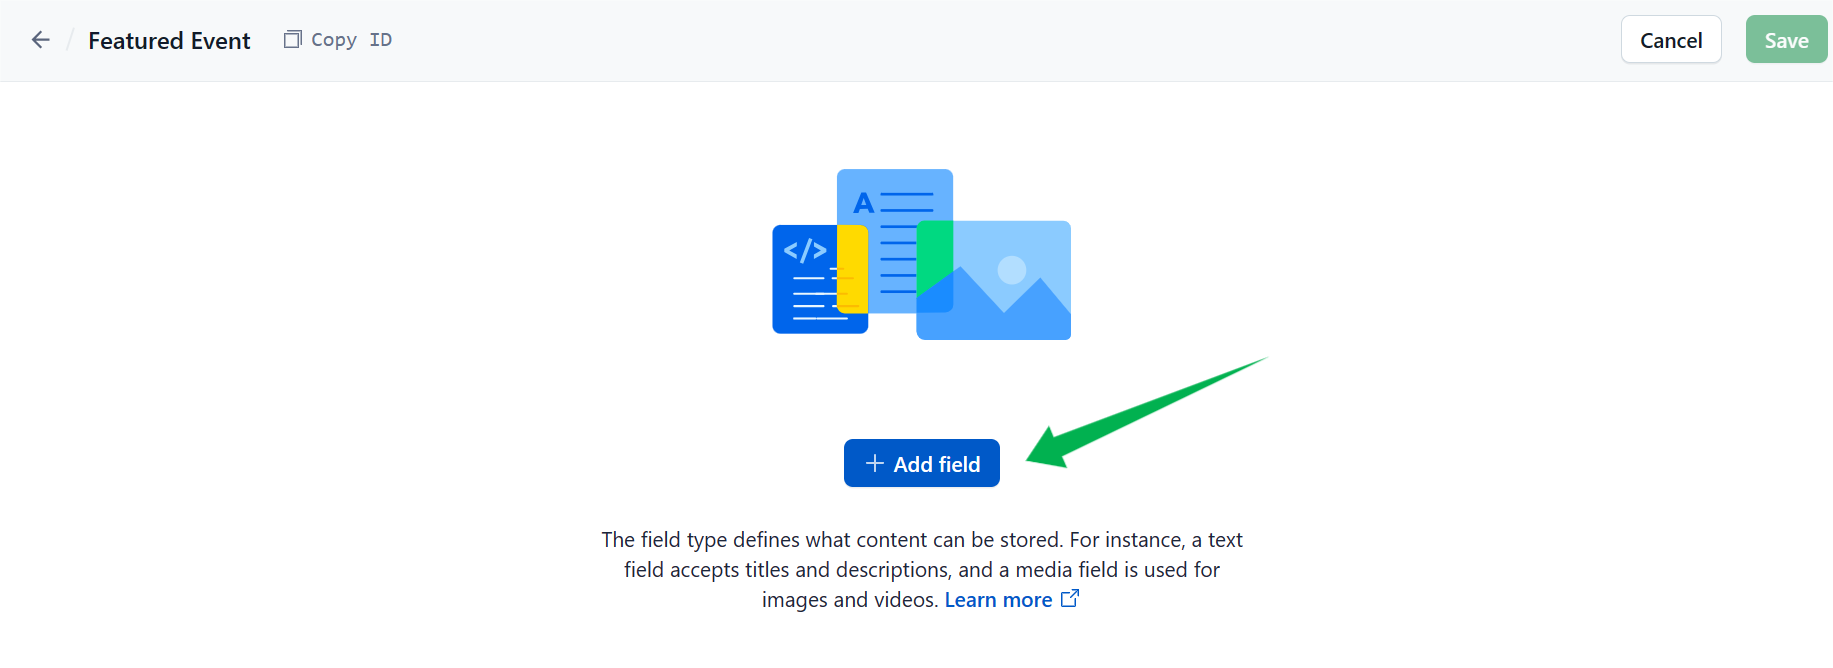
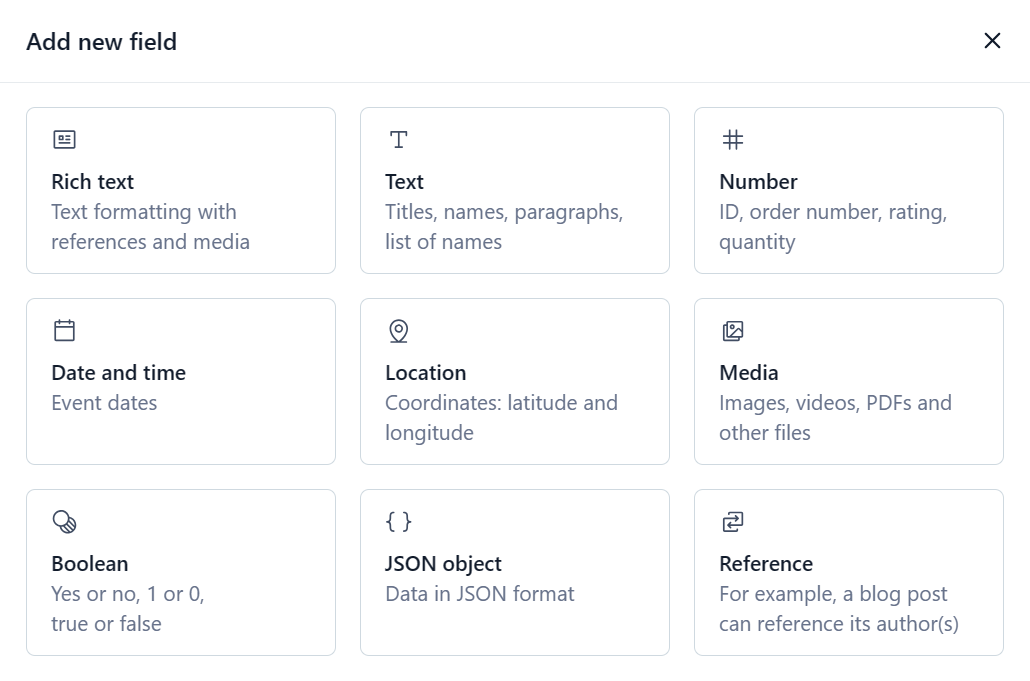
Our content model will define elements for an event card, containing:
An image: name 'Event Image', type 'media asset'
A heading: name 'Event Heading', type 'text'
The event end date: name 'Event End Date', type 'Date'

Add Content
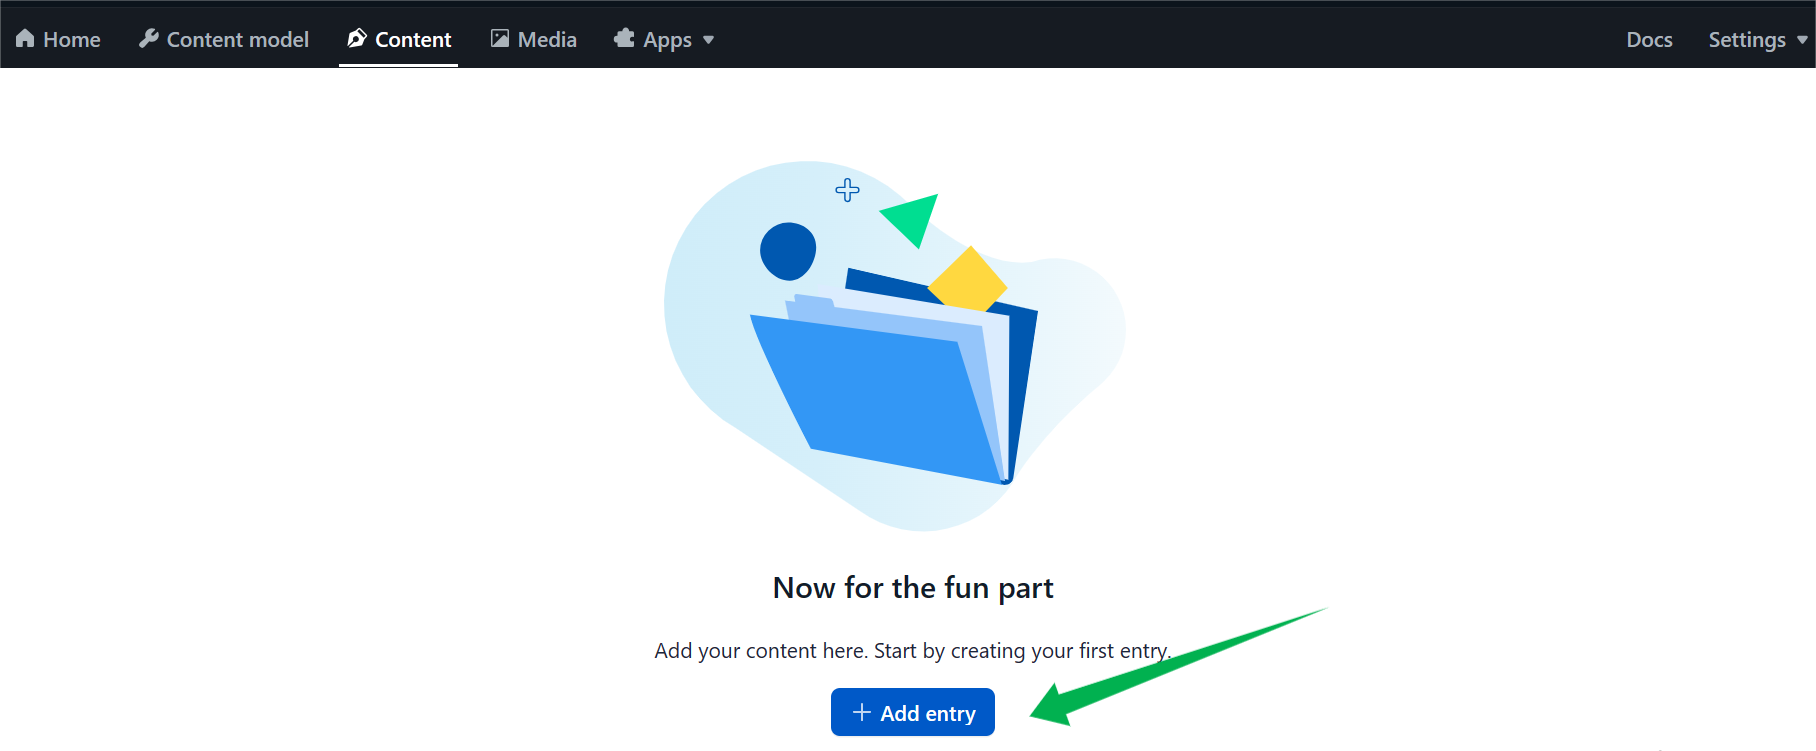
- After adding all our fields, we will navigate to the Content tab and click on "Add Entry". We then fill out the fields and publish the entry.

Creating an API key
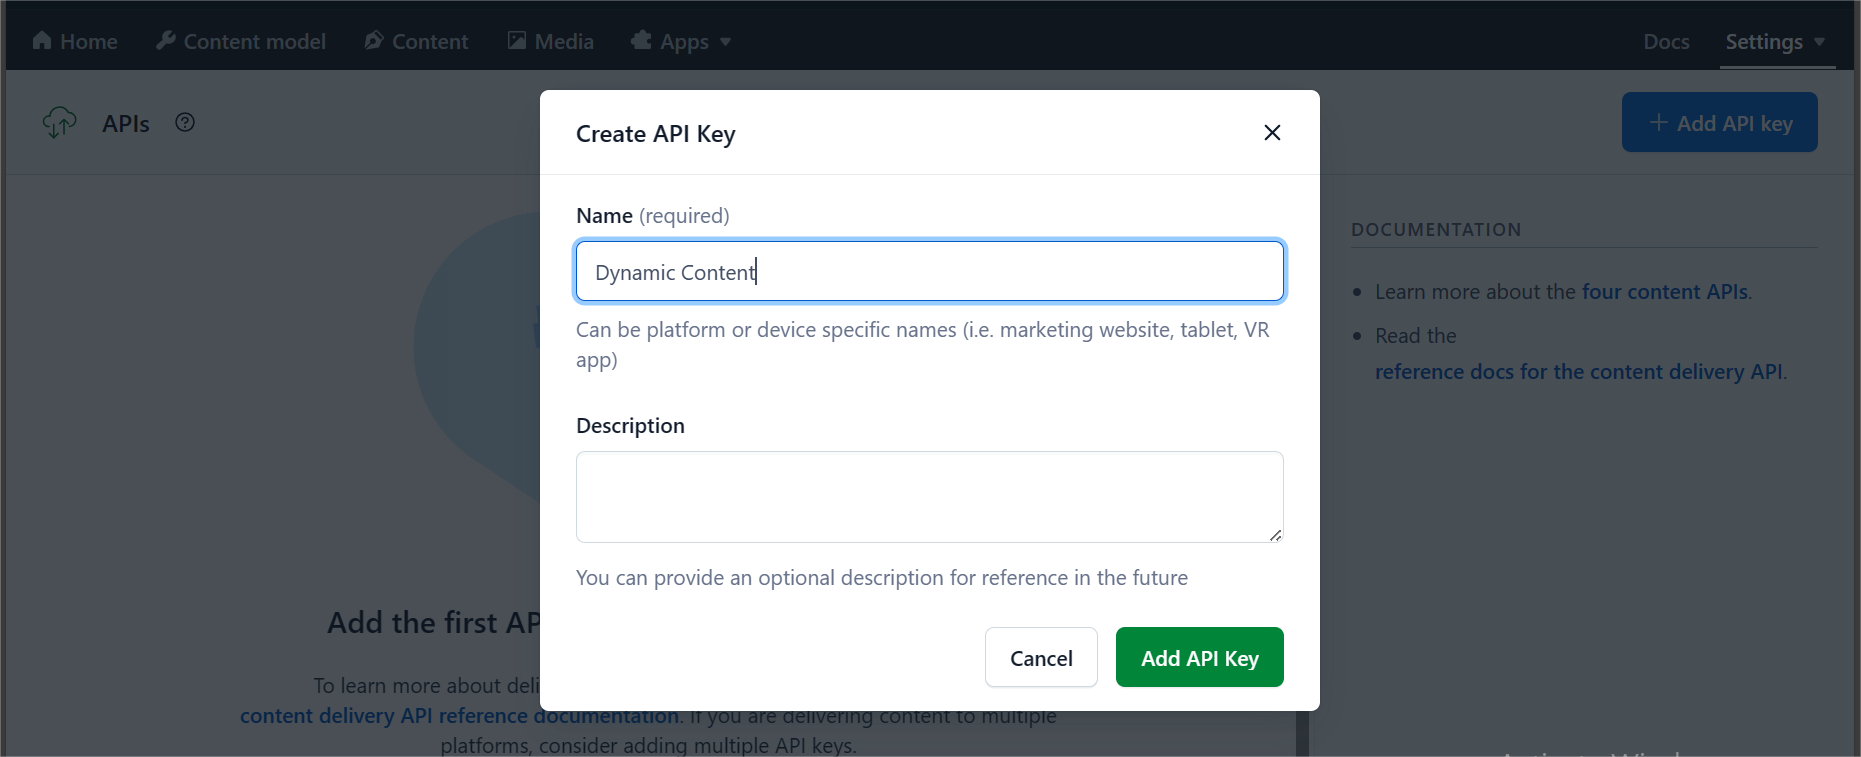
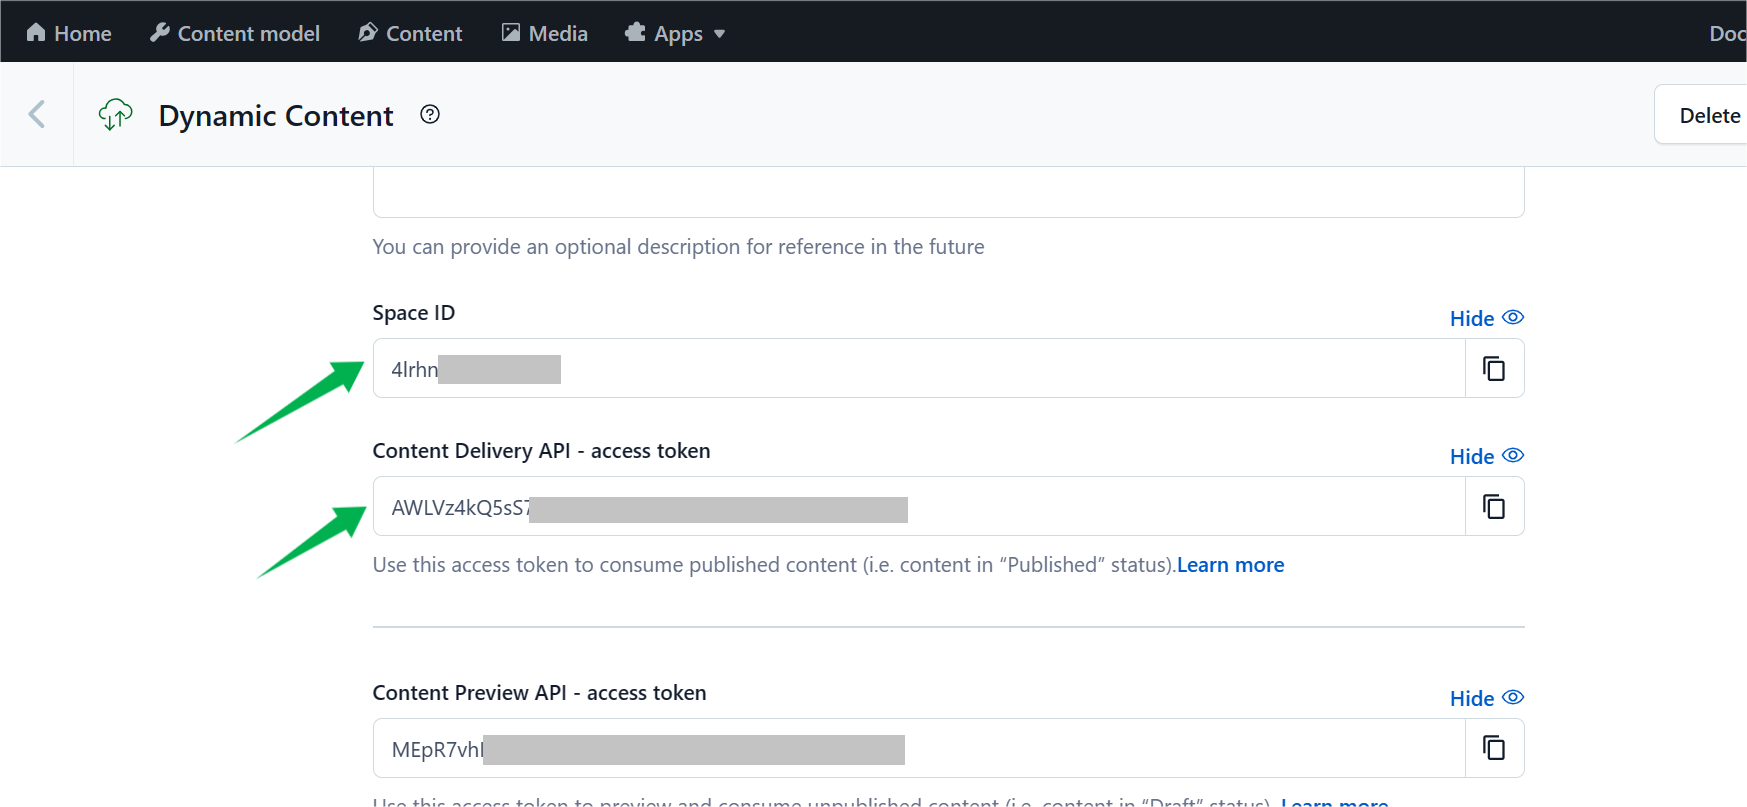
- To fetch this data through an API and send it to our app, we need to create an API key. This API key provides us with a space ID and an access token. To create an API key, navigate to Settings > API Keys > Add API Key.
2. Creating a React App
We will start by creating an empty folder named
dynamic-card-with-contentful. Inside it, we will initialize a new React app usingnpx create-react-appnpx create-react-app dynamic-card-with-contentfulThe React app comes with default files as a template. We will edit the
App.jsfile to create our frontend structure. Before doing that, let's outline the essential elements of our event card:
Image: A visual representation of the event.
Heading: The event's title.
End Date: The date when the event concludes.
  import './App.css';

  function EventCard() {
    return (
      <div className="event-card">
        <h1 className='section-title'>Featured Event</h1>
        <img src='' alt=''  />
        <h2 className='event-heading'></h2>
        <p className='end-date'> Ends: </p>
      </div>
    );
  }
   default EventCard;
Explanation:
We define a functional component
EventCardthat renders our structure: a section title, image placeholder, event heading, and end date. We keep the import./App.cssat the top as we will need it shortly.When we run our app with
npm startand open the URLlocalhost:3000in our browser, we should see our basic event card structure.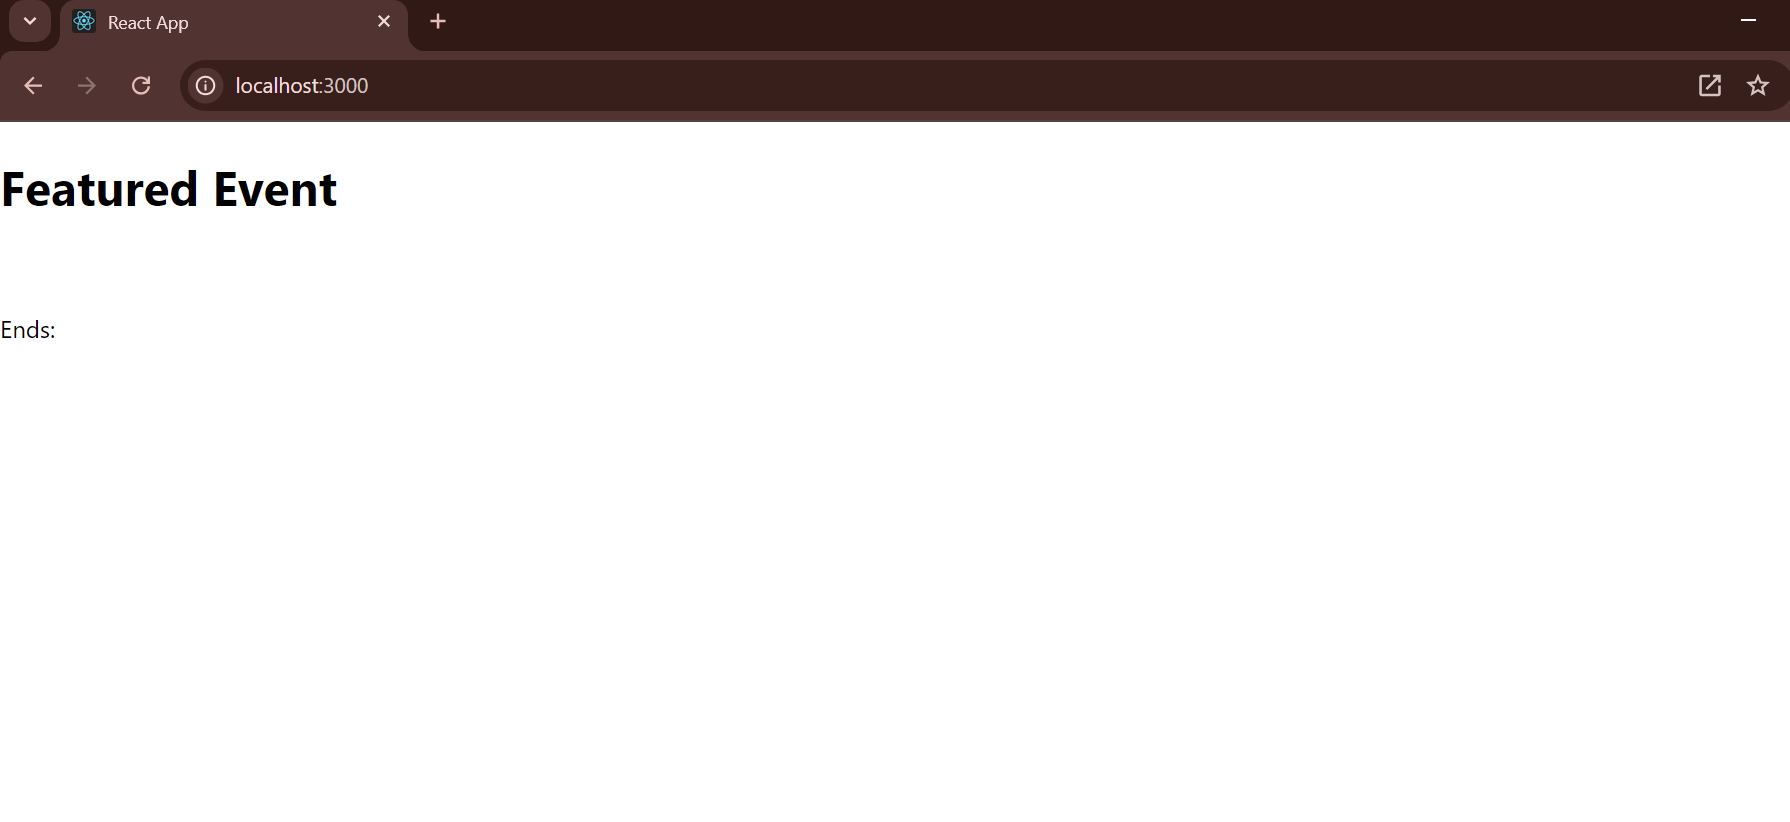
Next, let's add some styling to our UI by modifying the
App.cssfile:.container { display: flex; justify-content: center; align-items: center; height: 100vh; width: 100%; } .event-card { display: flex; align-content: center; justify-content: center; height: 400px; width: 400px; border: 4px solid rgb(100, 9, 9); background-color: rgb(230, 229, 229); border-radius: 1rem; box-shadow: 0px 4px 8px rgba(0, 0, 0, 0.1); transition: box-shadow 300ms ease-in-out; &:hover { box-shadow: 0px 8px 16px rgba(0, 0, 0, 0.2); } } h1 { font-size: 2.25rem; line-height: 2.5rem; font-weight: 800; color: transparent; background-image: linear-gradient(to right, #1e40af, #9a3412); background-clip: text; position: absolute; top: 4px; } .event-image { height: 230px; width: 100%; object-fit: cover; } .event-heading { font-size: 1.5rem; line-height: 1.75rem; position: absolute; top: 346px; color: #1e40af; font-weight: 700; } .event-end-date { position: absolute; top: 67%; padding: 8px; border-radius: 0.9rem; background: linear-gradient(to right, #f06595, #f9a825); color: transparent; background-clip: text; font-weight: 800; font-size: 1.25rem; }
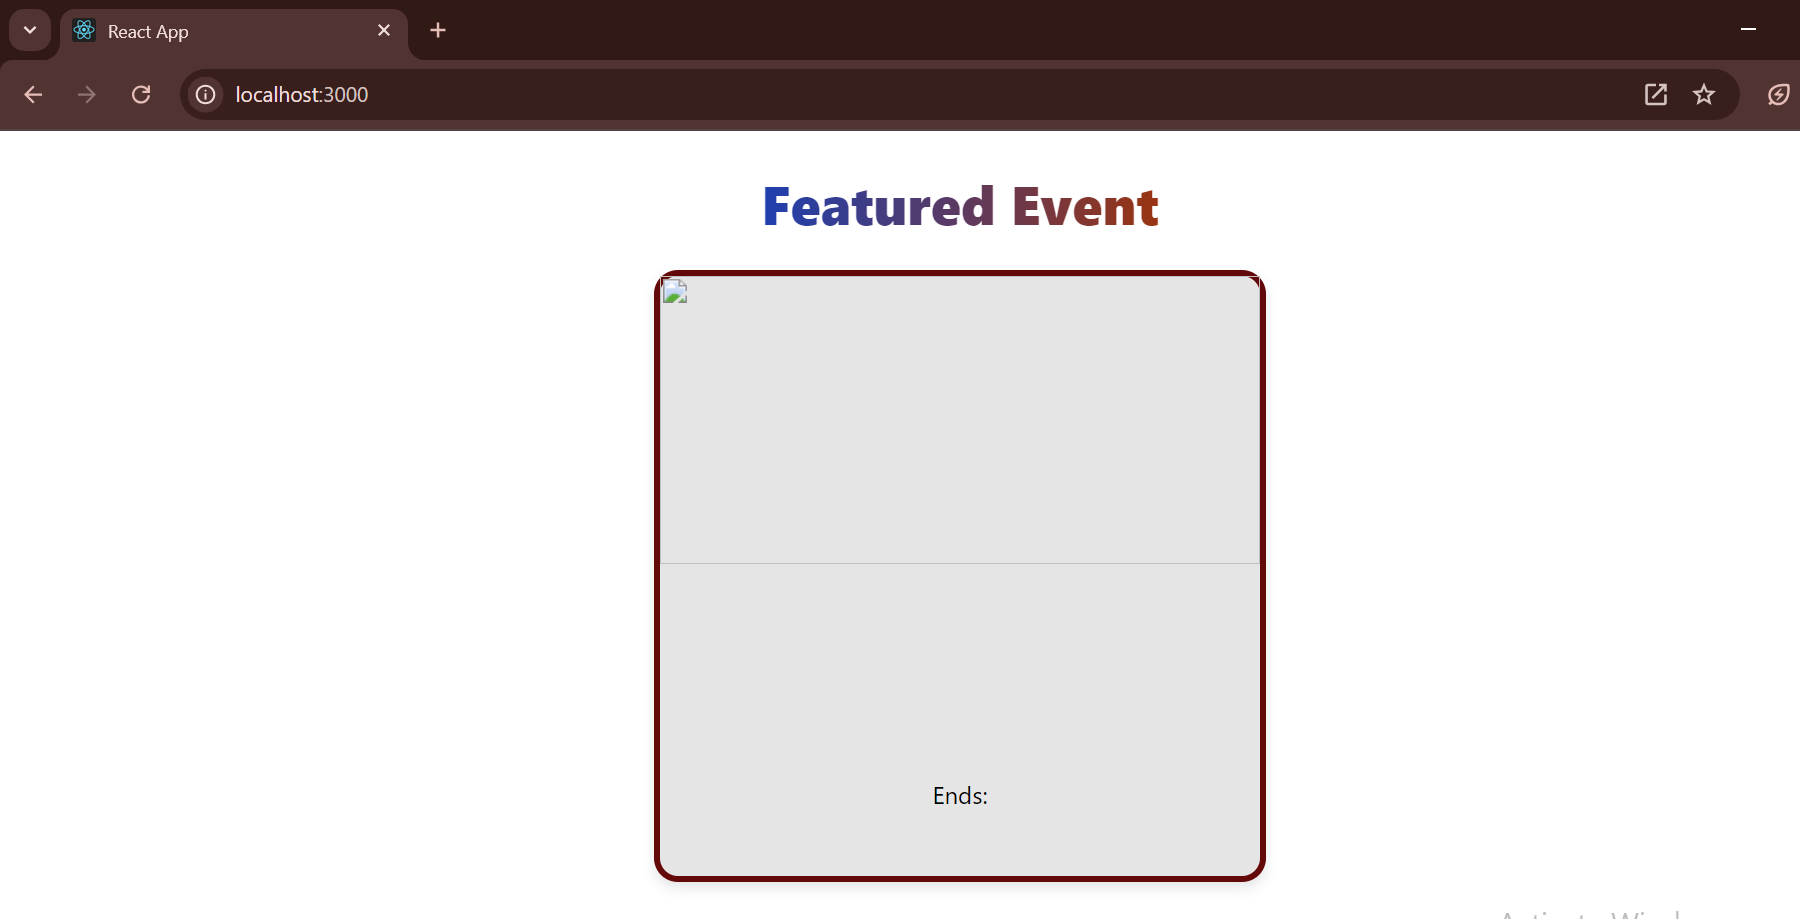
Output:
Our event card is now styled but still empty. Let's fill it with our Contentful data.
3. Fetching and Displaying Contentful Data
To fetch our data from Contentful, we will add fetch logic inside our EventCard component.
First, we will install the Contentful library:
npm install contentful
Next, we will create a .env file in the root of our project and add our Contentful space ID and access token:
REACT_APP_CONTENTFUL_SPACE_ID=your_space_id
REACT_APP_CONTENTFUL_ACCESS_TOKEN=your_access_token
We will update the App.js file as follows:
import './App.css';
import React, { useState, useEffect } from 'react';
import { createClient } from 'contentful';

const client = createClient({
  space: process.env.REACT_APP_CONTENTUL_SPACE_ID,
  accessToken: process.env.REACT_APP_CONTENTFUL_ACCESS_TOKEN,
});

function EventCard() {
  const [event, setEvent] = useState(null);

  useEffect(() => {
    const fetchContentfulData = async () => {
      try {
        const response = await client.getEntries({
          content_type: 'featuredEvent'
        });
        setEvent(response.items[0]?.fields);
      } catch (error) {
        console.error('Error fetching events:', error);
      }
    };
    fetchContentfulData();
  }, []);

  if (!event) return null;

  const { eventImage, eventHeading, eventEndDate } = event;
  const formattedDate = formatDate(eventEndDate);

  return (
    <div className='container'>
      <h1 className='section-title'>Featured Event</h1>
      <div className="event-card">
        <img className='event-image' src={eventImage?.fields?.file?.url} alt={eventHeading} />
        <h2 className='event-heading'>{eventHeading}</h2>
        <p className='event-end-date'> Ends: {formattedDate}</p>
      </div>
    </div>
  );
}

  // Helper function to format date
  function formatDate(dateString) {
    const [datePart] = dateString.split('T');
    const [year, month, day] = datePart.split('-');
    const date = new Date(year, month - 1, day);
    return new Intl.DateTimeFormat('en-US', {
      year: 'numeric',
      month: 'long',
      day: 'numeric'
    }).format(date);
  }

export default EventCard;
Code Explanation:
We begin by importing necessary modules:
React,useState,useEffect, andcreateClientfrom thecontentfullibrary.import React, { useState, useEffect } from 'react'; import { createClient } from 'contentful';We establish a connection to Contentful using
createClientwith our space ID and access token.const client = createClient({ space: process.env.REACT_APP_CONTENTUL_SPACE_ID, accessToken: process.env.REACT_APP_CONTENTFUL_ACCESS_TOKEN, });We create a state variable
eventand a setter functionsetEvent, and employ theuseStatehook to manage theeventdata.const [event, setEvent] = useState(null);We use the
useEffecthook, containing an asynchronous functionfetchContentfulData, to request data from Contentful and seteventstate with the fetched data if the data is not null.useEffect(() => { const fetchContentfulData = async () => { try { const response = await client.getEntries({ content_type: 'featuredEvent' }); setEvent(response.items[0]?.fields); } catch (error) { console.error('Error fetching events:', error); } }; fetchContentfulData(); }, []); if (!event) return null;We destructure the required fields from the
eventobject and format the end date for better readability with a helper functionformatDate.const { eventImage, eventHeading, eventEndDate } = event; const formattedDate = formatDate(eventEndDate);We update our JSX structure with the required fields.
 return (
     <div className='container'>
       <h1 className='section-title'>Featured Event</h1>
       <div className="event-card">
         <img className='event-image' src={eventImage?.fields?.file?.url} alt={eventHeading} />
         <h2 className='event-heading'>{eventHeading}</h2>
         <p className='event-end-date'> Ends: {formattedDate}</p>
       </div>
     </div>
   );
Helper function to format date
   // Helper function to format date
   function formatDate(dateString) {
     const [datePart] = dateString.split('T');
     const [year, month, day] = datePart.split('-');
     const date = new Date(year, month - 1, day);
     return new Intl.DateTimeFormat('en-US', {
       year: 'numeric',
       month: 'long',
       day: 'numeric'
     }).format(date);
   }
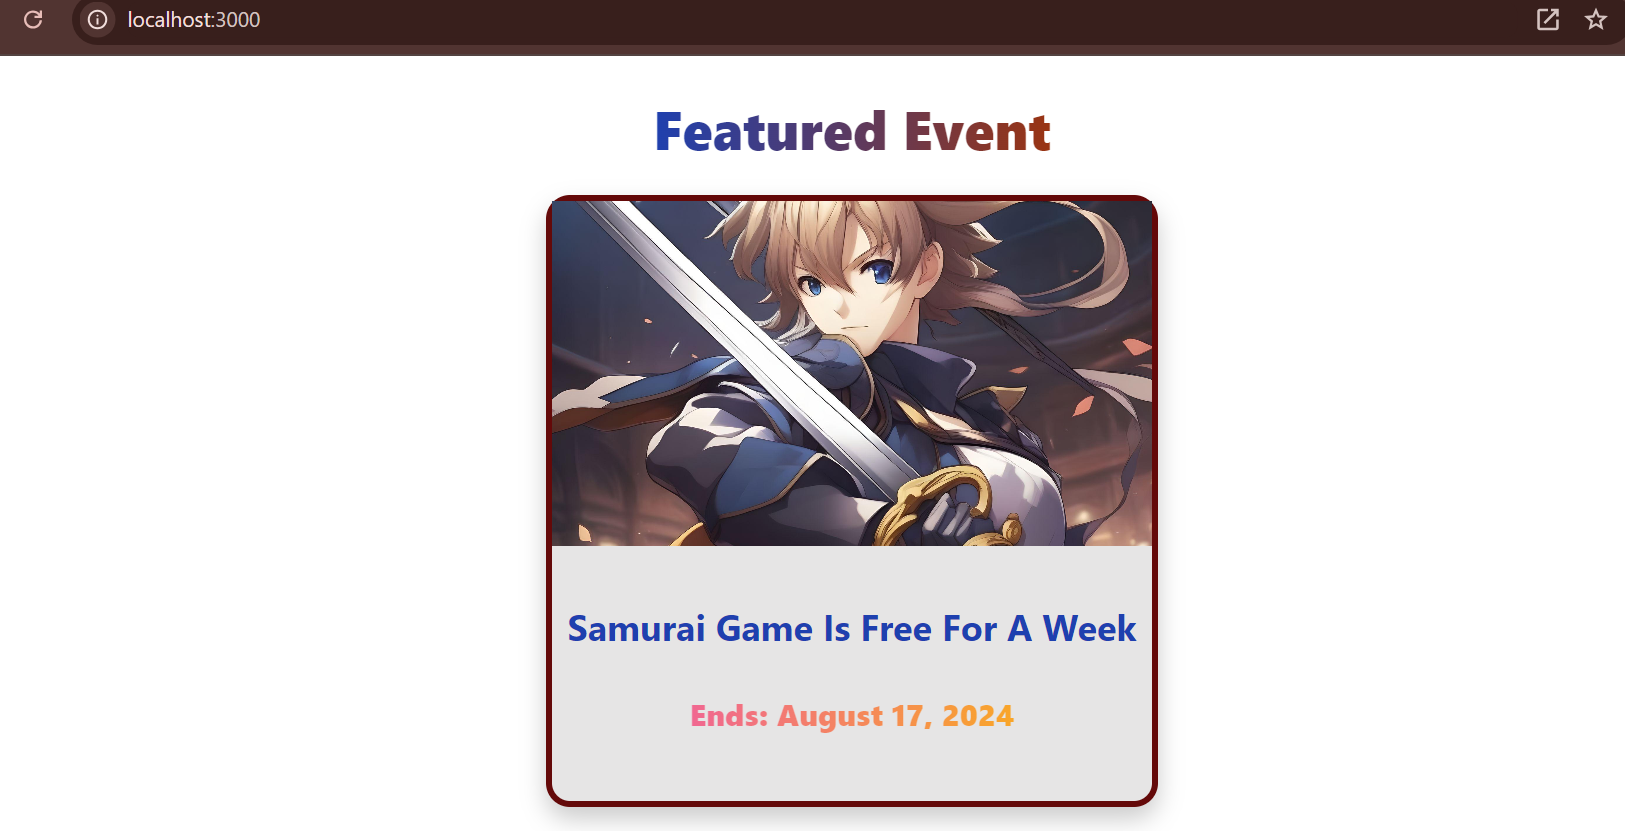
Final Output:
Conclusion
Dynamic content has become a necessity in today's digital landscape. With Contentful CMS, you can create flexible content and seamlessly integrate it into your application. Contentful provides a user-friendly interface and the ability to manage diverse content types.
By embracing the power of dynamic content with Contentful CMS, you can keep your website fresh, personalized, and responsive to user needs, unlocking new possibilities for engagement and growth.
Subscribe to my newsletter
Read articles from Rufus Gladness directly inside your inbox. Subscribe to the newsletter, and don't miss out.
Written by

Rufus Gladness
Rufus Gladness
As a Software engineer and blockchain developer, I constantly crave new coding adventures. Exploring everything from HTML to web3 magic, I've delved into the realm of web development, developing a fervor for decentralized technologies. Come along on this exciting journey as we transform the digital landscape together!"