Day 14: Comprehensive Tutorial on Setting Up GitLab for CI/CD
 Vandana Pandit
Table of contents
- How to create GitLab Account?
- How to create GitLab Project/Group?
- Create GitLab Project via Import?
- How to create a Pipeline in GitLab?
- What is Runners?
- Types of Runners:
- Navigation to Runners
- Steps to determine which runner executed a particular job:
- How to Set Up Self-Hosted Runners:
- How to Write Parallel Jobs in .gitlab-ci.yml File
- Variables:
- Artifacts:
How to create GitLab Account?
Create GitLab account
Verify Email
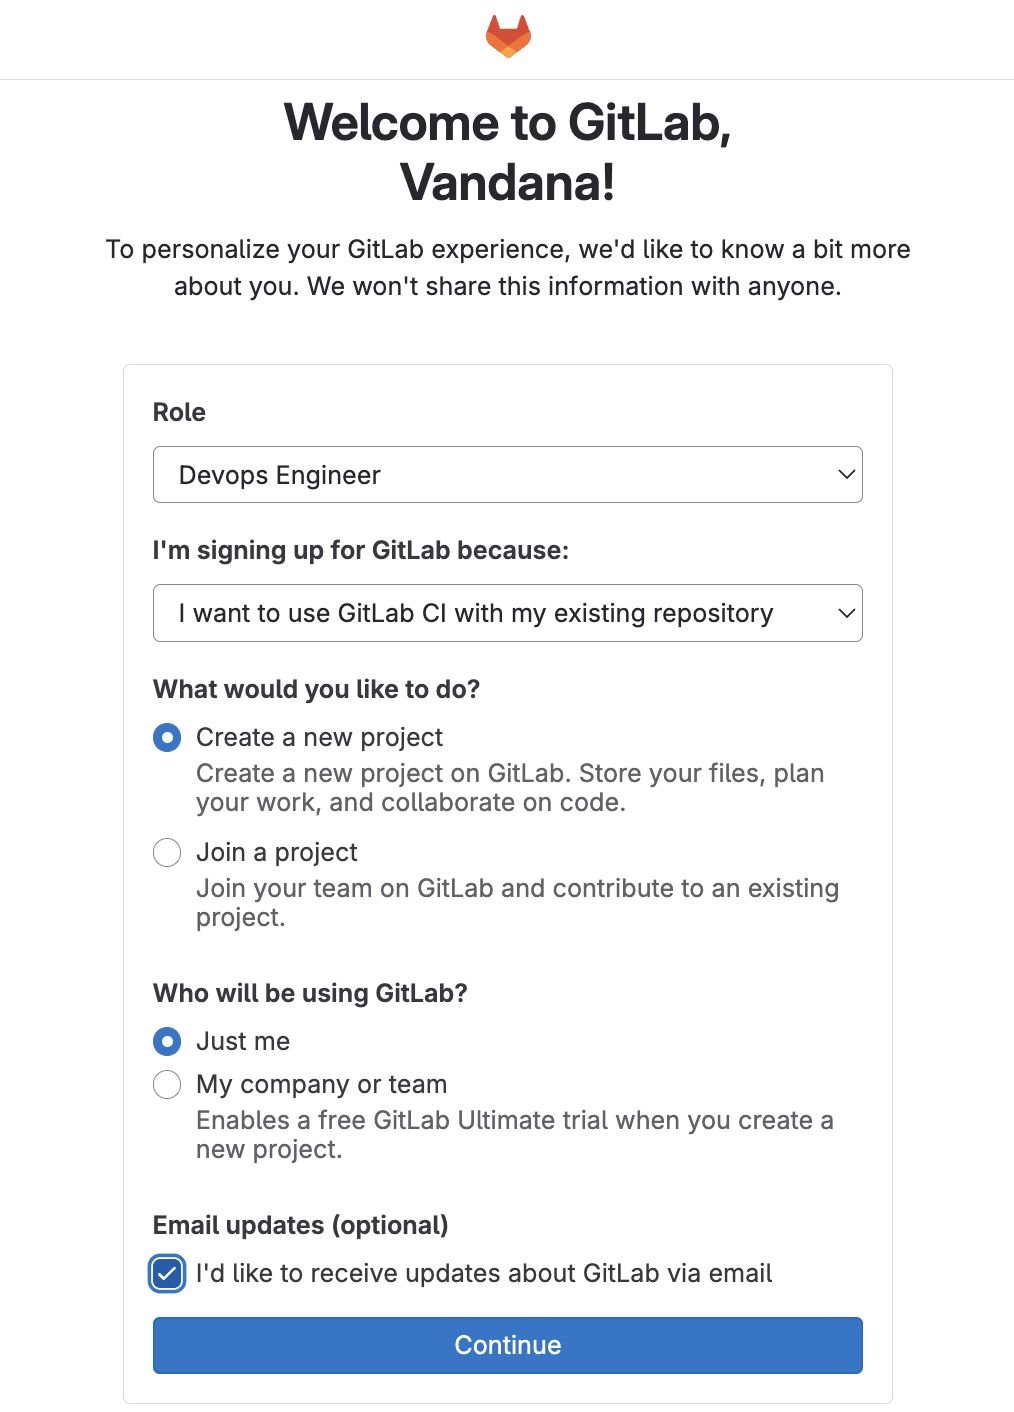
On welcome GitLab page fill the required details:
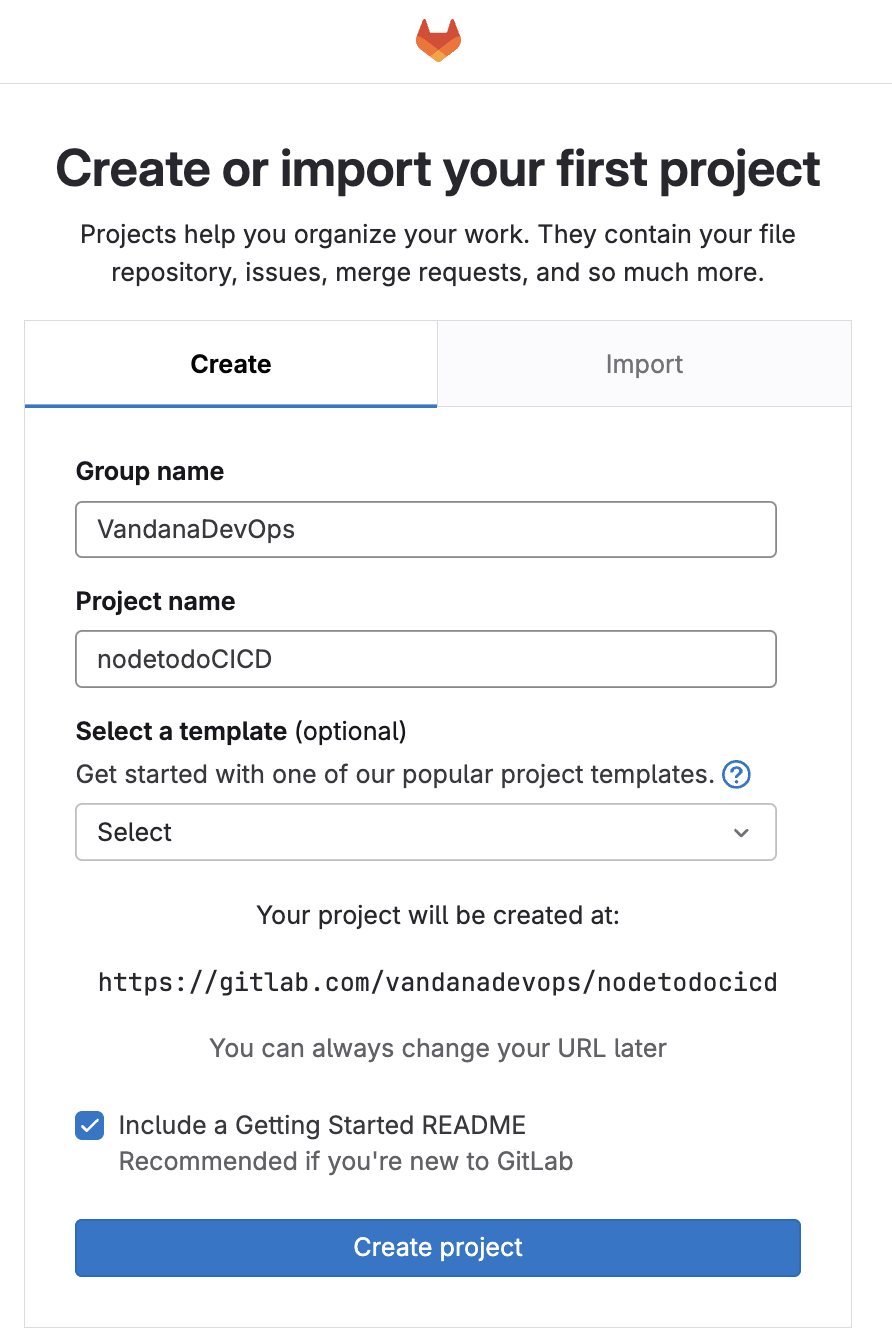
How to create GitLab Project/Group?
Provide required details to create project
On the left panel select your project name in my case its is 'nodetodoCICD'
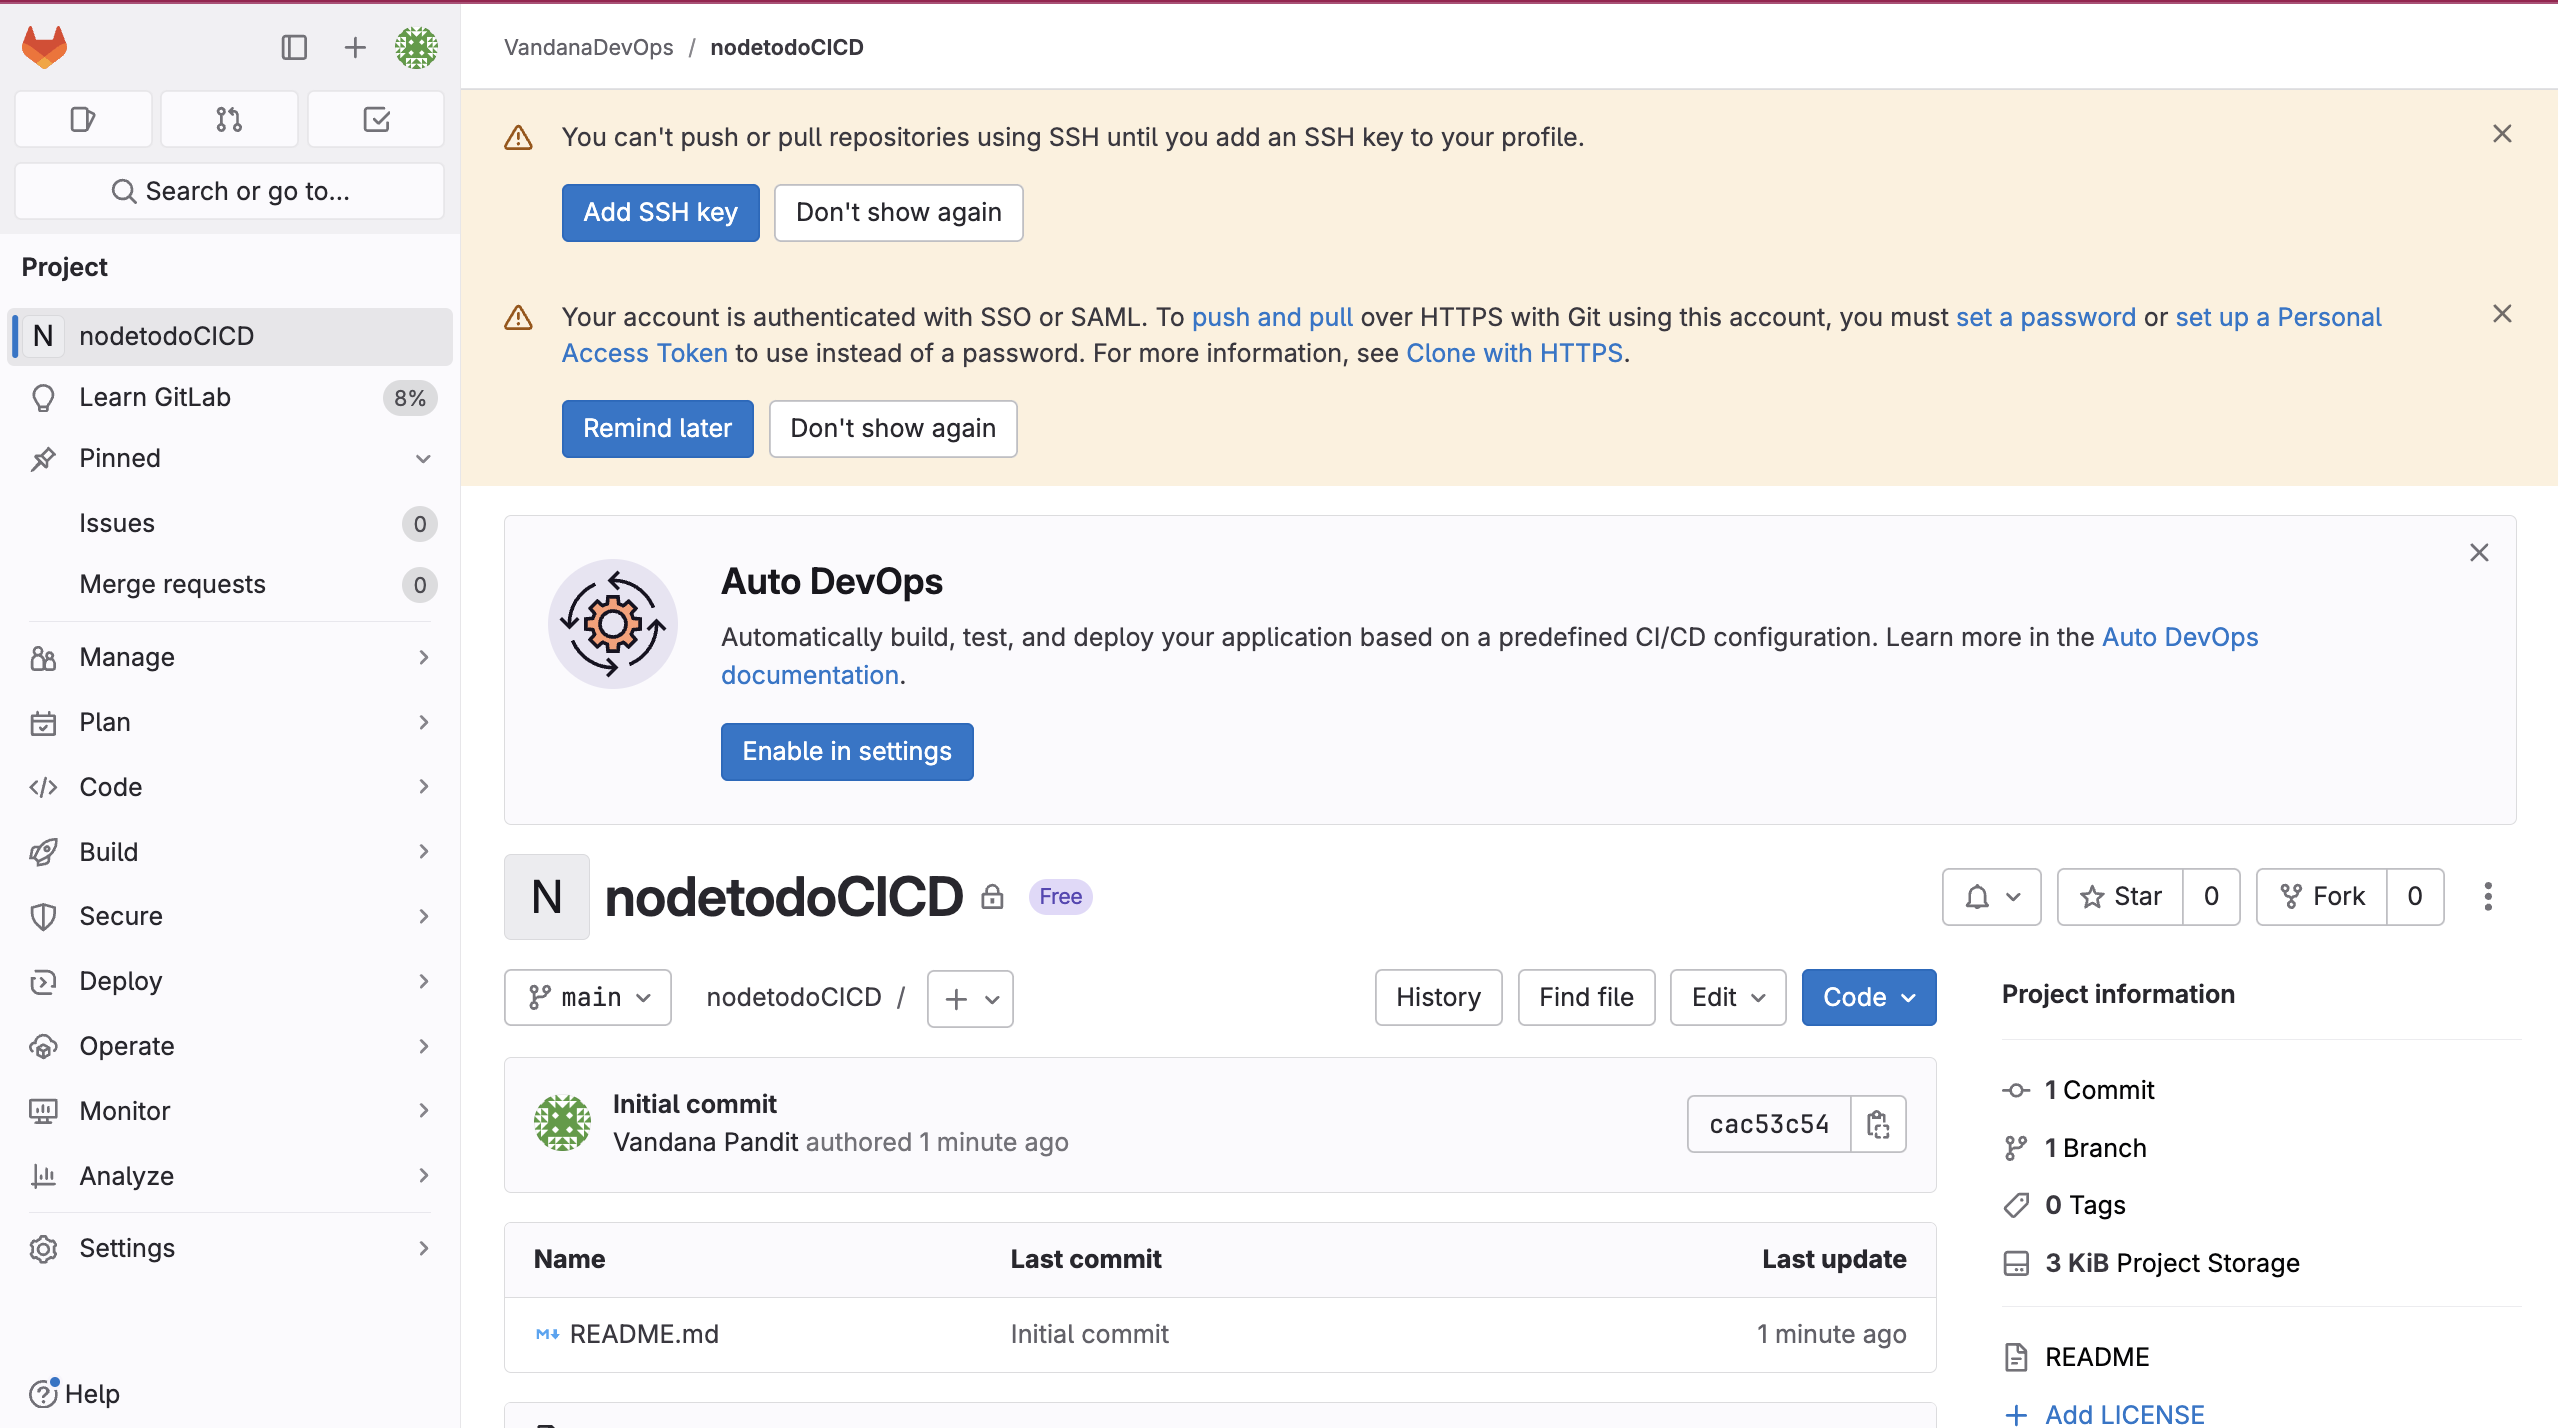
To push or pull using SSH we need to add a SSH key. Go to you GitLab server in my case it is AWS ubuntu instance, in the instance create a SSH keys.
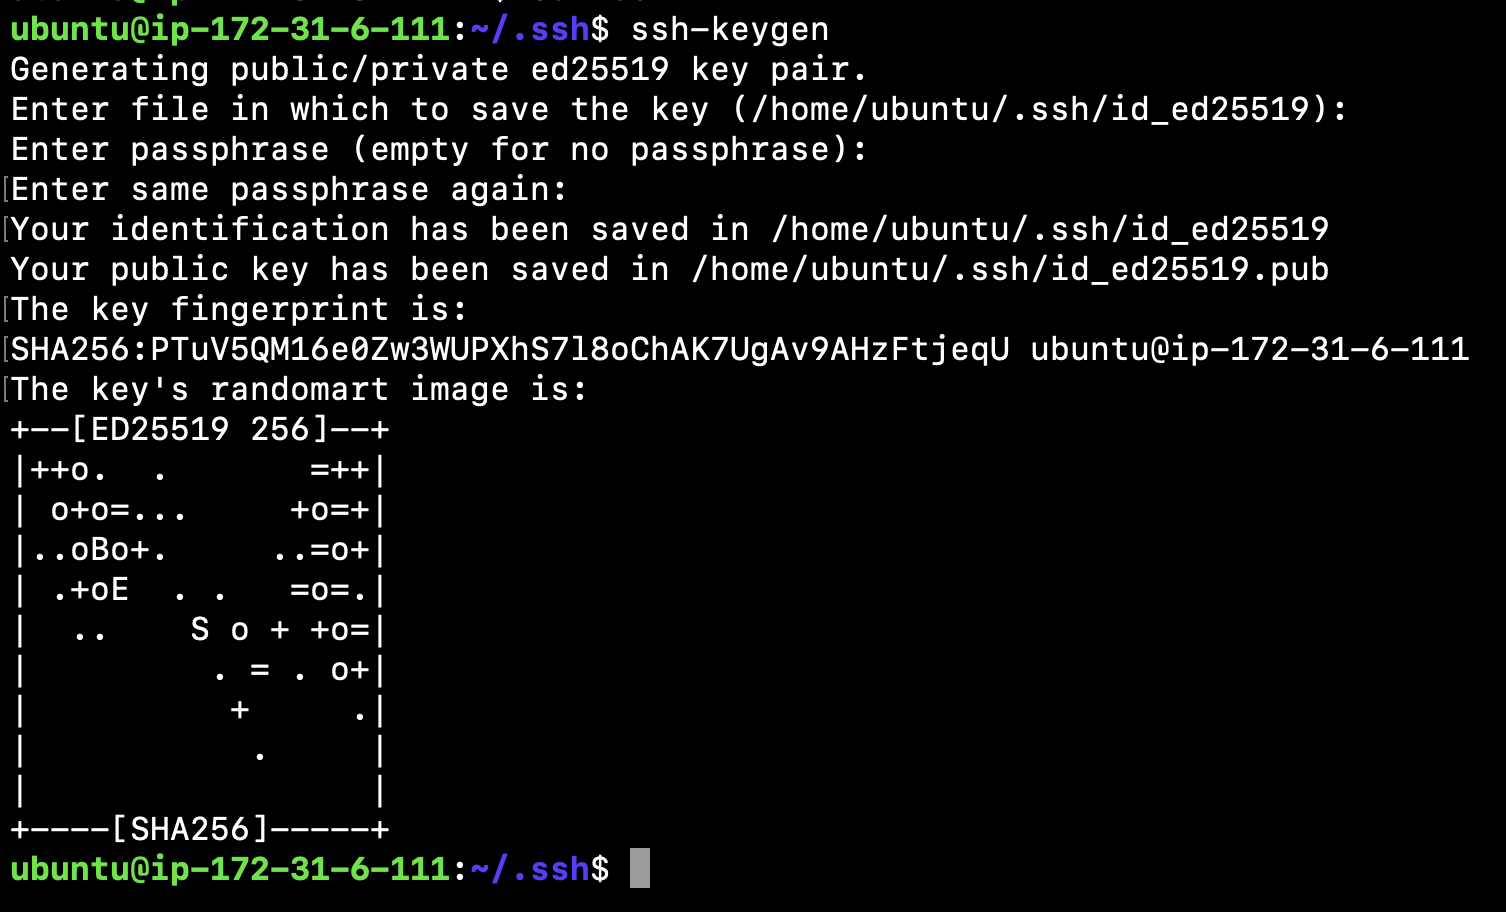
Copy SSH public key:

Go to Gitlab page and select Add SSH key
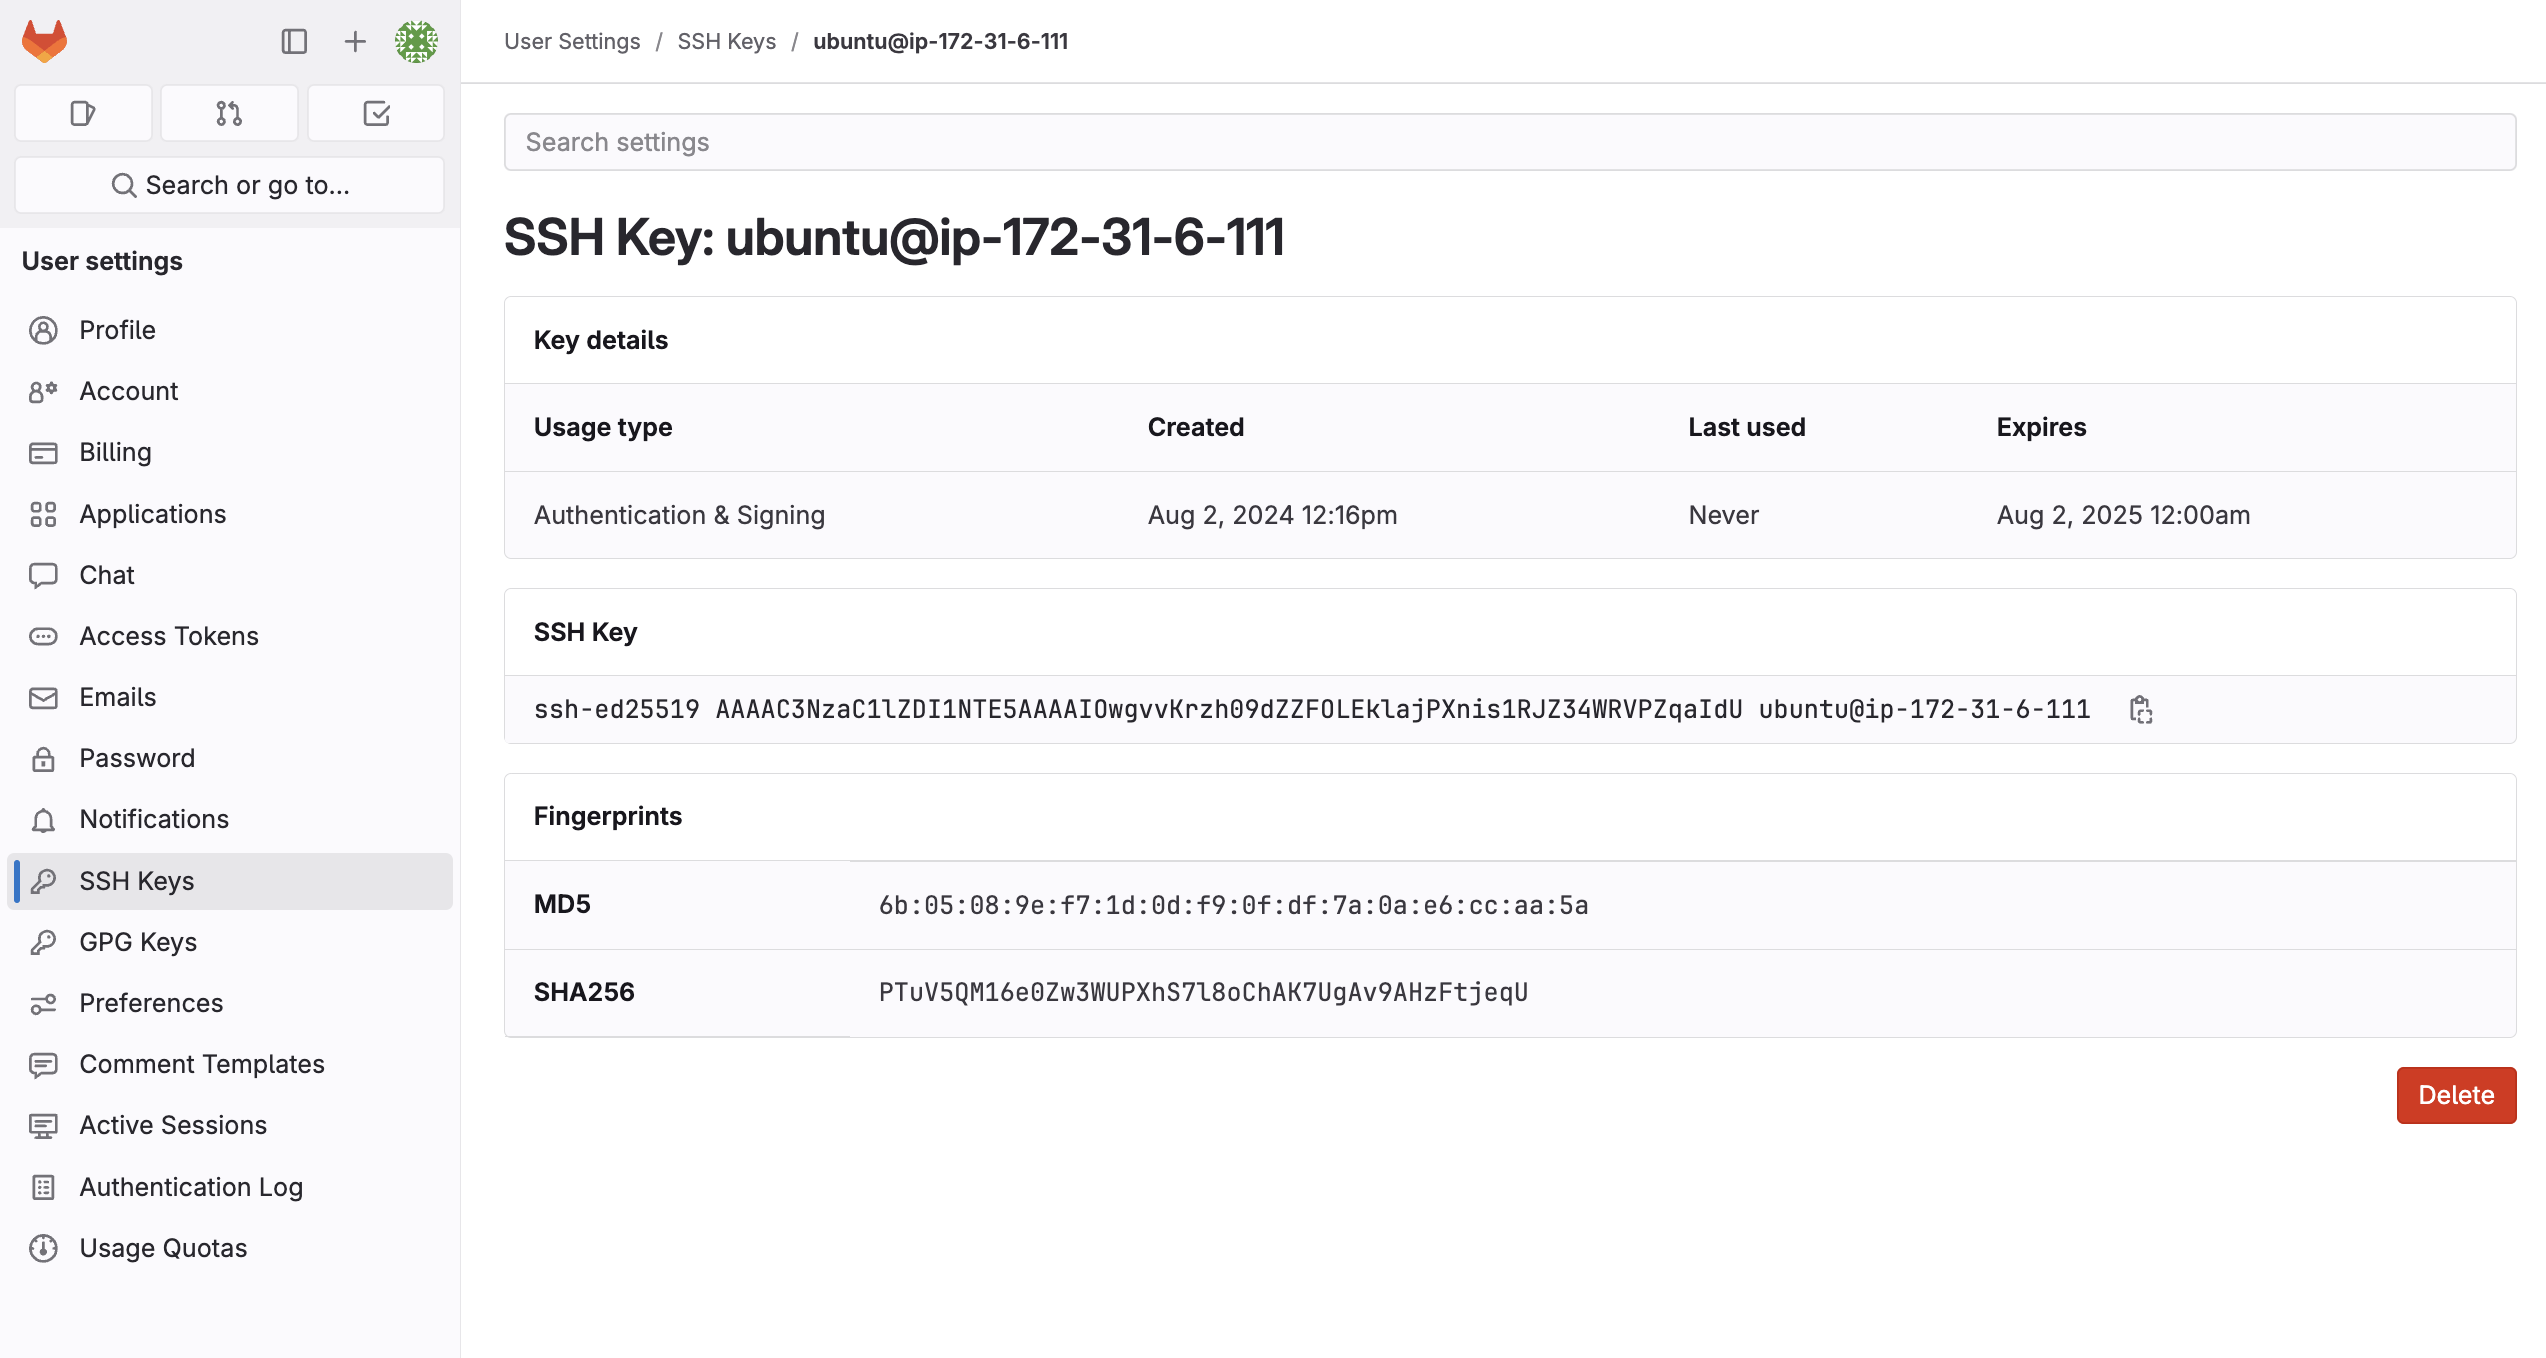
Paste the SSH key copied from the GitLab server and click on 'ADD'. After that, the following page will be displayed.
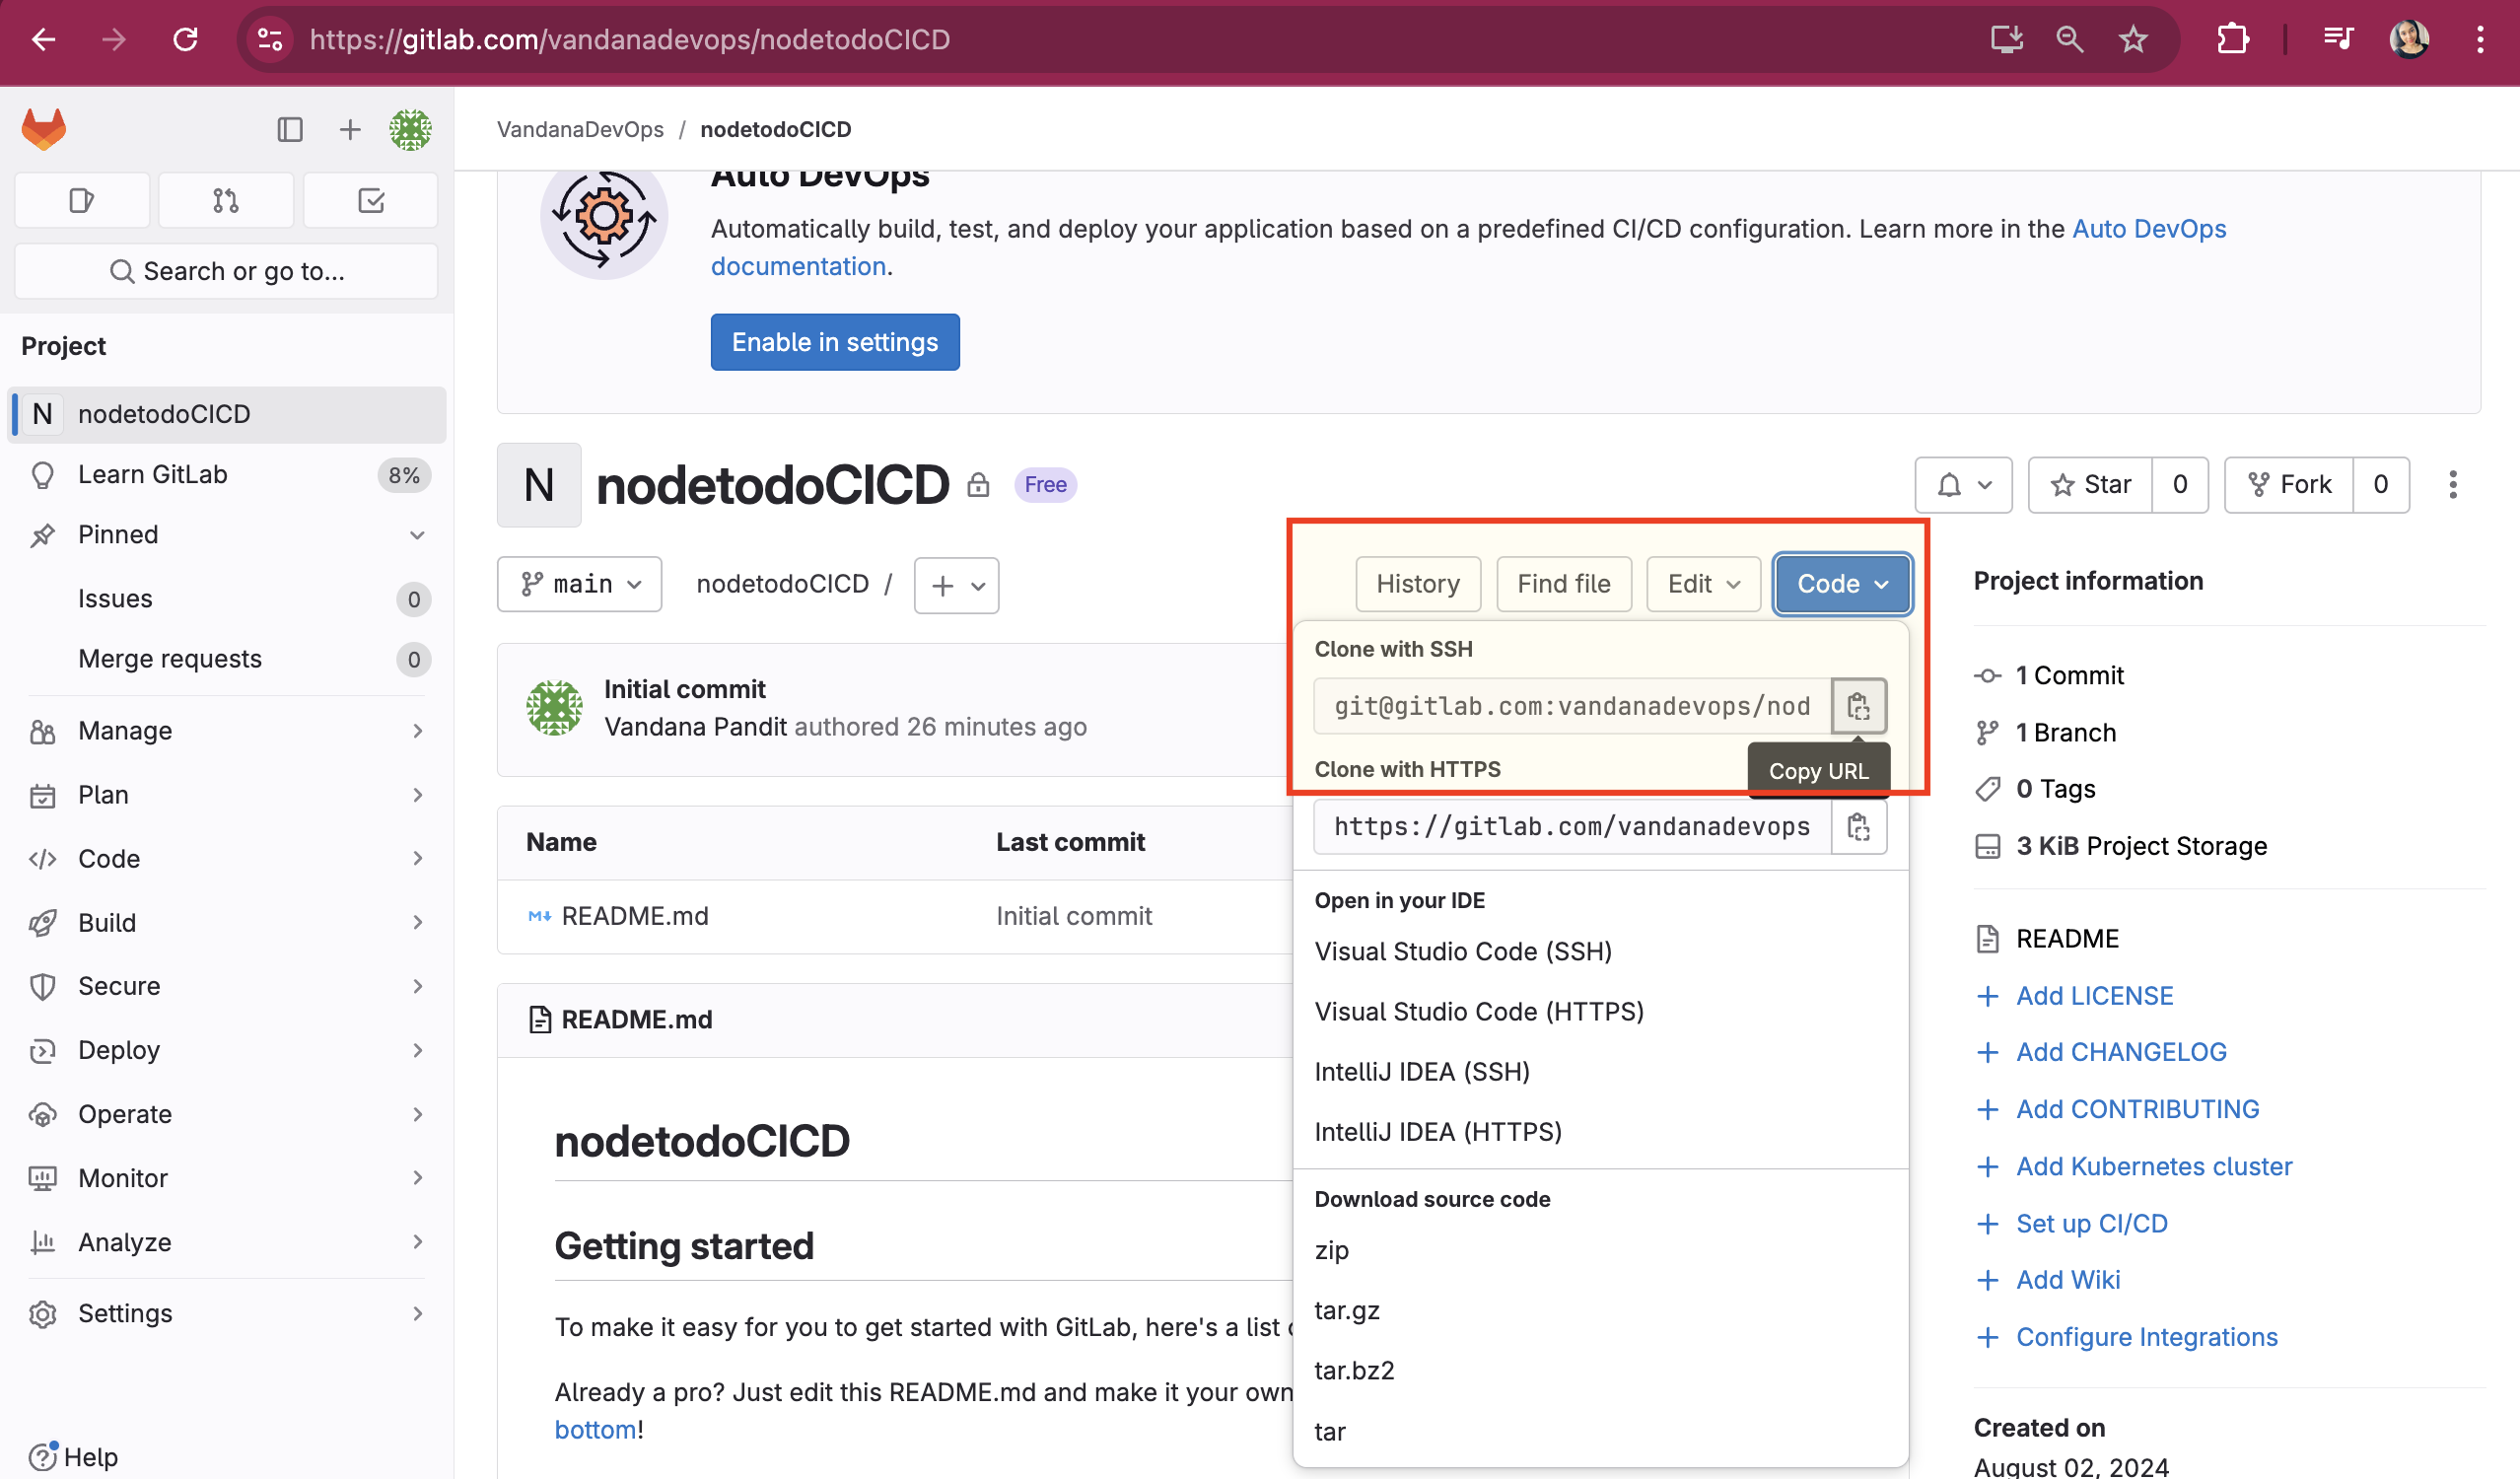
Clone the gitlab project to the gitlab ubuntu server:
Copy the SSH URL from GitLab's Project page
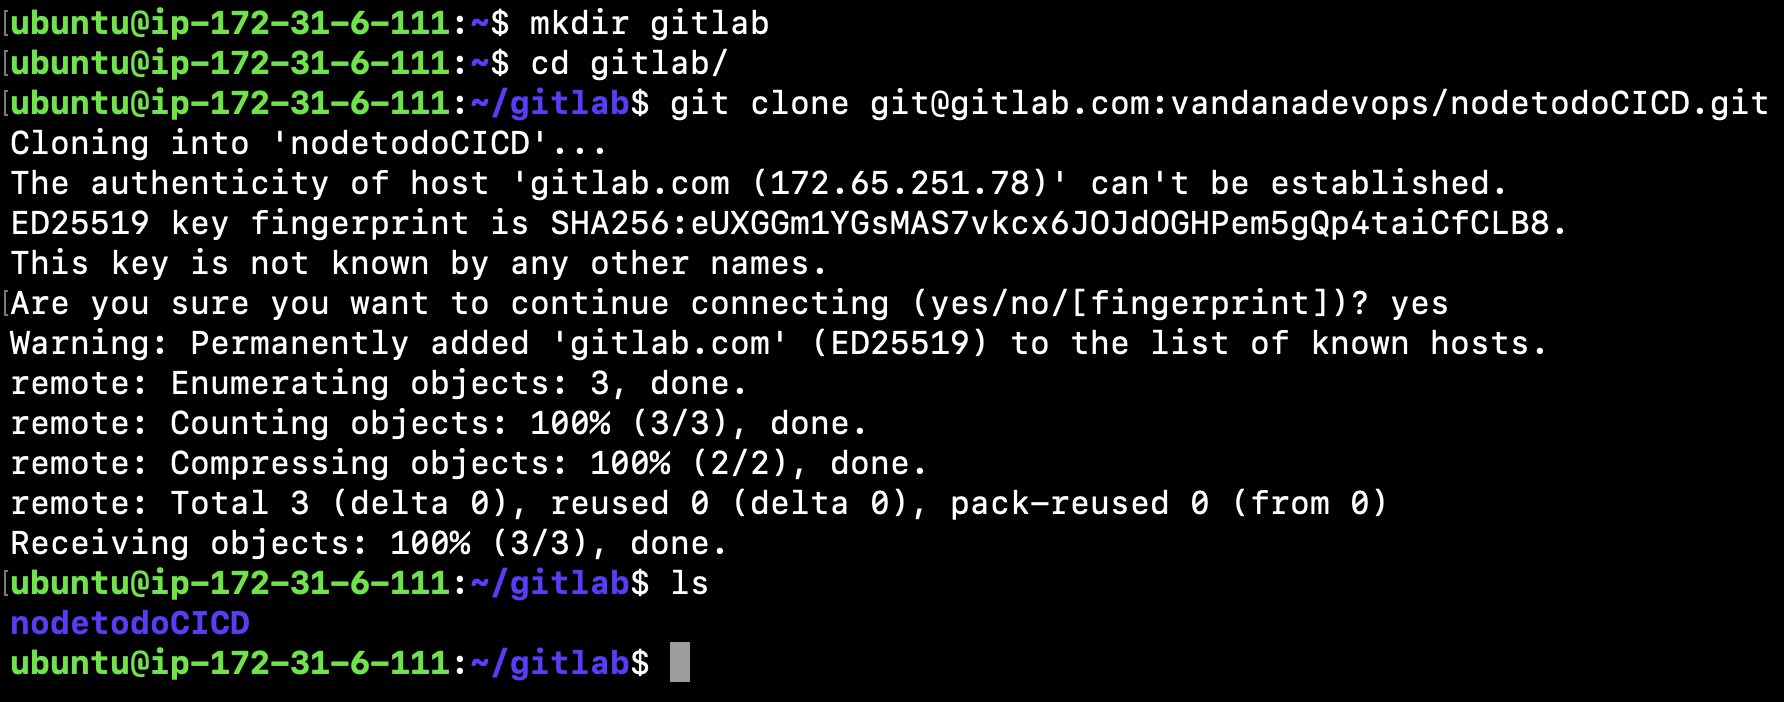
Go to the Ubuntu server, create a directory, and clone the GitLab project by running the command git clone <paste-ssh-url>.
Create GitLab Project via Import?
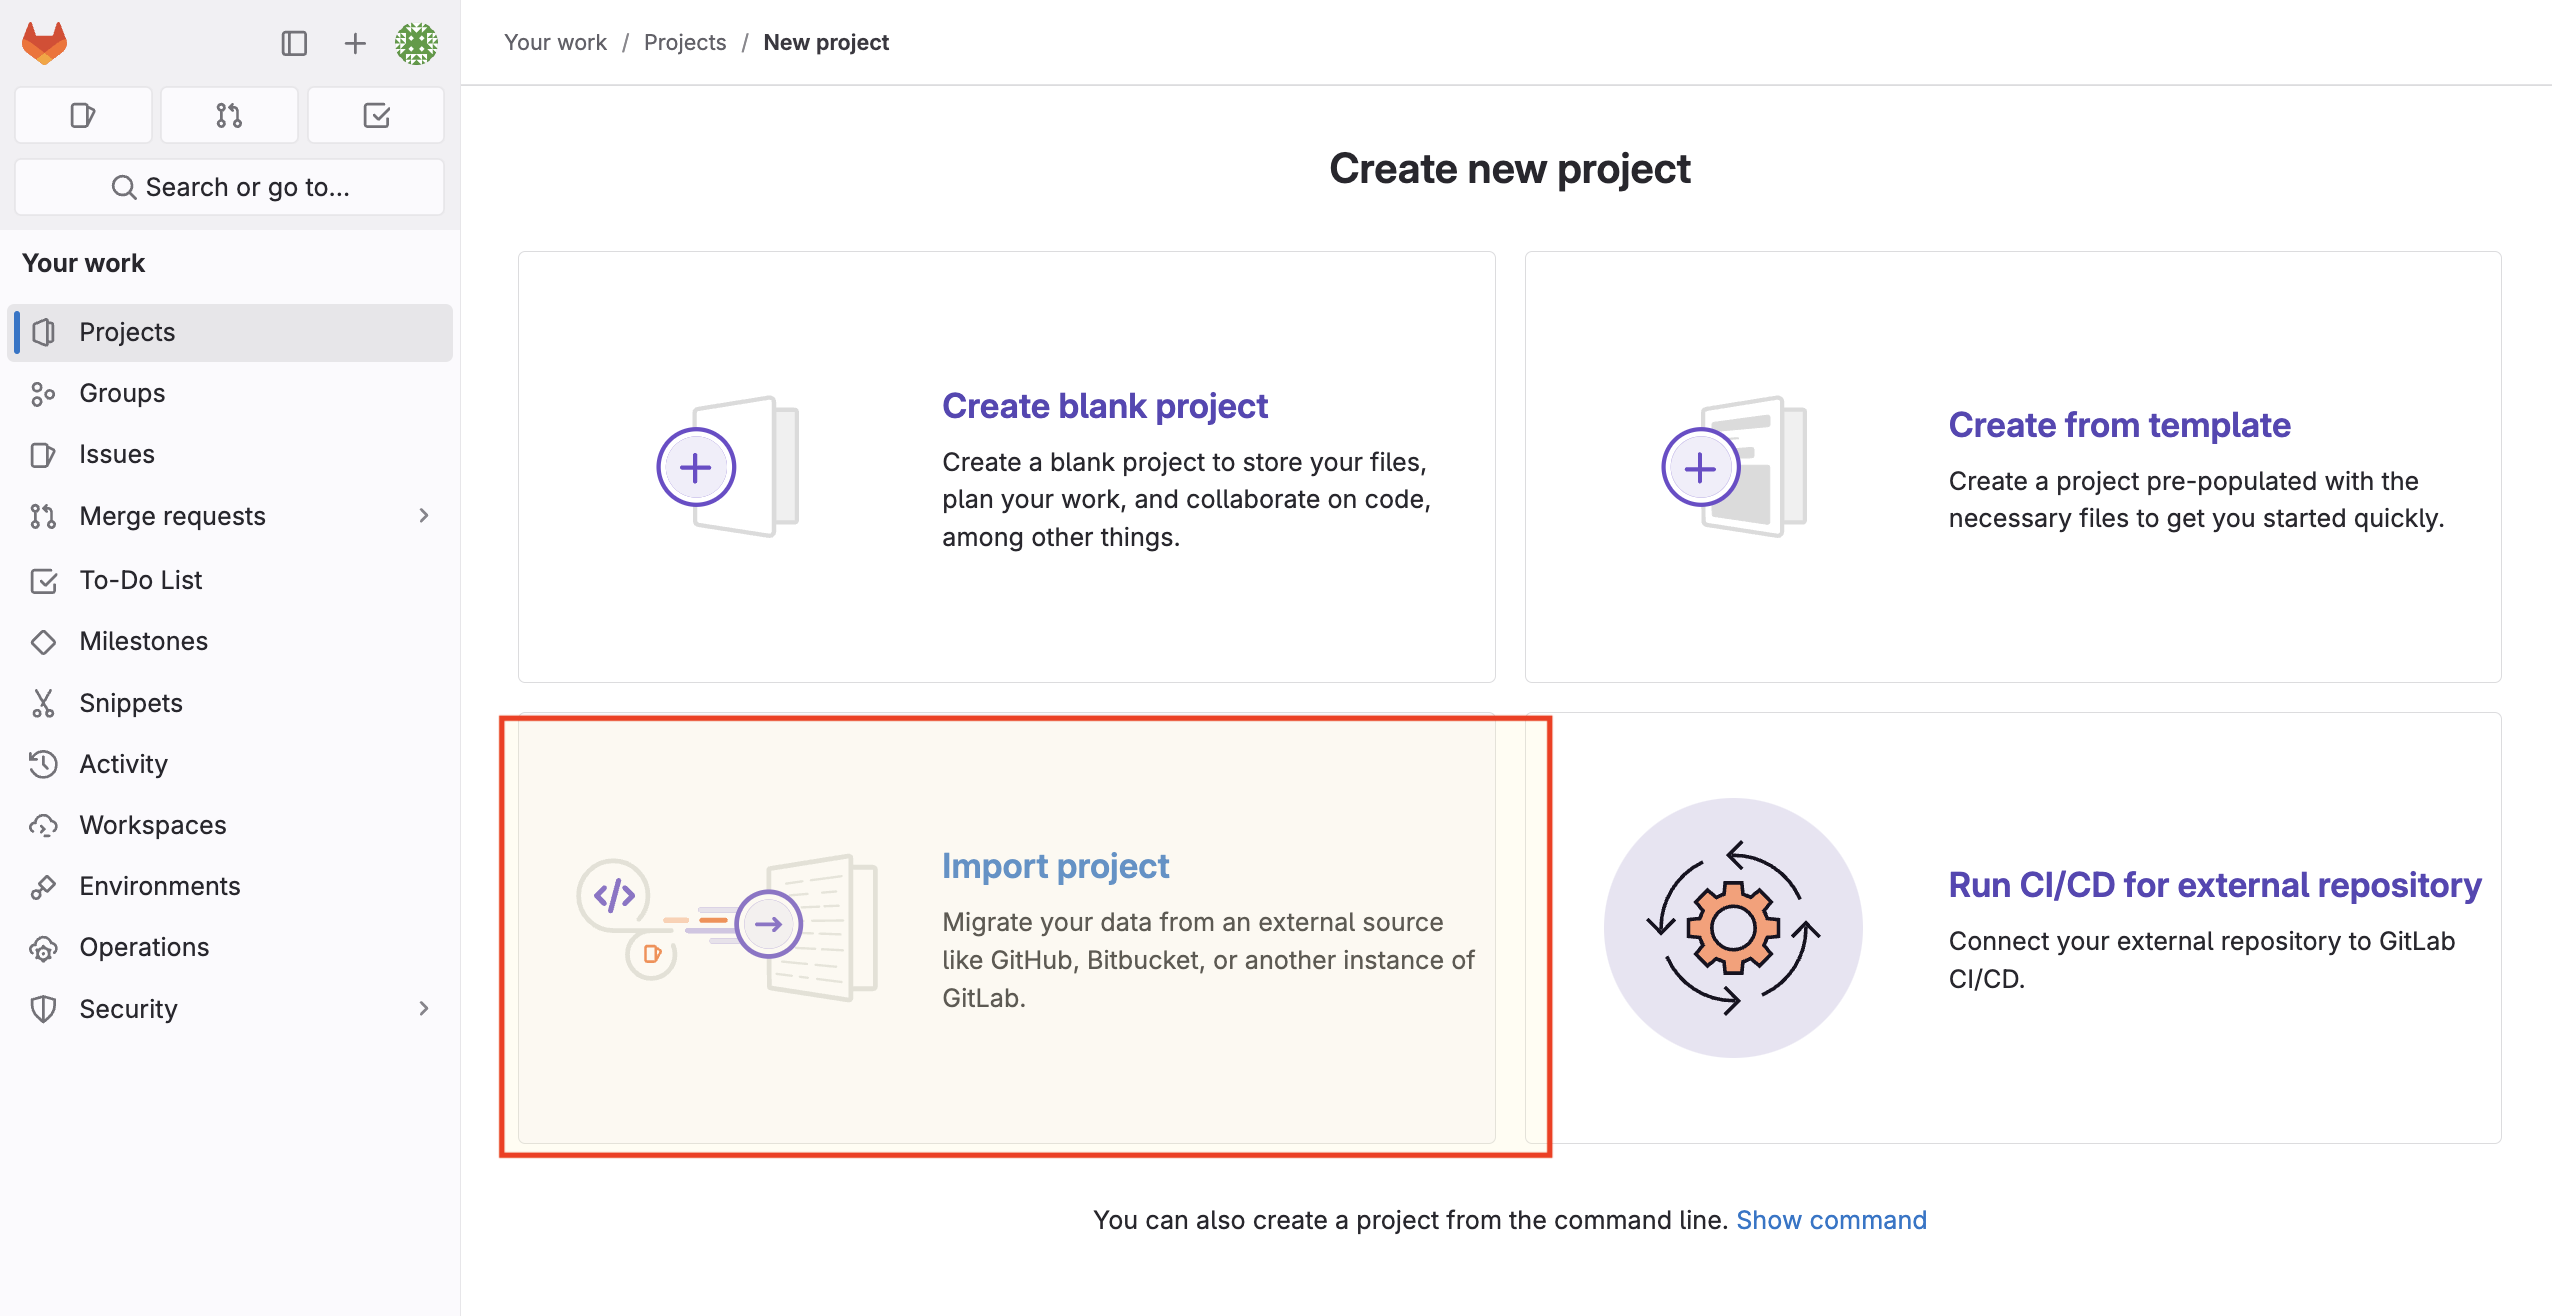
Click on Plus icon in left panel and then select 'Import project' to import github repository:
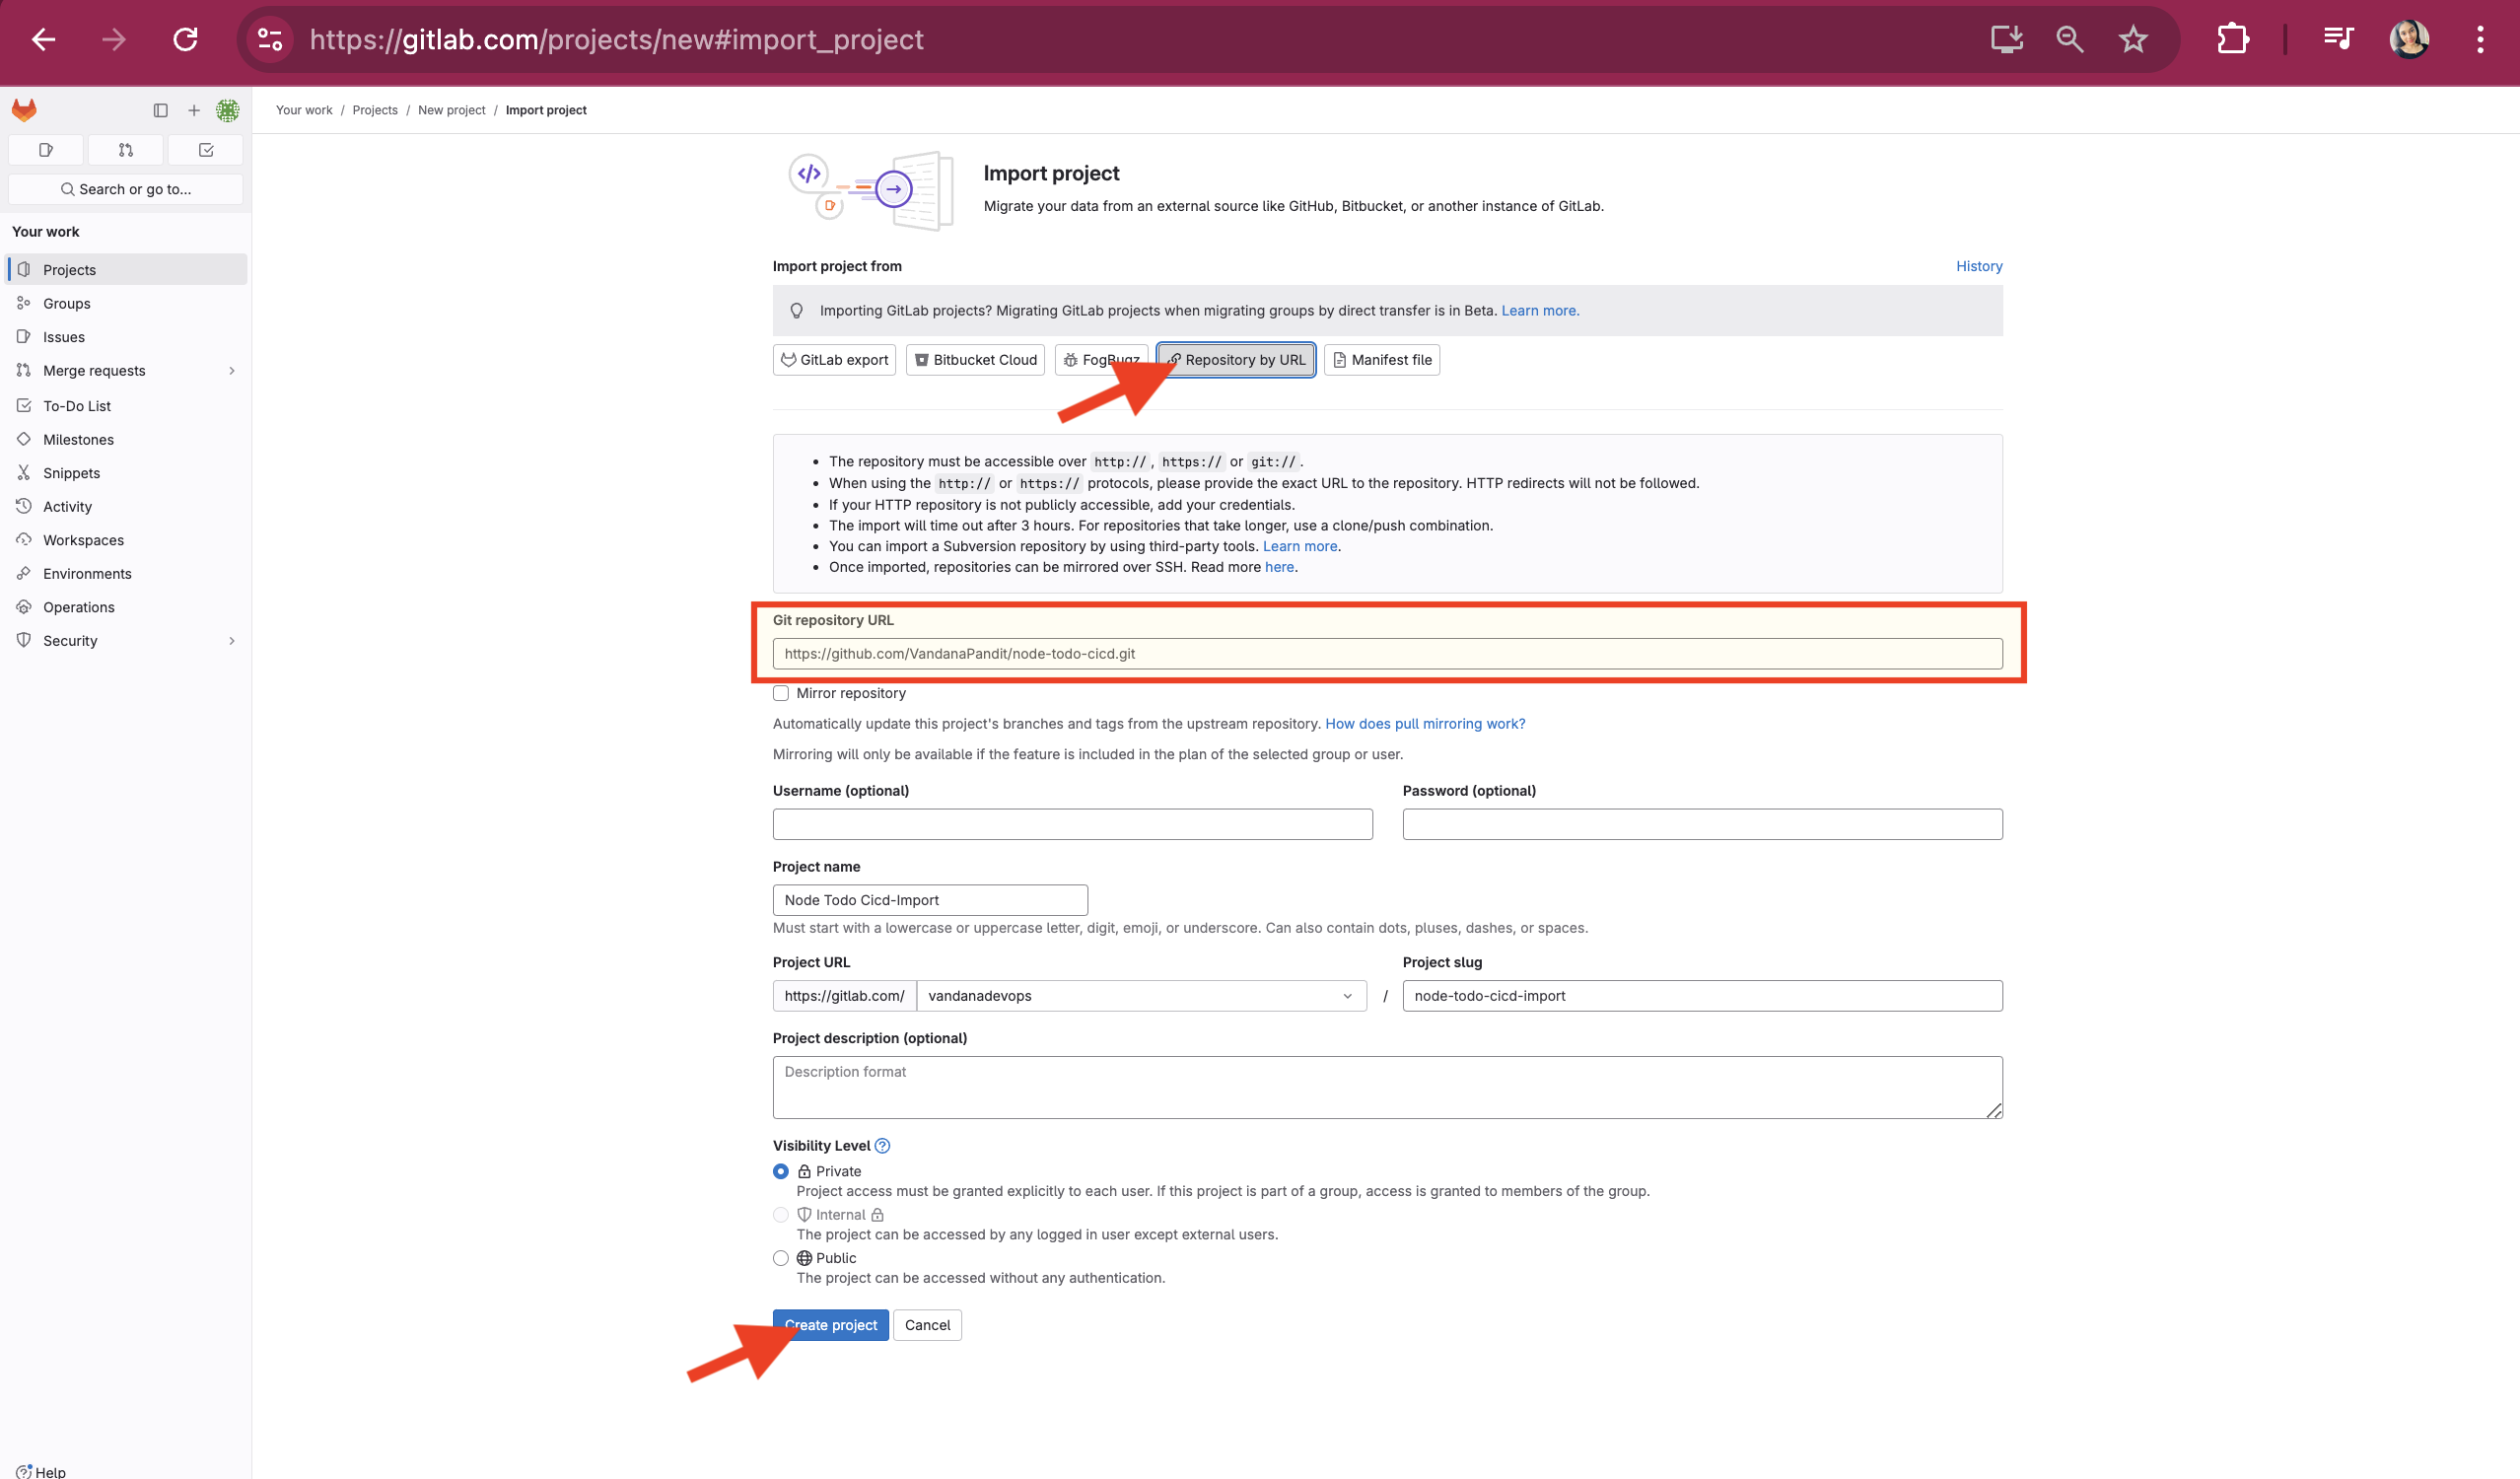
On the "Import Project" page, select "Repository URL" and paste the GitHub URL for the repository you want to import. Name the project "Node Toto Cicd-Import" (the "-import" in the name will differentiate it from the previously created project named "nodetodoCICD"). Then click "Create Project".
GitHub Repo Link: https://github.com/VandanaPandit/node-todo-cicd
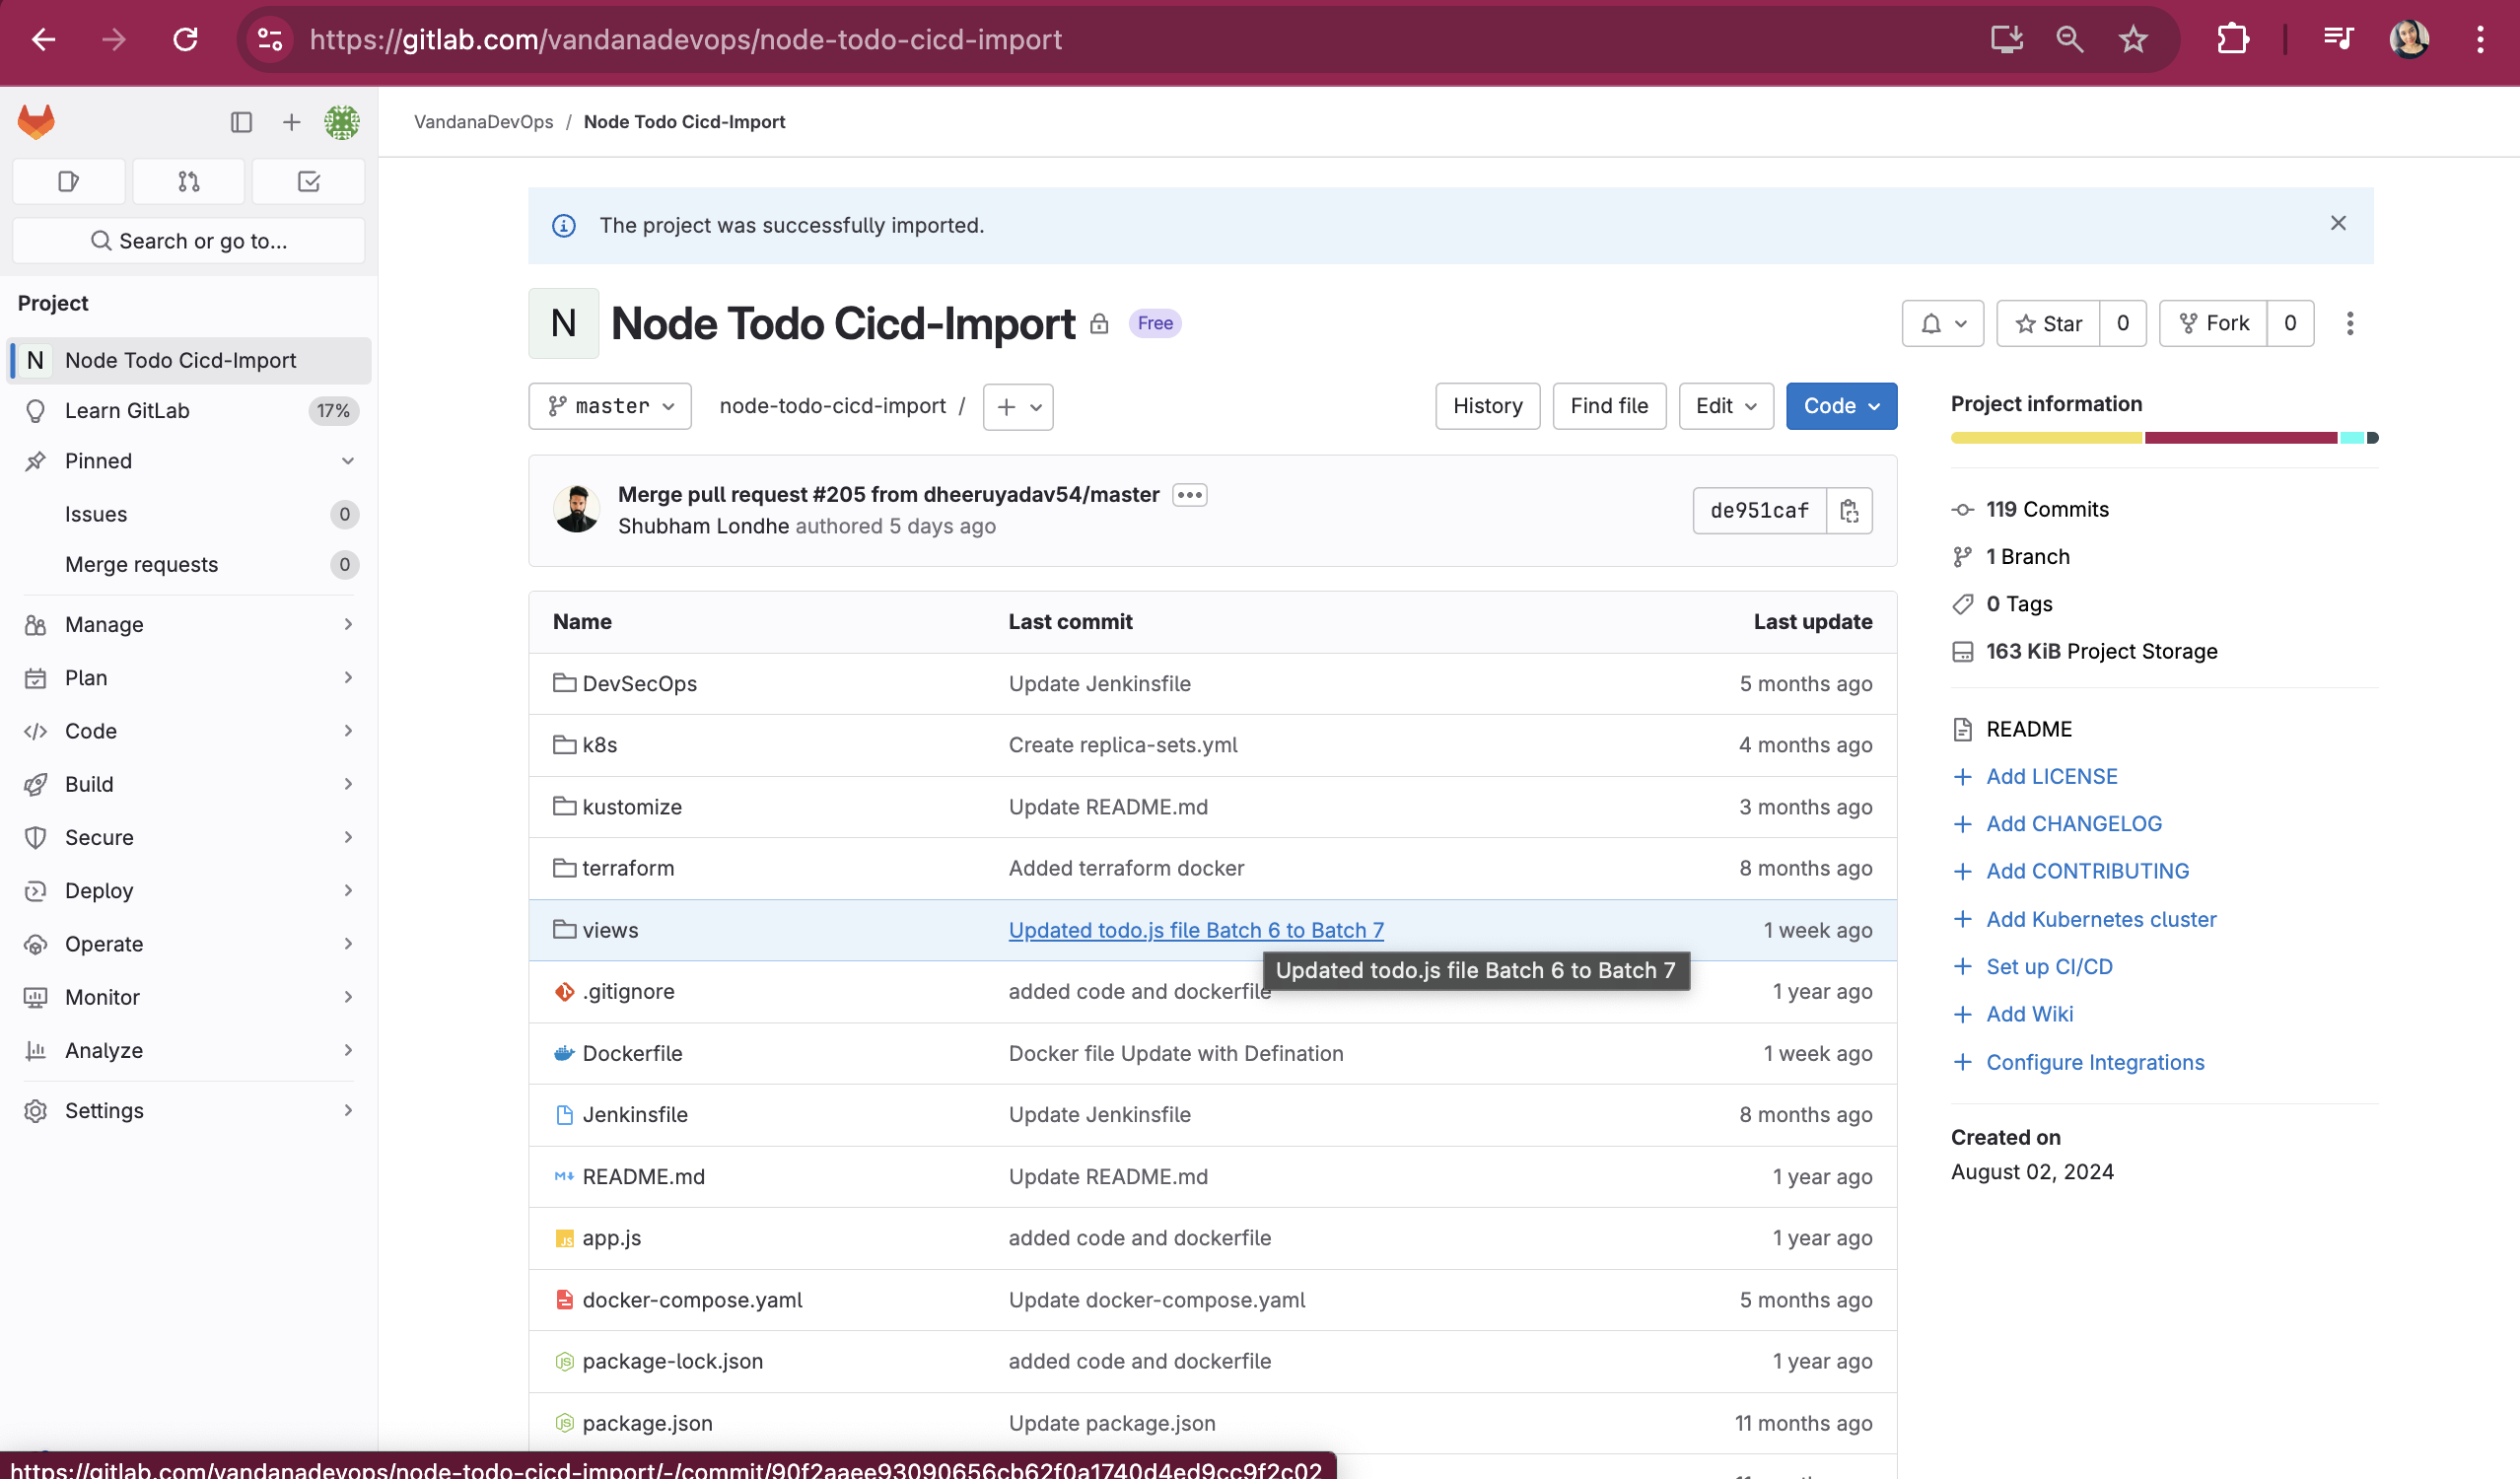
Repository is imported to GitLab
How to create a Pipeline in GitLab?
Go to your GitLab project "nodetodoCICD" (the project that was created earlier)
On the nodetodoCICD project page, click on the "+" icon and select "New file" from the dropdown.
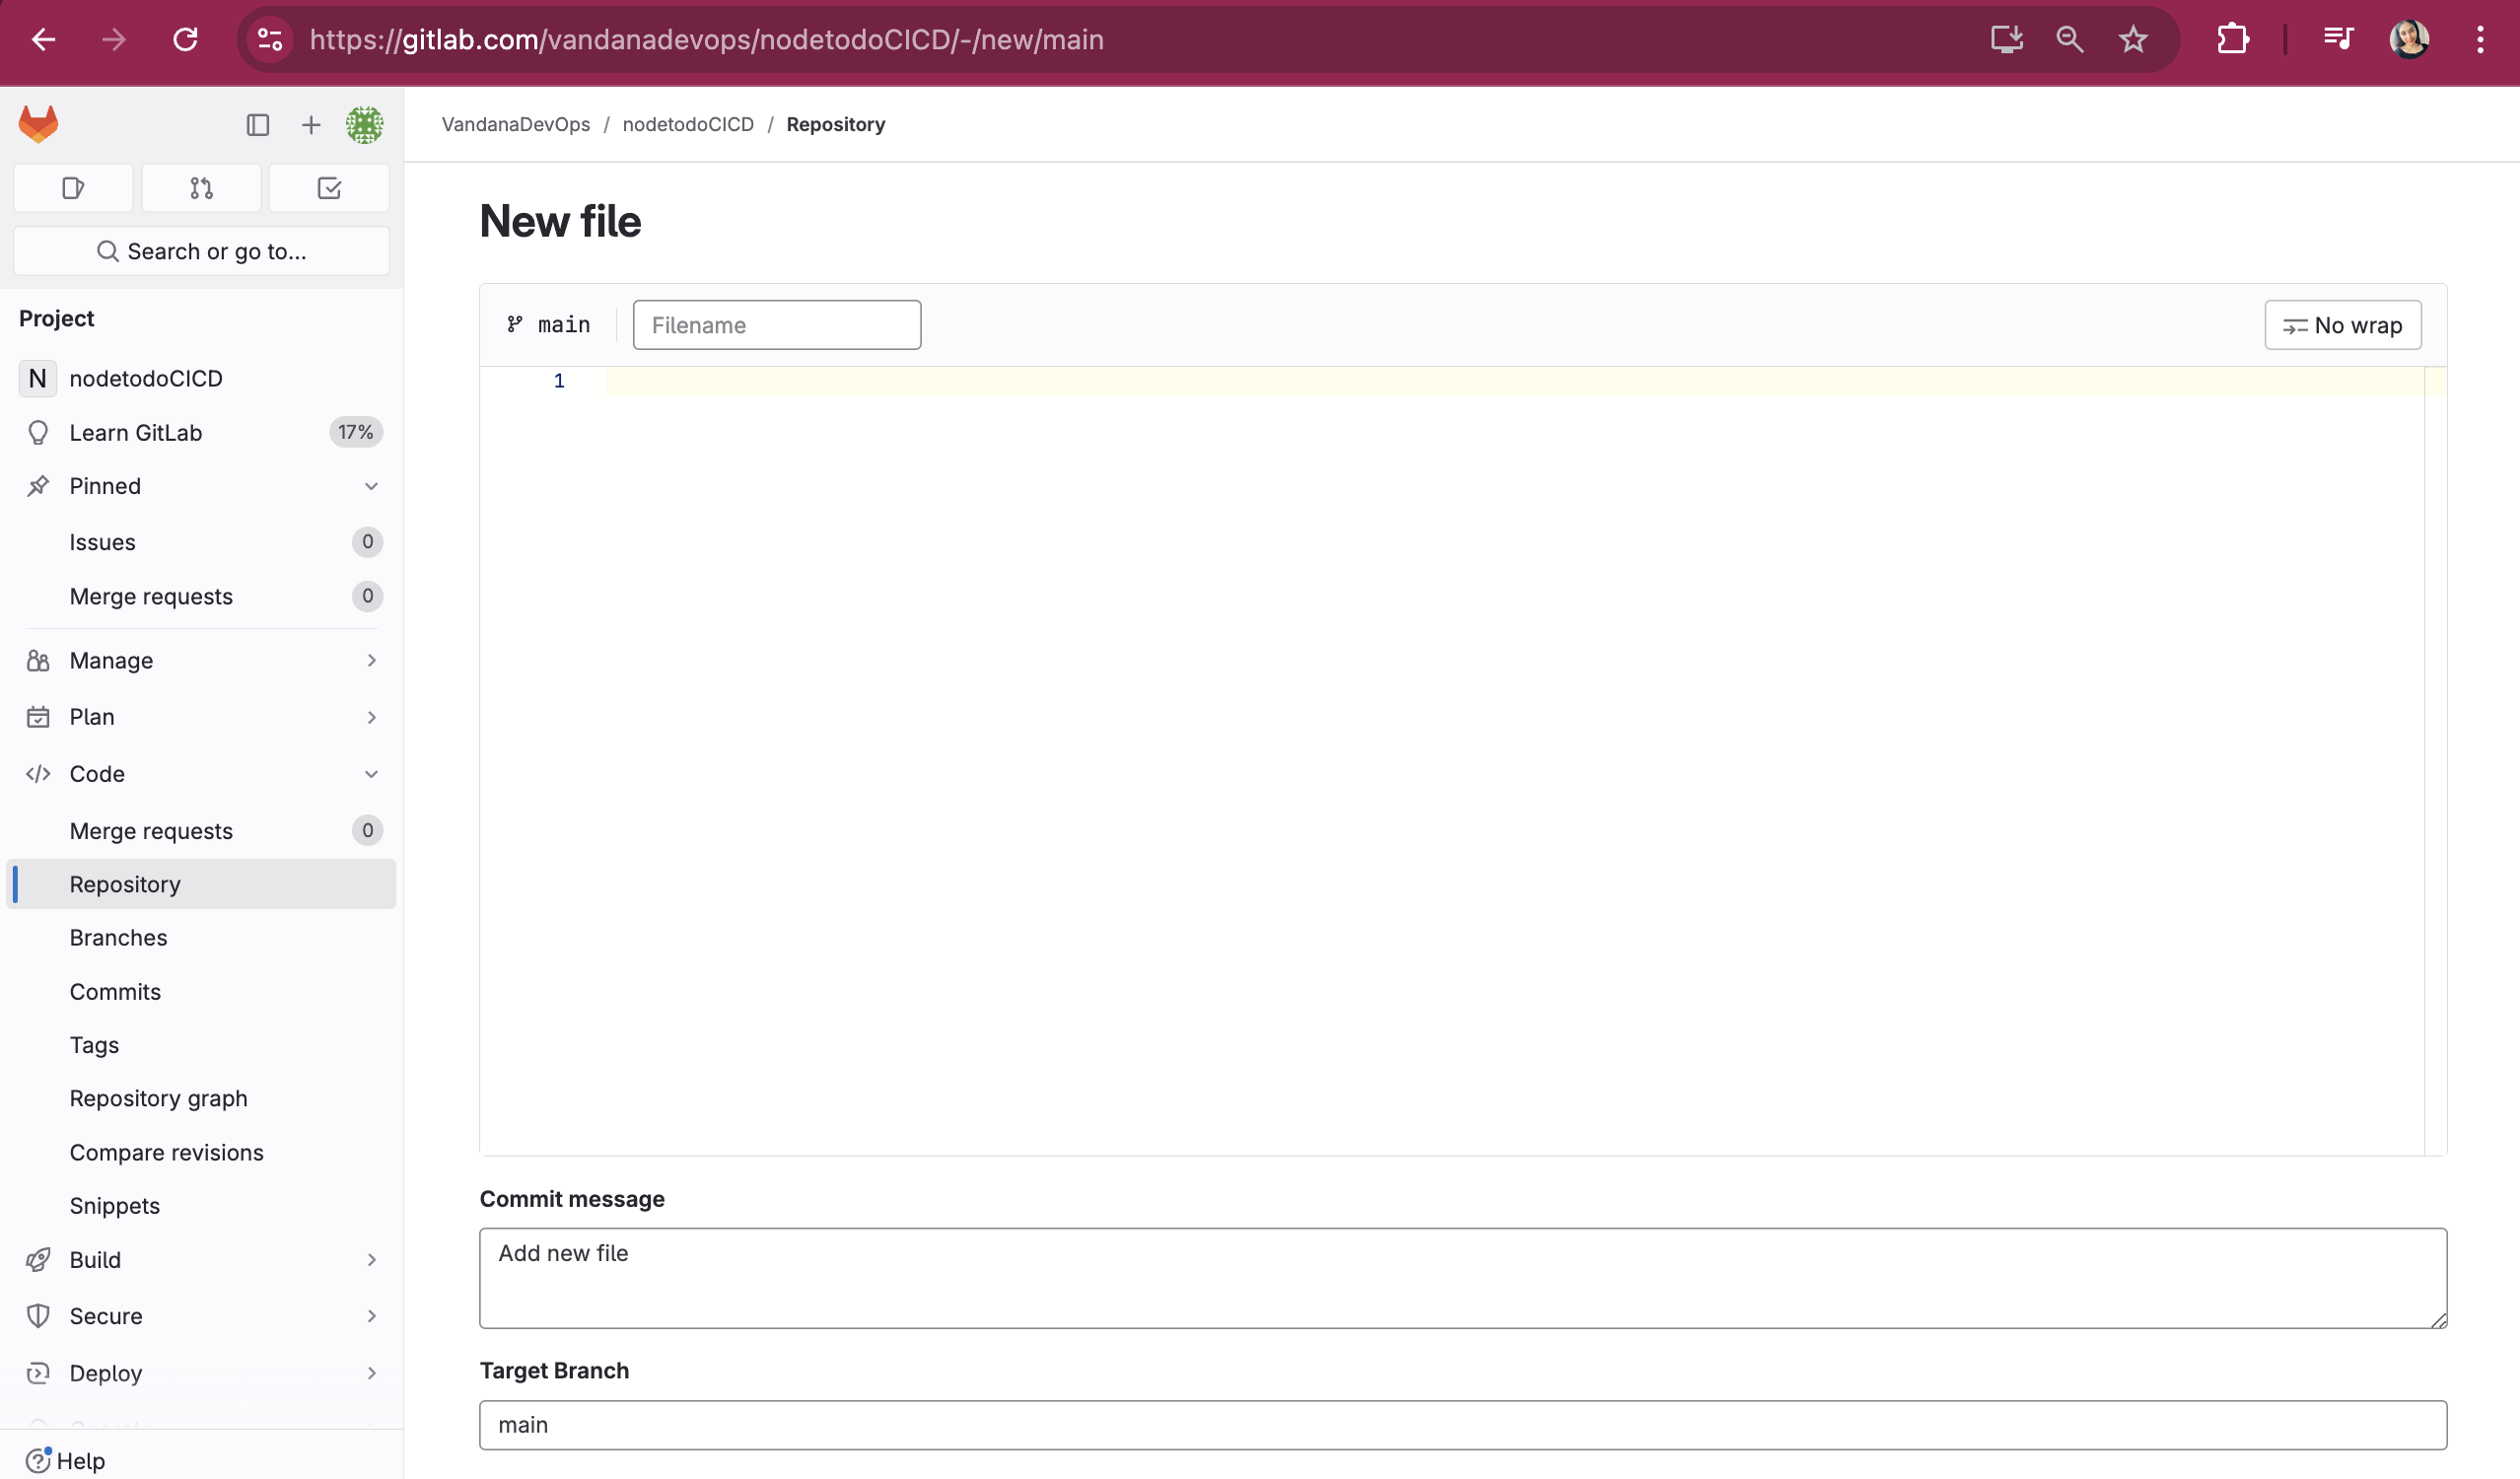
Name the file .gitlab-ci.yml
Note: If you want to create a CI/CD pipeline on GitLab, it is mandatory to name the file.gitlab-ci.ymland the Apply Template option will be auto-populated.
We will start writing the .gitlab-ci.yml file. First, let's define the stages that will be involved in the CI/CD pipeline.
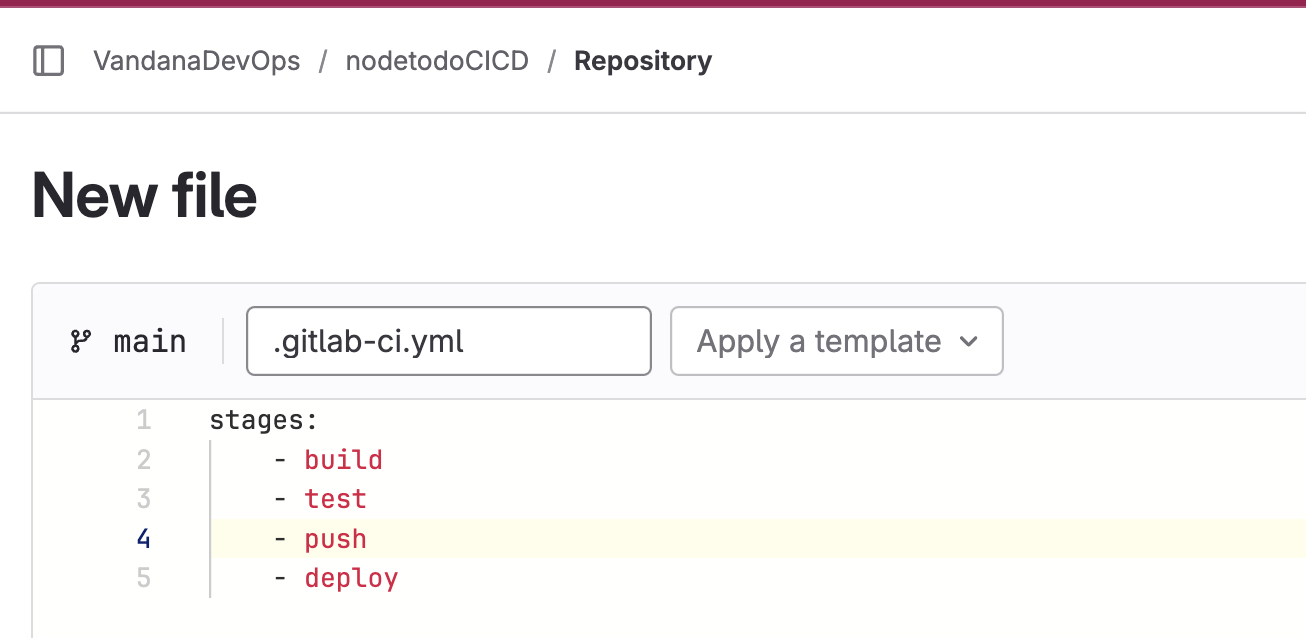
Each stage will have its own job, and within each job, we will have a script that specifies what needs to be executed. The yml file will look like this.
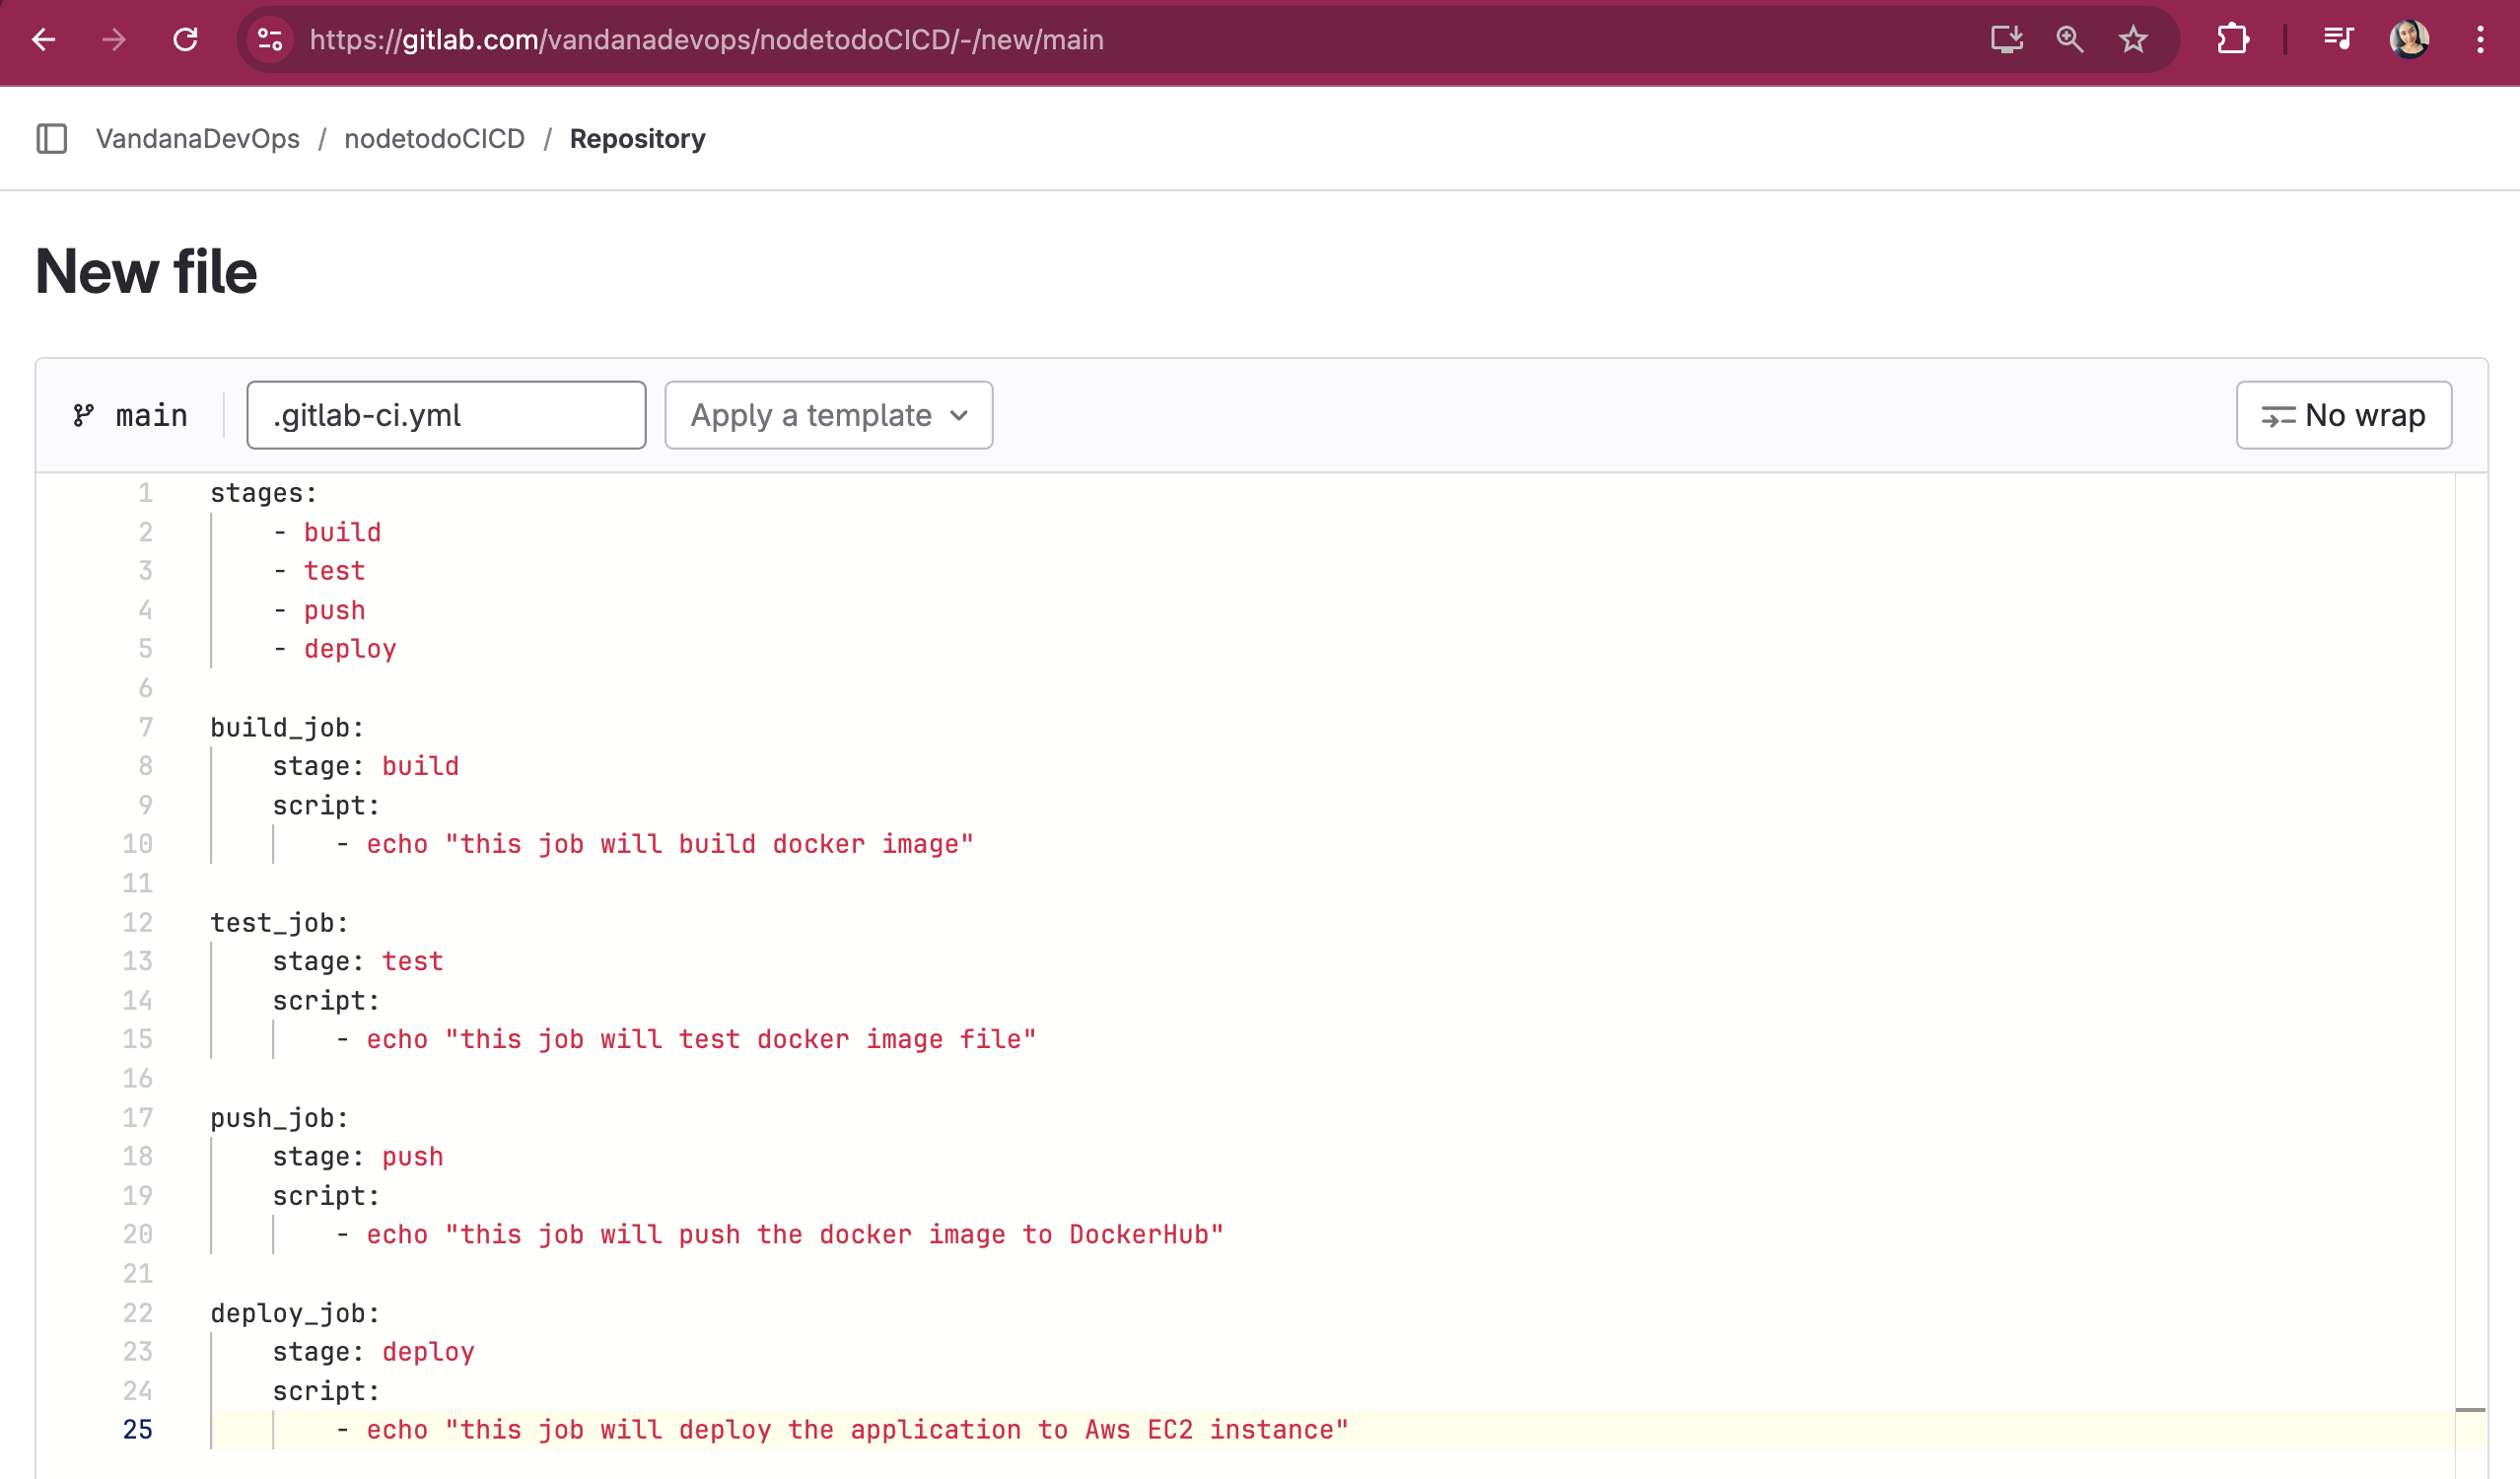
Note: You can give any random name of your choice to job
Commit the changes to your repository.
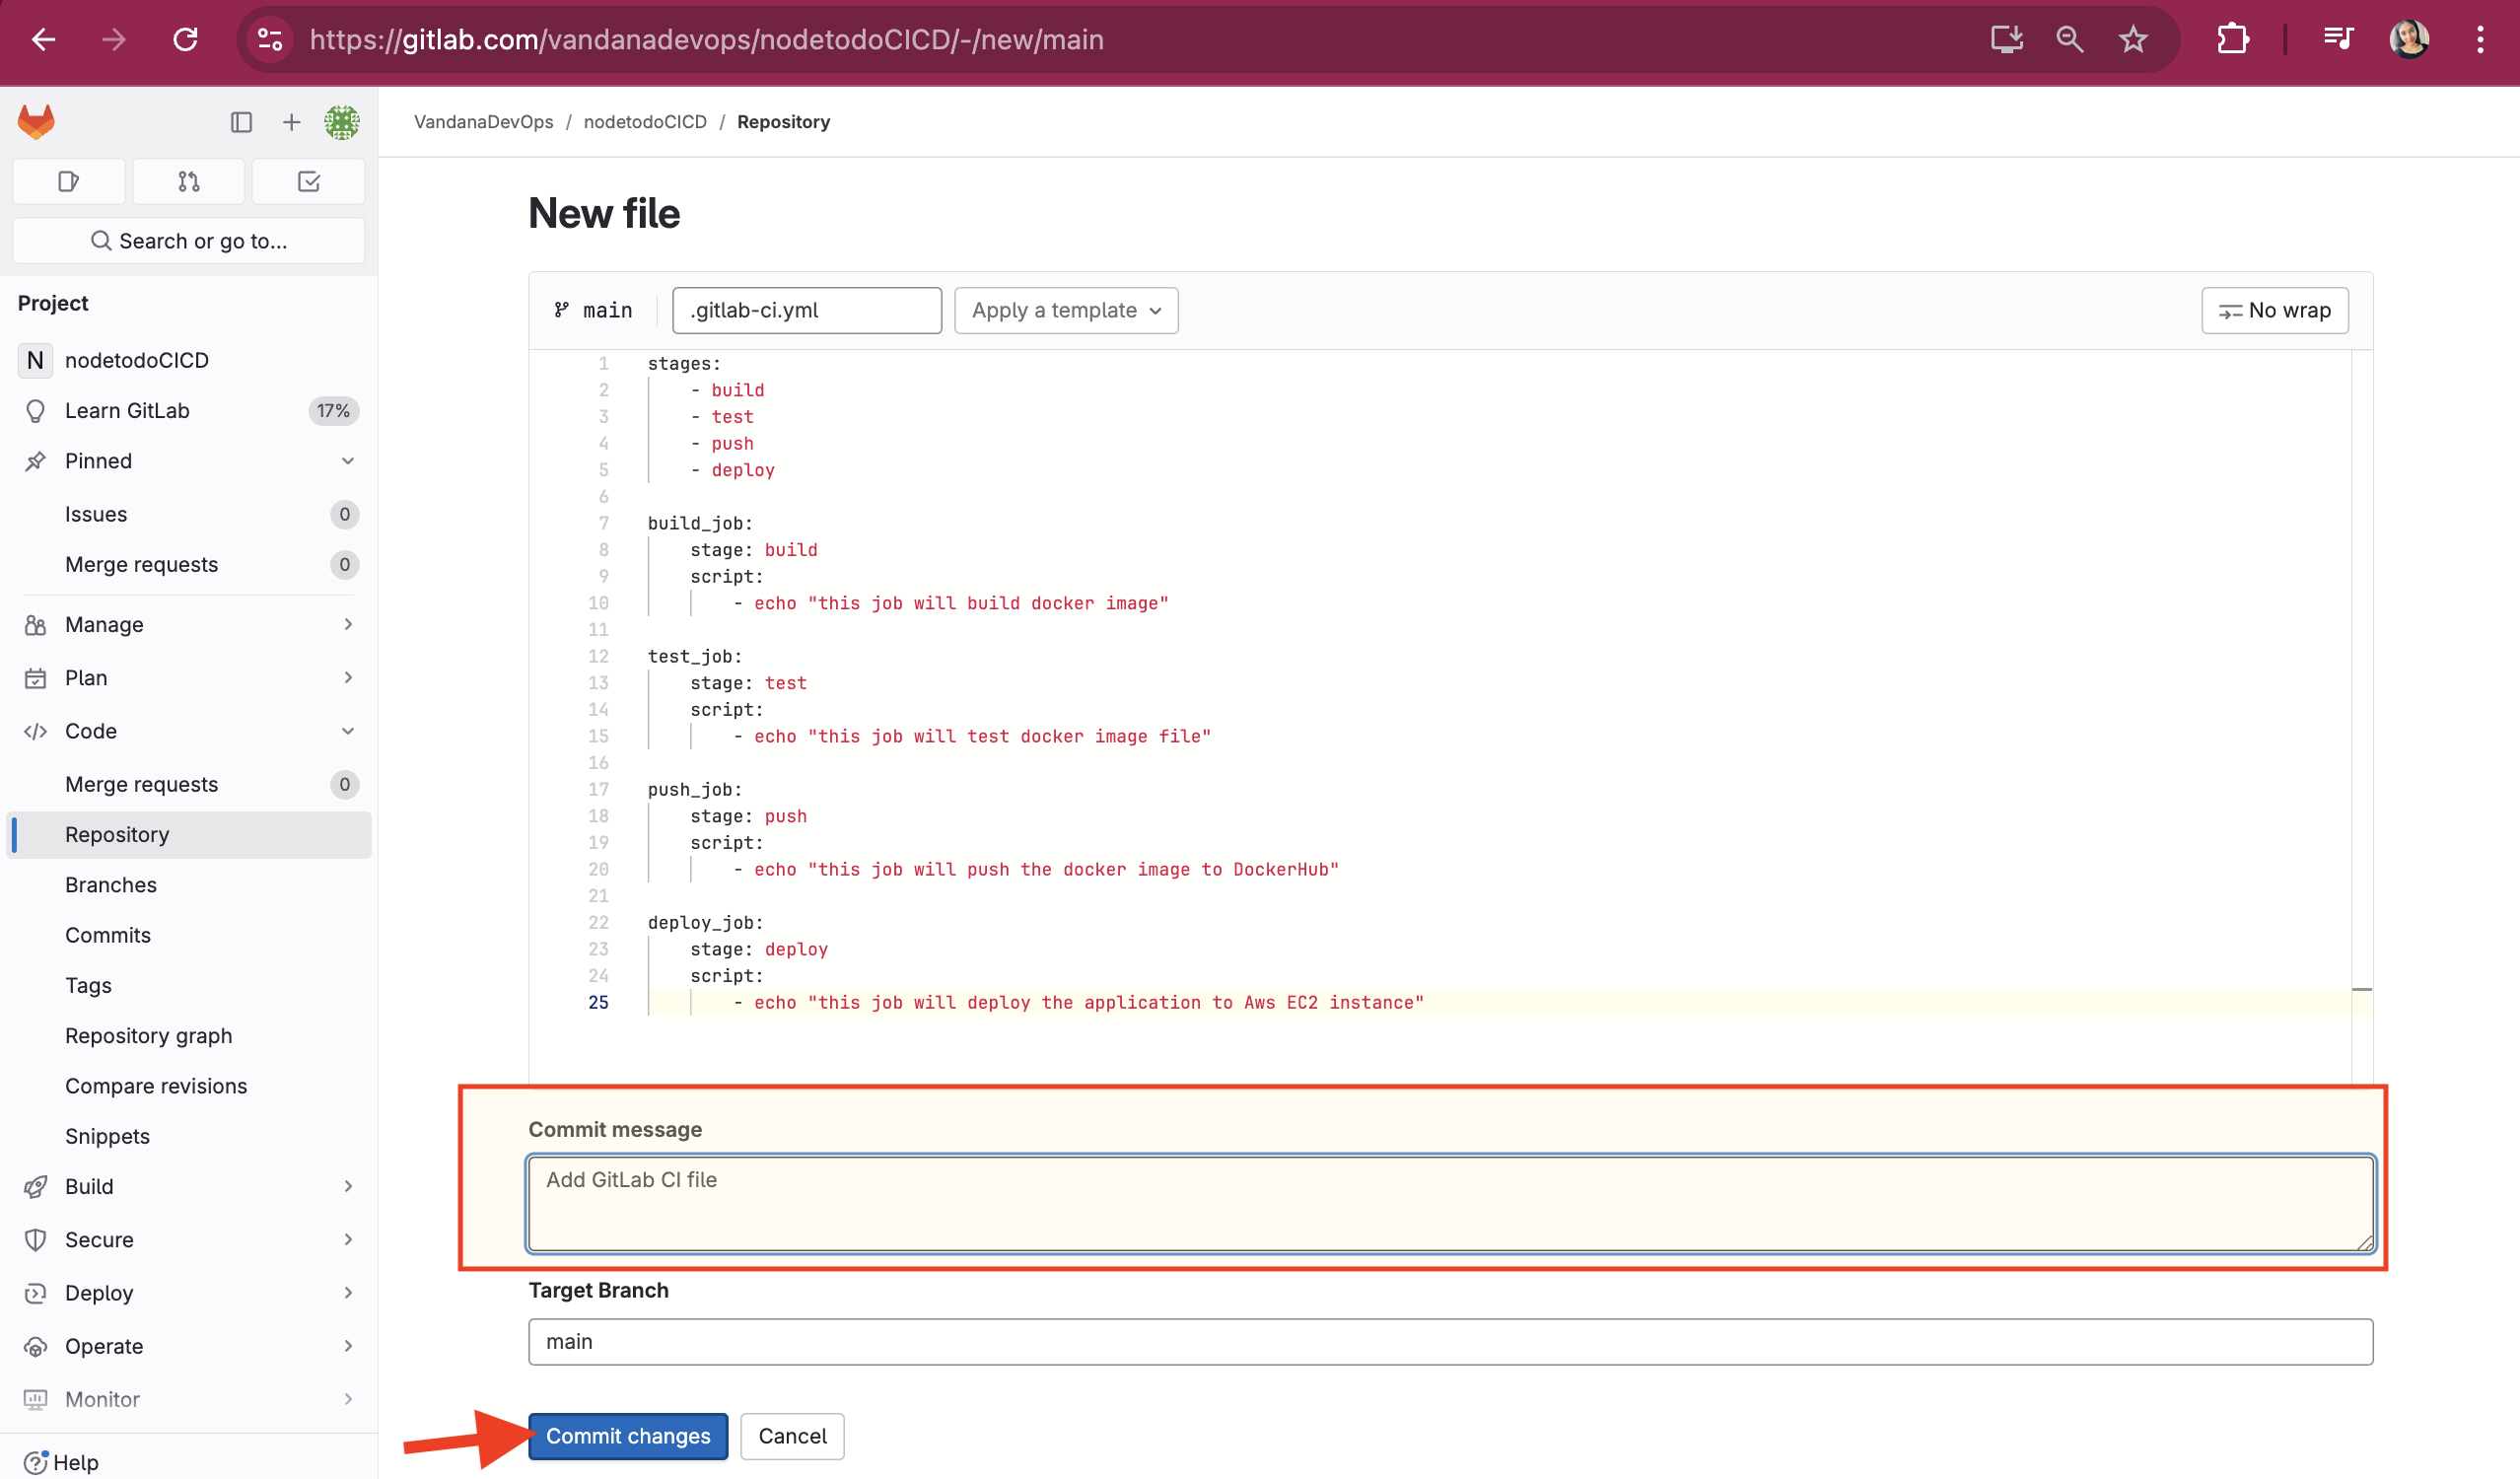
Your pipeline will automatically start running based on the configuration.
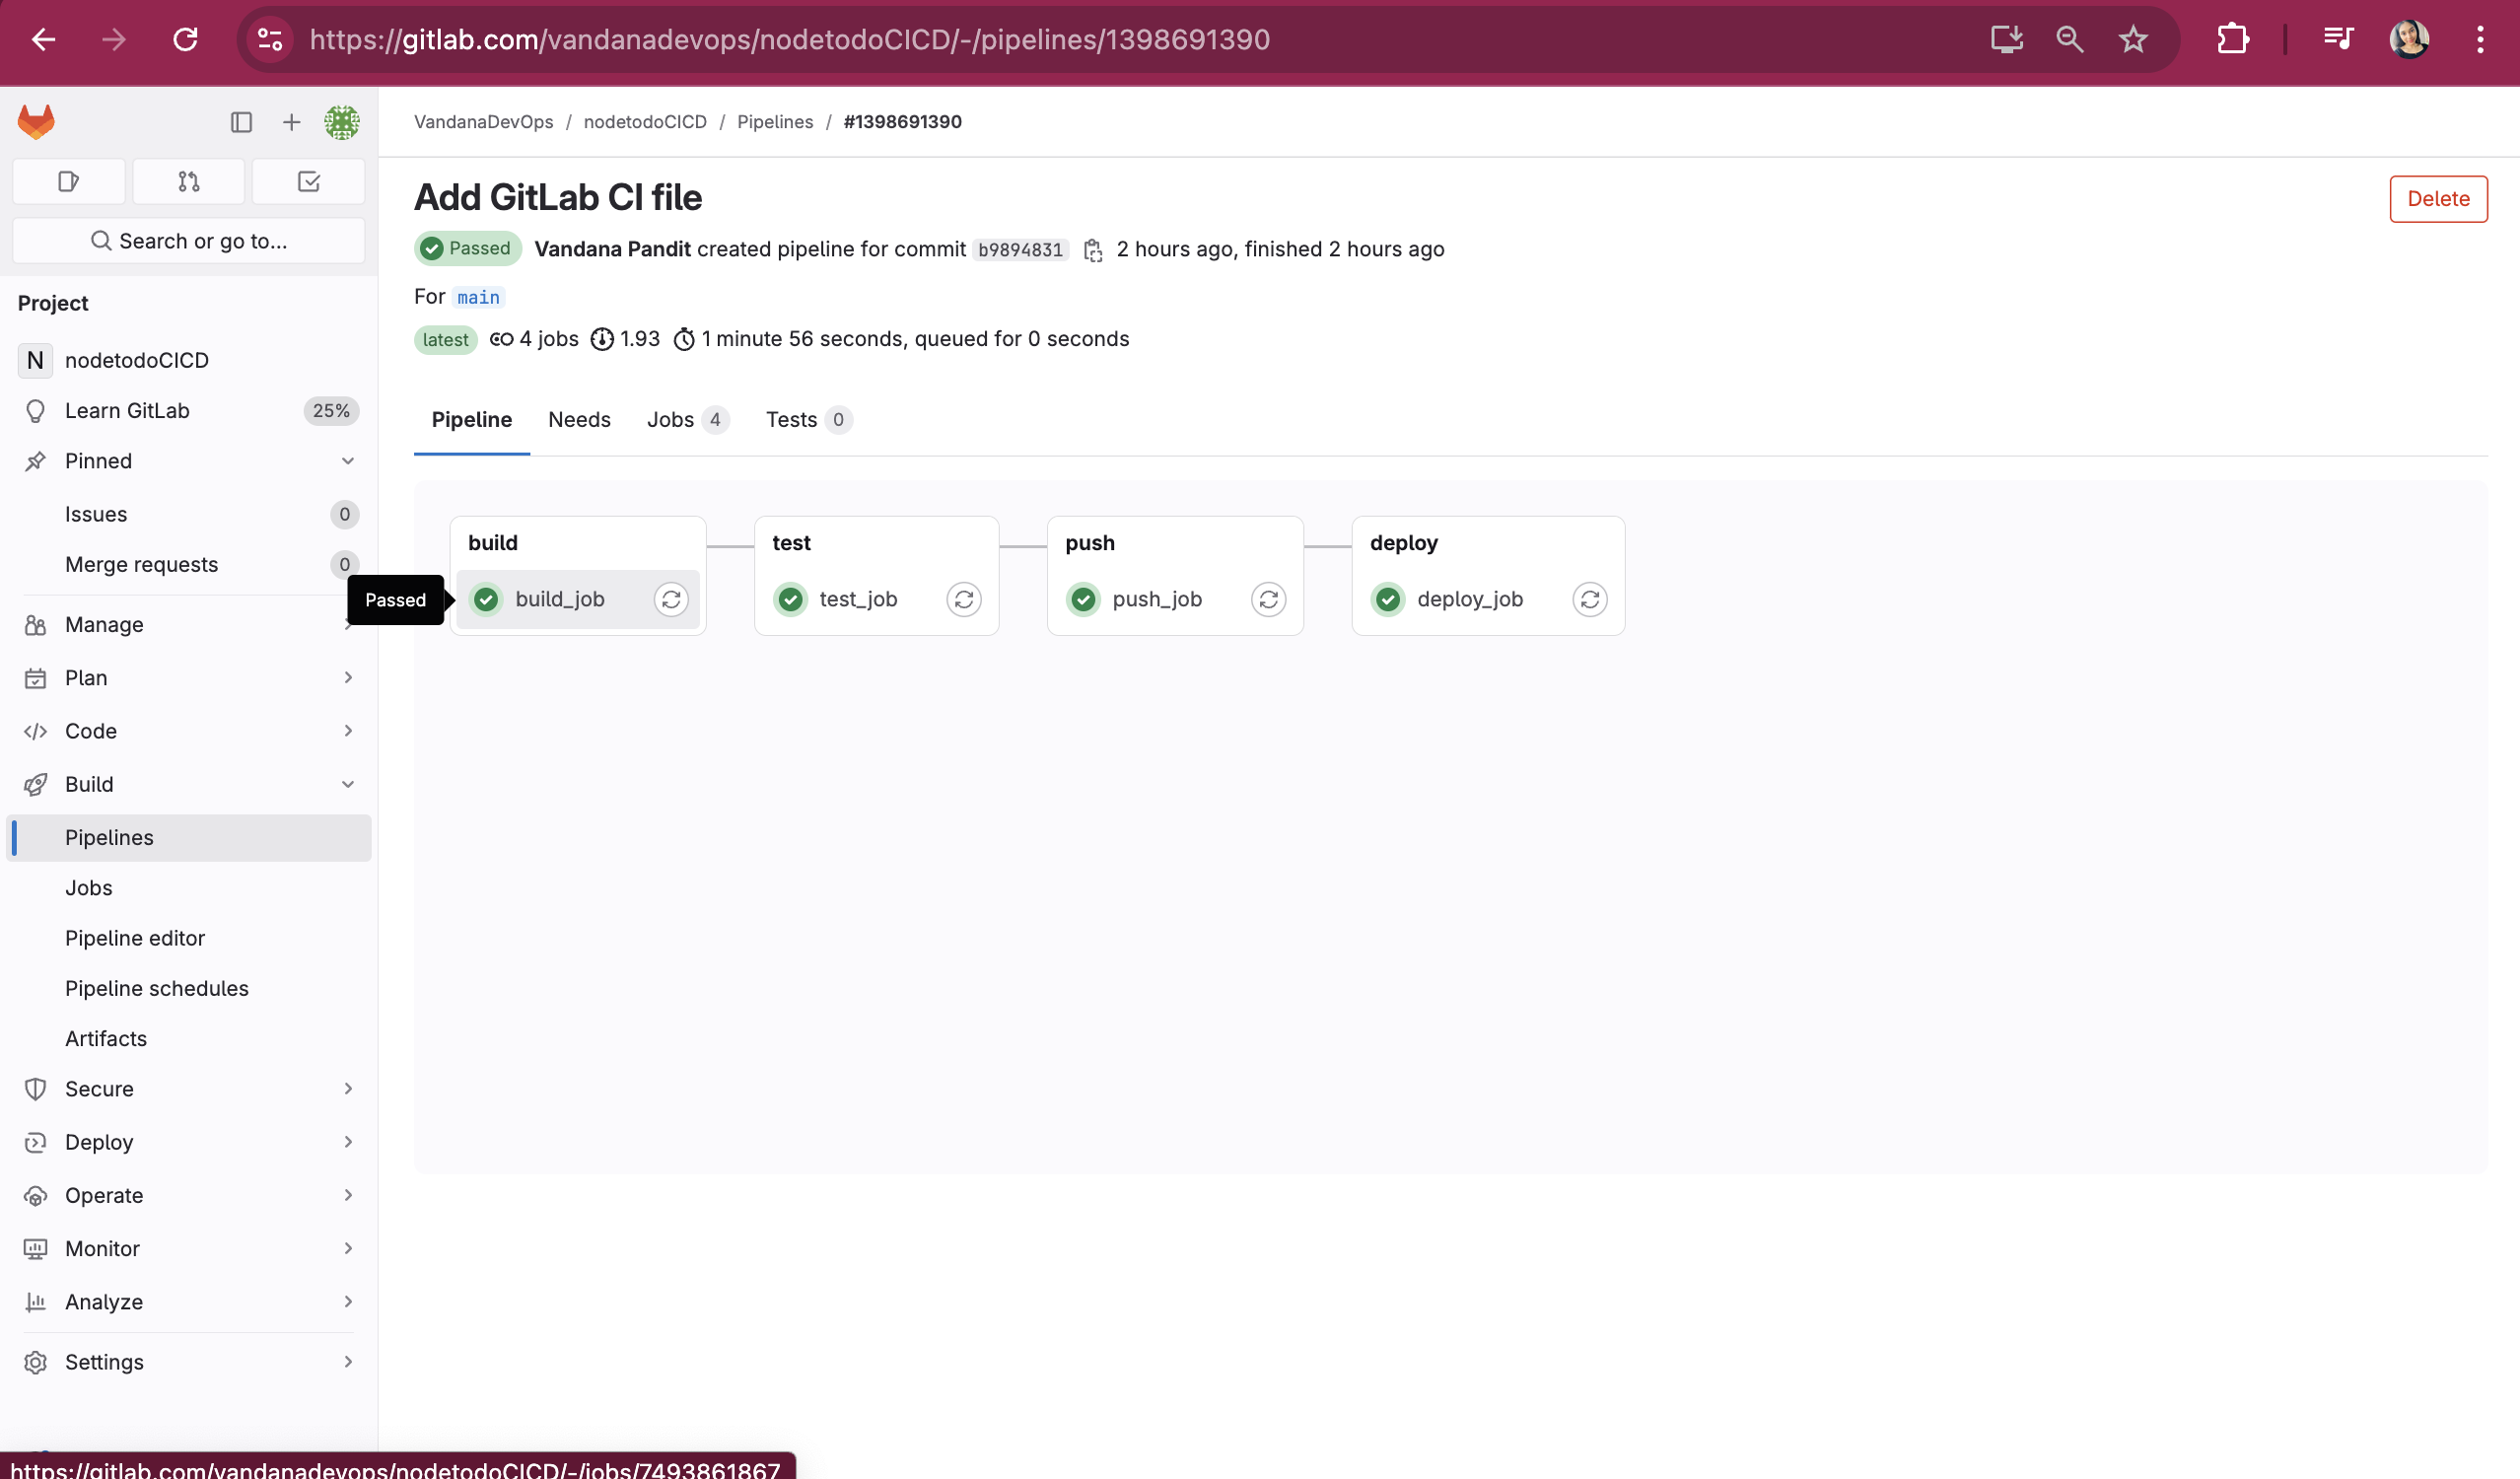
That's it! Your pipeline is now set up in GitLab.
Go to Build and select Pipeline
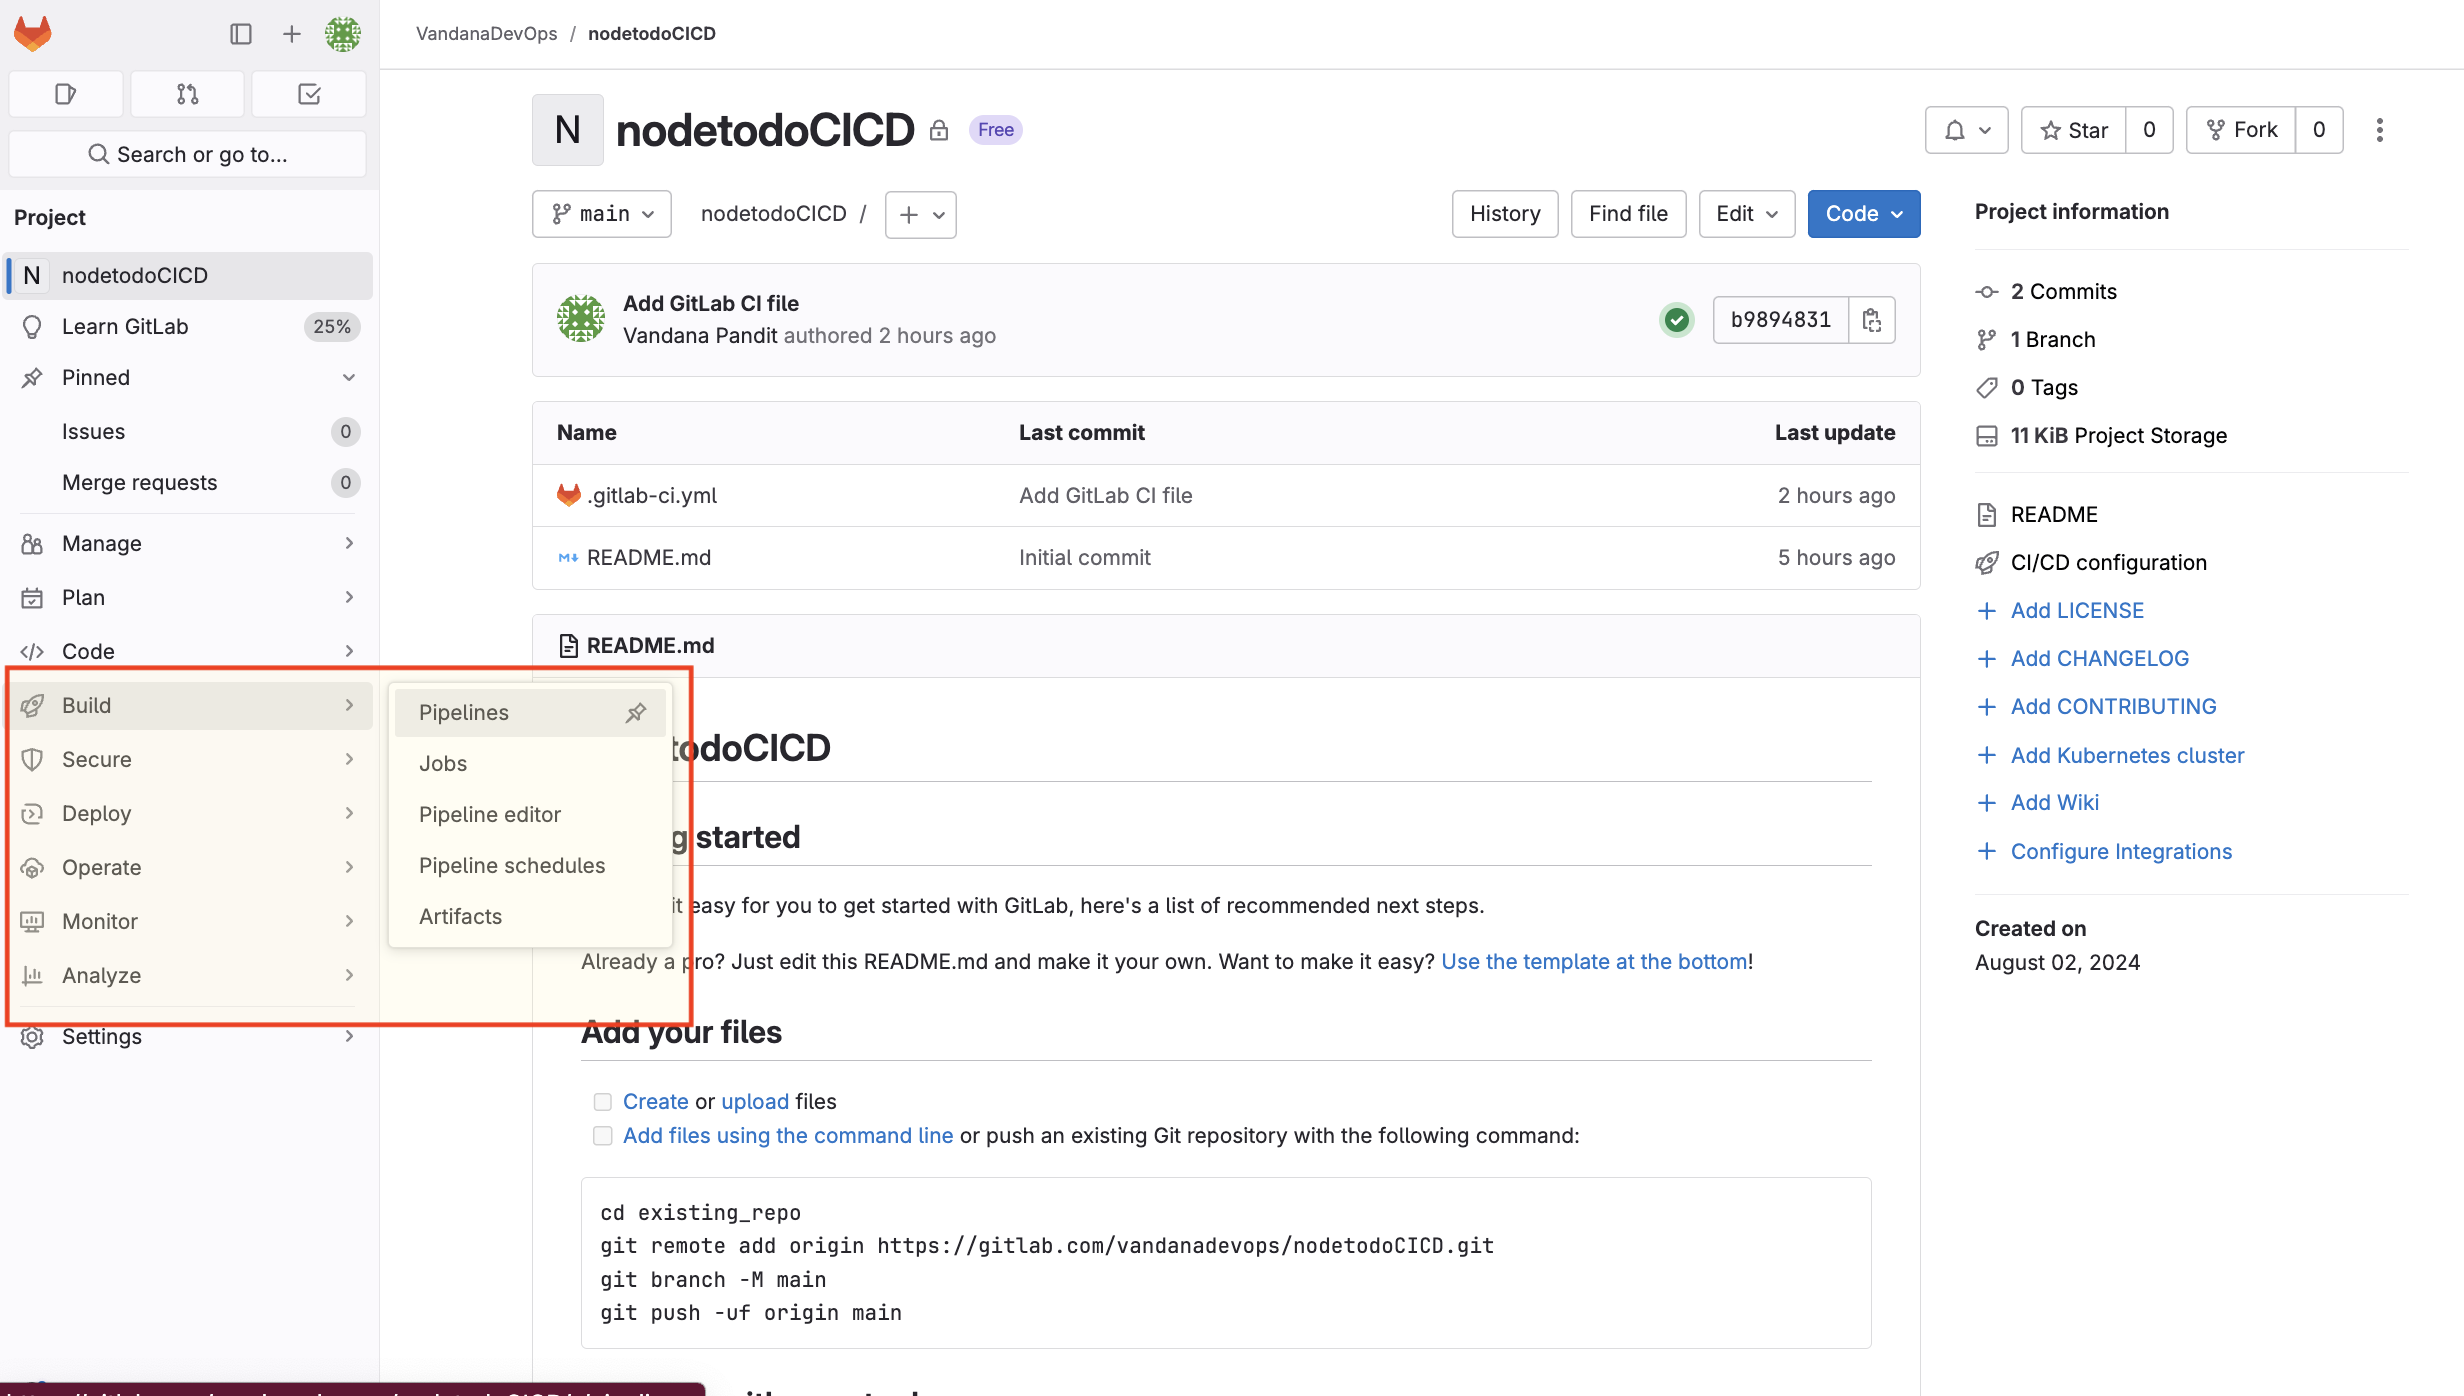

What is Runners?
GitLab Runners are the agents that execute the jobs defined in your GitLab CI/CD pipelines.
Types of Runners:
Instance Runners:
These are provided by GitLab and are available to all projects within the GitLab instance.
Project Runners (or Project Runners):
These are runners that are registered to specific projects or groups.
Navigation to Runners
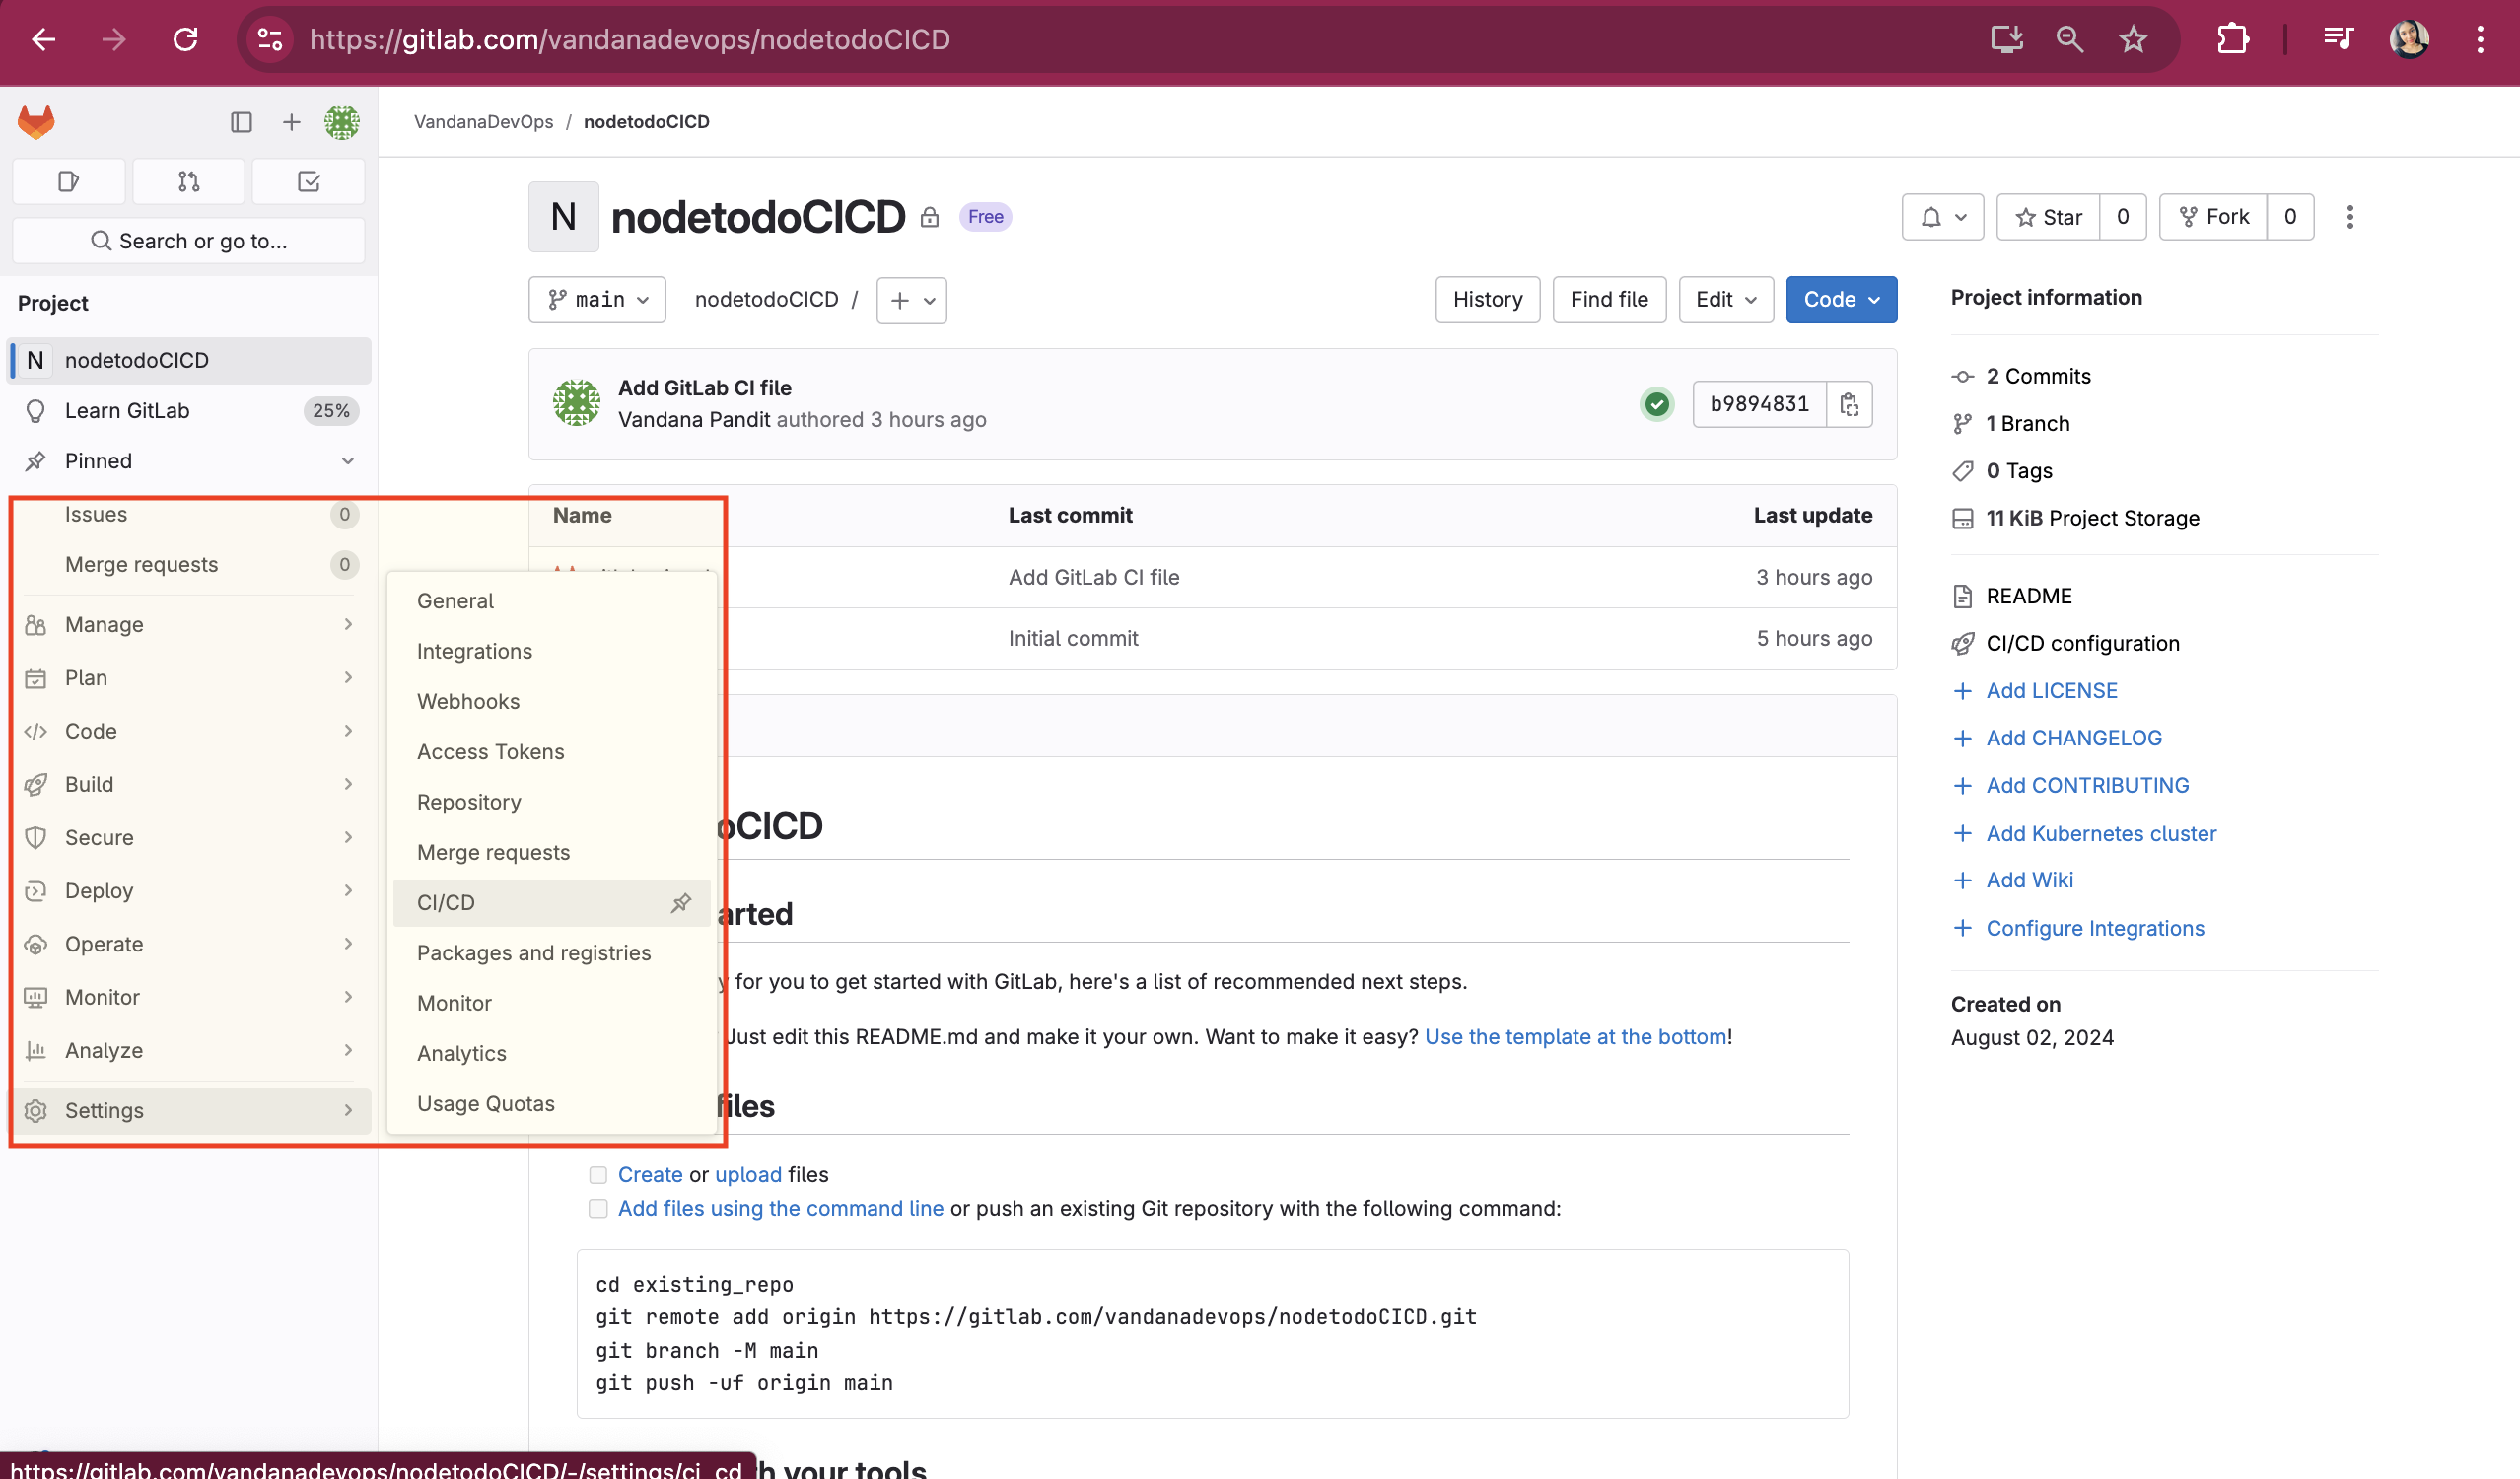
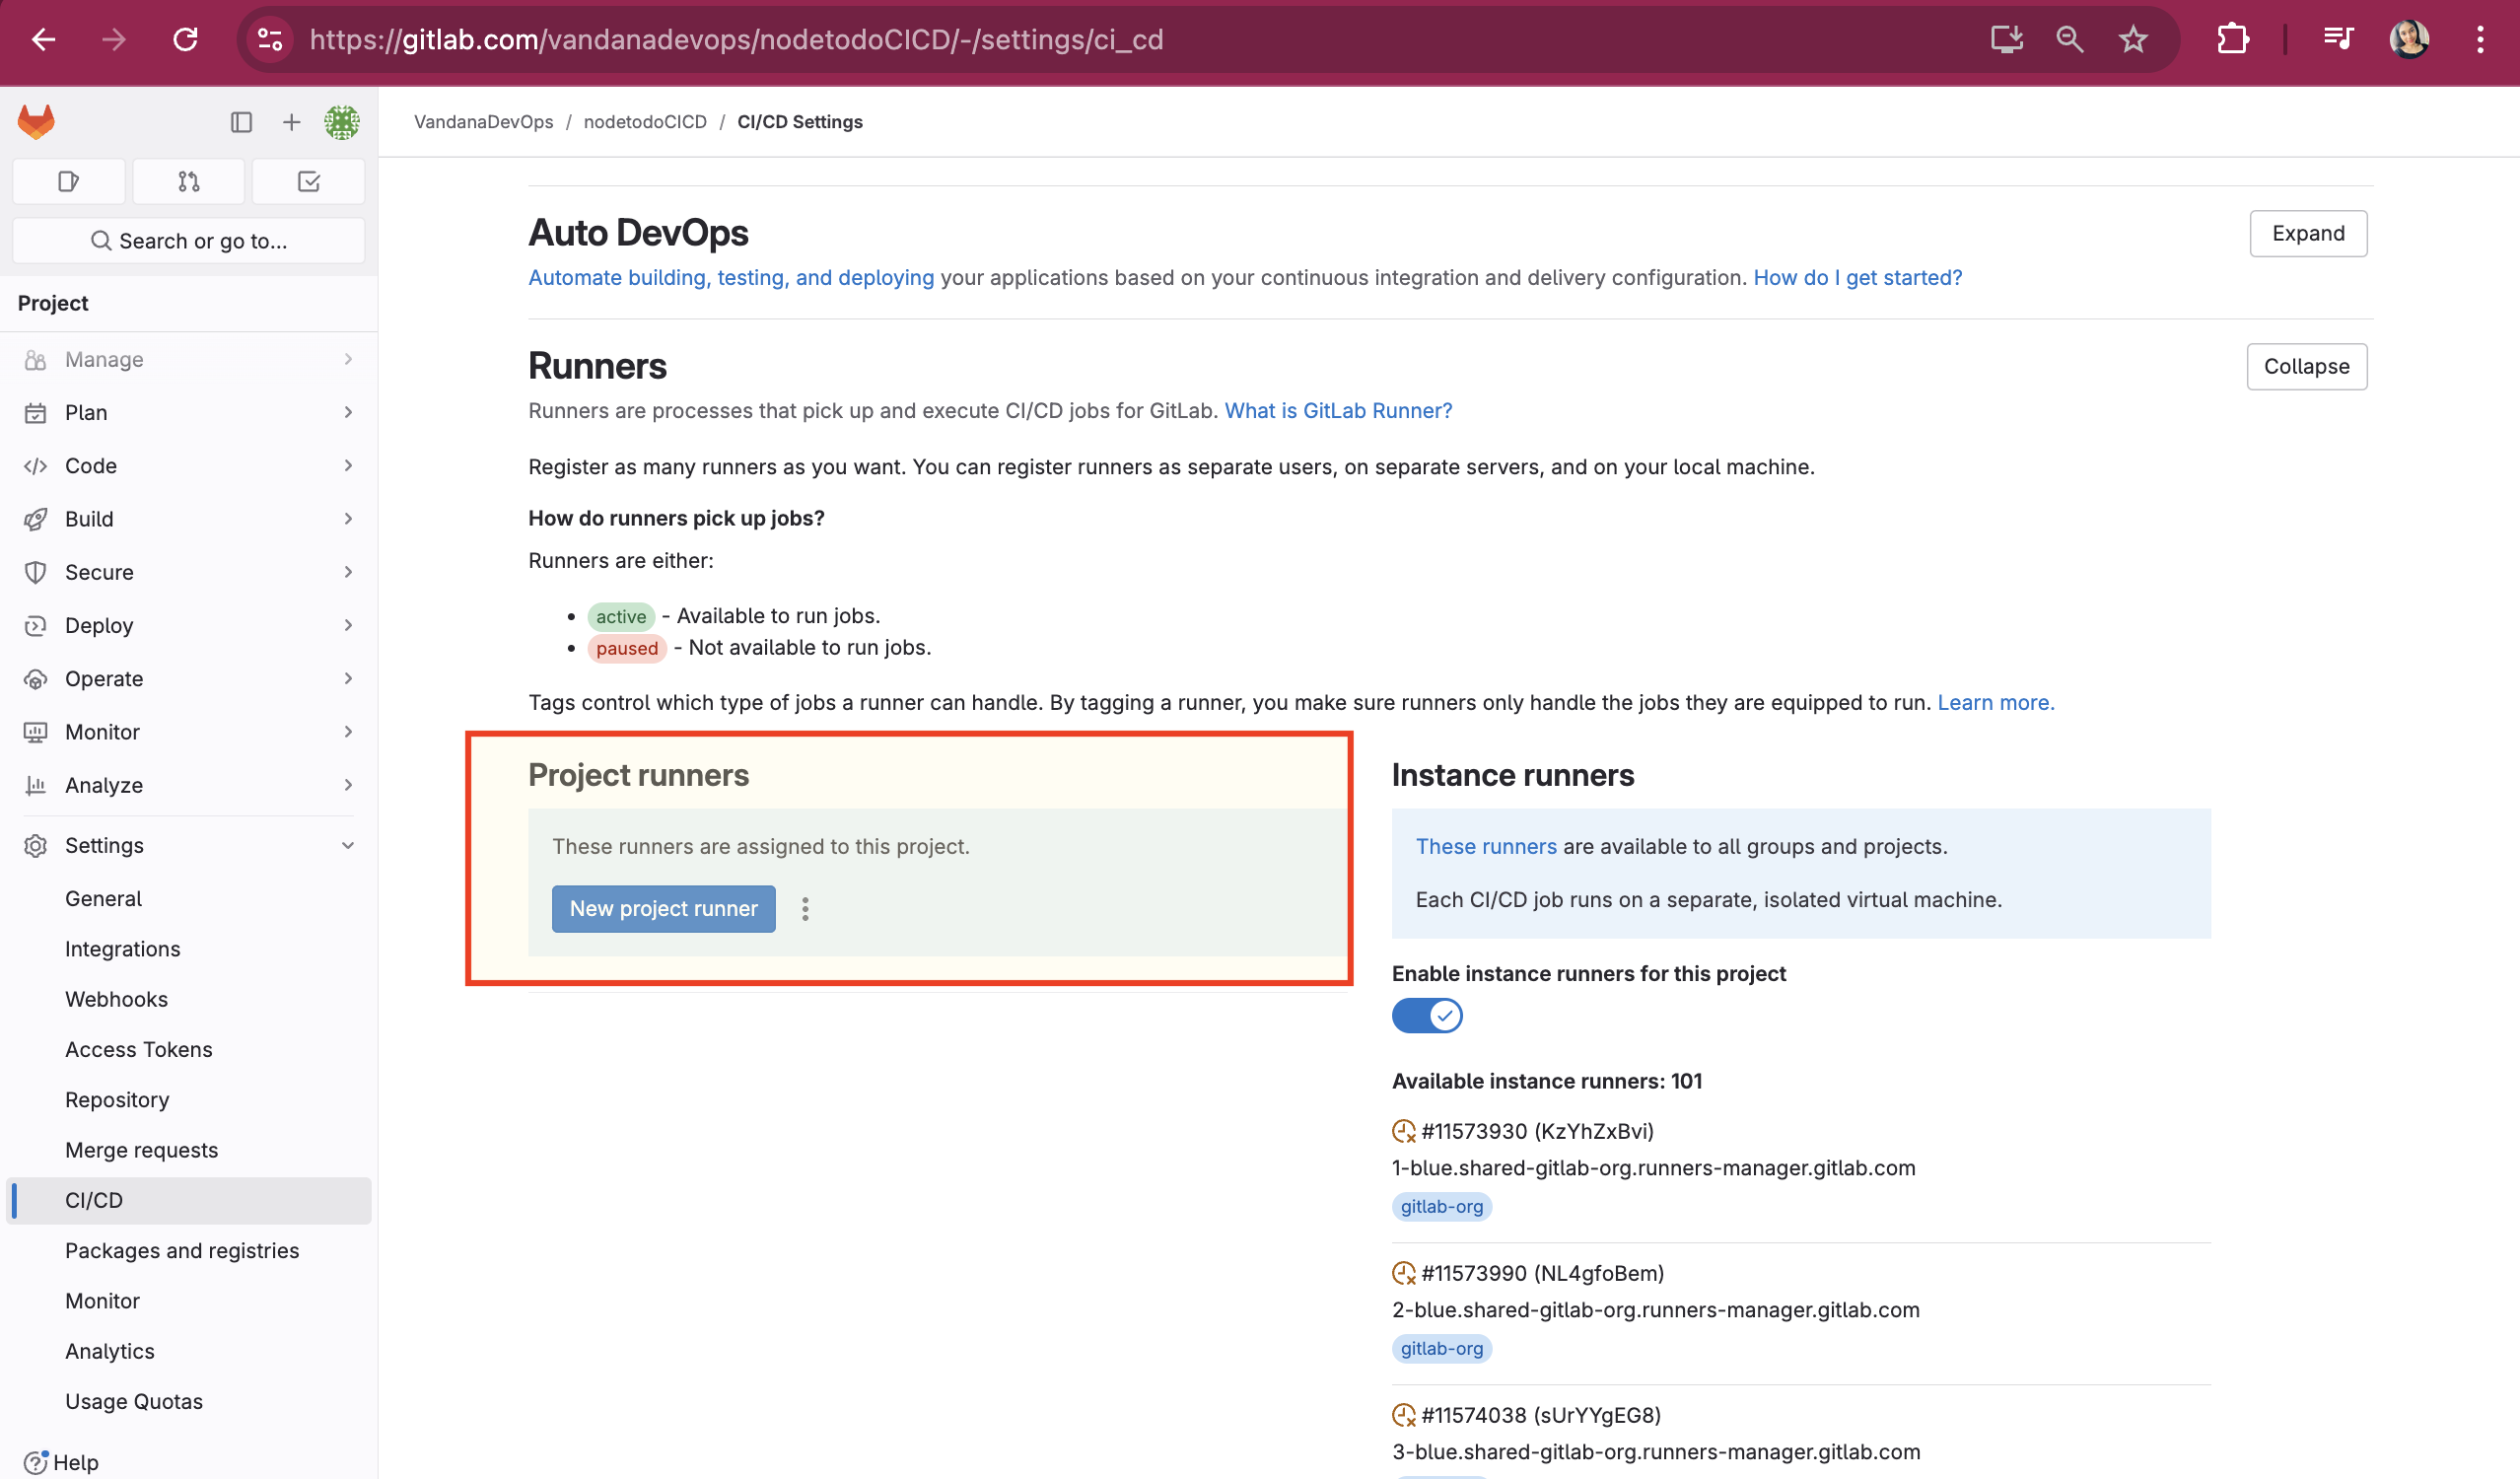
Go to Settings in the left panel and select CI/CD:
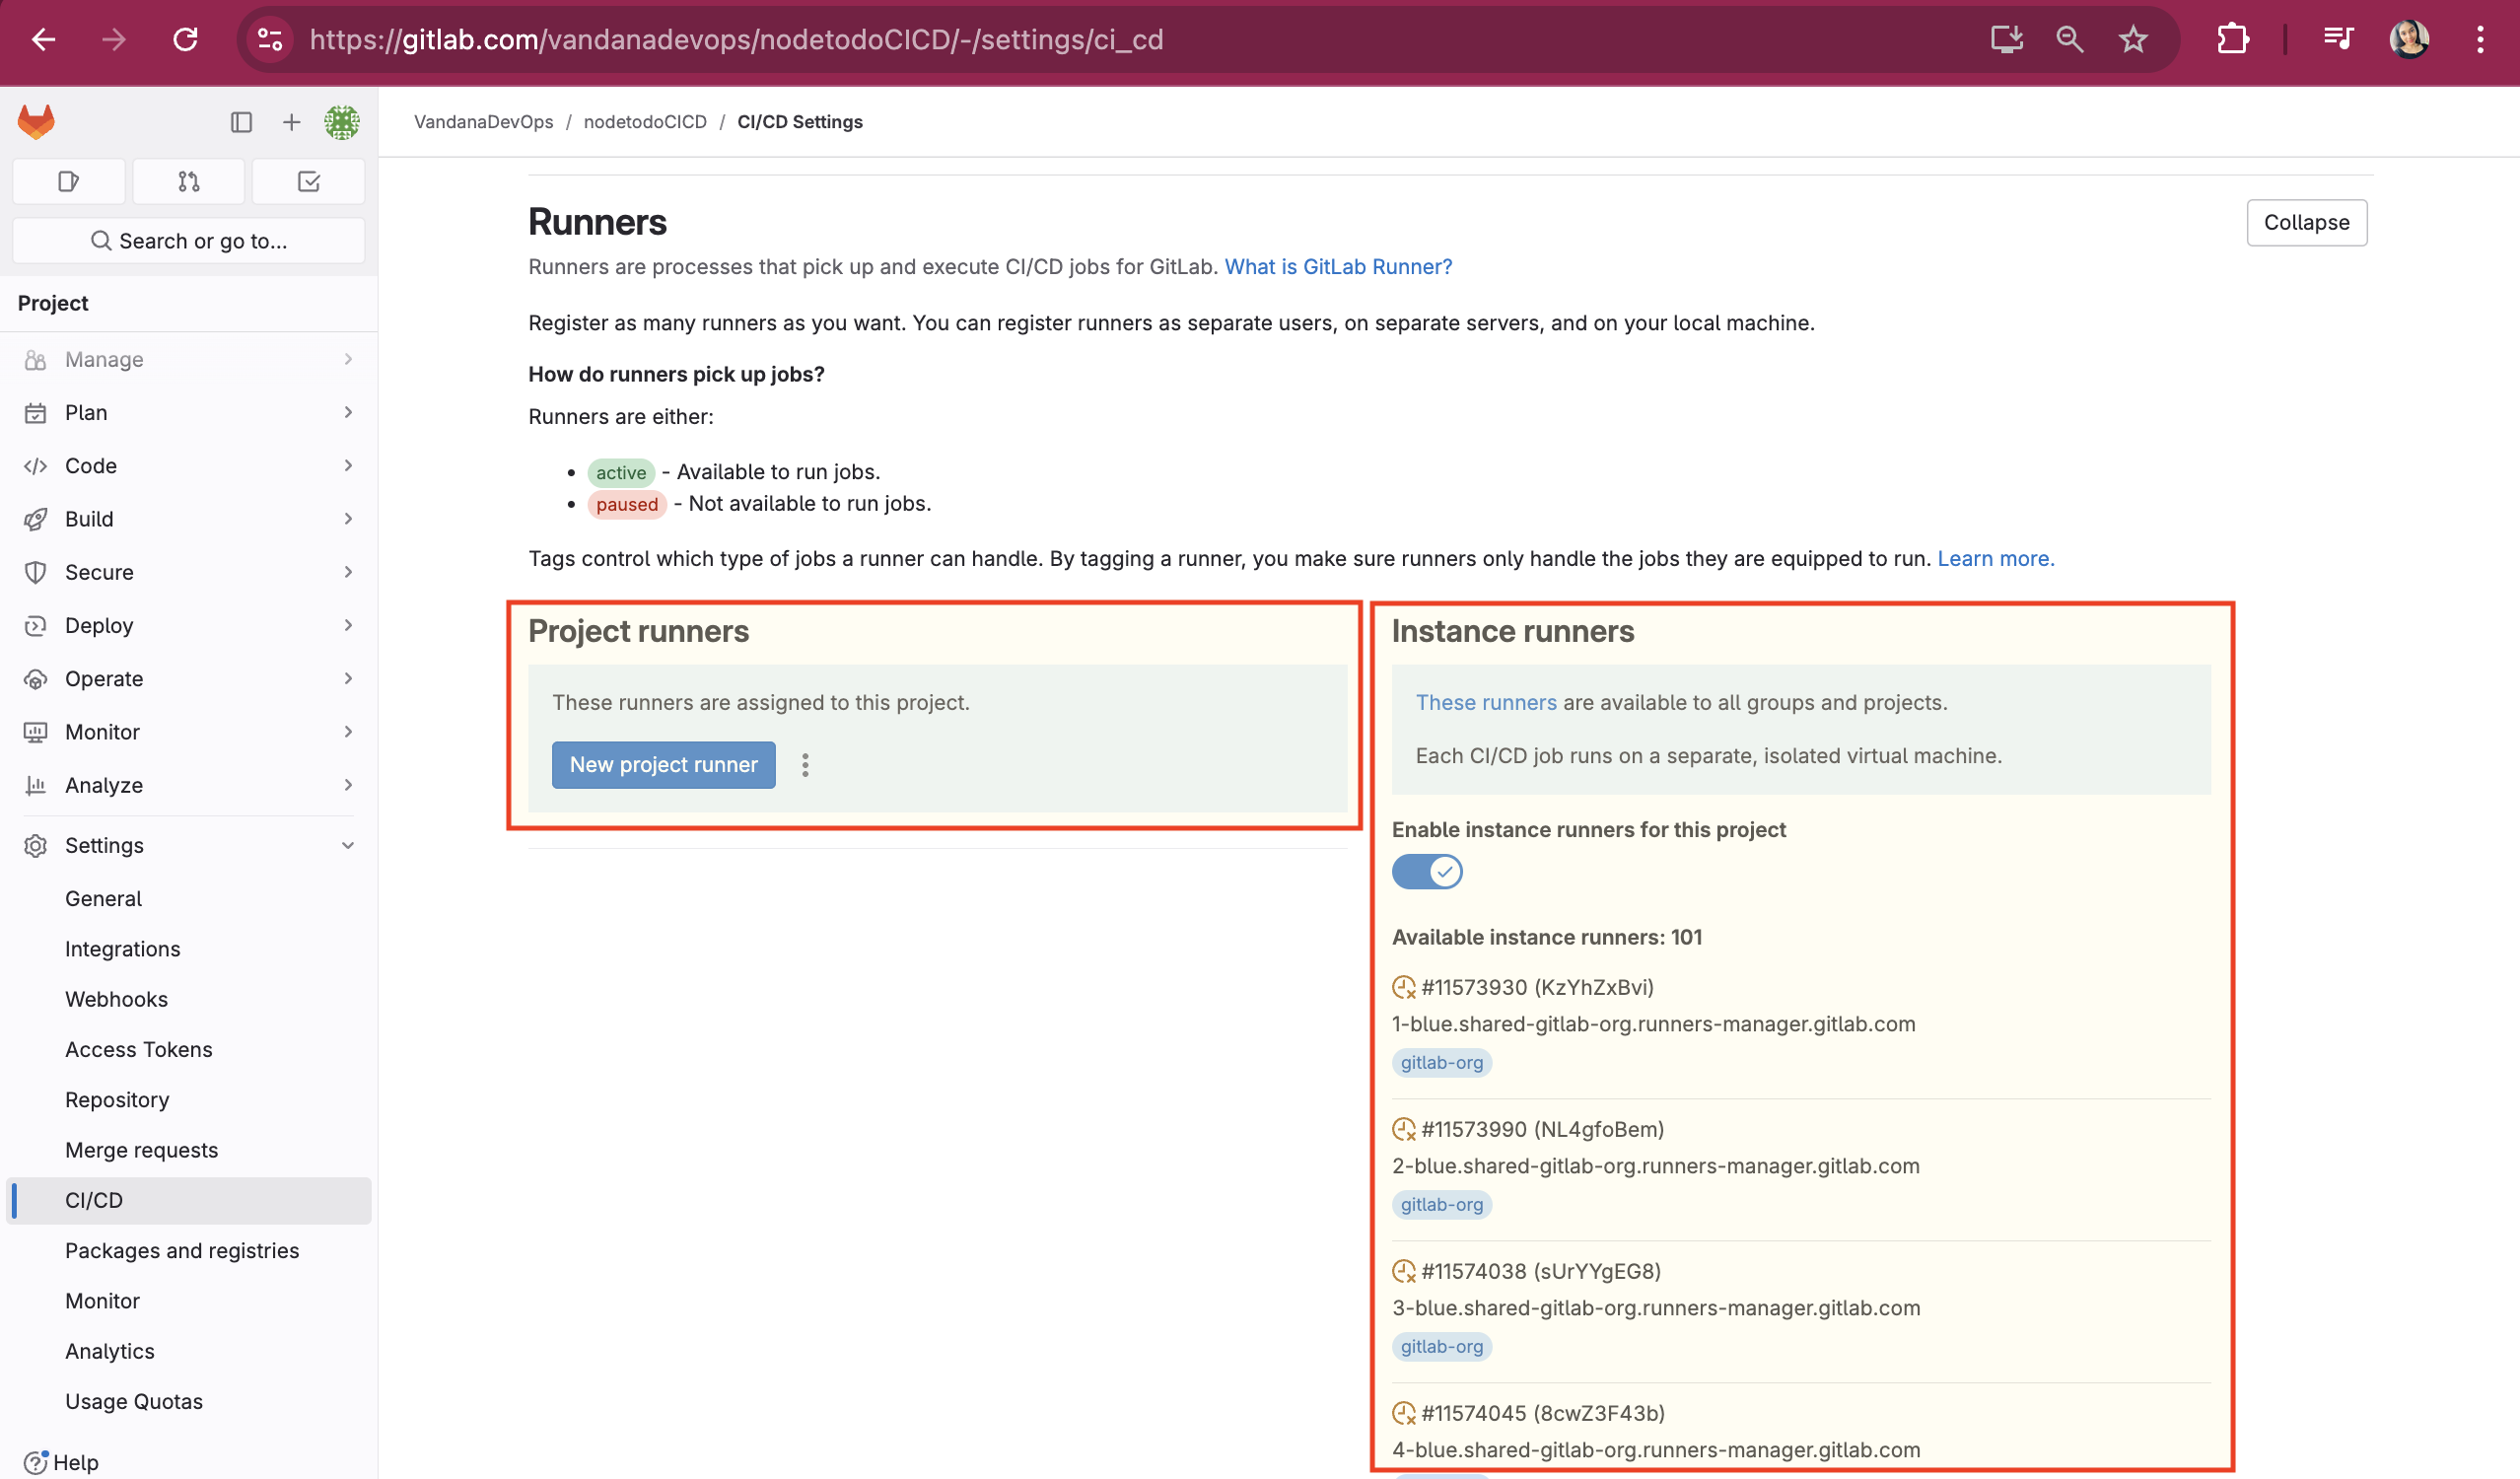
In GitLab CI/CD, jobs are executed by runners, which can be either shared runners provided by GitLab or specific runners configured by the user.
Since we did not setup runner for our pipeline an instance was automatically assigned to our pipeline.
Steps to determine which runner executed a particular job:
Navigate to the Pipeline:
Go to your GitLab project.
Click on Build in the left sidebar.
Click on Pipelines to see the list of pipelines.
Select the Pipeline:
Click on the pipeline you are interested in to view its details.
View the Job Details:
In the pipeline details, you will see a list of jobs.
Click on the job you want to investigate.
Check the Job Log:
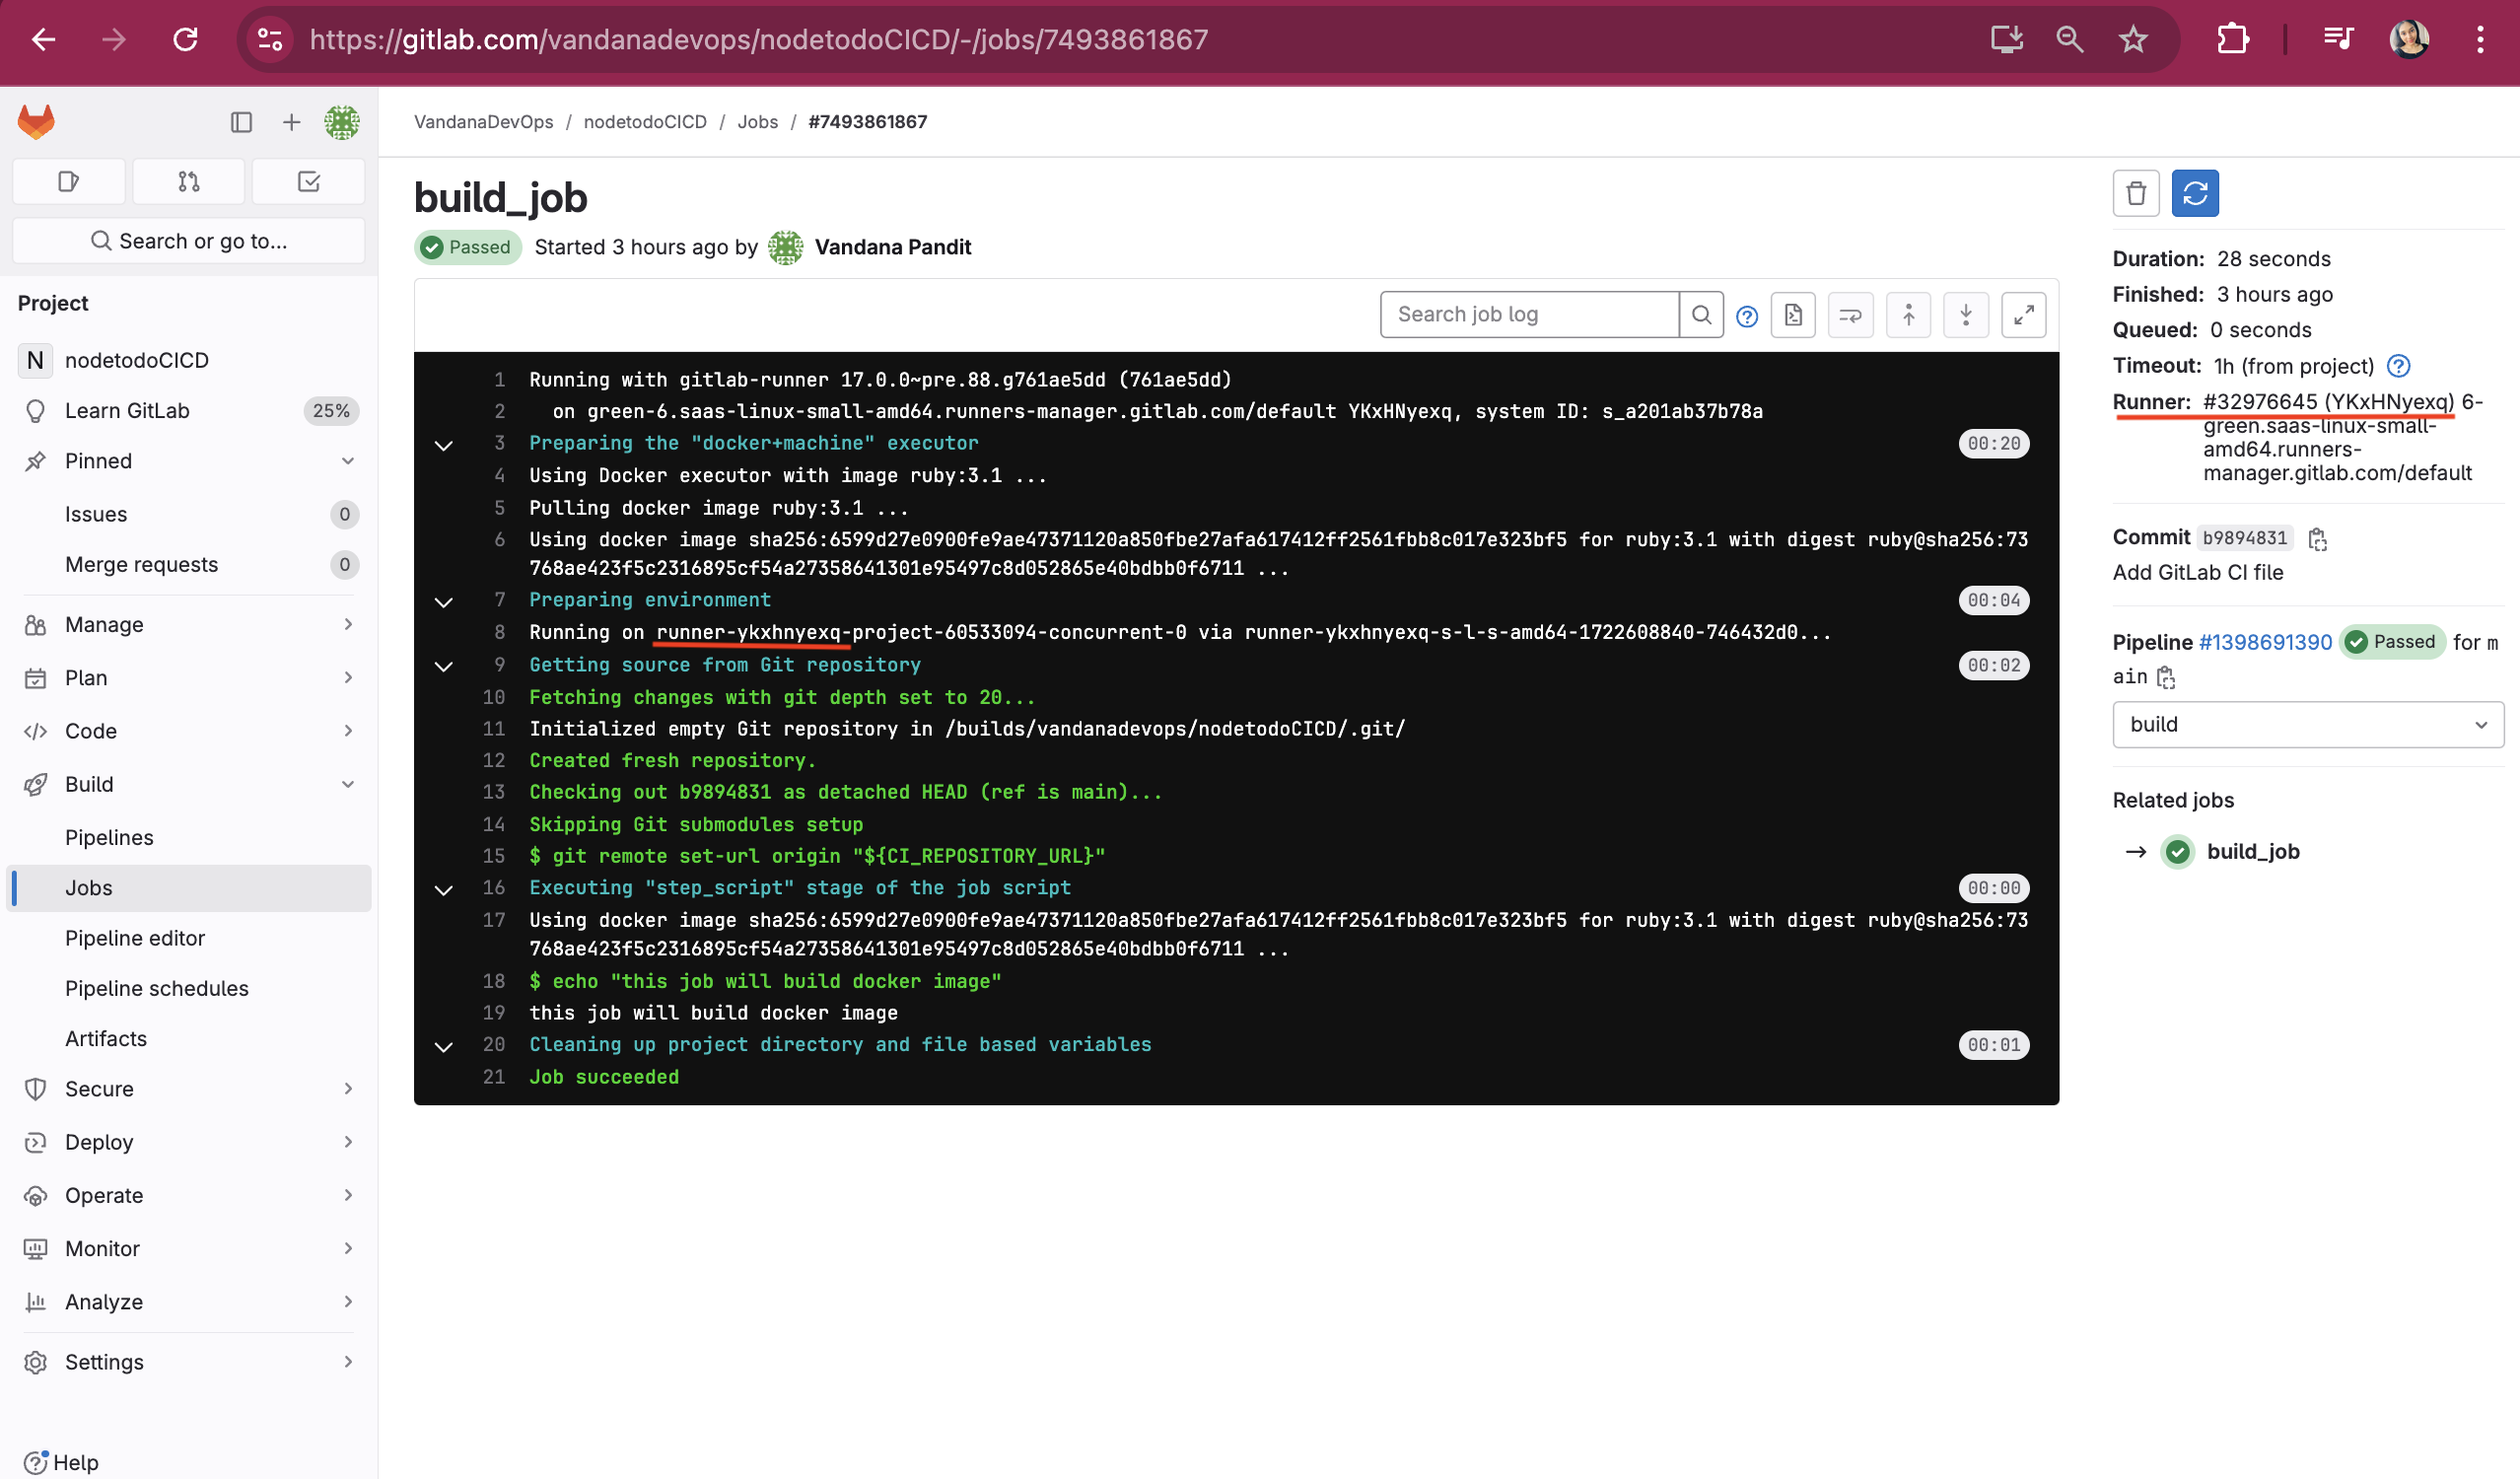
In the job details, scroll down to the job log.
At the top of the job log, you will see information about the runner that executed the job. It typically includes the runner's ID, description, and tags.
How to Set Up Self-Hosted Runners:
Setting up GitLab Runners involves installing the GitLab Runner software, registering the runner with your GitLab instance, and configuring it to run jobs. Here’s a step-by-step guide to help you set up GitLab Runners:
Click on "New project runner"
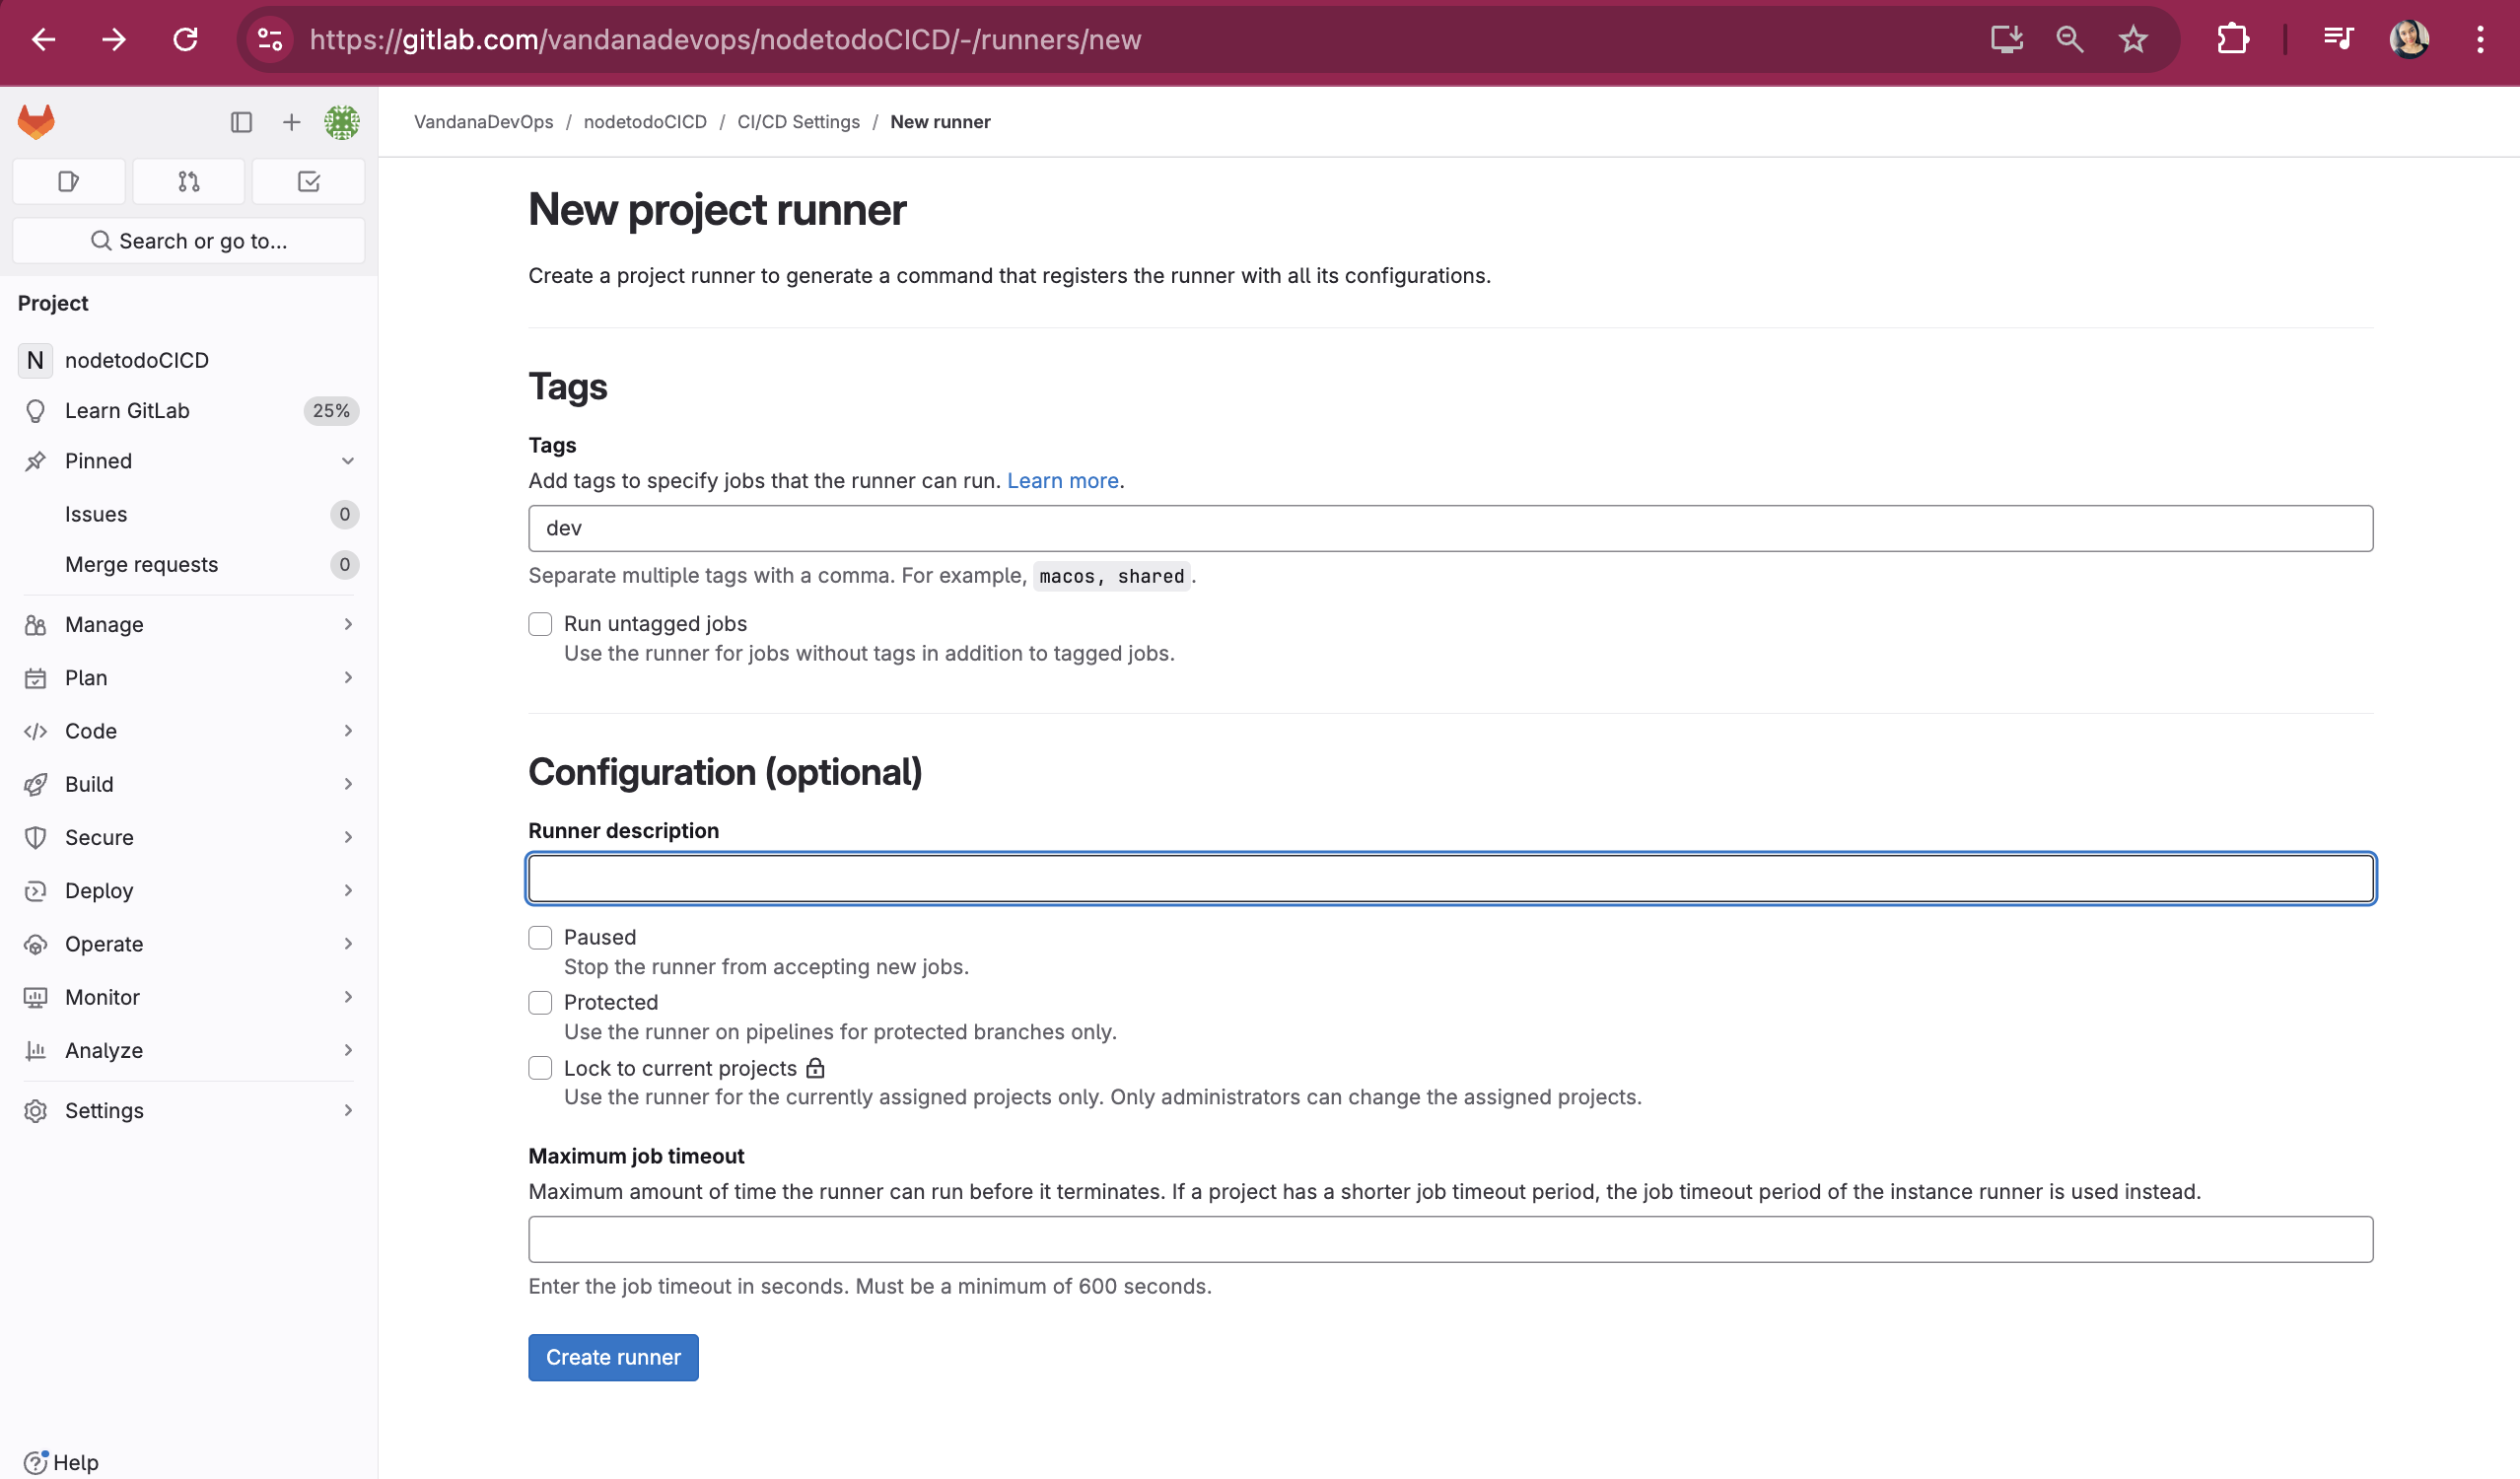
Give the tag name as 'dev' and click on "create runner" button
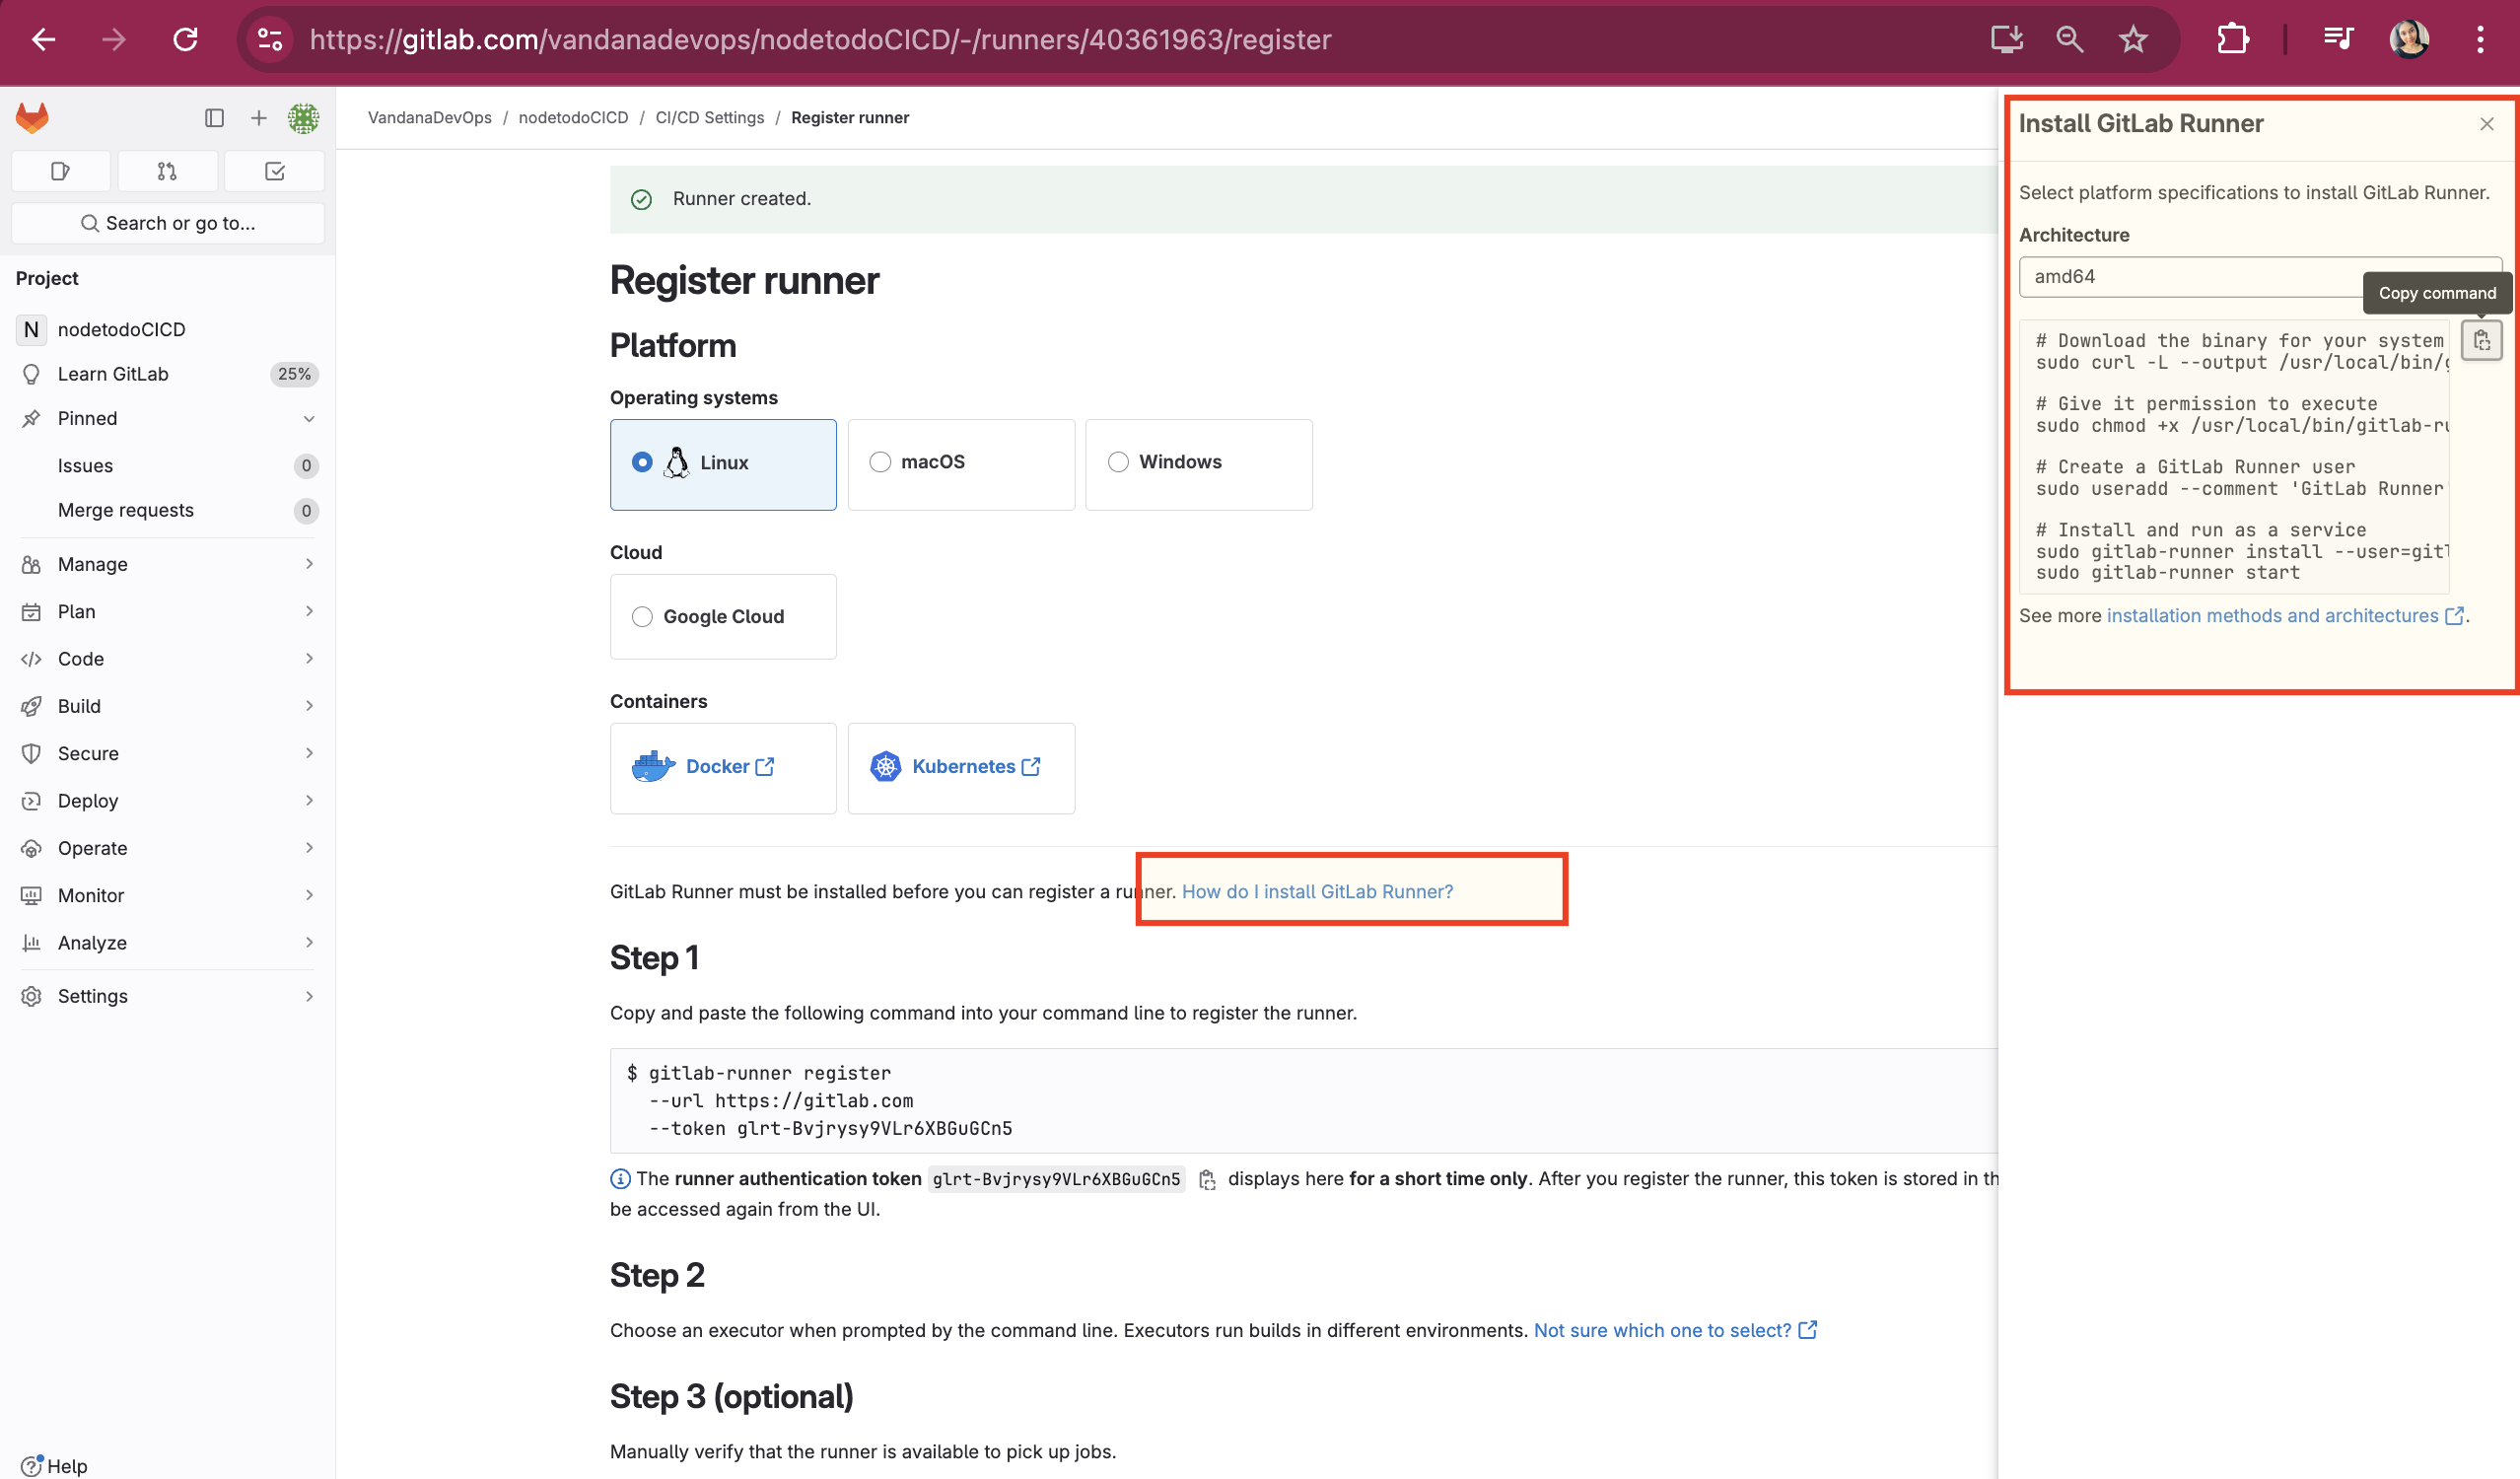
Step1: Install GitLab Runner
Select Linux and click on the link that says "How do I install GitLab Runner?". Then copy the command mentioned under "Install GitLab Runner".
Go to your ubuntu instance and paste the copied command:

Step2: Register the Runner
Copy the command from step1 (highlighted section)
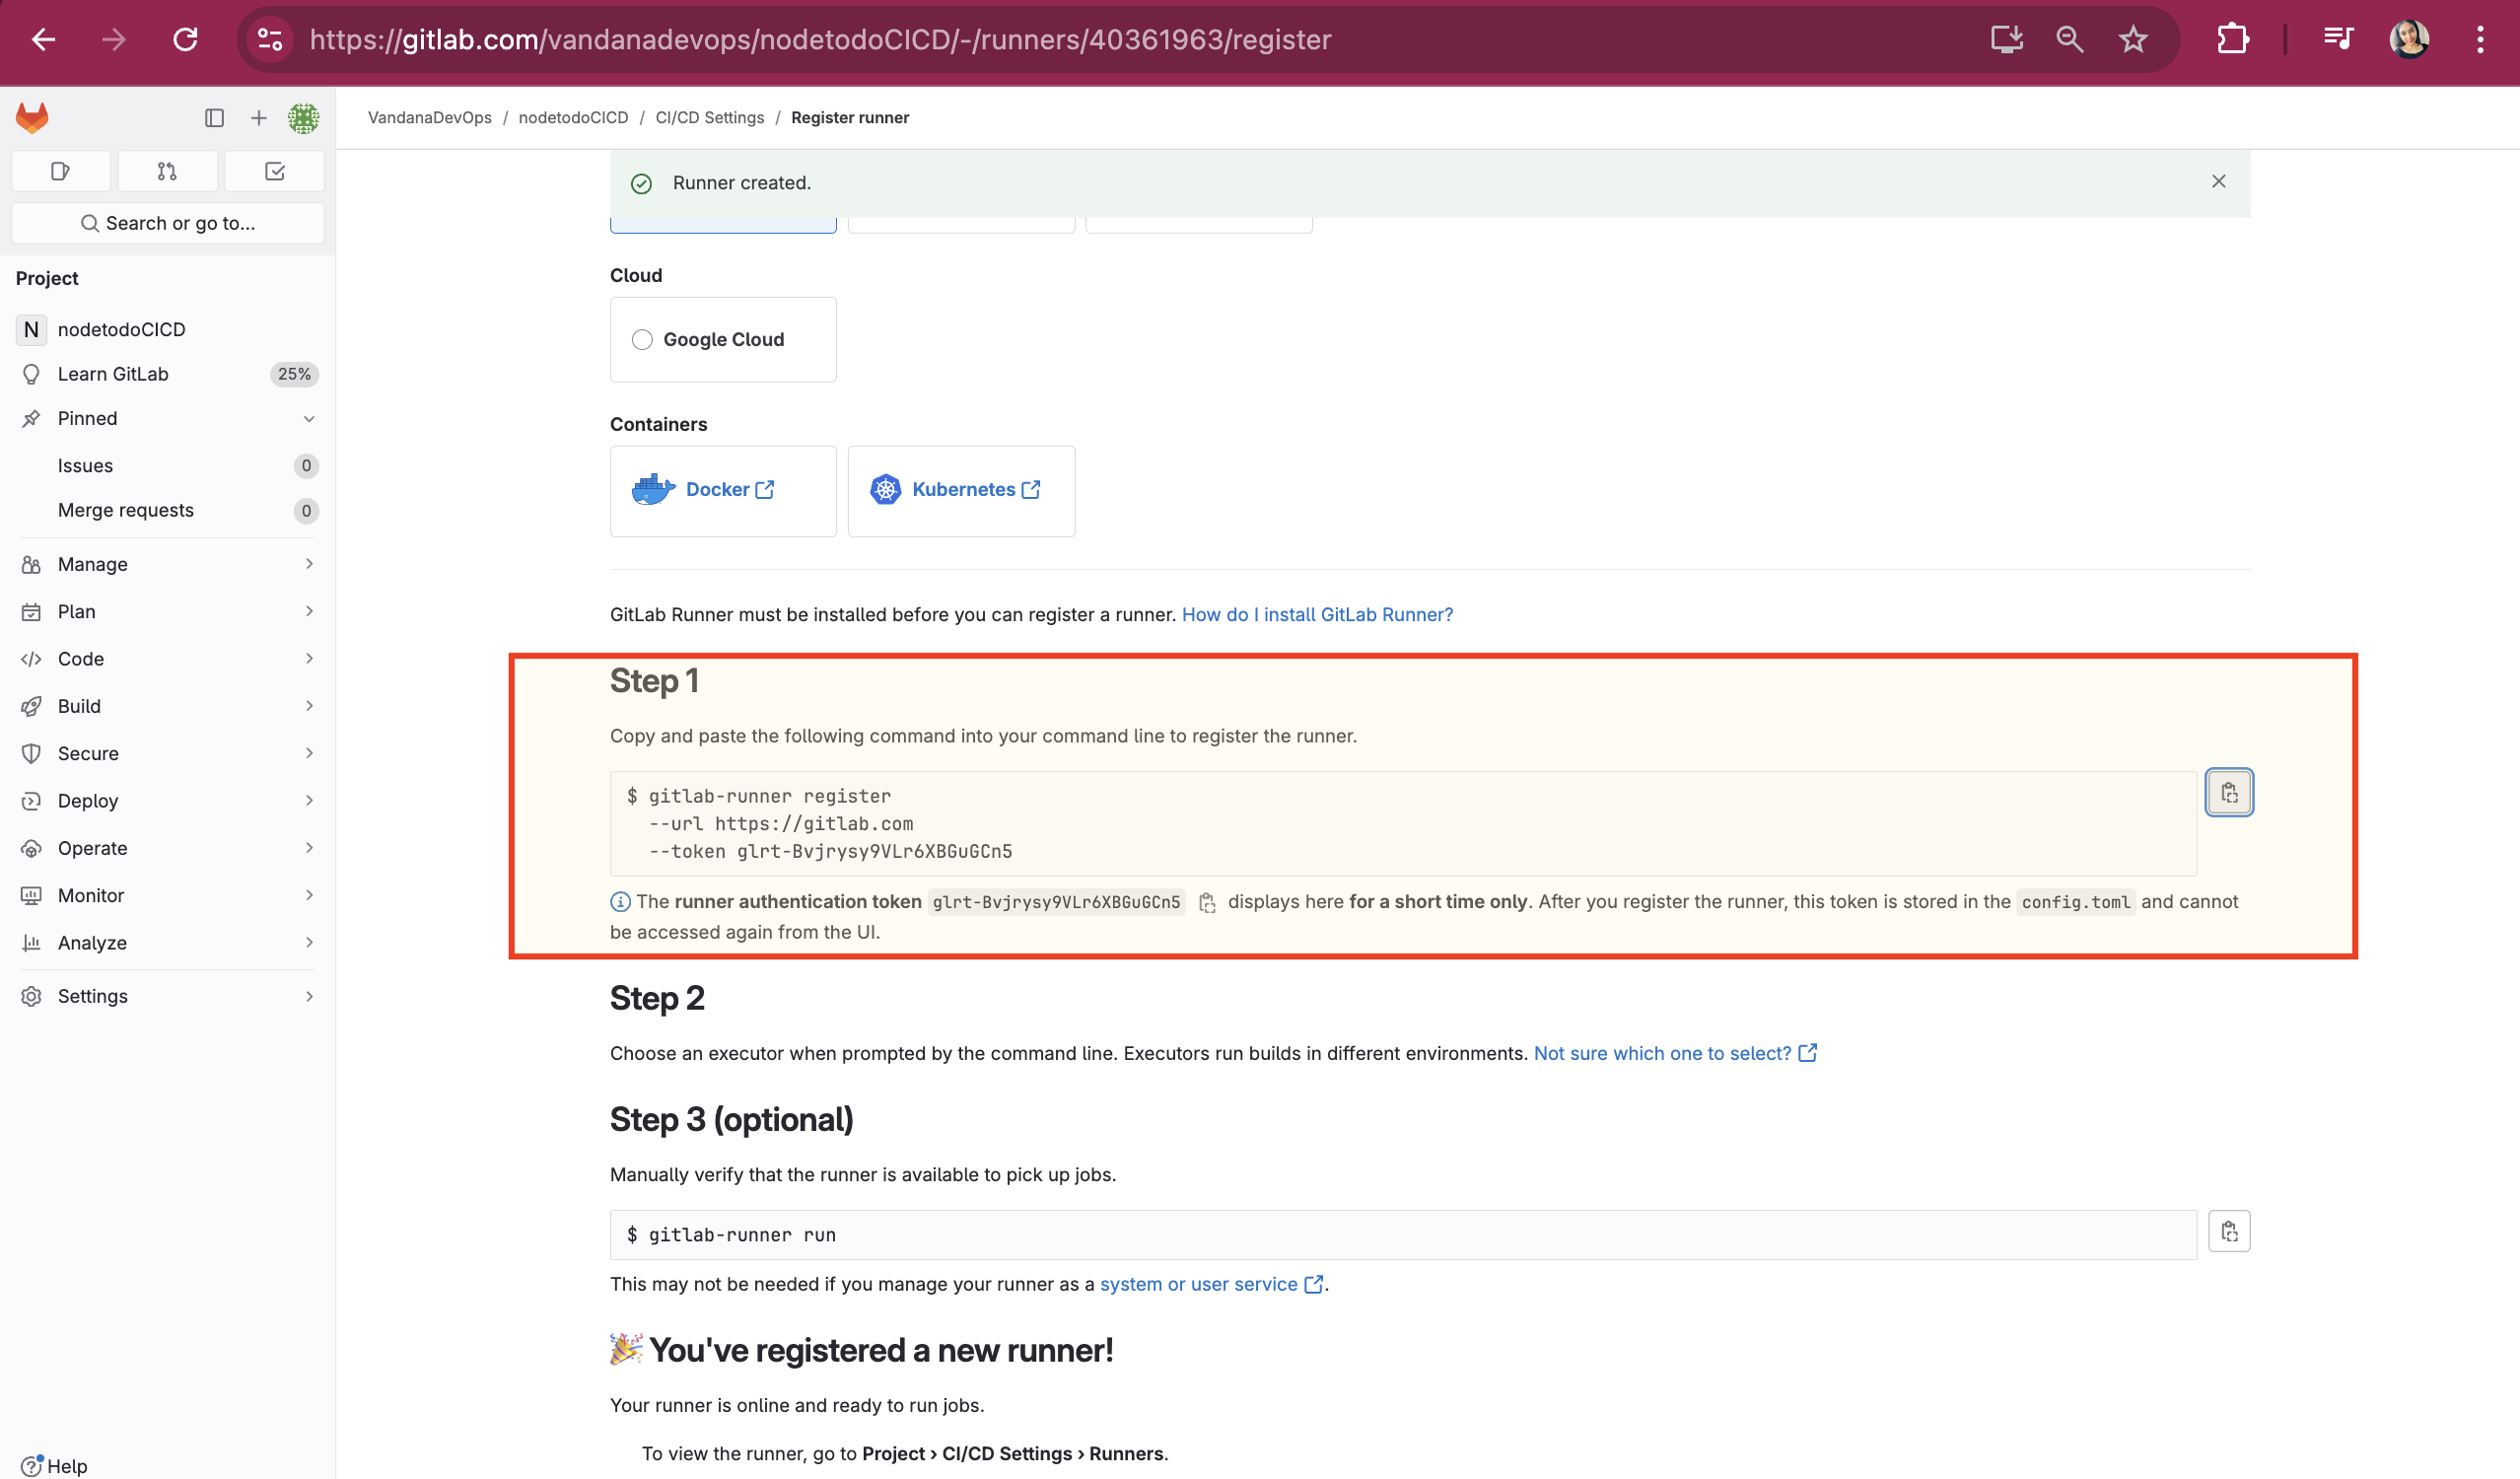
Paste the copied command on your Ubuntu system and answer the questions that follow.

Questions and their respective answers:
Enter the GitLab instance URL (for example, https: //gitlab.com/): <press enter>
Enter a name for the runner. This is stored only in the local config.tomI file: <give any name>
Enter an executor: virtualbox, docker-windows, docker-autoscaler, parallels, shell, ssh, docker, docker+machine, kubernetes, stance, custom: <type shell>
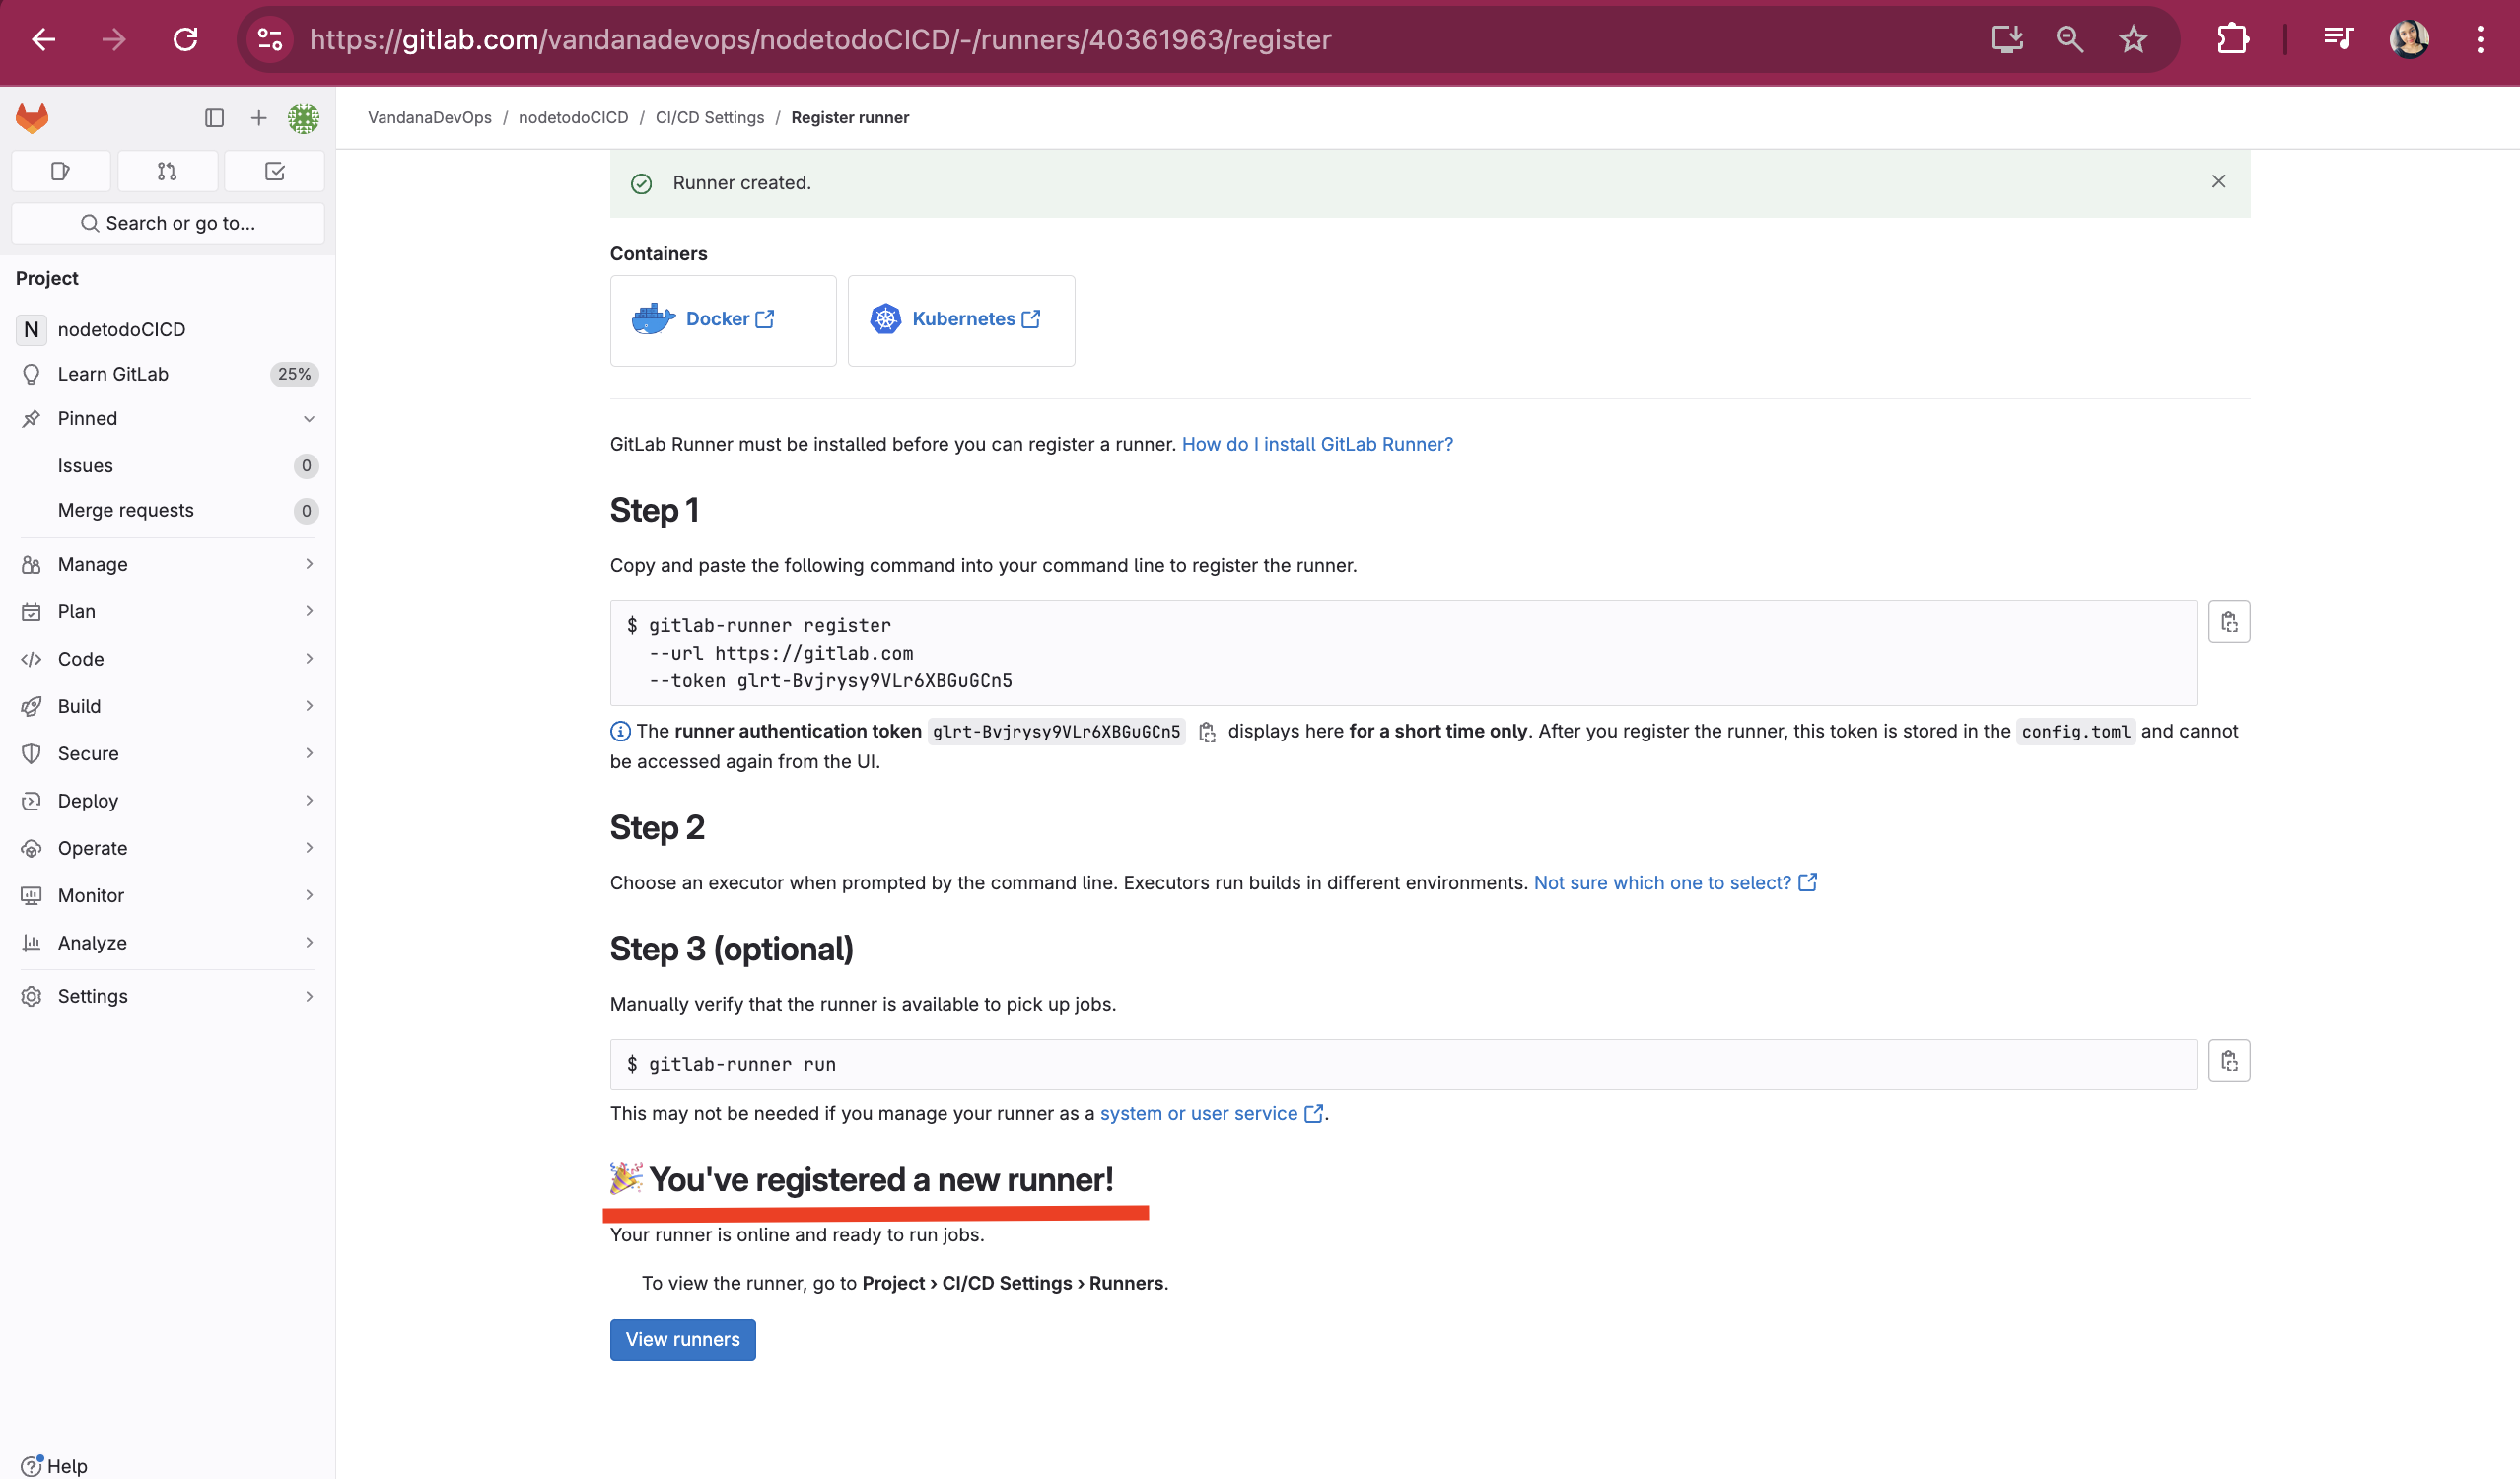
Now the runner has been setup successfully.
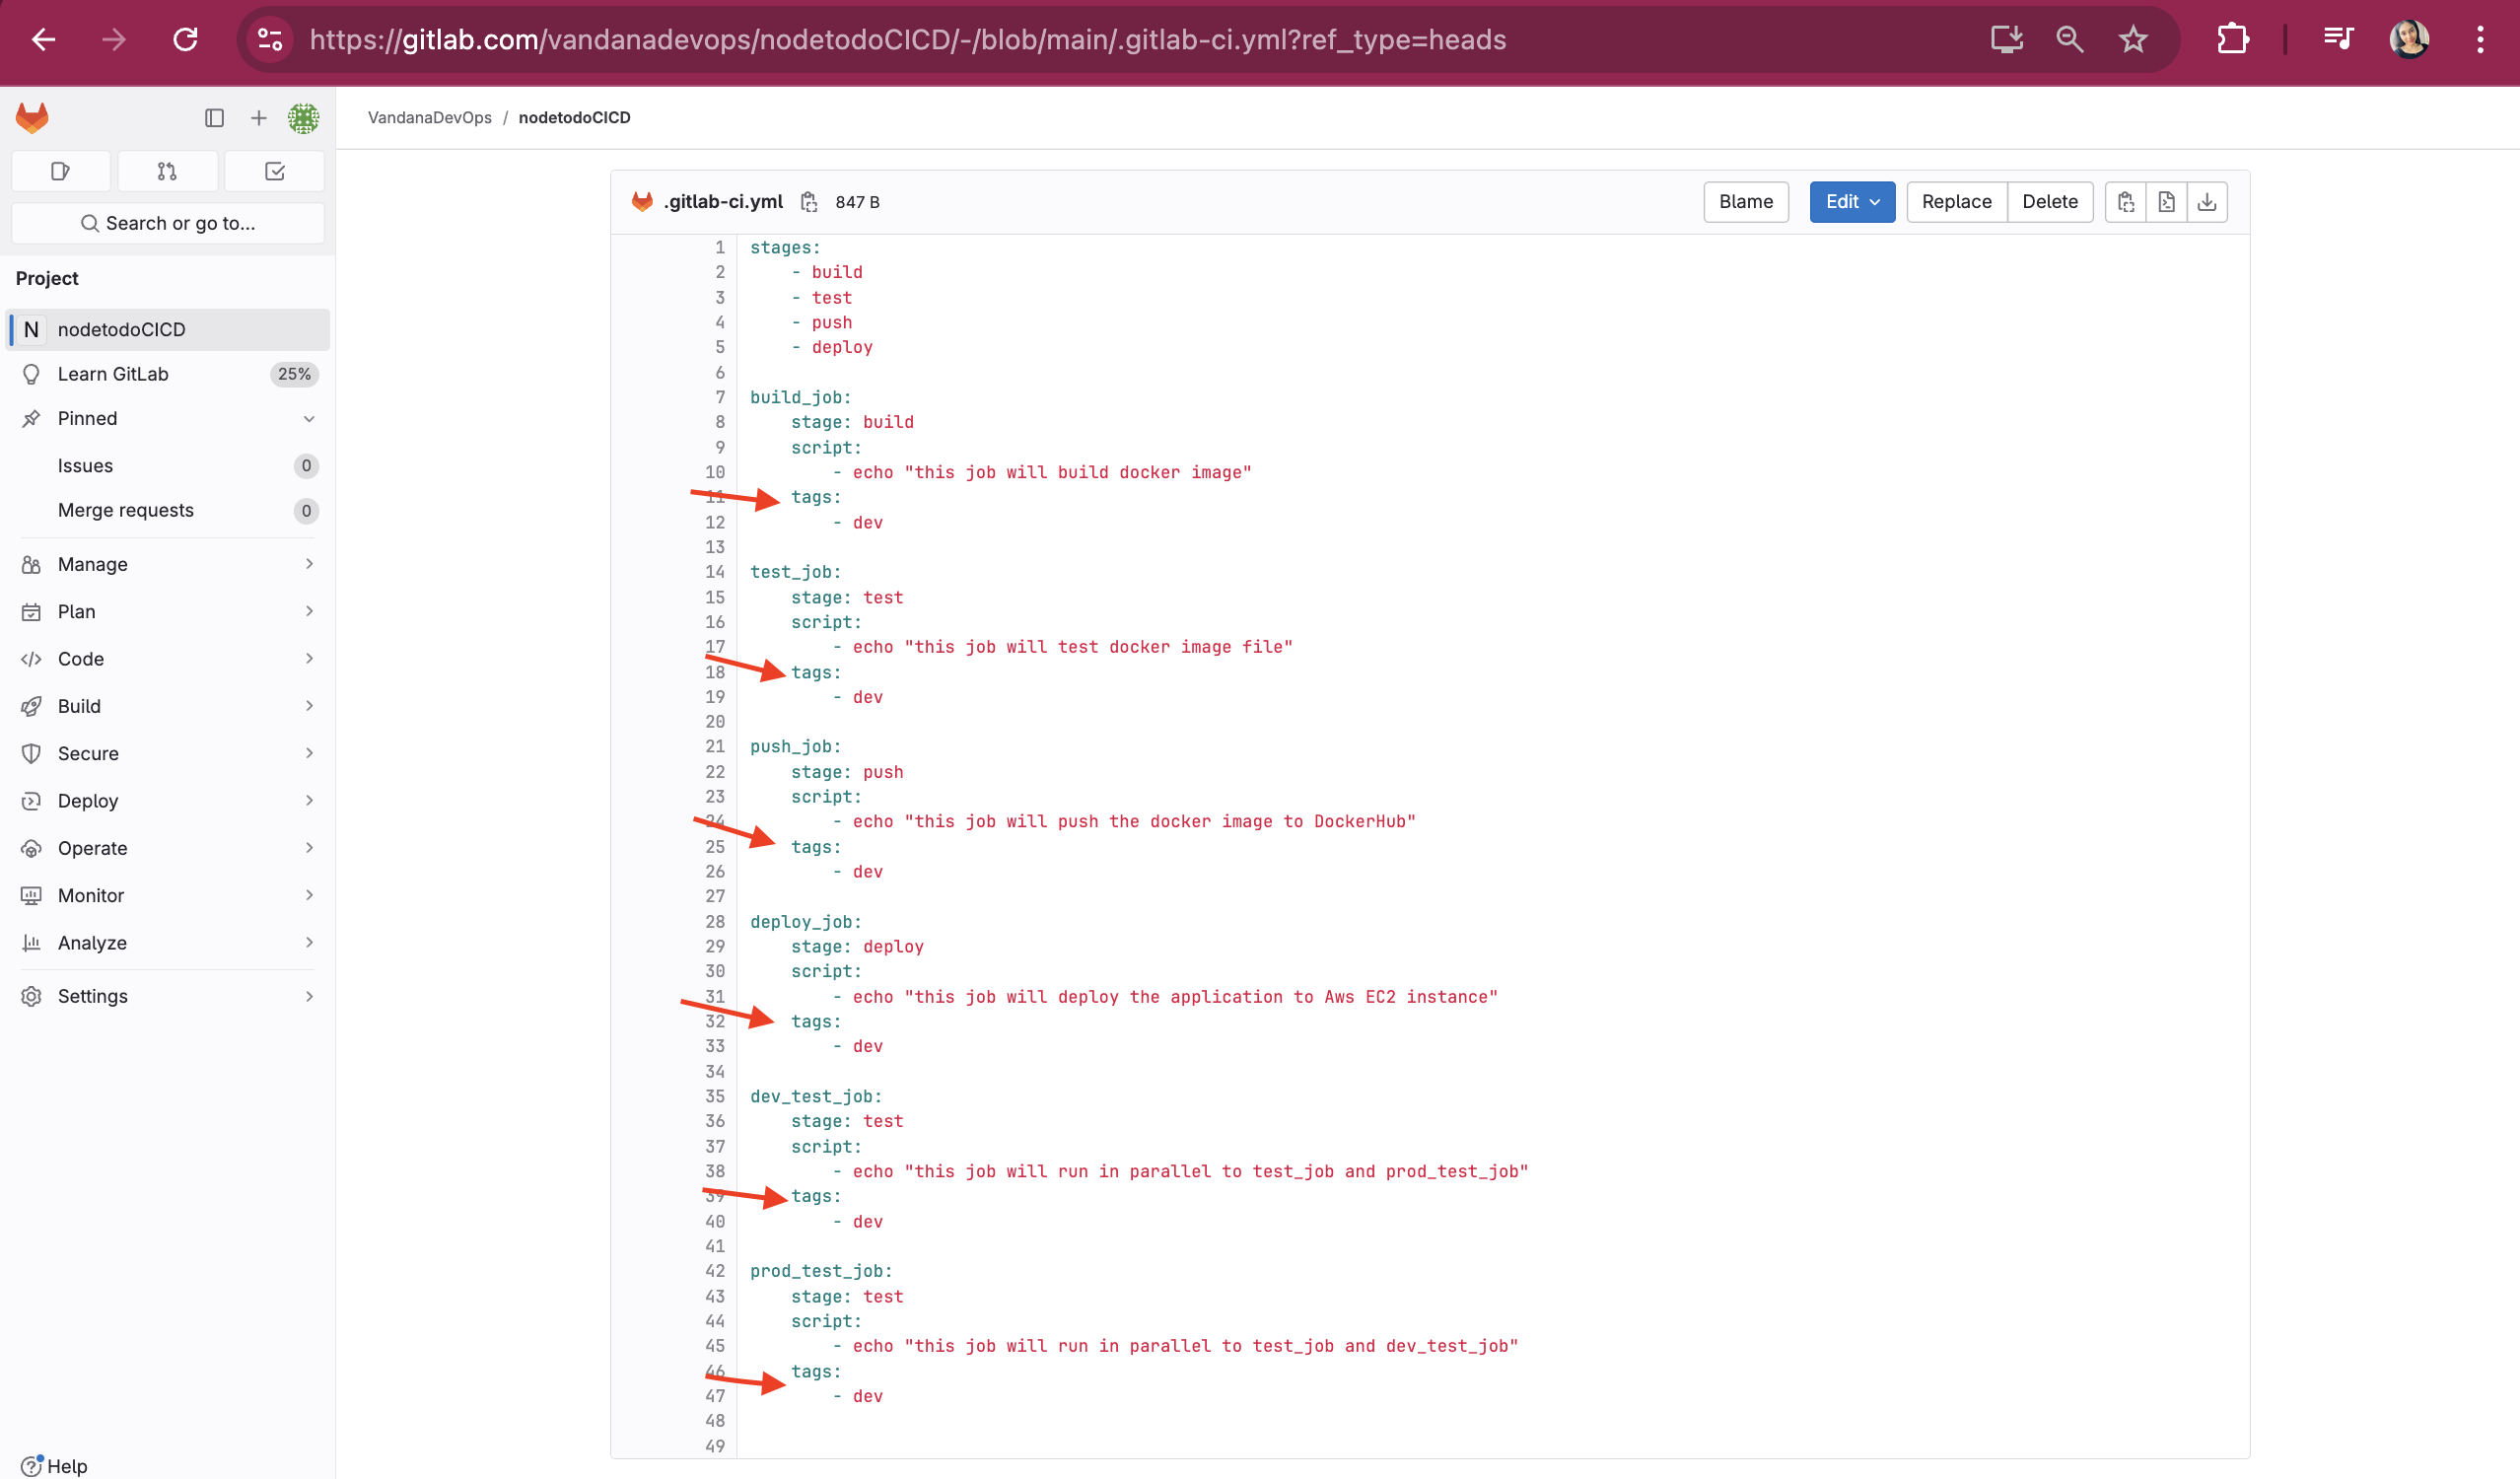
To run jobs with the setup runner, we need to specify the tags in the gitlab-ci.yml file like this:
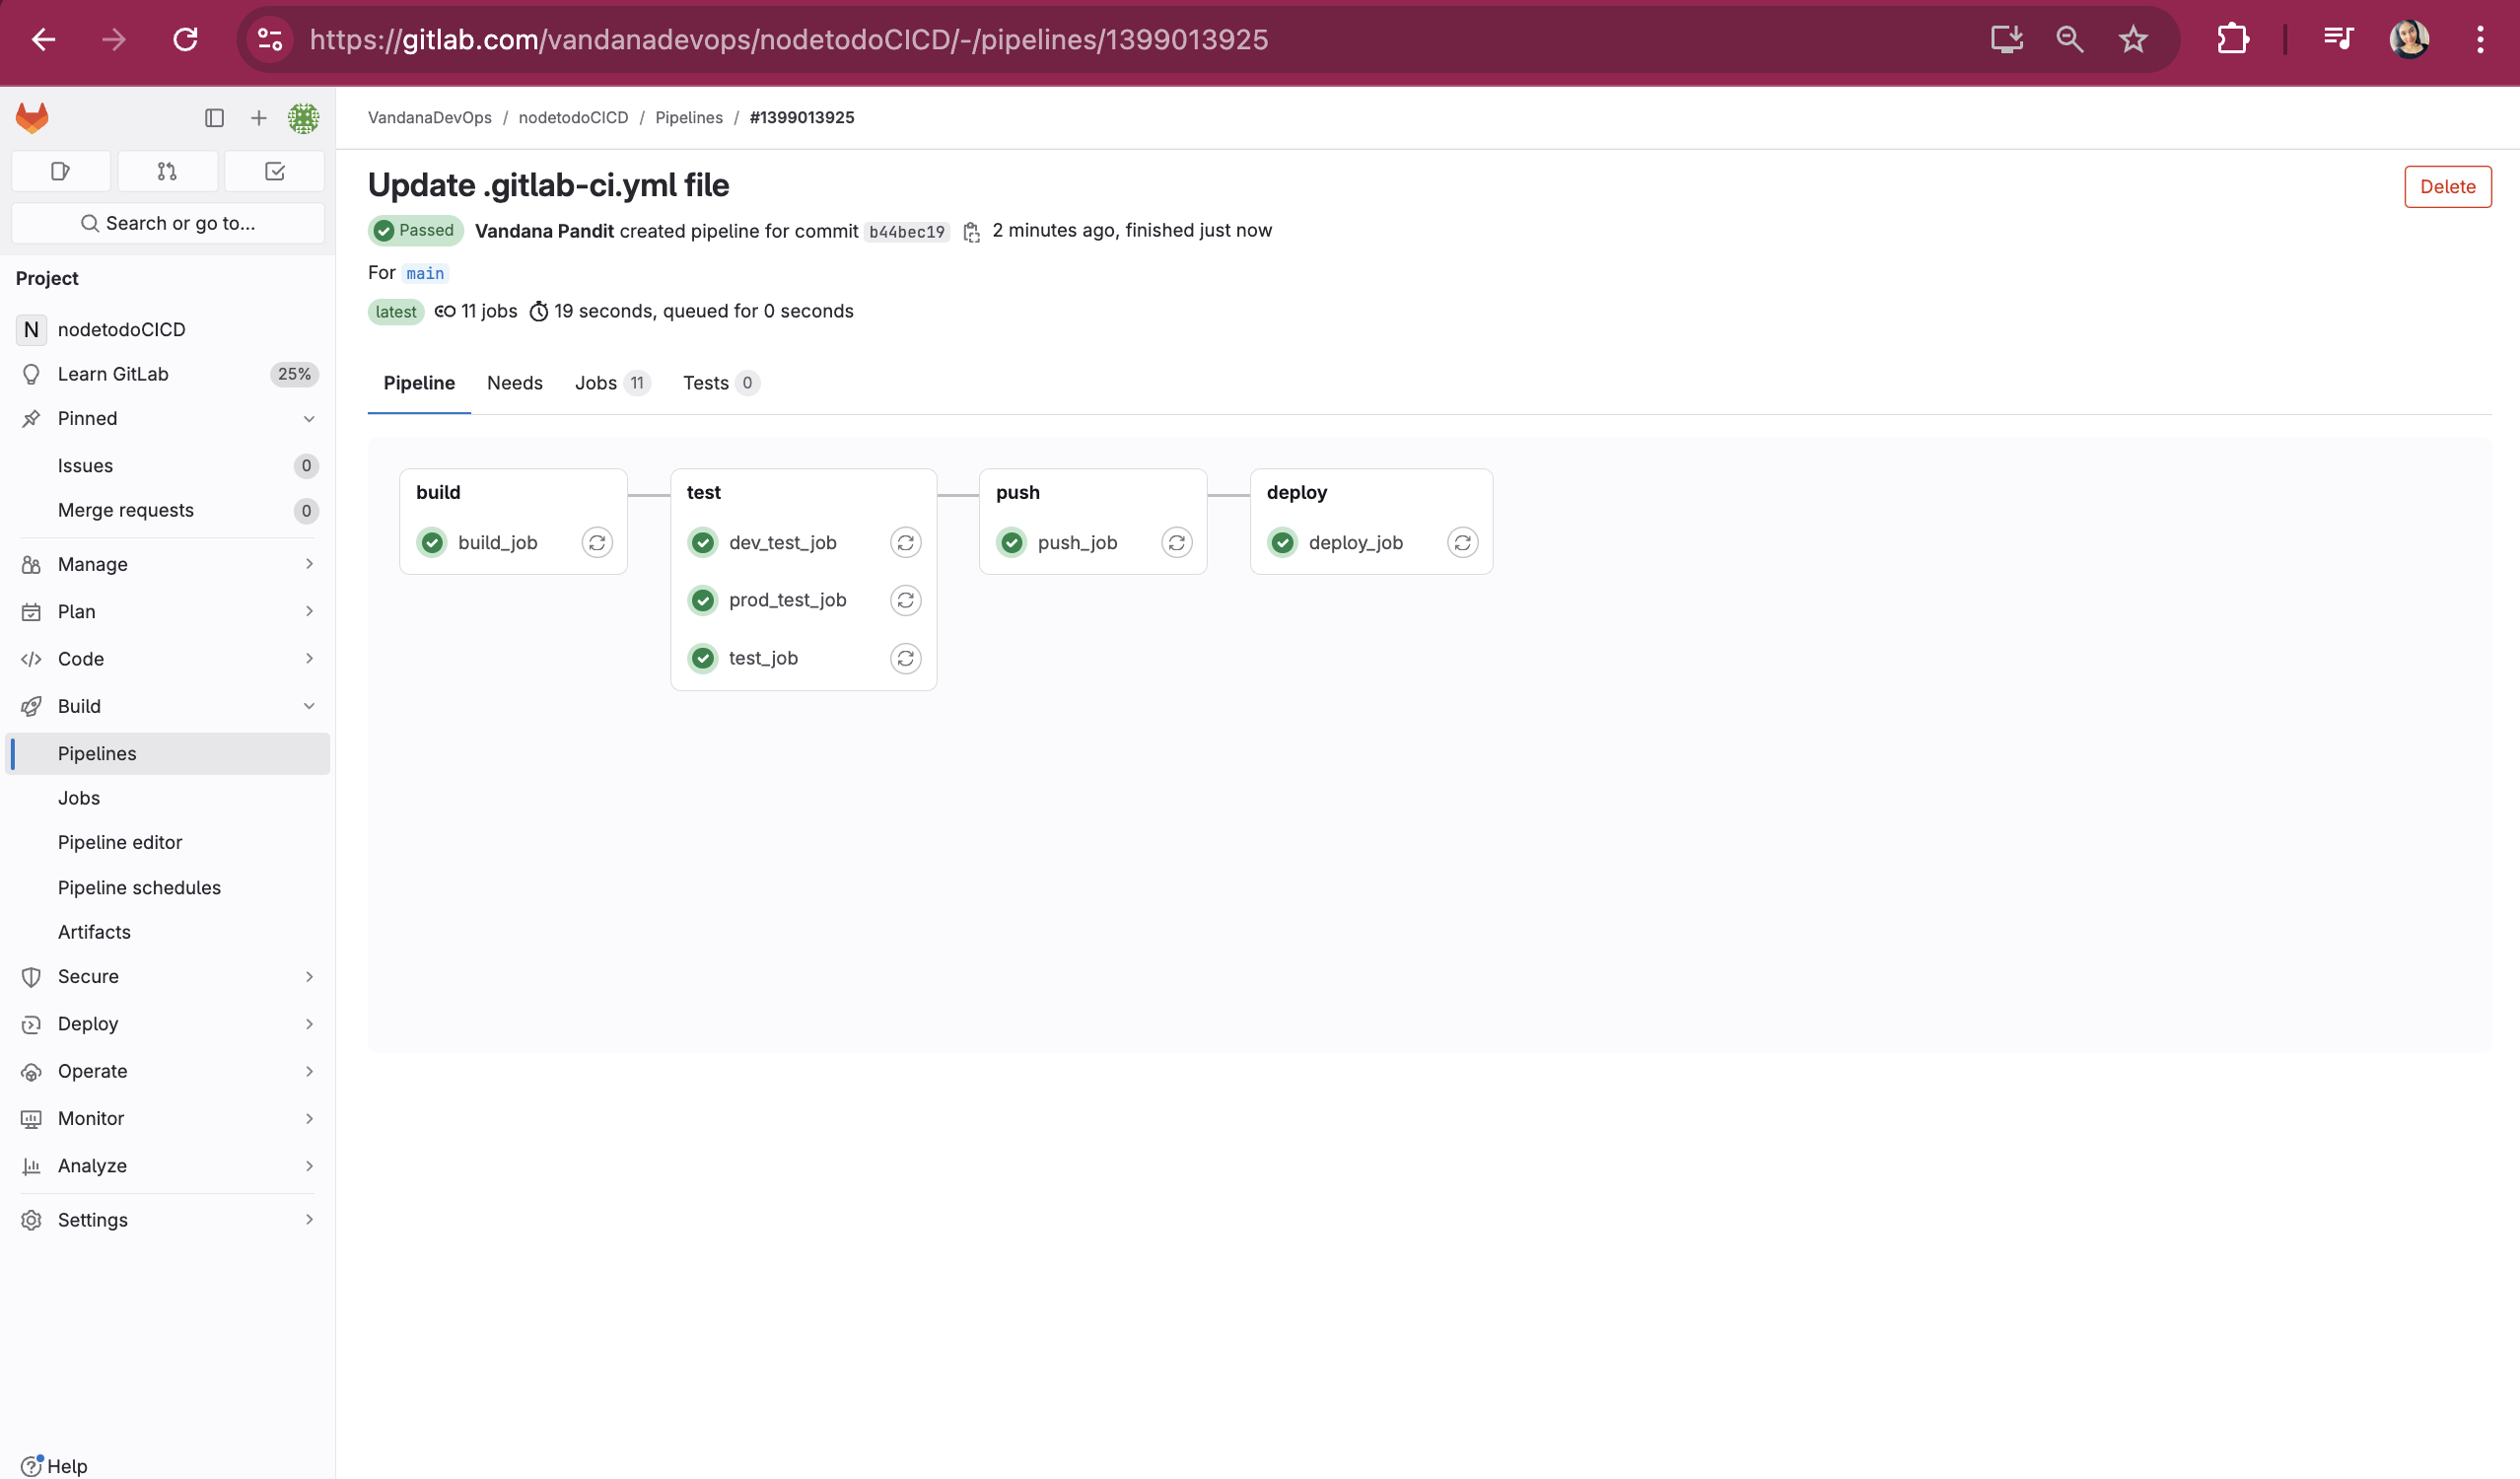
Run the Pipeline, but before running the pipeline execute command "gitlab-runner run" on ubuntu server
How to Write Parallel Jobs in .gitlab-ci.yml File
In GitLab CI/CD, you can run jobs in parallel to speed up your pipeline. Here's how you can set up parallel jobs in your .gitlab-ci.yml file.
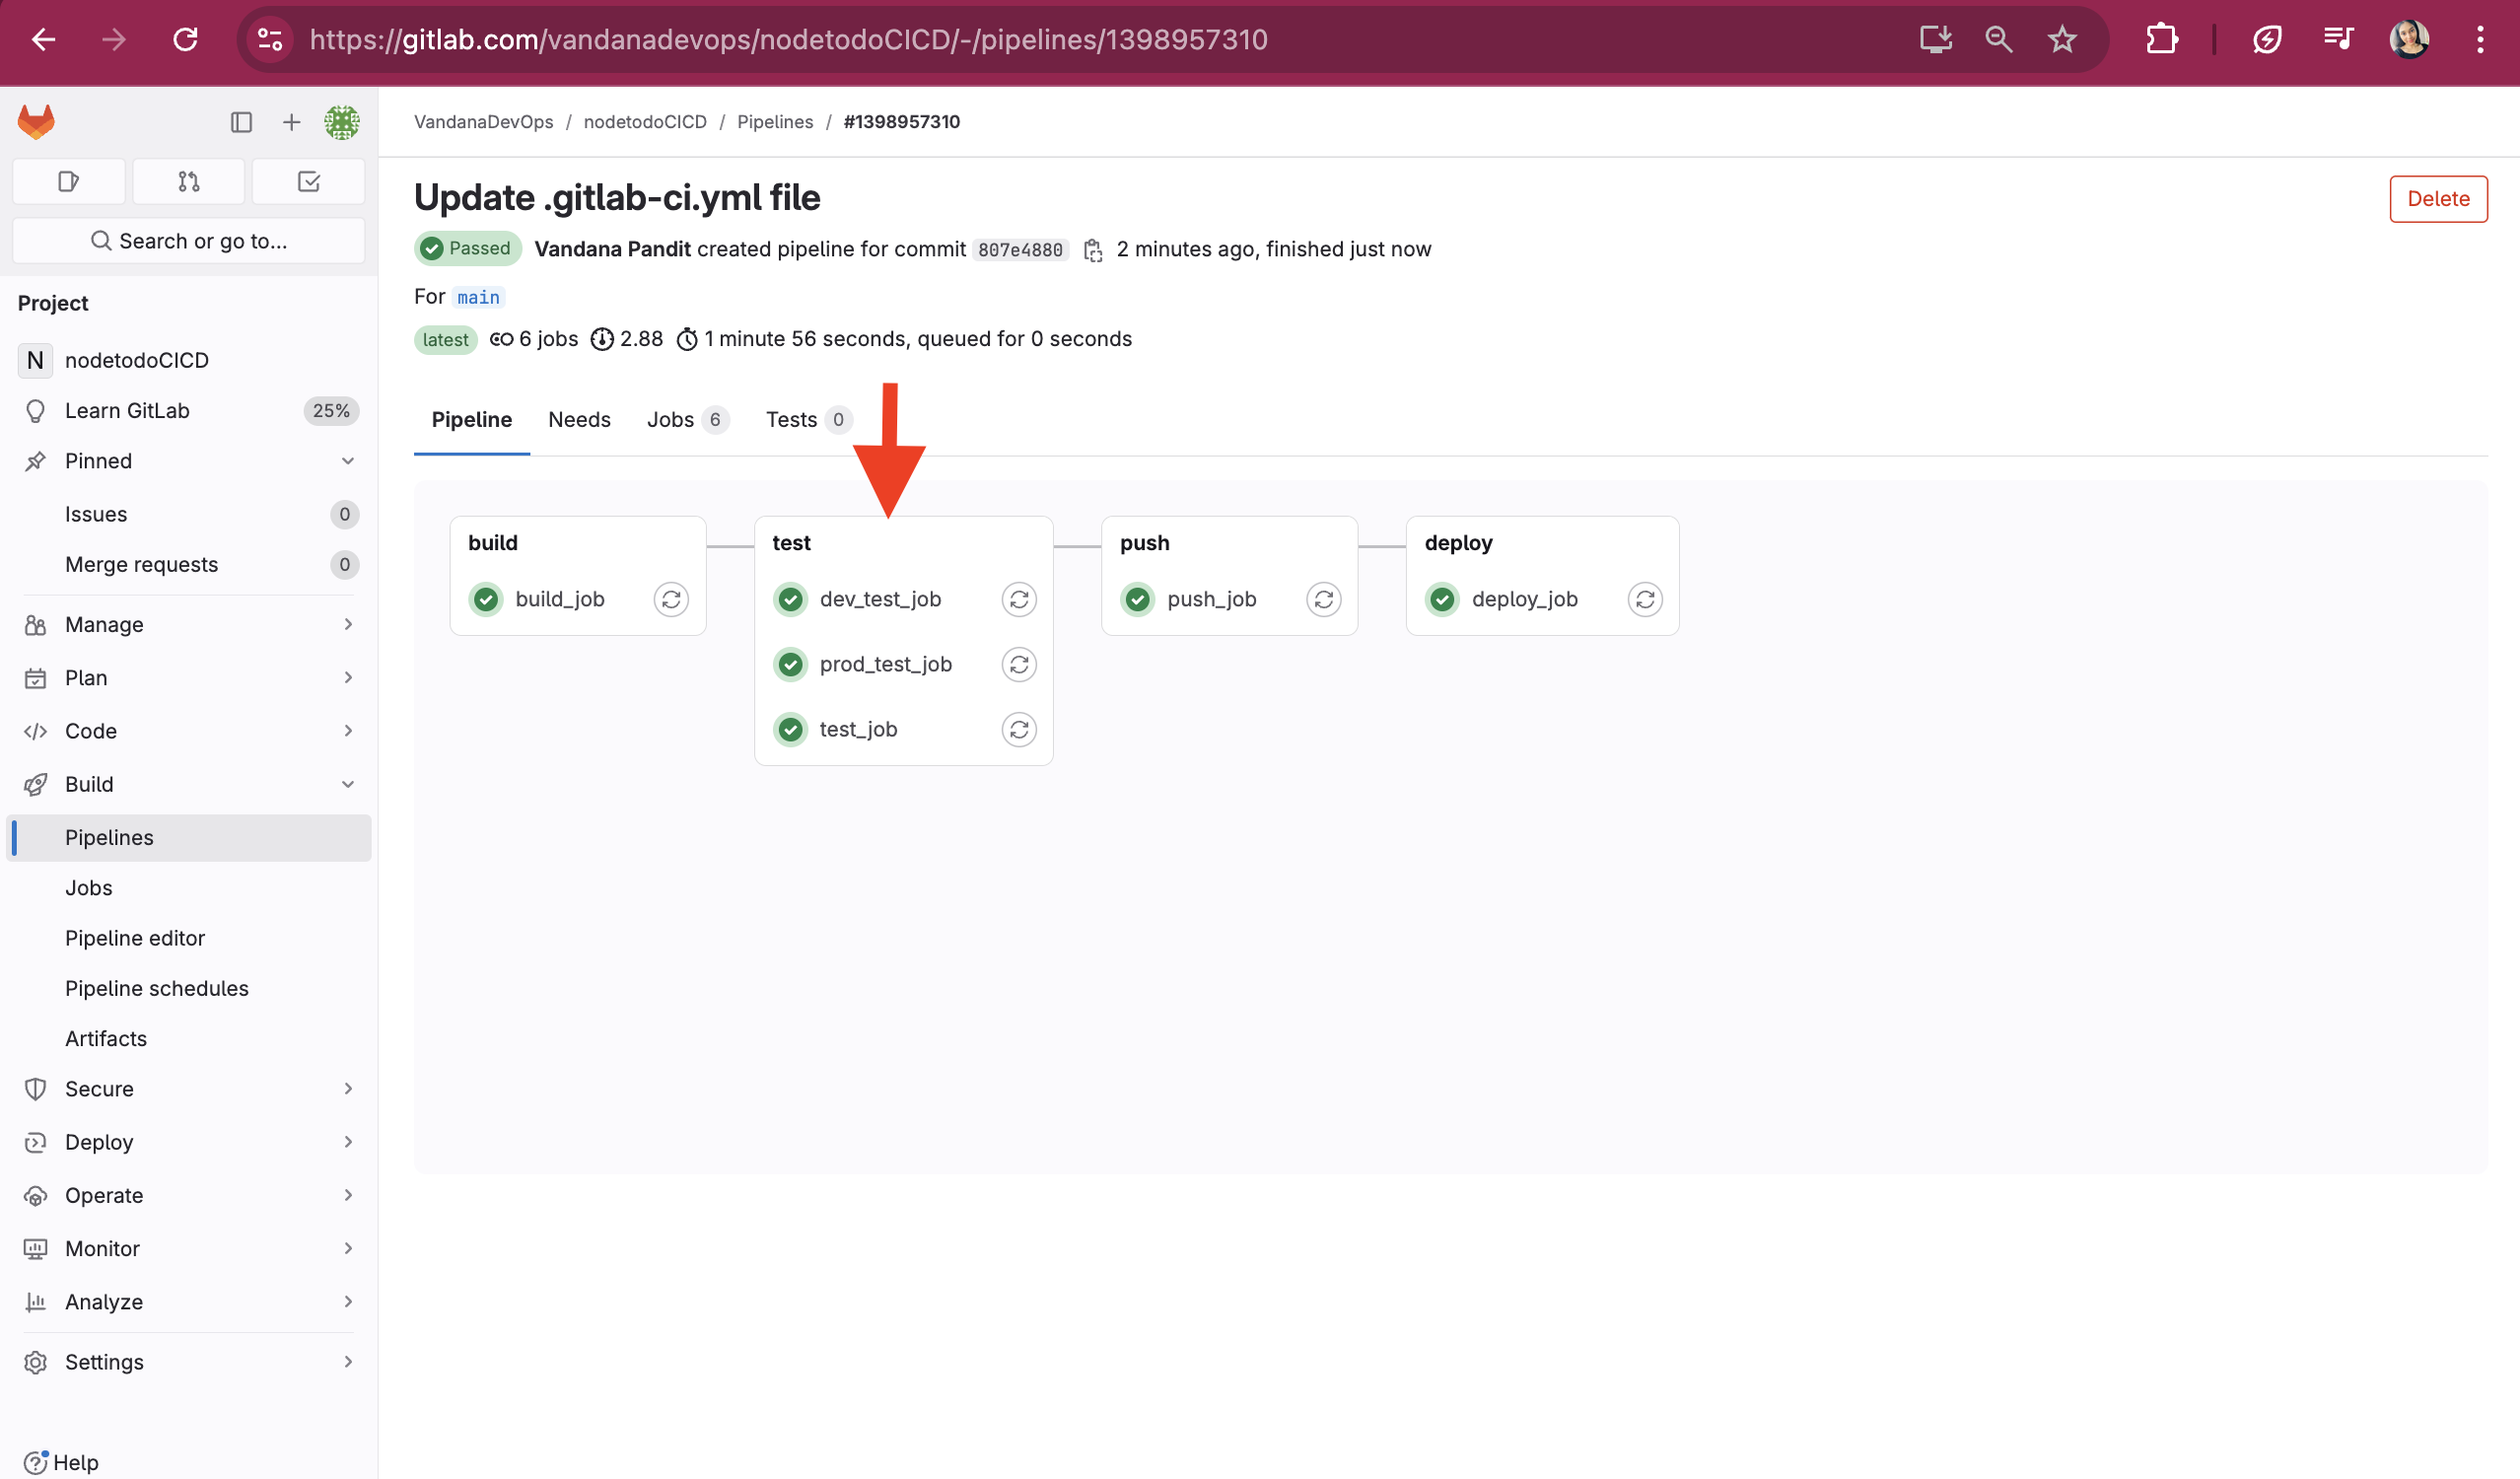
Say I want to create parallel jobs in the test stage. I will create jobs named dev_test_job and prod_test_job. I will specify the stage as test, like this:
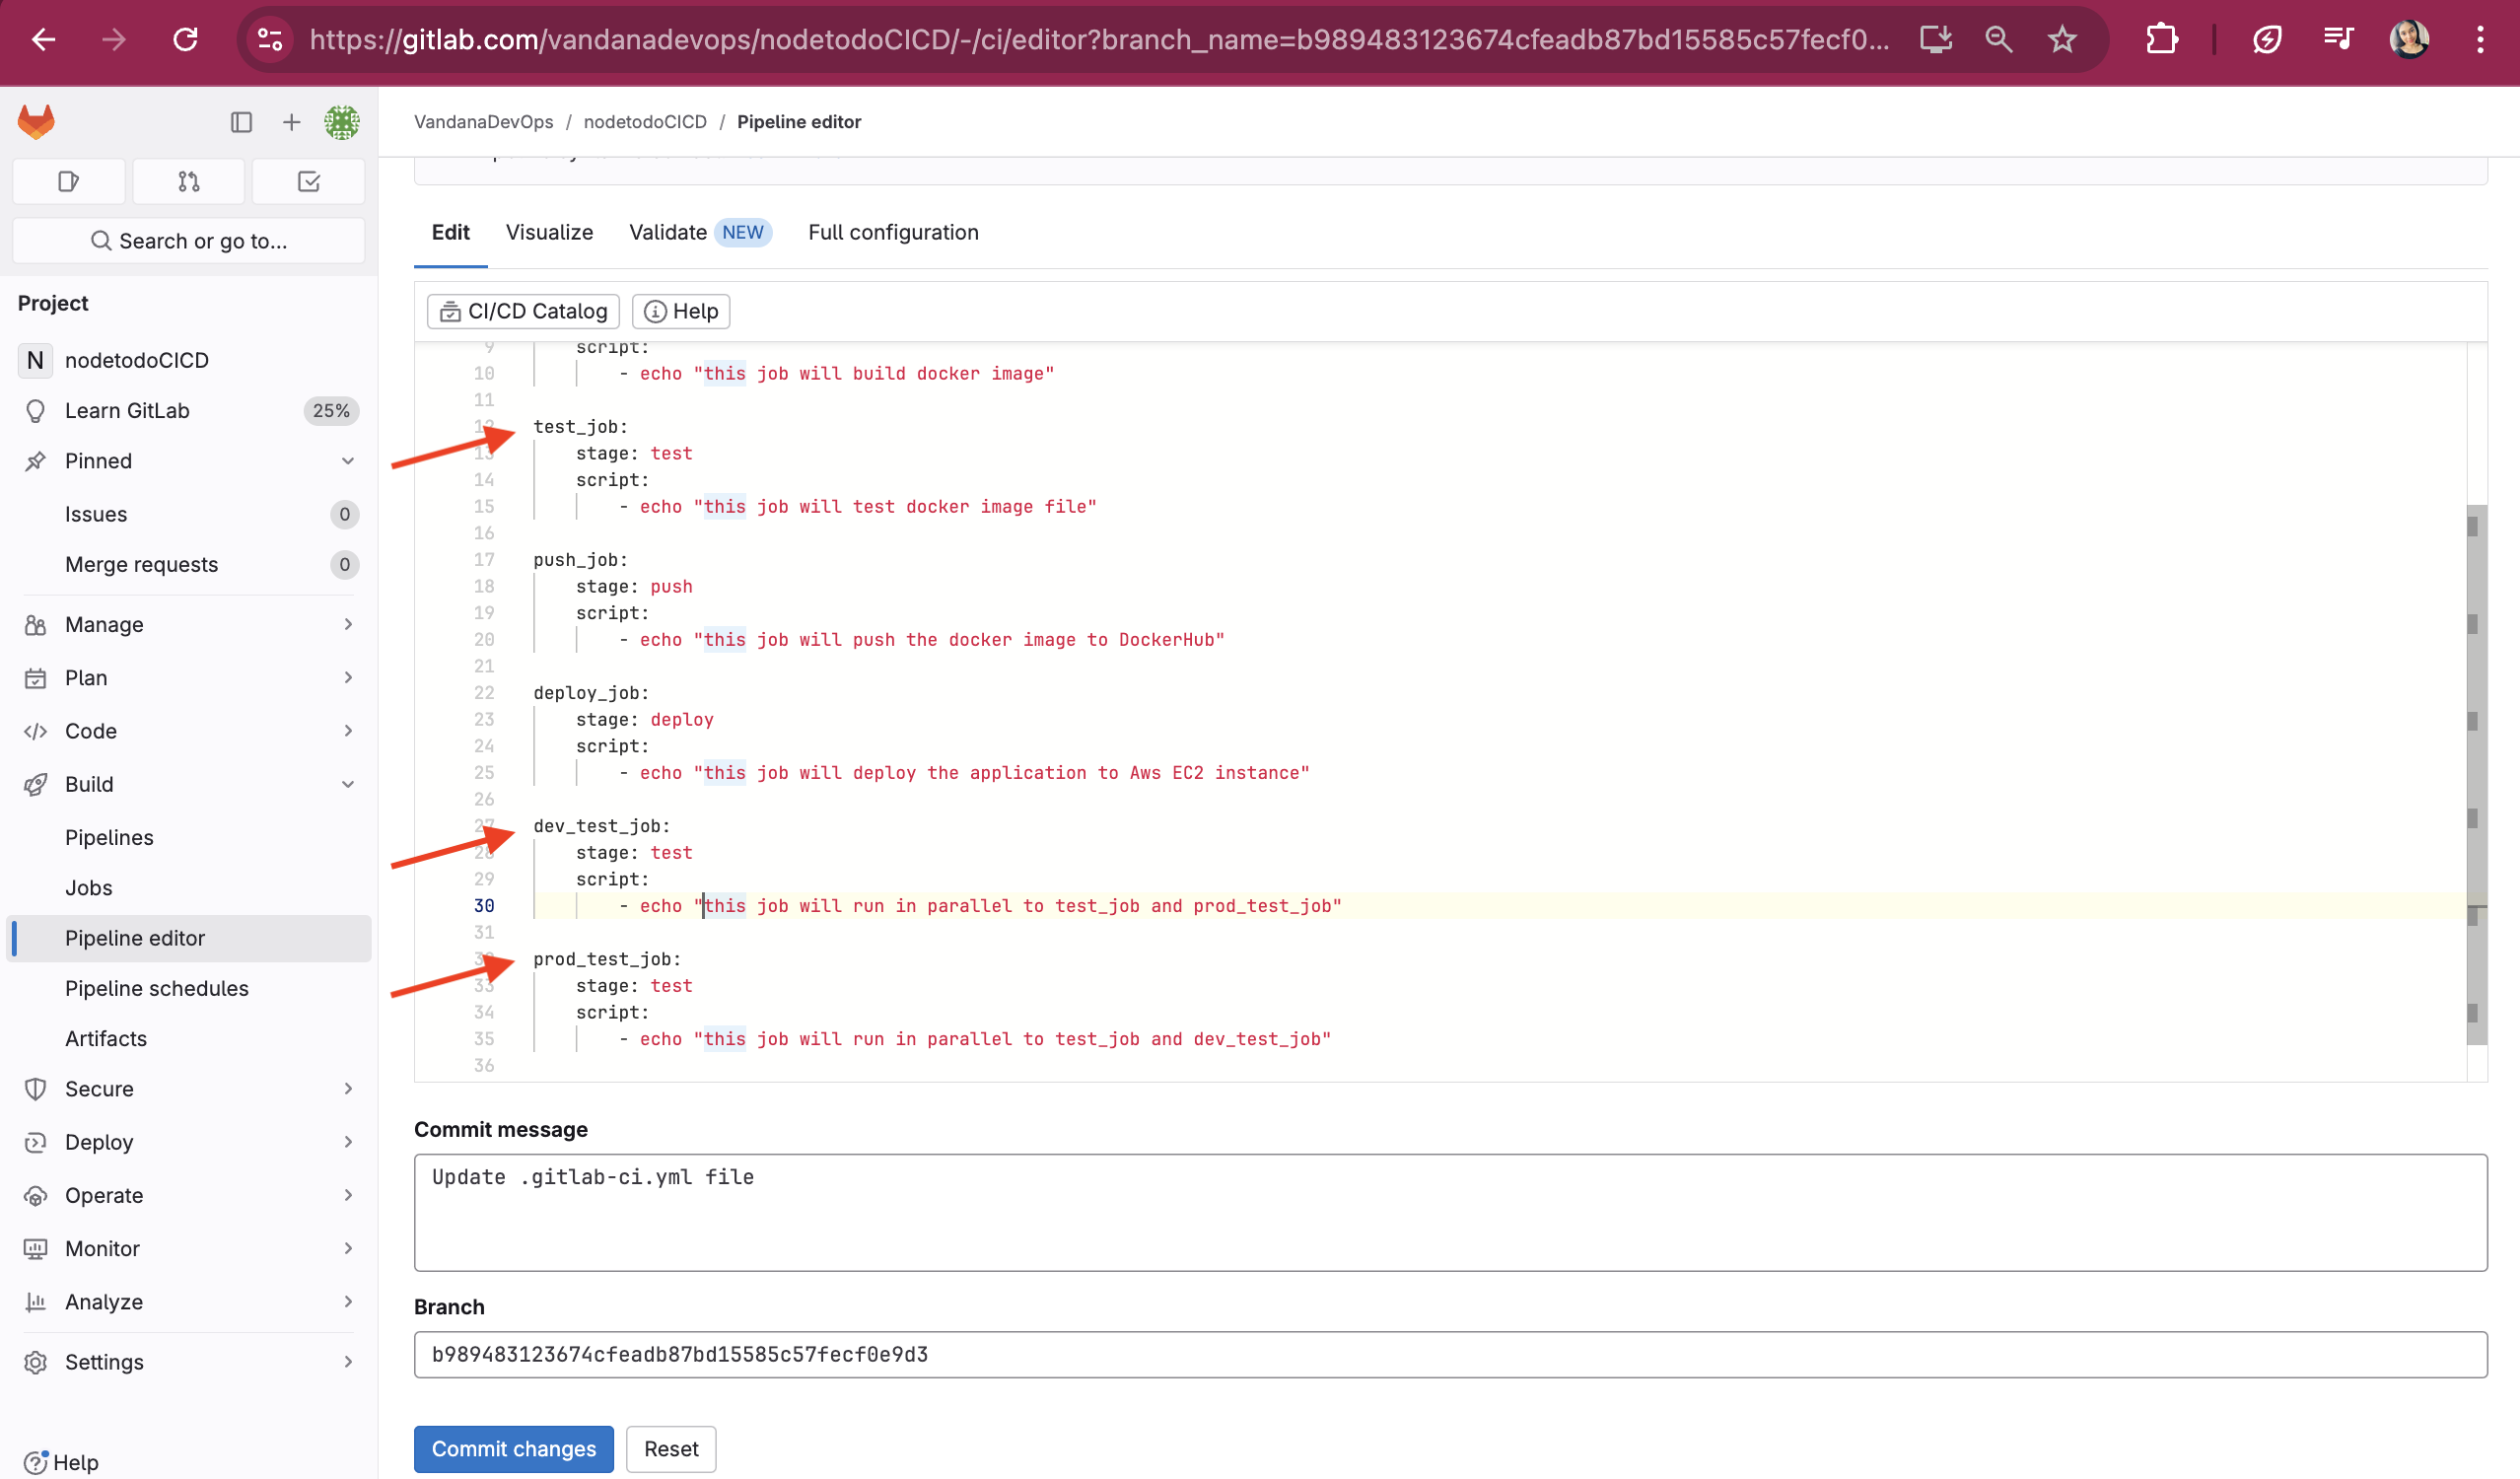
Commit the changes and check the pipeline:
Variables:
In GitLab CI/CD, variables are used to customize the behavior of pipelines, jobs, and scripts. They allow you to define values that can be used across multiple jobs, making your CI/CD configuration more flexible and easier to manage.
There are three types of variables:
Custom Variables
Predefined Variables
Environment Variables
Custom Variables:
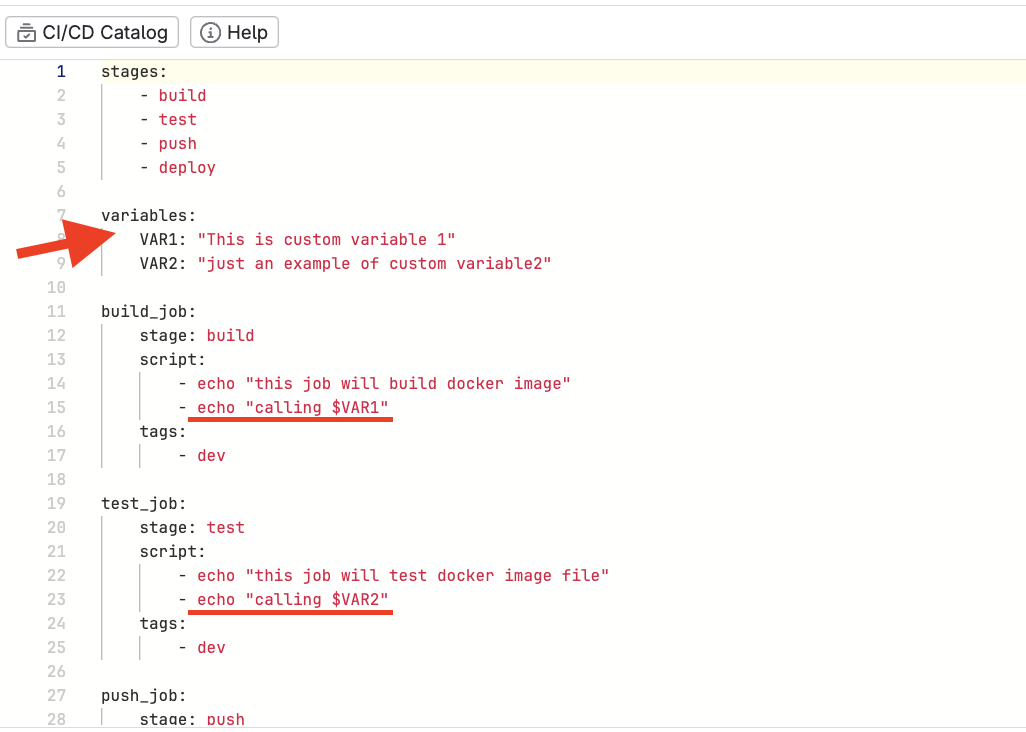
These are user-defined variables that you can set in various places such as project settings, group settings, or directly in the .gitlab-ci.yml file.
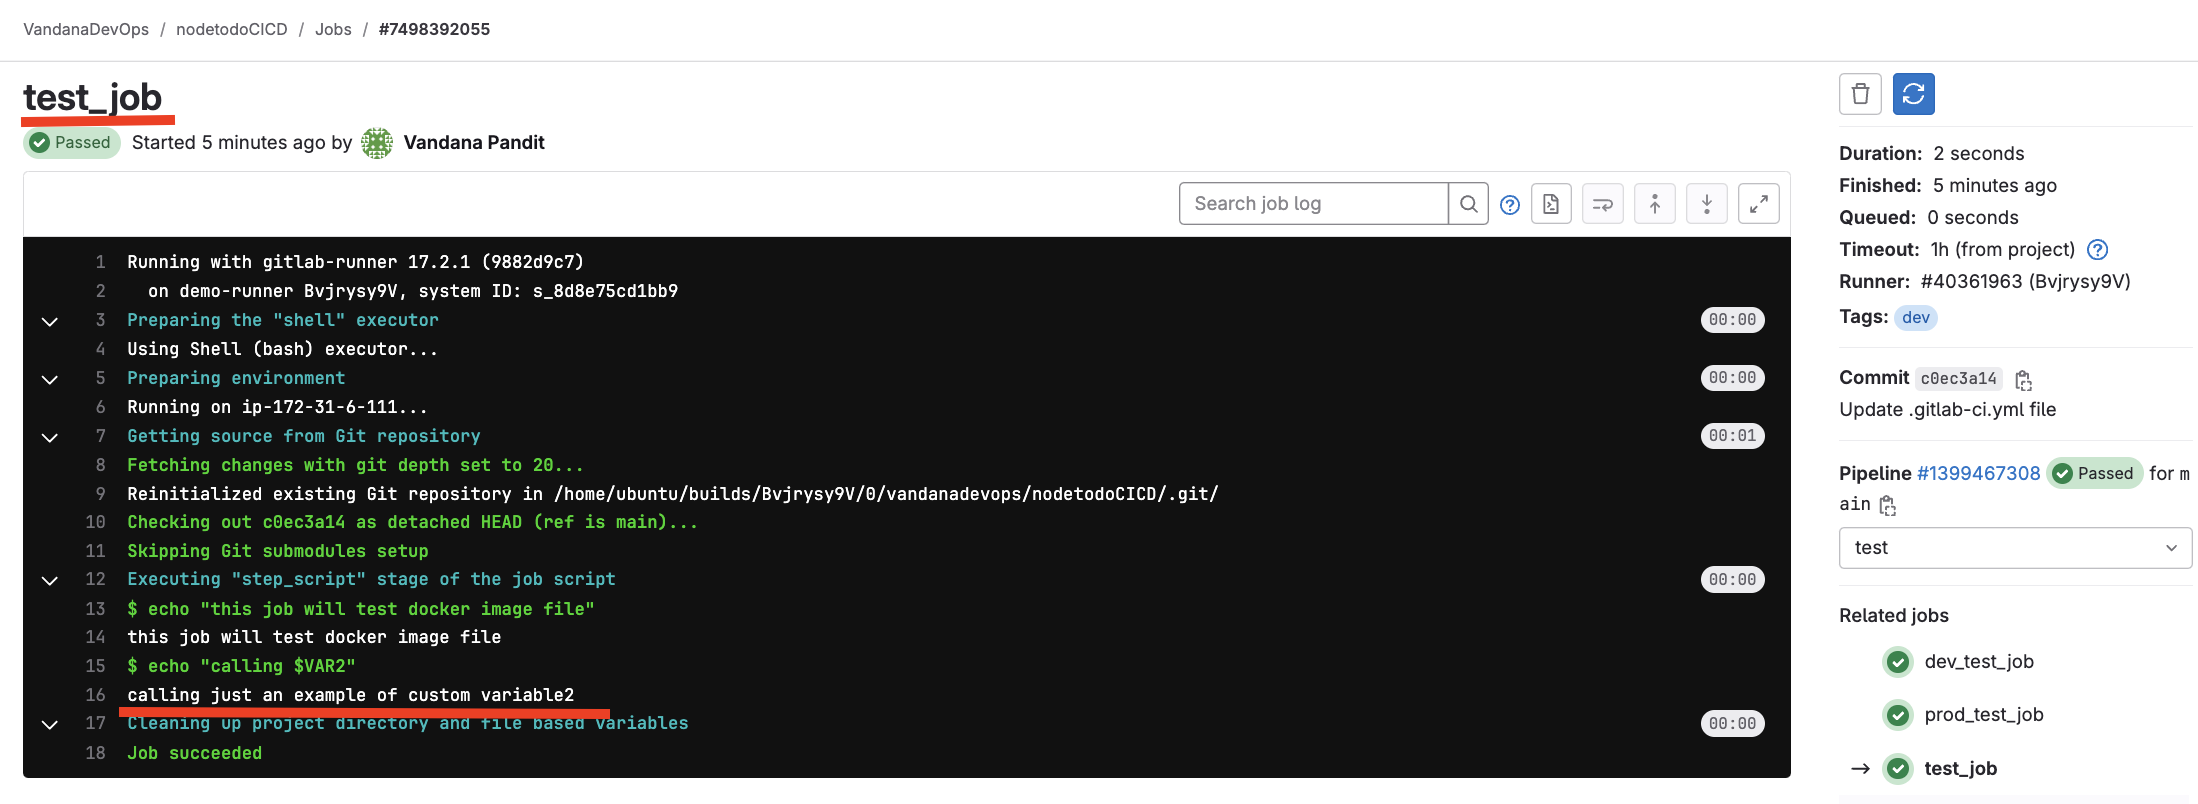
Lets see how to define variables in .gitlab-ci.yml file.
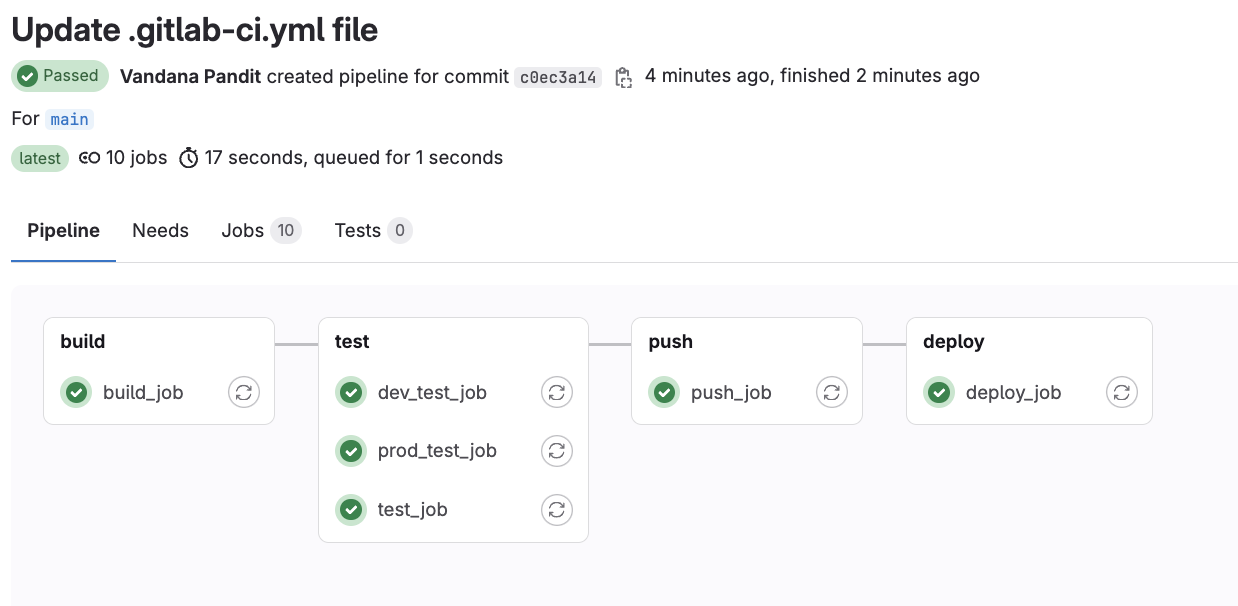
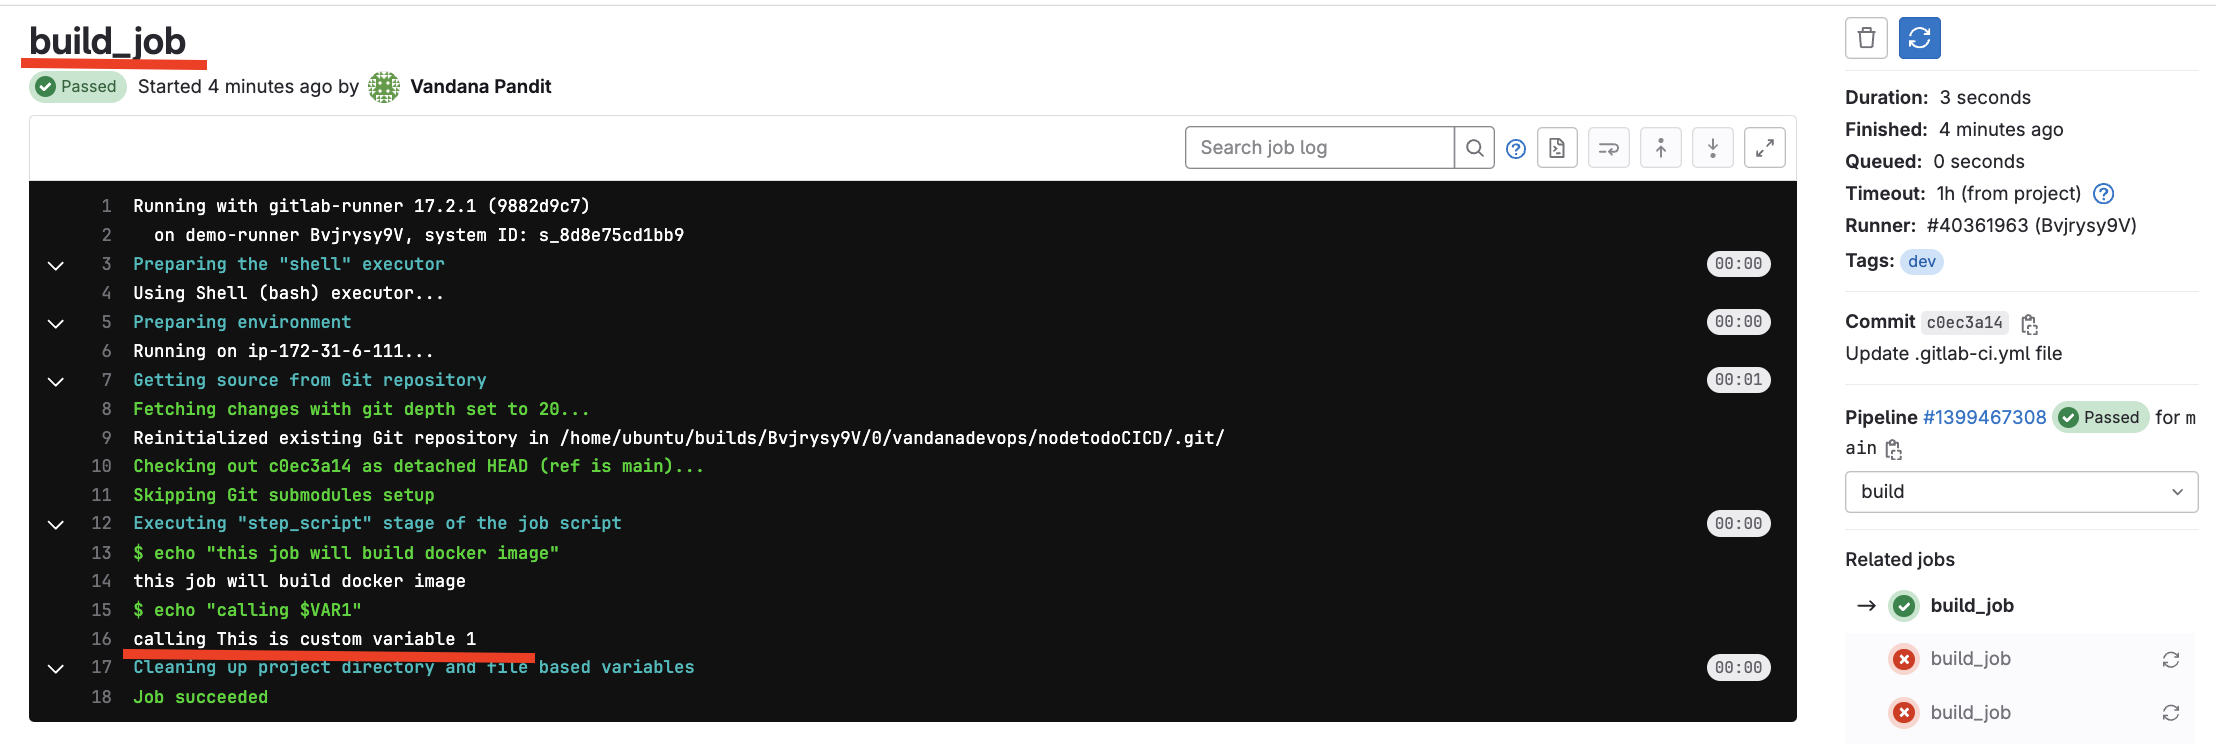
Lets run this pipeline and check if the variable values are reflected correctly
Predefined Variables :
These are built-in variables provided by GitLab, which are set automatically and cannot be changed. They contain information about the GitLab project, pipeline, job, and more.
Here you can find all the predefined GitLab variables: https://docs.gitlab.com/ee/ci/variables/predefined_variables.html
You can use predefined variable like this:

Lets run the "build_job" job and see of the predefined variable 'CI_RUNNER_TAGS' value is returned in the logs correctly.
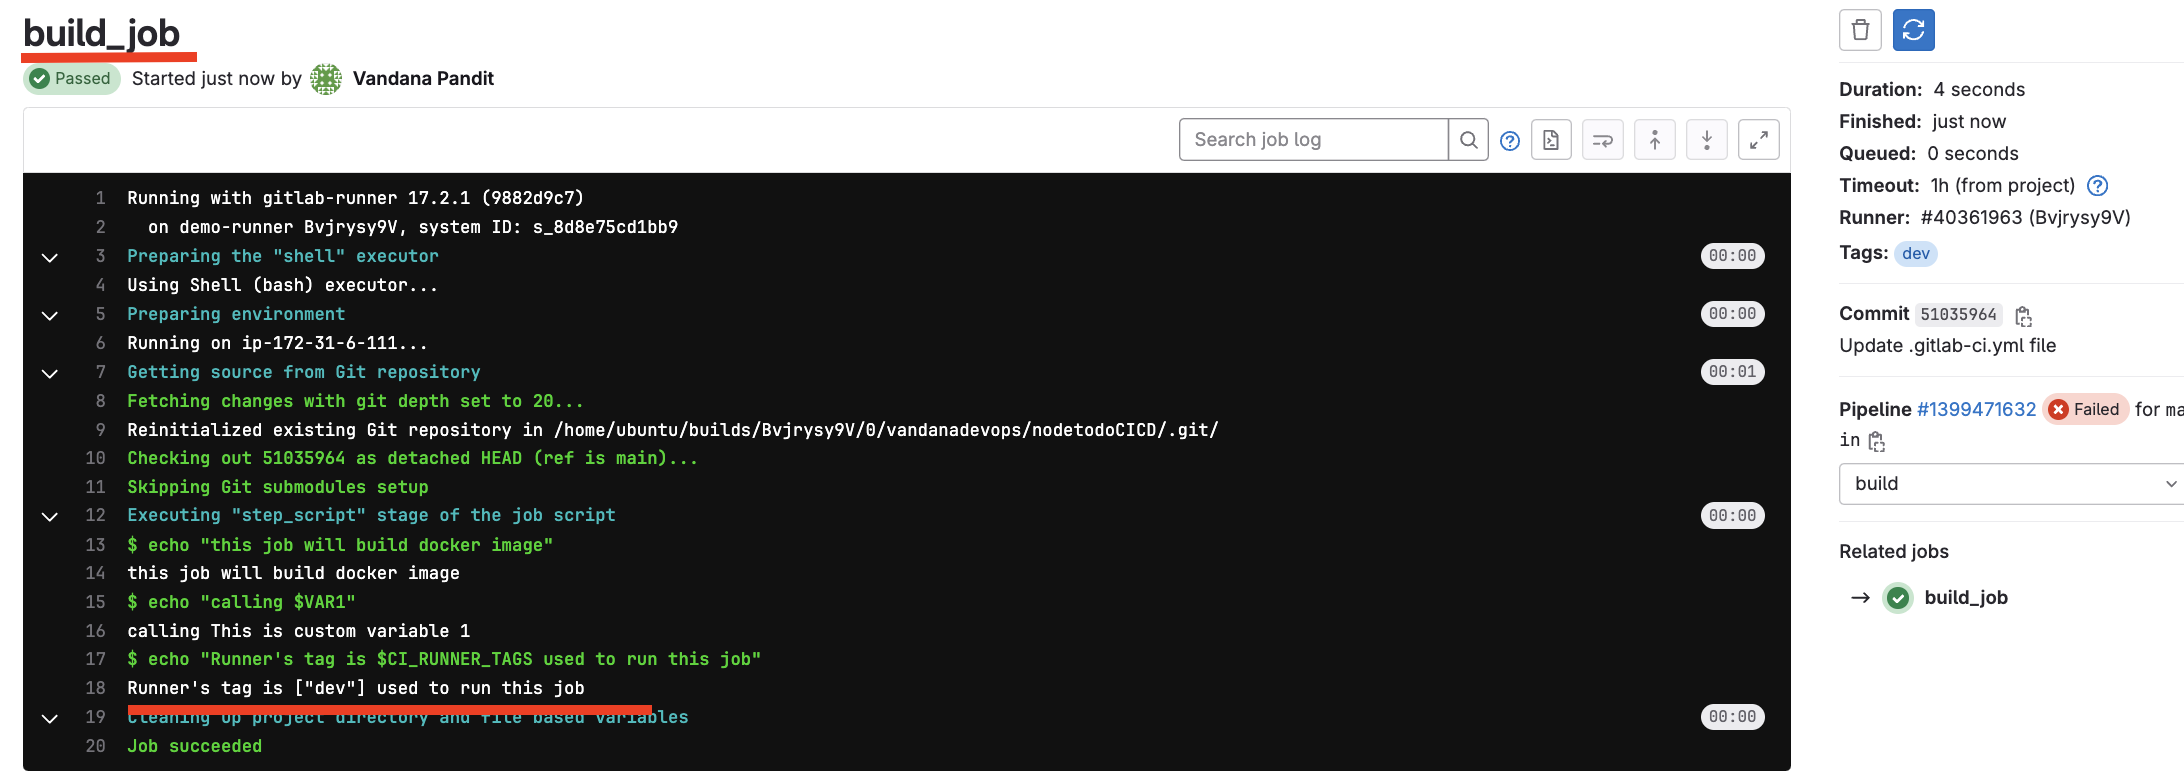
Predefined variable's value is returned successfully.
Environment Variable:
These are specific to certain environments. You can define them in the GitLab UI under Settings > CI/CD > Variables, scoped to particular environments.
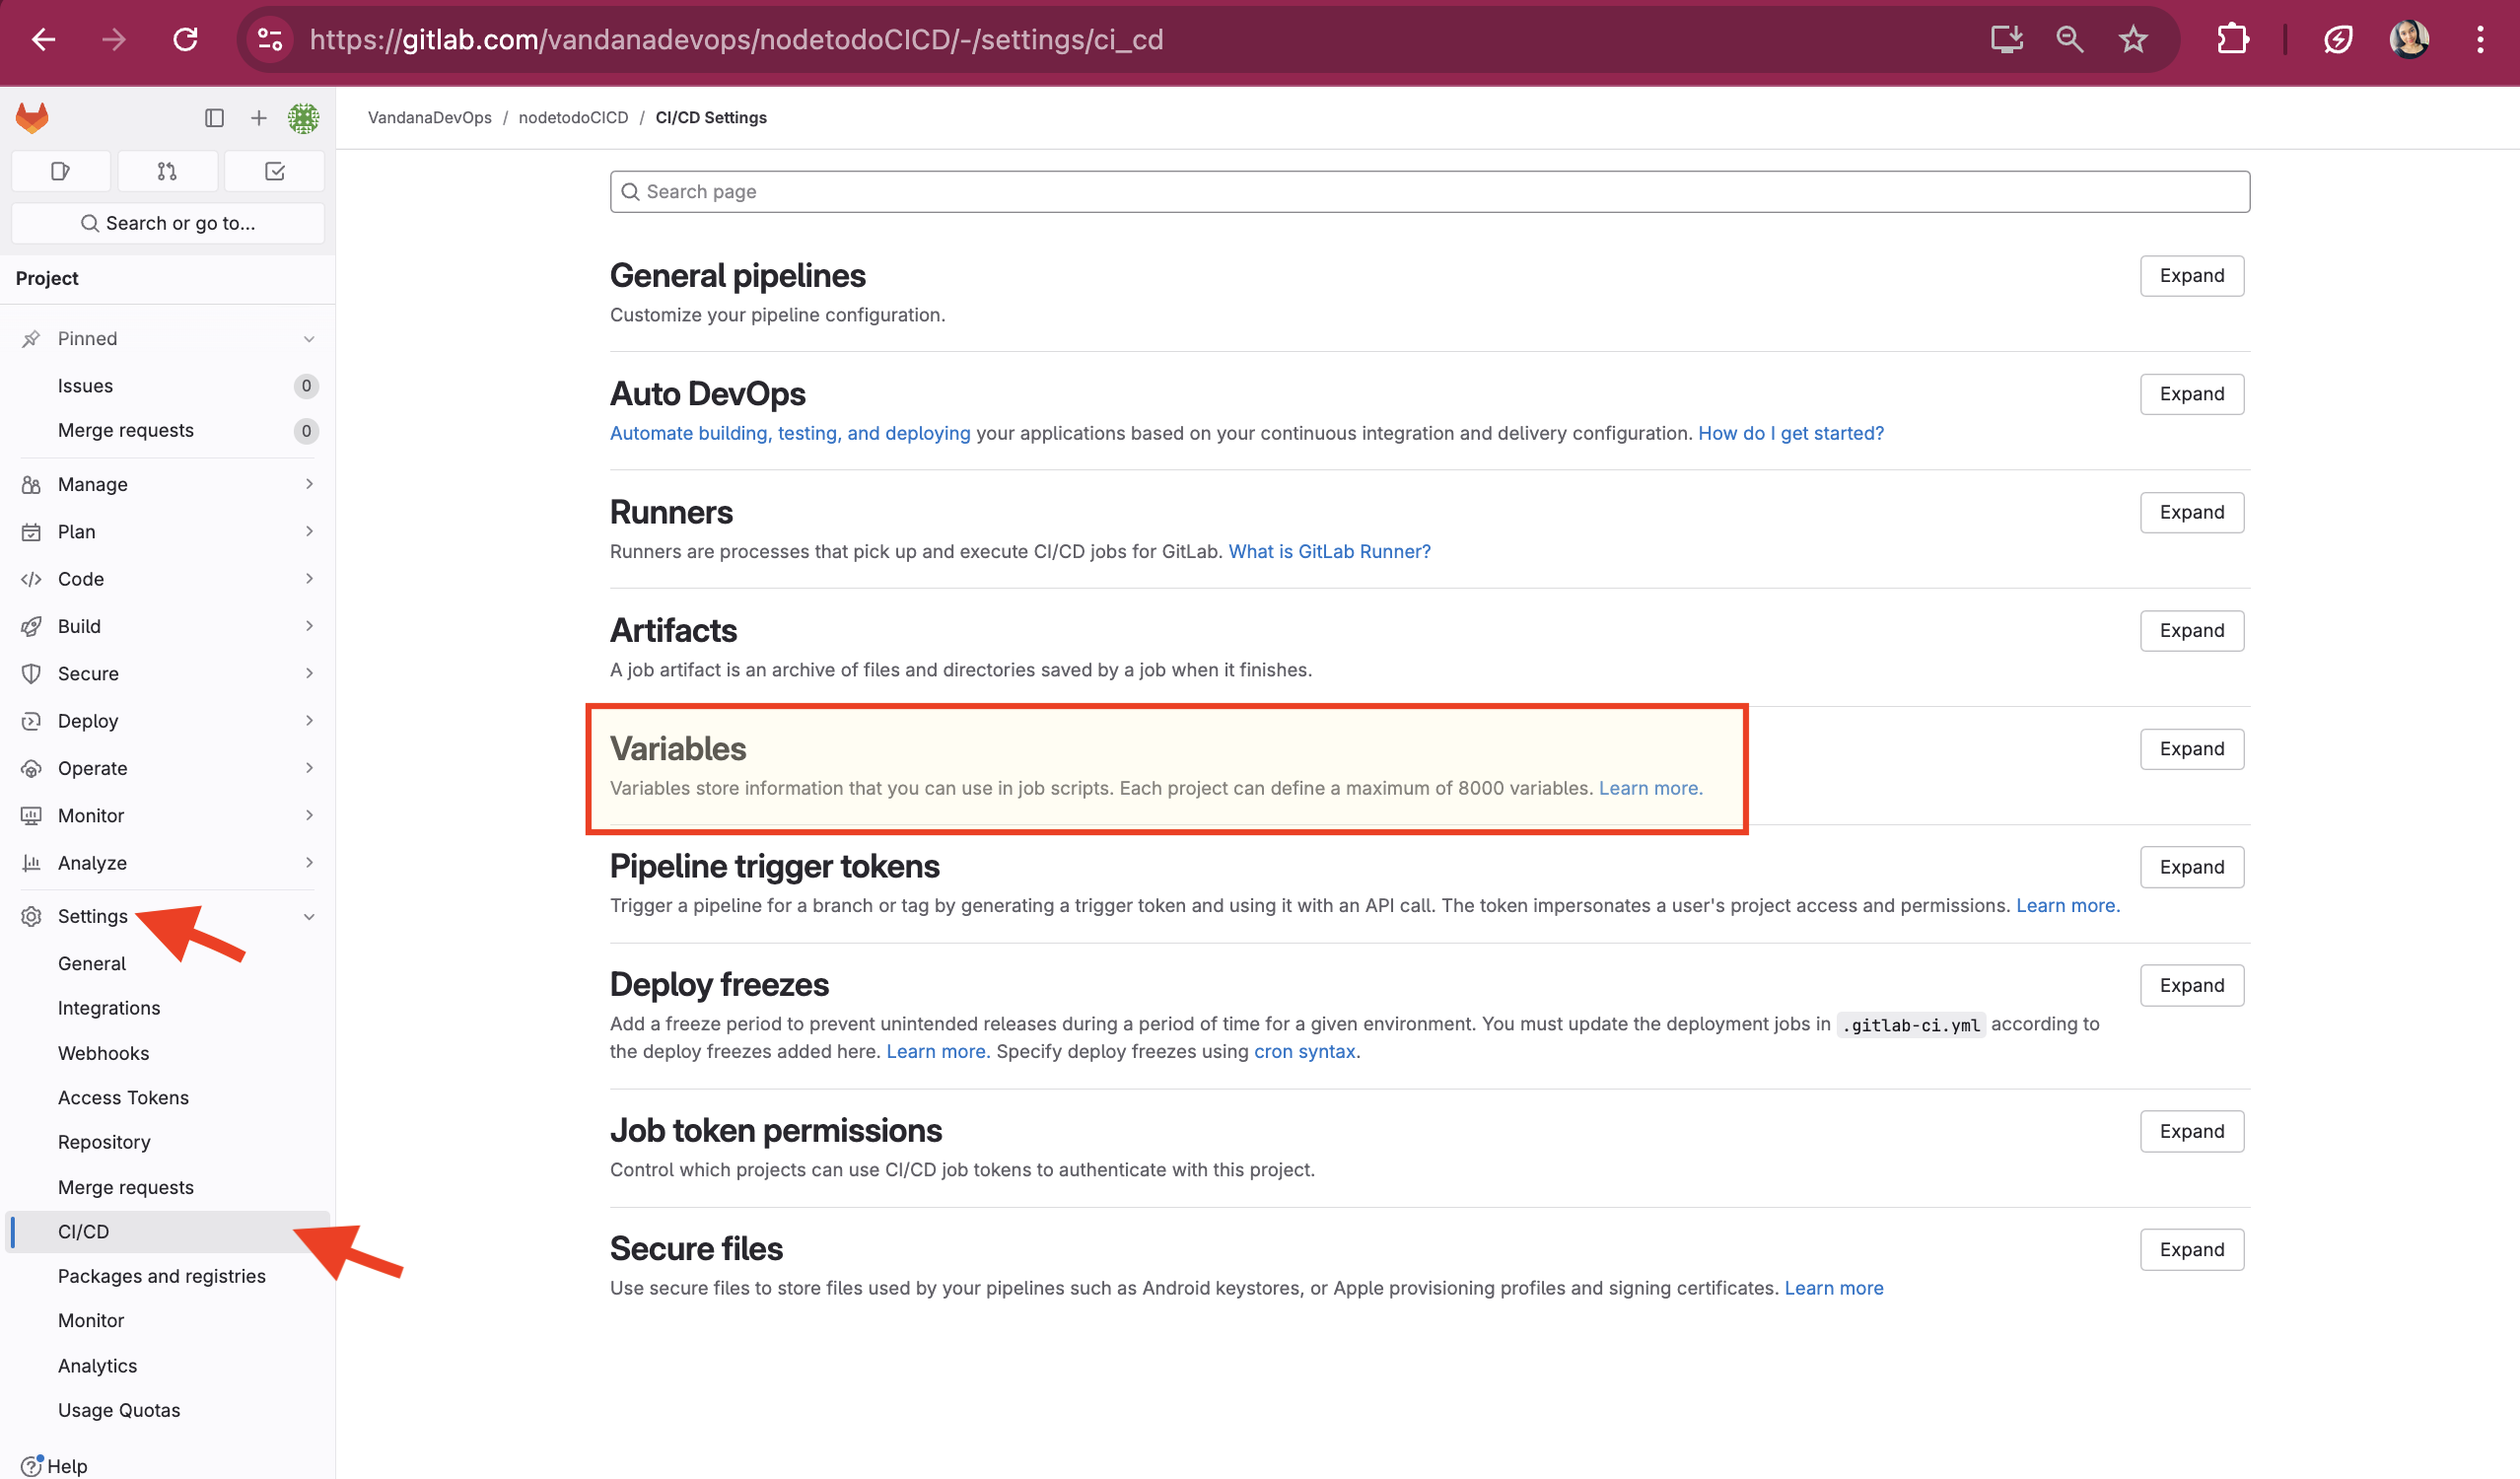
Click on "Add Variable" button and provide the required details
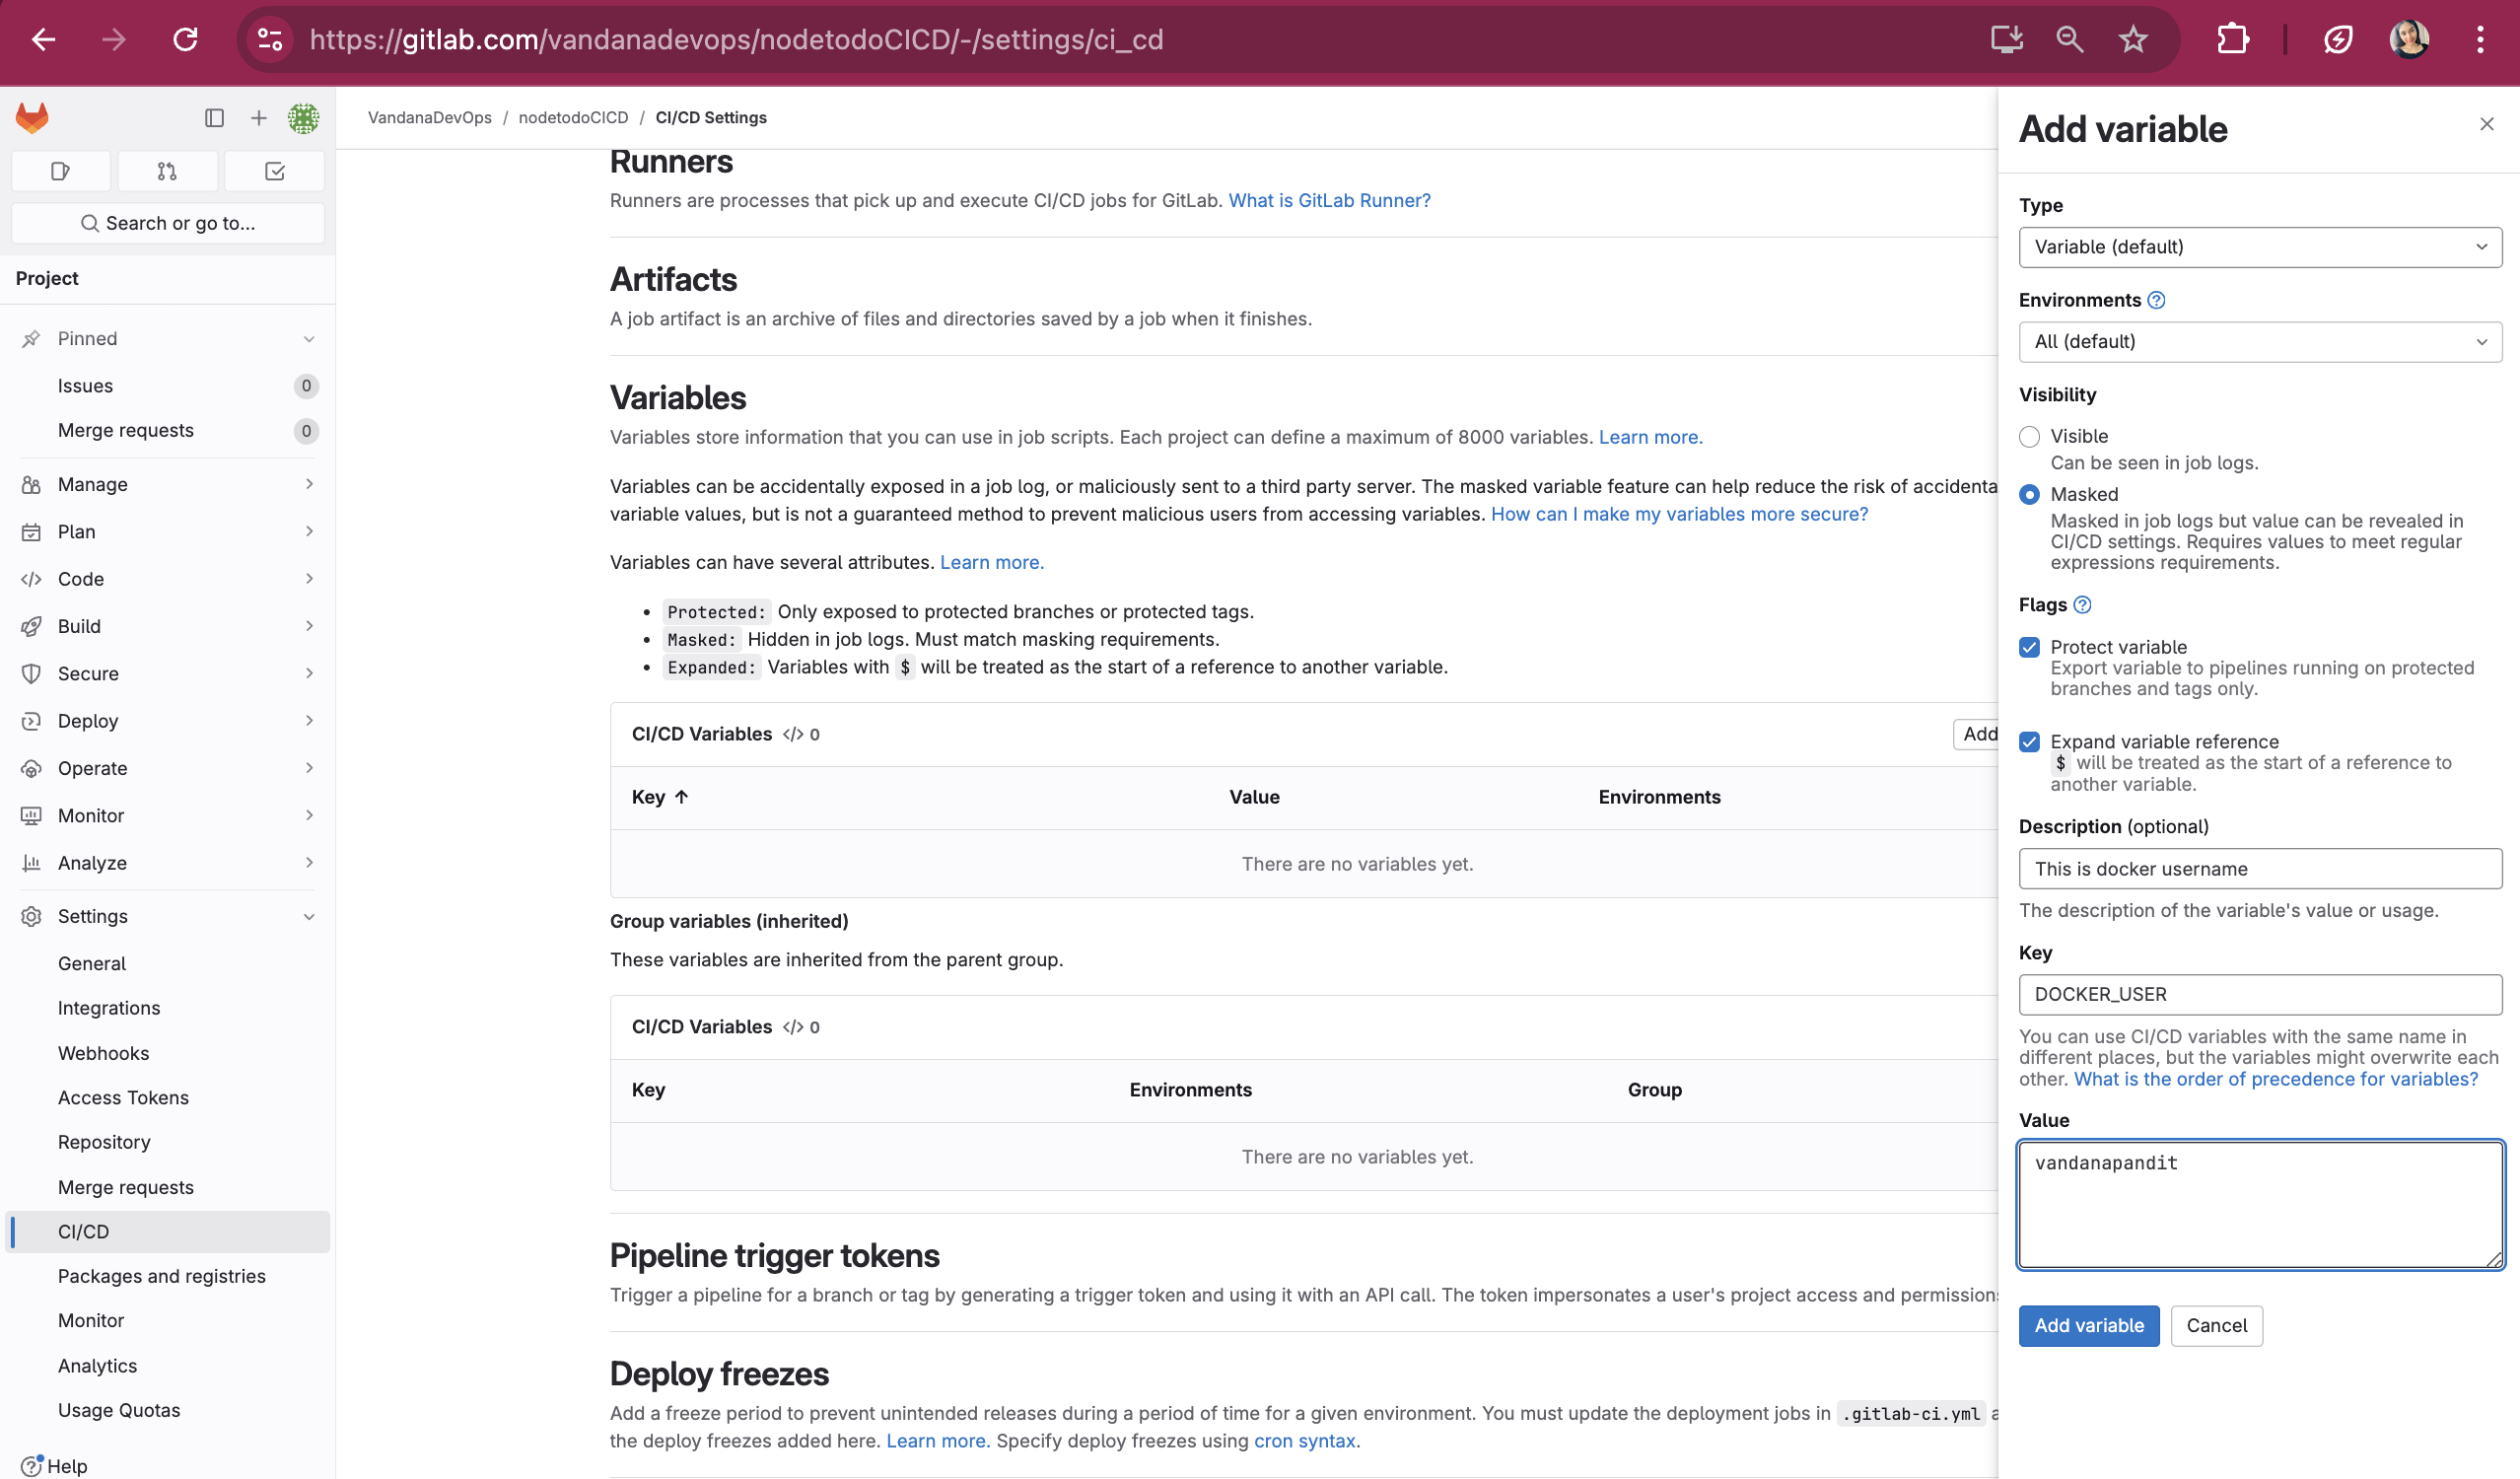
After you click on Add variable in the right panel the variable will be added
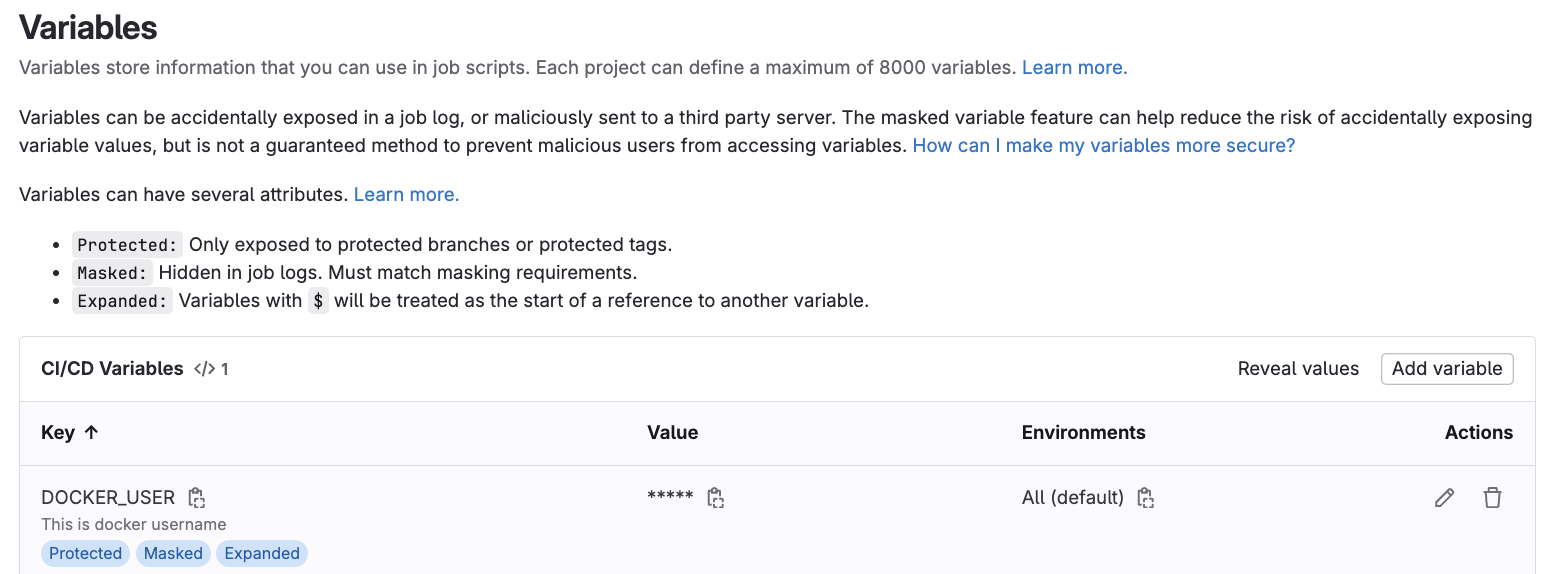
Now let's use this environment variable in our .gitlab-ci.yml file
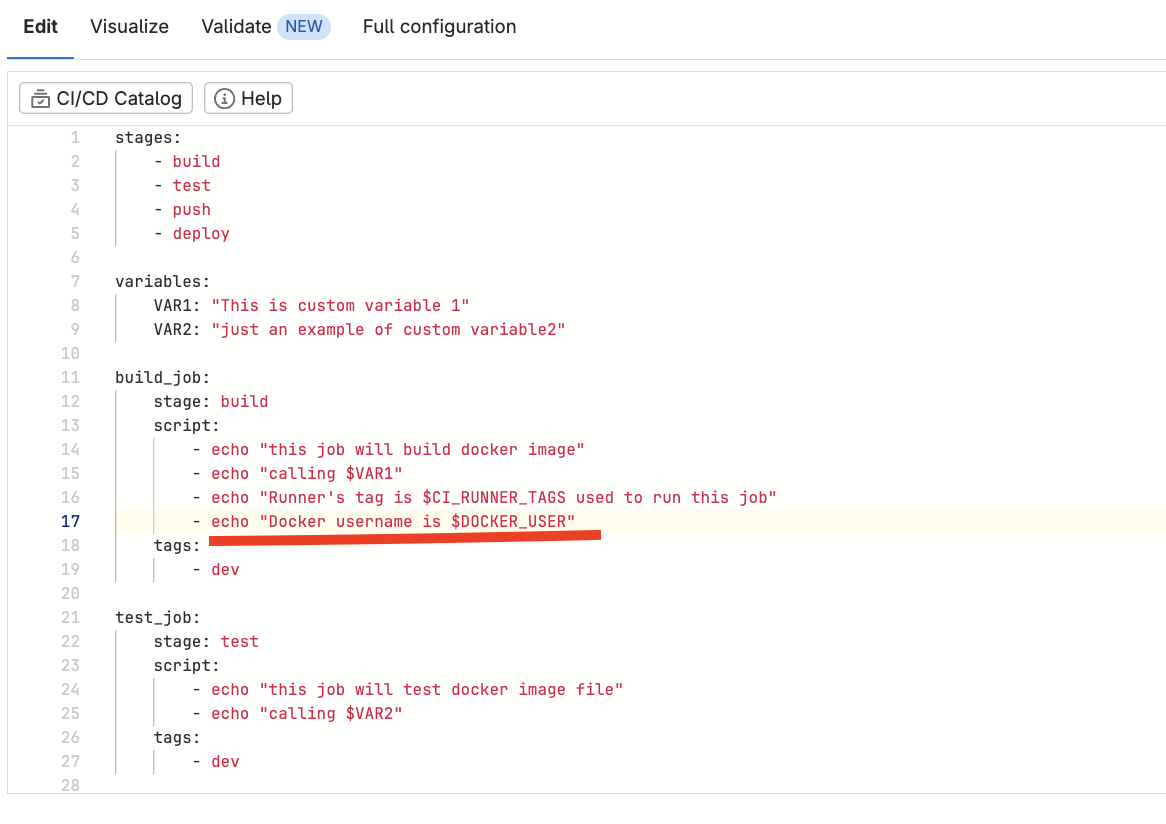
Let's check the build_job log :
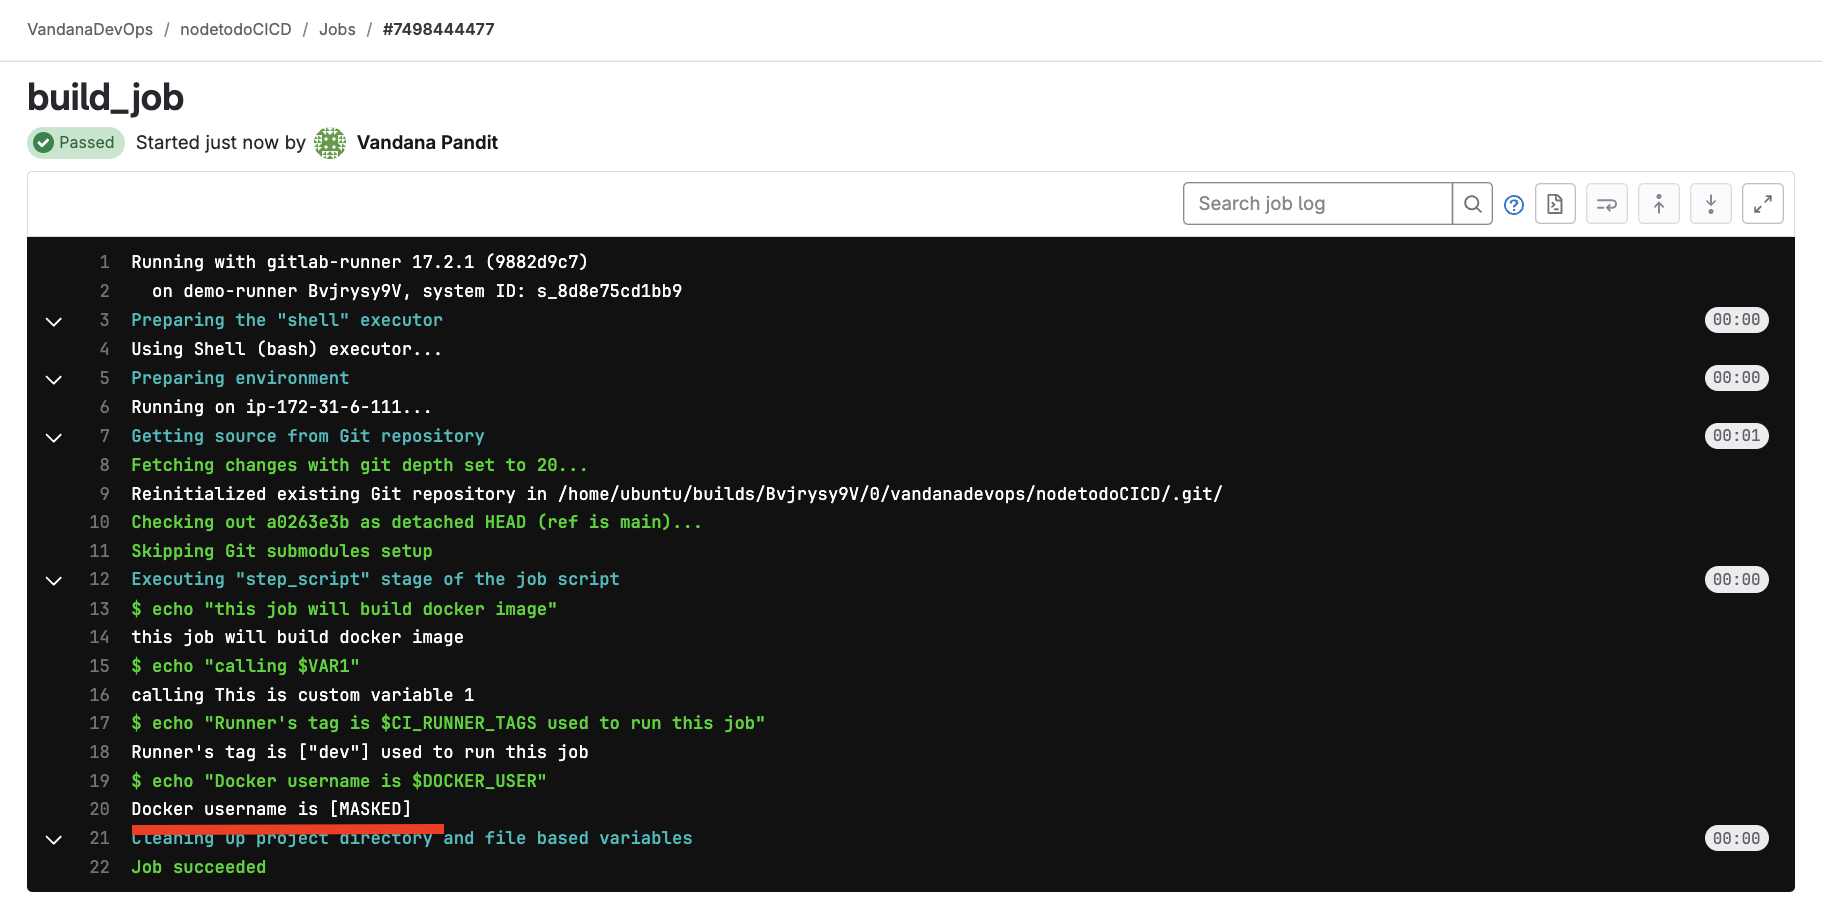
The variable's value is masked because we specified in the environment variable settings to make the variable masked and protected.
Artifacts:
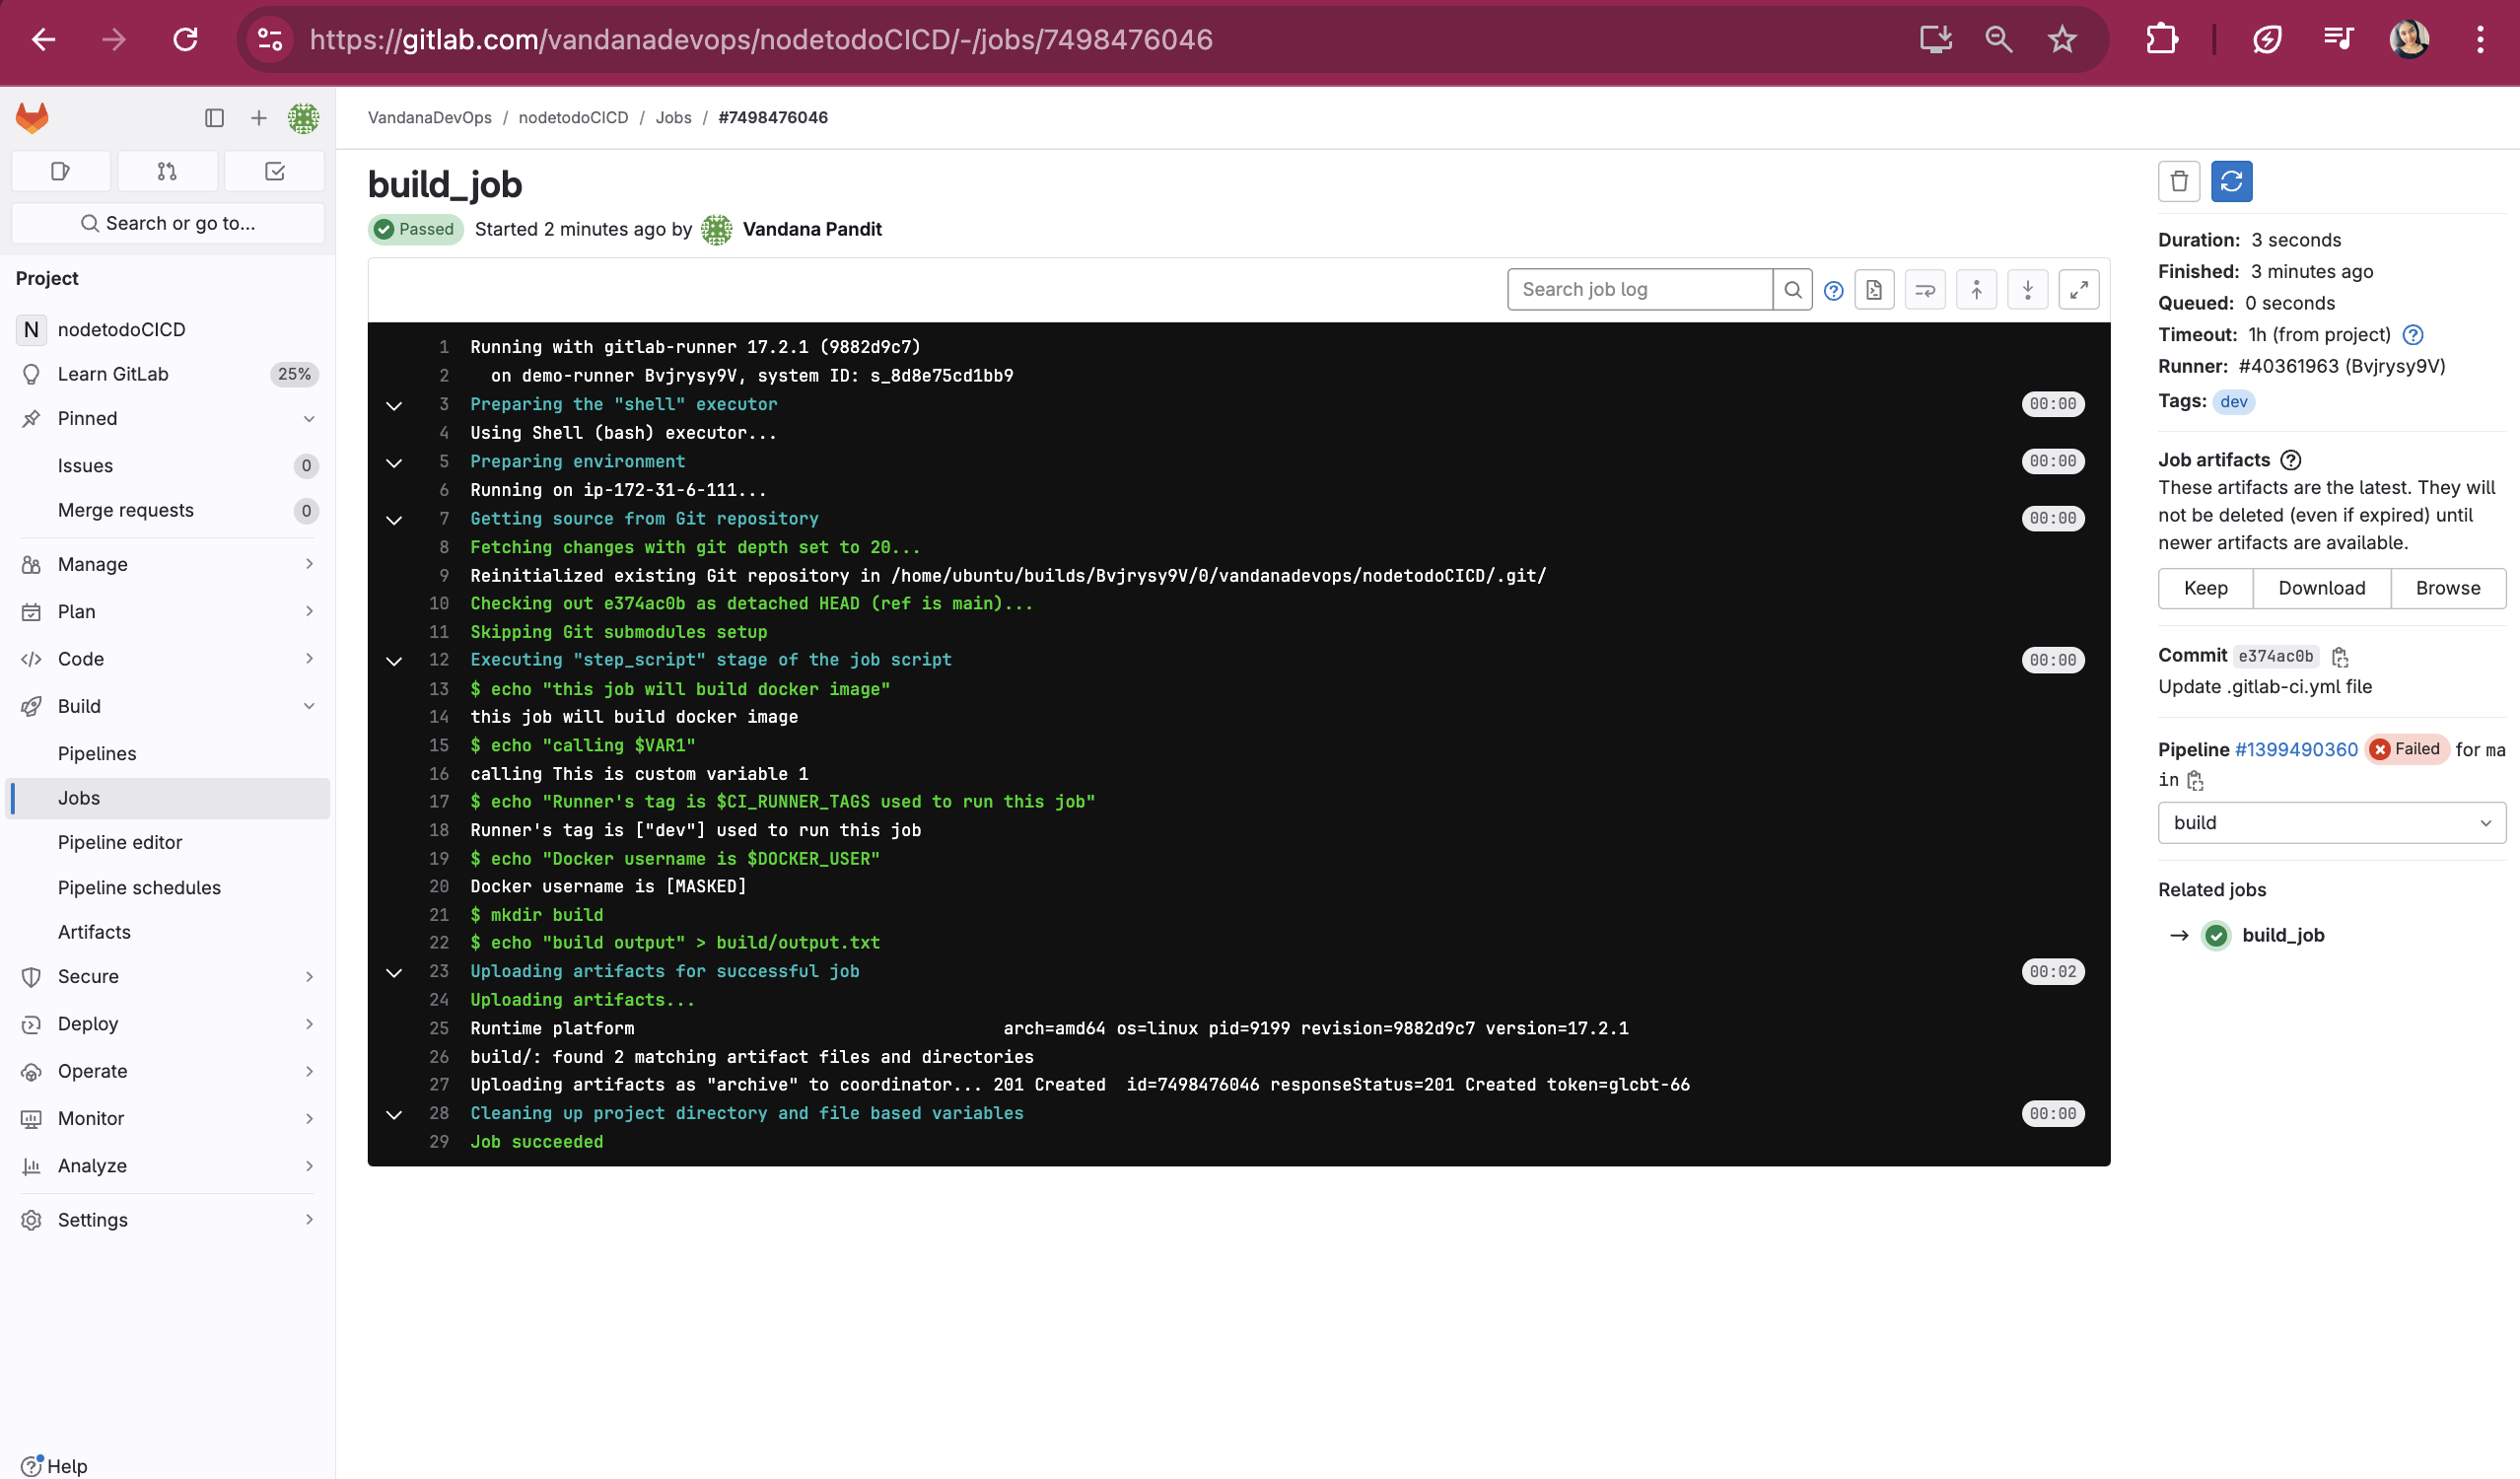
Artifacts in GitLab CI/CD are files generated by your jobs that you want to save and access later. They can be used for a variety of purposes, such as storing build outputs, test results, logs, or other data that you want to pass between jobs or download after a pipeline has run.
Artifacts are defined in the .gitlab-ci.yml file within the job that generates them. Here is a basic example:
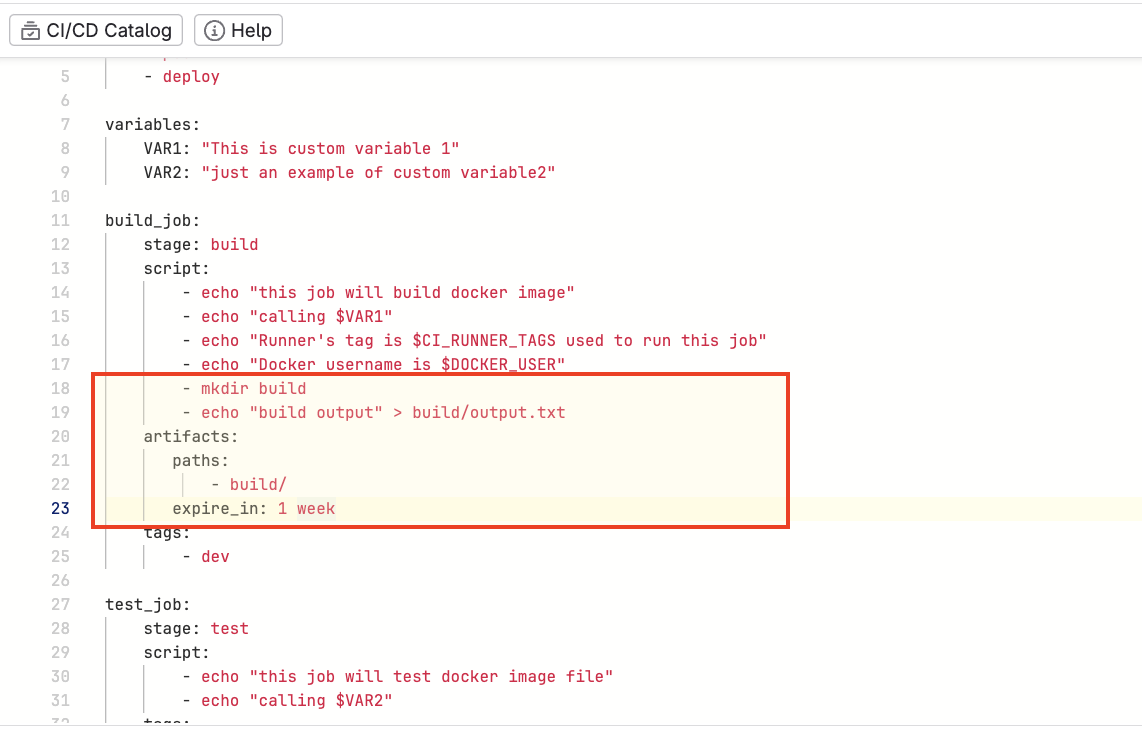
In this example the build_job generates an artifact, lets see the logs
Downloading Artifacts
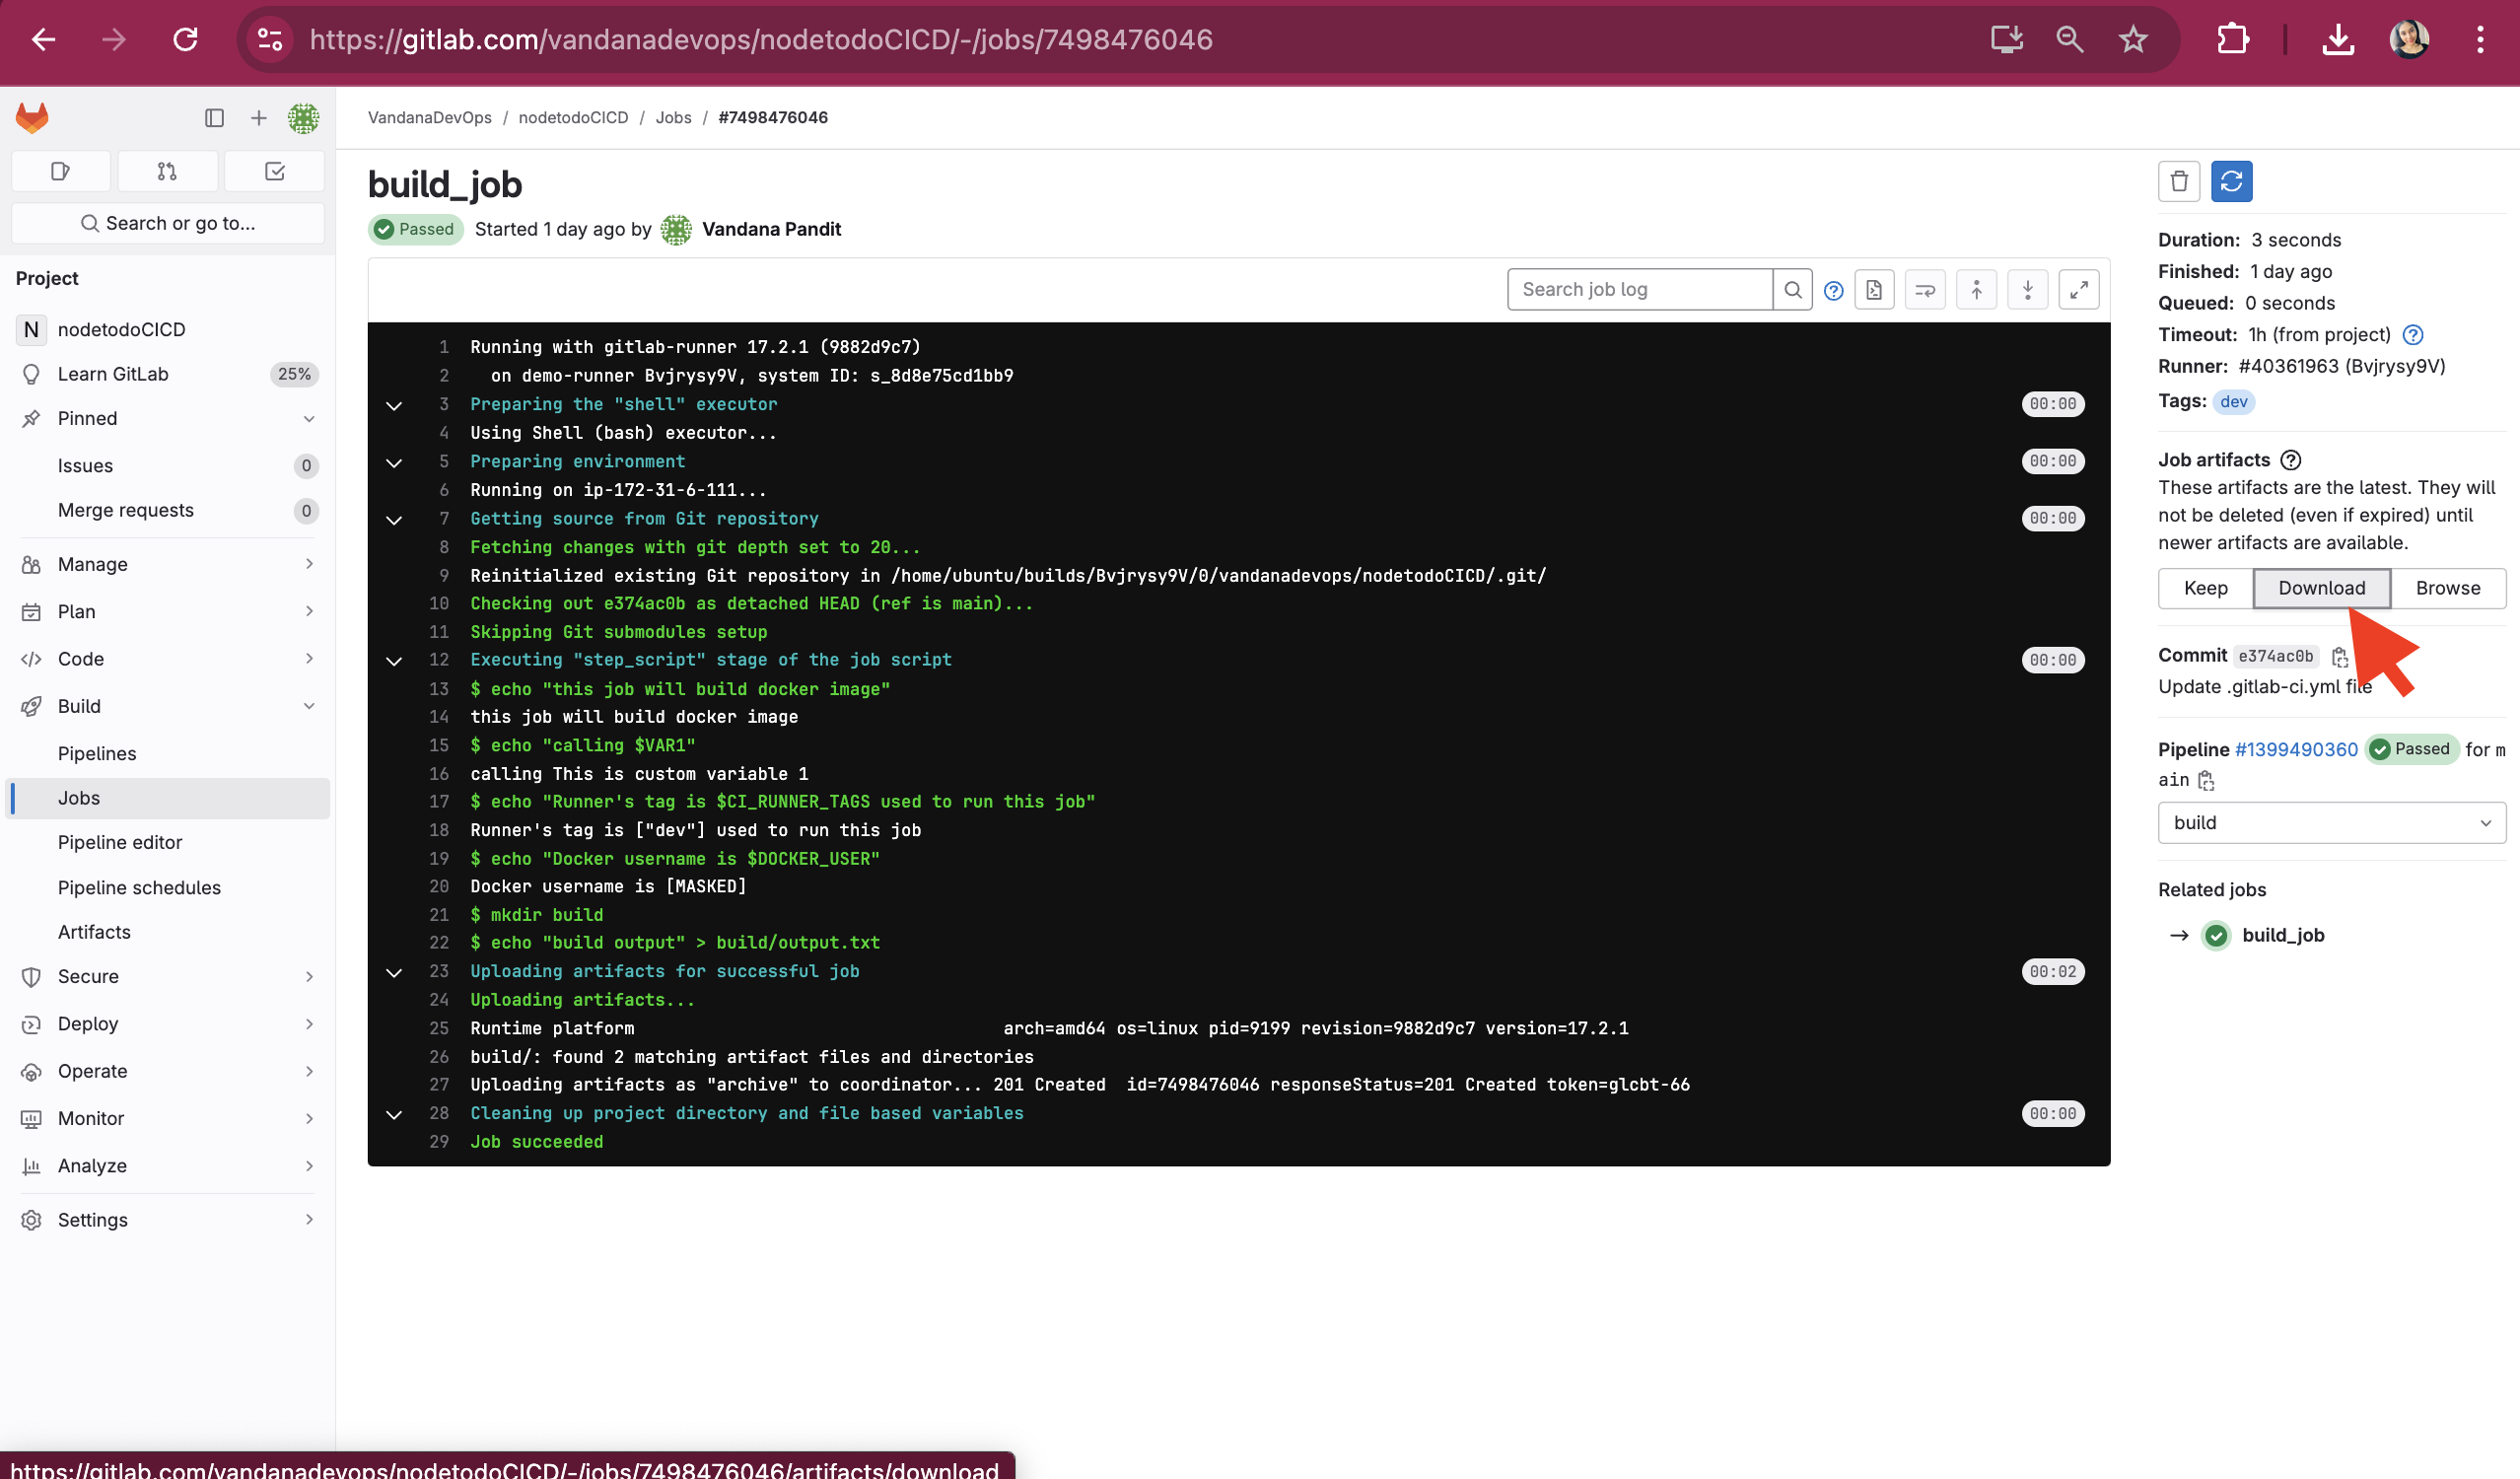
Artifacts can be downloaded from the GitLab UI. After a pipeline has run:
Go to Build > Pipelines.
Click on the pipeline you are interested in.
Click on the job that produced the artifacts.
There will be a download link for the artifacts if they are available.


Subscribe to my newsletter
Read articles from Vandana Pandit directly inside your inbox. Subscribe to the newsletter, and don't miss out.
Written by

Vandana Pandit
Vandana Pandit
👩💻 I am currently working as Infrastructure Engineer. 🔭 I’m currently preparing for CKA certification. 📝 Do check my linked post I keep posting articles related to DevOps