Deploying Blazor Apps Behind Load Balancers: Common Issues and Fixes
 Peter Makafan
Introduction
One of my recent projects involved building a client-side application, and given my familiarity with C#, I chose to use Blazor as the client-side technology to use in delivering this task. Blazor is a web framework that allows you to build interactive web UIs using C# instead of JavaScript. It offers two main hosting models: Blazor Server and Blazor WebAssembly.
Blazor Server vs WebAssembly
Blazor Server offers tighter control and potentially stronger security for sensitive logic on the server, while Blazor WebAssembly executes code on the client-side, introducing potential security risks if not handled carefully. Due to the critical security requirements of this task, I opted for Blazor Server to benefit from its tighter control over client-side execution.
Blazor Server relies on SignalR over WebSockets to manage UI updates and user interactions. Each client has a "circuit" on the server, which maintains the client's state. These circuits can survive temporary network issues, allowing the client to reconnect when the connection is lost, this keeps the app responsive.
After finalizing the task and preparing for deployment in a load-balanced environment, I faced a couple of issues.

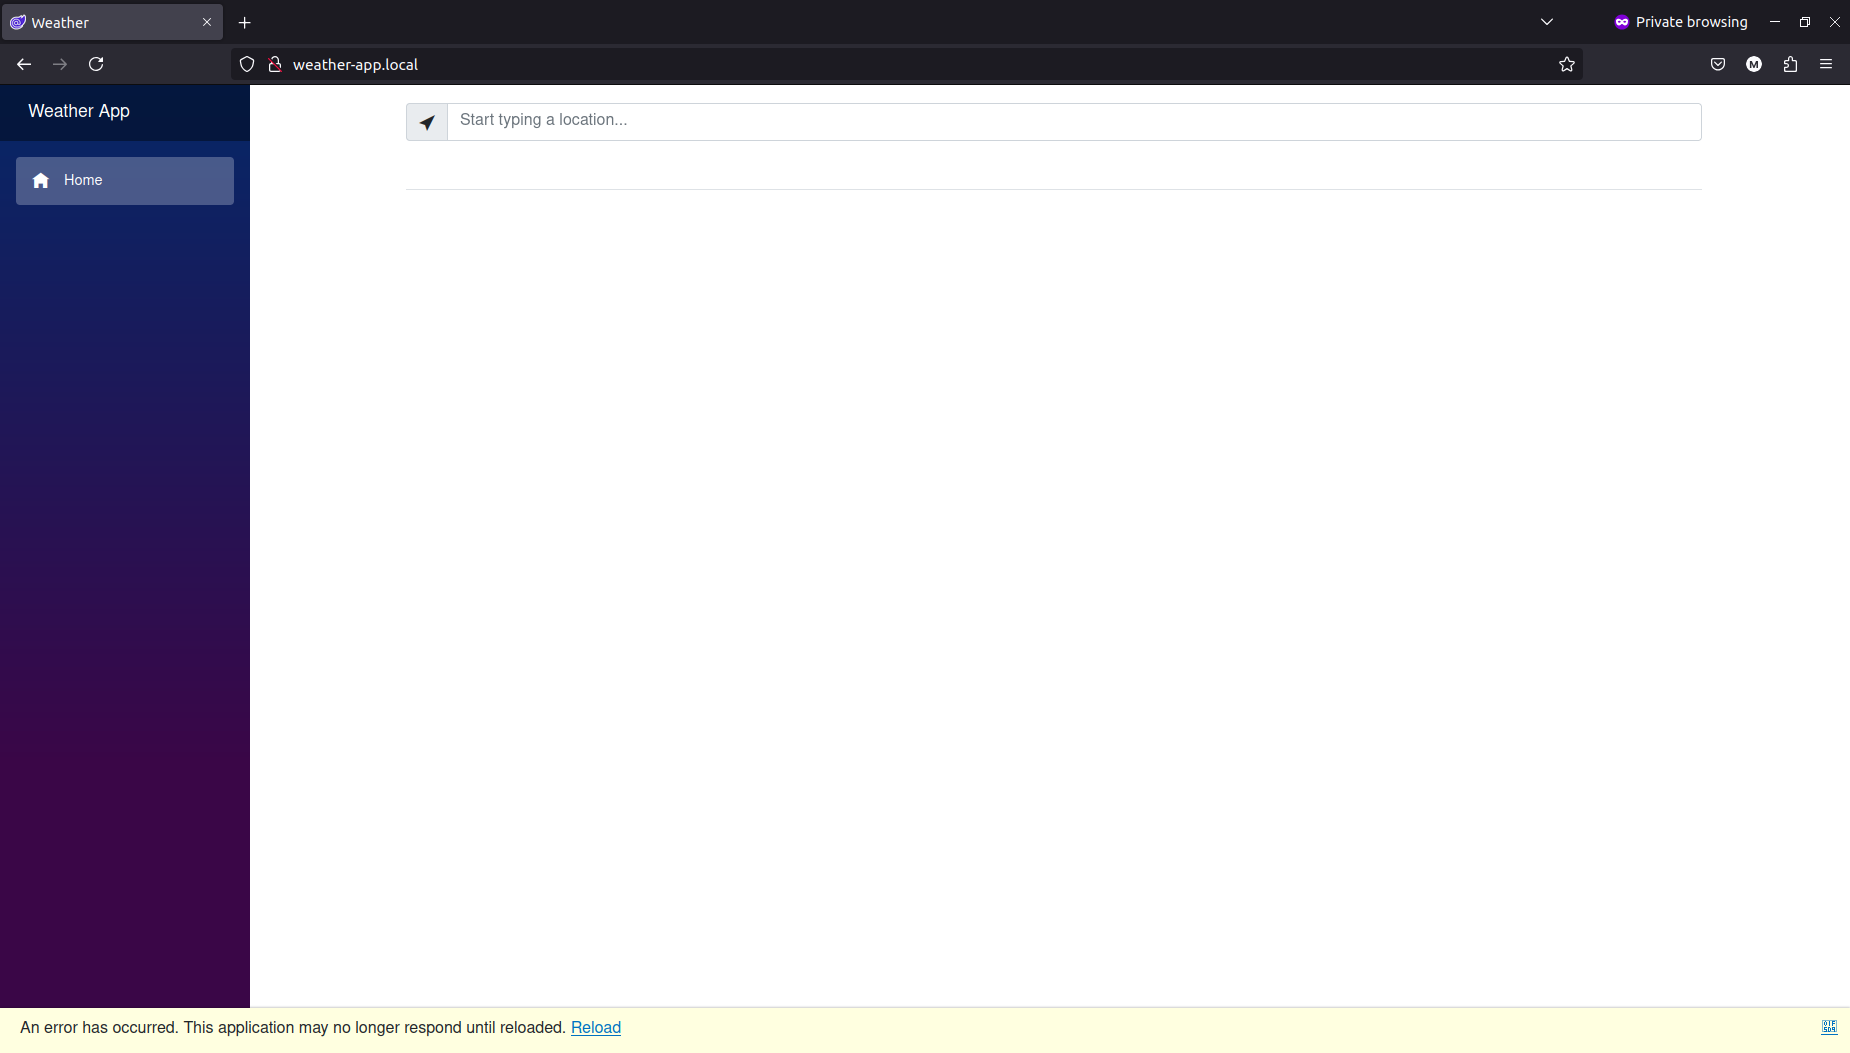
Inspecting browser debugging tools would display connection errors similar to:
Firefox can’t establish a connection to the server at ws://weather-app.local/_blazor?id=AxMKuw-lbFFzFnf-4YocCQ. blazor.server.js:1:50787
Common Issues
Stateful WebSockets vs. Stateless HTTP
Unlike HTTP, which is stateless and requires a new request for each interaction, WebSocket is a stateful protocol built on TCP. This means after an initial handshake using HTTP, the connection is upgraded to a persistent, two-way channel (full-duplex). This allows the server to proactively push data to subscribed clients, eliminating the need for polling or long polling.
The Challenge of Scalability:
WebSocket's stateful-ness presents a challenge for scalability in multi-server environments. Each client connection needs to be handled by the same server process that established the initial connection. This is fine for single-server deployments, but not ideal for distributed applications.
Data Protection Keys
ASP.NET Core's built-in Data Protection library safeguards sensitive data in Blazor applications that require authentication. Data Protection uses private key cryptography to encrypt and sign sensitive data, ensuring it is only accessible by the application. The framework secures data commonly used by various authentication implementations, such as authentication cookies and anti-forgery tokens. The Data Protection keys are critical secrets for Blazor apps requiring authentication because they encrypt substantial amounts of sensitive data at rest and prevent tampering with sensitive data exchanged through the browser.
In load-balanced environments, maintaining consistent data protection keys across multiple instances is crucial for seamless authentication and data integrity. If not managed properly, each instance might have its own set of keys, leading to authentication failures and data inconsistencies.
Fixes
Azure SignalR Service
Azure SignalR Service simplifies the process of adding real-time web functionality to applications over HTTP. This real-time functionality allows the service to push content updates to connected clients, such as a single page web or mobile application. As a result, clients are updated without the need to poll the server, or submit new HTTP requests for updates.
While Azure SignalR Service offers a compelling solution for real-time communication, it wouldn't be a suitable fit in this case since the company's infrastructure isn't hosted on Azure. Let's explore alternative options that can integrate seamlessly with their existing setup.
Self hosting SignalR
While self-hosting SignalR offers flexibility, deploying it outside Azure (e.g., managed Kubernetes or servers) introduces complexities in scaling, high availability, and managing components like load balancers.
Sticky Sessions
One approach to address SignalR scalability issue is using "sticky sessions" or "session affinity" with a load balancer. This ensures that subsequent requests from a client are routed back to the same server that handled the initial handshake, maintaining the connection state.
Typically, load balancers route each request independently to a registered target, using a selected load-balancing algorithm. However, by activating the sticky session feature (also known as session affinity), the load balancer can associate a user's session with a specific target server. This ensures that all requests from the user within a session are forwarded to the same server.
Most load balancers offer detailed documentation on implementing sticky sessions.
The following Kubernetes Ingress configuration demonstrates how to implement sticky sessions:
Azure Key Vault to Persist Data Protection Keys
Azure Key Vault is a secure and managed service for storing cryptographic keys, secrets, and certificates. By leveraging Key Vault to store and manage data protection keys, we can effectively address the challenges posed by load-balanced environments.
Persistent Volumes or Shared mounted drives to Persist Data Protection Keys
Using Persistent Volumes (PVs) could be a potential solution for persisting data protection keys. PVs offer a mechanism to maintain data beyond the lifecycle of a pod or container, ensuring data protection keys are preserved even if the application restarts or scales across multiple instances.
However, PVs inherently pose security risks. They provide file-level access, making data protection keys vulnerable to exposure if unauthorized individuals gain access to the PV. Also the keys are stored in plaintext, increasing the risk of theft.
Scaling SignalR out with Redis backplane
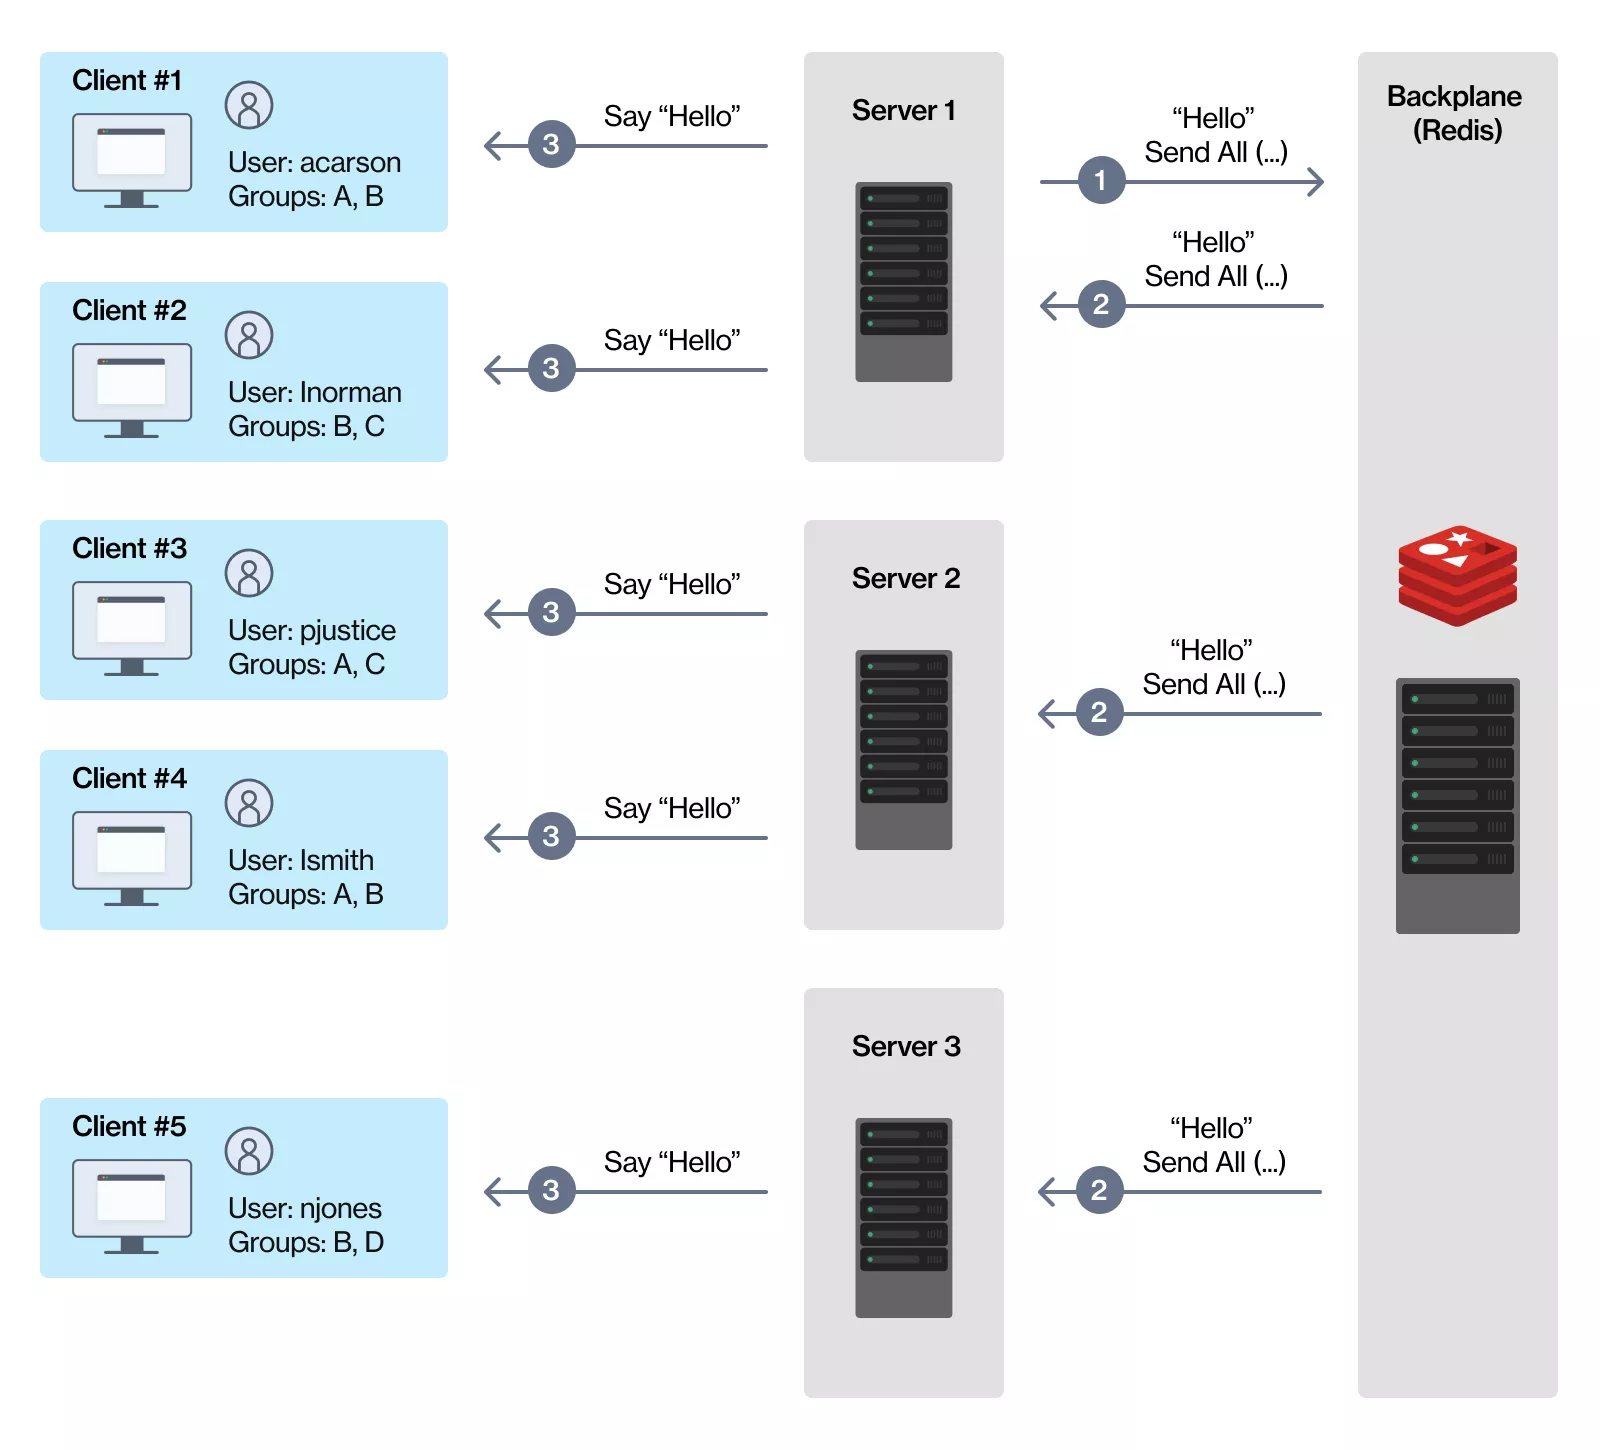
Scaling a Blazor Server application involves adding a few components to your system architecture. After adding a load balancer, you may consider using the Redis backplane to pass SignalR messages between your servers and keep them in sync. This is crucial because SignalR servers operate independently and lack awareness of each other's connections.
Why Redis?
Redis is an open-source in-memory data structure store, used as a distributed in-memory key-value database, that supports a messaging system with a publish/subscribe model.
The Redis backplane allows the hubs to exchange information between the instances of SignalR Hubs connected to it. When a client is connected to one instance of the hub and another client that we want to send a message to is connected to a different hub instance, the Redis backplane will transfer the message to the correct instance of the application so it can be sent to the right client.
Still, it is necessary to add sticky sessions if you are scaling with a backplane to prevent SignalR connections from switching servers.

Hands-On Tutorial: Deploying a Blazor Server App to Kubernetes

This tutorial will guide you through the process of deploying a Blazor server app on Kubernetes .
Prerequisites
Kubernetes cluster (Docker Desktop,minikube, GKE, EKS, etc.)
kubectlCLI tool configured to interact with your clusterBasic knowledge of Kubernetes concepts
Steps
Clone the Repository from Github
git clone https://github.com/makafanpeter/blazor-k8-deployment.git
Build Docker image
In this step, we'll use the docker build command to create a Docker image for our Blazor Weather App.
docker build -f ./src/WeatherApp/Dockerfile . -t blazor-k8-deployment/weather-app:latest
Set Up Namespace
Create a namespace for your Weather App to isolate it from other applications:
kubectl apply -f deployment/weatherapp-namespace.yaml
kubectl config set-context --current --namespace=weather-app
Create Secrets
Create secrets for storing sensitive information:
kubectl apply -f deployment/weatherapp-secret.yaml
Configure Persistent Storage
Set up persistent storage for your WeatherApp:
kubectl apply -f deployment/weatherapp-persistent.yaml
Deploy Weather App
Deploy the main application using the deployment file:
kubectl apply -f deployment/weatherapp-deployment.yaml
Set Up NGINX Ingress Controller
To manage Ingress resources, set up the NGINX Ingress Controller:
Minikube
If you are using minikube, enable the ingress addon:
minikube addons enable ingress
Other Environments
For other environments, apply the mandatory resources for NGINX Ingress Controller:
kubectl apply -f https://raw.githubusercontent.com/kubernetes/ingress-nginx/main/deploy/static/provider/cloud/deploy.yaml
Wait for the NGINX Ingress Controller pods to be up and running:
kubectl get pods --namespace ingress-nginx
If you want to access the ingress controller locally, you can set up port forwarding:
kubectl -n ingress-nginx --address 0.0.0.0 port-forward svc/ingress-nginx-controller 80
Apply Ingress Configuration
kubectl apply -f deployment/weatherapp-ingress.yaml
Configuration
Configure Weather App to use only Sticky Session
Navigate to the sticky-session directory and apply the configuration files:``
cd deployment/sticky-session
kubectl apply -f weatherapp-configmap.yml
Configure Weather App to use Redis as a Backplane
Navigate to the redis directory and apply the configuration files:
cd deployment/redis
kubectl apply -f weatherapp-configmap.yaml
kubectl apply -f weatherapp-redis.yaml
File Descriptions
weatherapp-namespace.yaml: Defines the namespace for the WeatherApp.weatherapp-secret.yaml: Stores sensitive information like database passwords.weatherapp-persistent.yaml: Configures persistent storage for the application.weatherapp-deployment.yaml: Manages the deployment of the WeatherApp.weatherapp-ingress.yaml: Manages ingress for the weather app.redis/weatherapp-configmap.yaml: Configures the Redis setup for the WeatherApp.redis/weatherapp-redis.yaml: Deploys the Redis instance.sticky-session/weatherapp-configmap.yaml: Configures sticky session settings.
Test the Application
To test if the application is properly set up, you can use curl to send a request and verify the response. If the response status is 200, return an error:
response=$(curl --location -s -o /dev/null -w "%{http_code}" 'http://weather-app.local/')

if [ "$response" -eq 200 ]; then
  echo "Error: Received status 200"
  exit 1
else
  echo "Success: Received status $response"
fi
Clean up
To remove the WeatherApp from your cluster, delete the resources in reverse order
cd deployment
kubectl delete -f sticky-session/weatherapp-configmap.yaml
kubectl delete -f redis/weatherapp-redis.yaml
kubectl delete -f redis/weatherapp-configmap.yaml
kubectl delete -f weatherapp-ingress.yaml
kubectl delete -f weatherapp-deployment.yaml
kubectl delete -f weatherapp-persistent.yaml
kubectl delete -f weatherapp-secret.yaml
kubectl config set-context --current --namespace=default
kubectl delete -f weatherapp-namespace.yaml
Conclusion
Successfully deploying a Blazor Server app behind a load balancer involves addressing several potential challenges. Understanding and addressing issues such as stateful WebSockets connectivity and data protection key management are essential for implementing effective solutions. Also, optimizing load distribution is critical for achieving scalability.
While sticky sessions may improve user experience, they can also undermine the load balancer's purpose by concentrating traffic on specific servers, leading to uneven load distribution. Implementing a fix like setting expiration times for sticky session cookies can mitigate these risks and ensure optimal performance for your Blazor Server application in a load-balanced environment.
By carefully considering these factors and implementing appropriate solutions, you can ensure a robust and scalable deployment for your Blazor Server app.
References
Subscribe to my newsletter
Read articles from Peter Makafan directly inside your inbox. Subscribe to the newsletter, and don't miss out.
Written by

Peter Makafan
Peter Makafan
Hi, I'm Peter, a Senior Software Engineer and independent Technology consultant, specializes in building scalable, resilient, and distributed software systems. With over a decade of experience in fintech, ecommerce, and digital marketing, he brings a unique perspective to technology solutions. His academic background in Artificial Intelligence and Computer Science fuels his passion for cutting-edge technologies like financial technology, robotics, and cloud-native development.