Jenkins Build Trigger & Queuing jobs (Upstream, Downstream)
 Dinesh Kumar K
Build Trigger
Jenkins build triggers are mechanisms that automatically initiate a build job based on specific conditions or events. These triggers can be time-based, event-driven, or manually activated. By configuring build triggers, you can reduce manual intervention, accelerate development cycles, and ensure that your builds are consistently up-to-date with the latest code changes.
I will explain about Periodic Trigger & Remote trigger
Periodic Trigger
Periodic triggers in Jenkins allow you to schedule builds to run at specific intervals or times. This feature is particularly useful for tasks that need to be performed regularly, such as nightly builds, scheduled testing, or periodic deployments.
Step by step configuration :
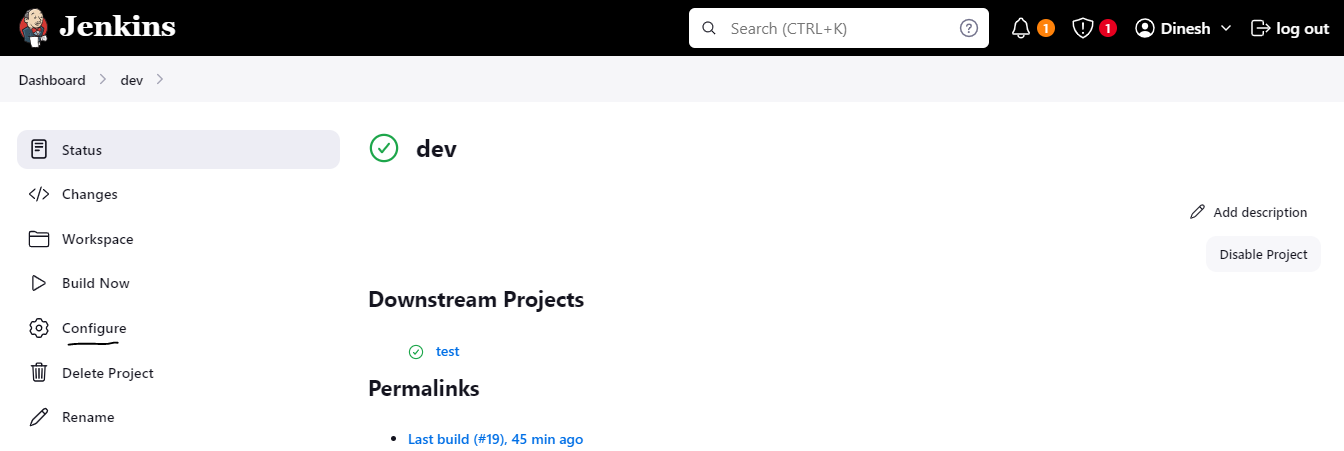
Go to any job > Click on "Configure"
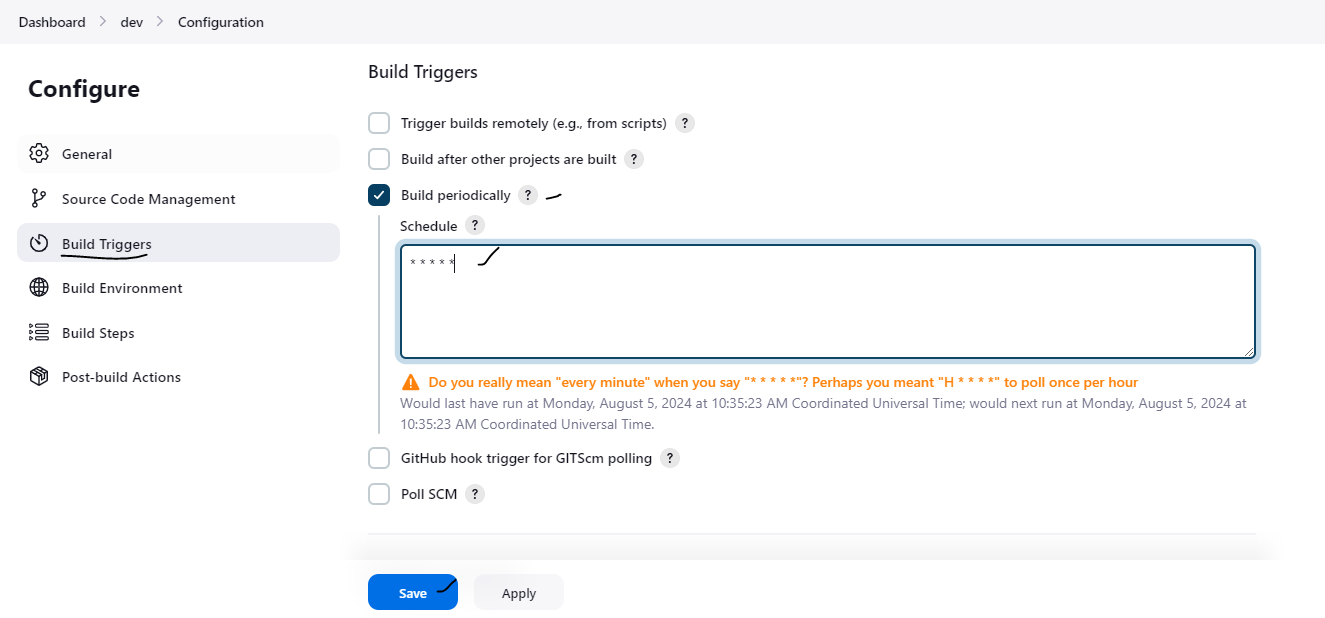
Click on "Build trigger" > Click on "Build periodically" > In the schedule, Enter Cron Syntax > Click save
i have mentioned "* * * * *" it means, Every minute
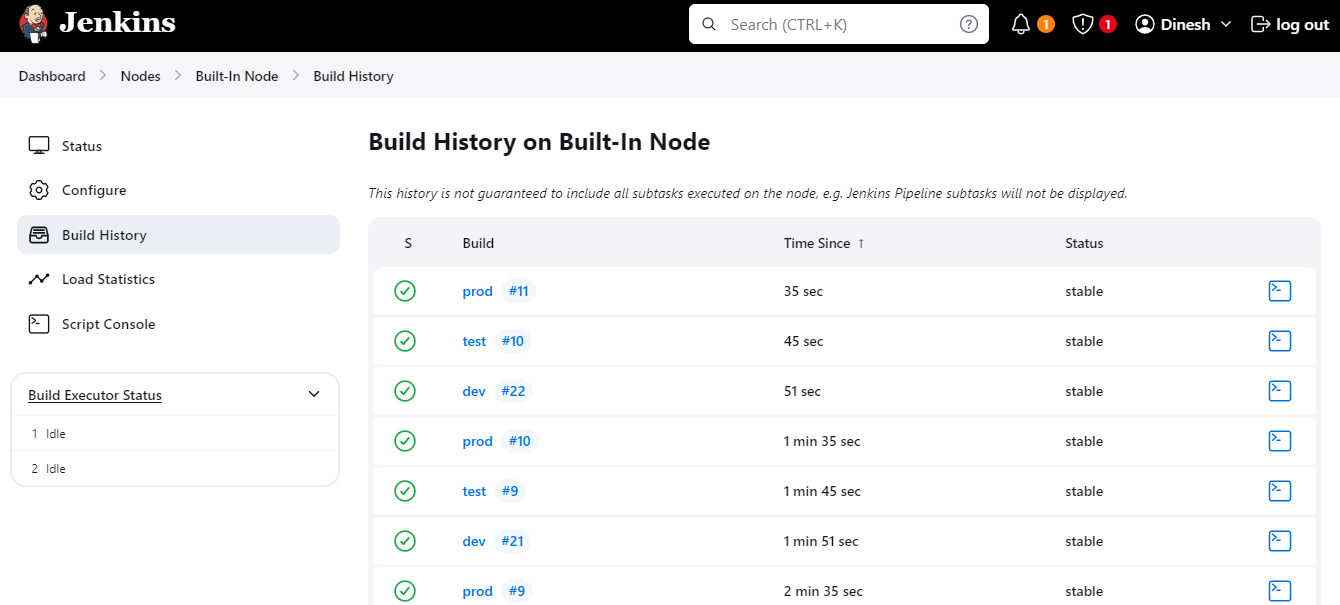
Check the Build History: After configuring, you can verify if the build triggers as expected by checking the build history of the job
Now, Every minutes, Jenkins automatically executes the jobs.
Remote trigger
Remote triggers in Jenkins allow you to start a build job from an external system, script, or web service. This feature is useful for integrating Jenkins with other tools, automating builds based on external events, or initiating builds programmatically.
Go to any job > Click on "Configure"

Click on "Build trigger: > Select Trigger build remotely > Enter Authentication toke (Any) > Copy the mentioned URL (JENKINS_URL/job/dev/build?token=TOKEN_NAME) > Click Save
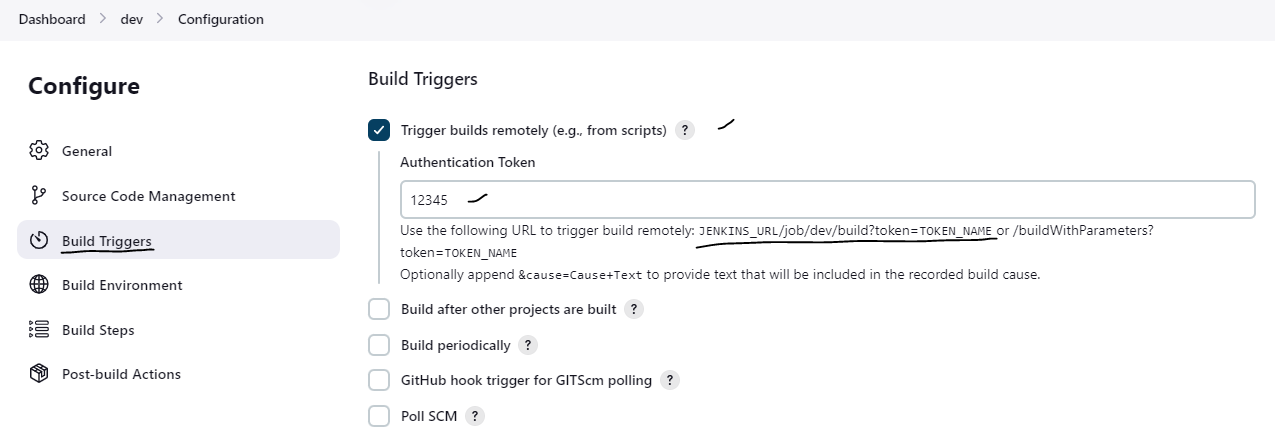
Need to replace JENKINS URL and TOKEN NAME
JENKINS_URL/job/dev/build?token=TOKEN_NAME
http://3.110.224.126:8080/job/dev/build?token=12345
Now hit this link in your browser from anywhere. Trigger will start immediately. No need jenkins credentials

Now, "dev" job build has started
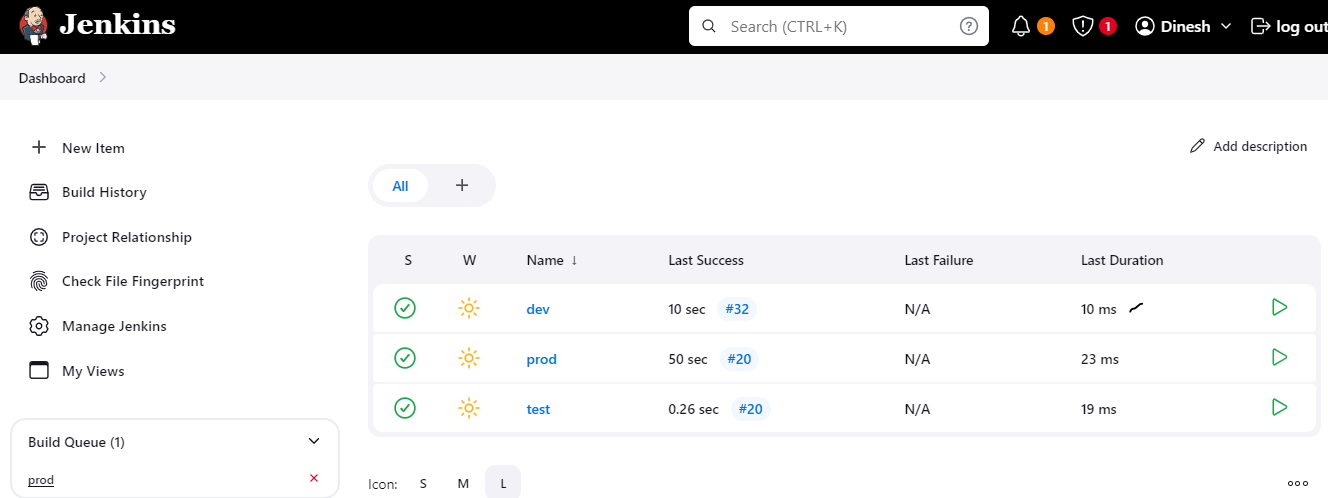
Queuing job step by step configuration
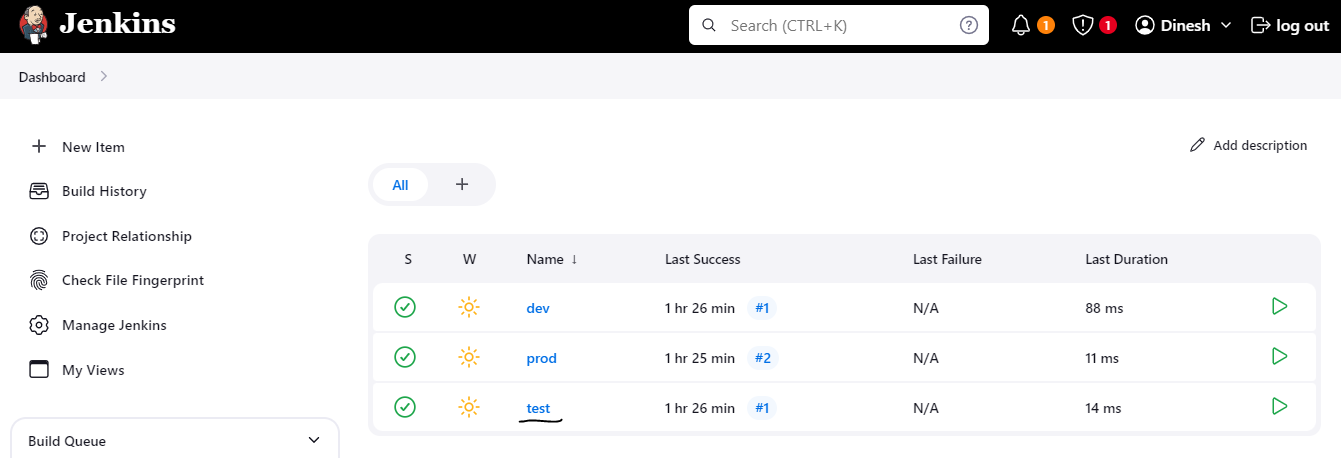
I have created 3 jobs [ dev, test, prod ]
Click on first job "dev"

Click on "Configure"

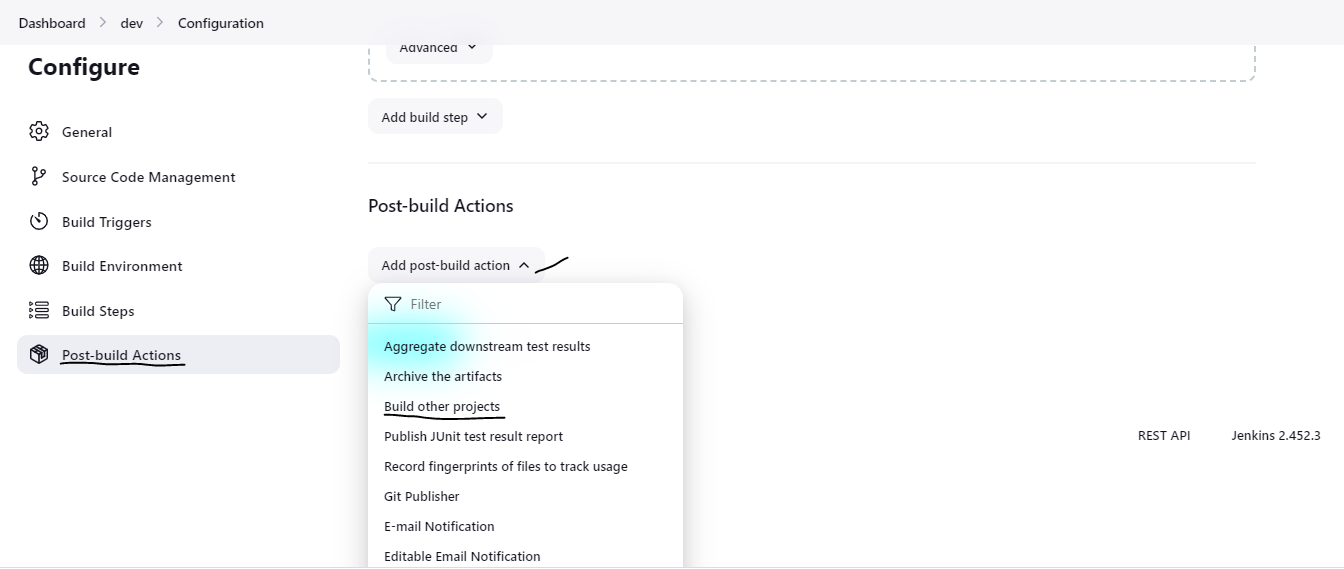
Click on Post build actions > Click add post build action > Select Build other projects
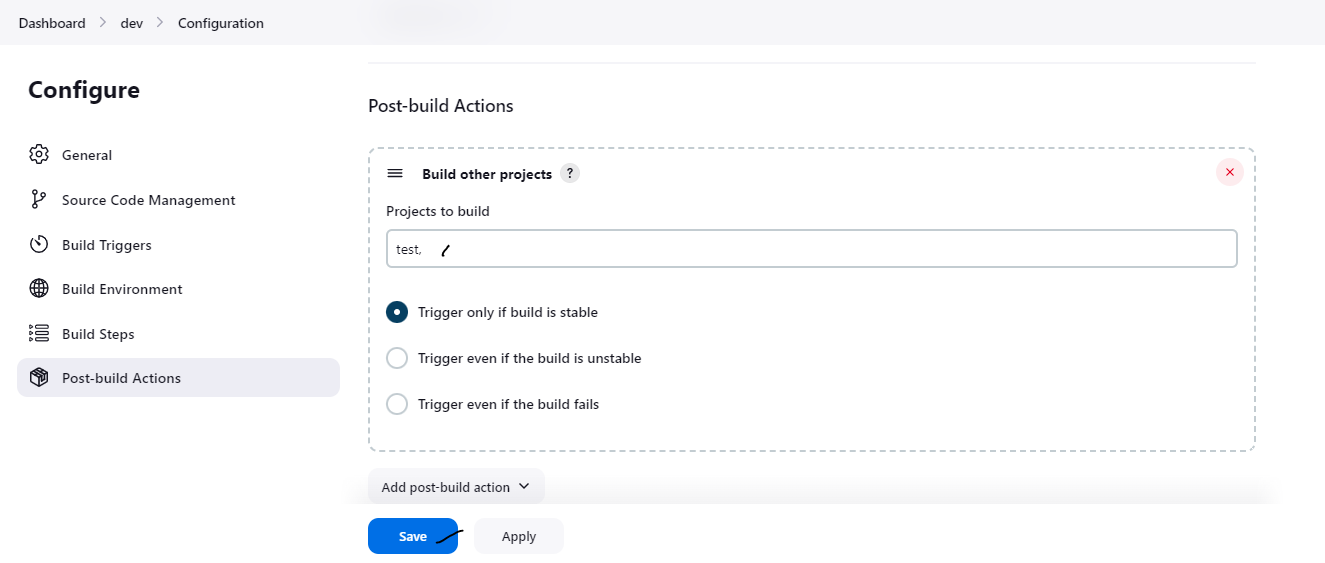
Enter the next job name to be run "test" > Click Save
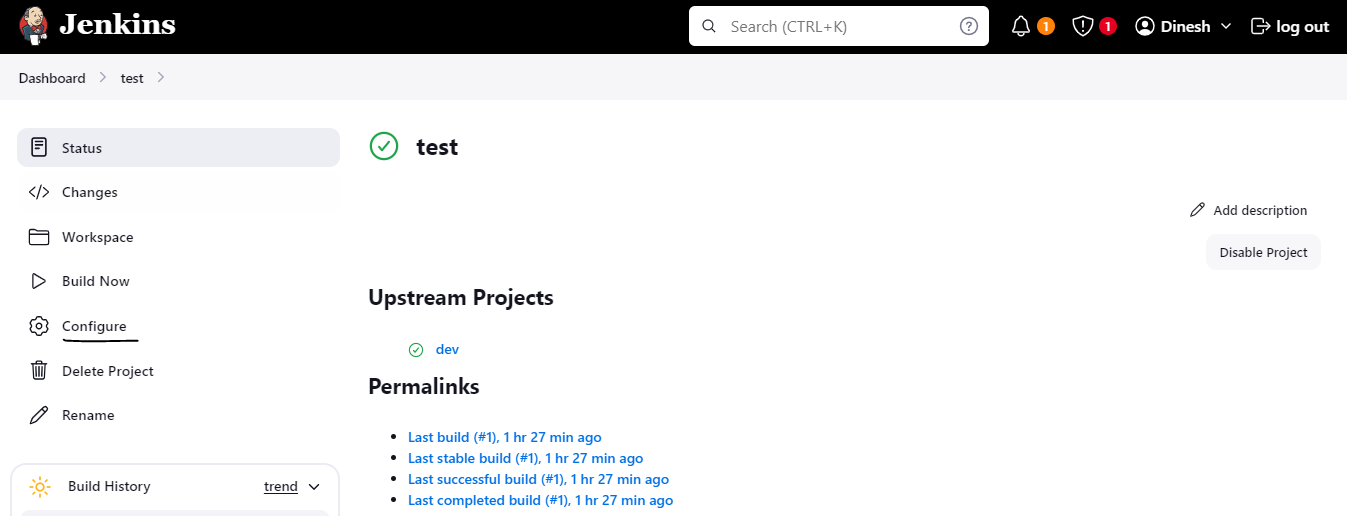
Select the "test" job
Click on "Configure"
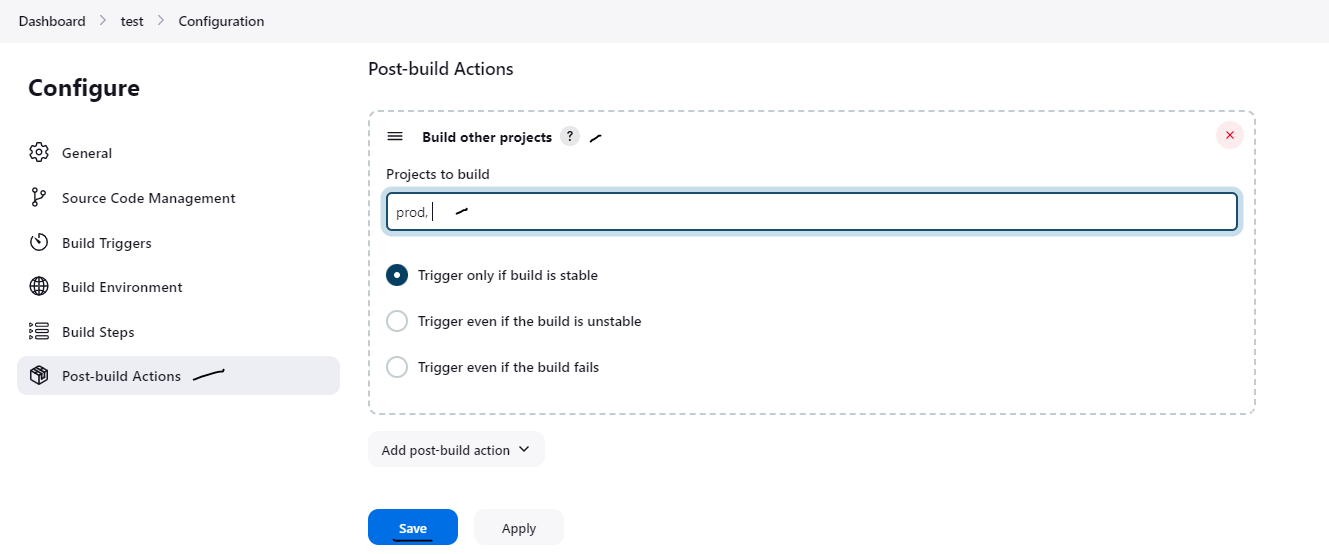
Click on Post build actions > Click add post build action > Select Build other projects
Enter the next job name to be run "prod" > Click Save
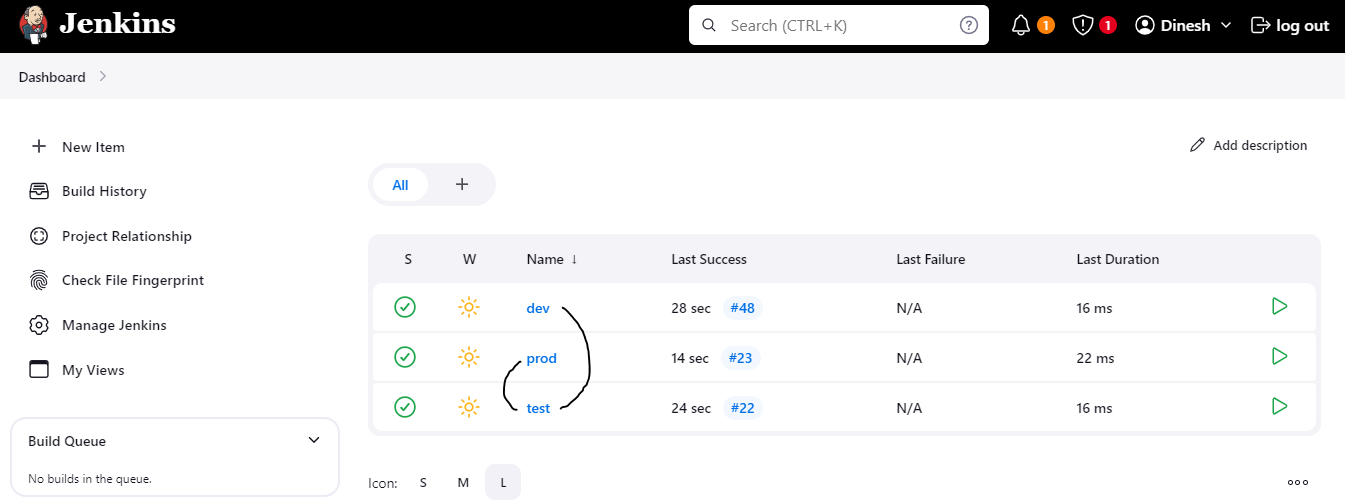
Now queuing is done. dev > test > prod
Now, if you run the dev job, the next two jobs "test and prod" will run one by one automatically.
Subscribe to my newsletter
Read articles from Dinesh Kumar K directly inside your inbox. Subscribe to the newsletter, and don't miss out.
Written by

Dinesh Kumar K
Dinesh Kumar K
Hi there! I'm Dinesh, a passionate Cloud and DevOps enthusiast. I love to dive into the latest new technologies and sharing my journey through blog.