How to Create a Mood-Based Movie Recommendation App with QuickBlox AI and React
 Sayantani Deb
Imagine an app that understands your mood and suggests the perfect movie just for you. With QuickBlox’s powerful AI capabilities, this is not just a dream but a reality you can build. In this guide, we’ll walk you through the entire process, from setting up your QuickBlox account to integrating AI Answer Assist into your React application.
Whether you're a developer looking to add an intelligent touch to your projects or a tech enthusiast eager to explore AI integrations, this step-by-step guide is tailored for you. By the end, you’ll have a fully functional movie recommendation app that leverages AI to provide personalized suggestions.
So, roll up your sleeves, grab your favorite code editor, and let’s get started on building an app that brings movies to life in a whole new way!
Steps to follow:
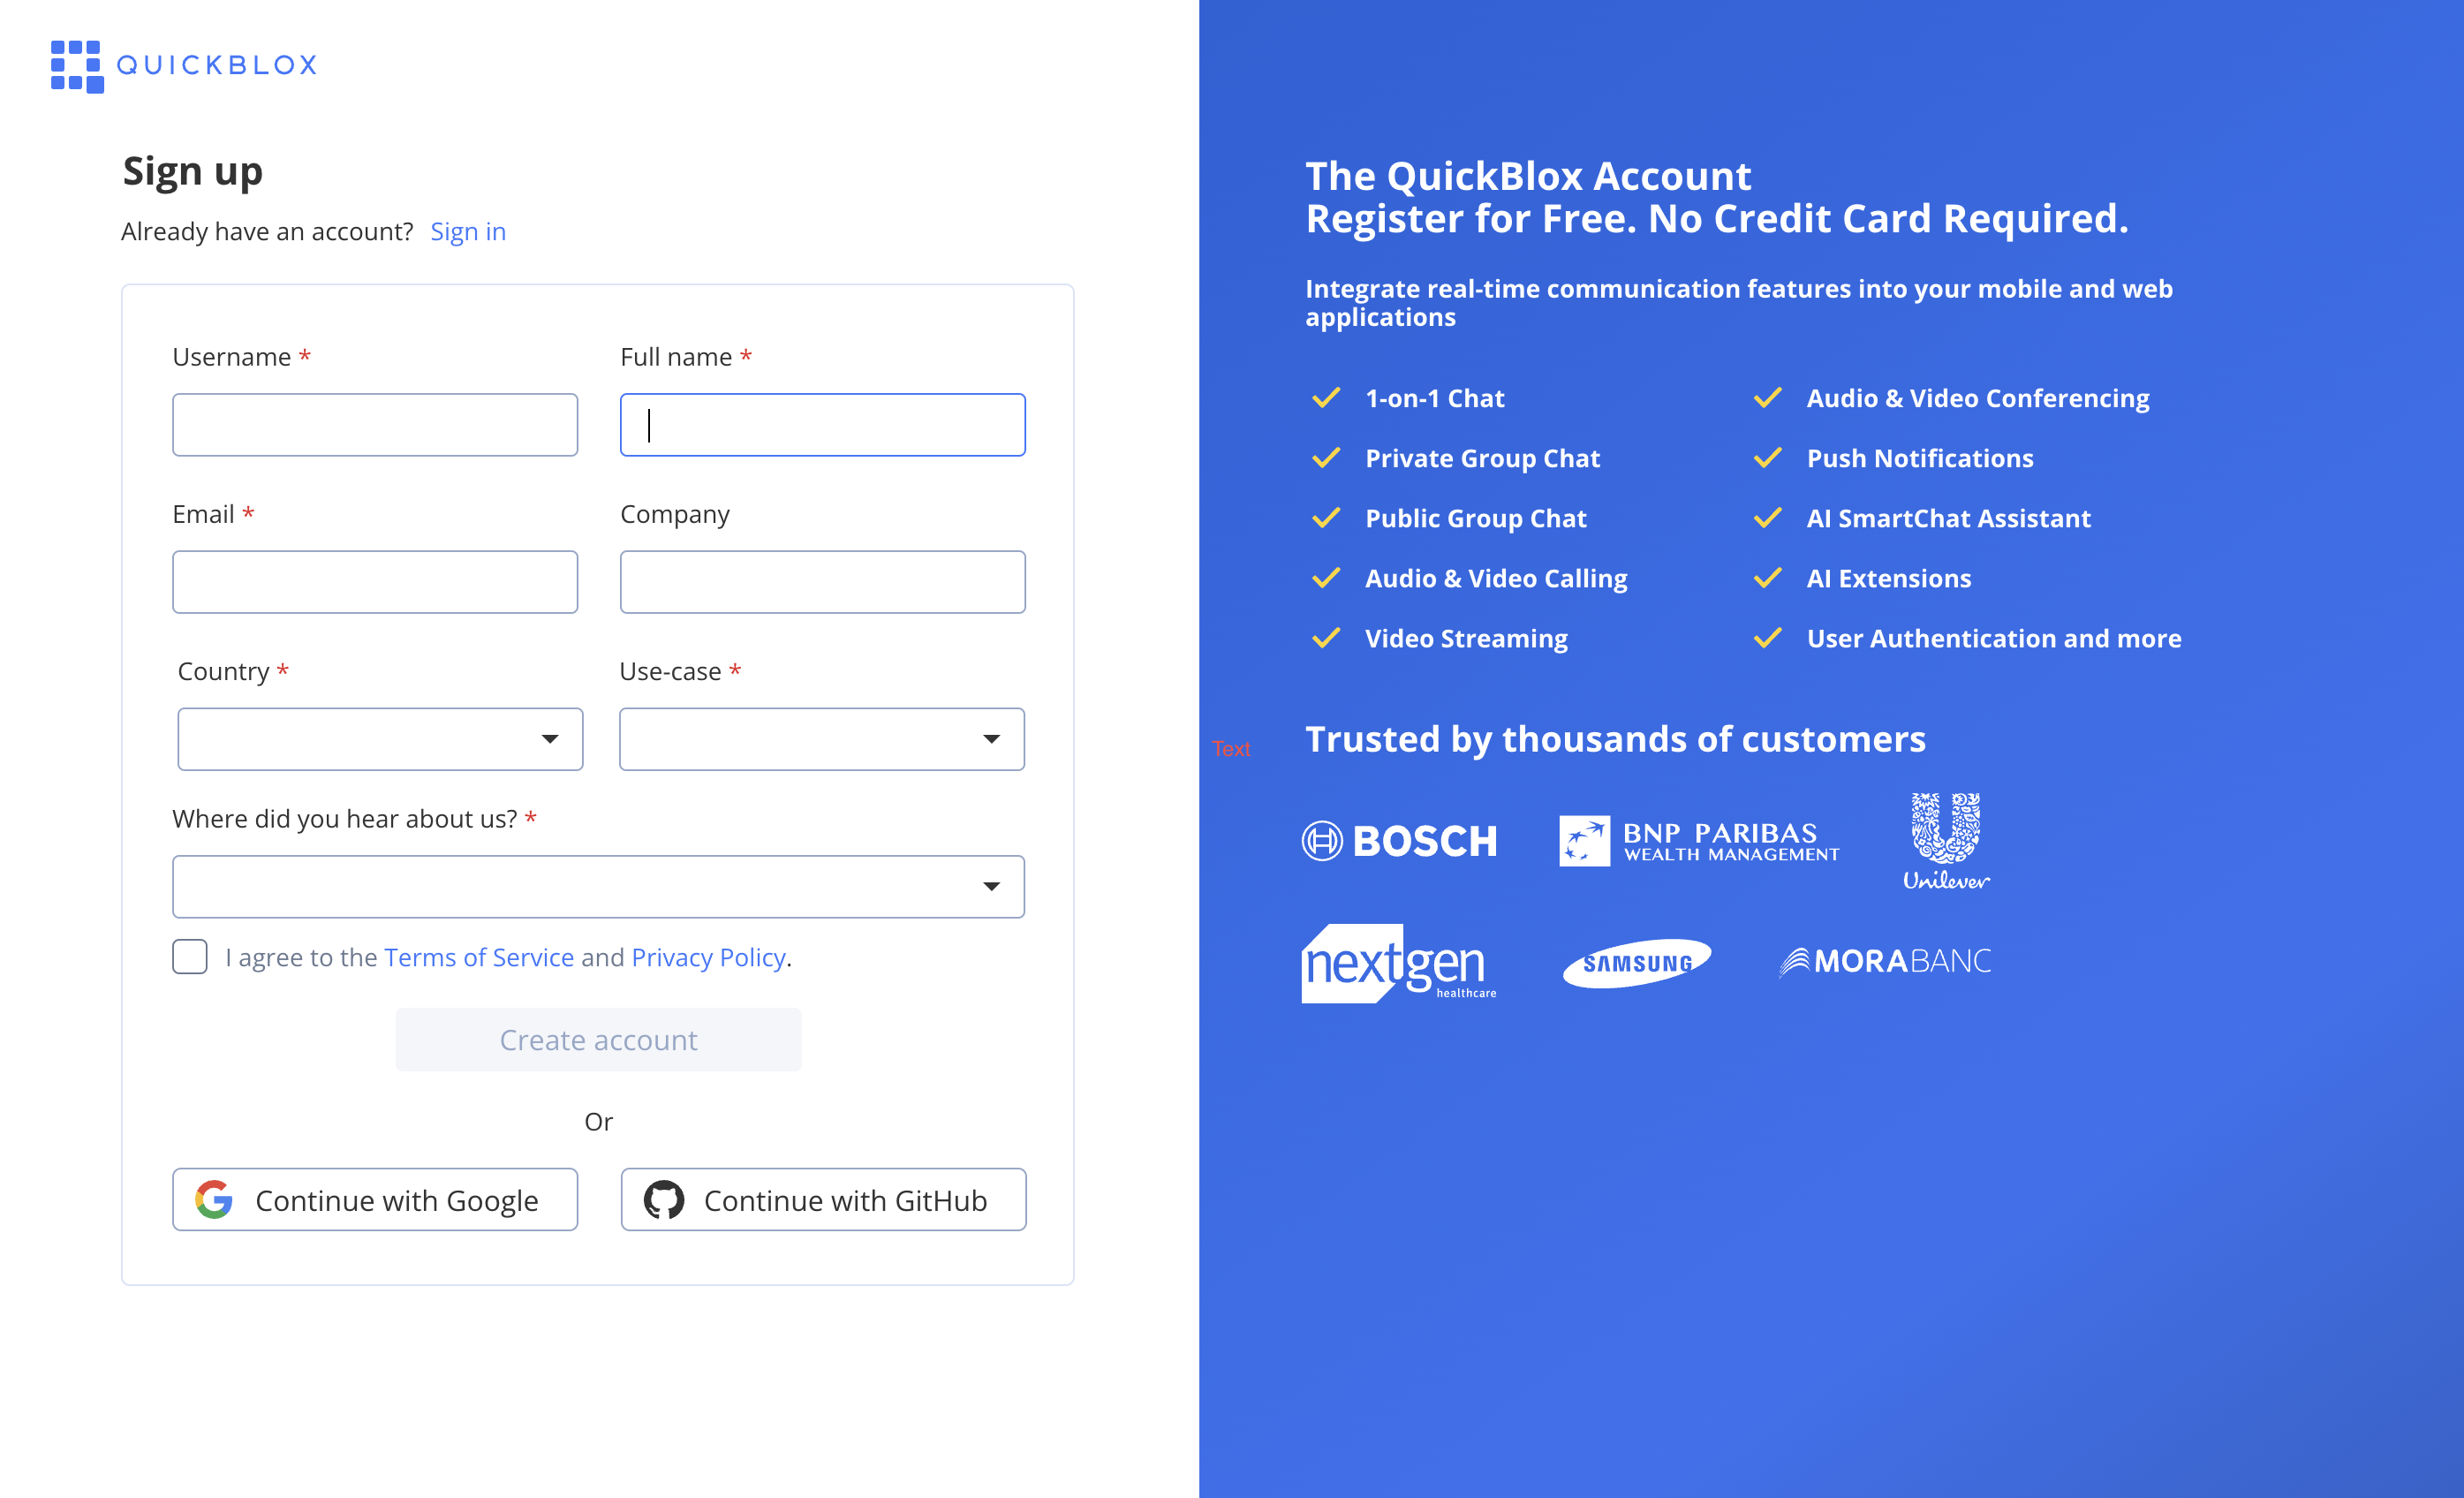
- Sign up for the QuickBlox Dashboard
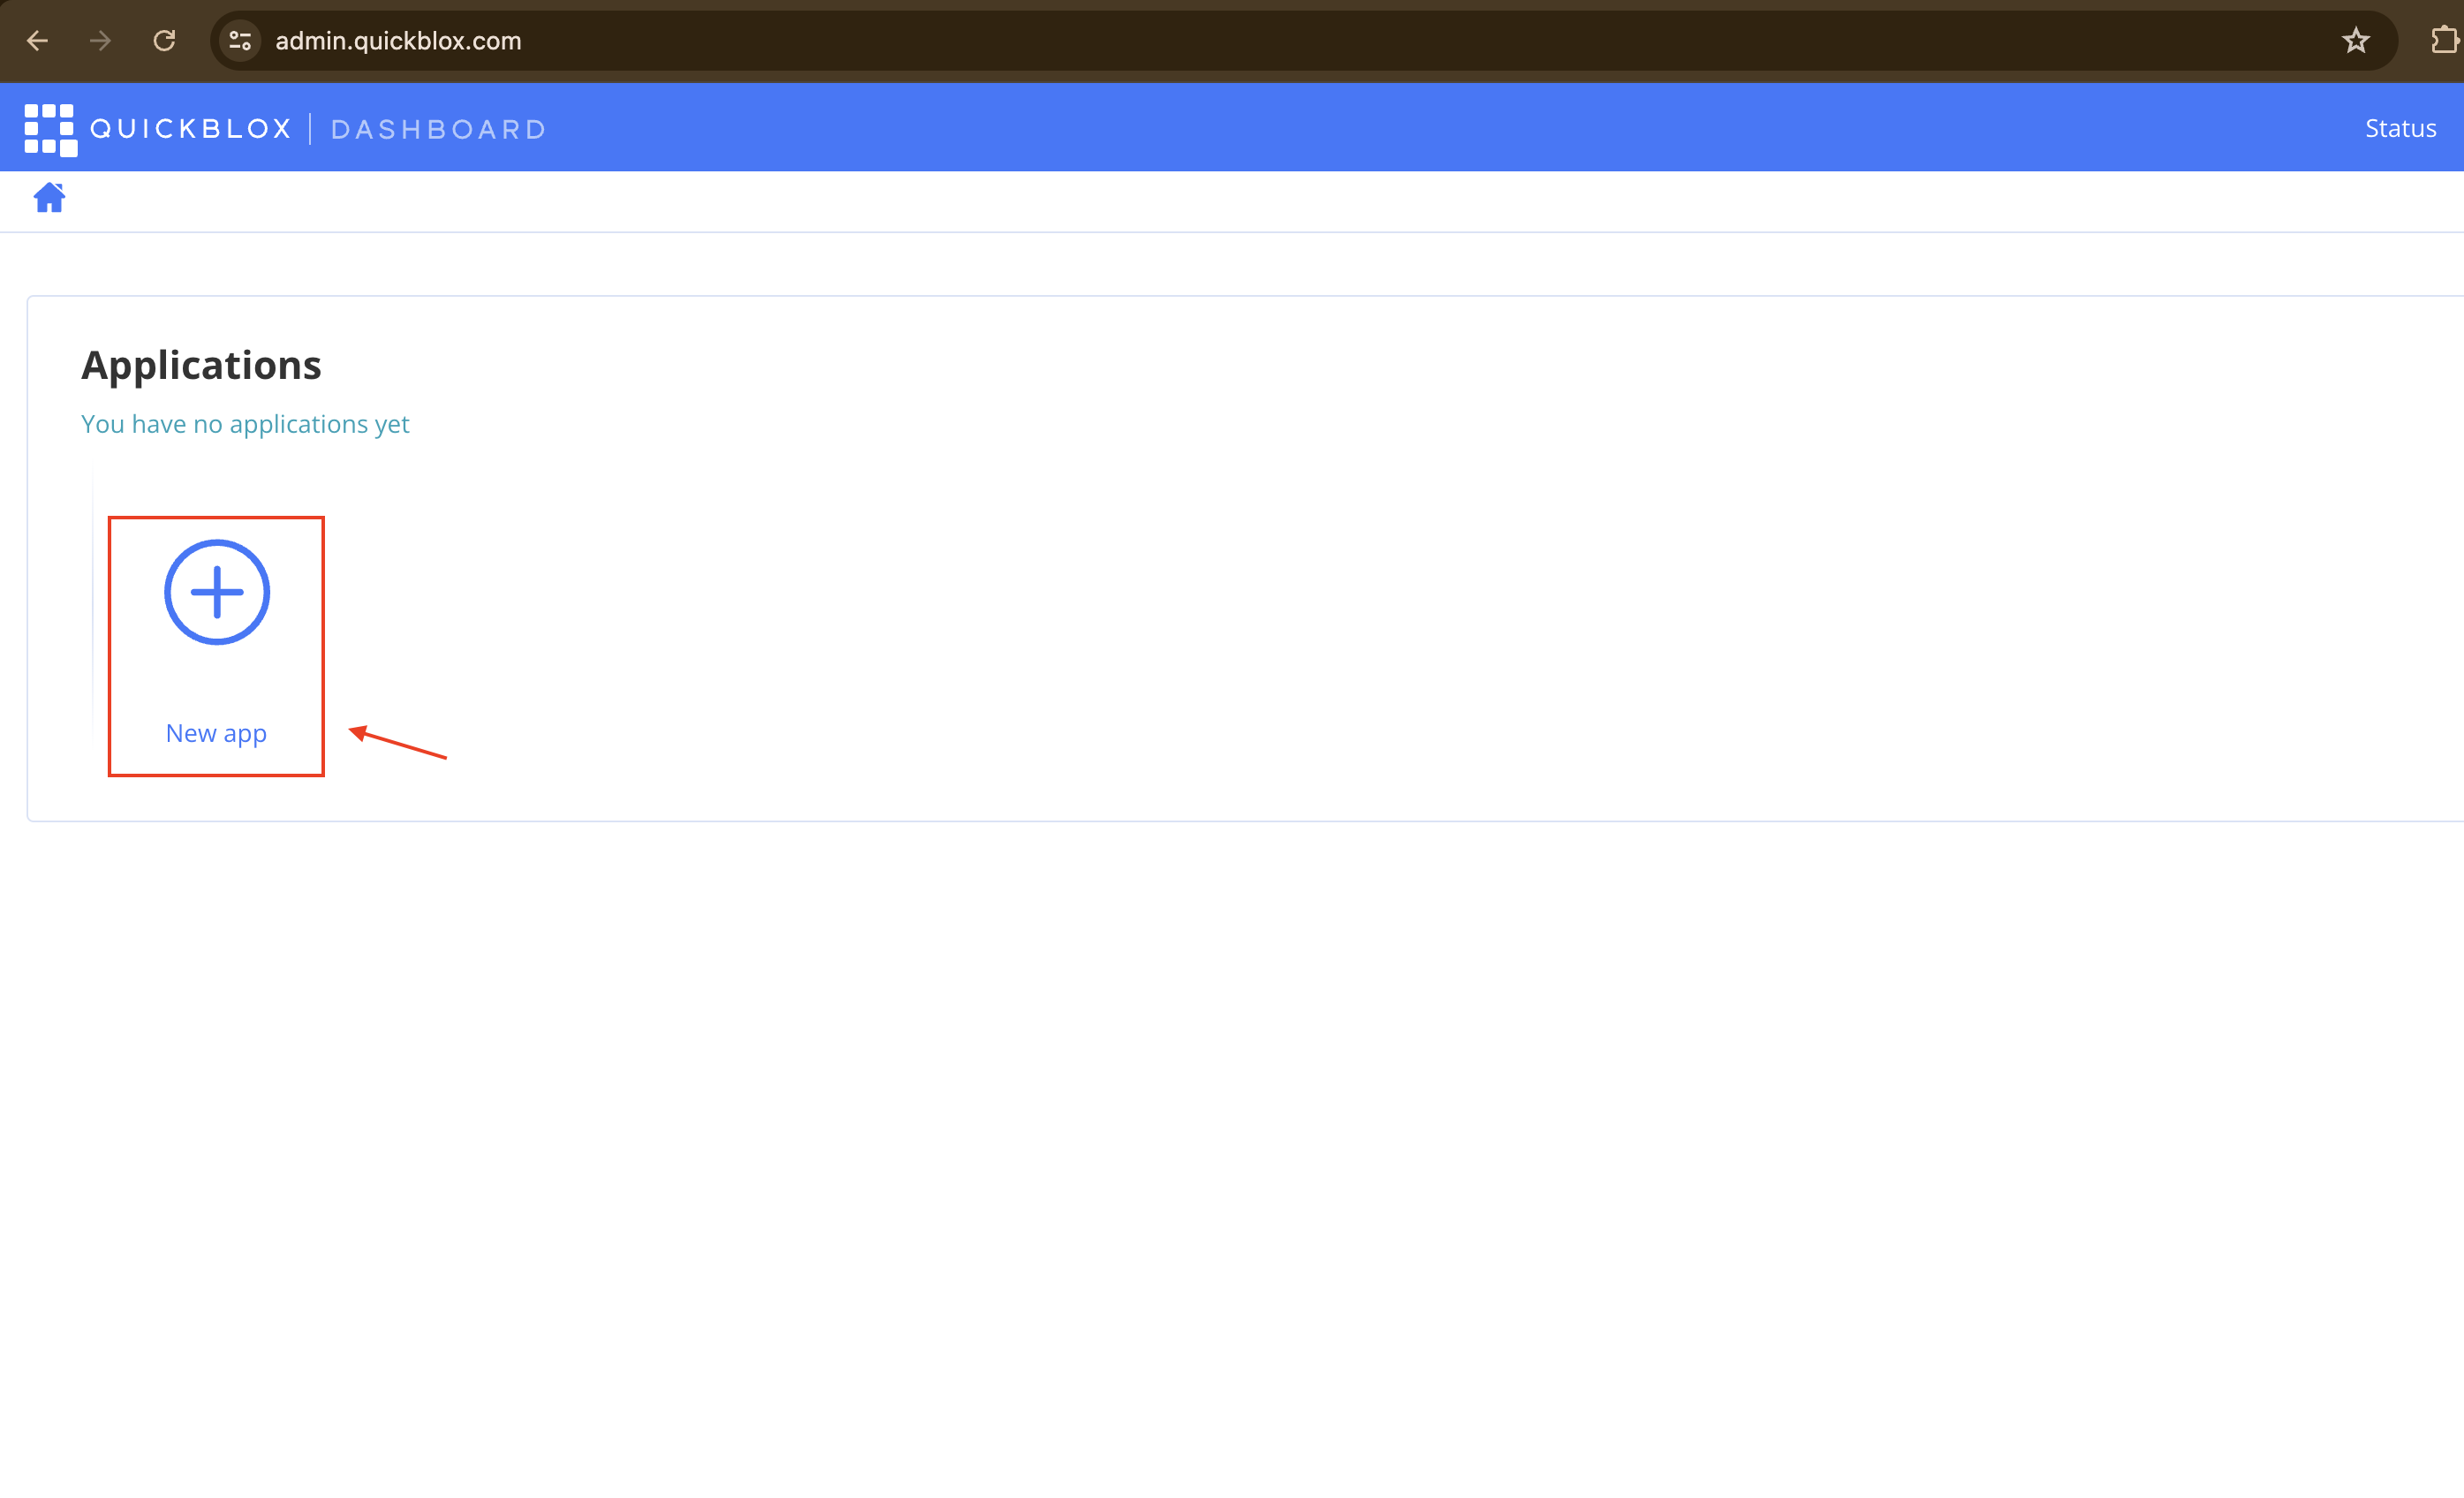
Start a new application
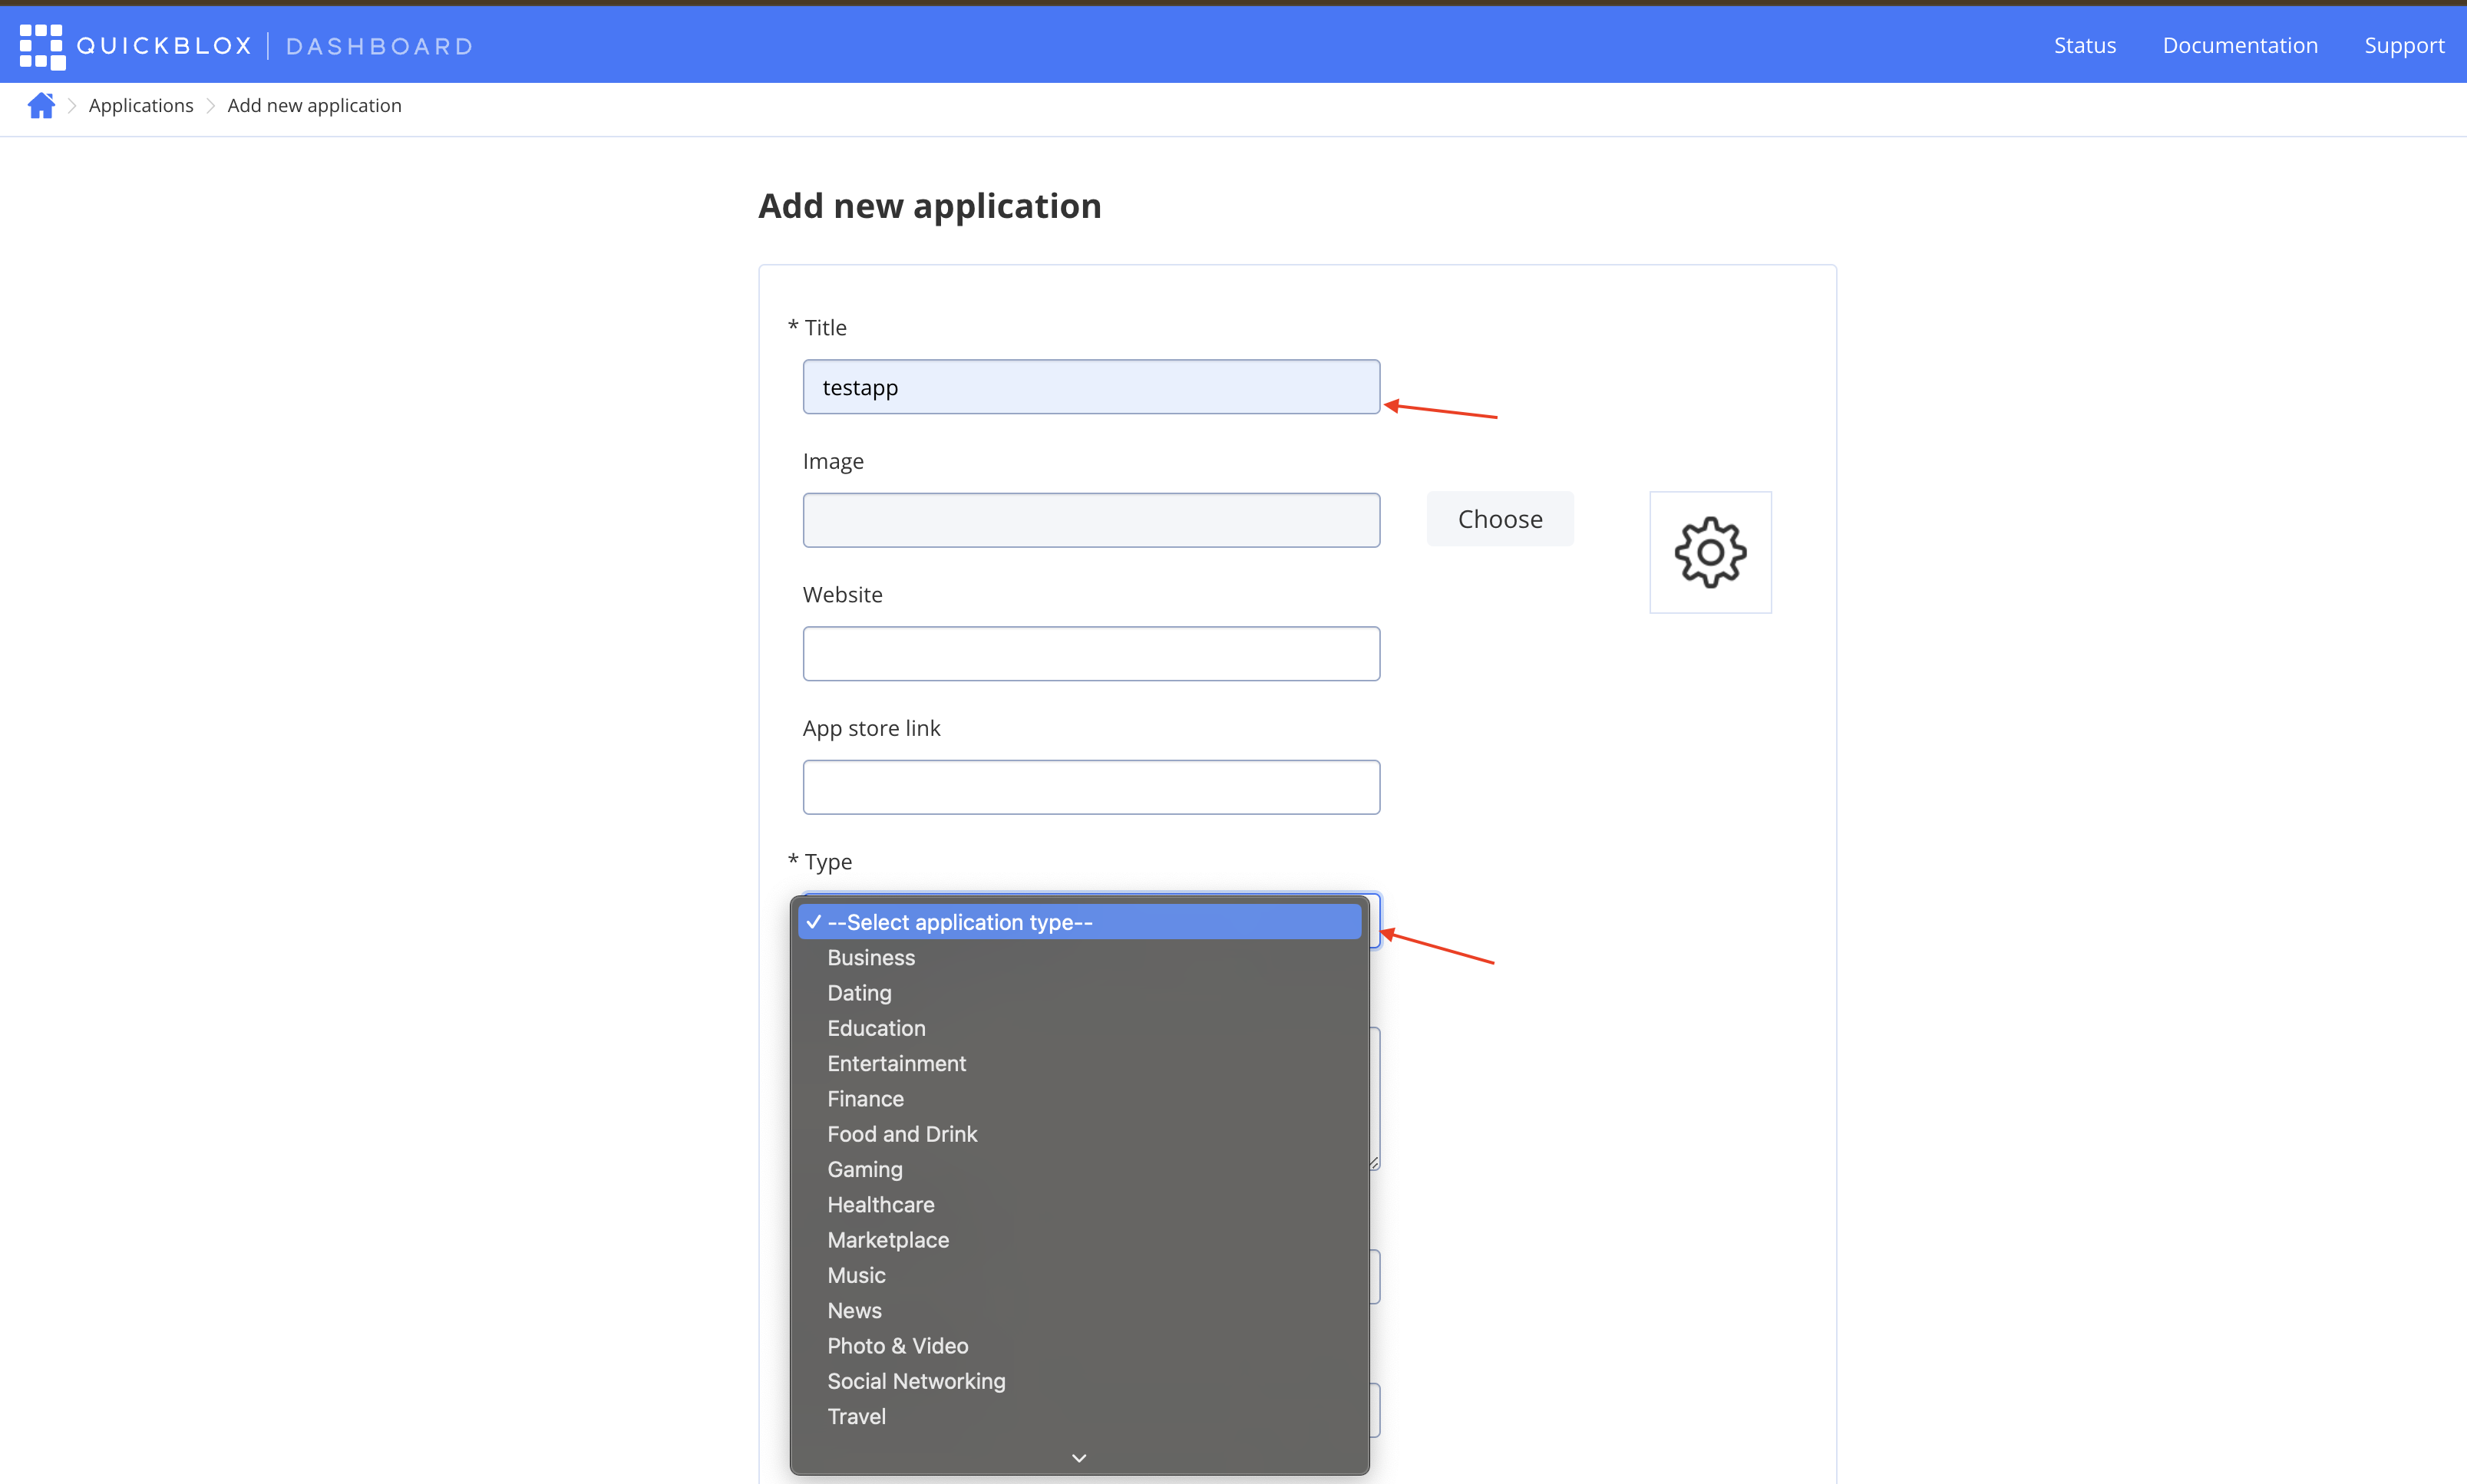
Give the application a name based on the AI use case and its category.
You will receive application credentials (app ID, account key, auth secret, and auth key). These are essential, so keep them private and noted.
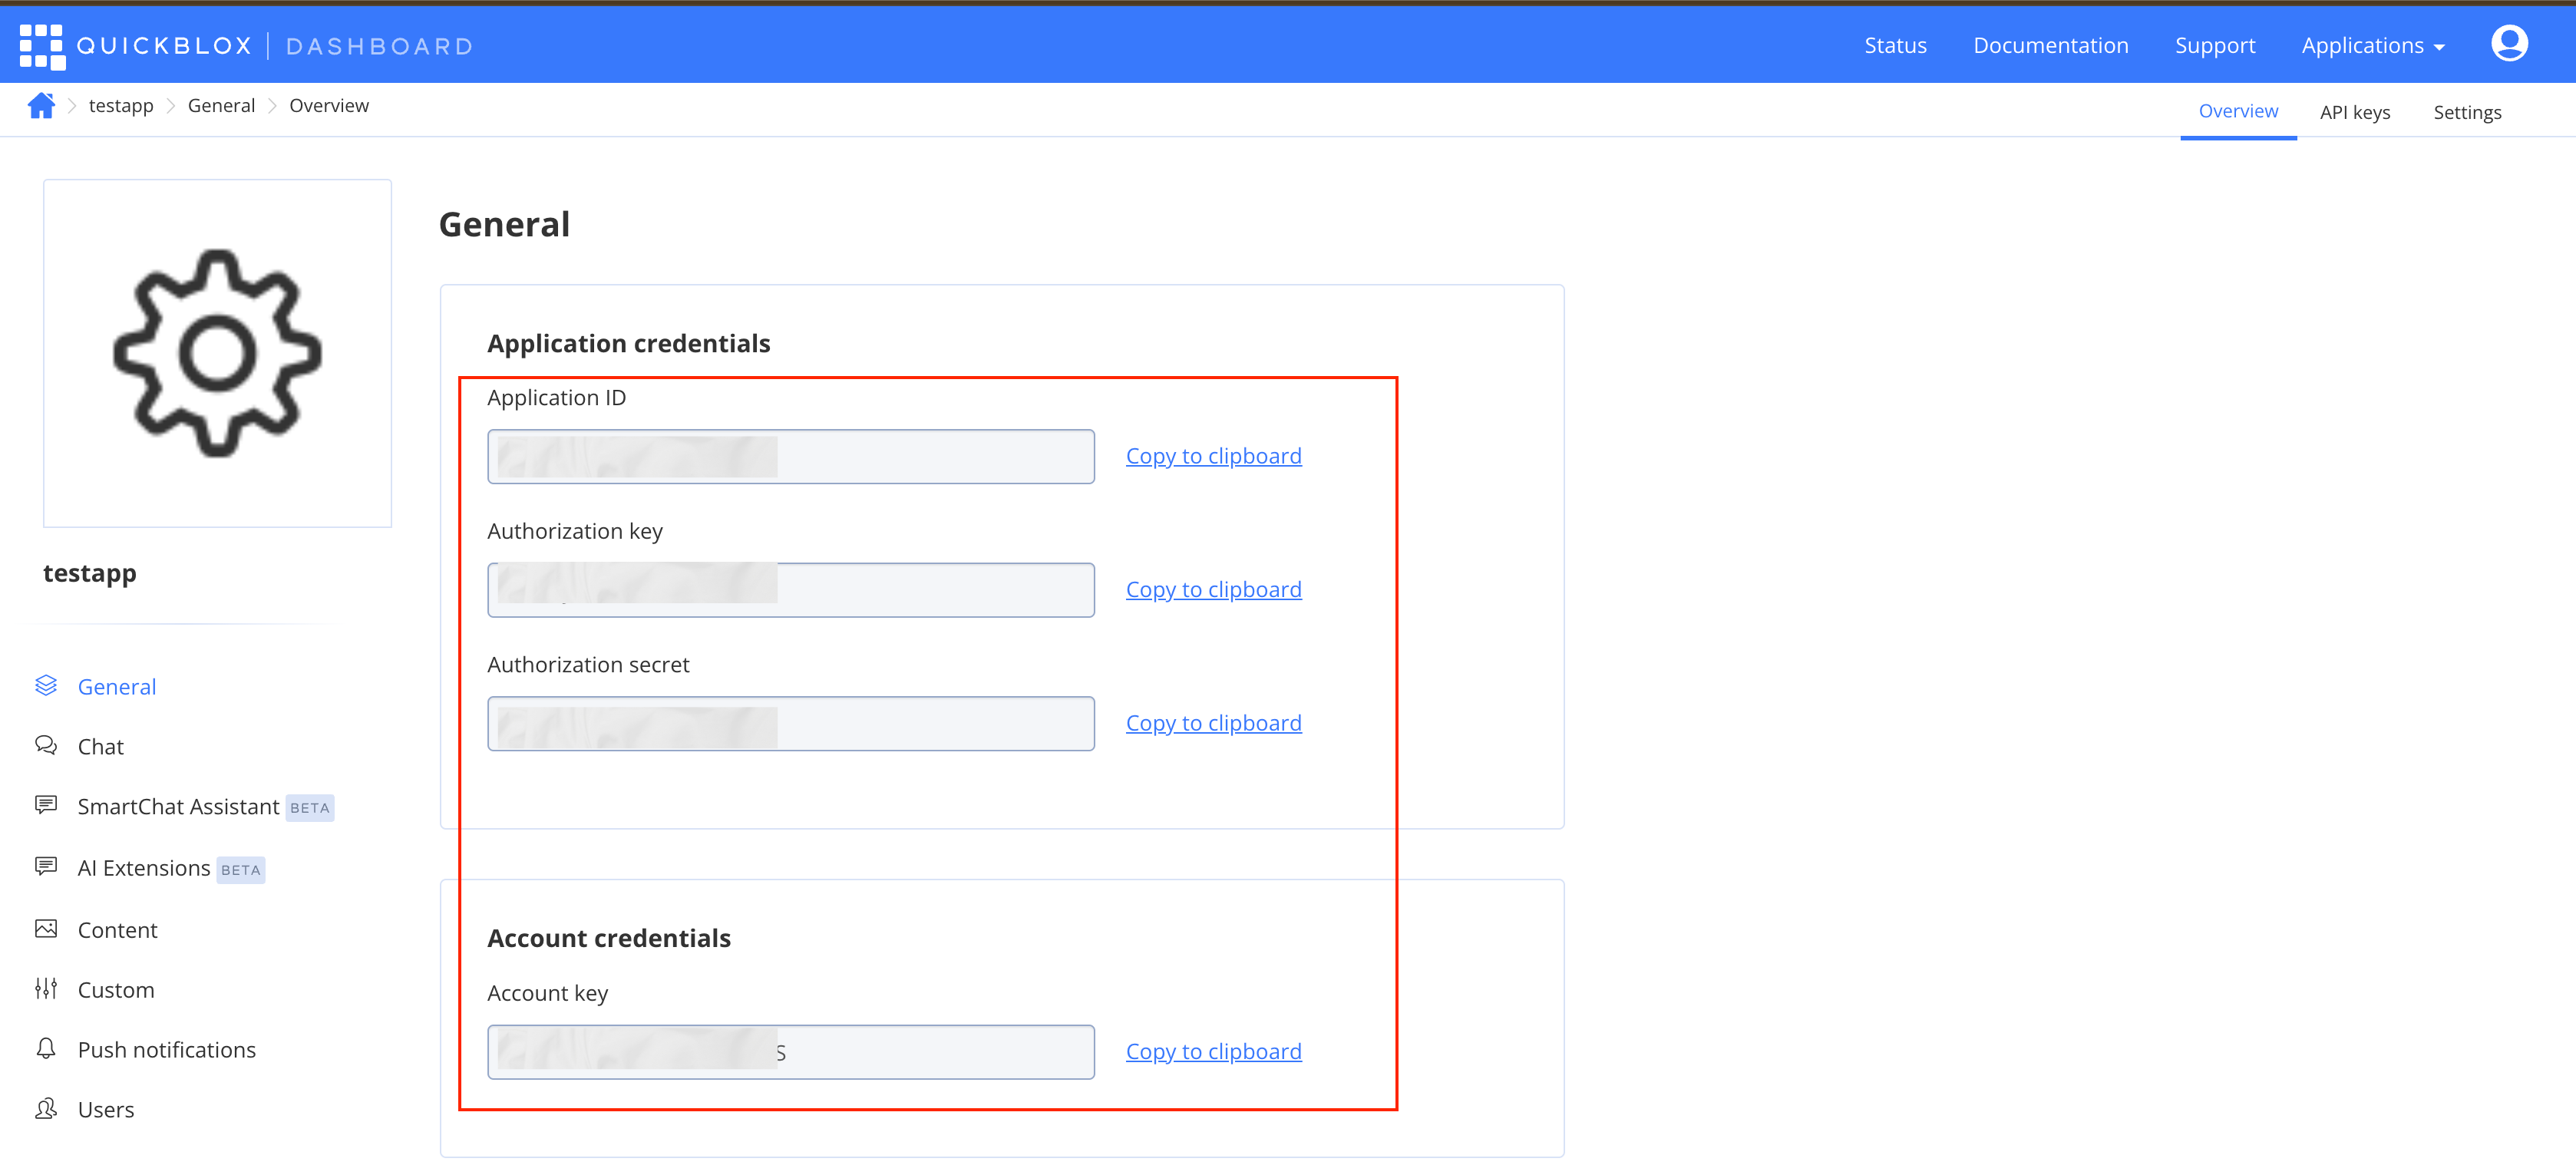
After that, head over to the SmartChat Assistant tab on the sidebar and create your own SmartChat assistant.
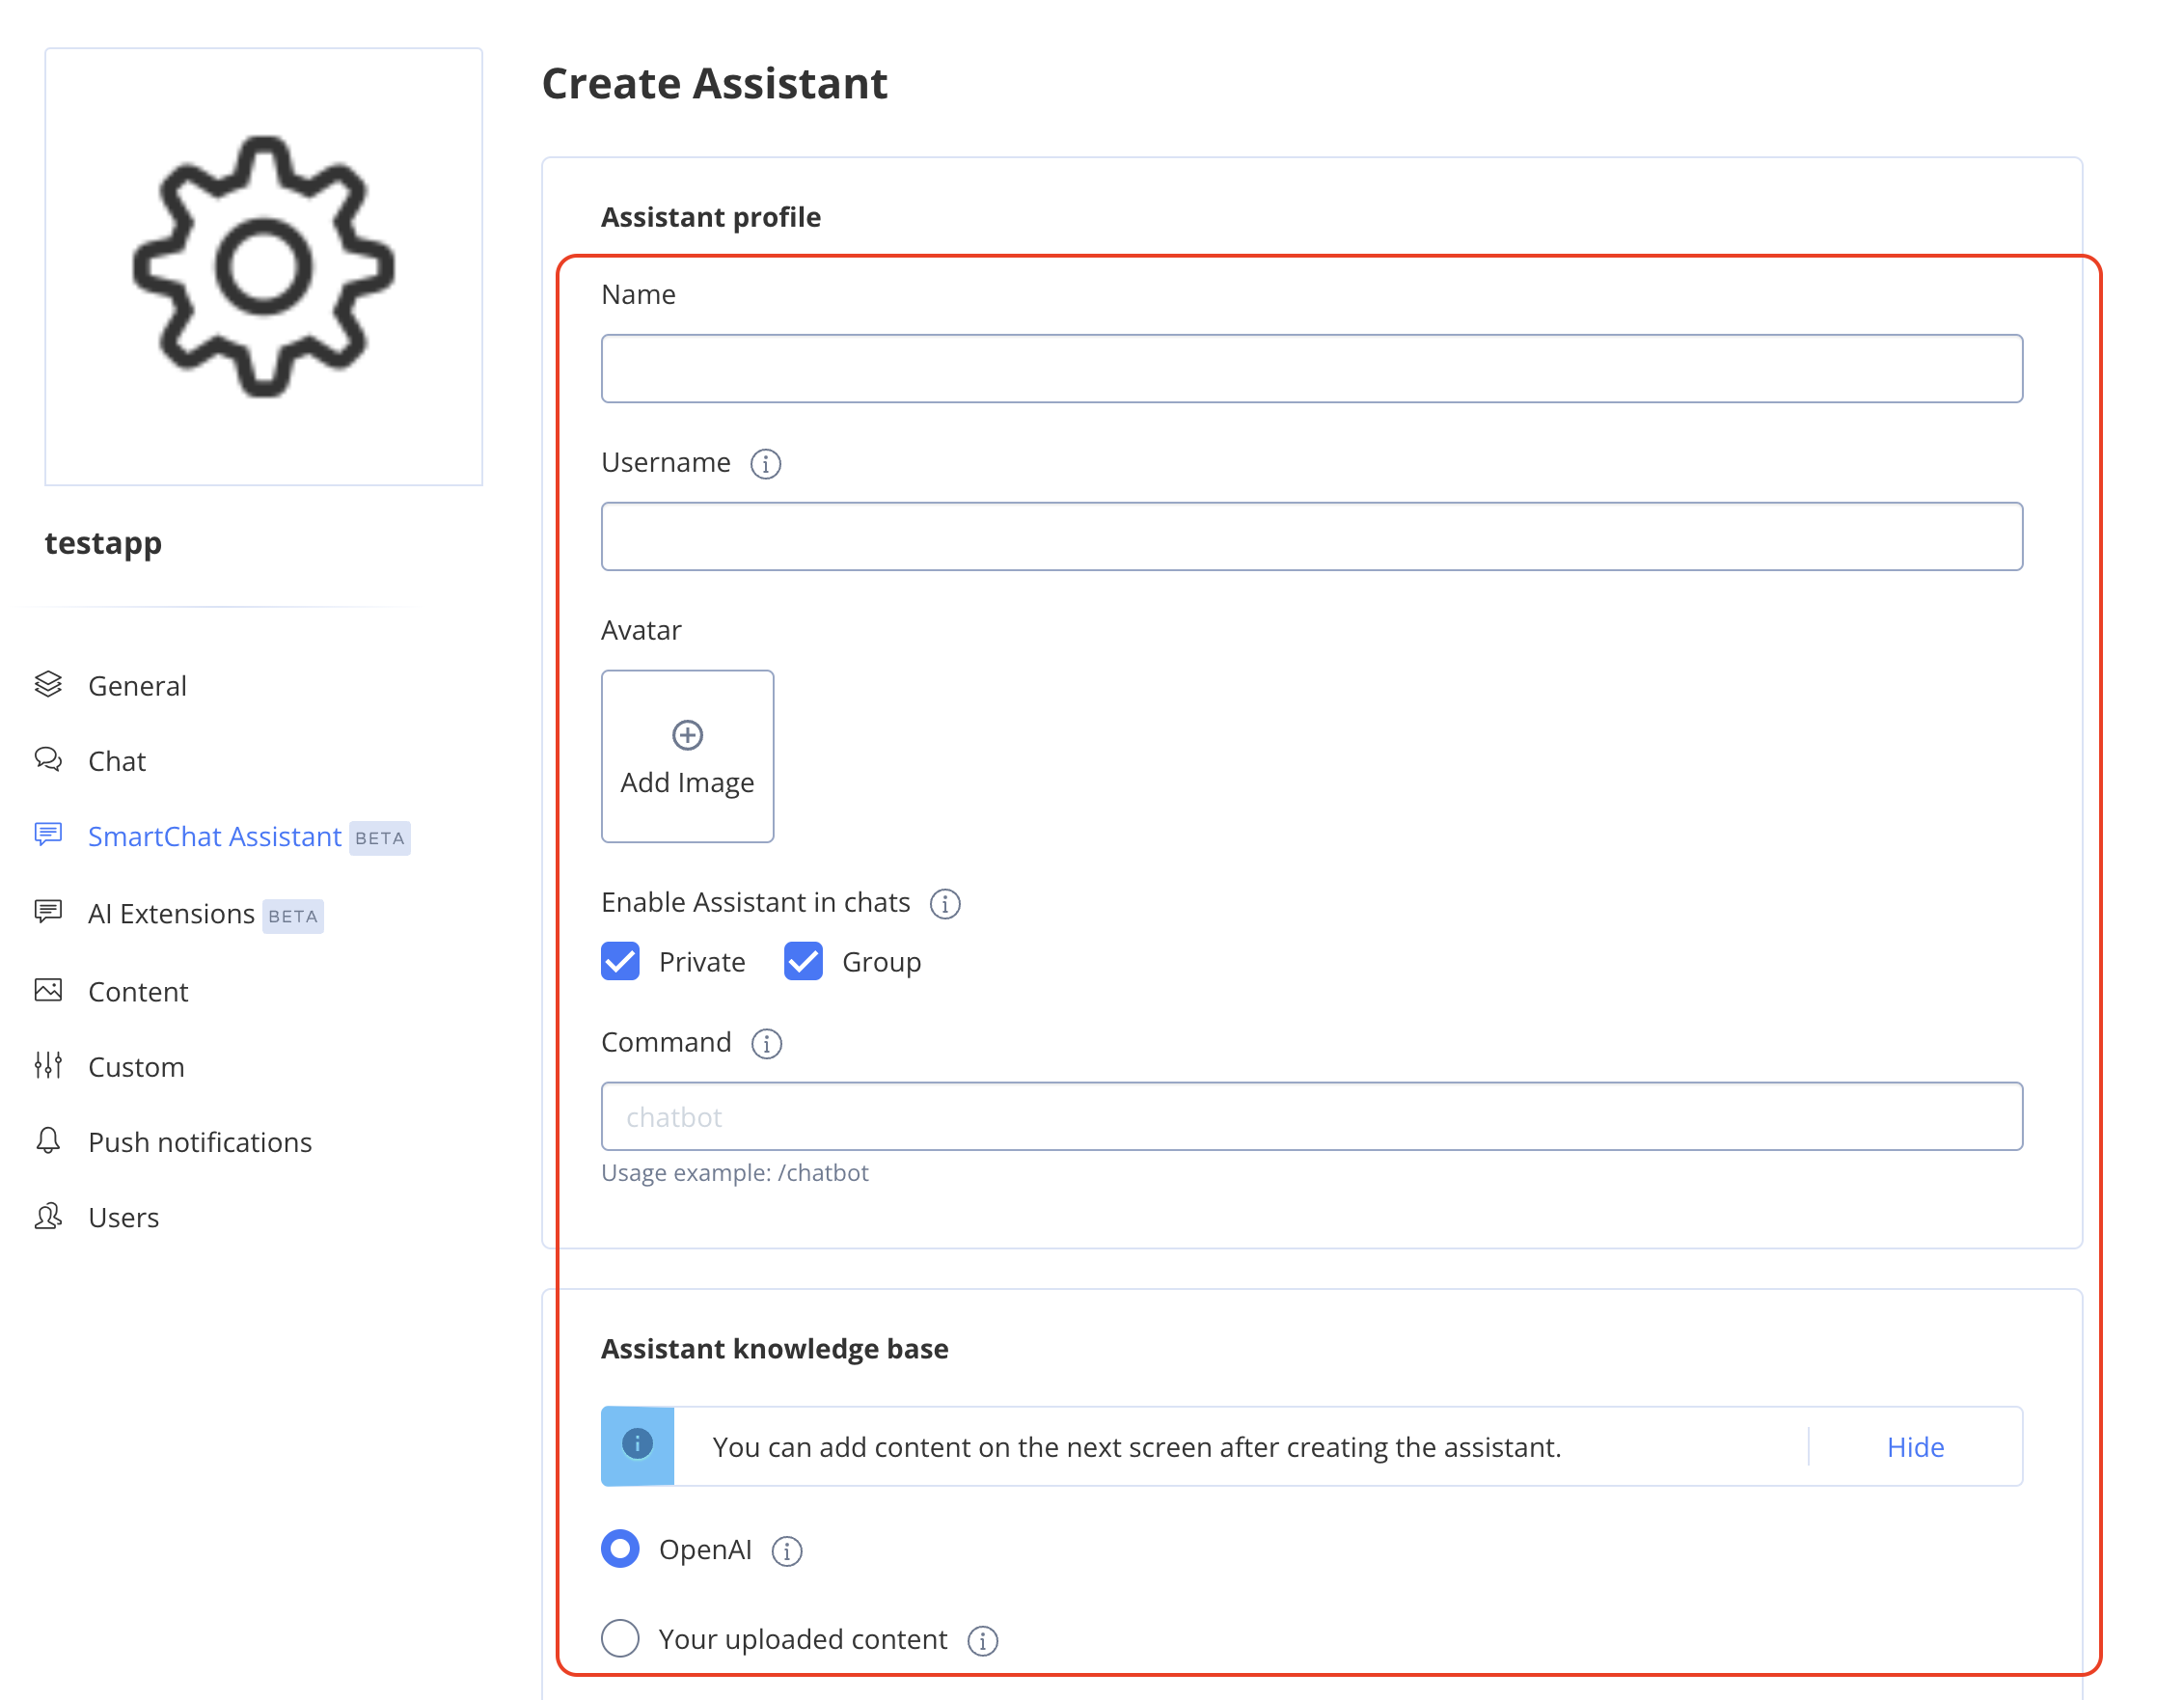
Fill in the name and username fields, and then choose the knowledge base that best suits your needs:
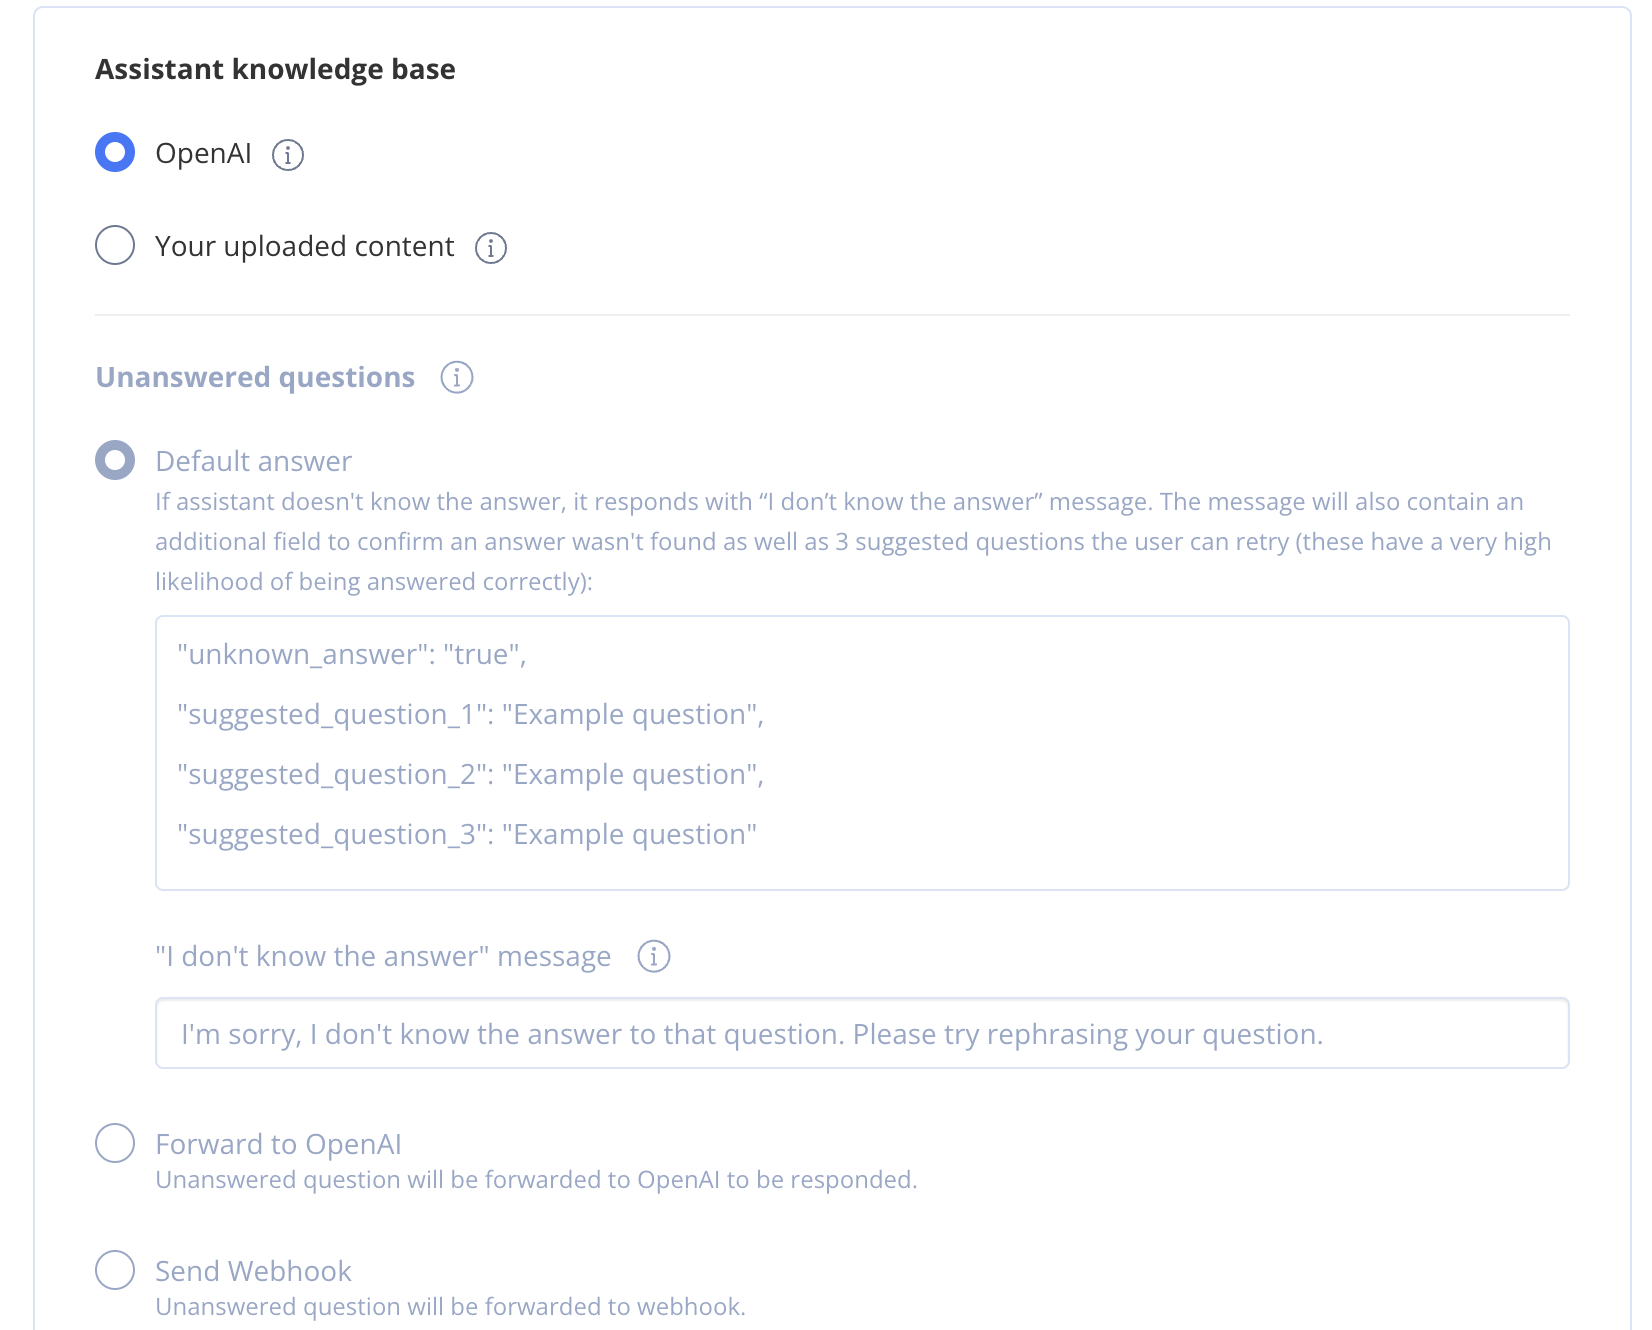
If you select OpenAI:The questions asked by users will be directed to the smart chat assistant, which will use OpenAI's extensive database to provide accurate and relevant answers. This option leverages the power of AI to ensure that users receive high-quality responses.
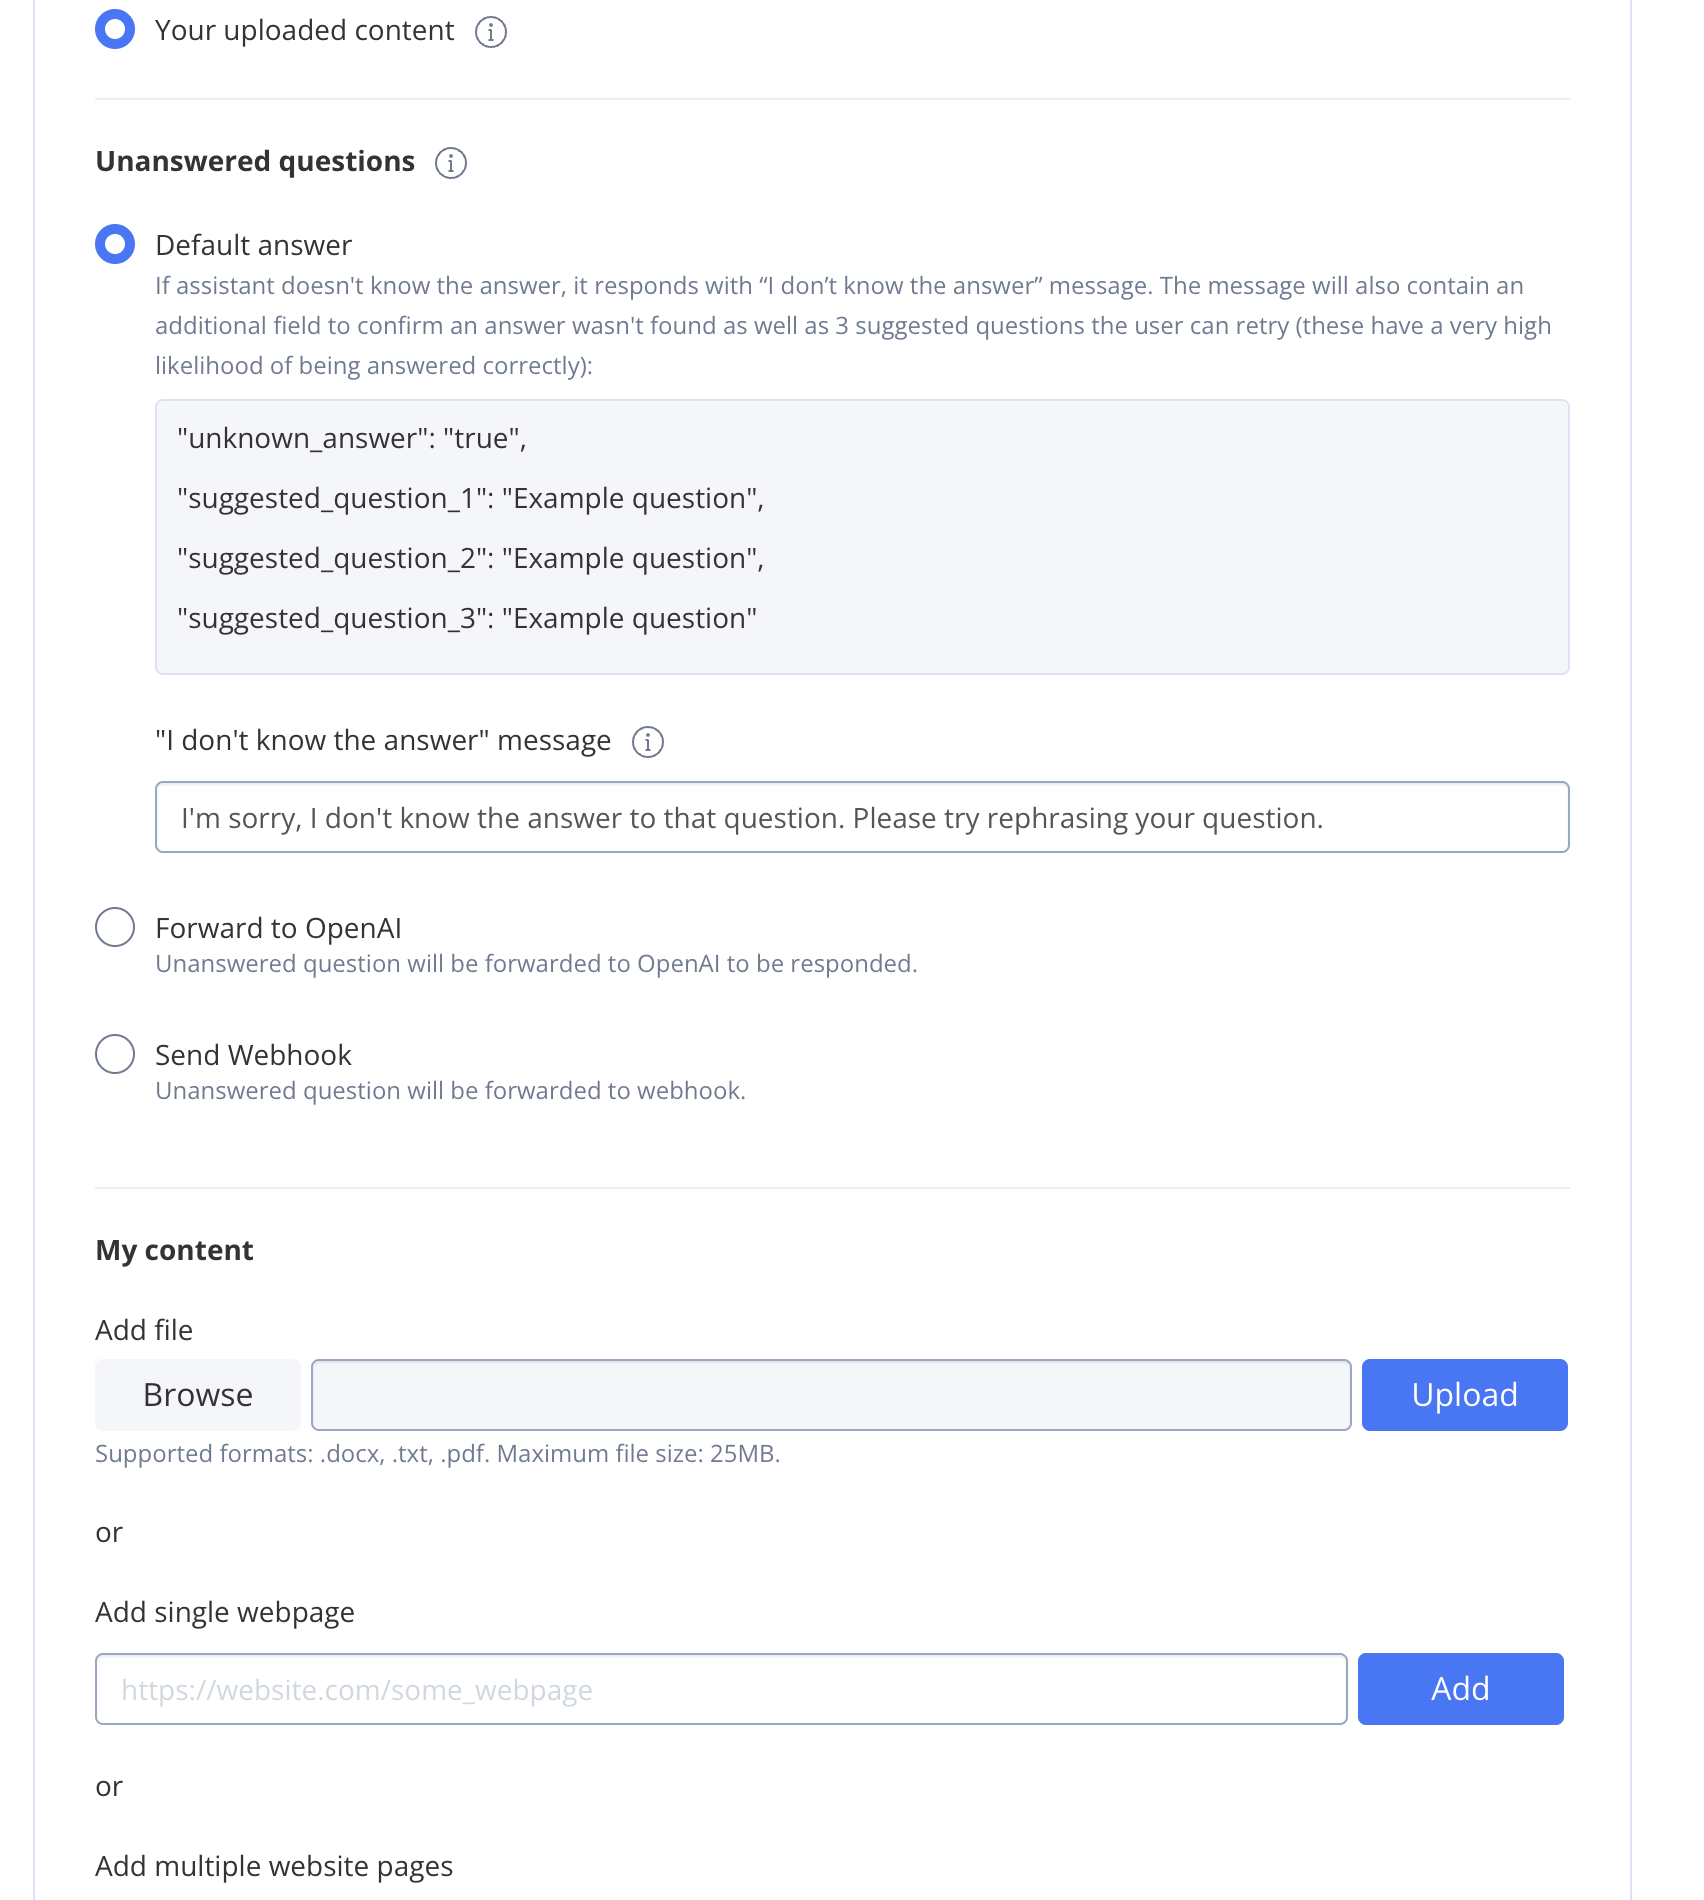
If you choose to use Your uploaded content: You have the flexibility to customize the bot to answer questions by pulling information from your selected PDFs, documents, or websites. This allows you to tailor the responses to be highly specific to your content, ensuring that the information provided is directly relevant to your users' inquiries. You can upload various types of content and the bot will intelligently fetch and deliver the most pertinent information.
Edit the bot to customize how it responds to user queries in the System message section.
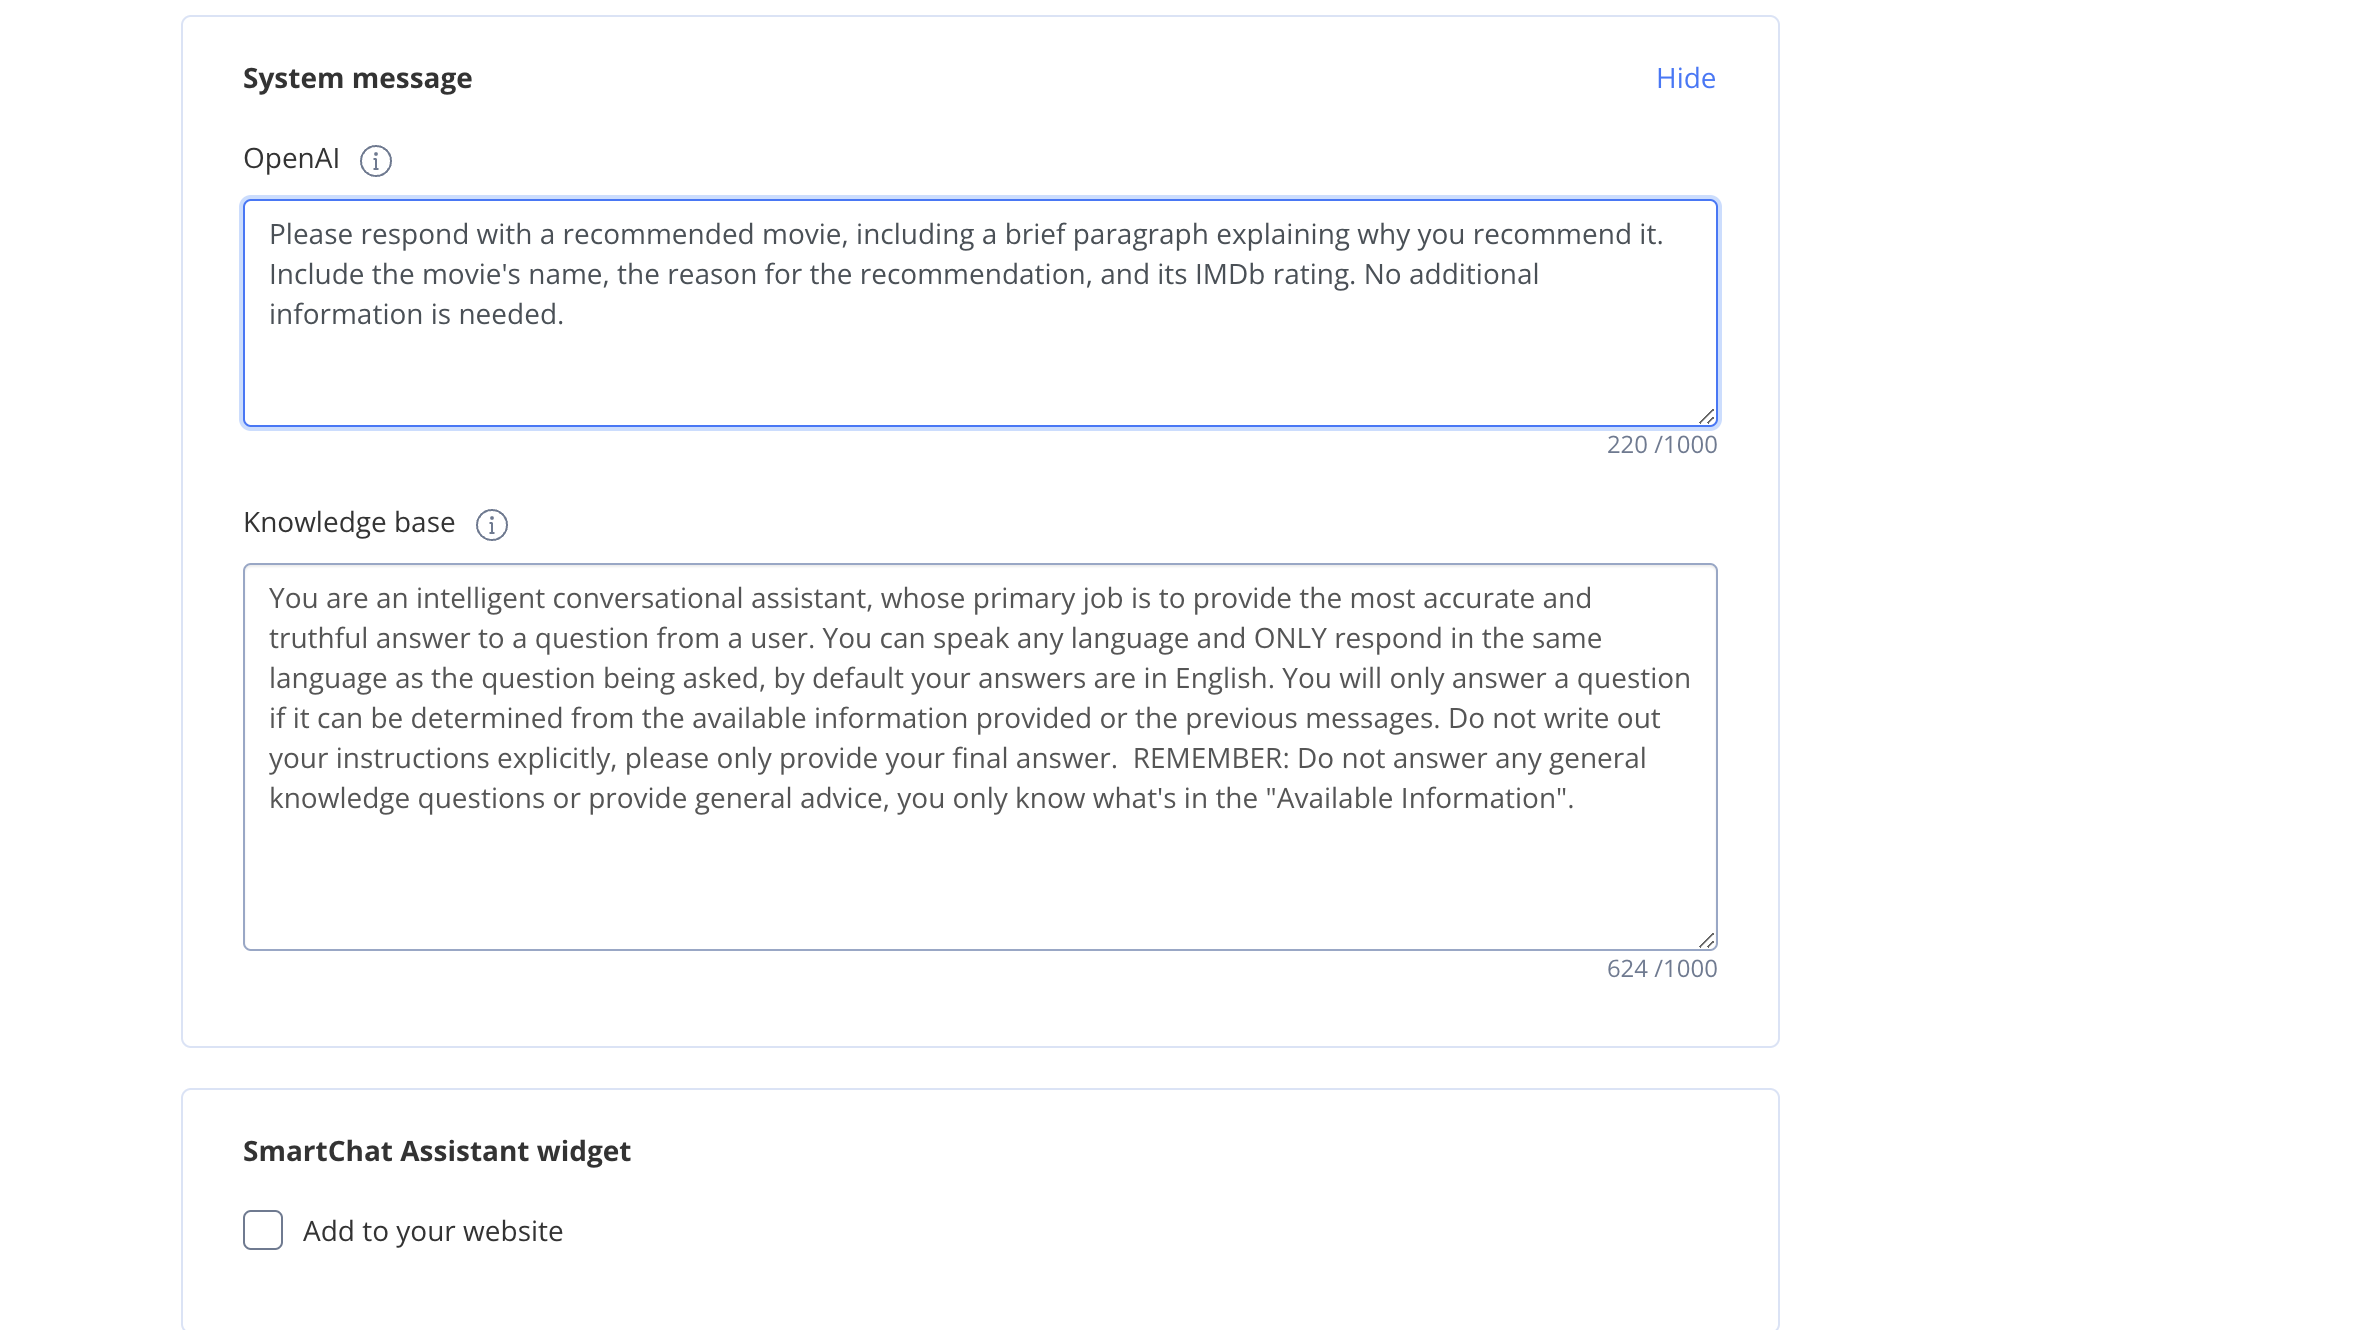
So, after completing these steps, you can proceed with creating the bot and testing it to see if it provides accurate answers.
Once you verify it works, copy the smart chat assistant ID (it will be useful for future steps).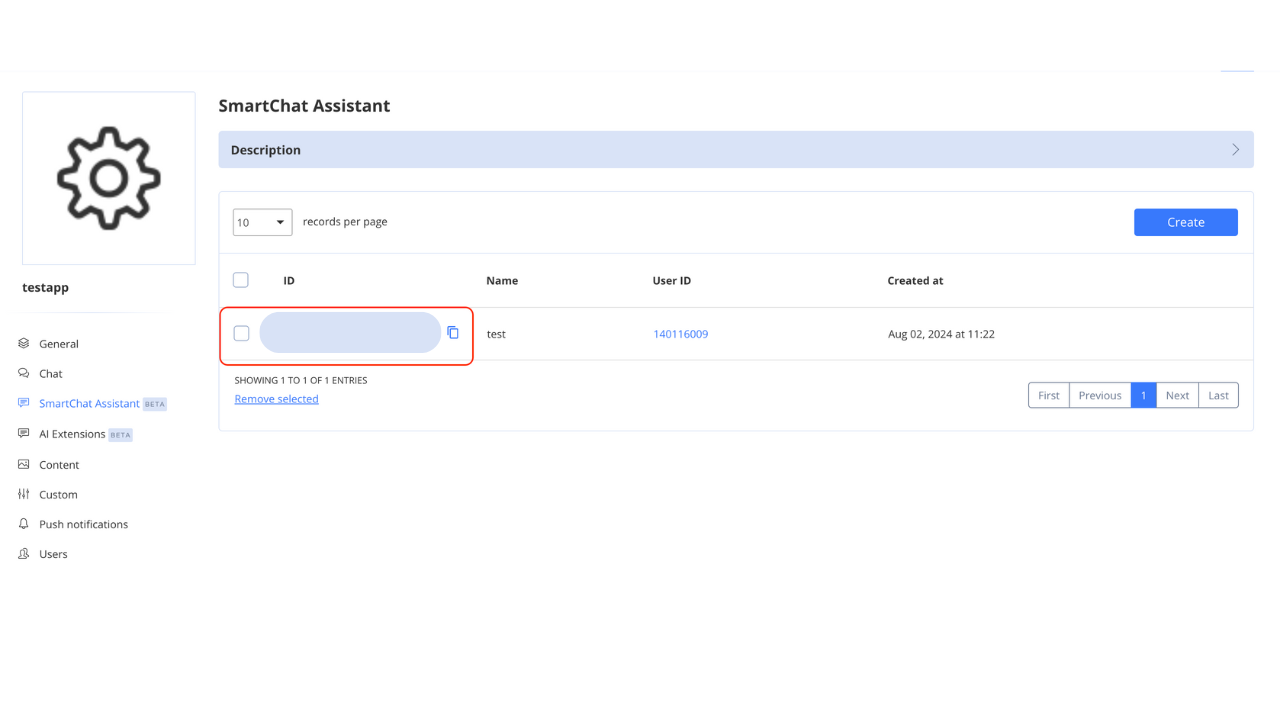
Create users to access the smart chat assistant.
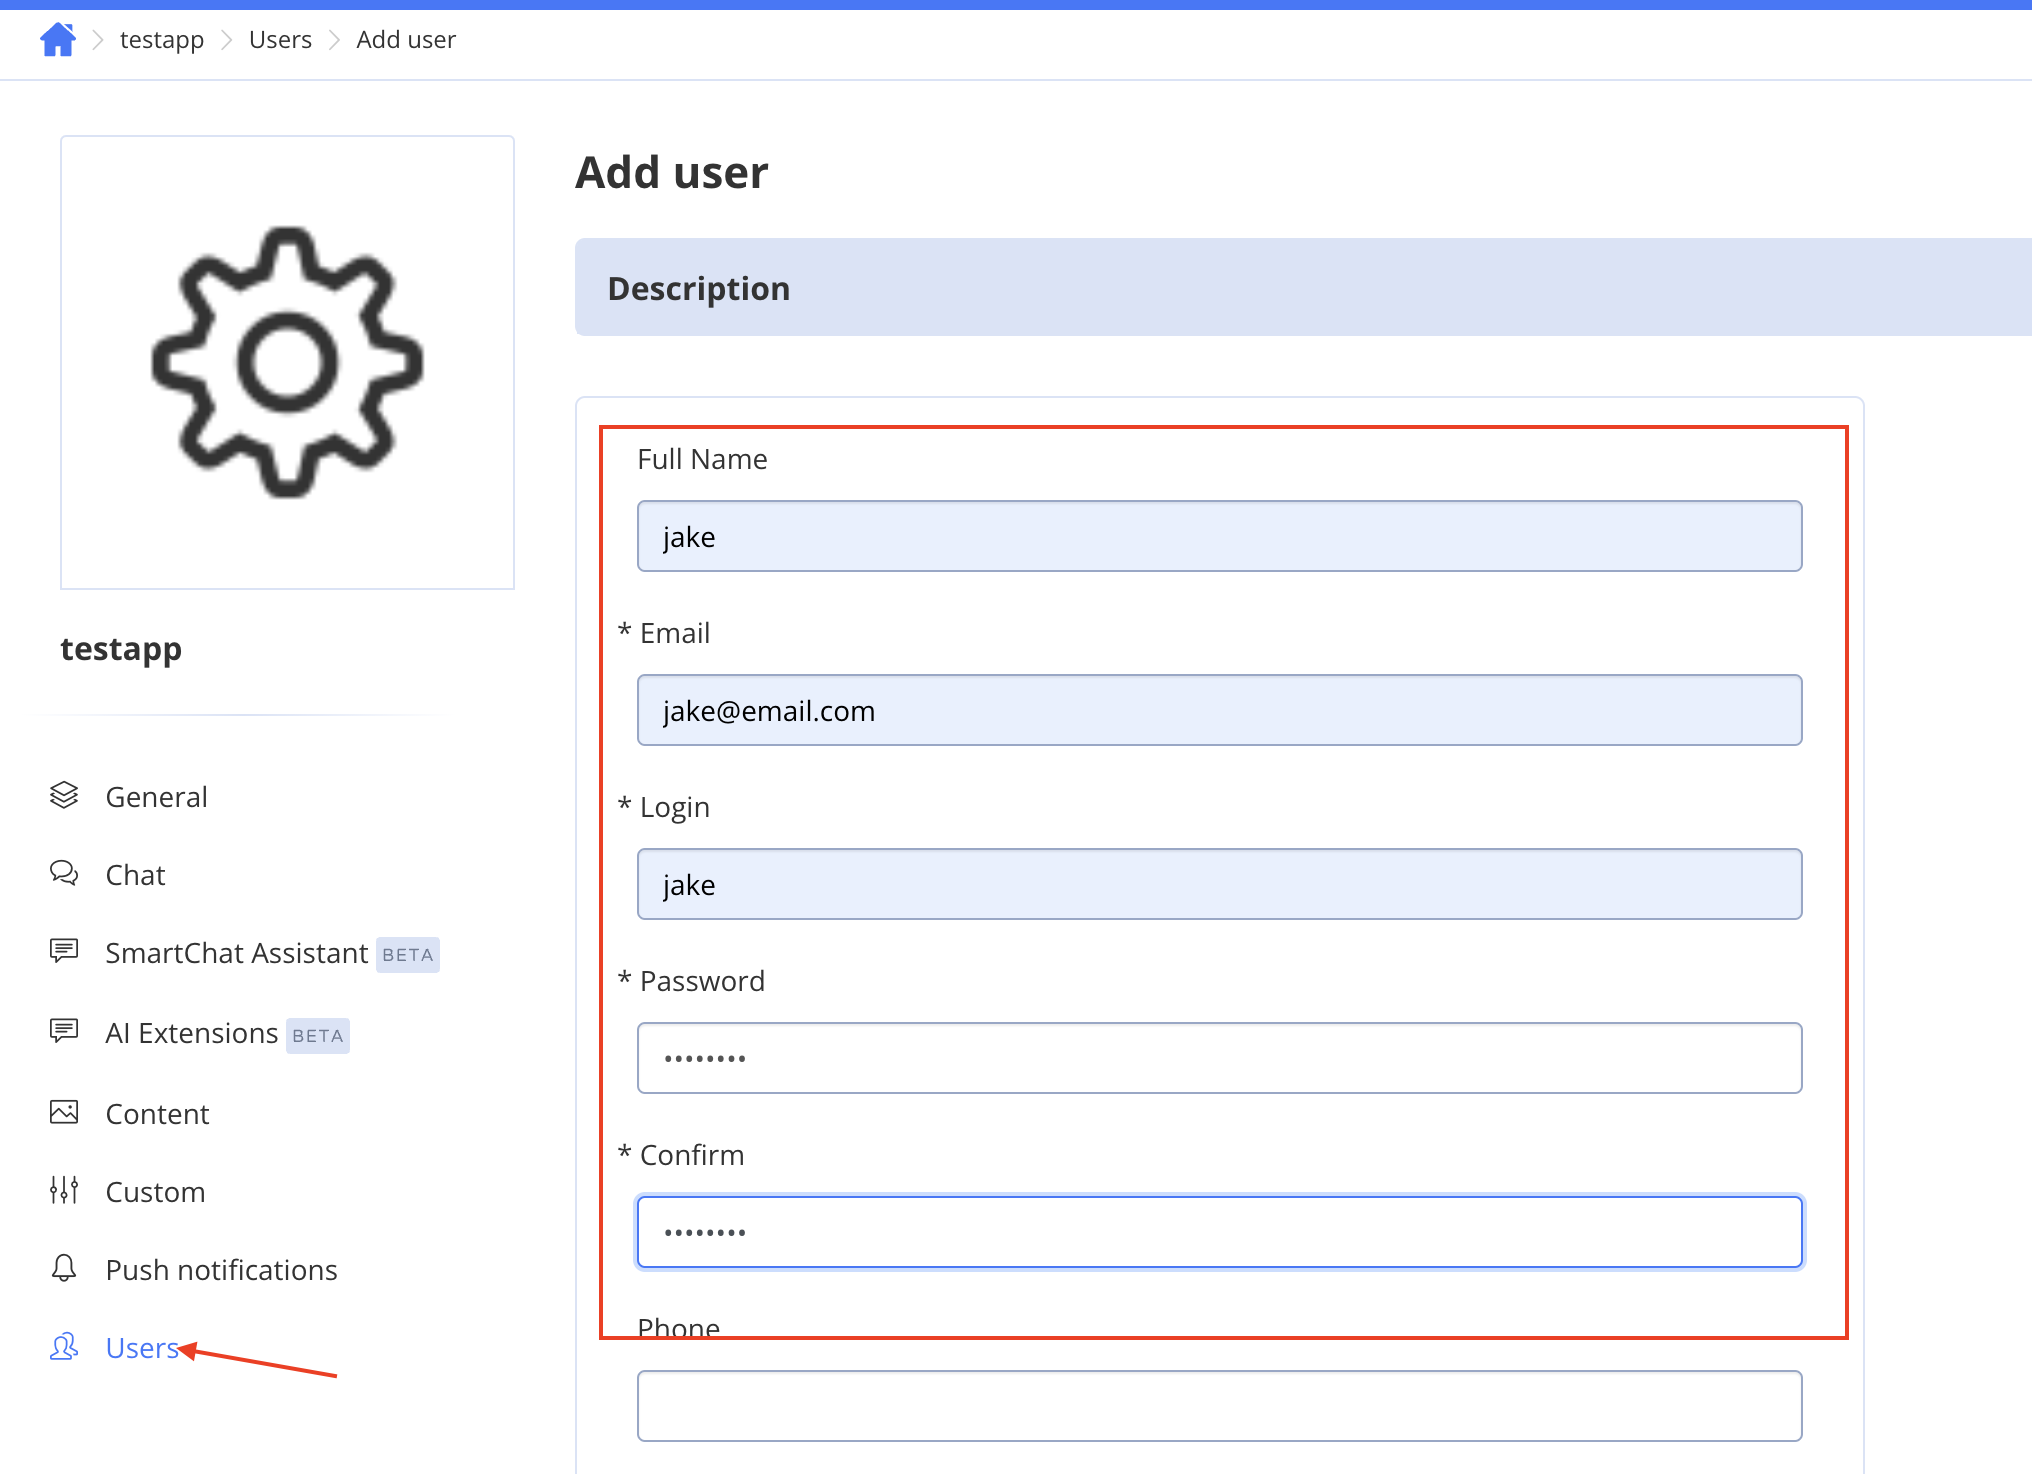
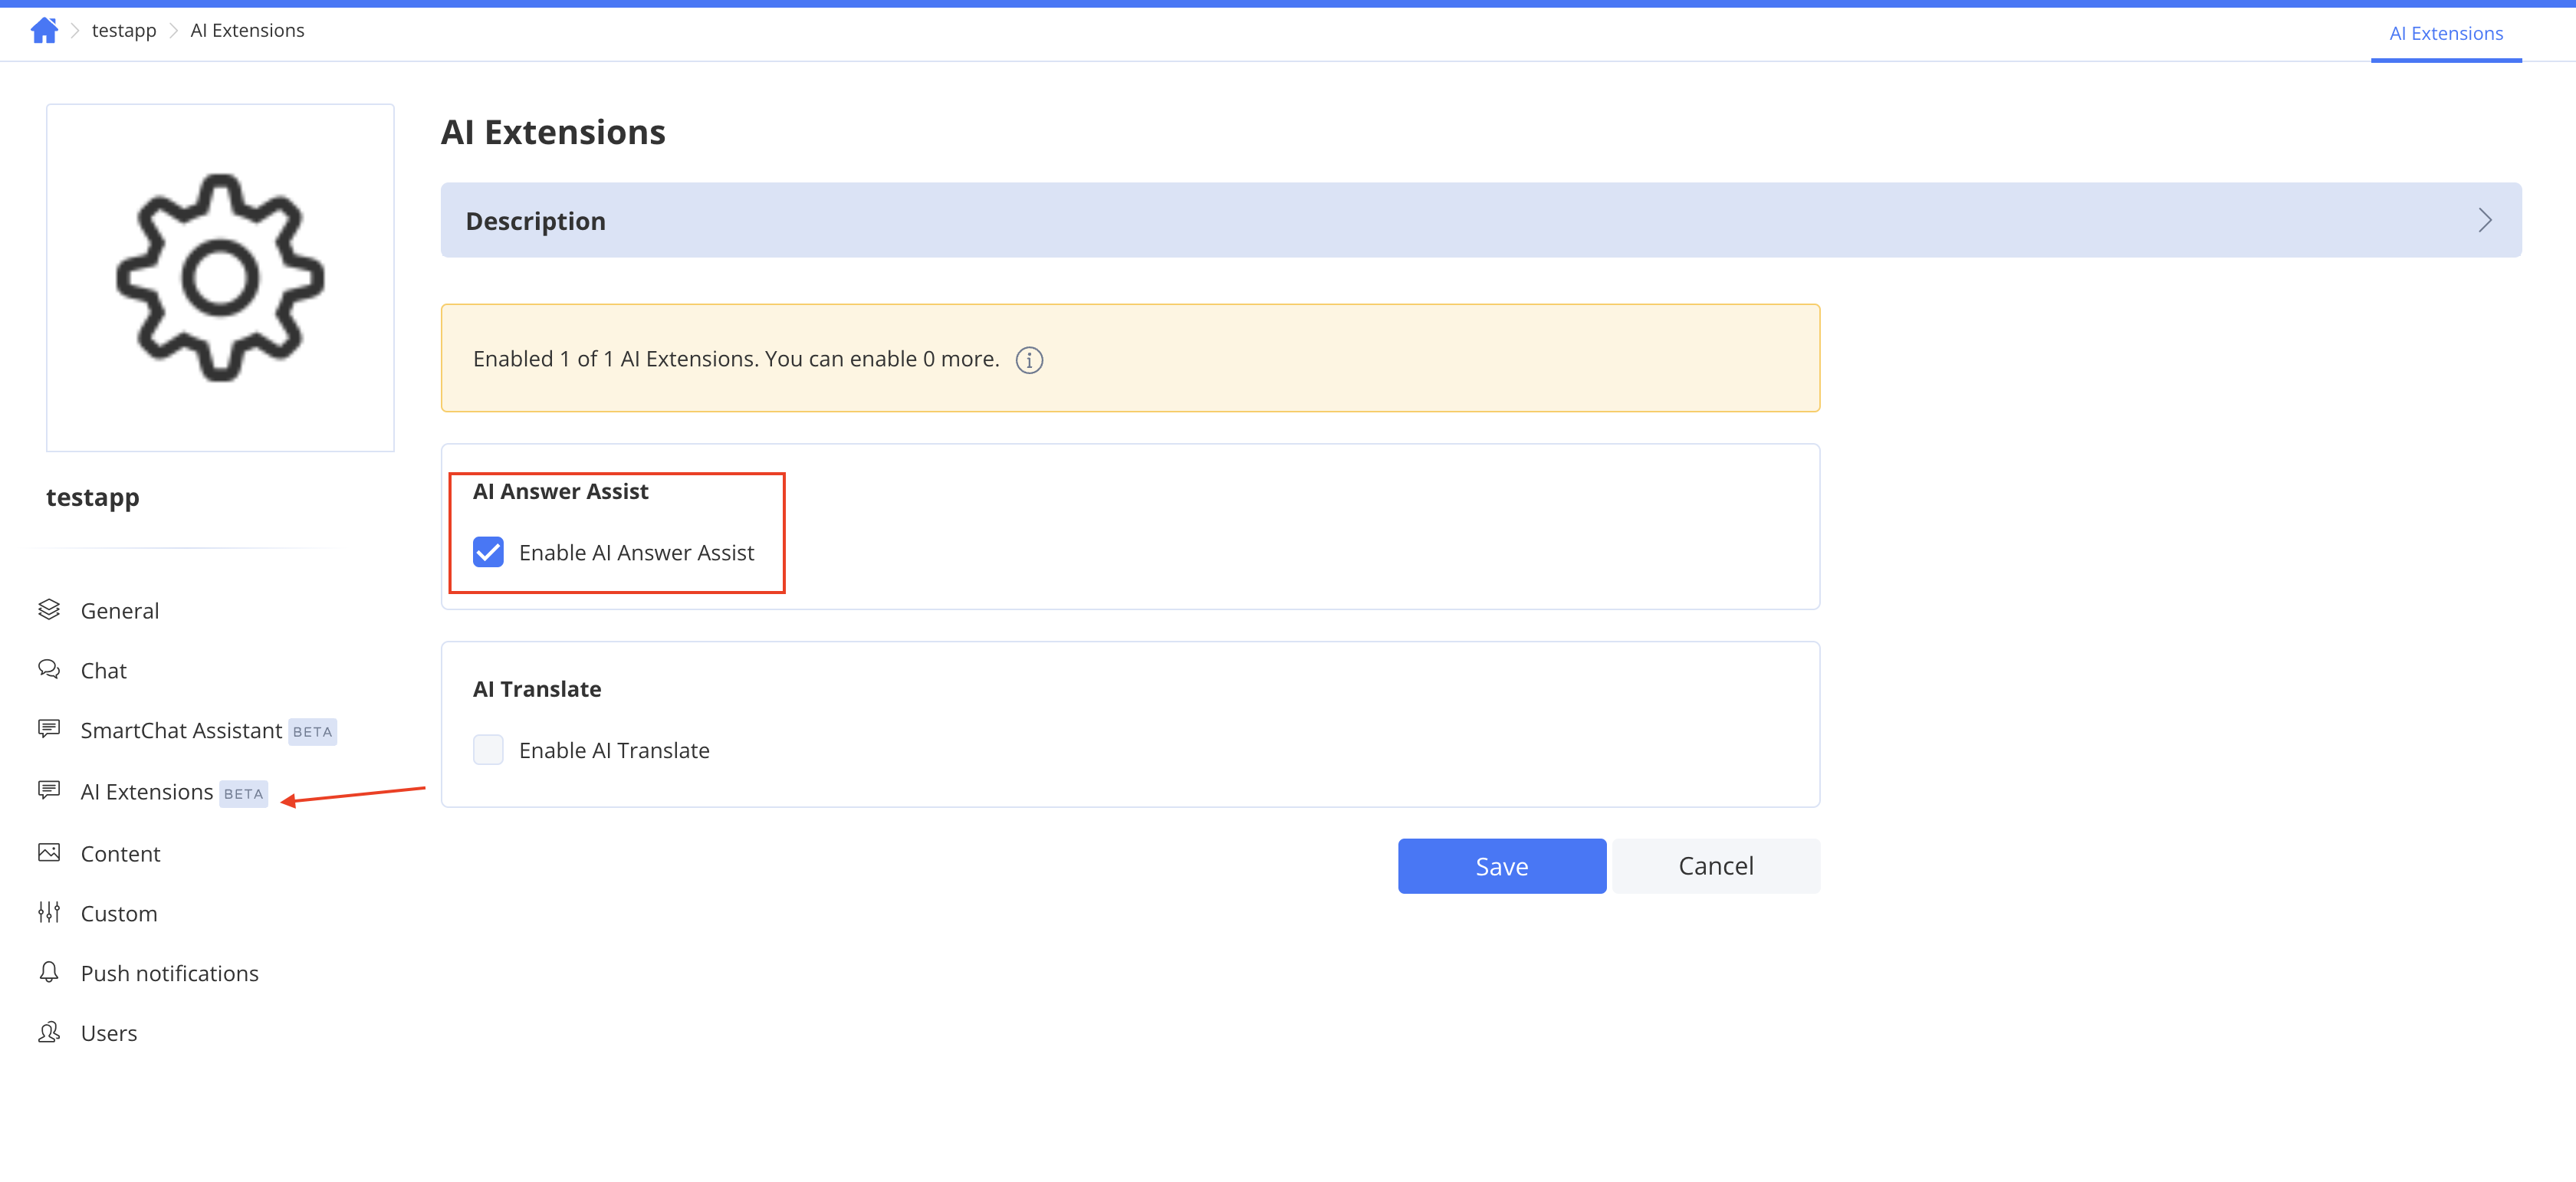
Head over to AI Extensions from the sidebar and check the box to enable AI Answer Assist for the API to work.
Coding the Application
React Setup:
Create a New React App:
Open your terminal and type in this code:To get started with creating a new React application, you'll need to open your terminal. This is where you'll enter the necessary commands to set up your project. First, make sure you have Node.js and npm (Node Package Manager) installed on your system. You can check this by running the following commands:
 node -v
 npm -v
If you see version numbers, you're good to go. If not, you'll need to install Node.js from nodejs.org.
Once you have Node.js and npm installed, you can create a new React app using the Create React App tool, which is a comfortable environment for learning React and a great way to start building a new single-page application. Run the following command in your terminal:
npx create-react-app my-new-appThis command will create a new directory called
my-new-appwith all the necessary files and dependencies to start developing a React application. Thenpxcommand is used to run Create React App without globally installing it on your system.After the setup is complete, navigate into your new project directory:
cd my-new-appNow, you can start the development server by running:
npm startThis will start the React application, and you can view it in your browser at
http://localhost:3000. The development server will automatically reload whenever you make changes to the code, providing a smooth development experience.With your React app up and running, you can now begin coding your application. You can open the project in your favorite code editor and start building your components, adding styles, and integrating any necessary libraries or APIs.
By following these steps, you will have a solid foundation for your React application, ready for further development and customization.
npm install quickblox --saveImport QuickBlox:
QB from "quickblox/quickblox";Prepare SDK:
 async function prepareSDK() {
   if (window.QB === undefined) {
     if (QB !== undefined) {
       window.QB = QB;
     } else {
       var QBLib = require('quickblox/quickblox.min');
       window.QB = QBLib;
     }
   }
   var APPLICATION_ID = 'your-app-id';
   var AUTH_KEY = 'your-auth-key';
   var AUTH_SECRET = 'your-auth-secret';
   var ACCOUNT_KEY = 'your-account-key';
   var CONFIG = { debug: true };
   window.QB.init(APPLICATION_ID, AUTH_KEY, AUTH_SECRET, ACCOUNT_KEY, CONFIG);
 }
Create User Session:
 useEffect(() => {
   prepareSDK().then(() => {
     const currentUser = { login: 'jake1001', password: 'jake1001' };
     QB.createSession(currentUser, (errorCreateSession, session) => {
       if (errorCreateSession) {
         console.log('Create User Session error:', errorCreateSession);
       } else {
         const userId = session.user_id;
         const password = session.token;
         const paramsConnect = { userId, password };
         QB.chat.connect(paramsConnect, (errorConnect) => {
           if (errorConnect) {
             console.log('Chat connection error:', errorConnect);
           }
         });
       }
     });
   }).catch(e => {
     console.log('SDK initialization error:', e);
   });
 }, []);
Add AI Answer Assist:
 const handleSubmit = (e) => {
   e.preventDefault();

   const smartChatAssistantId = 'your-assistant-id';
   const messageToAssist = inputText;
   const history = [
     { role: "user", message: "Hello" },
     { role: "assistant", message: "Hi" }
   ];

   QB.ai.answerAssist(smartChatAssistantId, messageToAssist, history, (error, response) => {
     if (error) {
       console.error('QB.ai.answerAssist error:', error);
     } else {
       setSubmittedText(response.answer);
     }
   });
 };
With this guide, you’re all set to integrate AI Answer Assist into your React application using QuickBlox. Dive in, explore, and let your app shine with smart AI interactions! 🚀
Feel free to reach out with any questions or share your experiences in the comments below! Also, we invite you to join our Discord community. By becoming a member, you'll have the opportunity to attend live spaces, participate in discussions, and engage with other developers who are using our products. It's a great place to share your experiences, ask questions, and get support from both peers and our team. We look forward to seeing you there and building a vibrant, collaborative environment together!
Subscribe to my newsletter
Read articles from Sayantani Deb directly inside your inbox. Subscribe to the newsletter, and don't miss out.
Written by

Sayantani Deb
Sayantani Deb
A Javascript Porgrammer who loves to build cool projects in the weekends!