Day 28,29/40 Days of K8s: Docker Volumes, Kubernetes Volumes Explained !!
 Gopi Vivek Manne
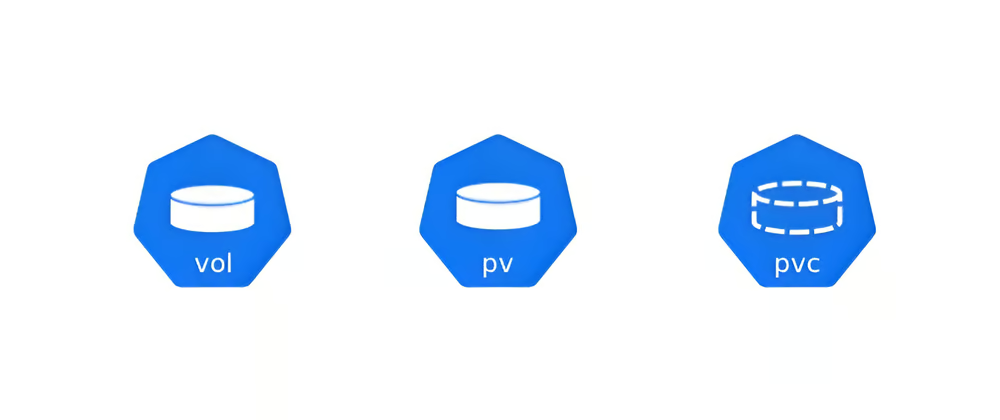
Before diving into Kubernetes volumes, let's look at how Docker volumes work for data persistence in containers.
❓ Why Do We Need Docker Volumes?
Docker containers are ephemeral in nature, meaning their data is lost when the container is removed or restarted. However, many applications, especially databases and stateful applications, require data persistence. This is where Docker volumes come in.
Containers run on a host system and have their own virtual file system. To ensure data persistence, we need a way to store data outside the container's lifecycle.
❓ What Are Docker Volumes?
Docker volumes is a way to persist data created by and used by Docker containers. They are completely managed by Docker. A directory or folder from the host file system is mounted into the Docker container's virtual file system. This allows the container to write data to both file systems, ensuring that even if the container restarts, the data remains available from the host file system.
🌟 Types of Docker Volumes
There are three main types of Docker volumes:
Host Volumes:
A specific path on the host file system is mounted into the container.
Syntax:
docker run -v /host/path:/container/path
Anonymous Volumes:
Docker manages the storage location on the host by itself.
Syntax:
docker run -v /container/path
Named Volumes:
Similar to anonymous volumes, but you can reference them by specific name.
Syntax:
docker run -v volume_name:/container/path
🌟 Create and Attach Docker Volumes
Let's Create a Docker image for Node.js TODO application and use Volumes for data persistence
Clone the Repo locally
  git clone https://github.com/docker/getting-started-app.git
  cd getting-started-app
Create a Dockerfile
 FROM node:18-alpine
 WORKDIR /app
 COPY . .
 RUN yarn install --production
 CMD ["node", "src/index.js"]
 EXPOSE 3000
Build a docker image out of Dockerfile
 docker build -t my-new-image:v1 .
 docker images
Run a container without volume (no data persistence):
 docker run -it -d -p 3000:3000 --name=todo-app f30352897b59
 docker ps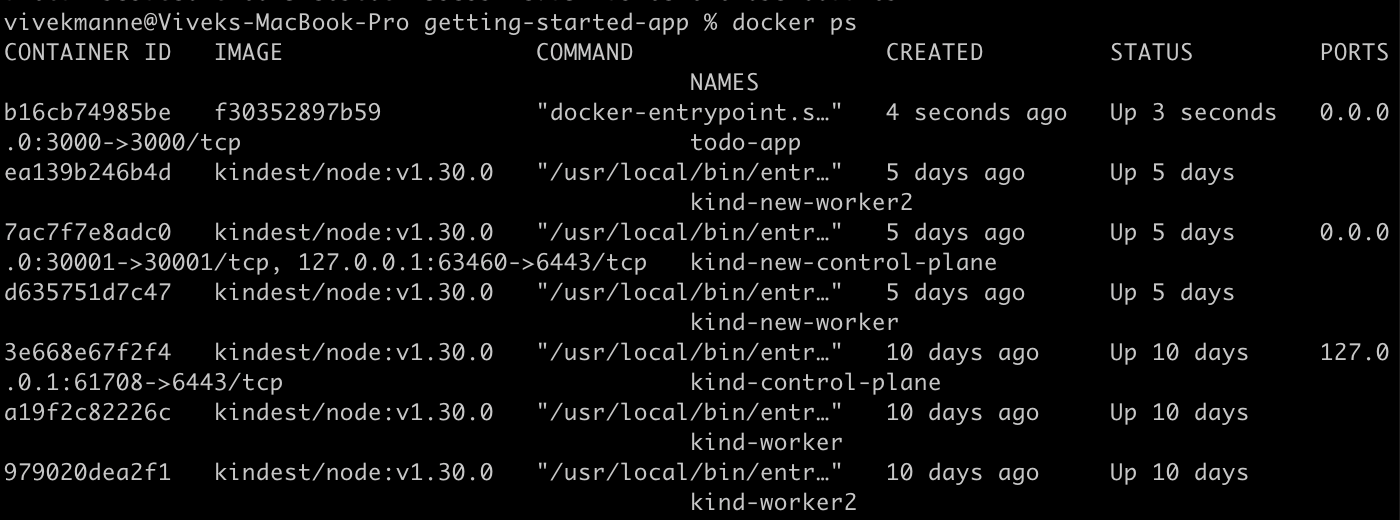
Add some data, then stop and recreate the container.
docker exec -it b16cb74985be /bin/sh
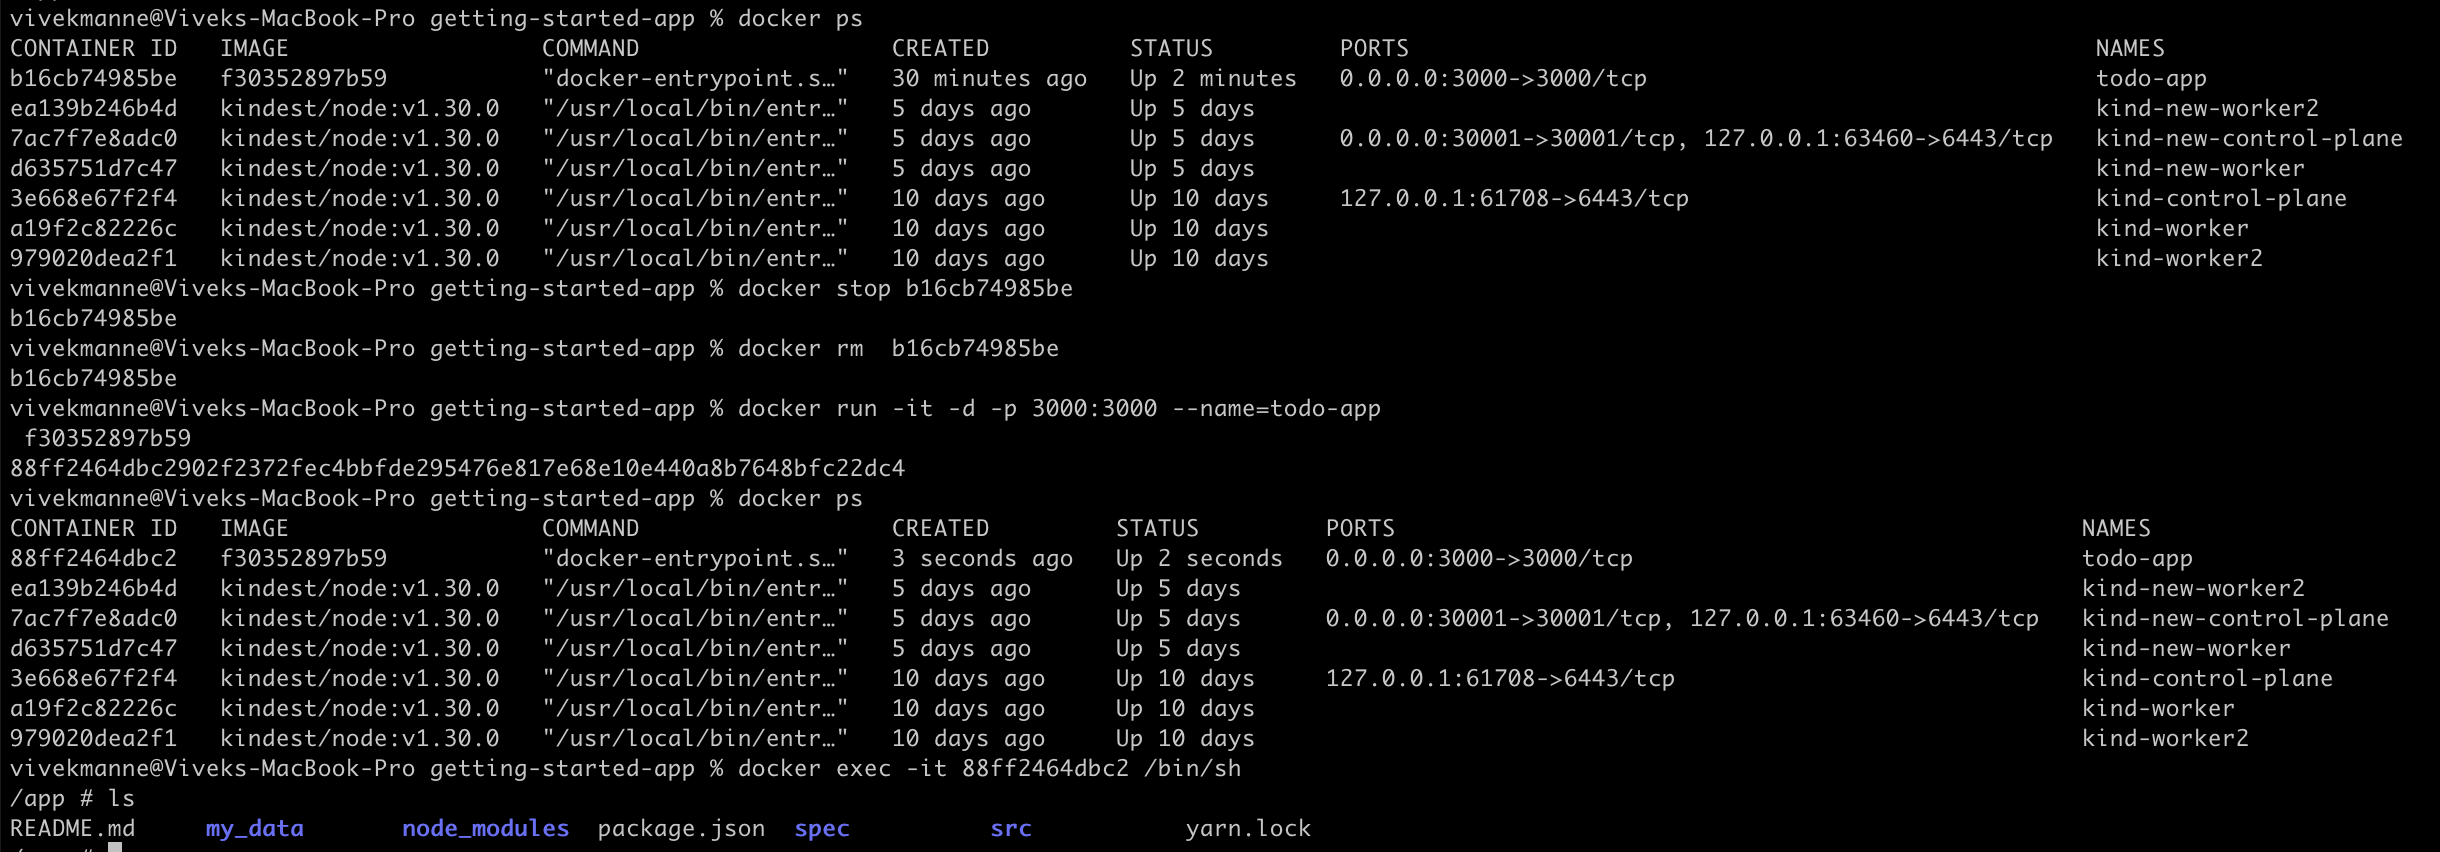
The new_data directory we created in the container file system is lost as there is no data storage.
Run a container with a named volume
docker run -d -it -v myvol:/app -p 3000:3000 --name=todo-app-persistent my-todo-app:v1Add some data, then stop and restart the container. The data should persist.
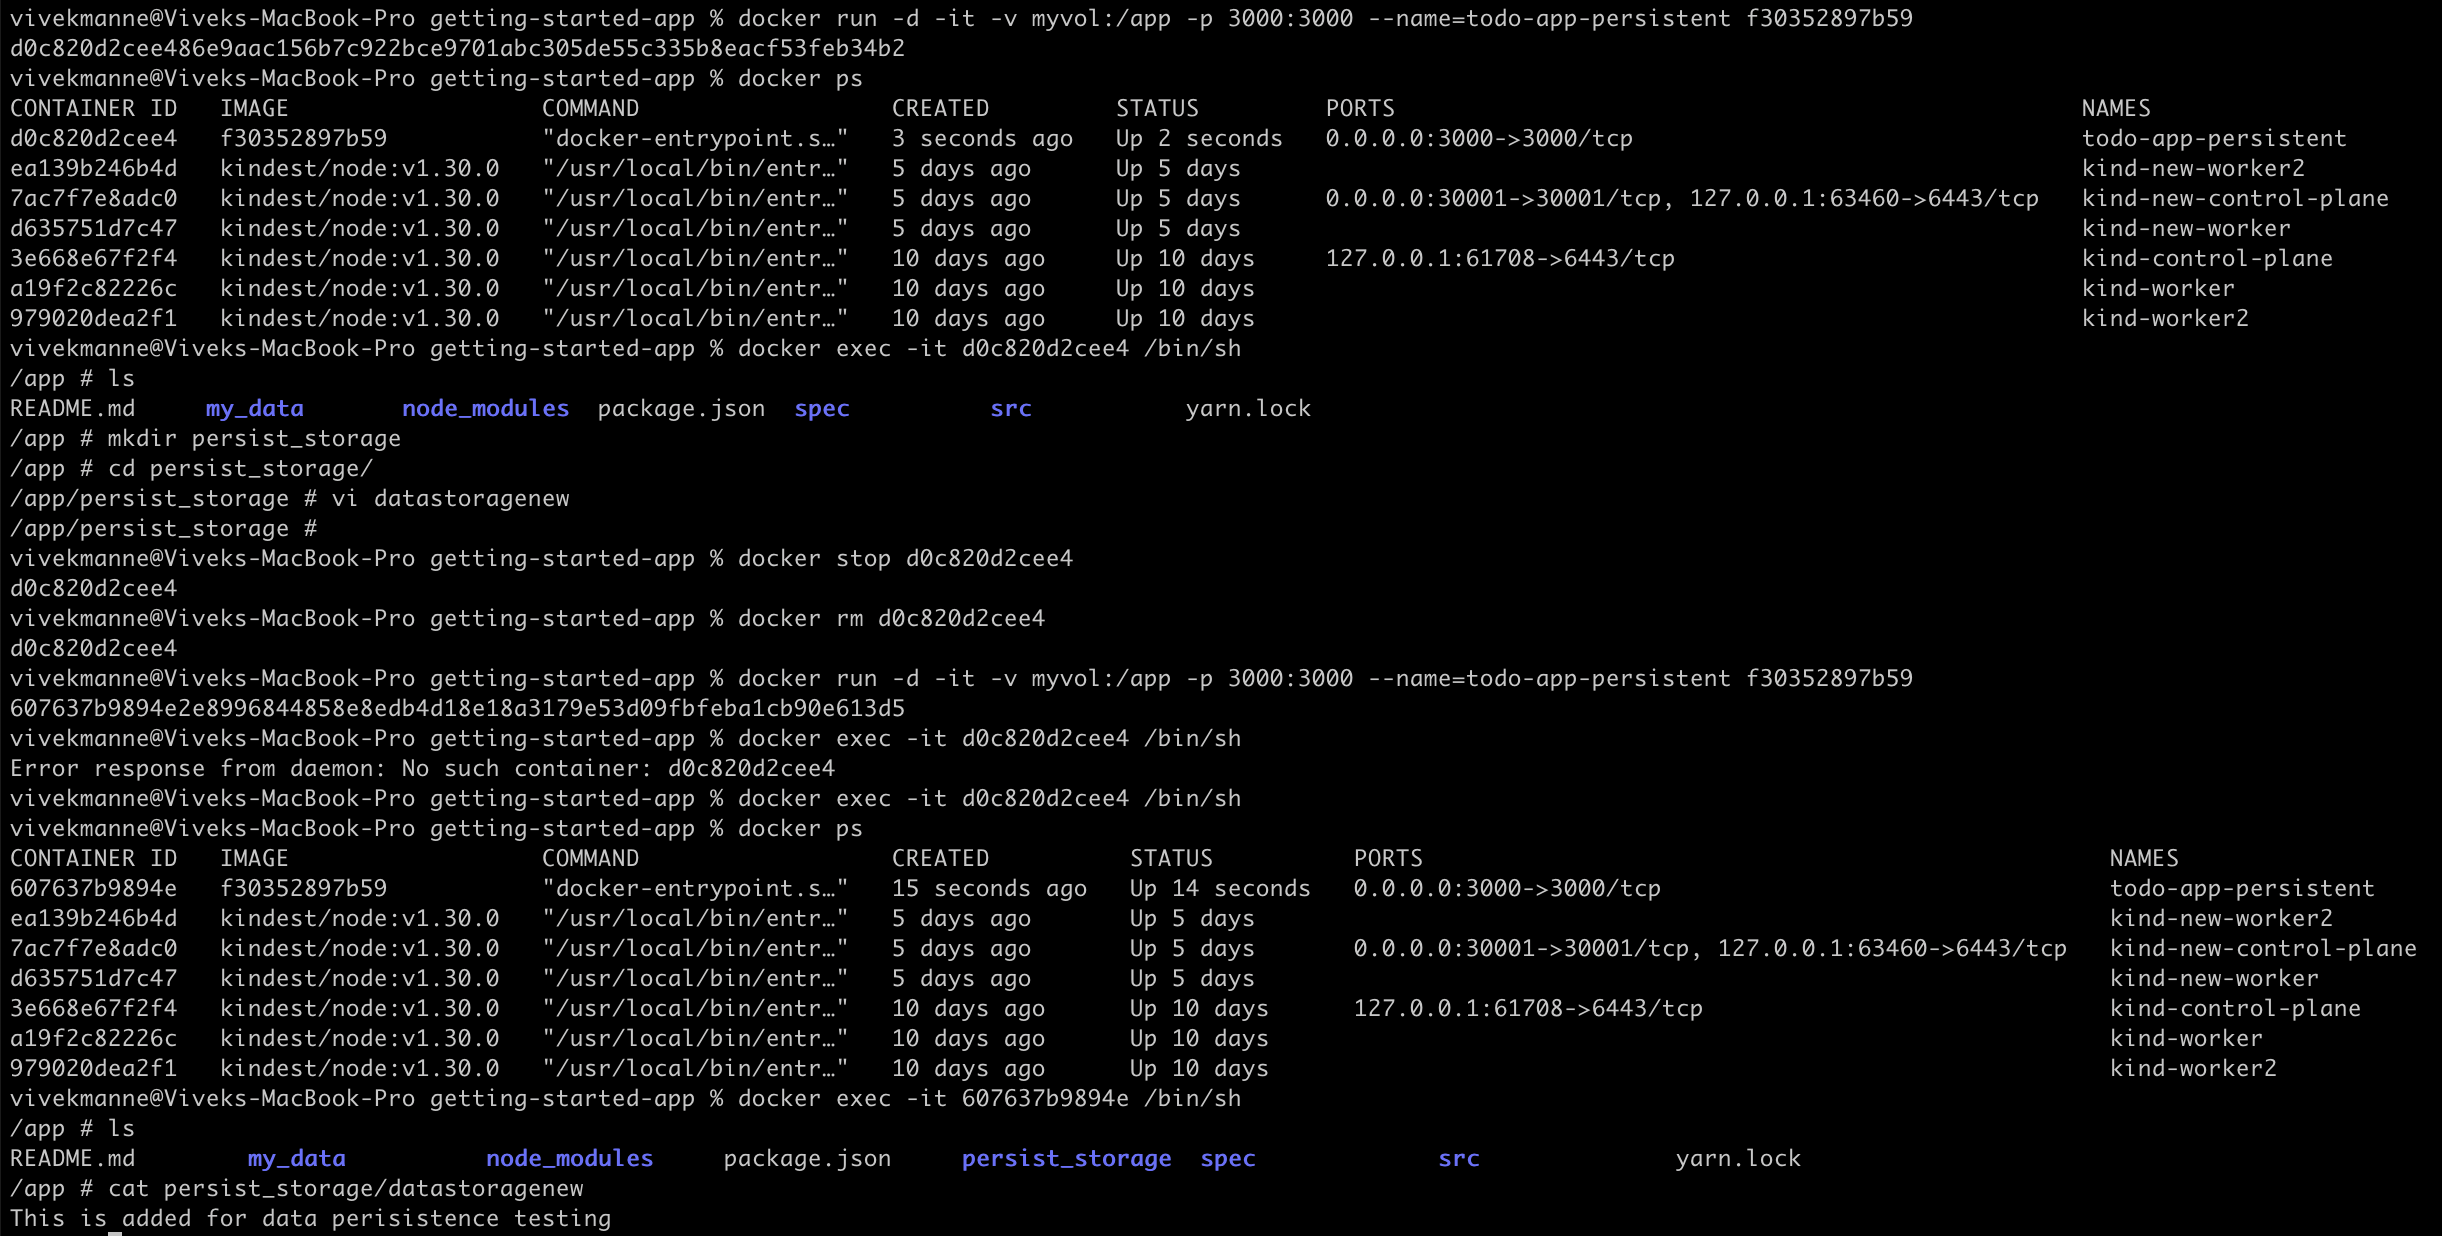

Now, the data remains intact because we mounted a host filesystem volume named
myvolonto the container's virtual filesystem path/app. Even if the container stops and is recreated, there is no data loss.
🌟 Key Points to Remember
Docker volumes act like external hard drives plugged into your containers.
You can use cloud-based storage as a backend for Docker volumes.
Bind mounts are similar to volumes but allow you to mount a specific directory from the host into the container.
Volumes offer more flexibility: Managed with Docker commands, persist beyond lifecycle of the containers and most importantly volumes can be shared across multiple containers.
🌟 Kubernetes Volumes
Volumes in Kubernetes, like in Docker, are used for data persistence. They address the need for persistent storage in containerized environments where data can be lost when pods restart or rescheduled.
🌟 Key Concepts
Volume: A directory with some data, accessible to containers in a pod.
Persistent Volume (PV): A storage in the cluster provisioned by an administrator or dynamically using Storage Classes.
Persistent Volume Claim (PVC): A request for storage by a user or pod.
Storage Class (SC): Sc creates PV the meets the needs of the claim. We confirm SC in SC yaml via provisioner attribute. Each storage backend has its own provisioner.
❓ Why Kubernetes Volumes?
Example: Consider an application pod that interacts with a MySQL database pod, frequently writing data to it. If the MySQL pod goes down and comes back up without data persistence configured, the data will be lost, preventing the application pod from accessing the required data.
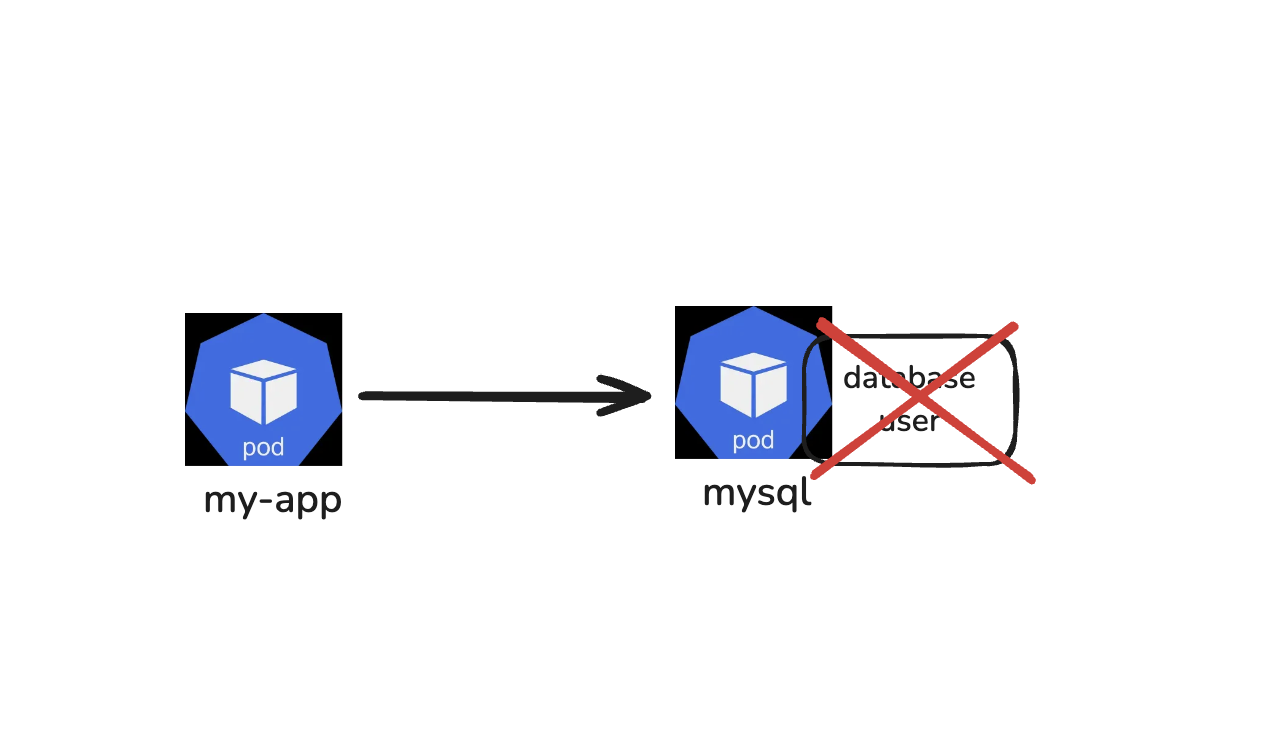
Kubernetes does not offer data persistence out of the box, we need to explicitly configure storage in the cluster.
Kubernetes Admin: Responsible for setting up, maintaining, and managing cluster resources, ensuring that storage is available in the cluster.
Kubernetes User: Deploys applications inside the cluster, utilizing the storage for data persistence.
🌟 Characteristics of Kubernetes Volumes
Storage persists beyond the lifecycle of a pod.
Must be available on all nodes in the cluster.
Should survive even if the entire cluster crashes.
🌟 Persistent Volumes (PV)
This is a storage available inside the cluster for application or pod to use.
Provisioned by an admin or dynamically using Storage Classes.
PVs are resources that exist at the cluster level (not namespaced).
Kubernetes supports various storage backends for PVs.
🌟 Storage Classes (SC)
SC used to dynamically provision Persistent Volumes when a PVC claims it.
We have different classes of storage with varying different attributes.
Each storage backend has its own provisioner which is configured in the SC resource via the
provisionerattribute.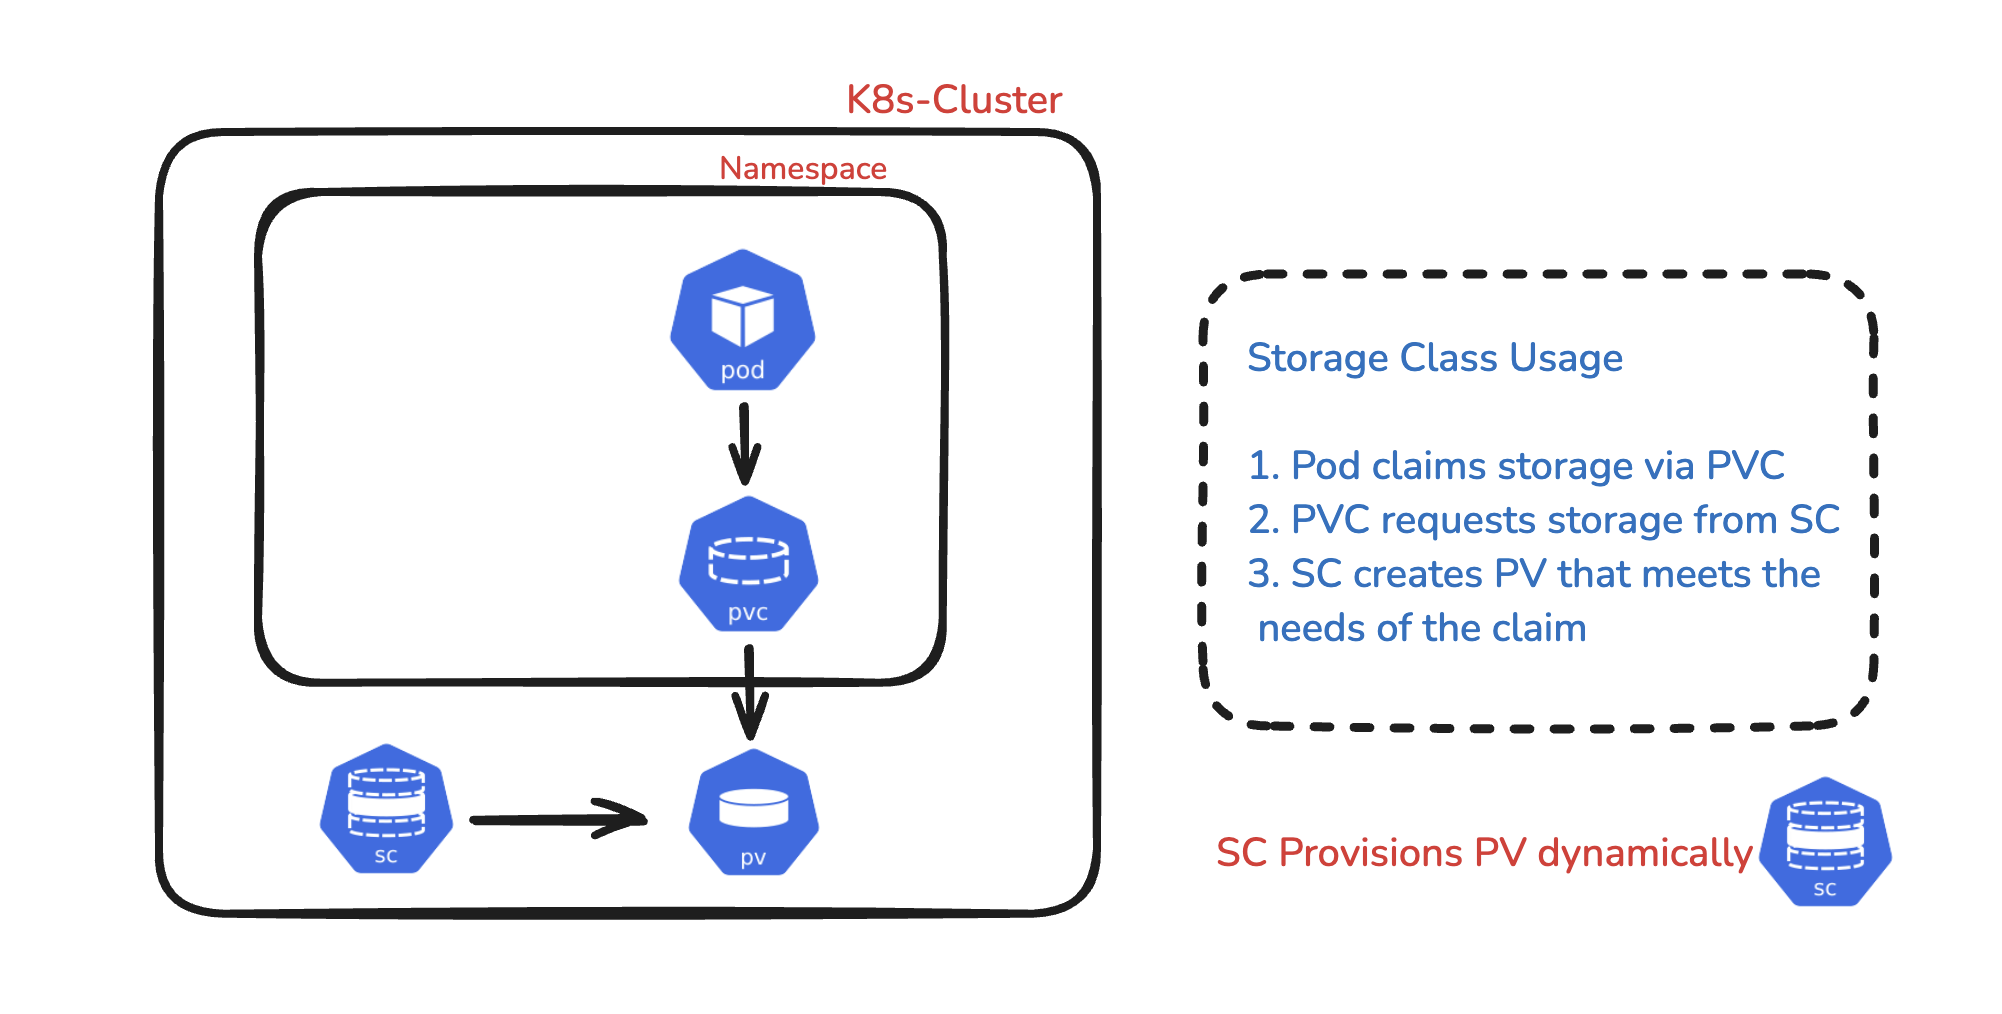
🌟 Workflow
A pod requests persistent volume (PV) storage via a Persistent Volume Claim (PVC), which is attached to the pod.
Storage Classes (SC) configured in the cluster will dynamically provision PVs based on the demands of the claim.
The storage class ensures that the PV is available for the pod to use for storage.
The pod requests storage via the PVC, and the storage class provisioner allocates a PV using backend storage (local or cloud) based on the provisioner attributes. The PVs are then utilized via PVCs.
Kubernetes supports different storage backends, each with its own provisioners.
We do not typically use local provisioners for real-time usage, instead we use cloud-based provisioners.
Reasons for Using Cloud-based Storage:
We cannot predict which node a pod will run on, so ensuring that storage is available across all nodes is crucial.
In the event of a cluster crash, data persistence is important.
Therefore, we use cloud-based storage classes for data persistence.
🌟 Local Volumes:
The default volumes managed by Kubernetes are ConfigMaps and Secrets. They can also be mounted at the container level within pods as mount paths.
Example: For applications like Prometheus or Elasticsearch, you may need ConfigMap data for configuration, Secrets for certificates, and external storage for data persistence (like AWS EBS as cloud-based storage). All three types of volumes can be utilized by the Elasticsearch pod within its containers.
🌟 TASK
Create a PersistentVolume named
pv-demo, access modeReadWriteMany, 512Mi of storage capacity and the host path/data/config.# This creates a PV of local storage type with capacity of 512Mi and accessmode and the data is # stored in the host file system path at /data/config apiVersion: v1 kind: PersistentVolume metadata: name: pv-demo labels: type: local spec: capacity: storage: 512Mi accessModes: - ReadWriteMany hostPath: path: "/data/config" #This is host file system pathCreate a PersistentVolumeClaim named
pvc-demo. The claim should request 256Mi and use an empty string value for the storage class. Please make sure that the PersistentVolumeClaim is properly bound after its creation.# This creates pvc which requests resources of 500Mi from available 1GB of storage from PV apiVersion: v1 kind: PersistentVolumeClaim metadata: name: pvc-demo spec: accessModes: - ReadWriteMany resources: requests: storage: 256Mi storageClassName: "" # Empty string value for the storage classMount the PersistentVolumeClaim from a new Pod named
appwith the path/var/app/config. The Pod uses the imagenginx:latest.
apiVersion: v1
kind: Pod
metadata:
  name: app
spec:
  nodeName: master # Pod will be scheduled on master node using nodeName
  containers:
  - name: nginx
    image: nginx:latest
    volumeMounts:
    - name: config-volume
      mountPath: /var/app/config #Container file system path
  volumes:
  - name: config-volume
    persistentVolumeClaim:
      claimName: pvc-demo  # Name of the PersistentVolumeClaim
kubectl apply -f Pv.yaml
kubectl apply -f Pvc.yaml
kubectl apply -f pod.yaml

Open an interactive shell to the Pod and create a file in the directory
/var/app/config.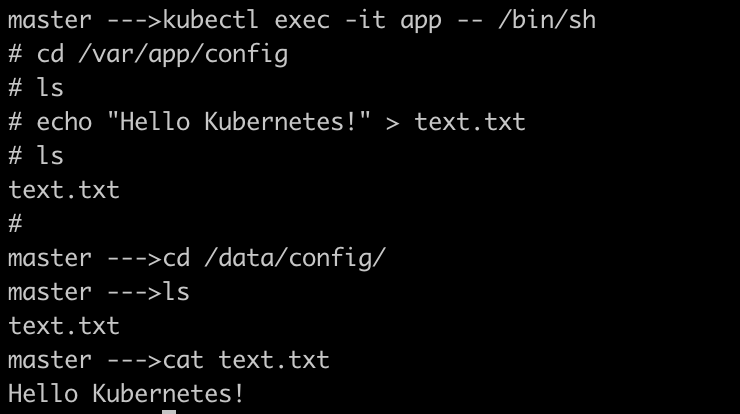
The file text.txt we created inside the container at the directory /var/app/config is mounted to the host file system at the path /data/config which offers data persistence.
By using PVs, PVCs, and SCs, Kubernetes provides a flexible and powerful way to manage persistent storage for containerized applications.
#Kubernetes #DockerVolumes #BindMounts #DataPersistence #KubernetesVolumes #PV #PVC #SC #40DaysofKubernetes #CKASeries
Subscribe to my newsletter
Read articles from Gopi Vivek Manne directly inside your inbox. Subscribe to the newsletter, and don't miss out.
Written by

Gopi Vivek Manne
Gopi Vivek Manne
I'm Gopi Vivek Manne, a passionate DevOps Cloud Engineer with a strong focus on AWS cloud migrations. I have expertise in a range of technologies, including AWS, Linux, Jenkins, Bitbucket, GitHub Actions, Terraform, Docker, Kubernetes, Ansible, SonarQube, JUnit, AppScan, Prometheus, Grafana, Zabbix, and container orchestration. I'm constantly learning and exploring new ways to optimize and automate workflows, and I enjoy sharing my experiences and knowledge with others in the tech community. Follow me for insights, tips, and best practices on all things DevOps and cloud engineering!