Mastering NestJS CLI: Advanced Usage - From Beginner to Pro
 Nicanor Talks Web
Table of contents

New to NestJS, look at NestJS 101 to get up and running.
NestJS is a powerful and versatile framework for building scalable and maintainable server-side applications. One key tool that makes working with NestJS so efficient is the NestJS CLI. Let's dive into basics, tips and tricks, NestJS capabilities, custom schematics, code generation, configuration and automation scripts
Introduction to NestJS CLI
The NestJS CLI was developed to streamline the development process of NestJS applications, drawing inspiration from the Angular CLI. It provides a set of powerful commands to automate routine tasks, ensuring that developers can focus more on building features rather than configuring their environment. With the NestJS CLI, you can quickly generate boilerplate code, manage dependencies, and run your application with ease.
Basic Commands
Creating a new project:
nest new project-nameRunning the development server:
npm run start:dev
Pros and Cons of NestJS CLI
Pros
Efficiency: Automates repetitive tasks, saving time and reducing human error.
Consistency: Ensures a consistent project structure and coding standards across the team.
Speed: Accelerates development with quick scaffolding of components.
Integration: Seamlessly integrates with TypeScript and other NestJS features.
Customization: Allows the creation of custom schematics to fit specific project needs.
Cons
High Learning Curve
Overhead: May introduce some overhead for very small projects where a simple setup would suffice.
Dependency: Heavy reliance on CLI can sometimes obscure understanding of underlying processes.
Setting Up NestJS CLI
Before you can start using the NestJS CLI, you need to install it globally on your machine.
npm install -g @nestjs/cli
Creating a New Project
To create a new NestJS project, use the following command:
nest new project-name
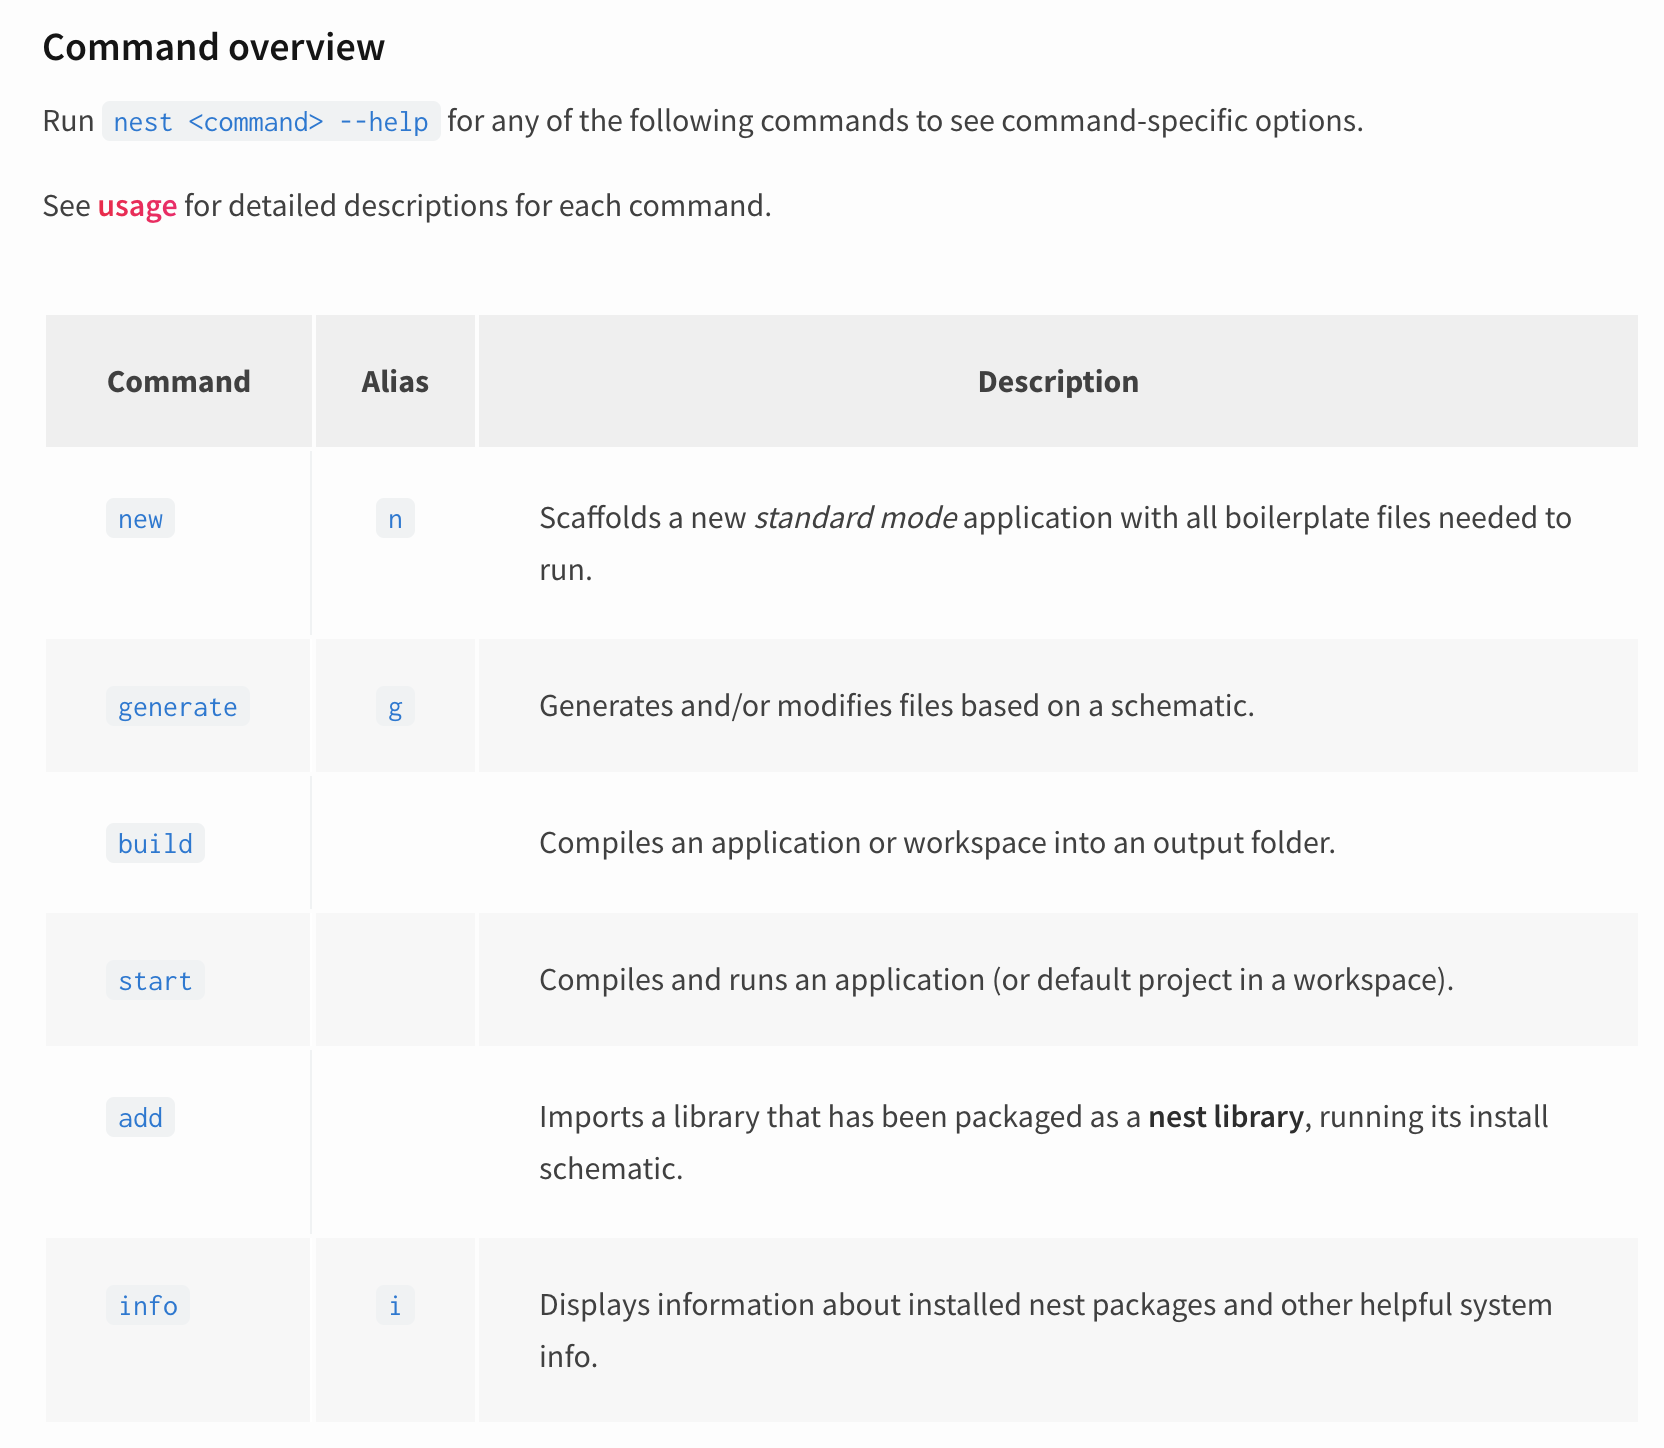
This command sets up a new NestJS project with a default structure, installs the necessary dependencies, and provides an initial set of files.

Code Generation with NestJS CLI
One of the most powerful features of the NestJS CLI is its ability to generate boilerplate code for you. This can save a lot of time and ensure that your code adheres to best practices.
Generating Modules
nest generate module module-name
Generating Controllers
nest generate controller controller-name
Generating Services
nest generate service service-name
Generating Middleware, Guards, Pipes, and Interceptors
nest generate middleware middleware-name
nest generate guard guard-name
nest generate pipe pipe-name
nest generate interceptor interceptor-name
Custom Schematics
Schematics in NestJS allow you to define custom templates for generating code. This can be incredibly useful for automating repetitive tasks and enforcing coding standards across your team. Custom schematics extend the capabilities of the default CLI commands by enabling you to create your own file structures, code patterns, and configurations tailored to your project requirements.
Creating Custom Schematics
Install the NestJS Schematics CLI:
npm install -g @nestjs/schematicsCreate a new schematics collection:
schematics blank --name my-schematicsDefine your custom schematic: Modify the files in the generated
my-schematicsfolder to define your custom schematic. This typically involves editing theindex.tsandschema.jsonfiles.Build and test your schematics:
 npm run build
 schematics .:my-schematic
Example: Custom Service Schematic
// my-schematics/src/service/index.ts
import { Rule, SchematicContext, Tree, apply, url, template, move, mergeWith } from '@angular-devkit/schematics';
import { strings } from '@angular-devkit/core';

export function service(options: any): Rule {
  return (tree: Tree, context: SchematicContext) => {
    const sourceTemplates = url('./files');
    const sourceParamTemplates = apply(sourceTemplates, [
      template({
        ...options,
        ...strings,
      }),
      move(options.path || 'src/app'),
    ]);
    return mergeWith(sourceParamTemplates)(tree, context);
  };
}
Project Configuration
The nest-cli.json file is the central configuration file for a NestJS project. It allows you to customize various aspects of your project, such as source roots, compiler options, and collection paths. Proper configuration ensures that your project is set up according to your specific requirements and can help streamline development processes.
Configuring the Project
Change Source Root: Specify the root directory of your source files.
{
  "sourceRoot": "src"
}
Add Compiler Options
Include additional compiler options to customize the build process.
{
  "compilerOptions": {
    "assets": ["**/*.json"],
    "watchAssets": true
  }
}
Example nest-cli.json
{
  "collection": "@nestjs/schematics",
  "sourceRoot": "src",
  "compilerOptions": {
    "deleteOutDir": true,
    "assets": ["**/*.json"],
    "watchAssets": true
  }
}
Automation Scripts
Automation scripts can help you streamline your development workflow by automating repetitive tasks. You can define these scripts in your package.json file.
Example: Automating Linting and Testing
"scripts": {
  "lint": "eslint src/**/*.ts",
  "test": "jest",
  "precommit": "npm run lint && npm run test"
}
Speed Up Development
Use the --dry-run flag: Preview the changes a command will make without actually applying them.
nest generate module new-module --dry-run
Keep Dependencies Updated
Regularly check for outdated packages and update them to keep your project secure and up-to-date.
npm outdated
npm update
Utilize Aliases
Shorten CLI commands: Create aliases for frequently used commands to speed up your workflow.
"scripts": {
  "g:m": "nest generate module",
  "g:c": "nest generate controller",
  "g:s": "nest generate service"
}
The NestJS CLI is a powerful tool that can significantly improve your development workflow. By mastering its advanced features, such as custom schematics, project configuration, and automation scripts, you can streamline your processes and focus on building robust applications.
Further Reading
Subscribe to my newsletter
Read articles from Nicanor Talks Web directly inside your inbox. Subscribe to the newsletter, and don't miss out.
Written by

Nicanor Talks Web
Nicanor Talks Web
Hi there! I'm Nicanor, and I'm a Software Engineer. I'm passionate about solving humanitarian problems through tech, and I love sharing my knowledge and insights with others.