Day 15: CI/CD Pipeline Tutorial: Deploying Two Tier Flask Apps via Jenkins and Docker
 Vandana Pandit
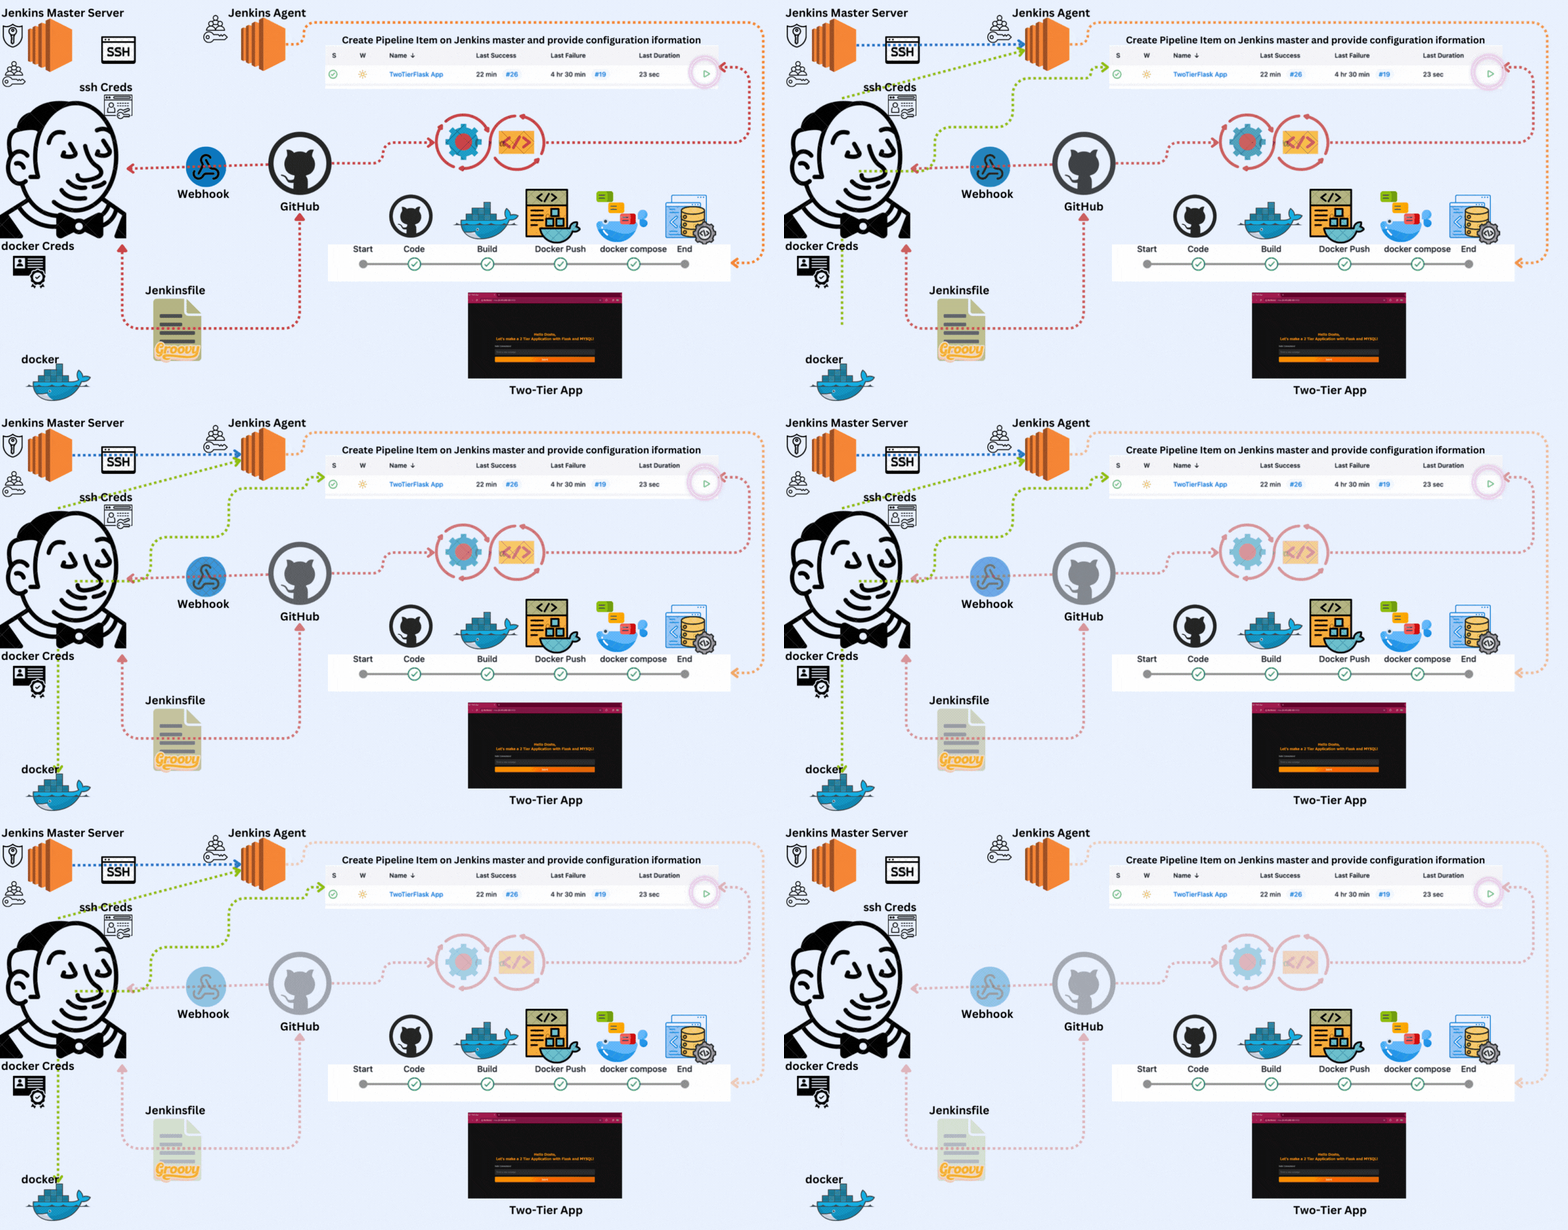
Launch your Ubuntu instance:
Ensure that the security group associated with the instance allows inbound traffic on the following ports:
SSH (port 22)
HTTP (port 80)
HTTPS (port 443)
Custom TCP rule for Jenkins (port 8080)
Connect to the instance via SSH:
Use an SSH client to connect to your instance. The command will look something like:
sh -i /path/to/your-key.pem ubuntu@your-instance-ip
Install Java on the instance
Update your package index:
sudo apt update
Install Java:
sudo apt install fontconfig openjdk-17-jre
Install Jenkins on the instance:
Add jenkins repository key to your system:
sudo wget -O /usr/share/keyrings/jenkins-keyring.asc \
  https://pkg.jenkins.io/debian-stable/jenkins.io-2023.key
Add Jenkins repository to your system:
echo "deb [signed-by=/usr/share/keyrings/jenkins-keyring.asc]" \
  https://pkg.jenkins.io/debian-stable binary/ | sudo tee \
  /etc/apt/sources.list.d/jenkins.list > /dev/null
Update your package index:
sudo apt-get update
Install Jenkins
sudo apt-get install jenkins
Start Jenkins:
Start Jenkins service:
systemctl start jenkins
Enable Jenkins service to start on boot
systemctl enable jenkins
Access Jenkins:
Open web browser and navigate to 'https://your-instance-public-ip:8080'
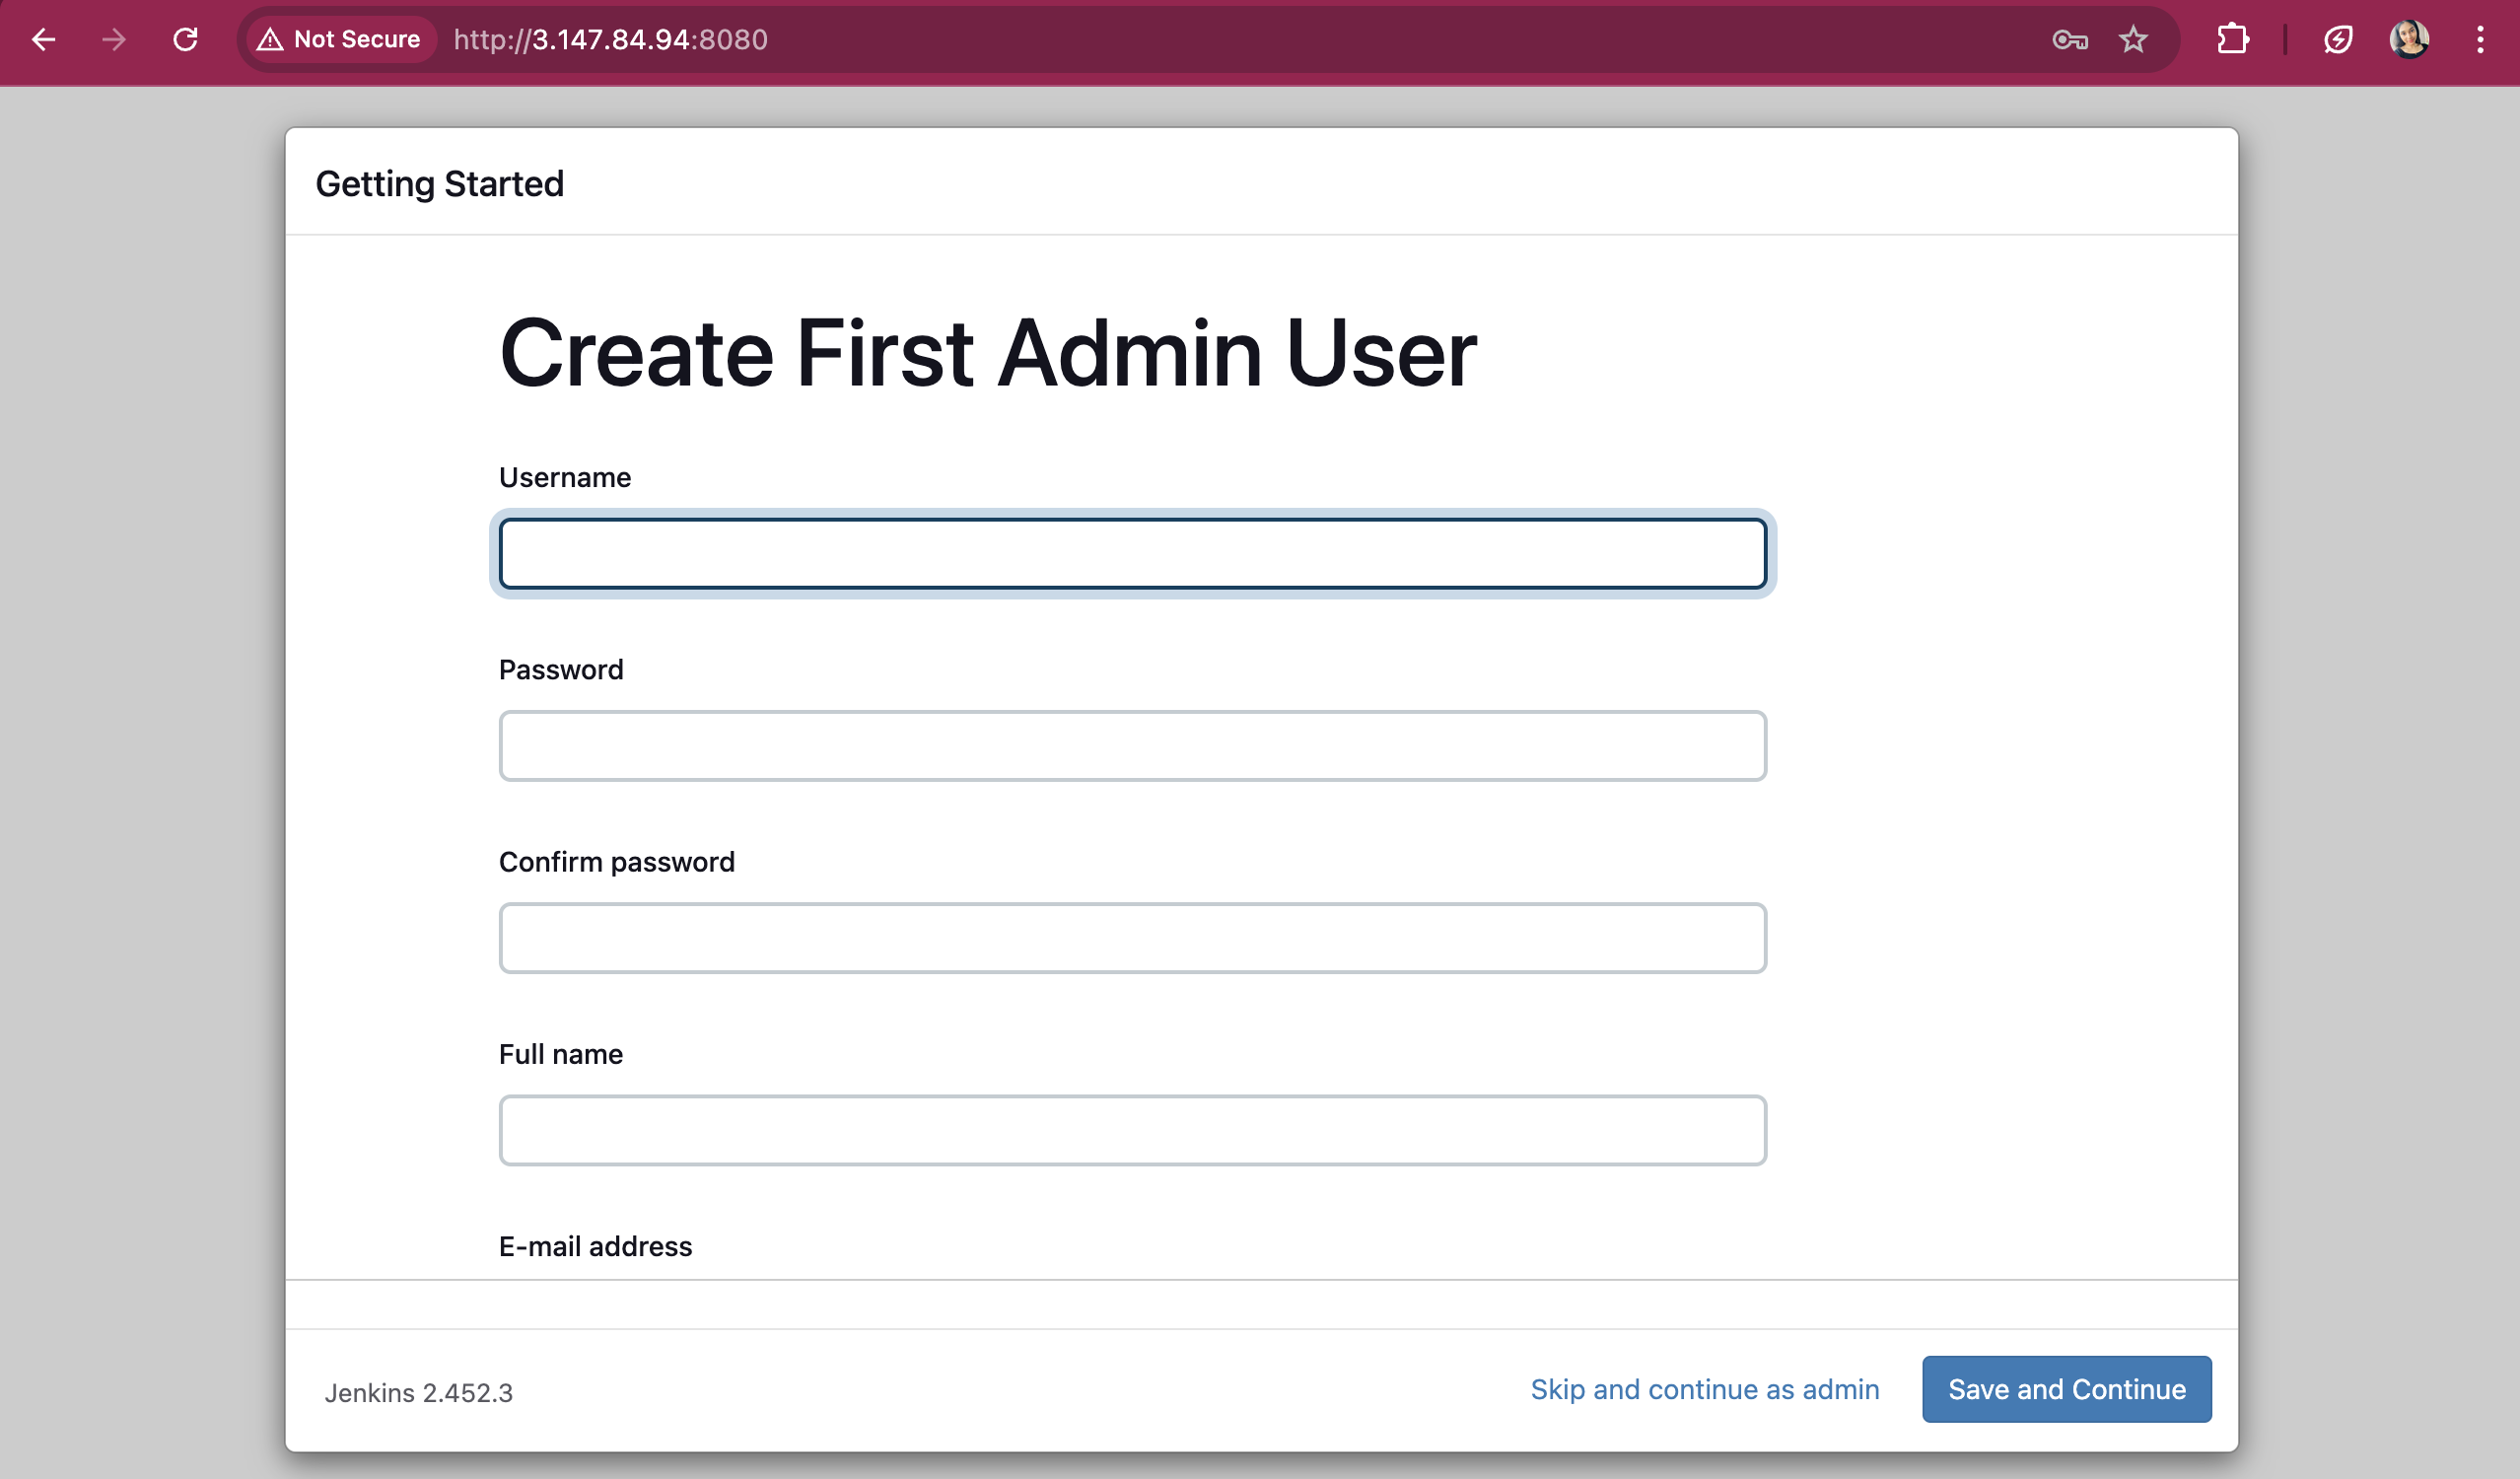
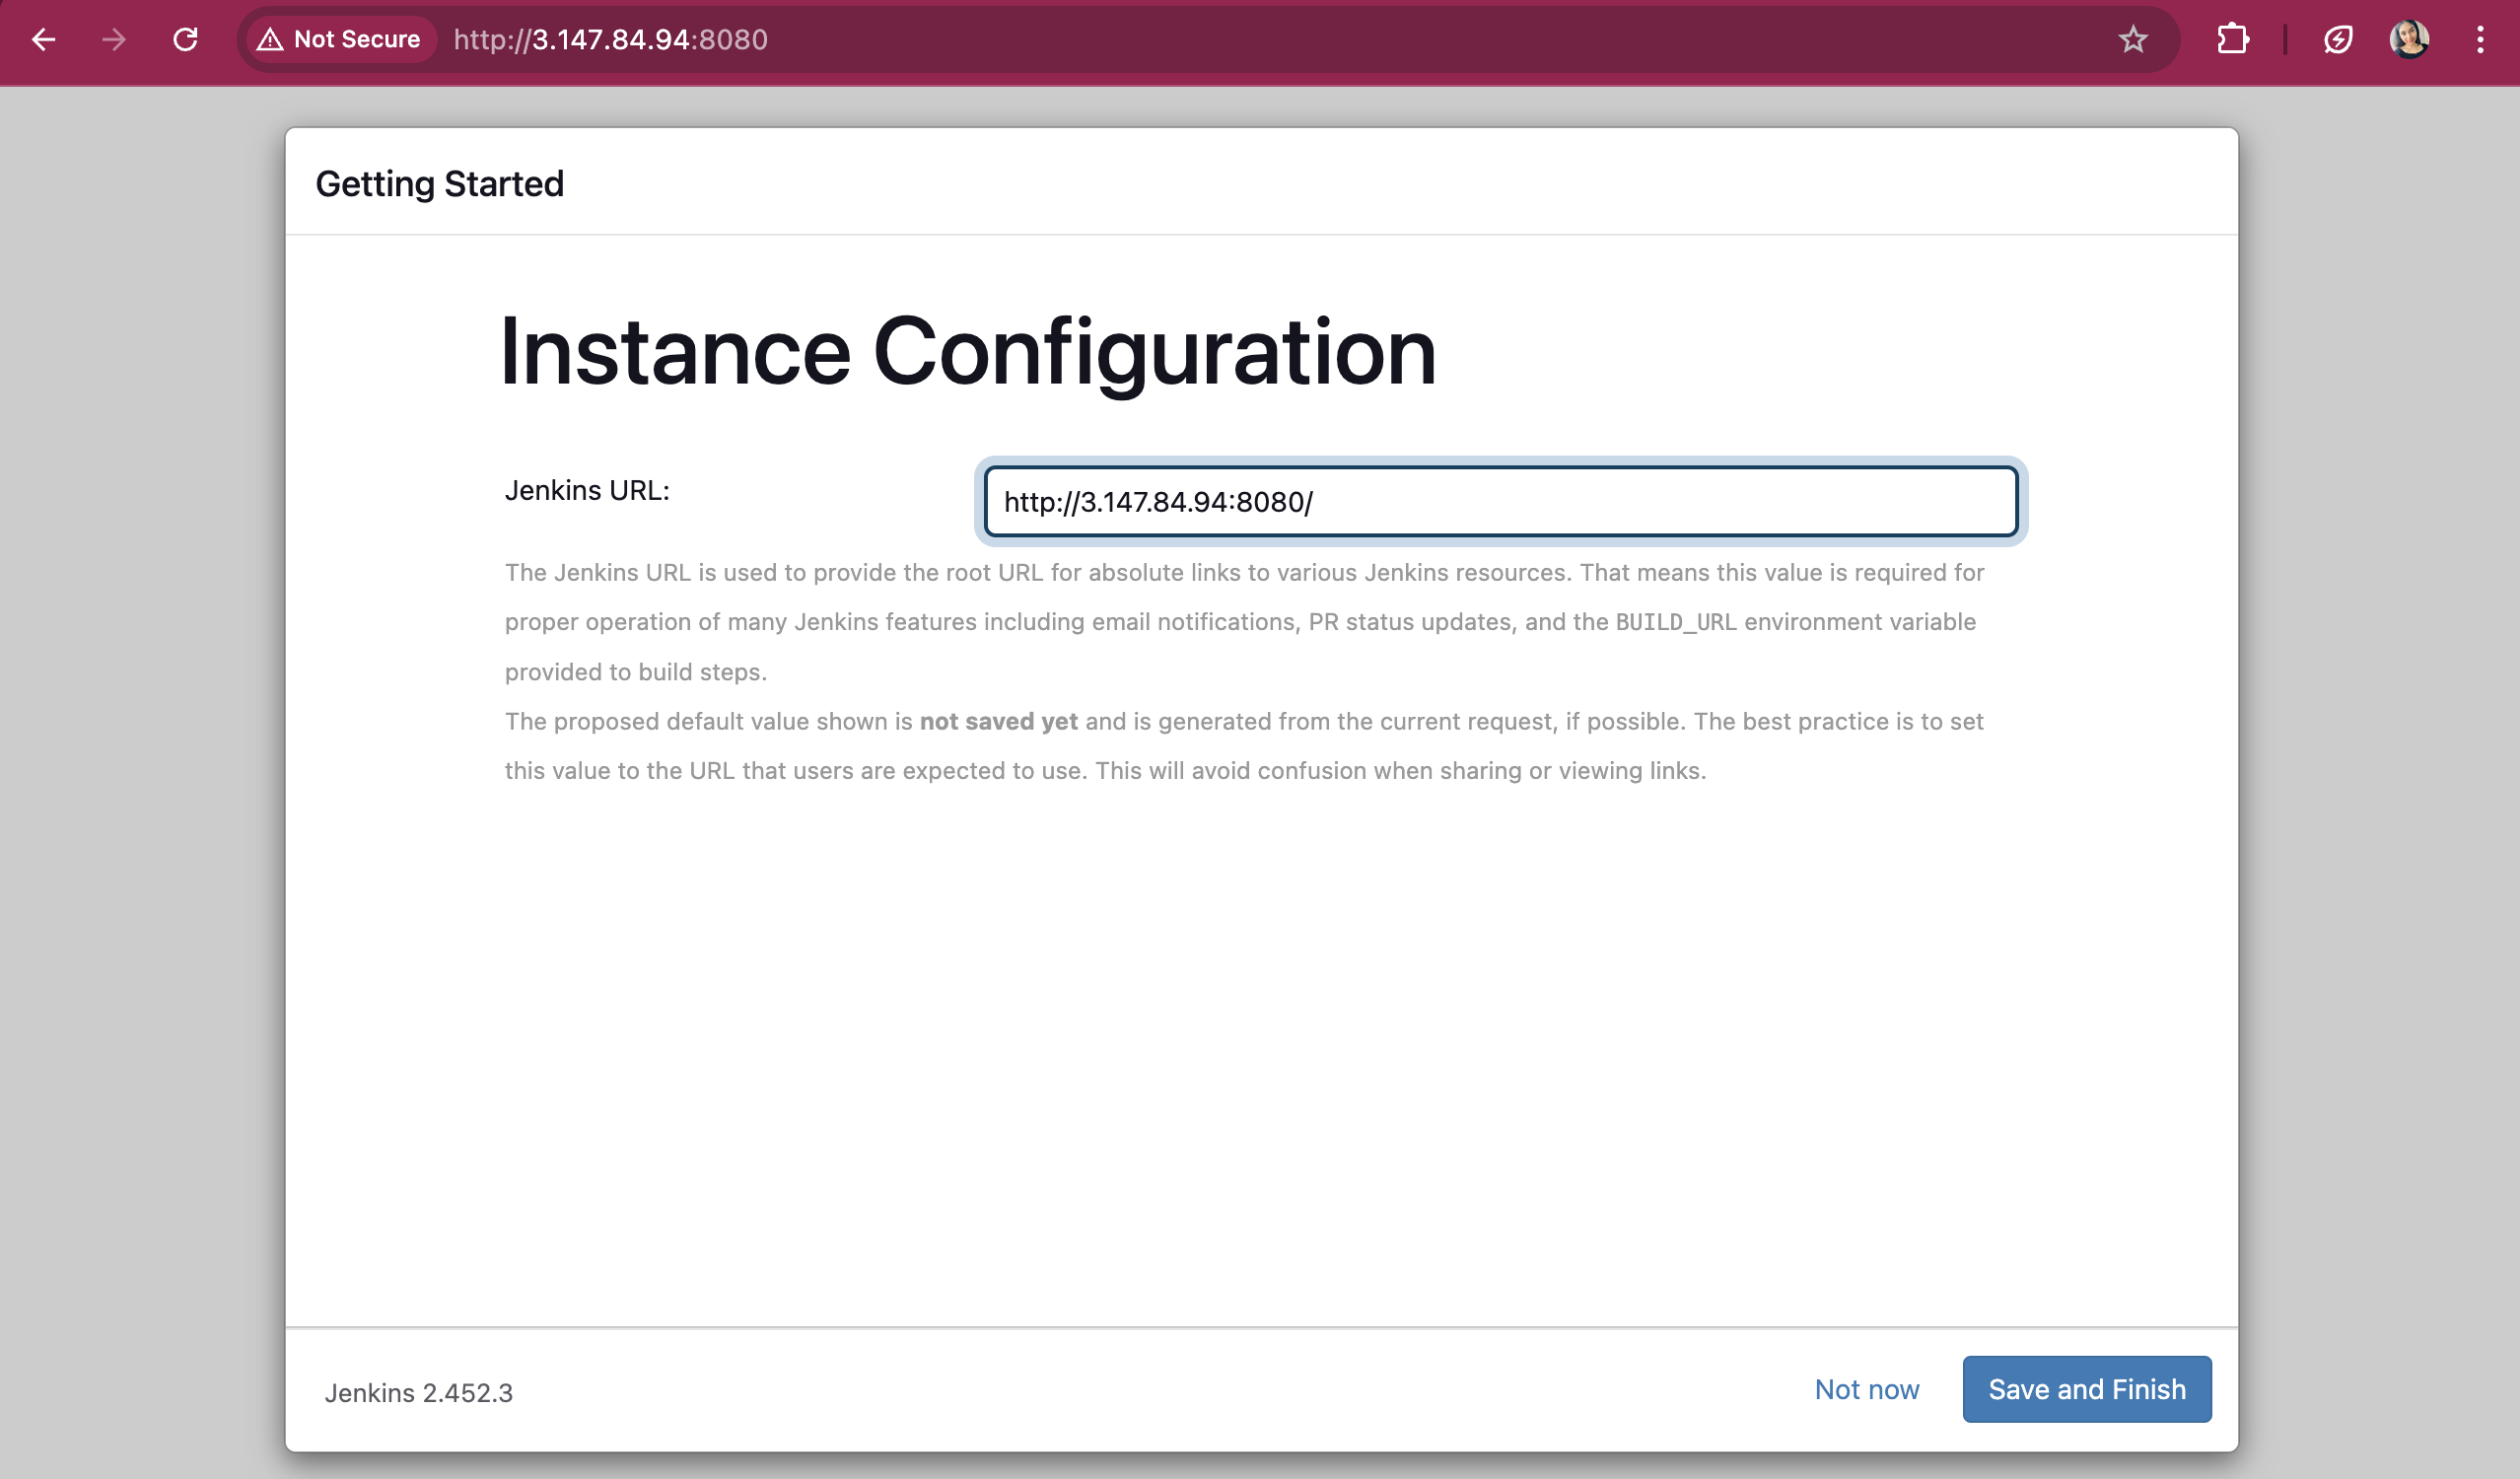
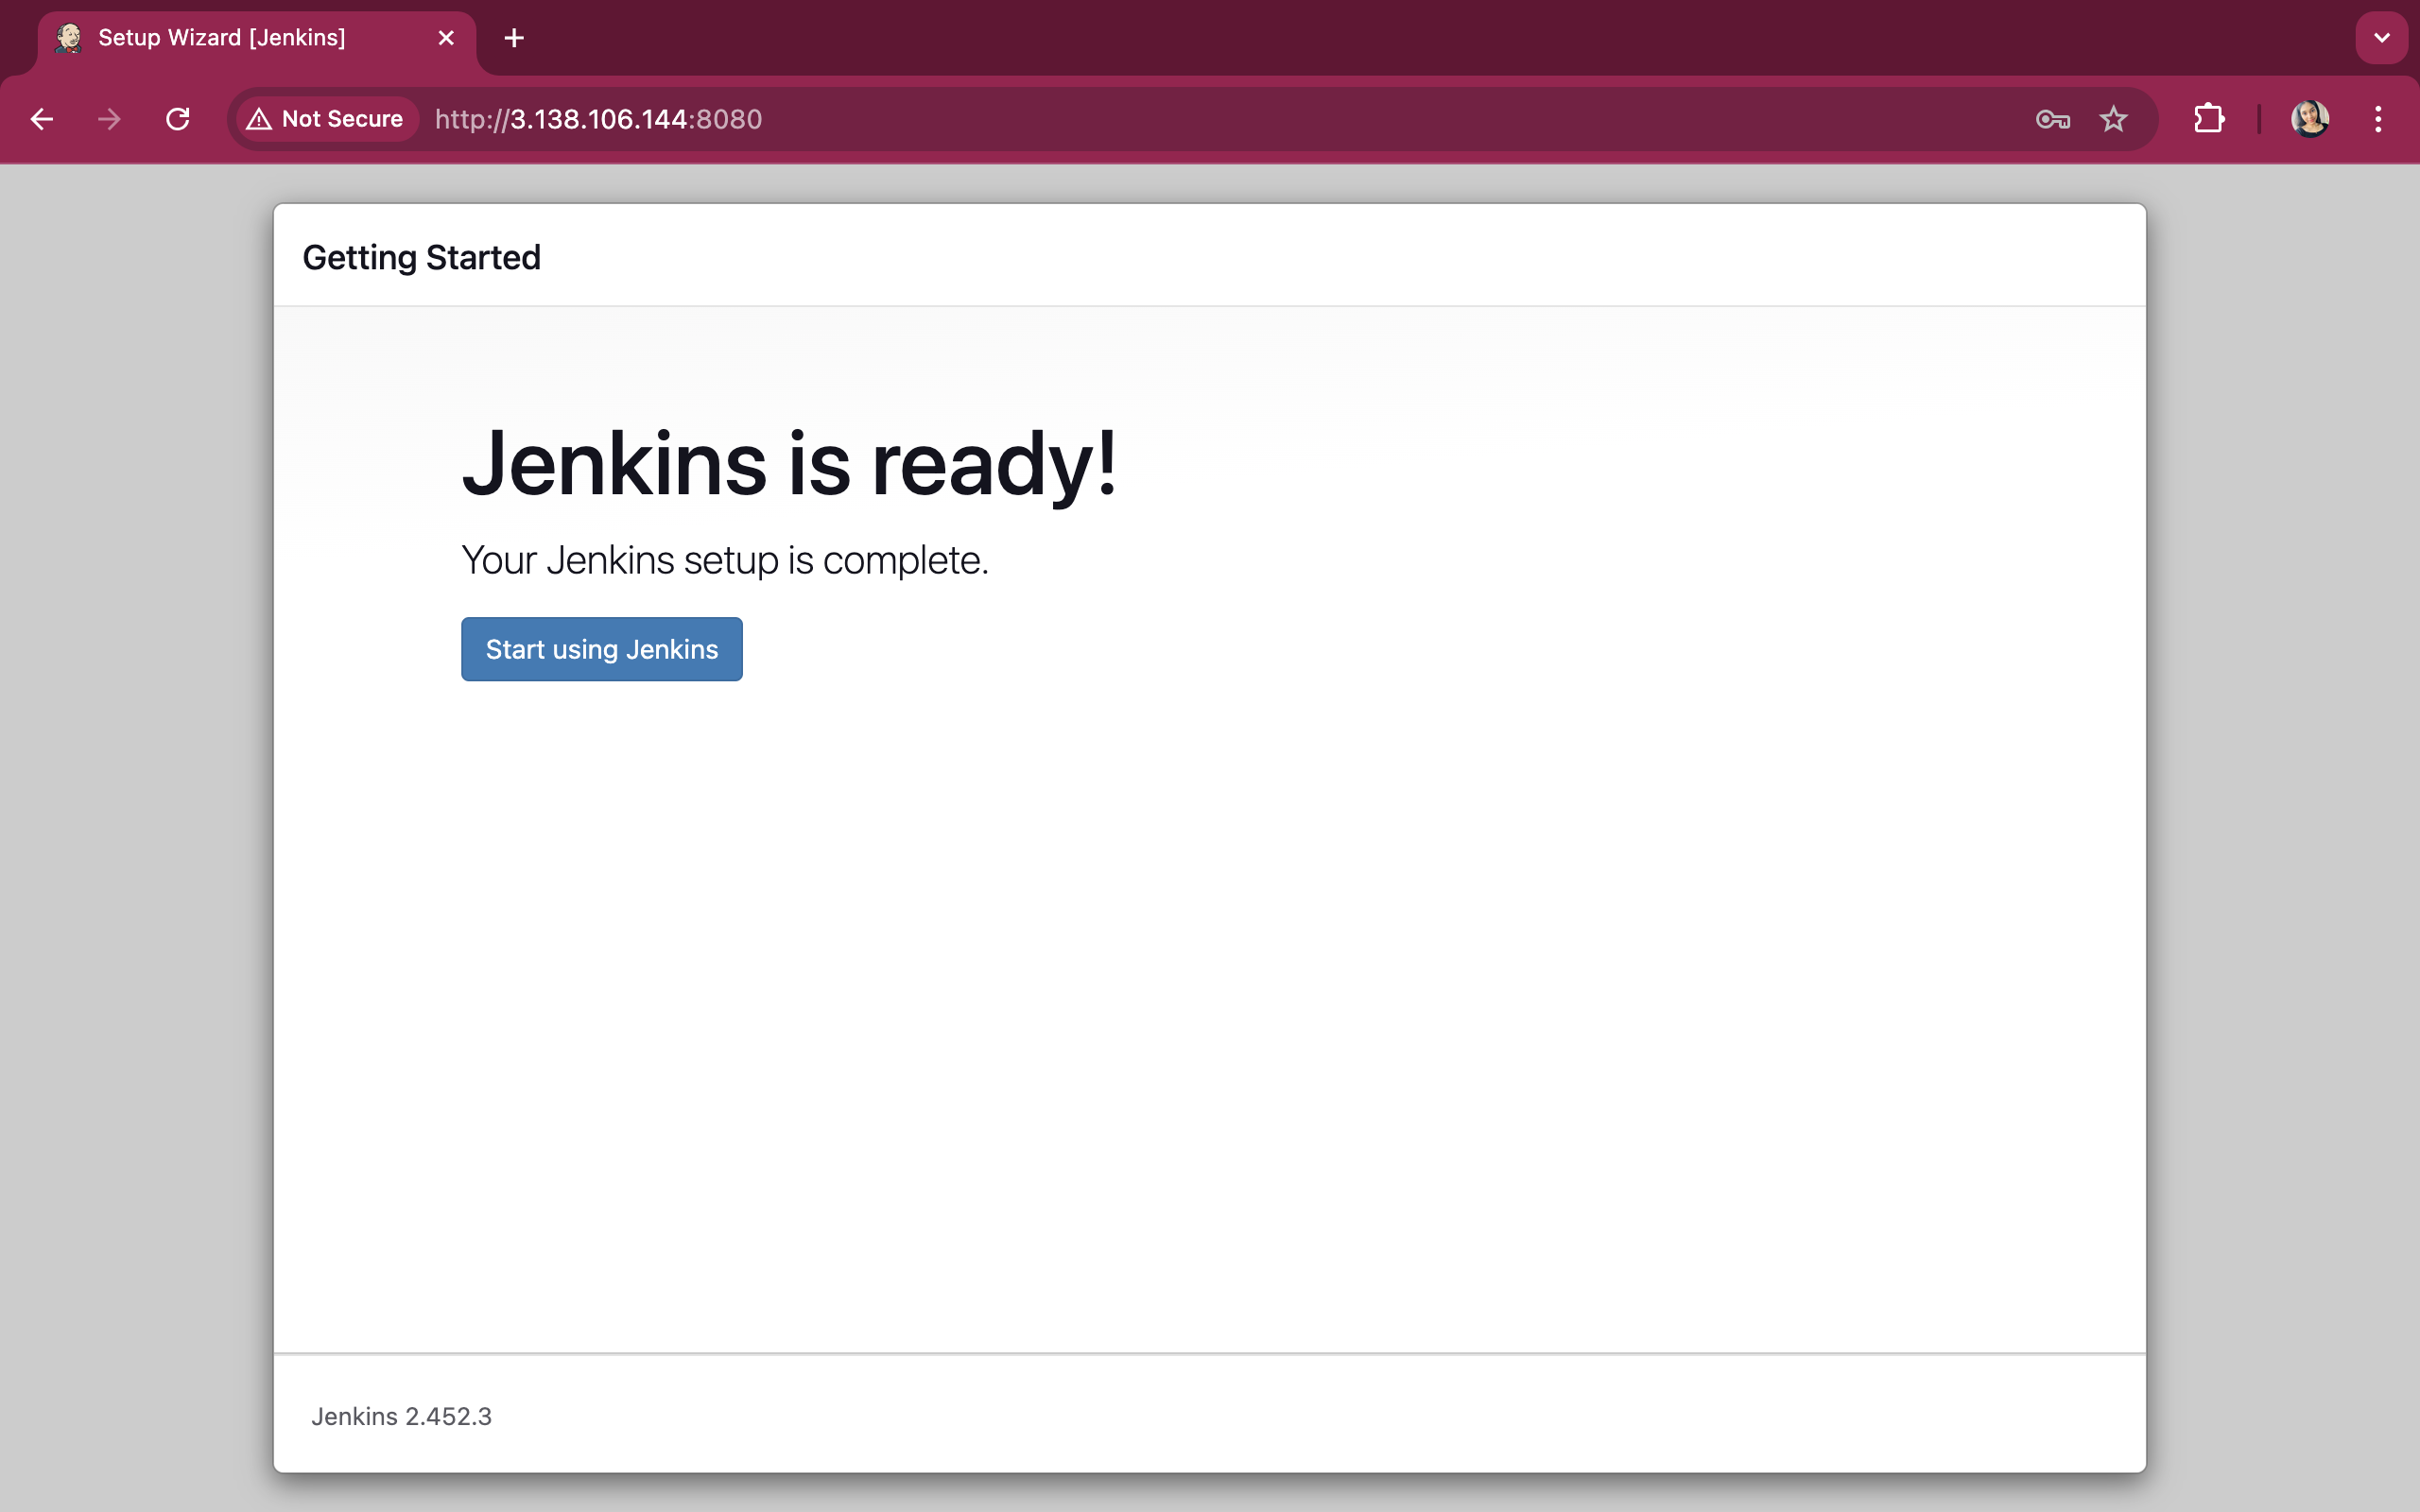
Follow on screen instruction to complete the setup.
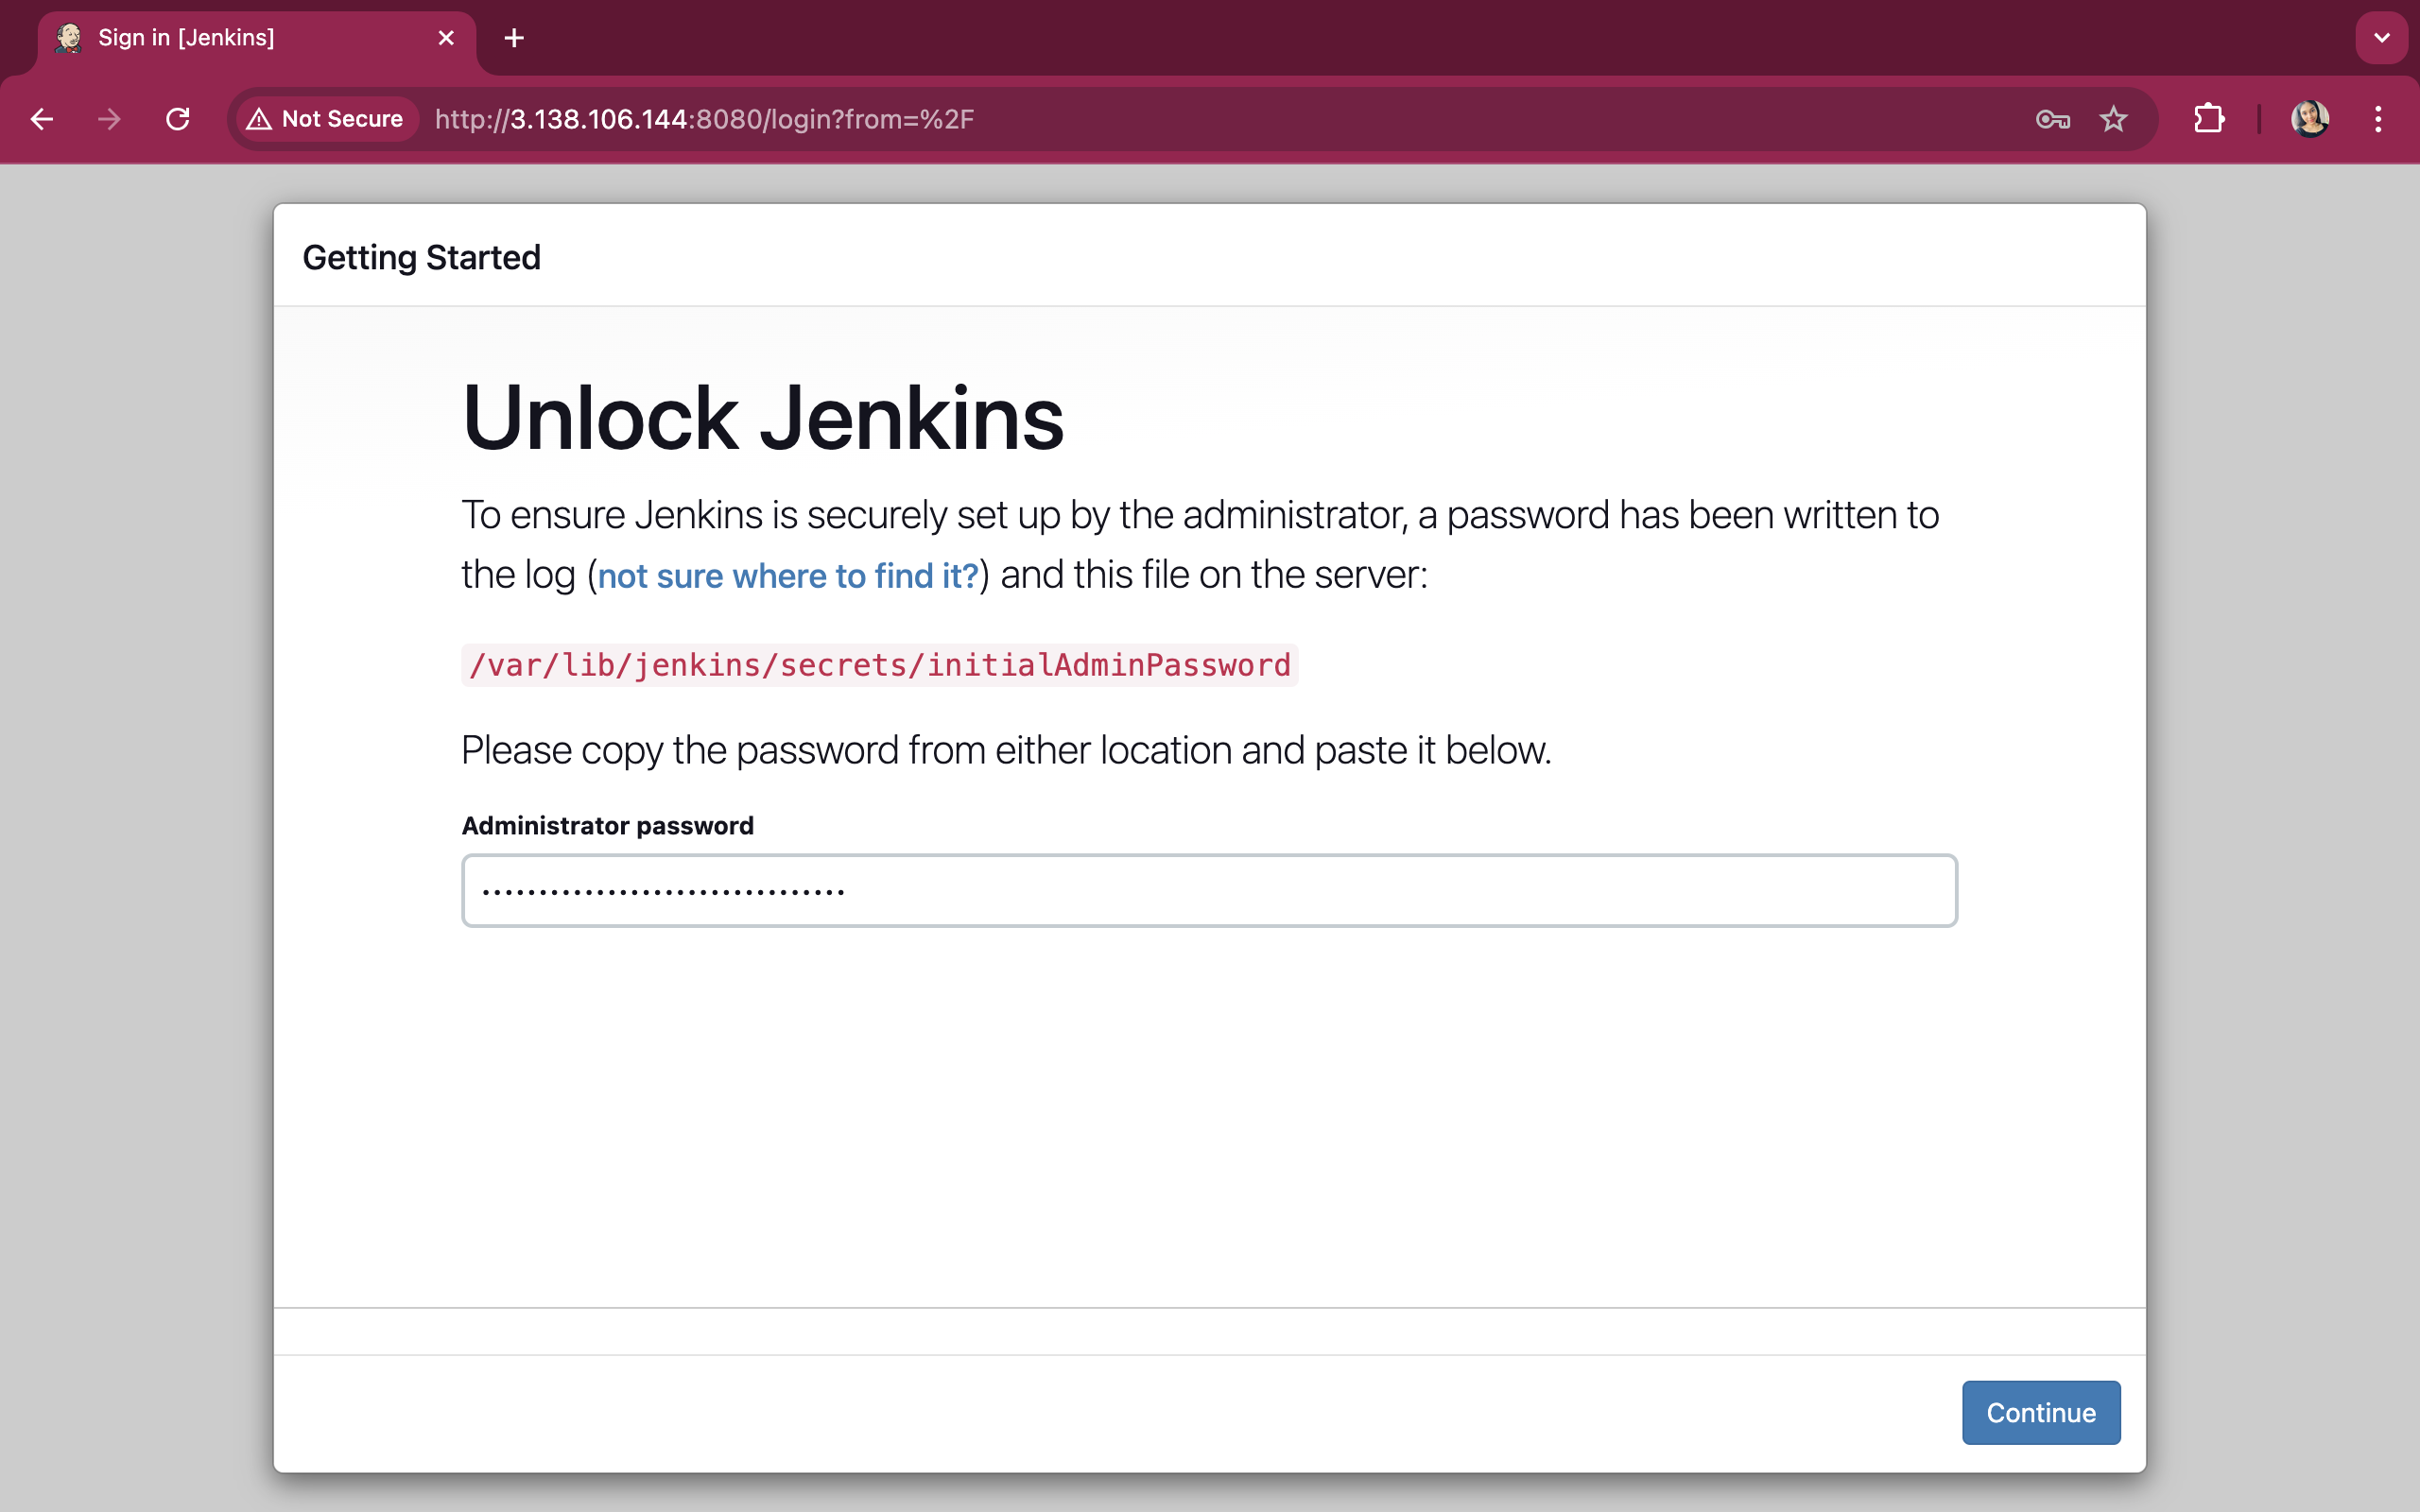
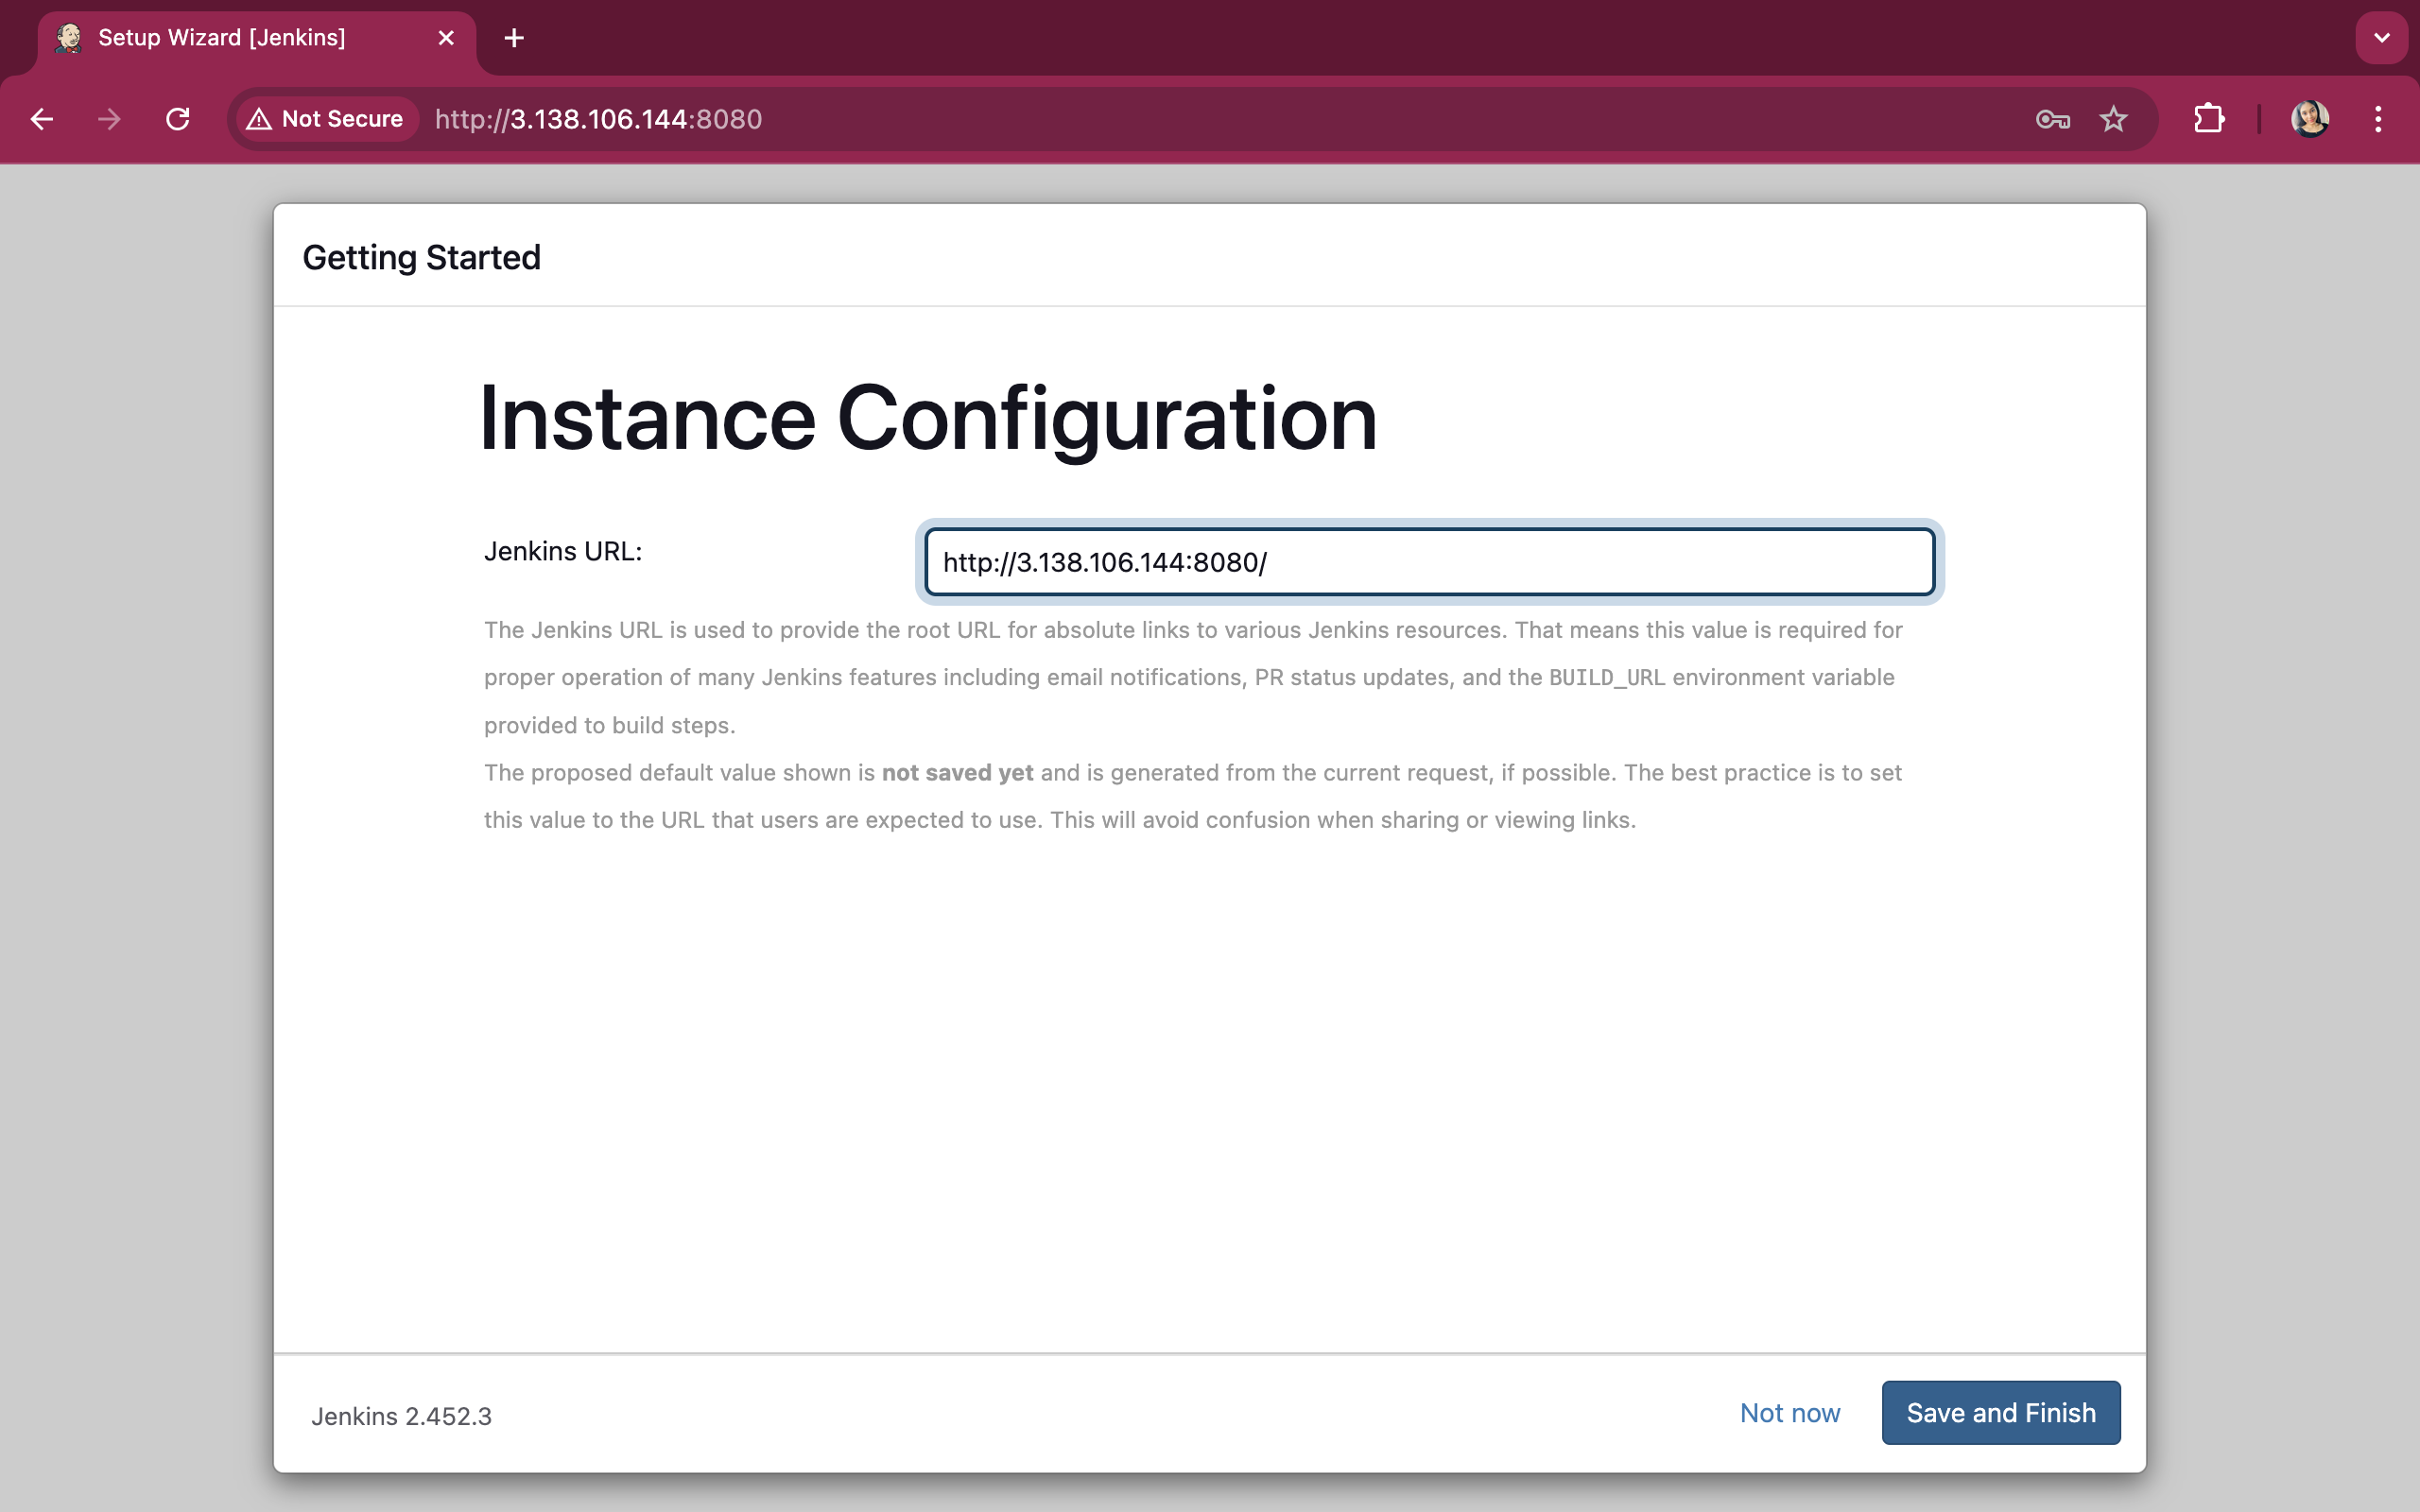
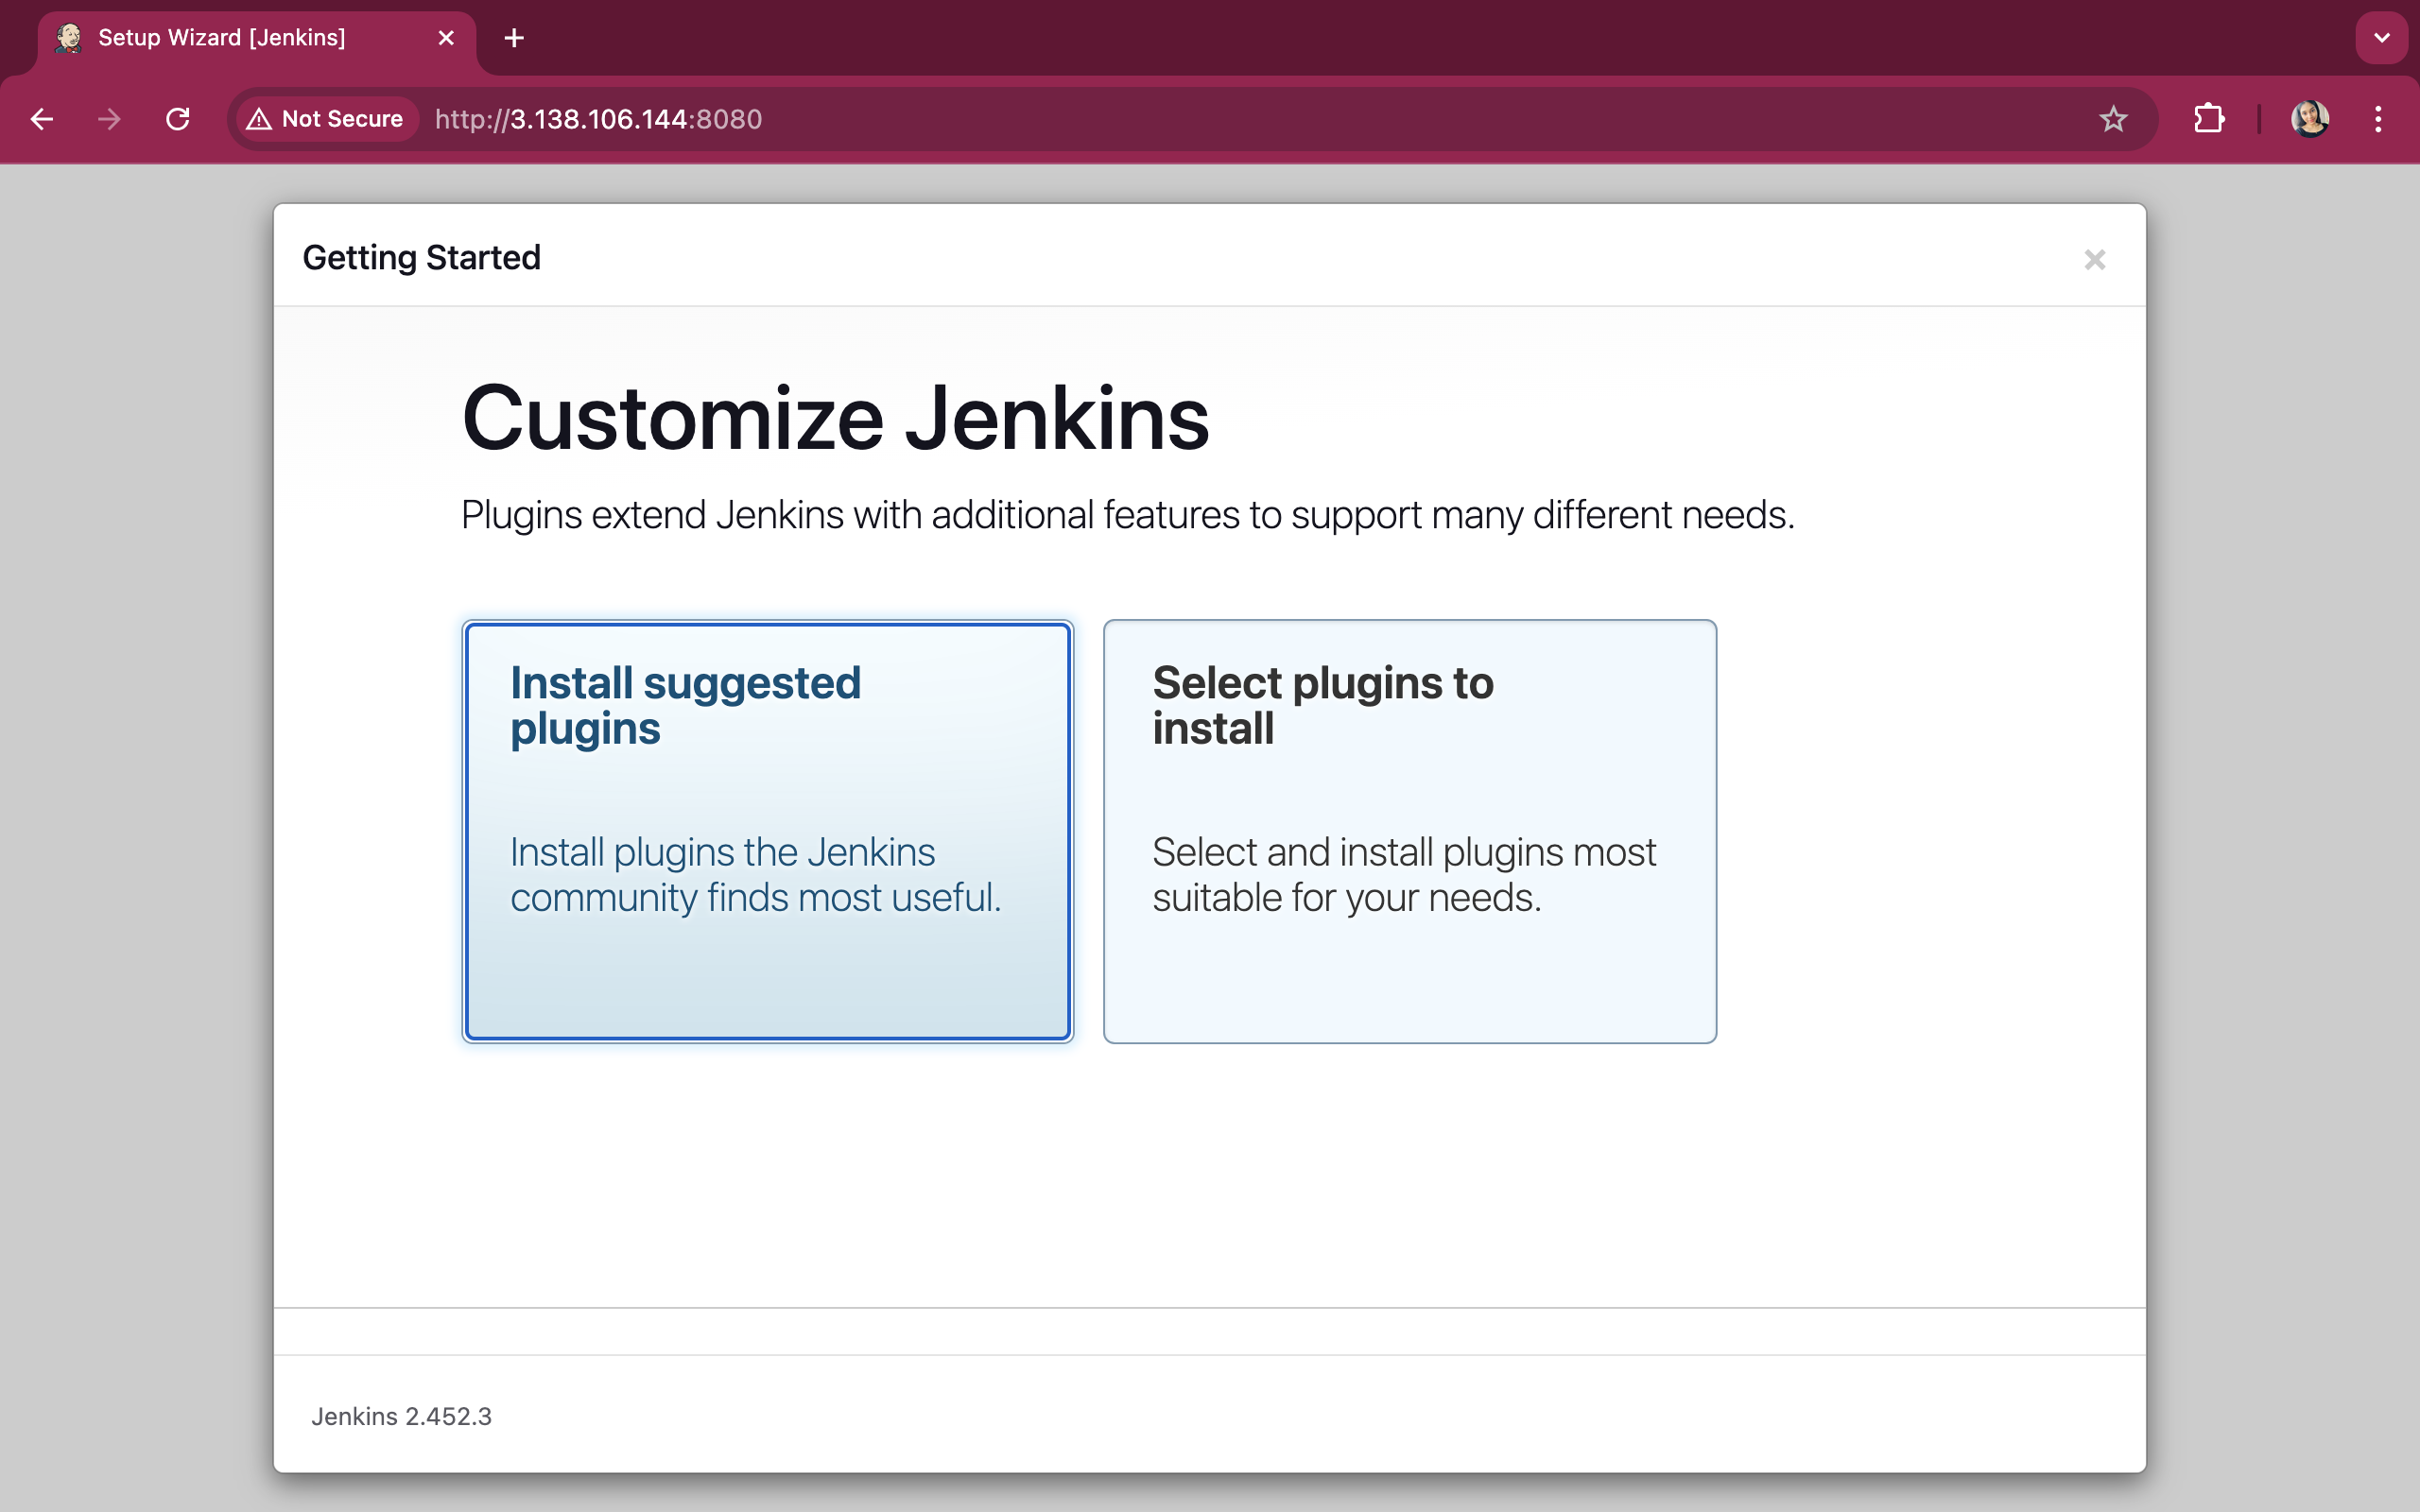
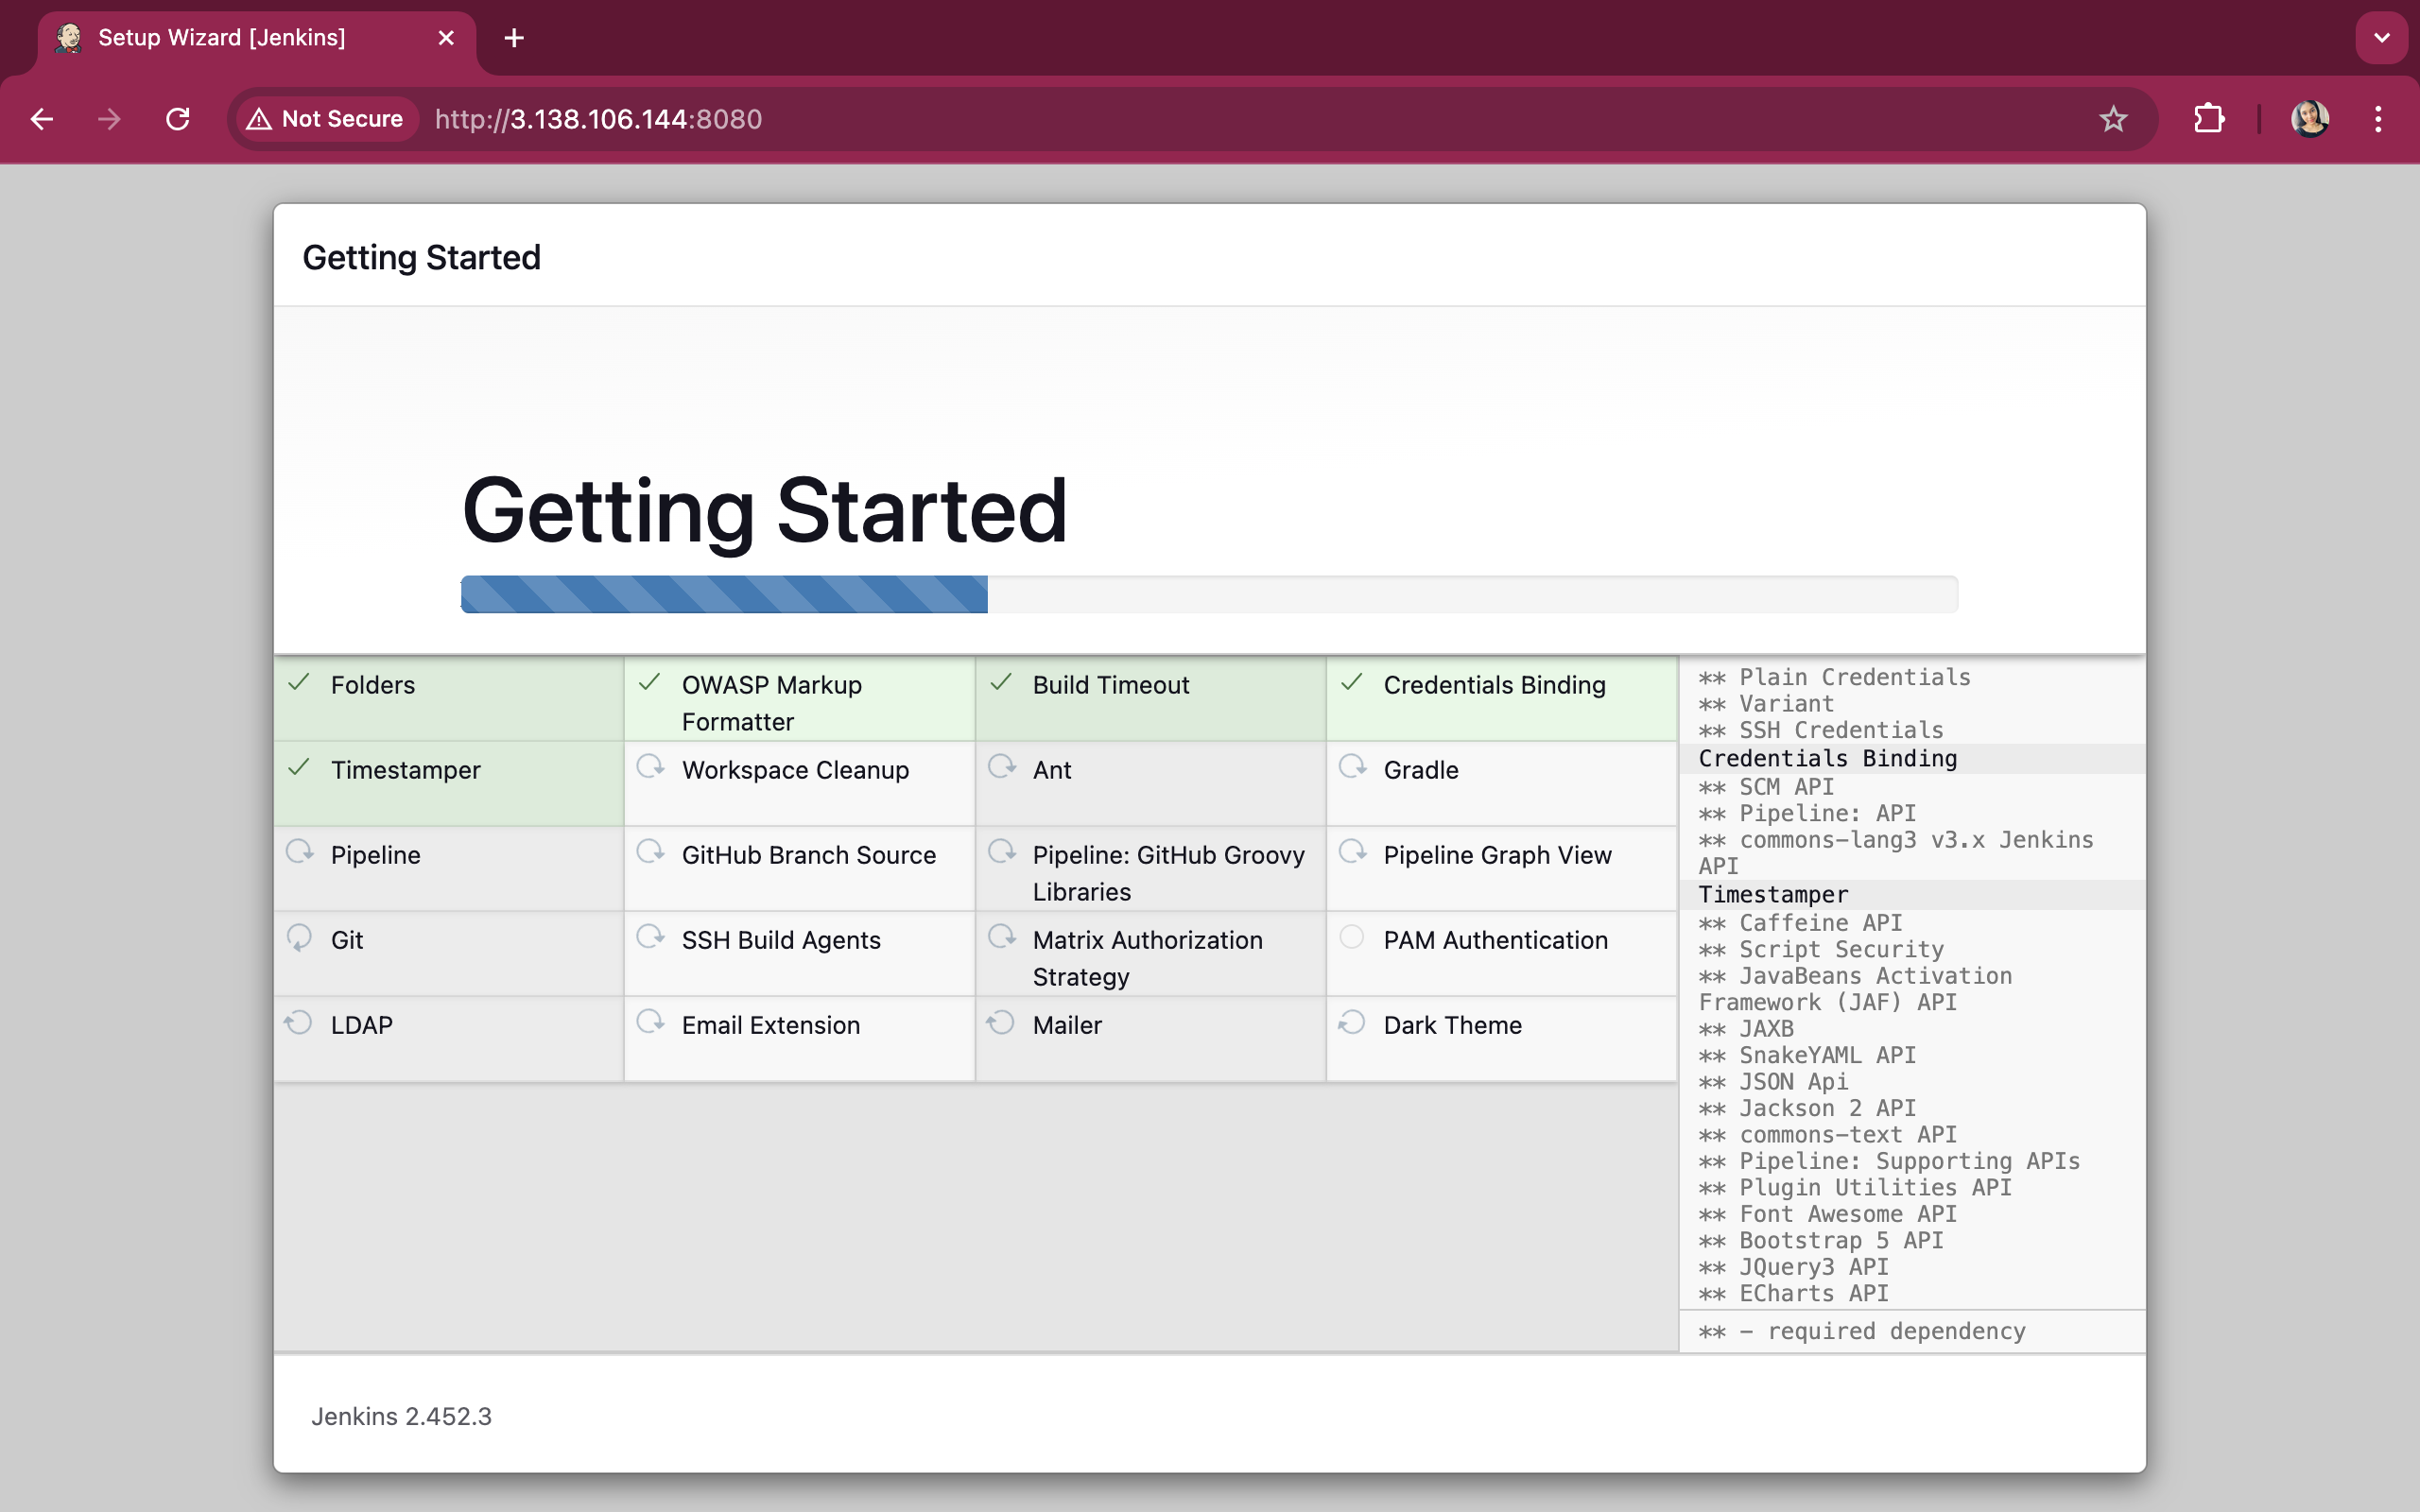
Provide the details in the Getting started page
Create Item:
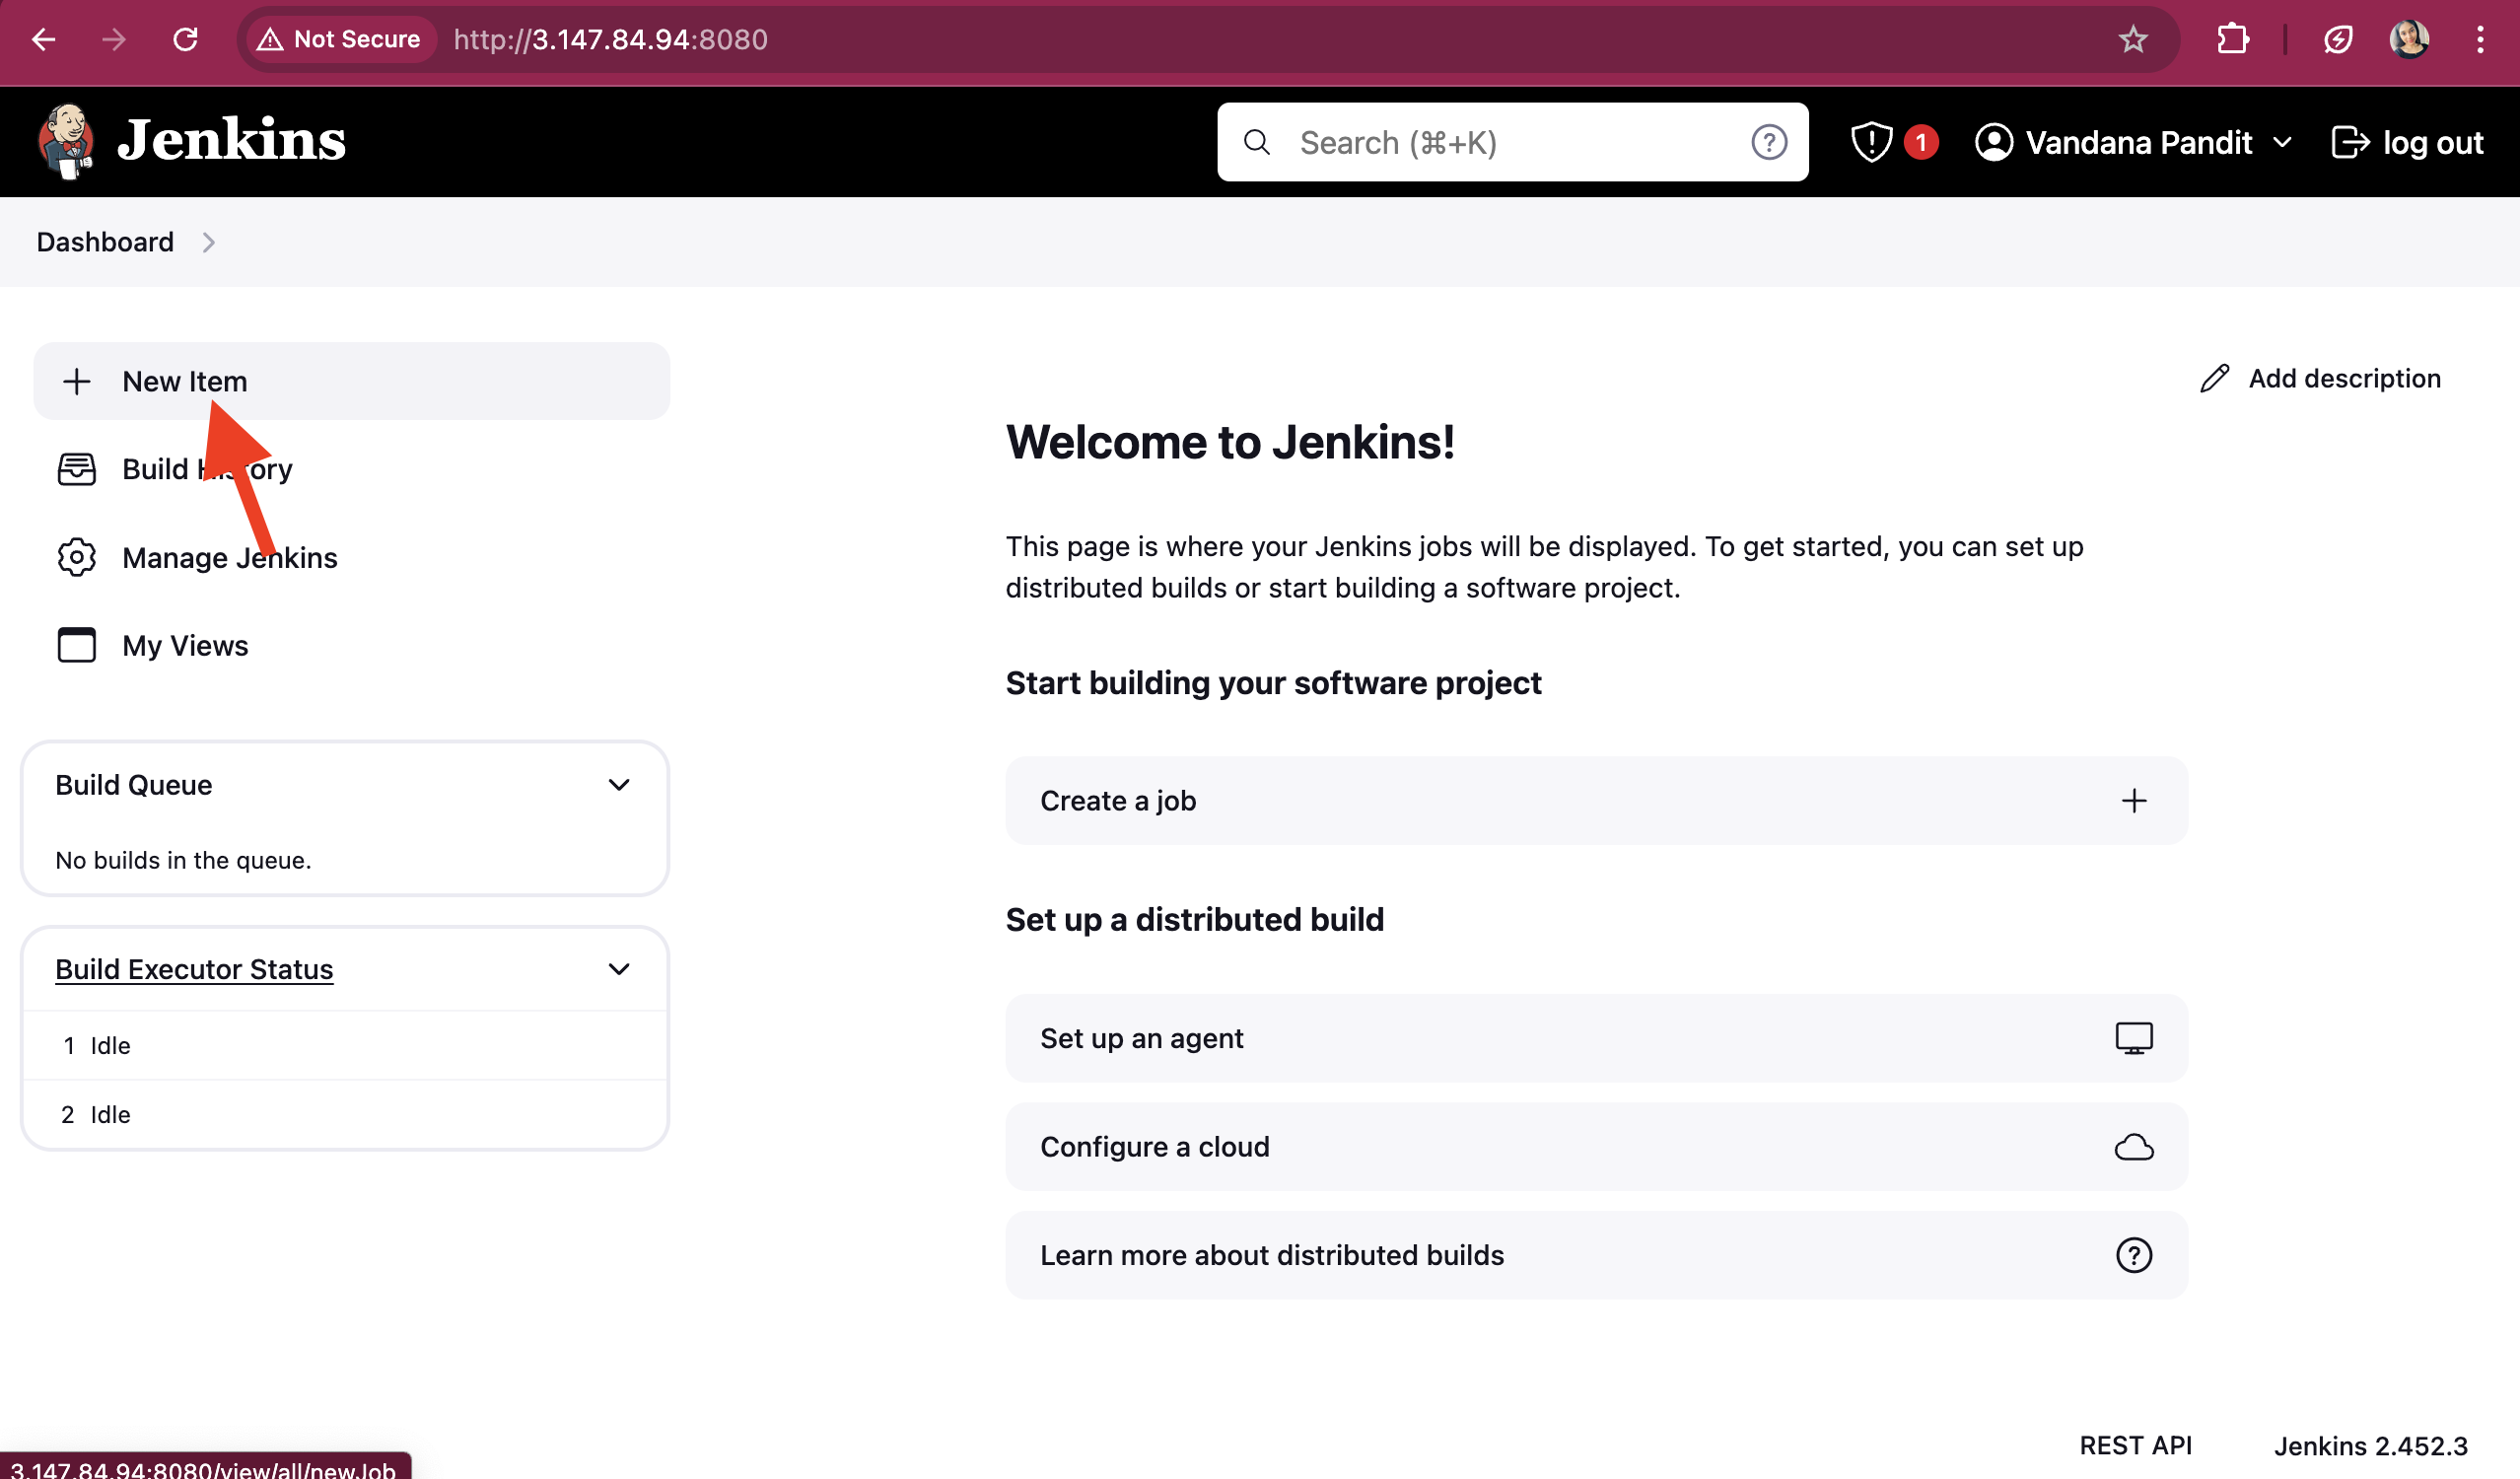
Click on New Item
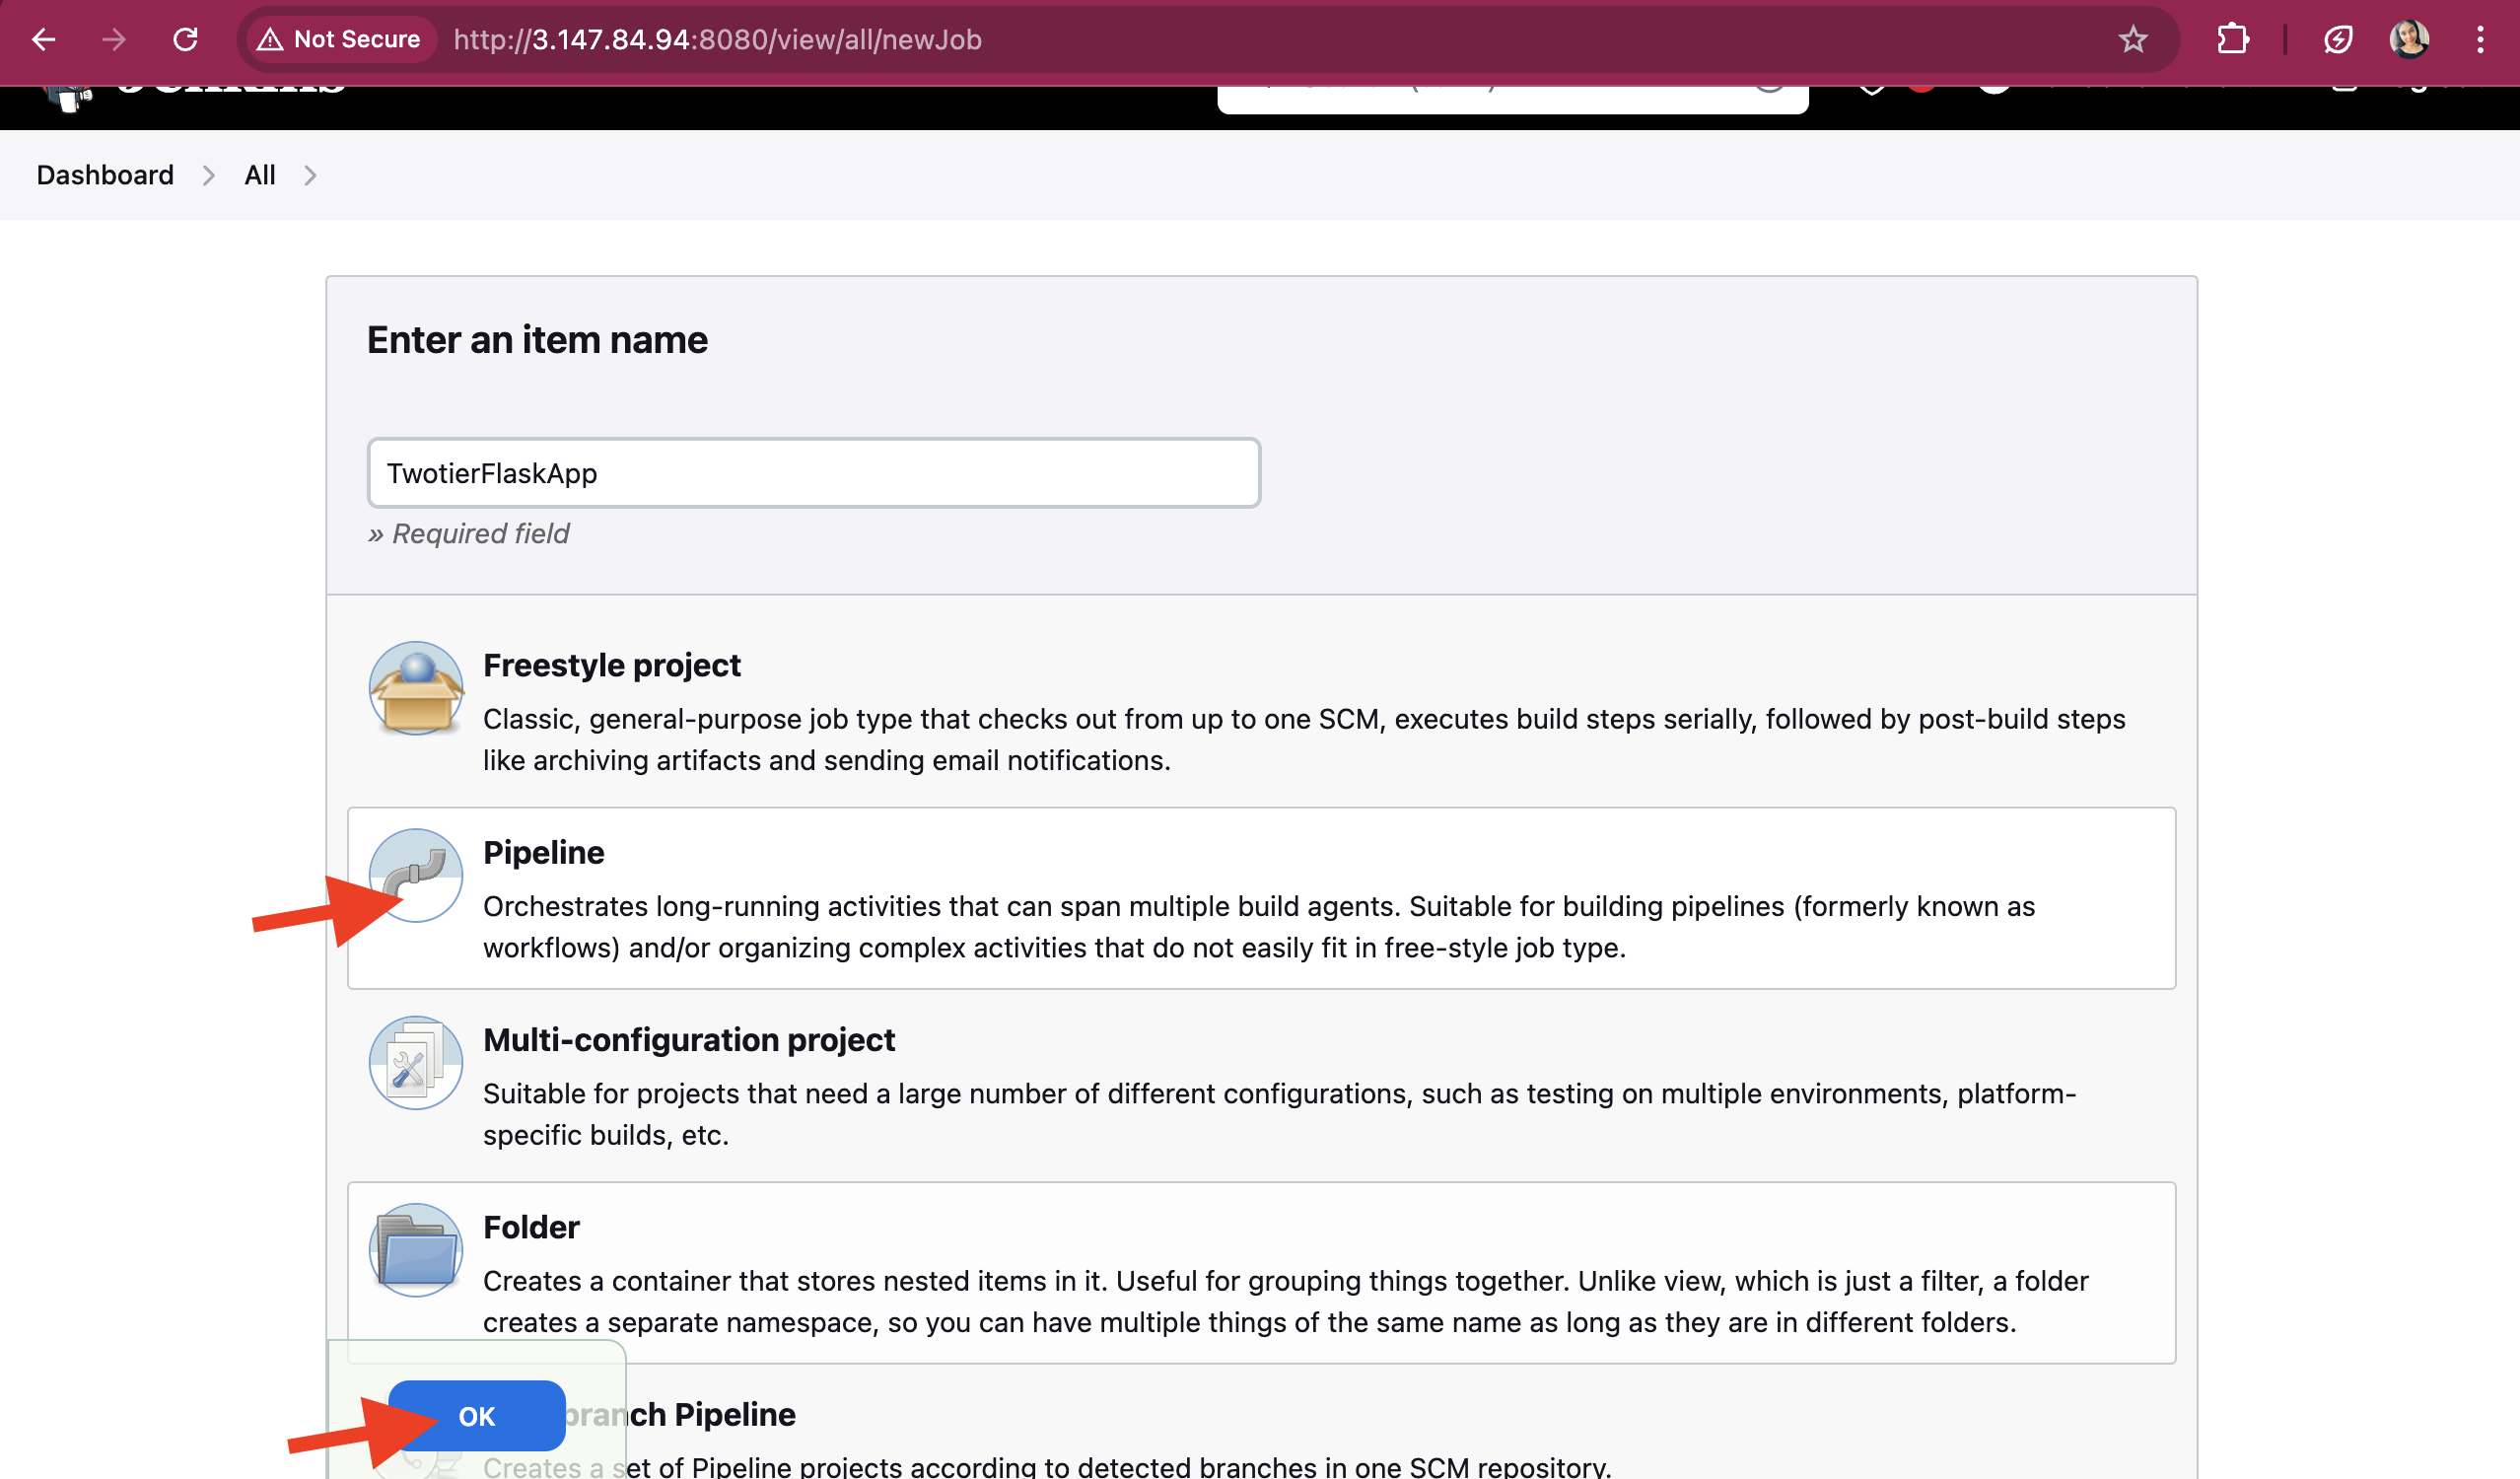
Select Pipeline and give it appropriate name and hit 'ok' button
The page will take you to the configuration page. Leave the configuration as it is, and in the Pipeline section, add the Groovy script. The Groovy script is mentioned below:
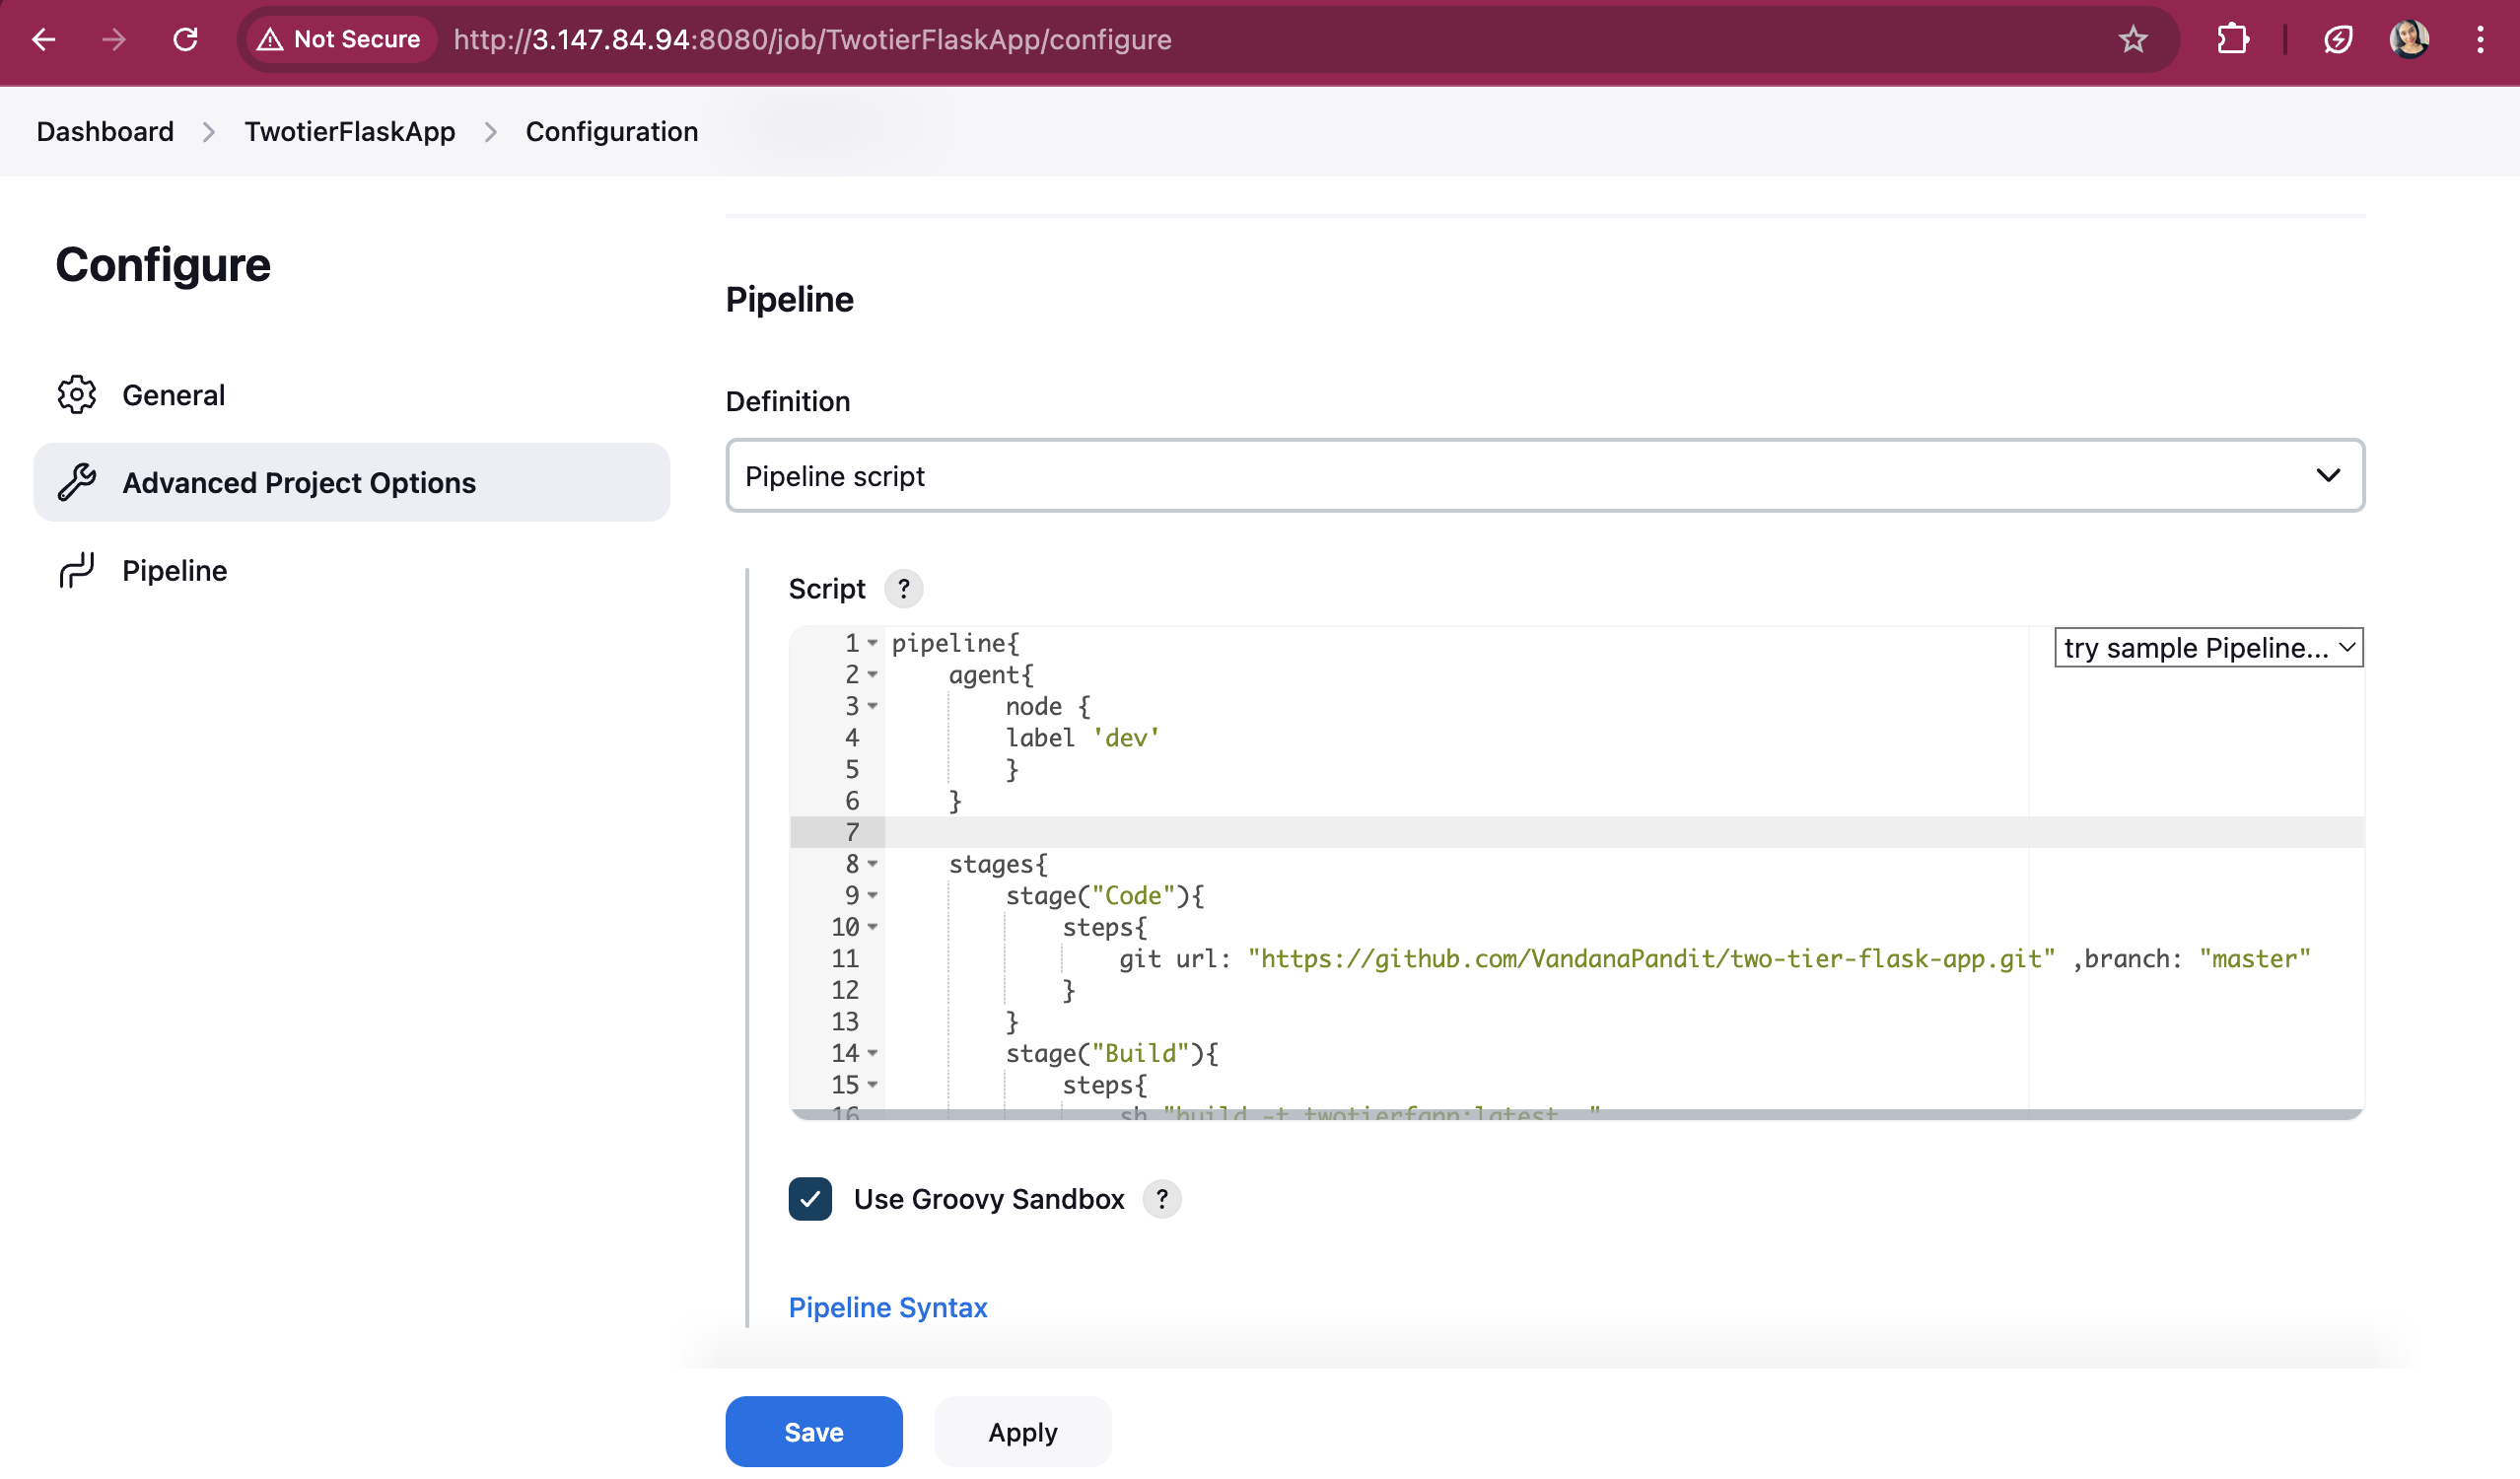
pipeline{
    agent{
        node {
        label 'dev'
        }
    }

    stages{
        stage("Code"){
            steps{
                git url: "https://github.com/VandanaPandit/two-tier-flask-app.git" ,branch: "master"
            }
        }
        stage("Build"){
            steps{
                sh "docker build -t twotierfapp:latest ."
            }
        }
        stage("Docker push")
        {
            steps{
            withCredentials([usernamePassword(credentialsId: 'DockerCreds', usernameVariable: 'DockerUsername', passwordVariable: 'DockerPassword')])
            {
            sh "docker image tag twotierfapp:latest $DockerUsername/twotierfapp:latest"
            sh "docker login -u $DockerUsername -p $DockerPassword"
            sh "docker push $DockerUsername/twotierfapp:latest"
            }
            }
        }
        stage("Docker Compose"){
            steps{
            sh "docker compose down && docker compose up -d"
            }
        }

    }
}
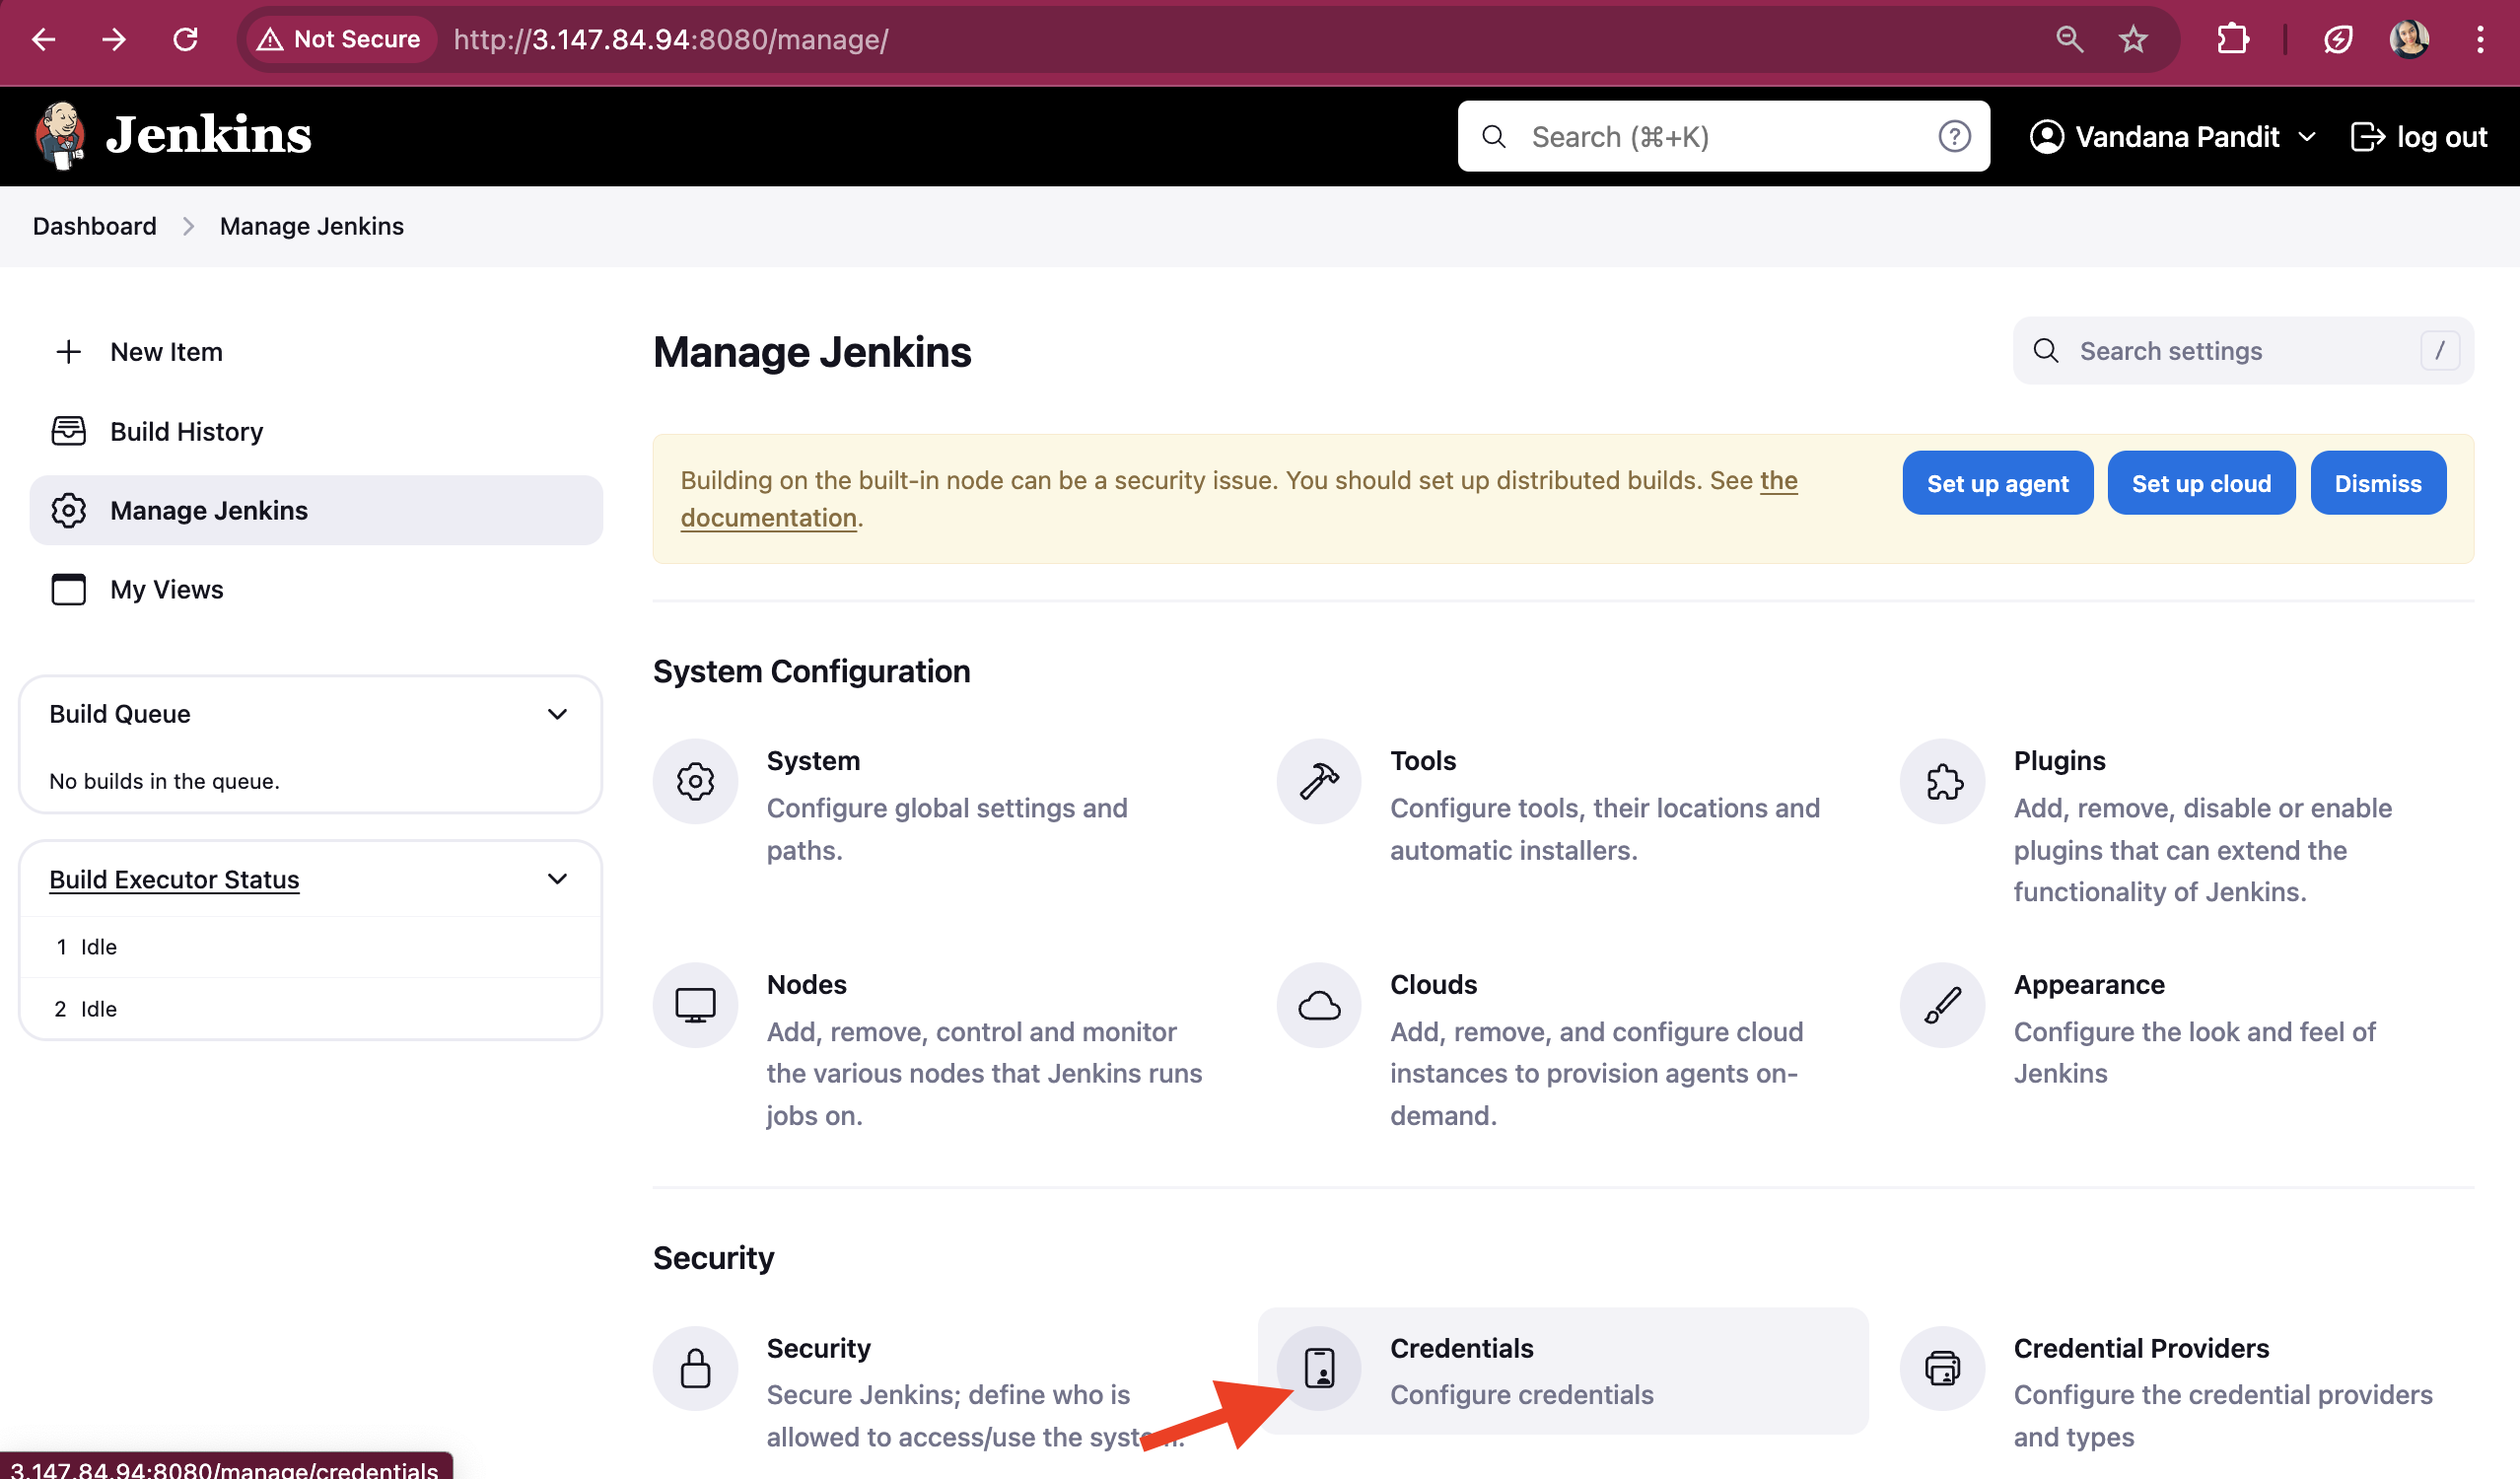
If you look at the Groovy script, I have mentioned credentials. Now let's add the credentials as shown in the snapshots below:
Go to Dashboard and click on "Manage Jenkins"
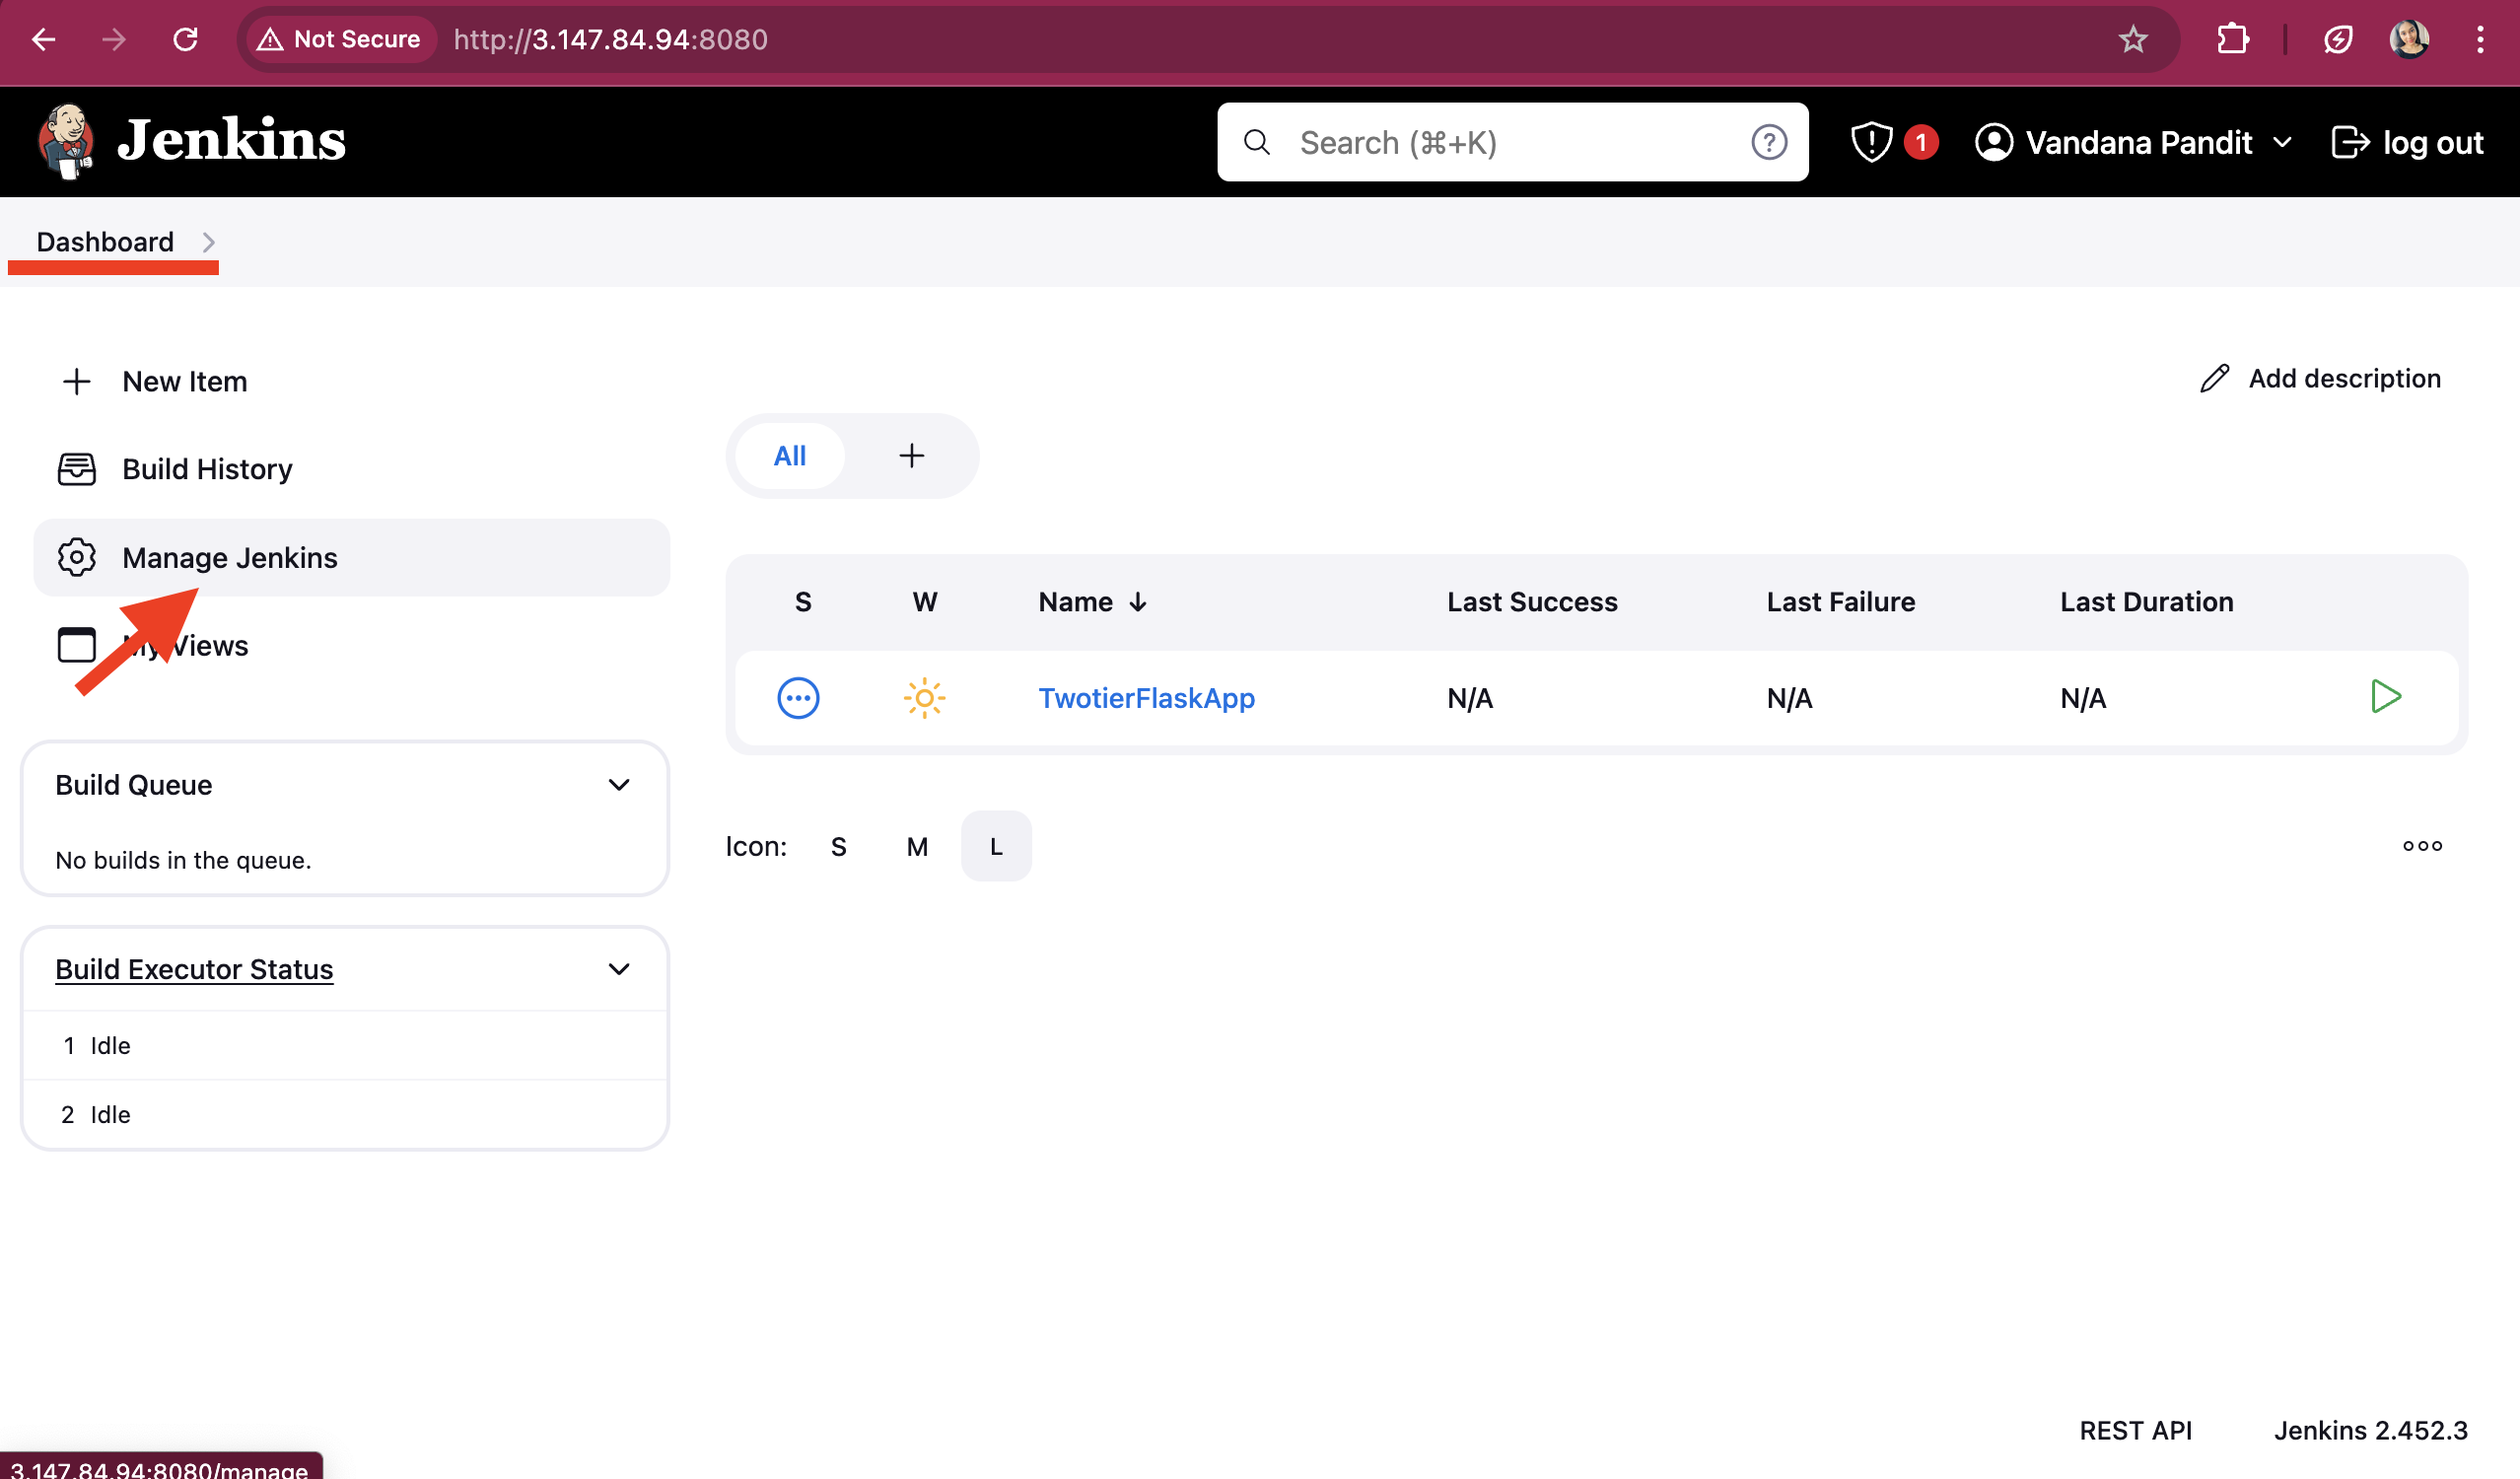
Click on "Credentials" under security section
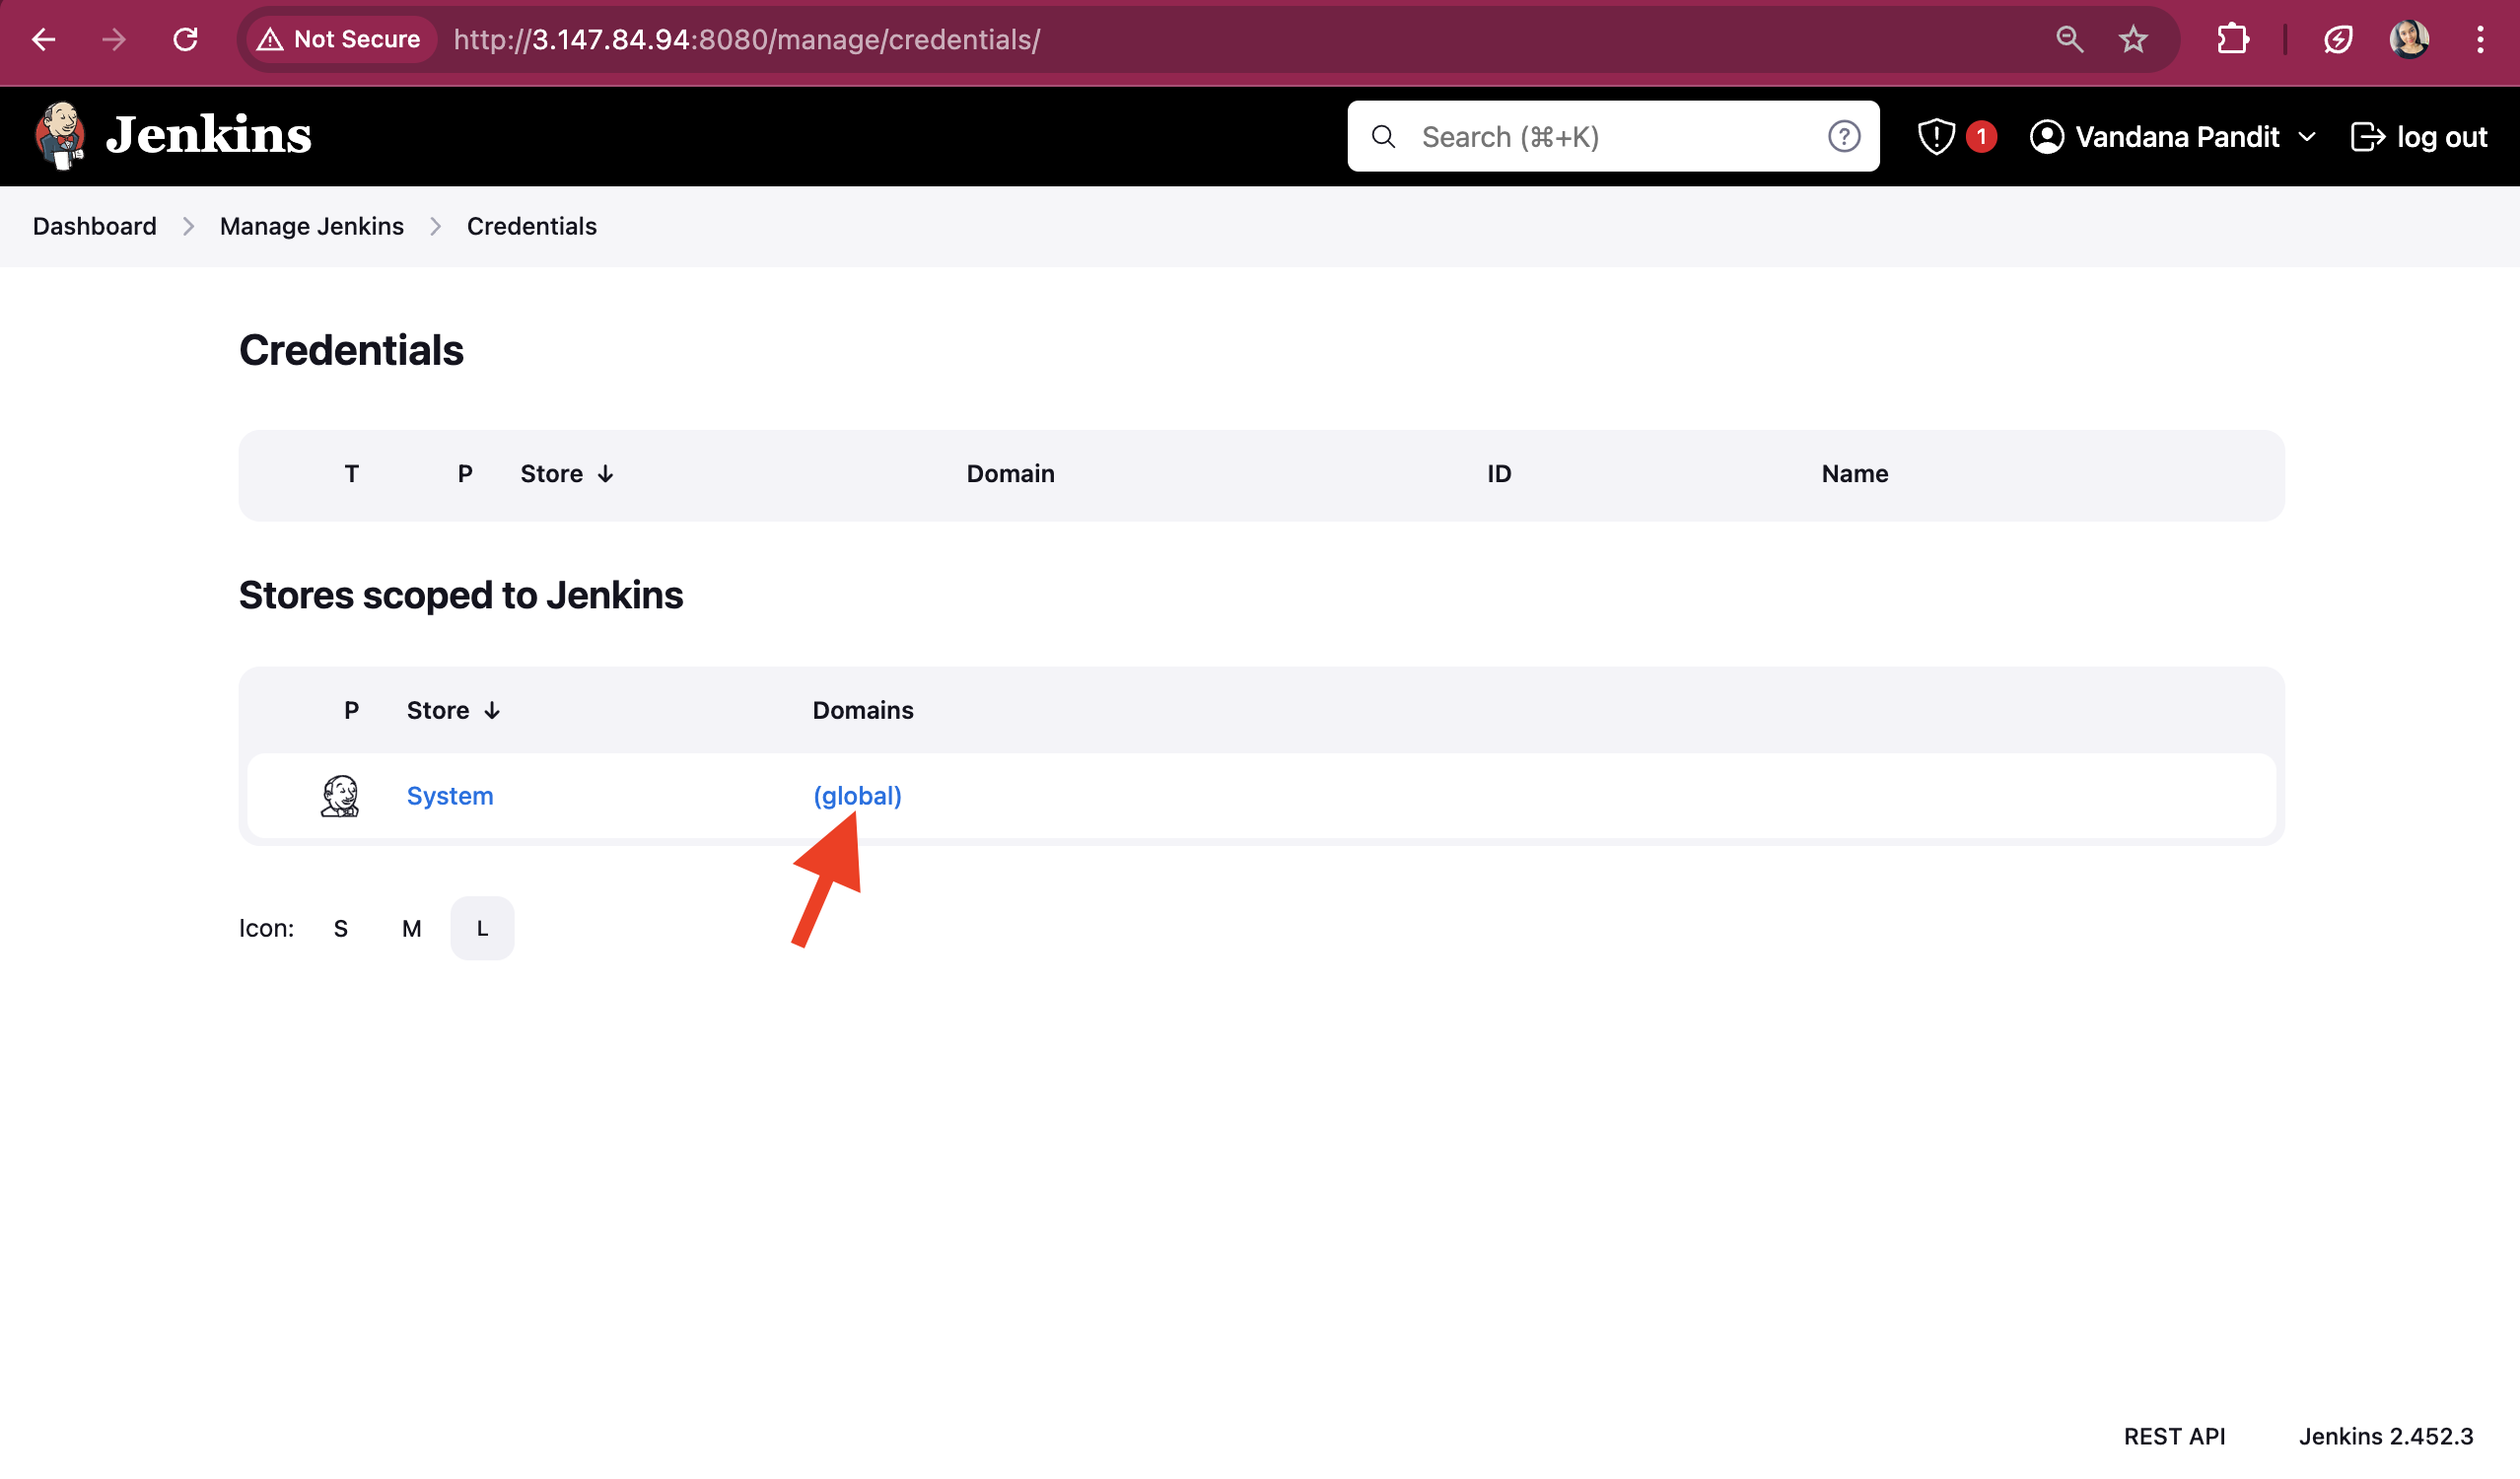
Click on "global" on Credentials page
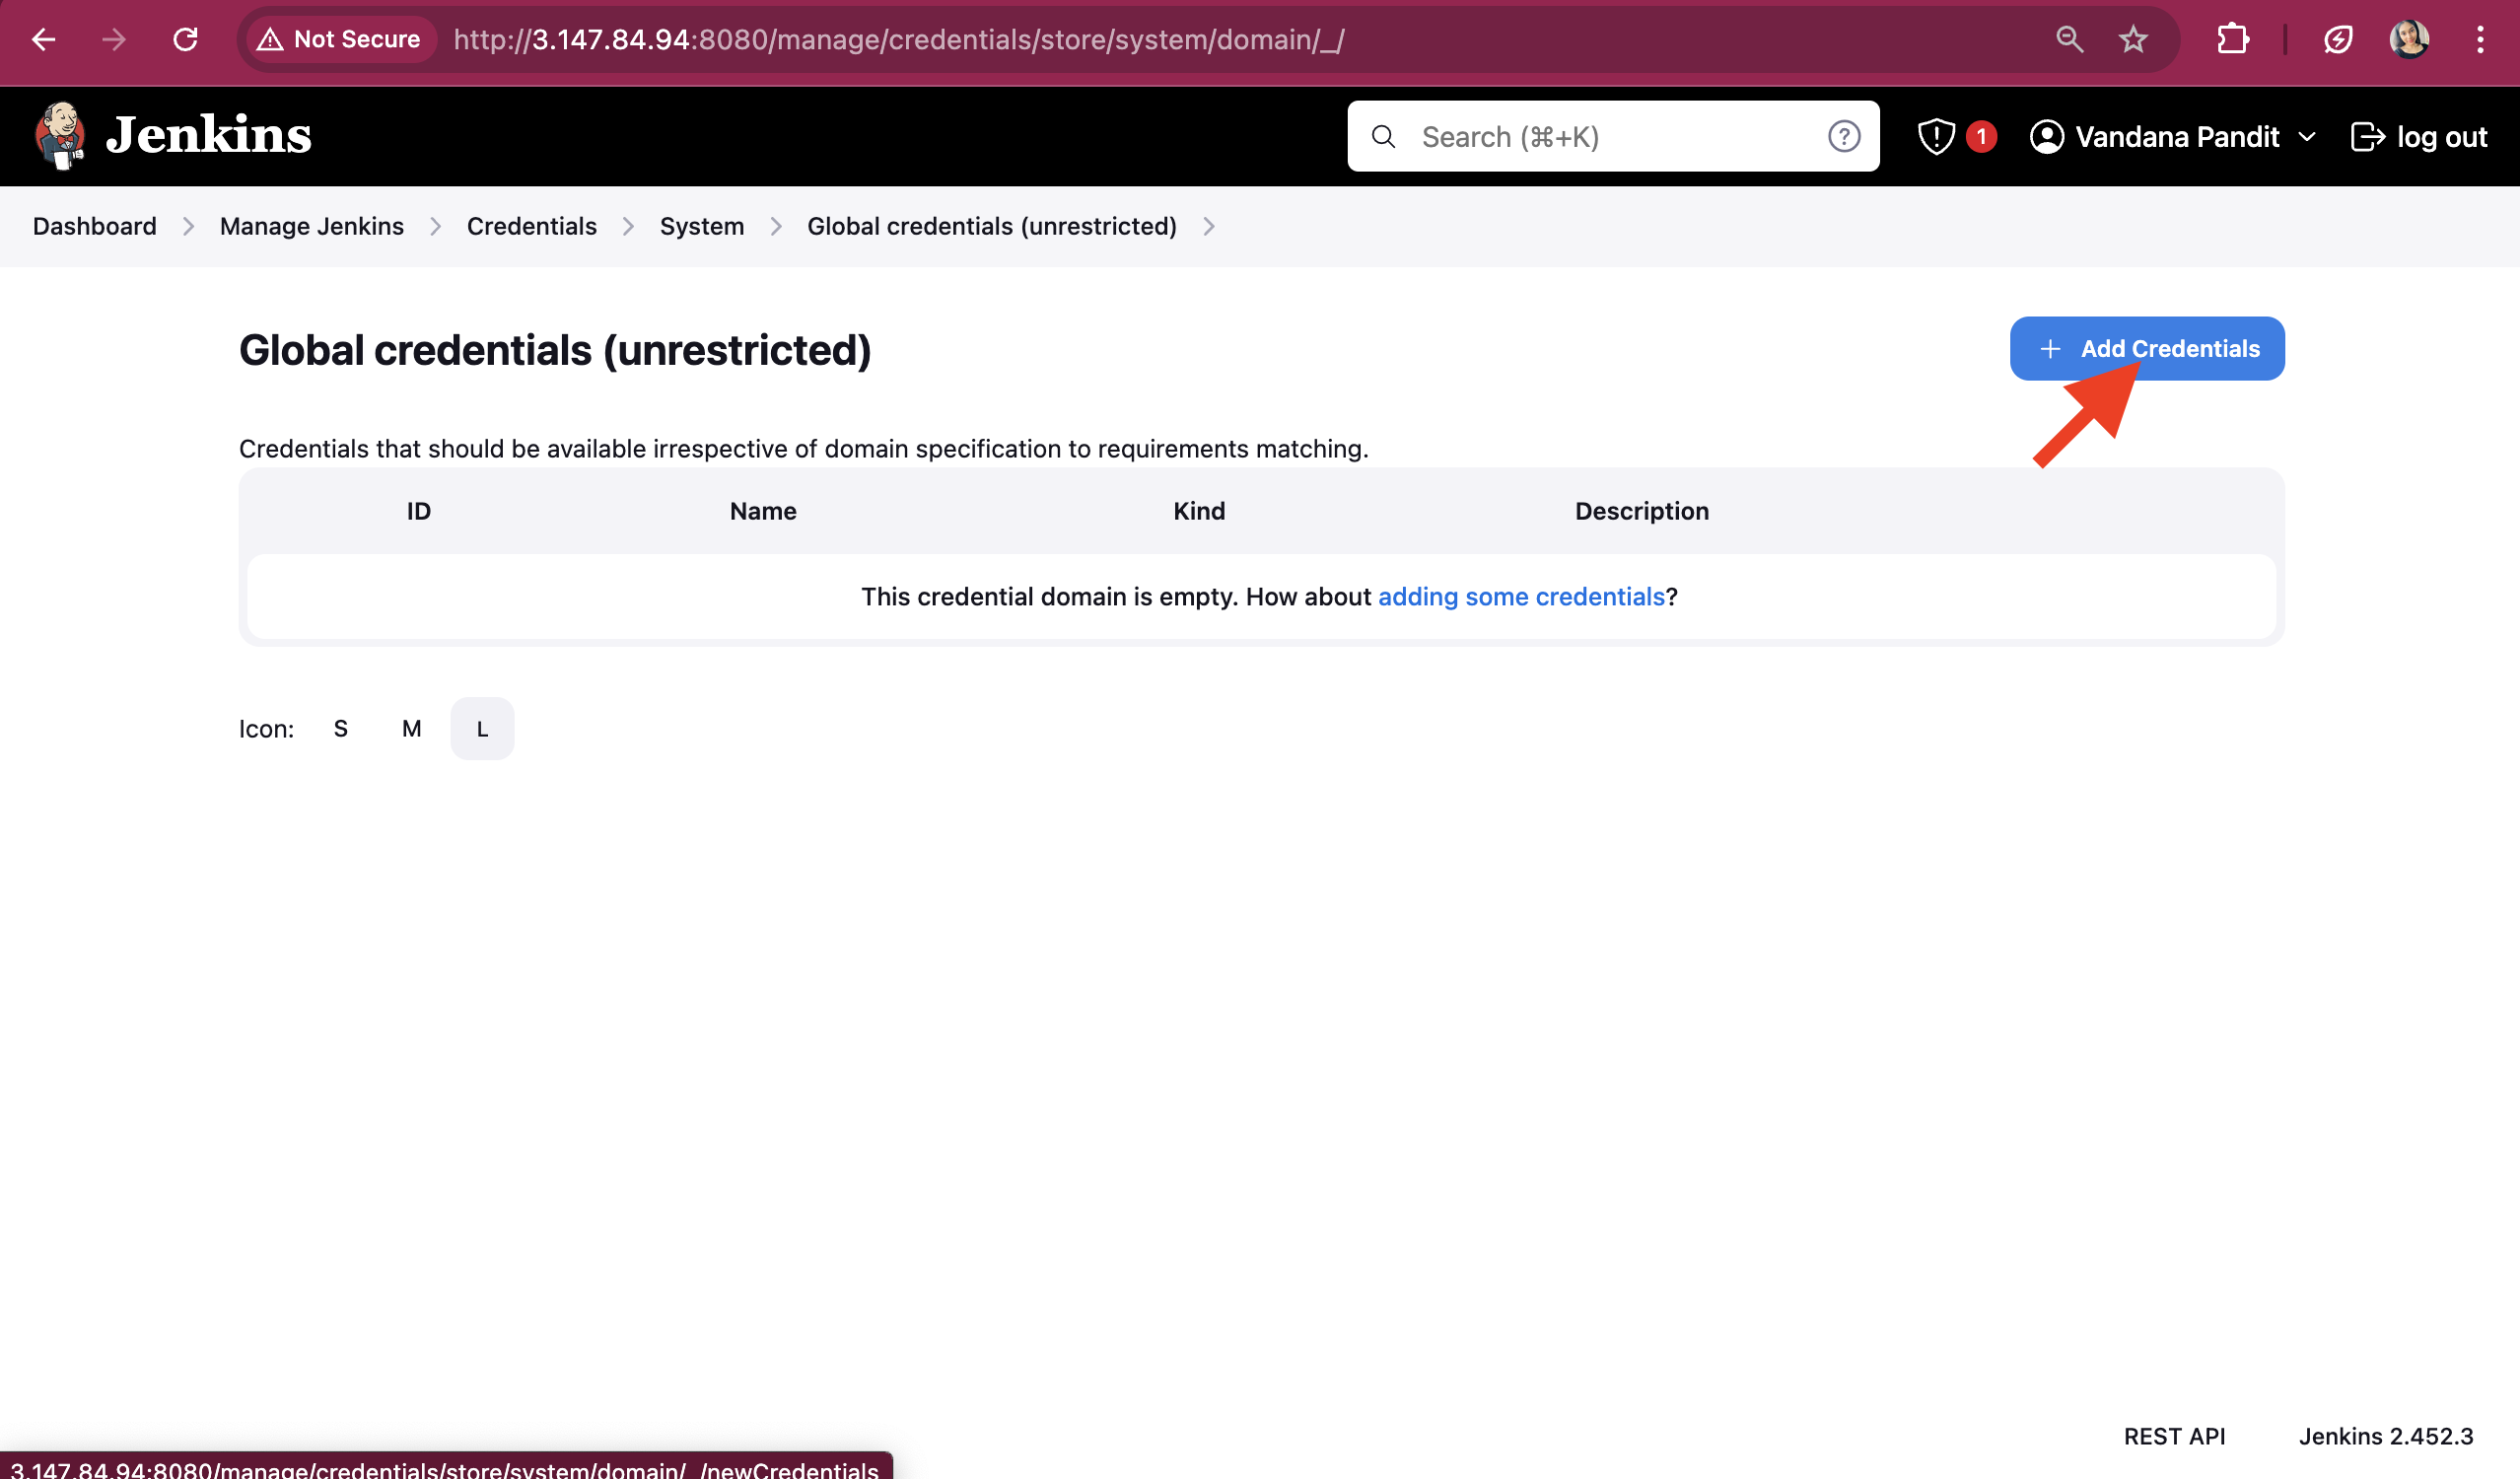
Click on "Add Credentials" button
Provide the Docker username and Docker Personal Access token. Fill the required details and click on "create" button
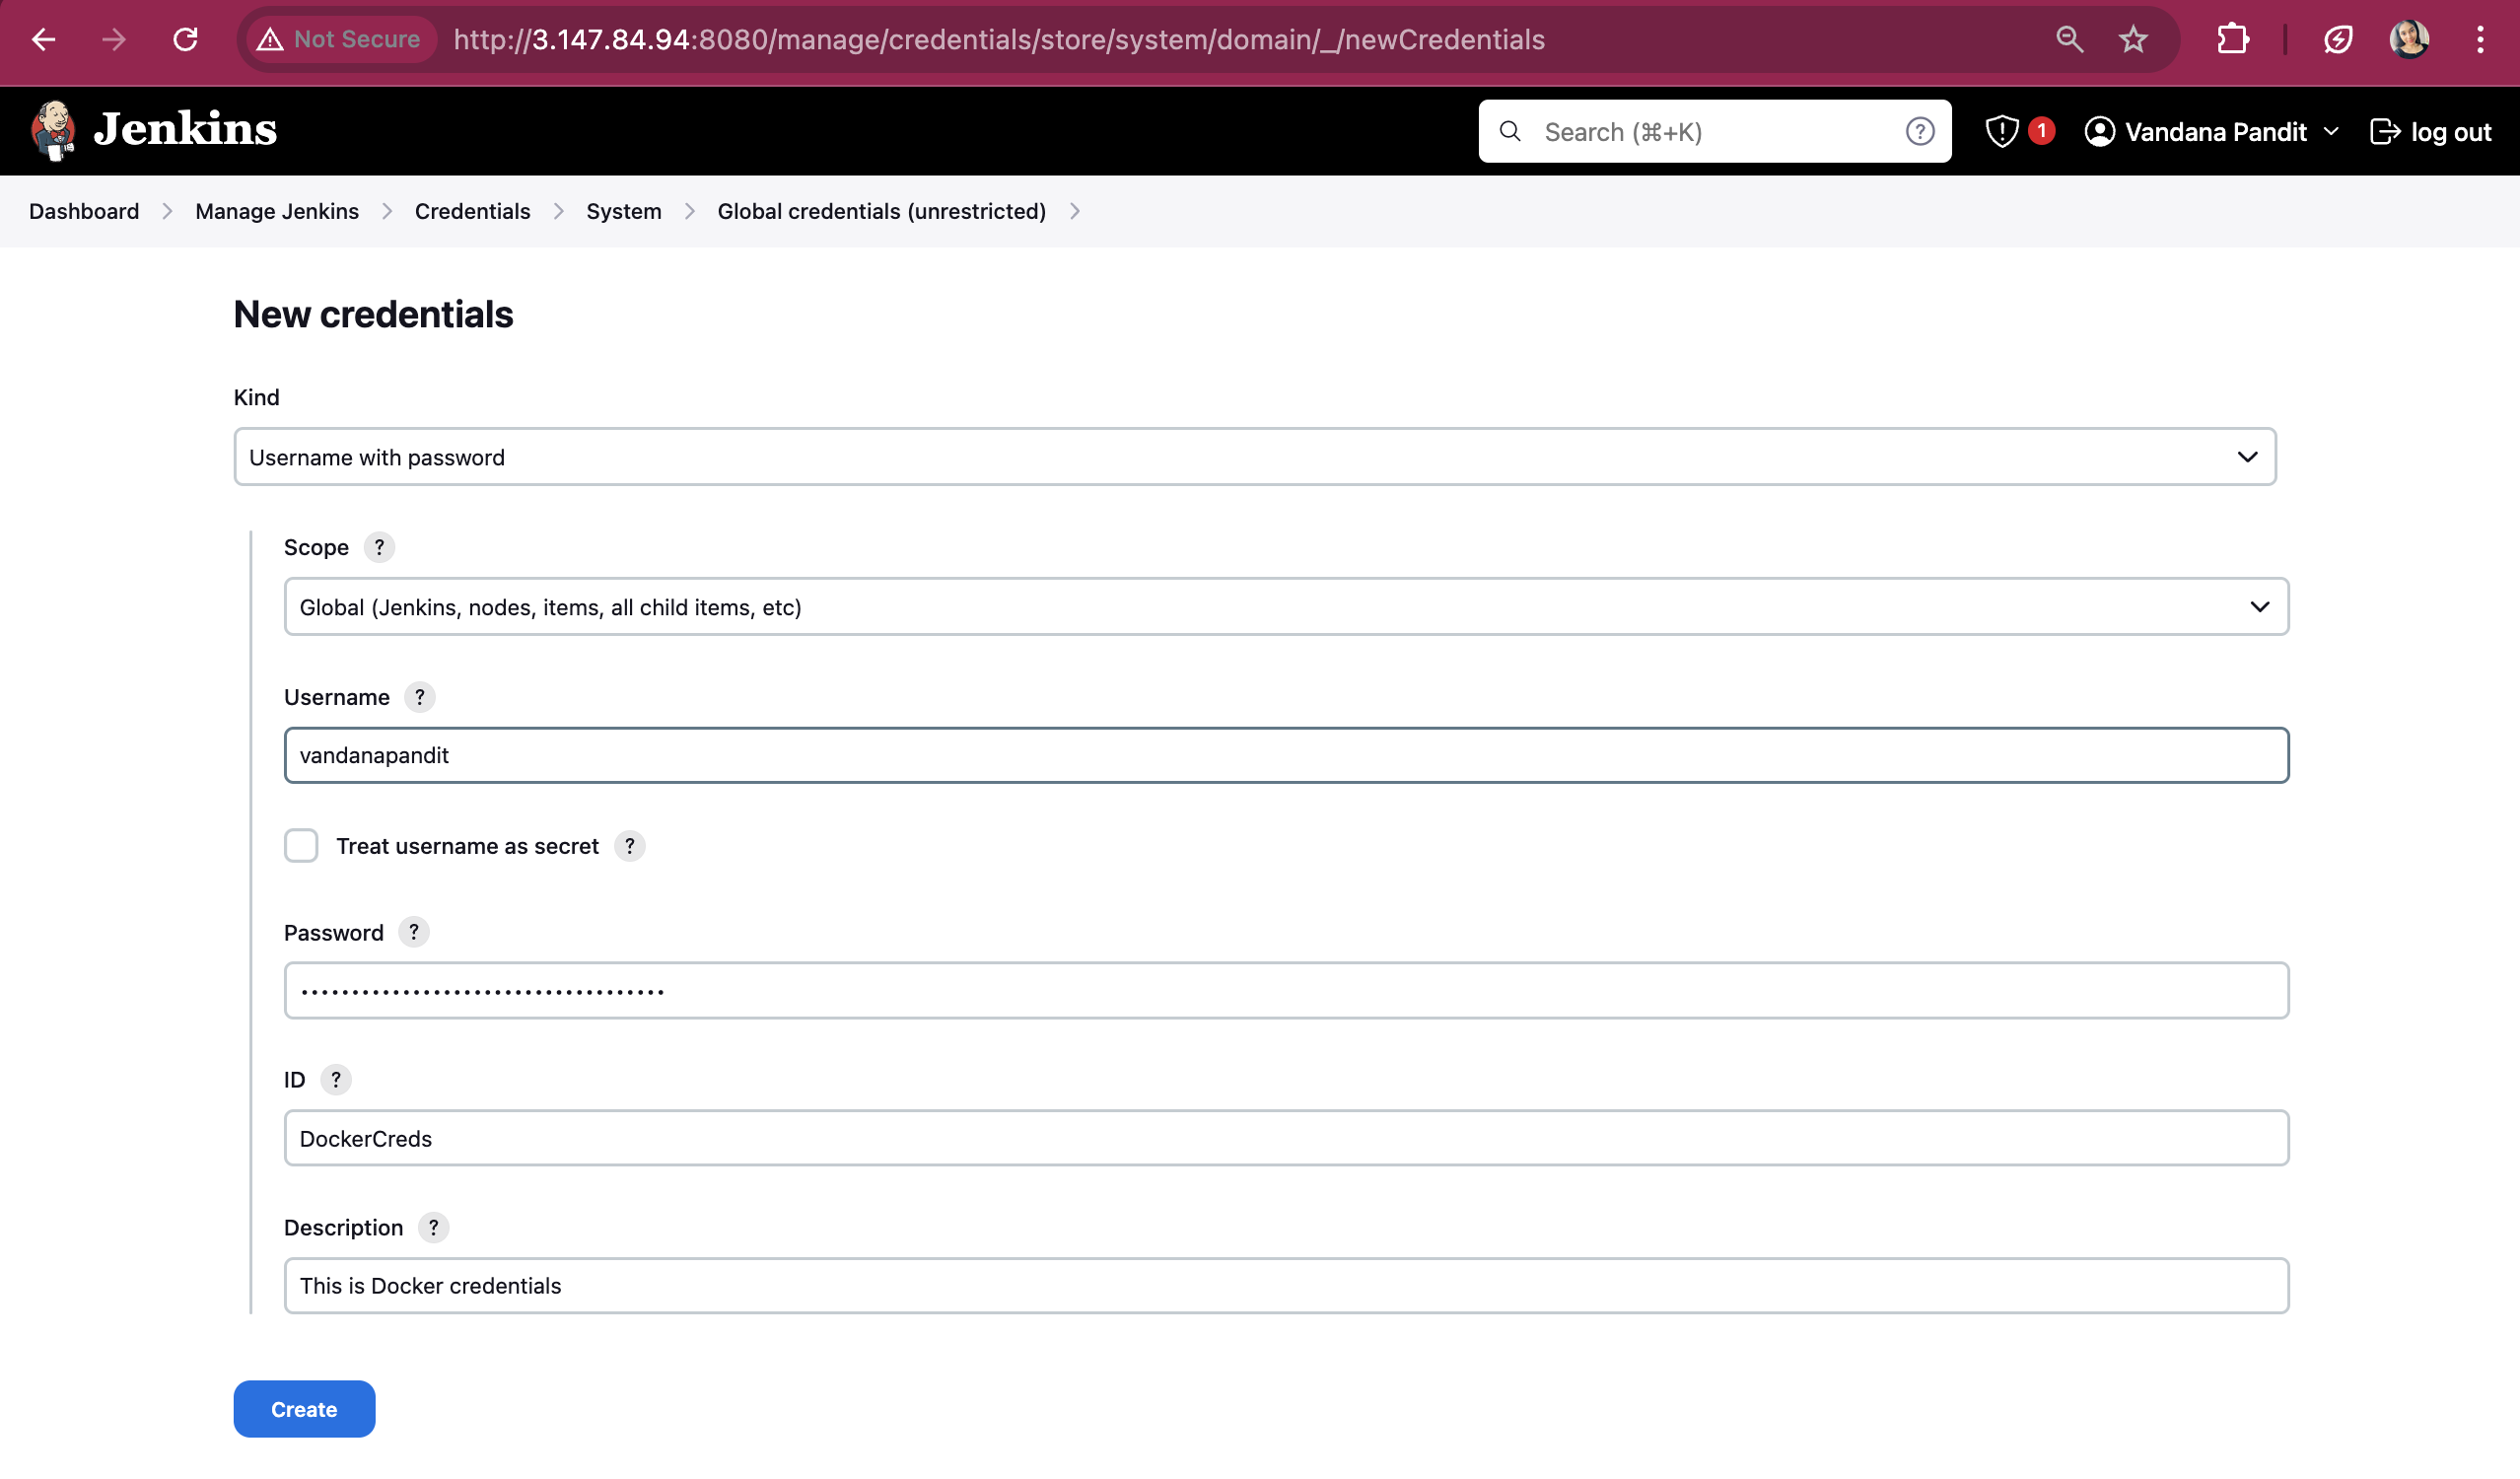
The Credentials will be added successfully.

Now go back to "Manage Jenkins" page and click on "Set up agent" button.
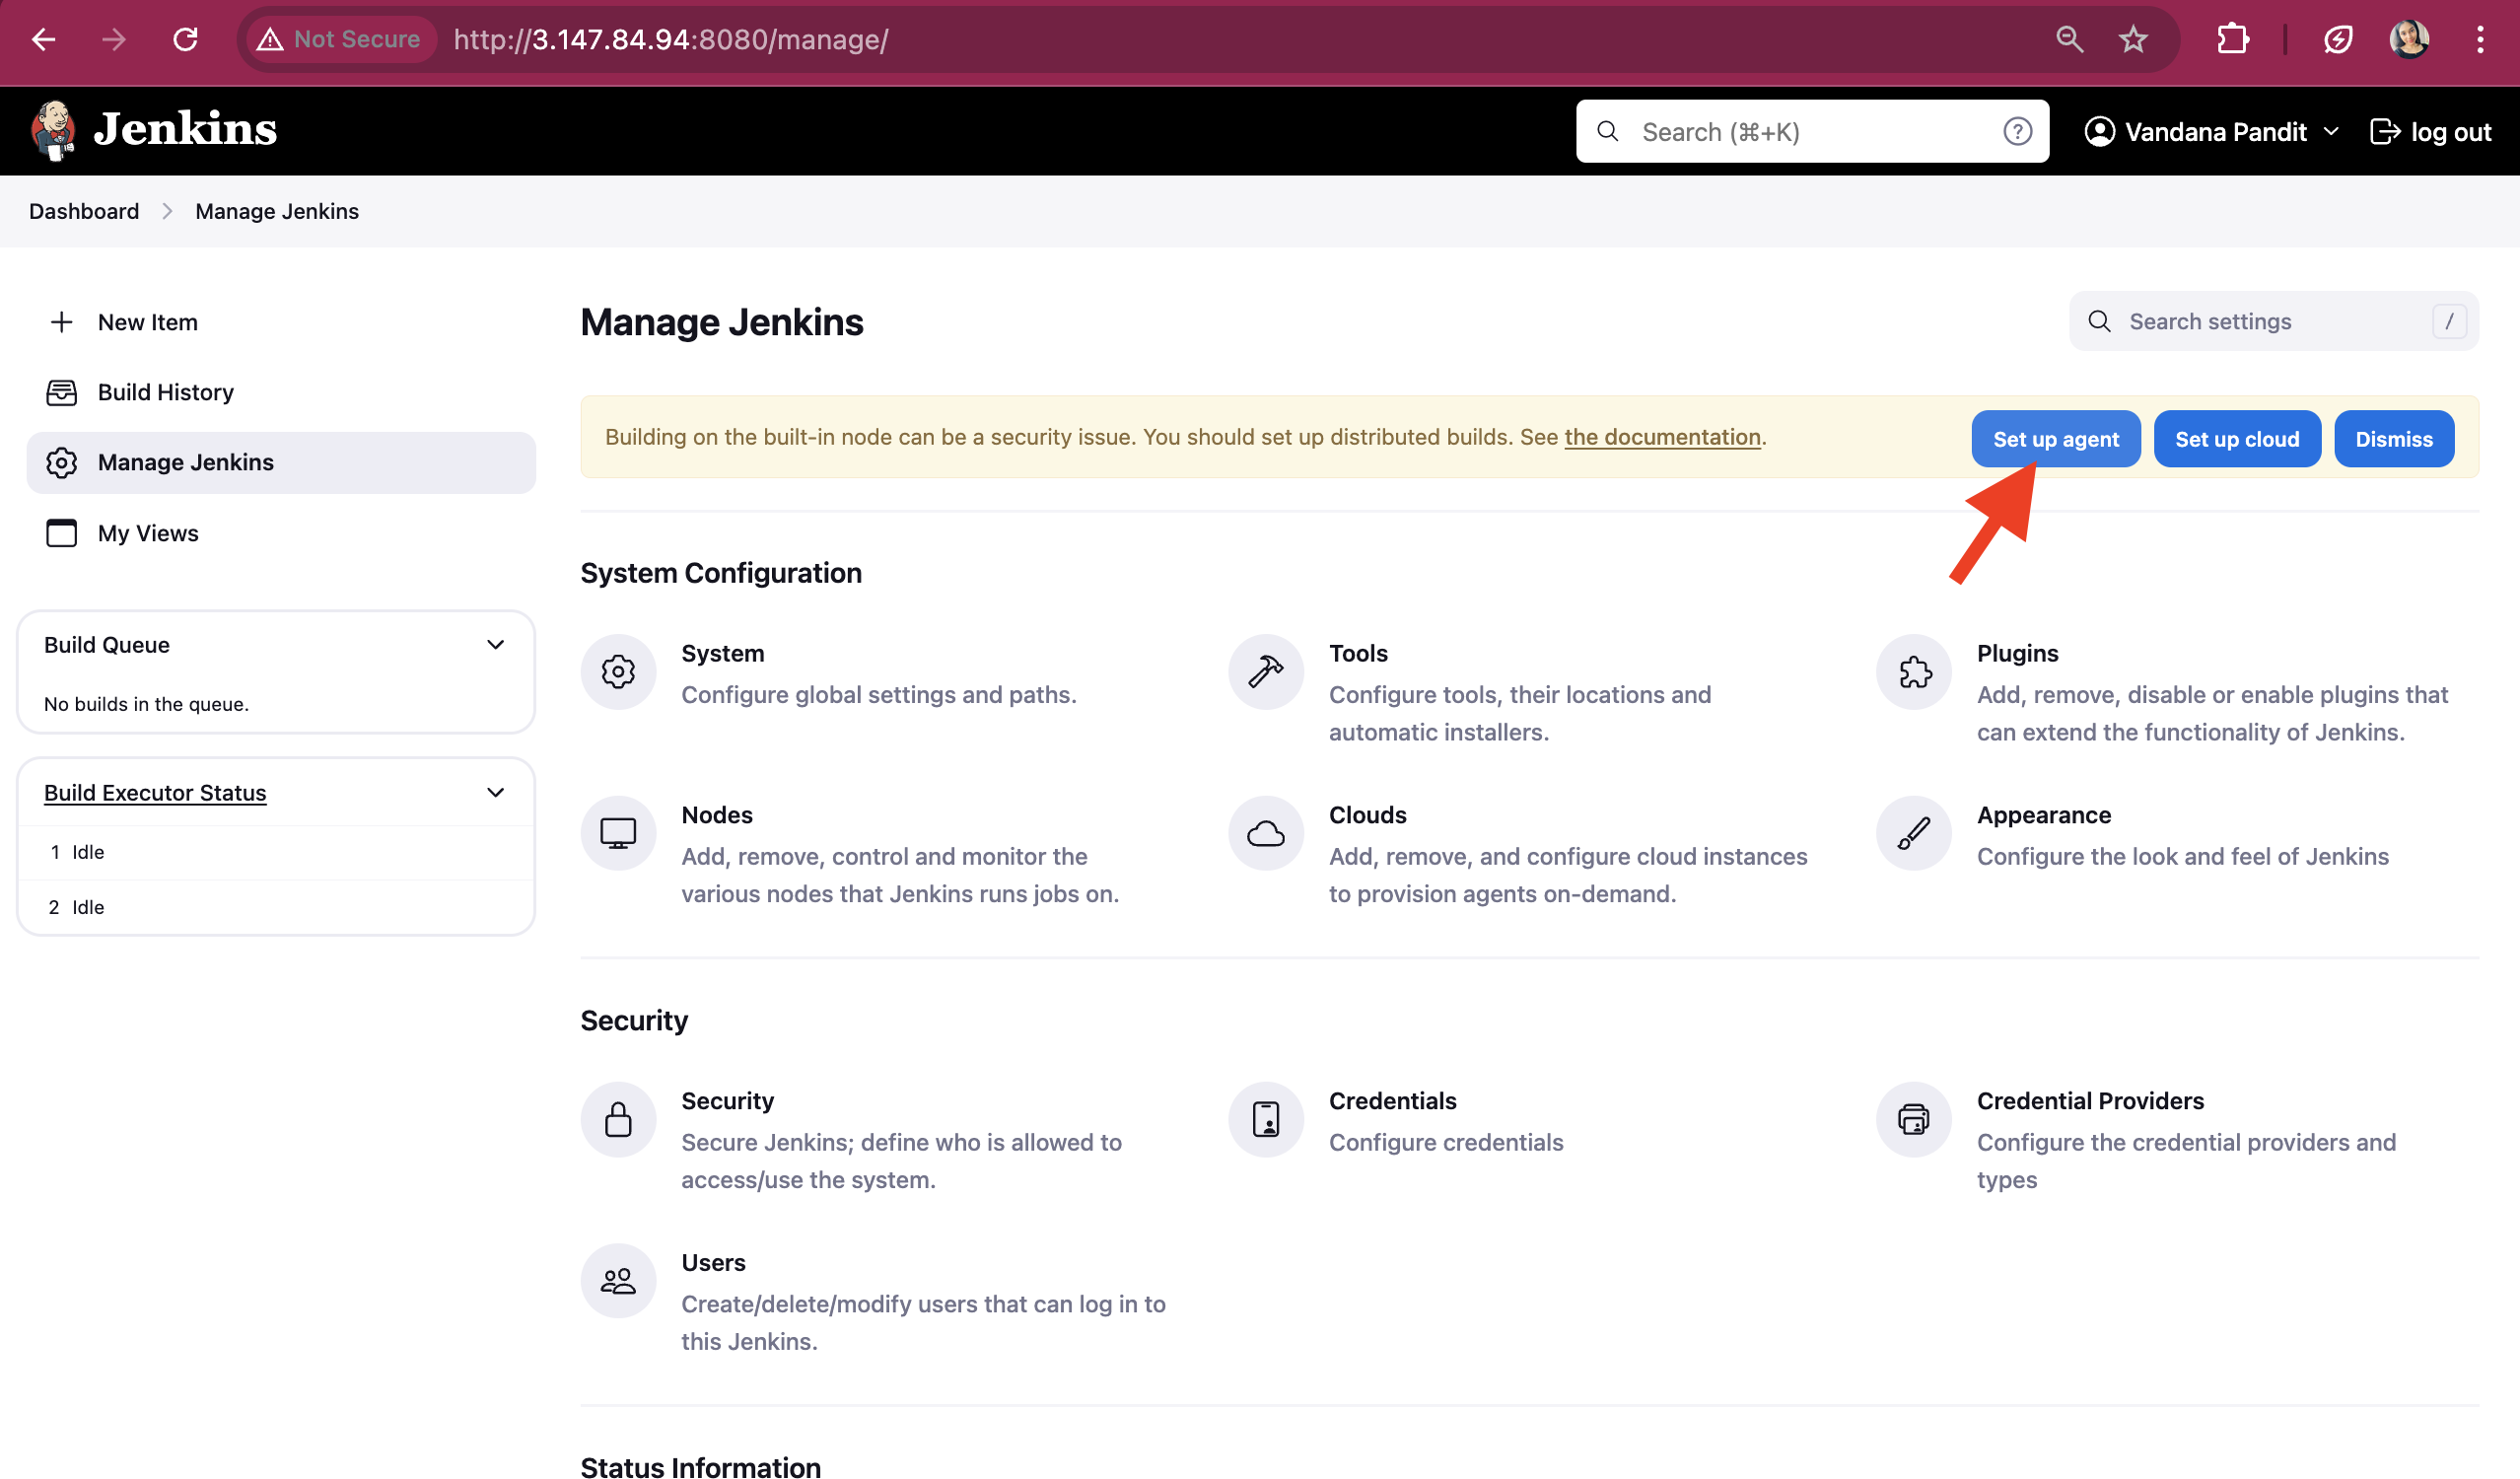
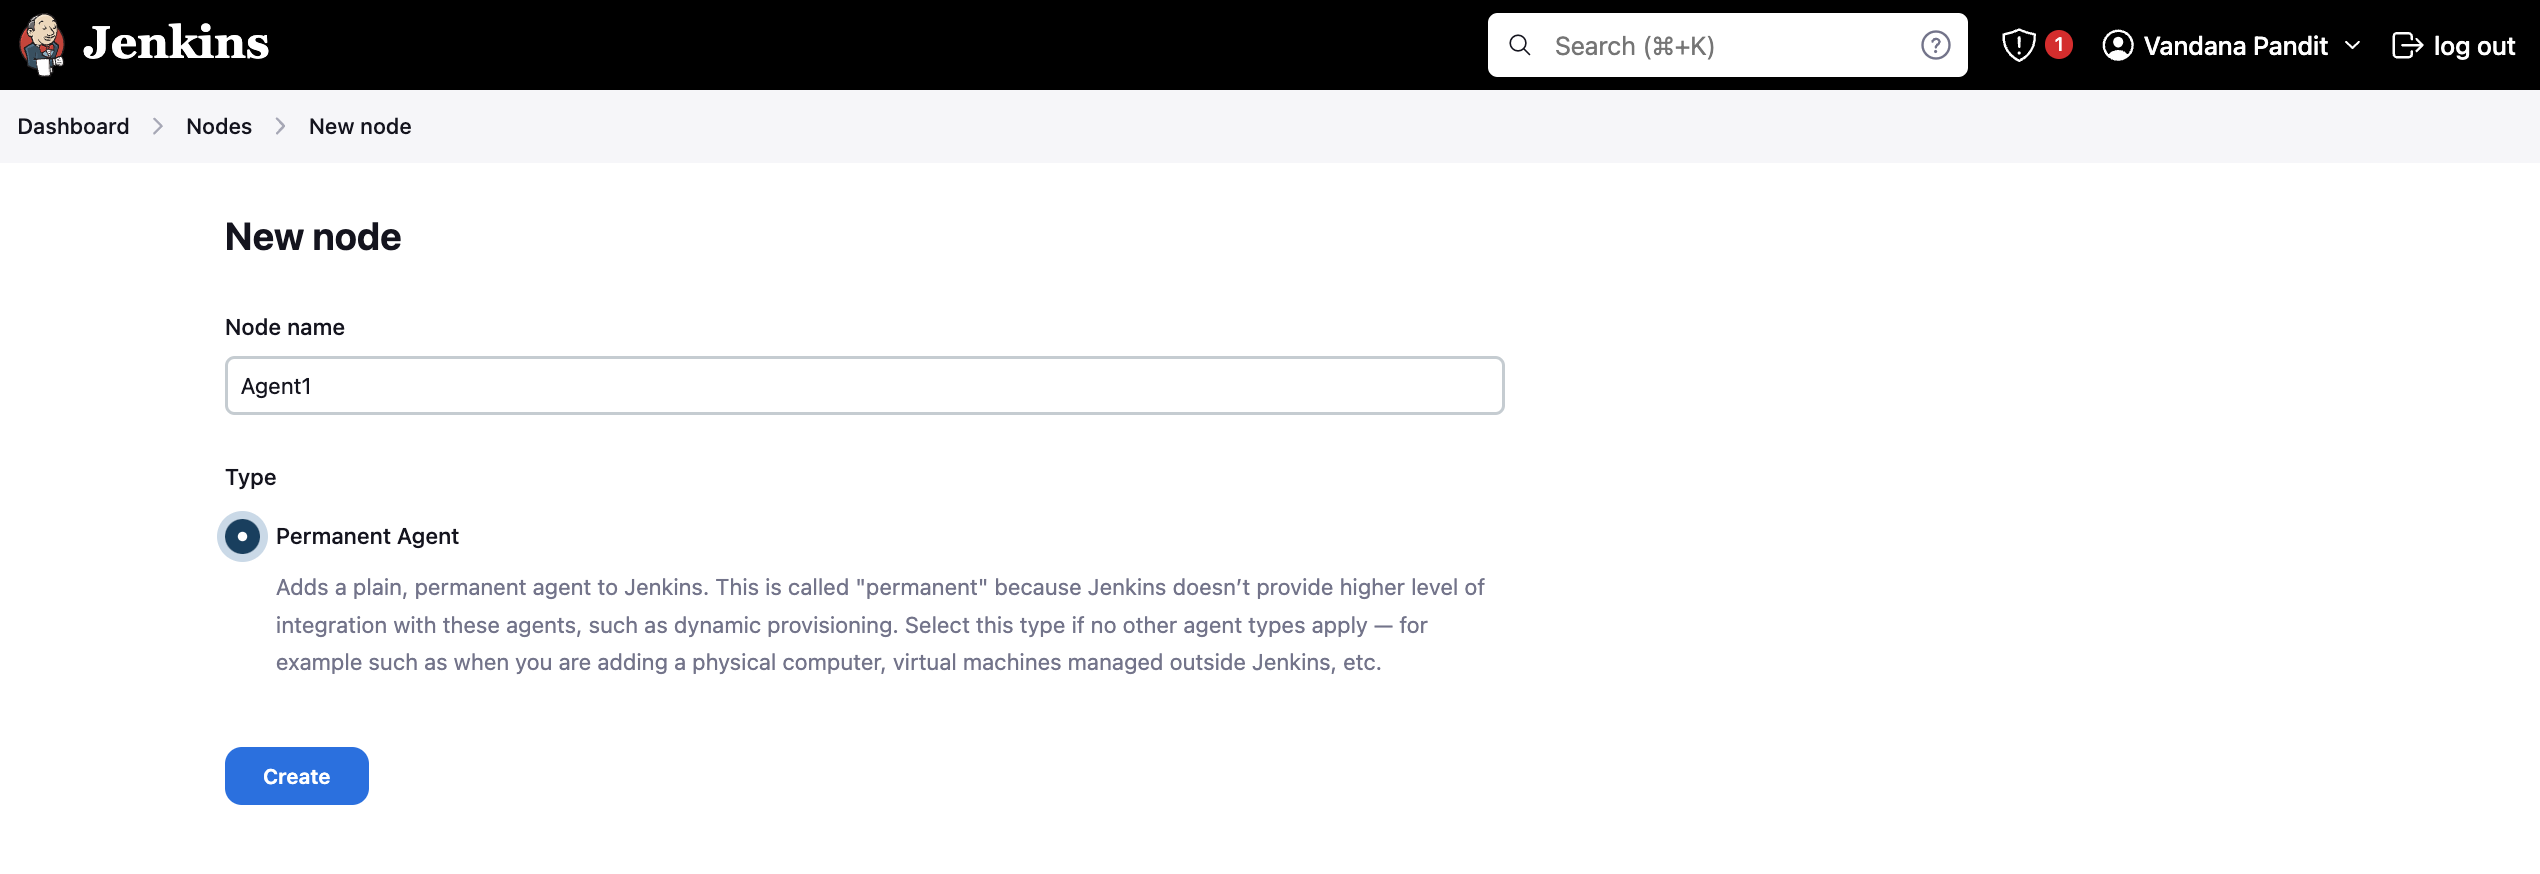
Give the node name as 'Agent1', select radio button "Permanent Agent" and click on "create"
Now in the below screenshot if you see we need a remote directory
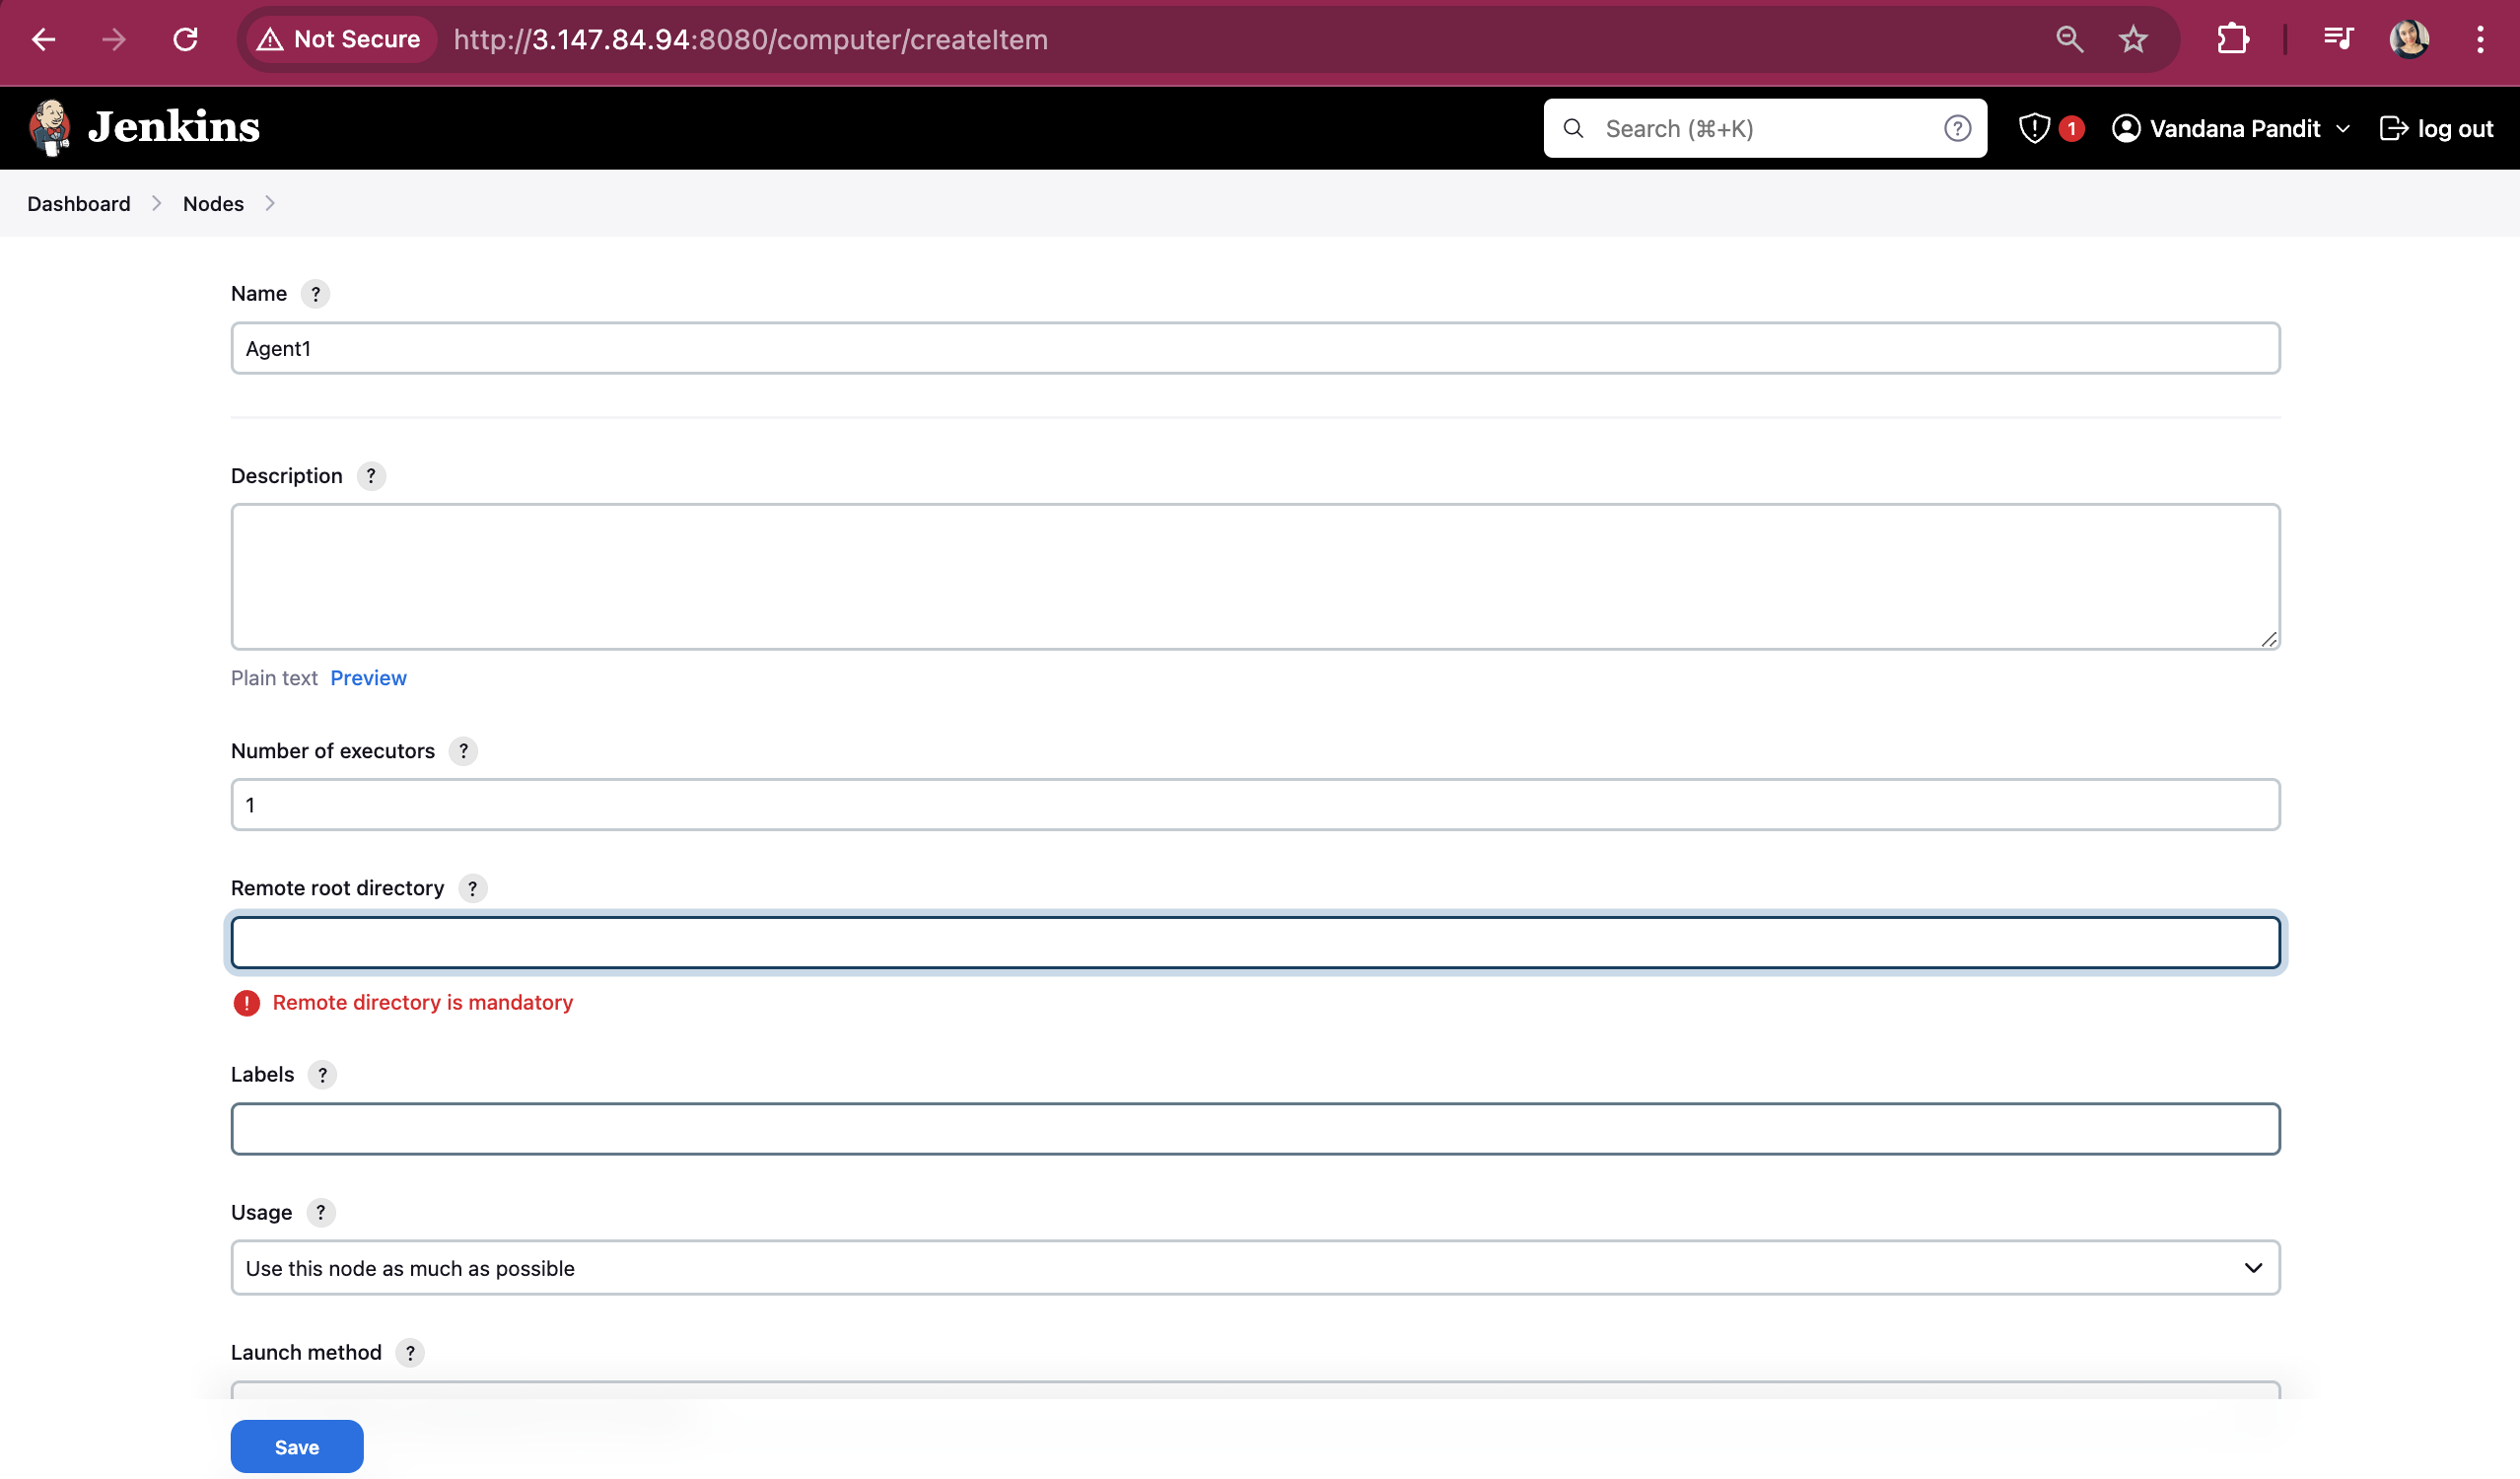
For this launch an EC2 Instance for Jenkins Agent and while launching ensure that the security group ssh, https and http is enabled.
Establish a passwordless SSH connection between the Jenkins-Master EC2 instance and the Jenkins-Agent EC2 instance. Try connecting to the Jenkins-Agent via SSH from the Jenkins-Master node.
Check if you can connect to the Jenkins agent via SSH. If the connection is successful, exit from the Jenkins agent. Open a new terminal, log in to the Jenkins agent, and follow the steps shown in the snapshots below.

Provide the created directory path, give the label name as 'dev' (since we mentioned 'dev' in our groovy script), and select the launch method as 'Launch agent via SSH'.
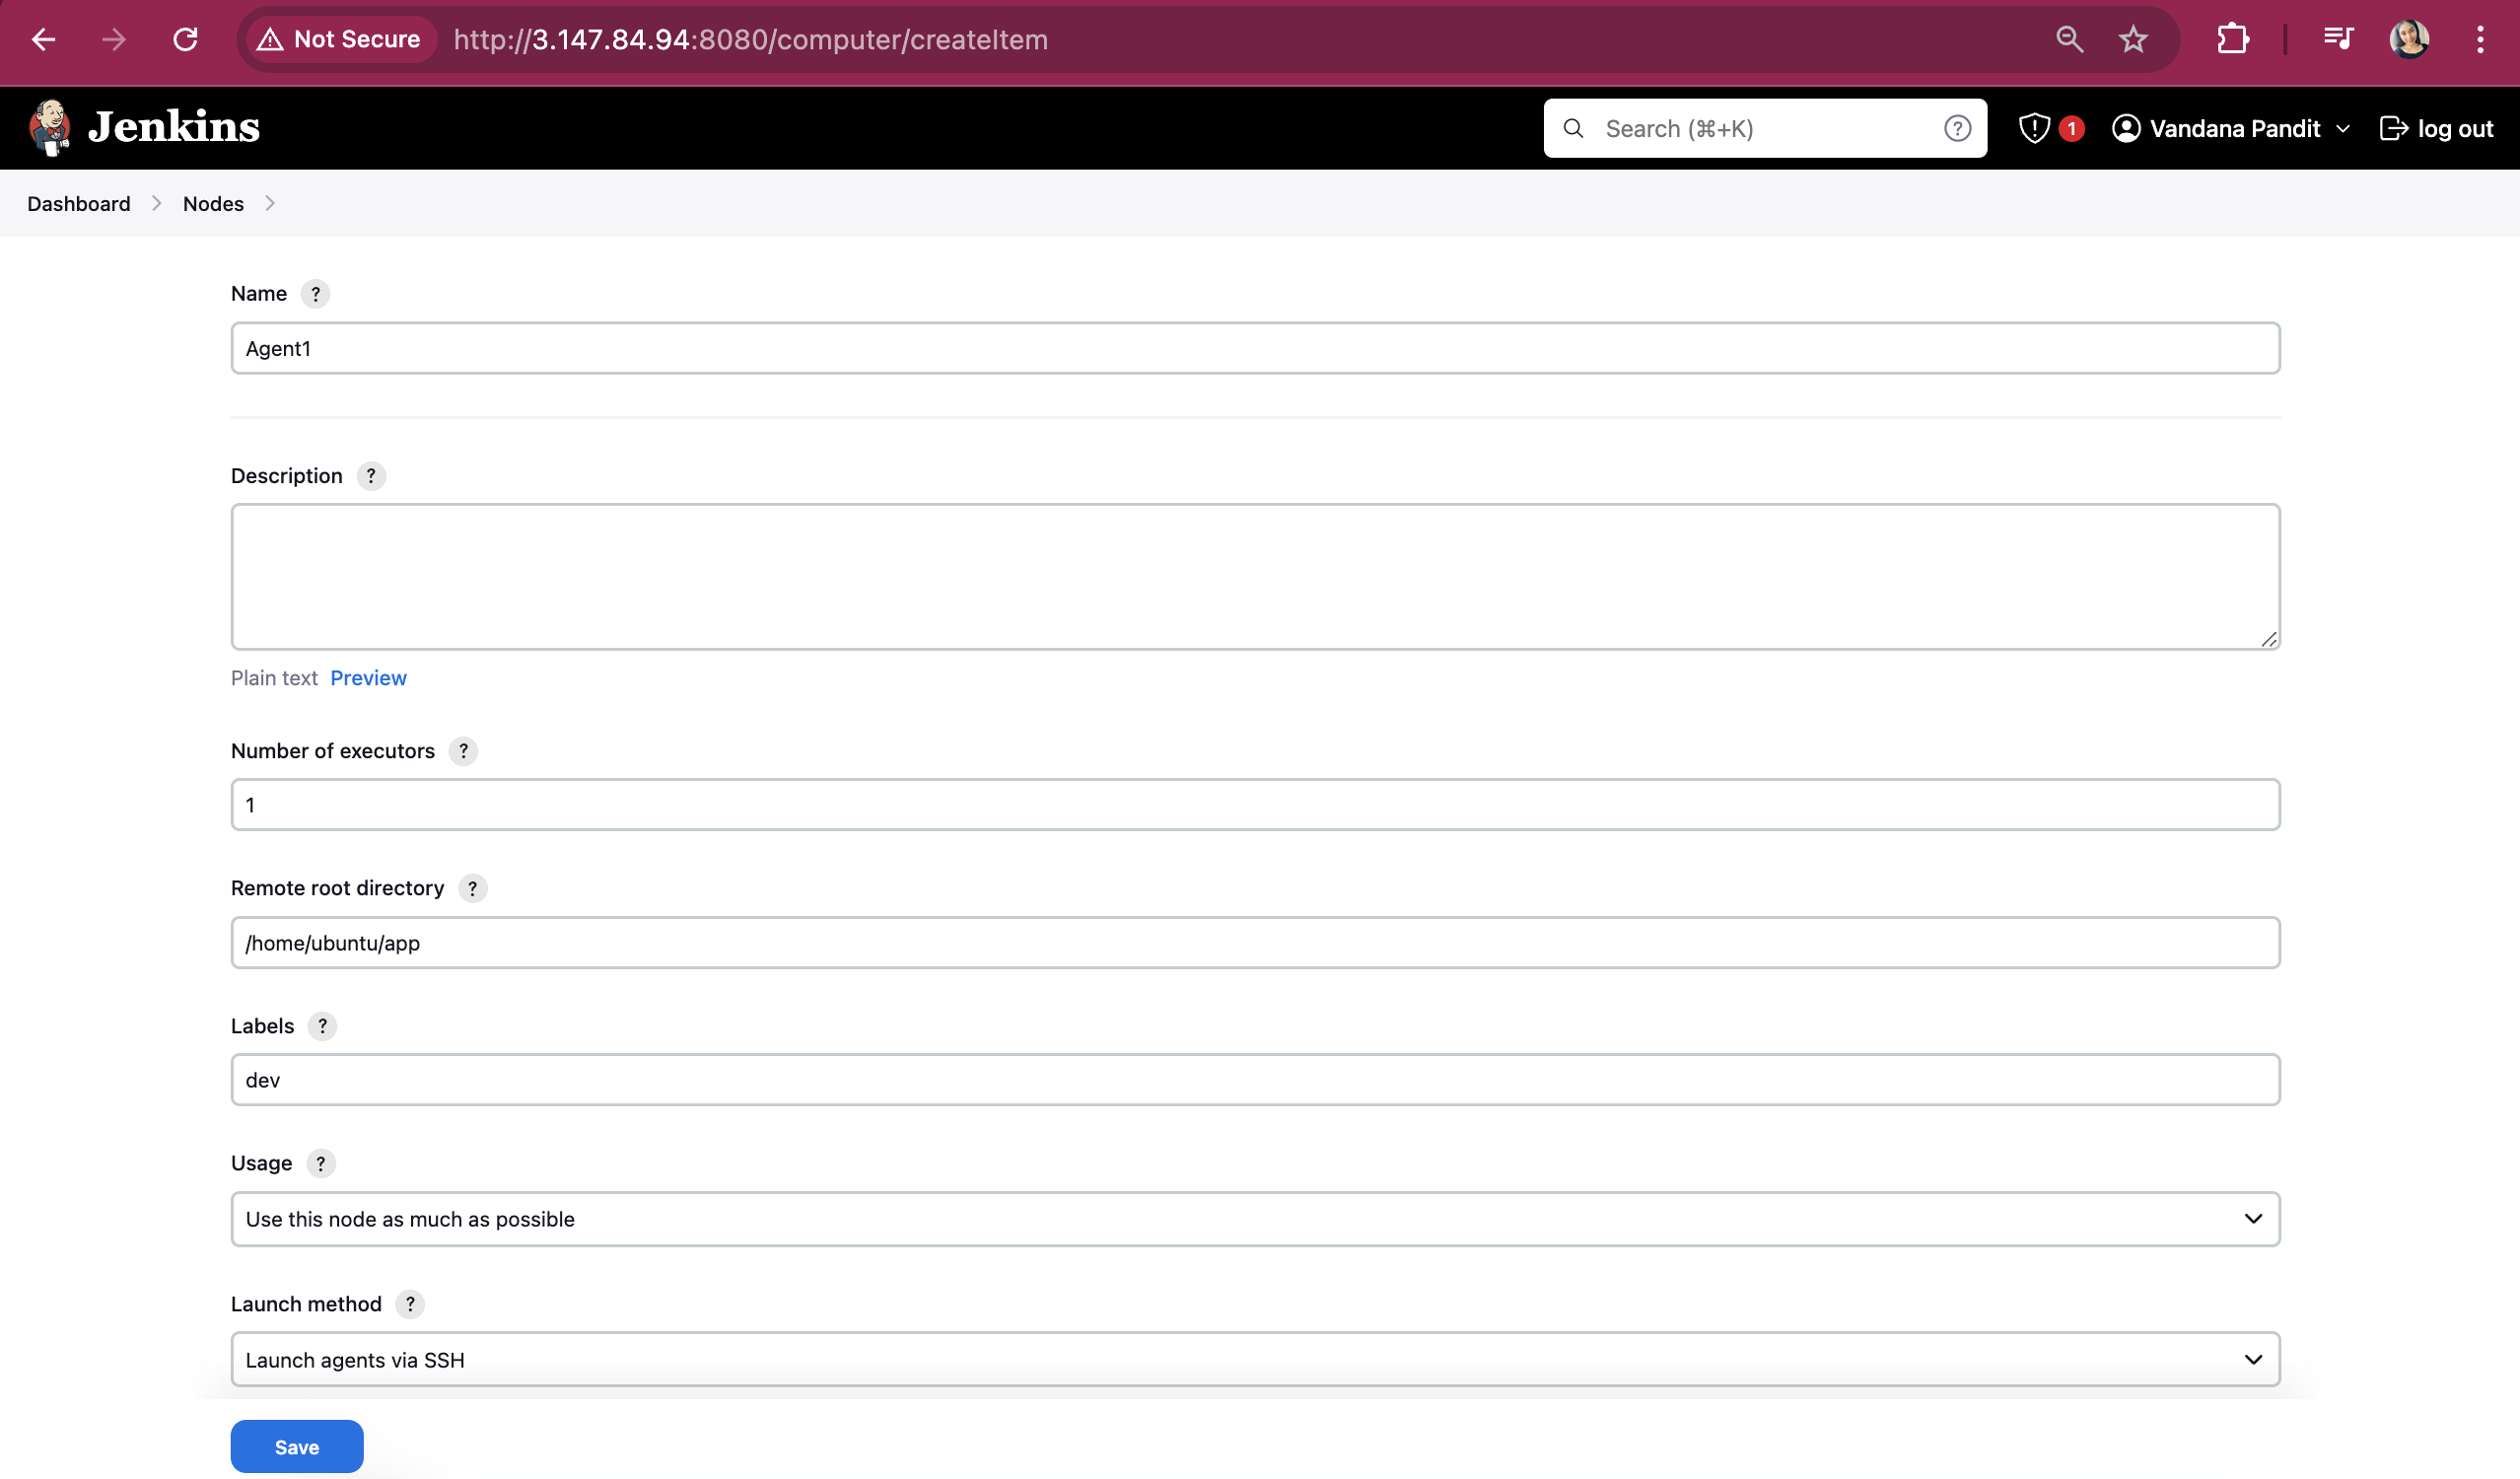
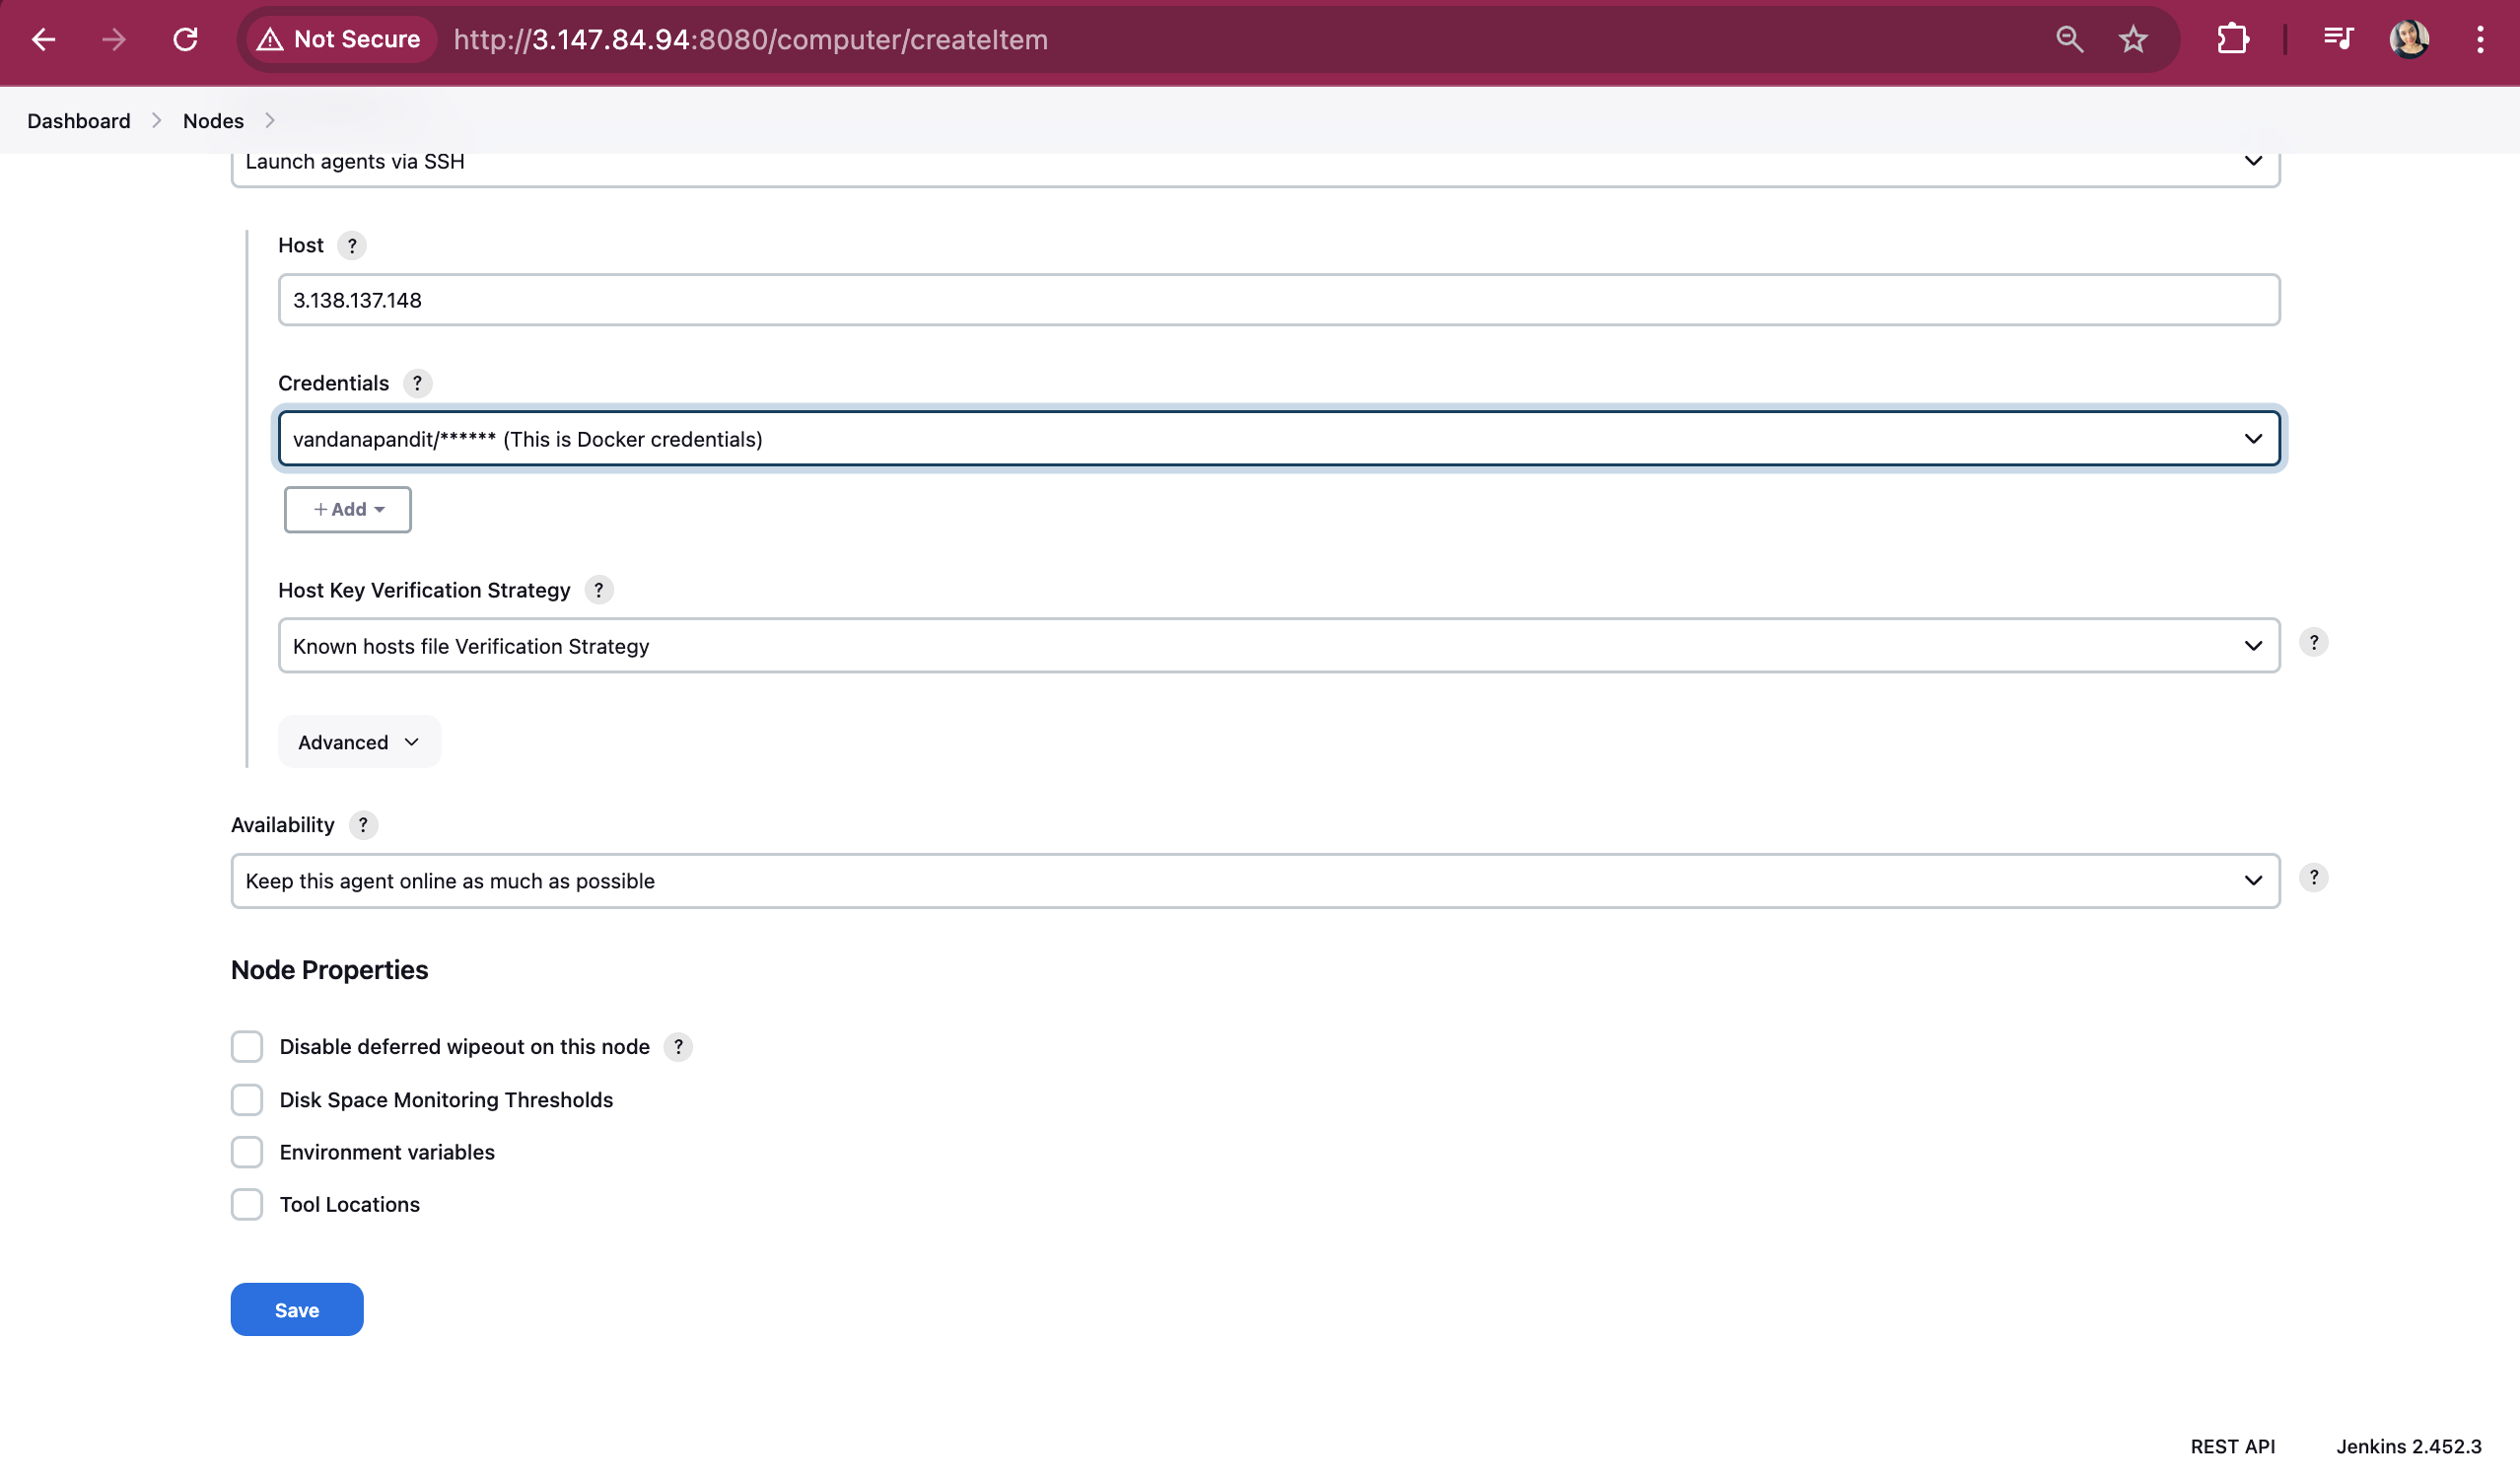
Provide the Jenkins agent EC2 instance's public IP address in the Host field and click the Add button under the 'Credentials' section.
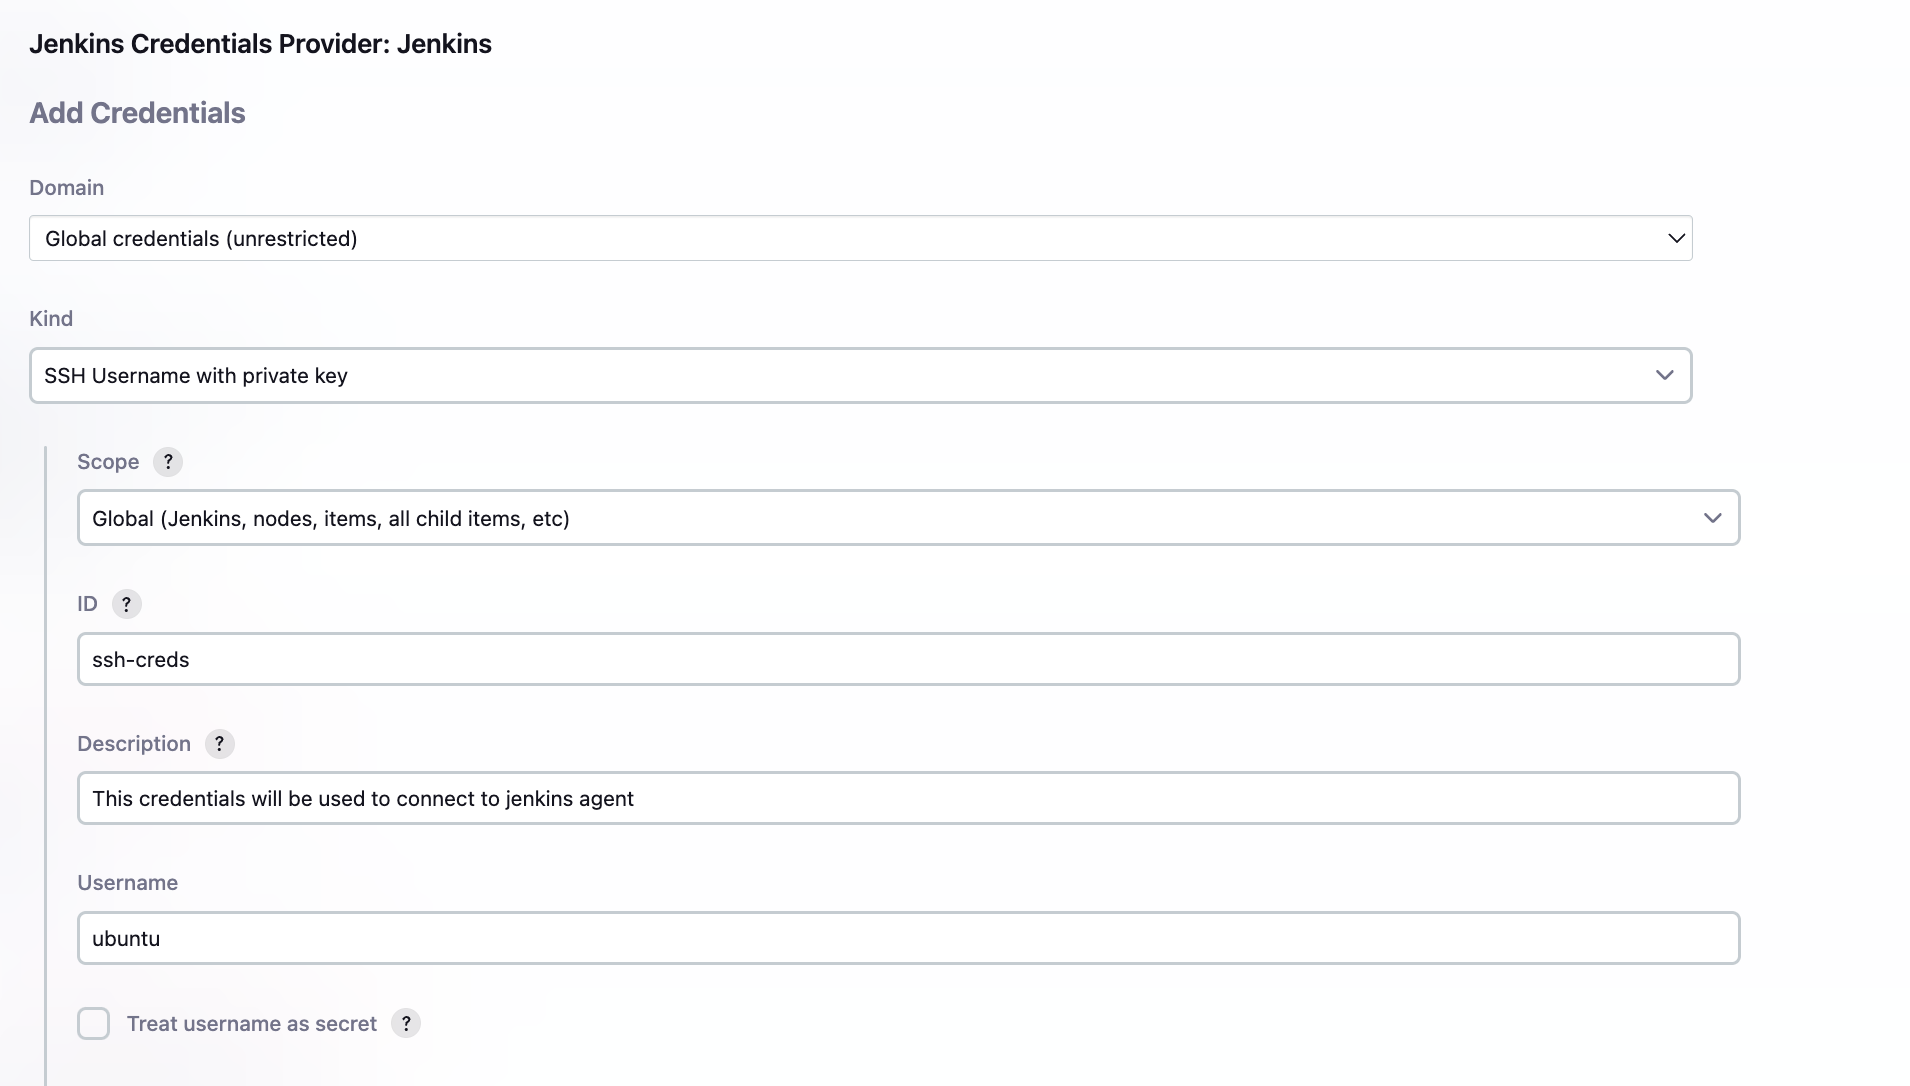
On the Credentials page, provide the required details as shown here.
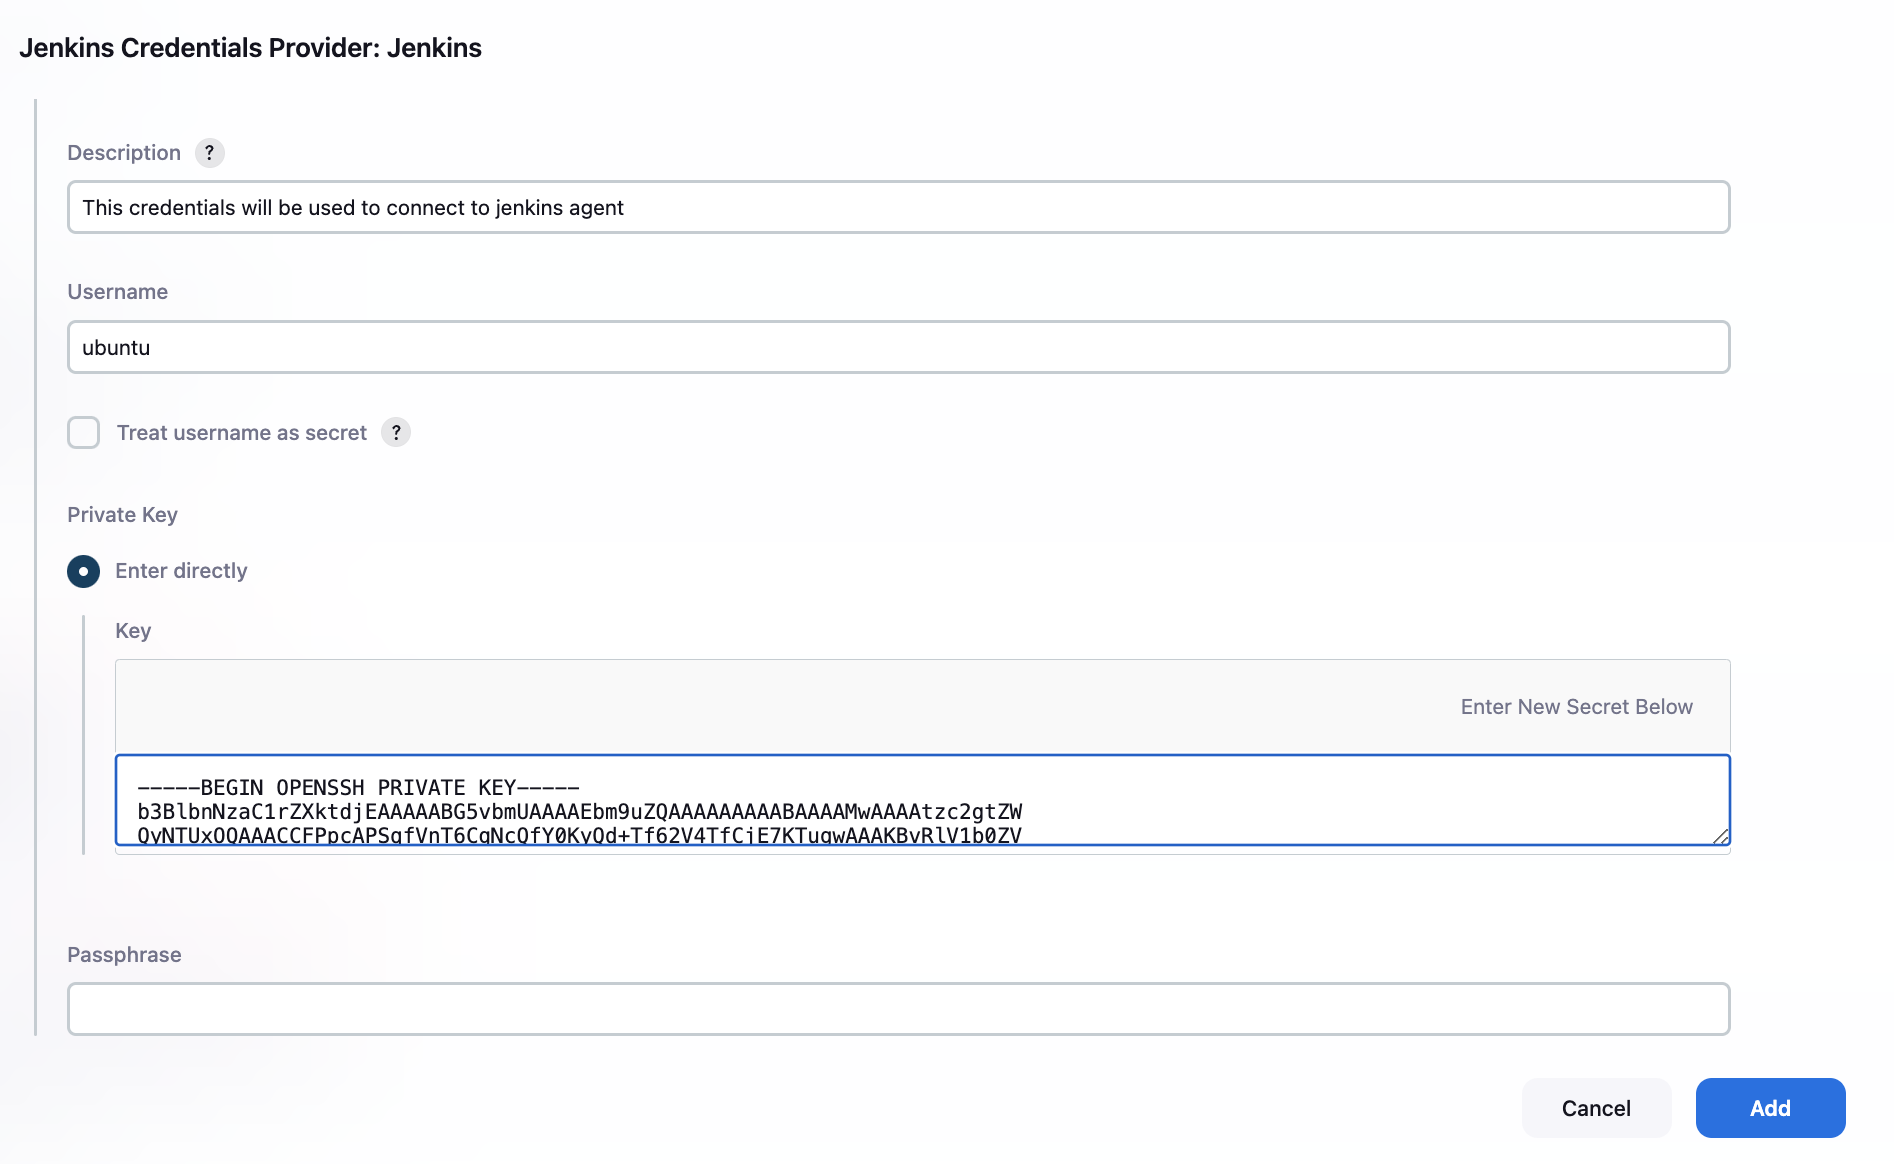
Add jenkin master's private key
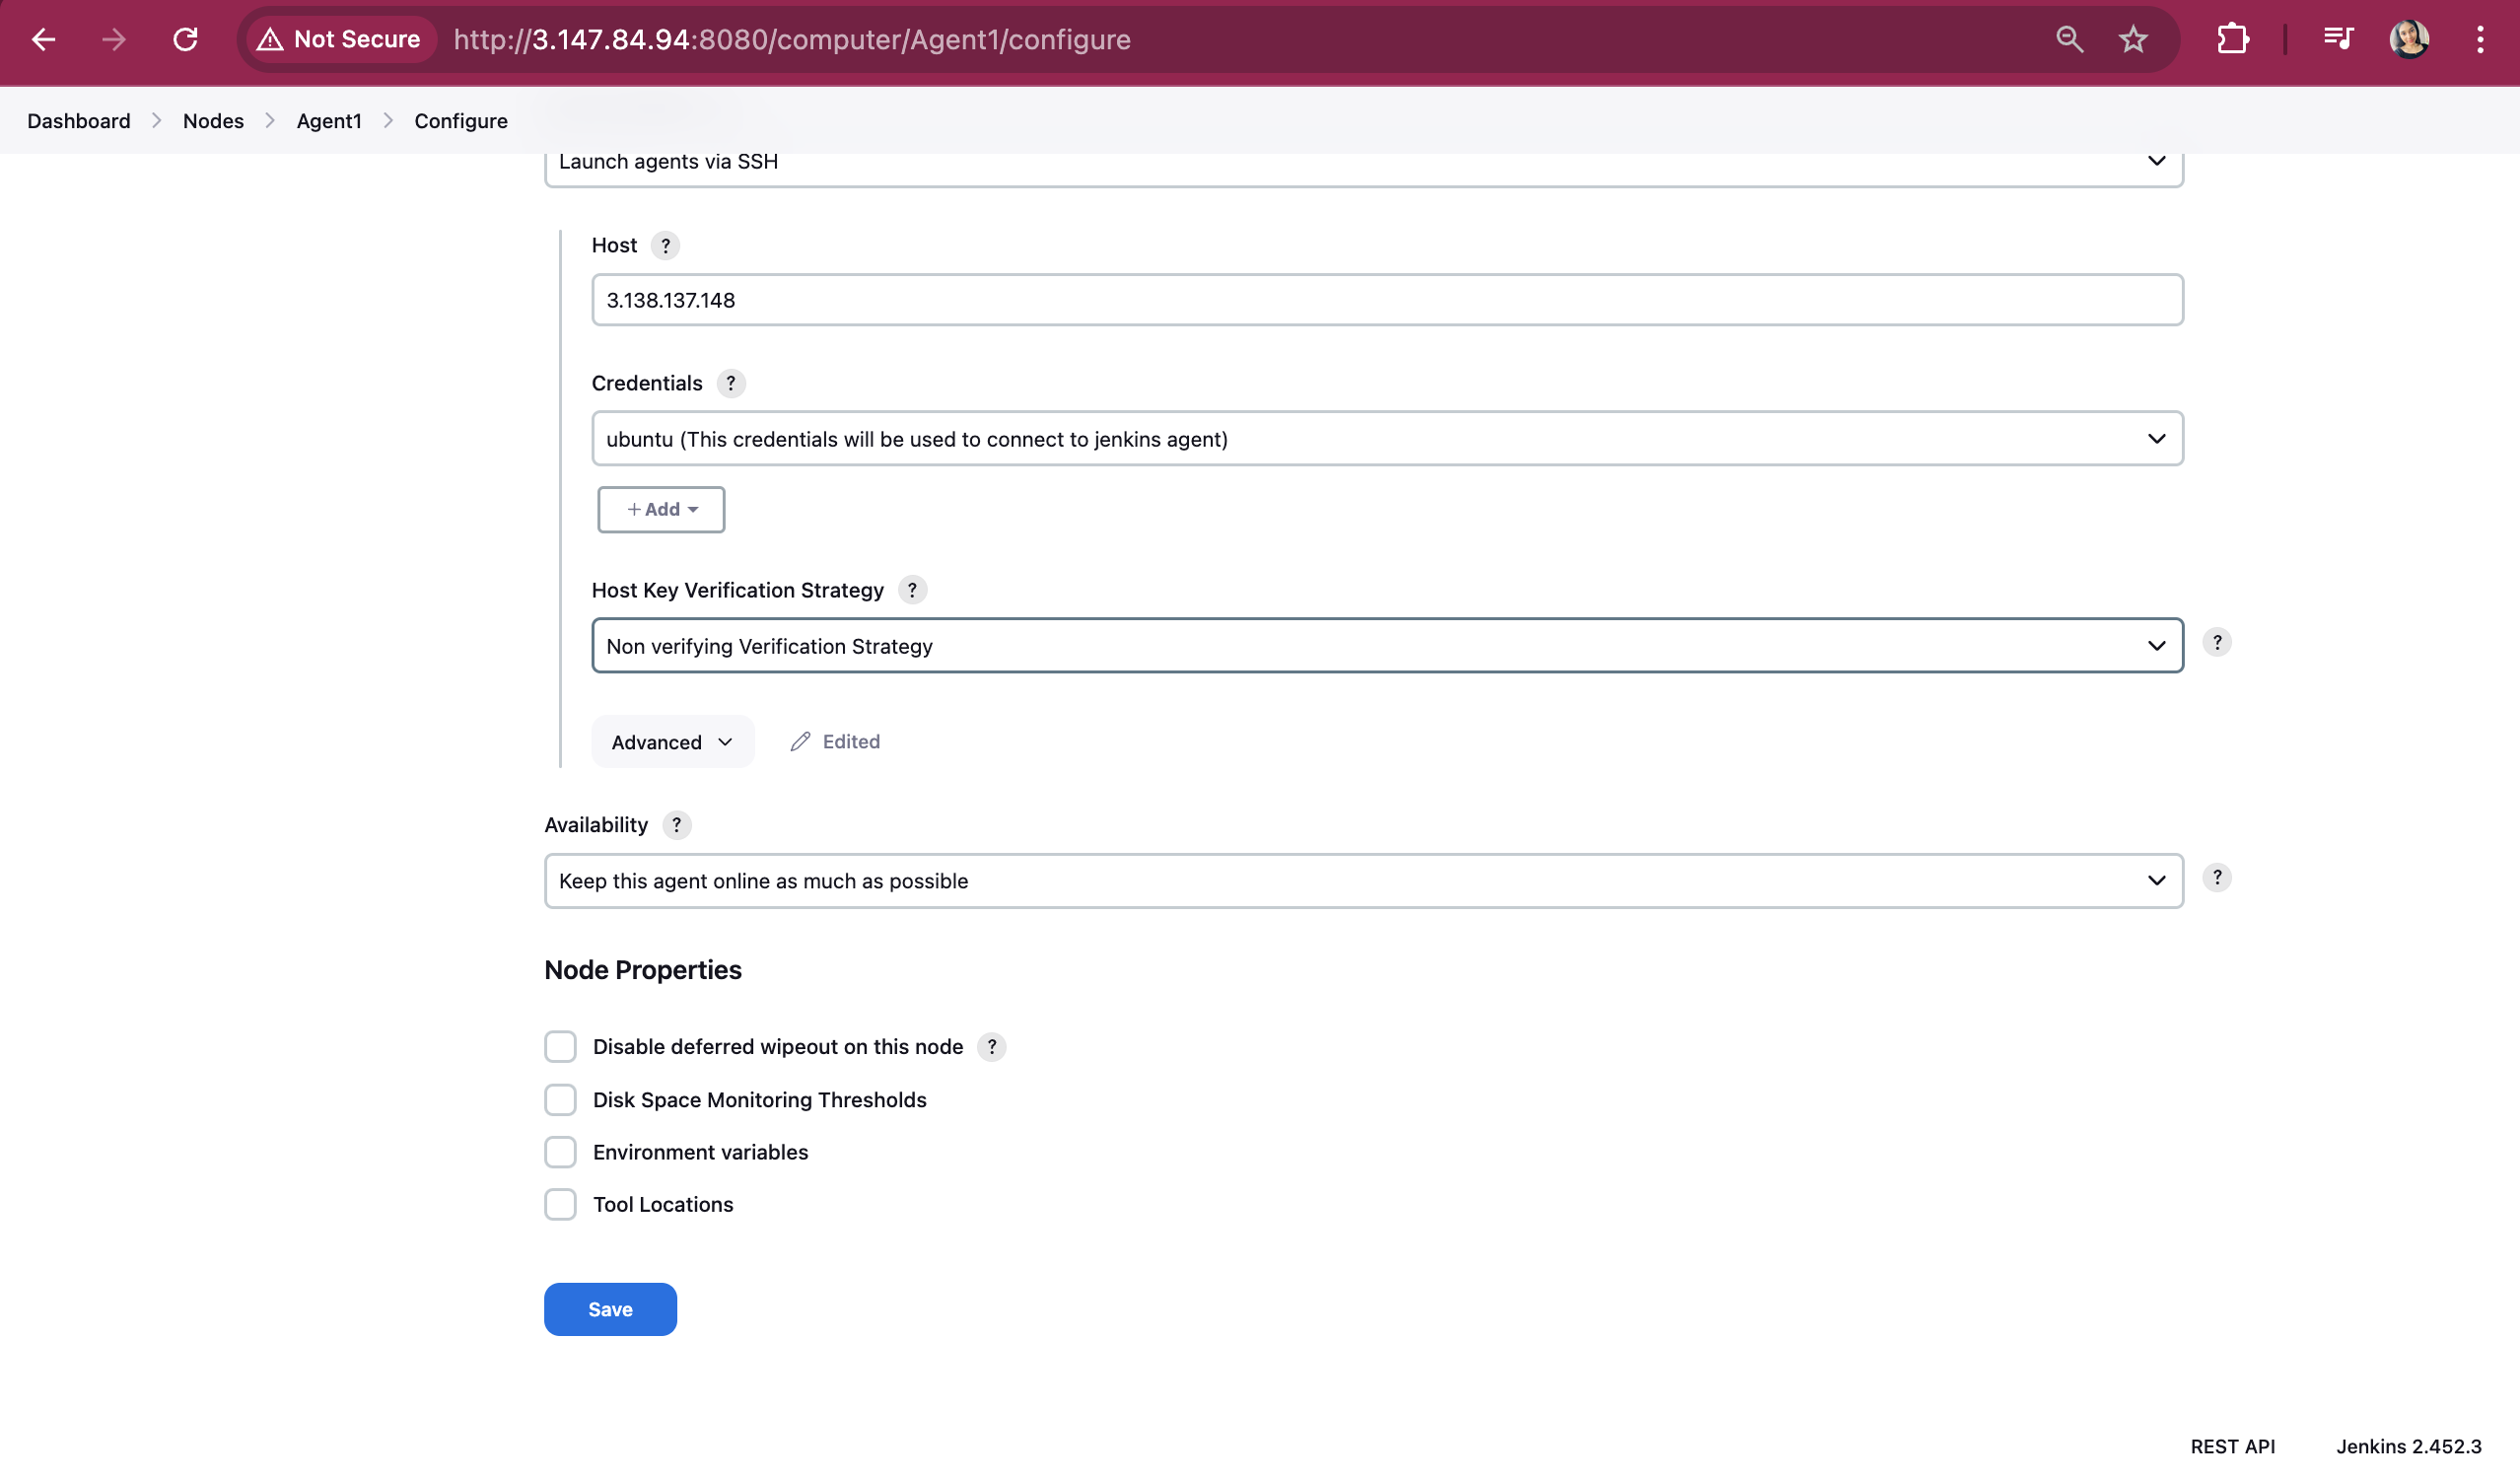
Select 'Non-verifying Verification Strategy' for the Host Key Verification Strategy field. Click on Save button
On Jenkins Agent install Java

Go to Nodes page in Jenkins
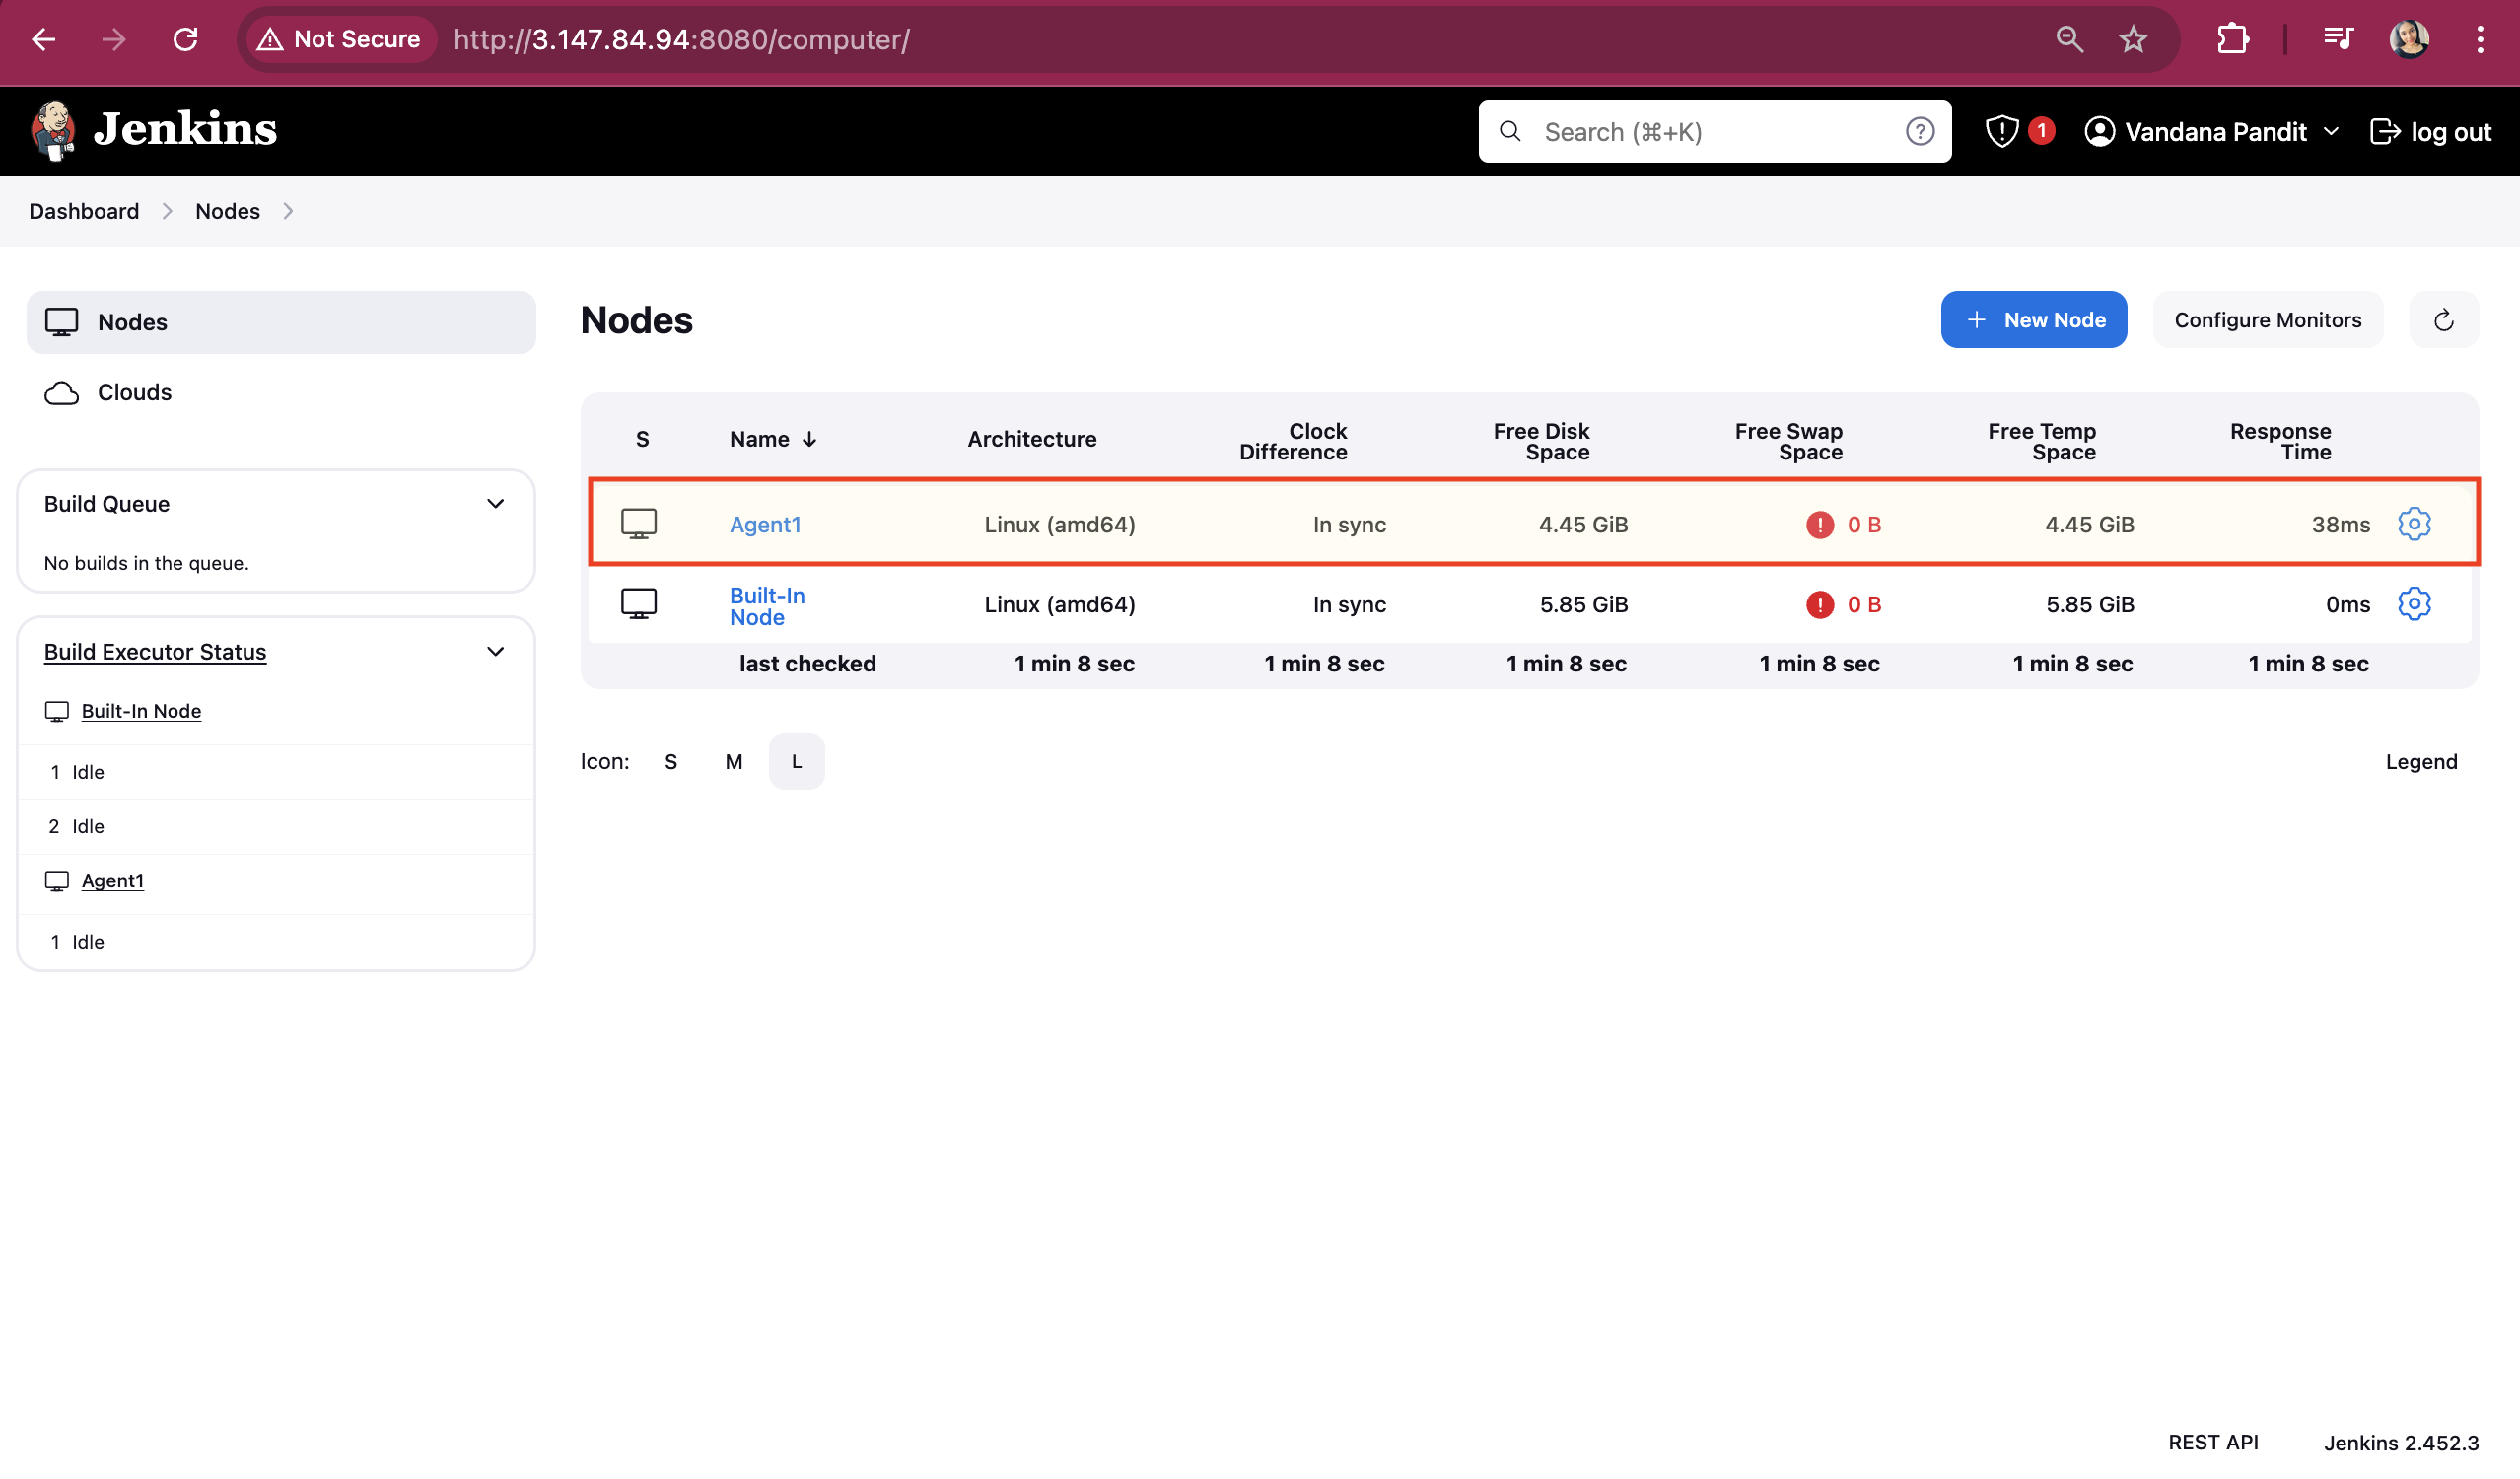
Install Docker on the Jenkins Agent server and add the user 'ubuntu' to the Docker group. Don't forget to reboot the server. Once the server has rebooted, follow these steps:
Add rule in Jenkins's Agent Security Group for port 5000 and 3306
Modify docker-compose file , just change the flaskapp image name that was pushed to docker HUB.
Click on "Build Now":
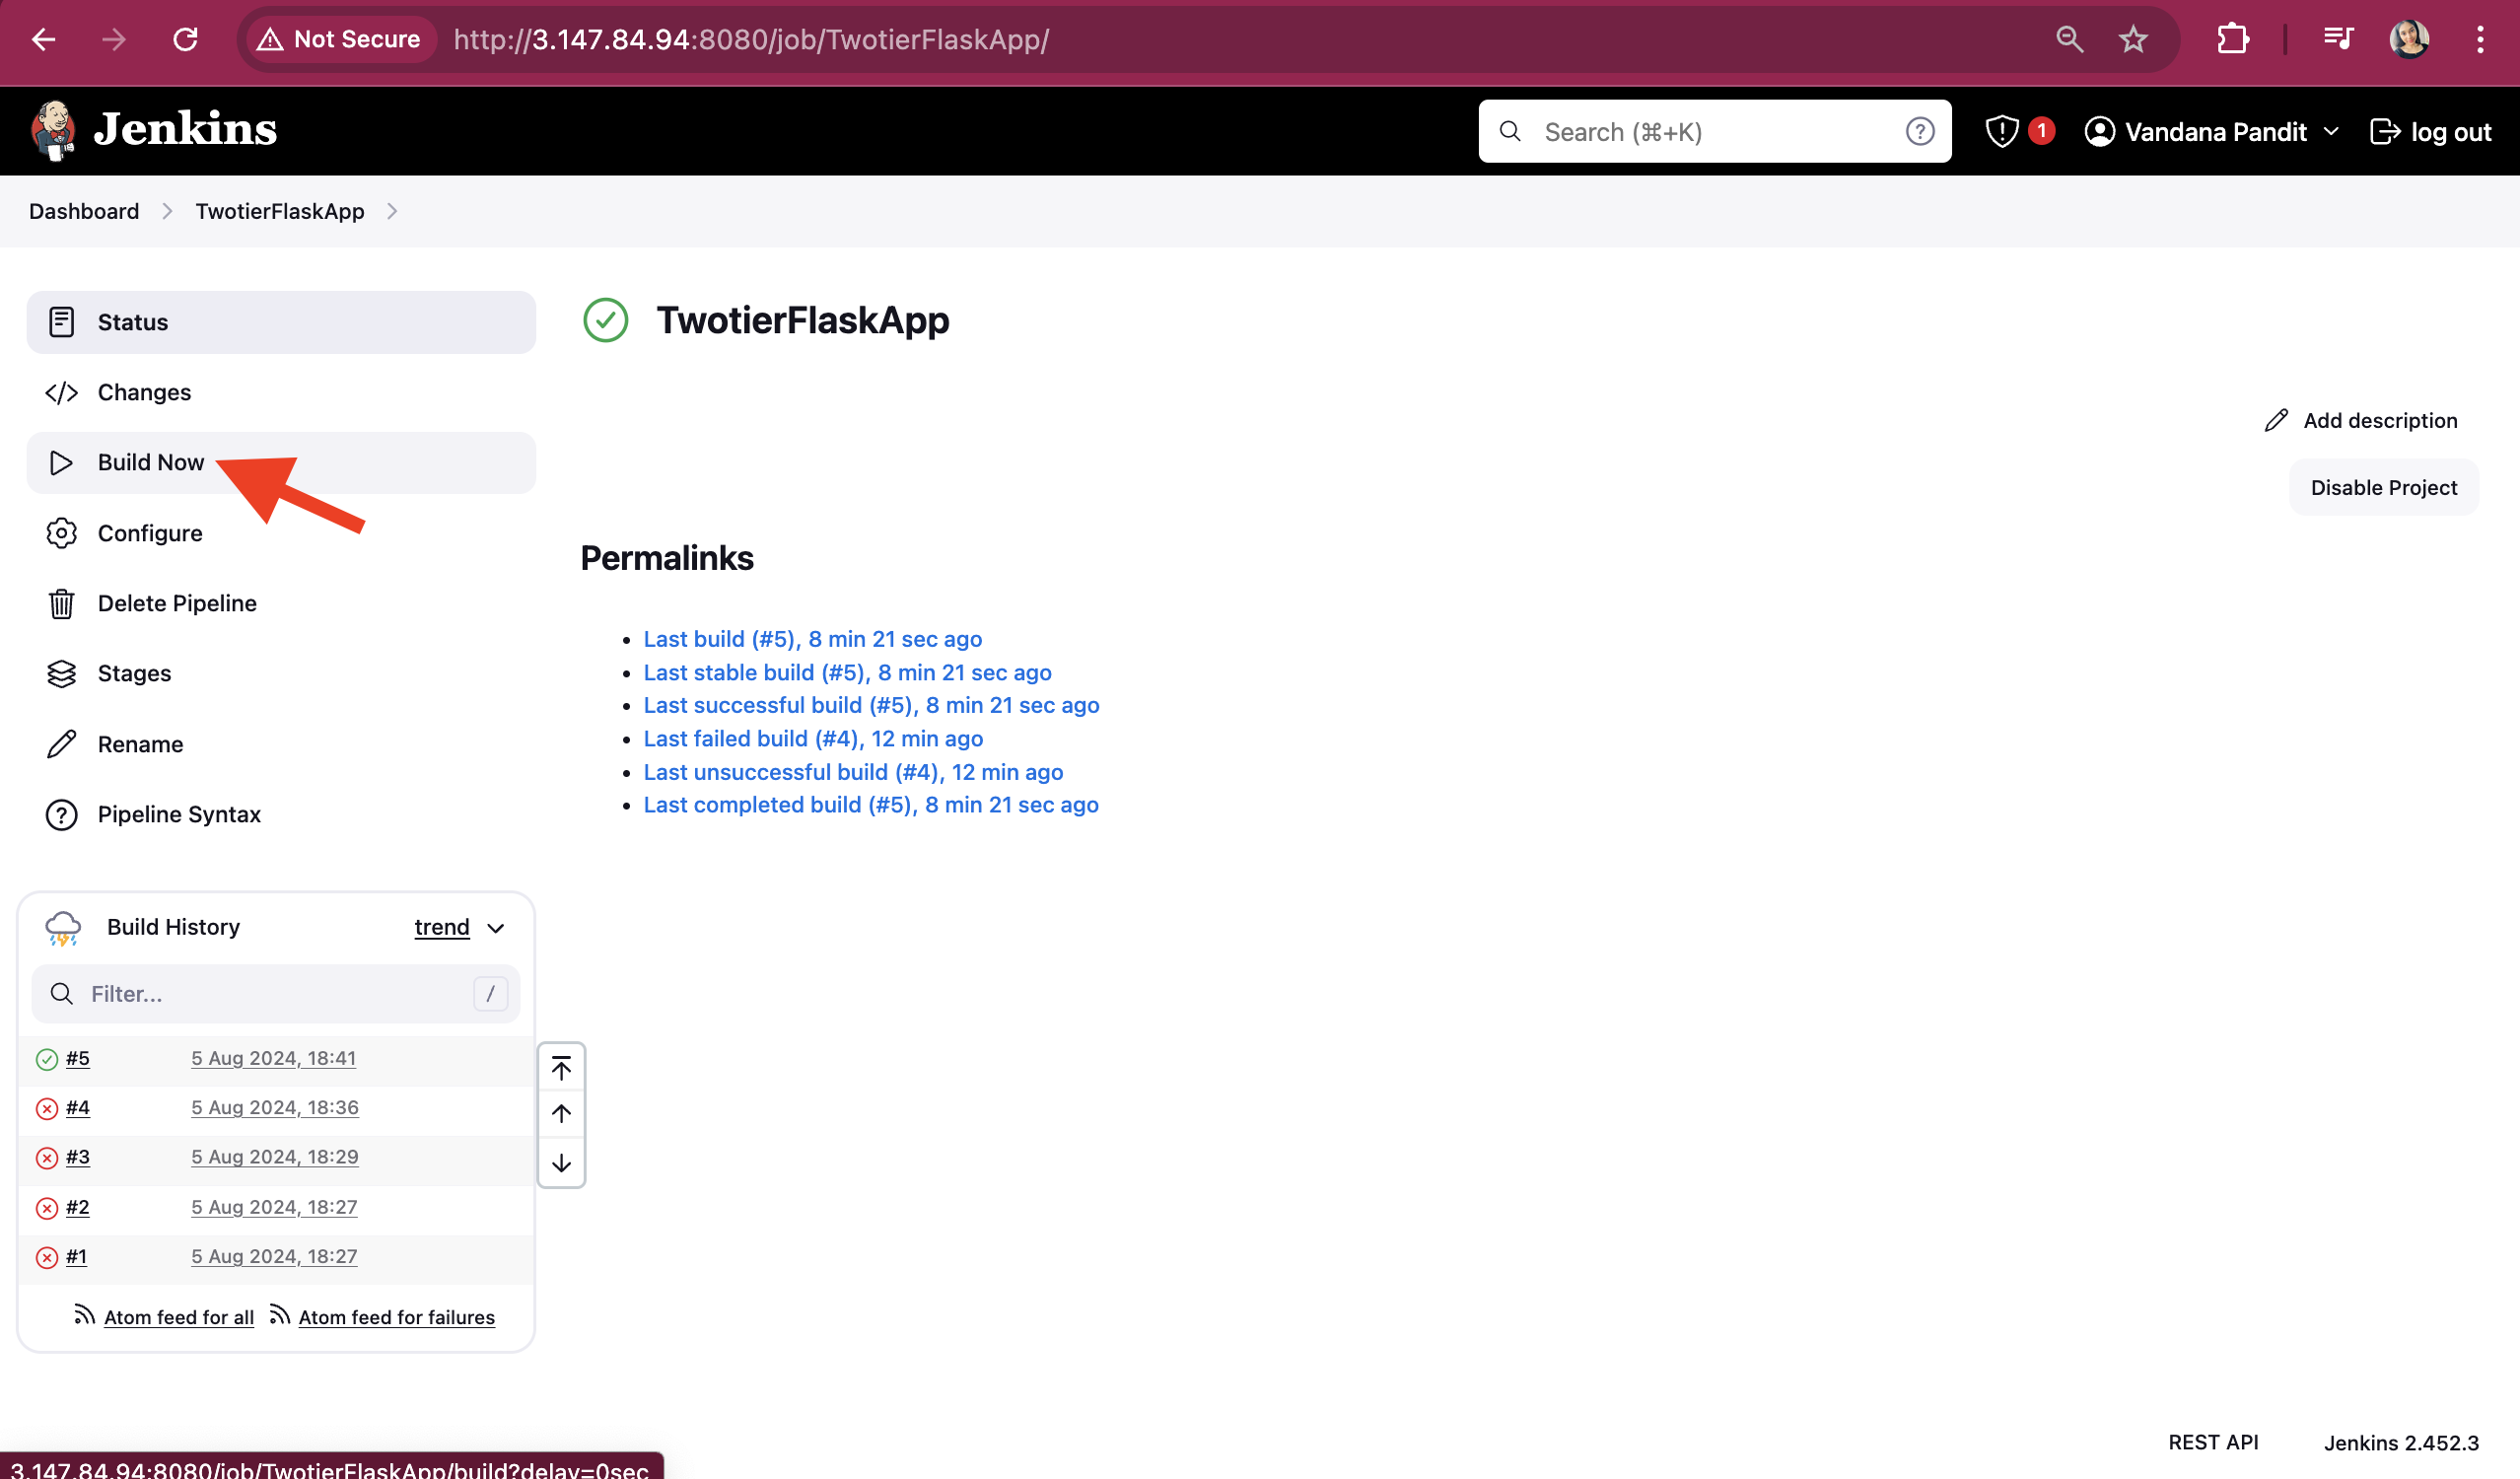
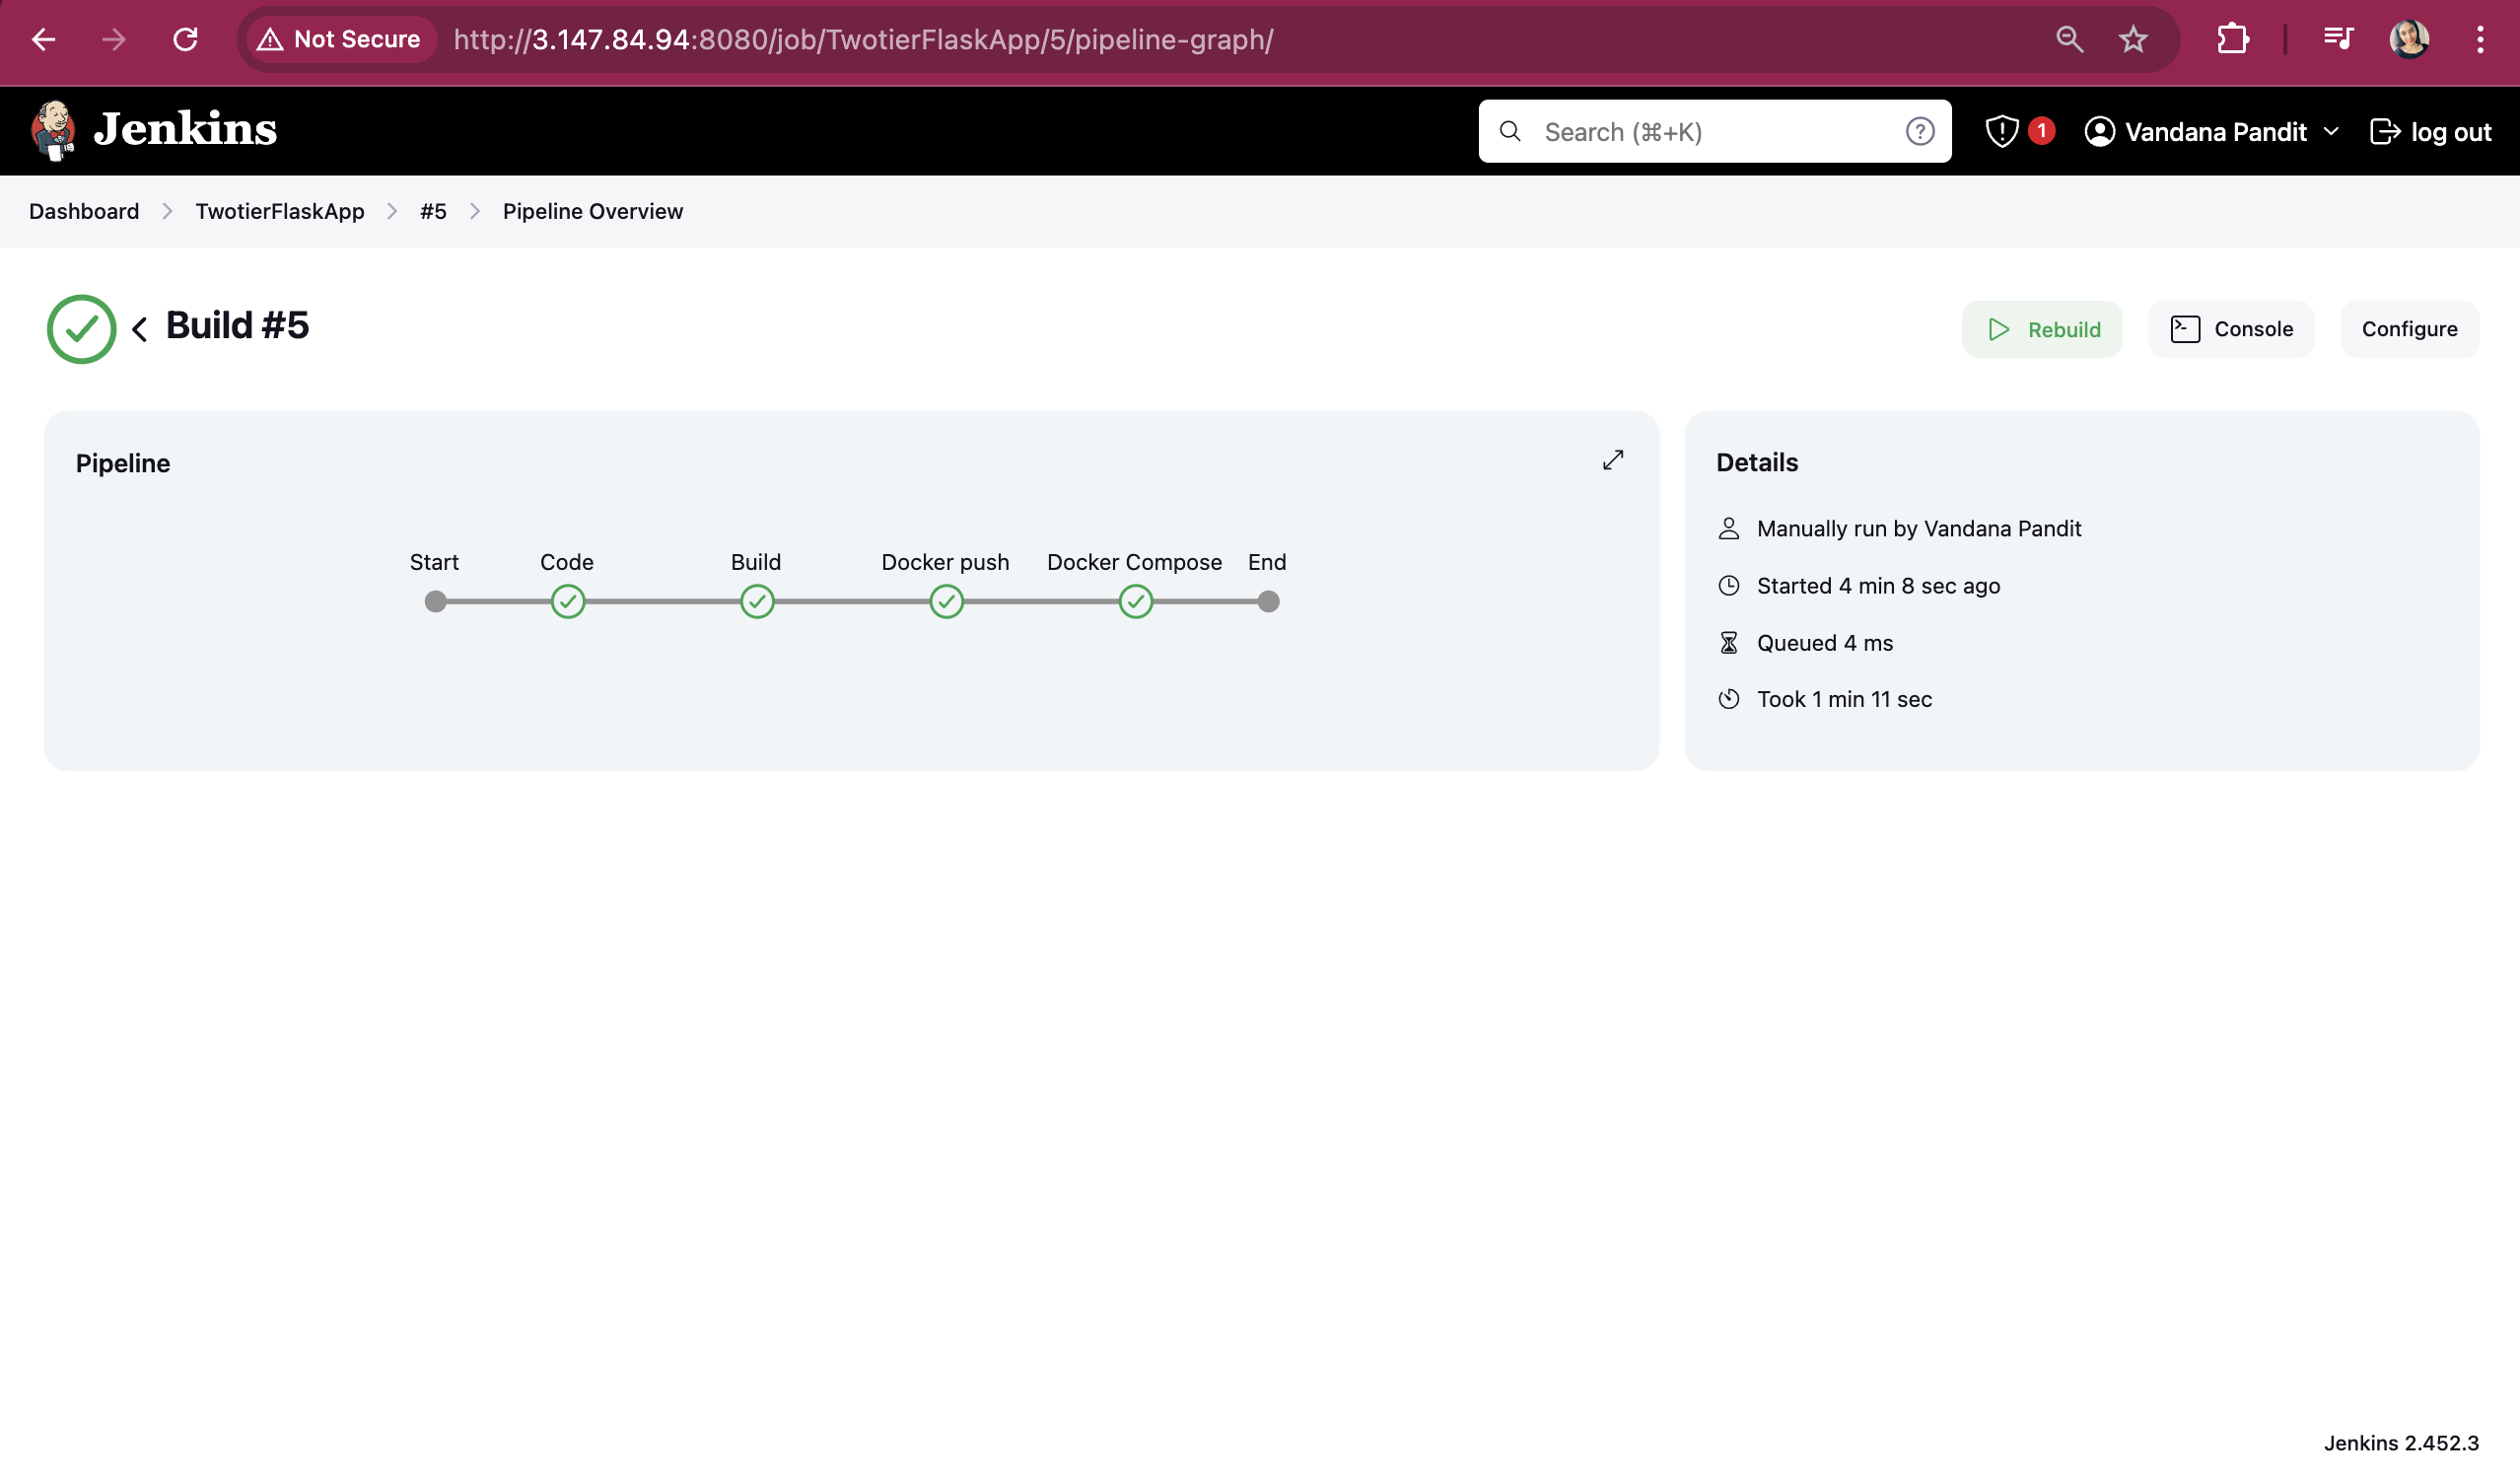
If Build is successful then check containers via "docker ps" on Jenkins-Agent

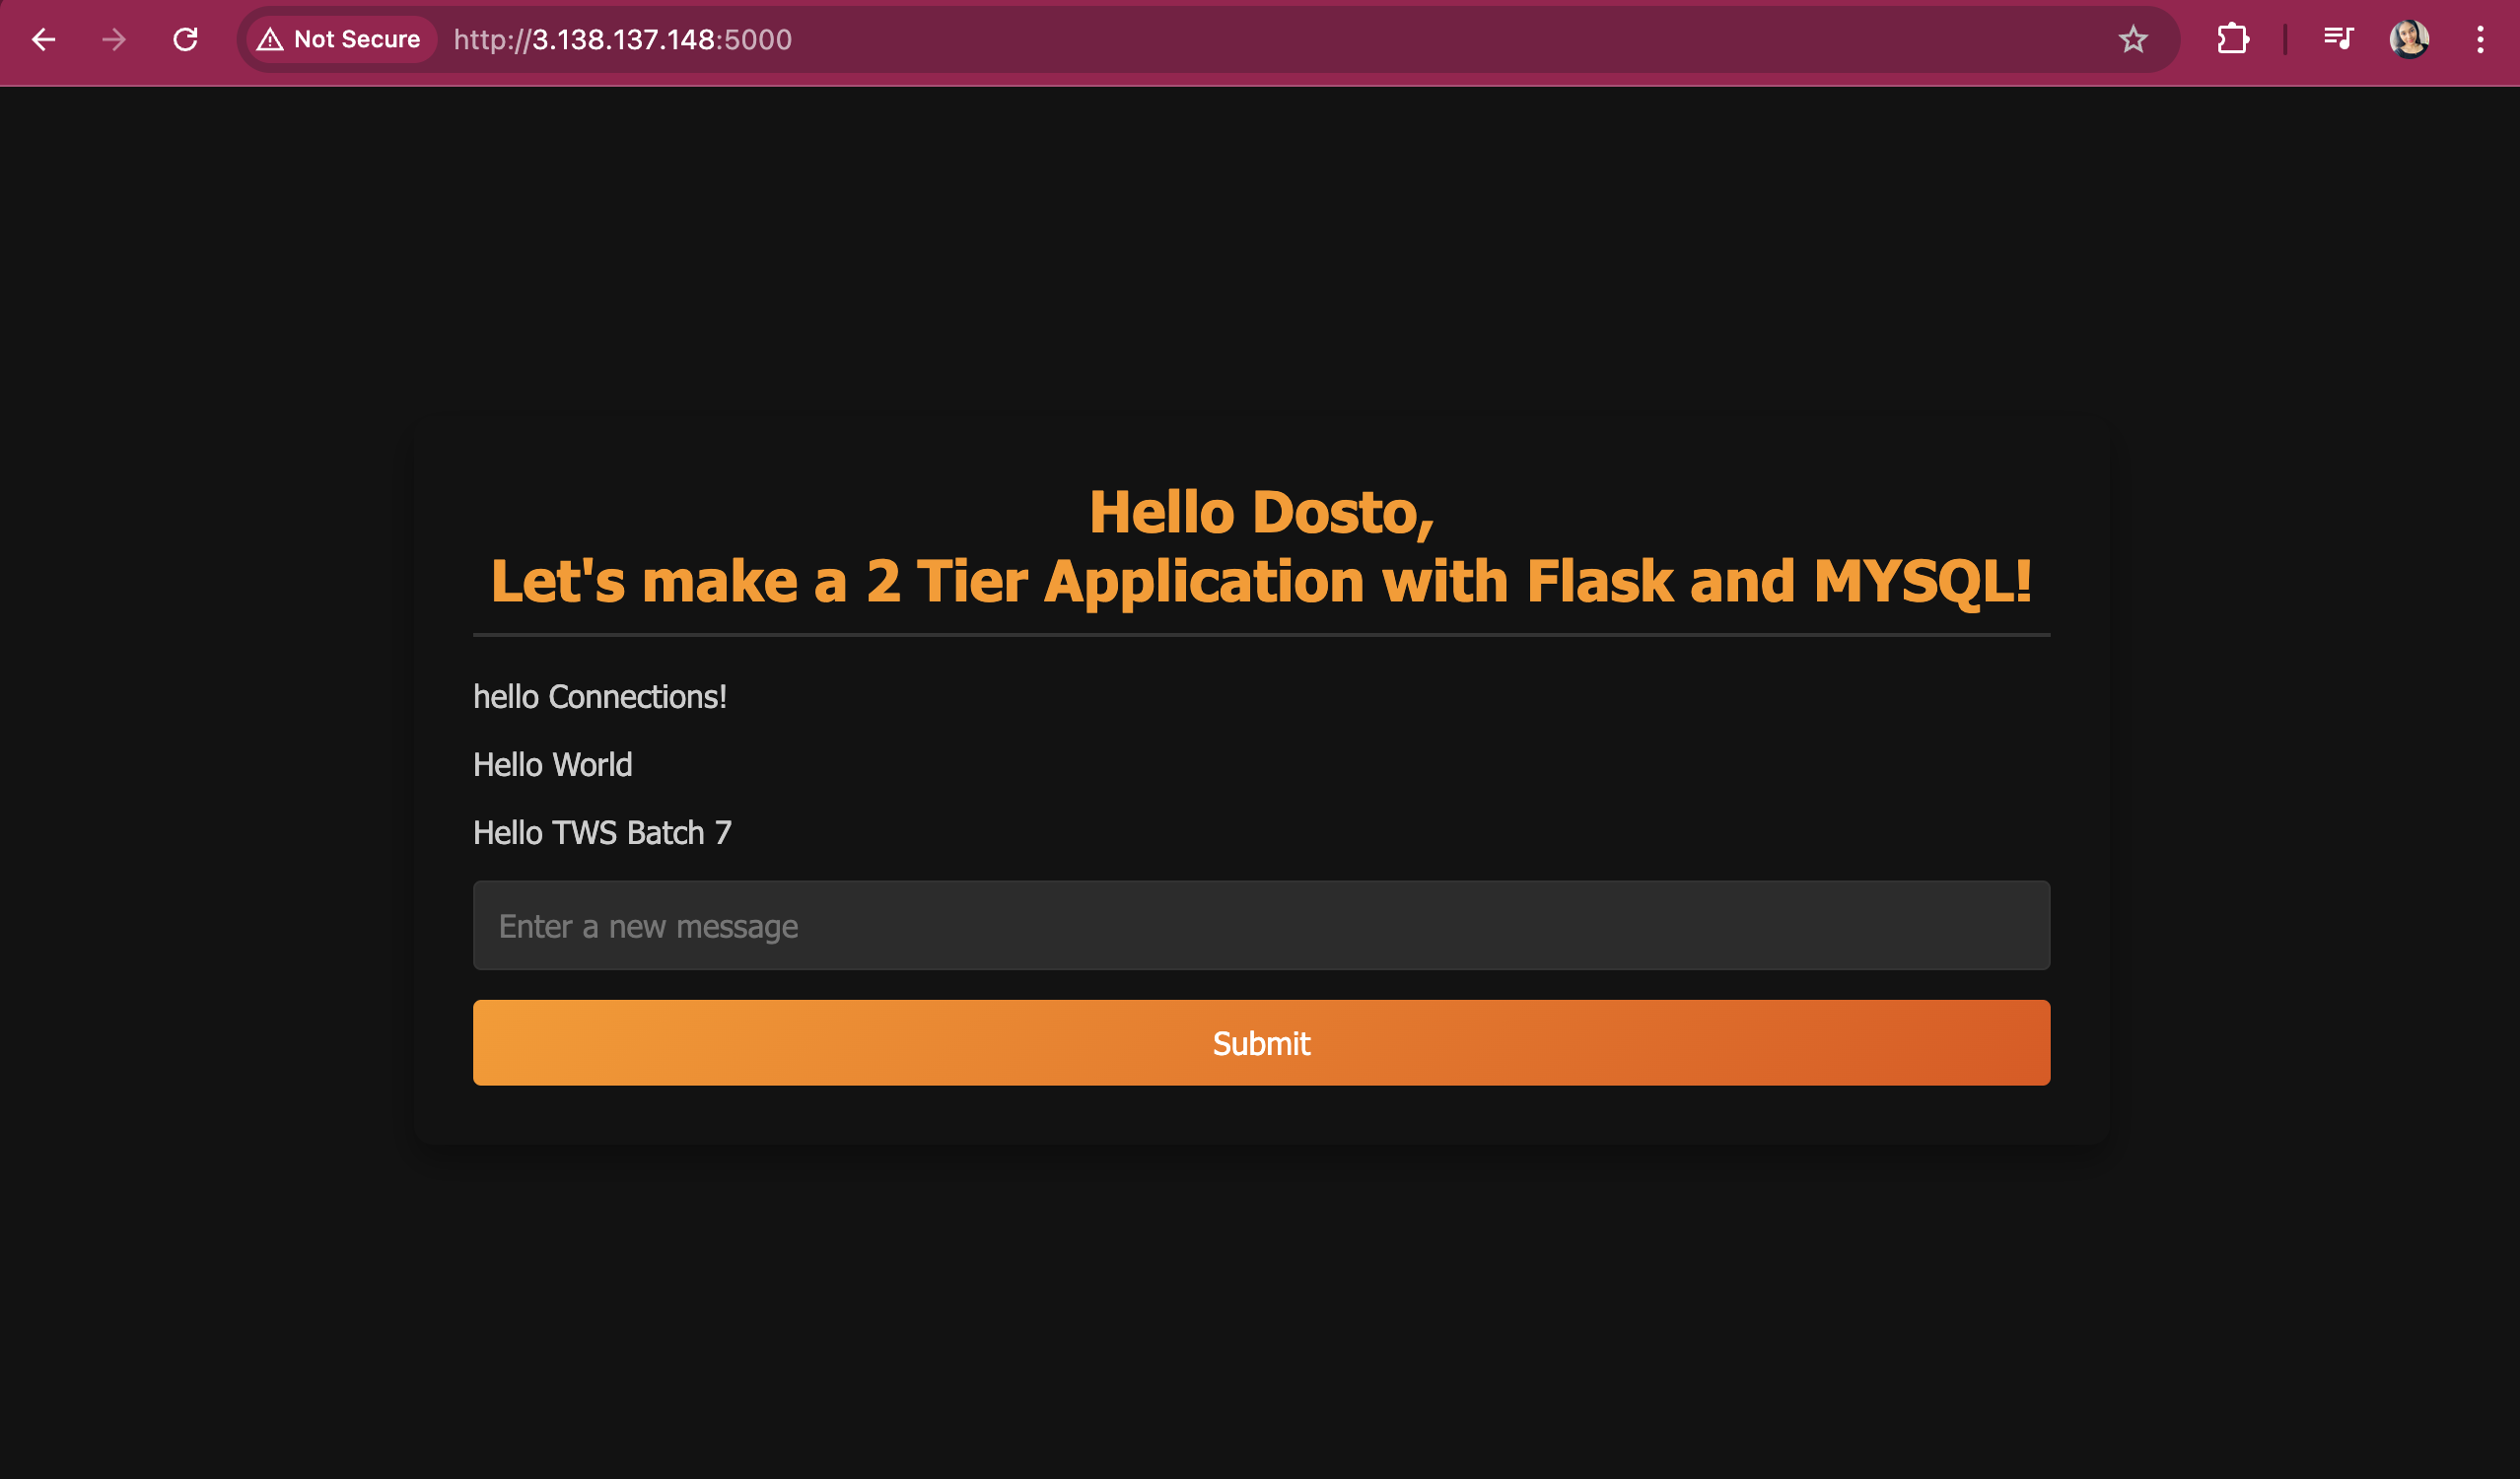
Paste the public IP of the Jenkins agent on web browser followed by the port number, like "https://<IP address>:5000".
To automatically trigger the build (i.e., for Continuous Deployment) whenever any changes are pushed to GitHub, we need to add a webhook on GitHub. Follow these steps to add a webhook:
Go to the GitHub repository's settings and under the "Code and automation" section, select "Webhooks." On the webhooks page, provide the Jenkins master IP address followed by /github-webhook/ in this format: http://<ipaddress>/github-webhook/.
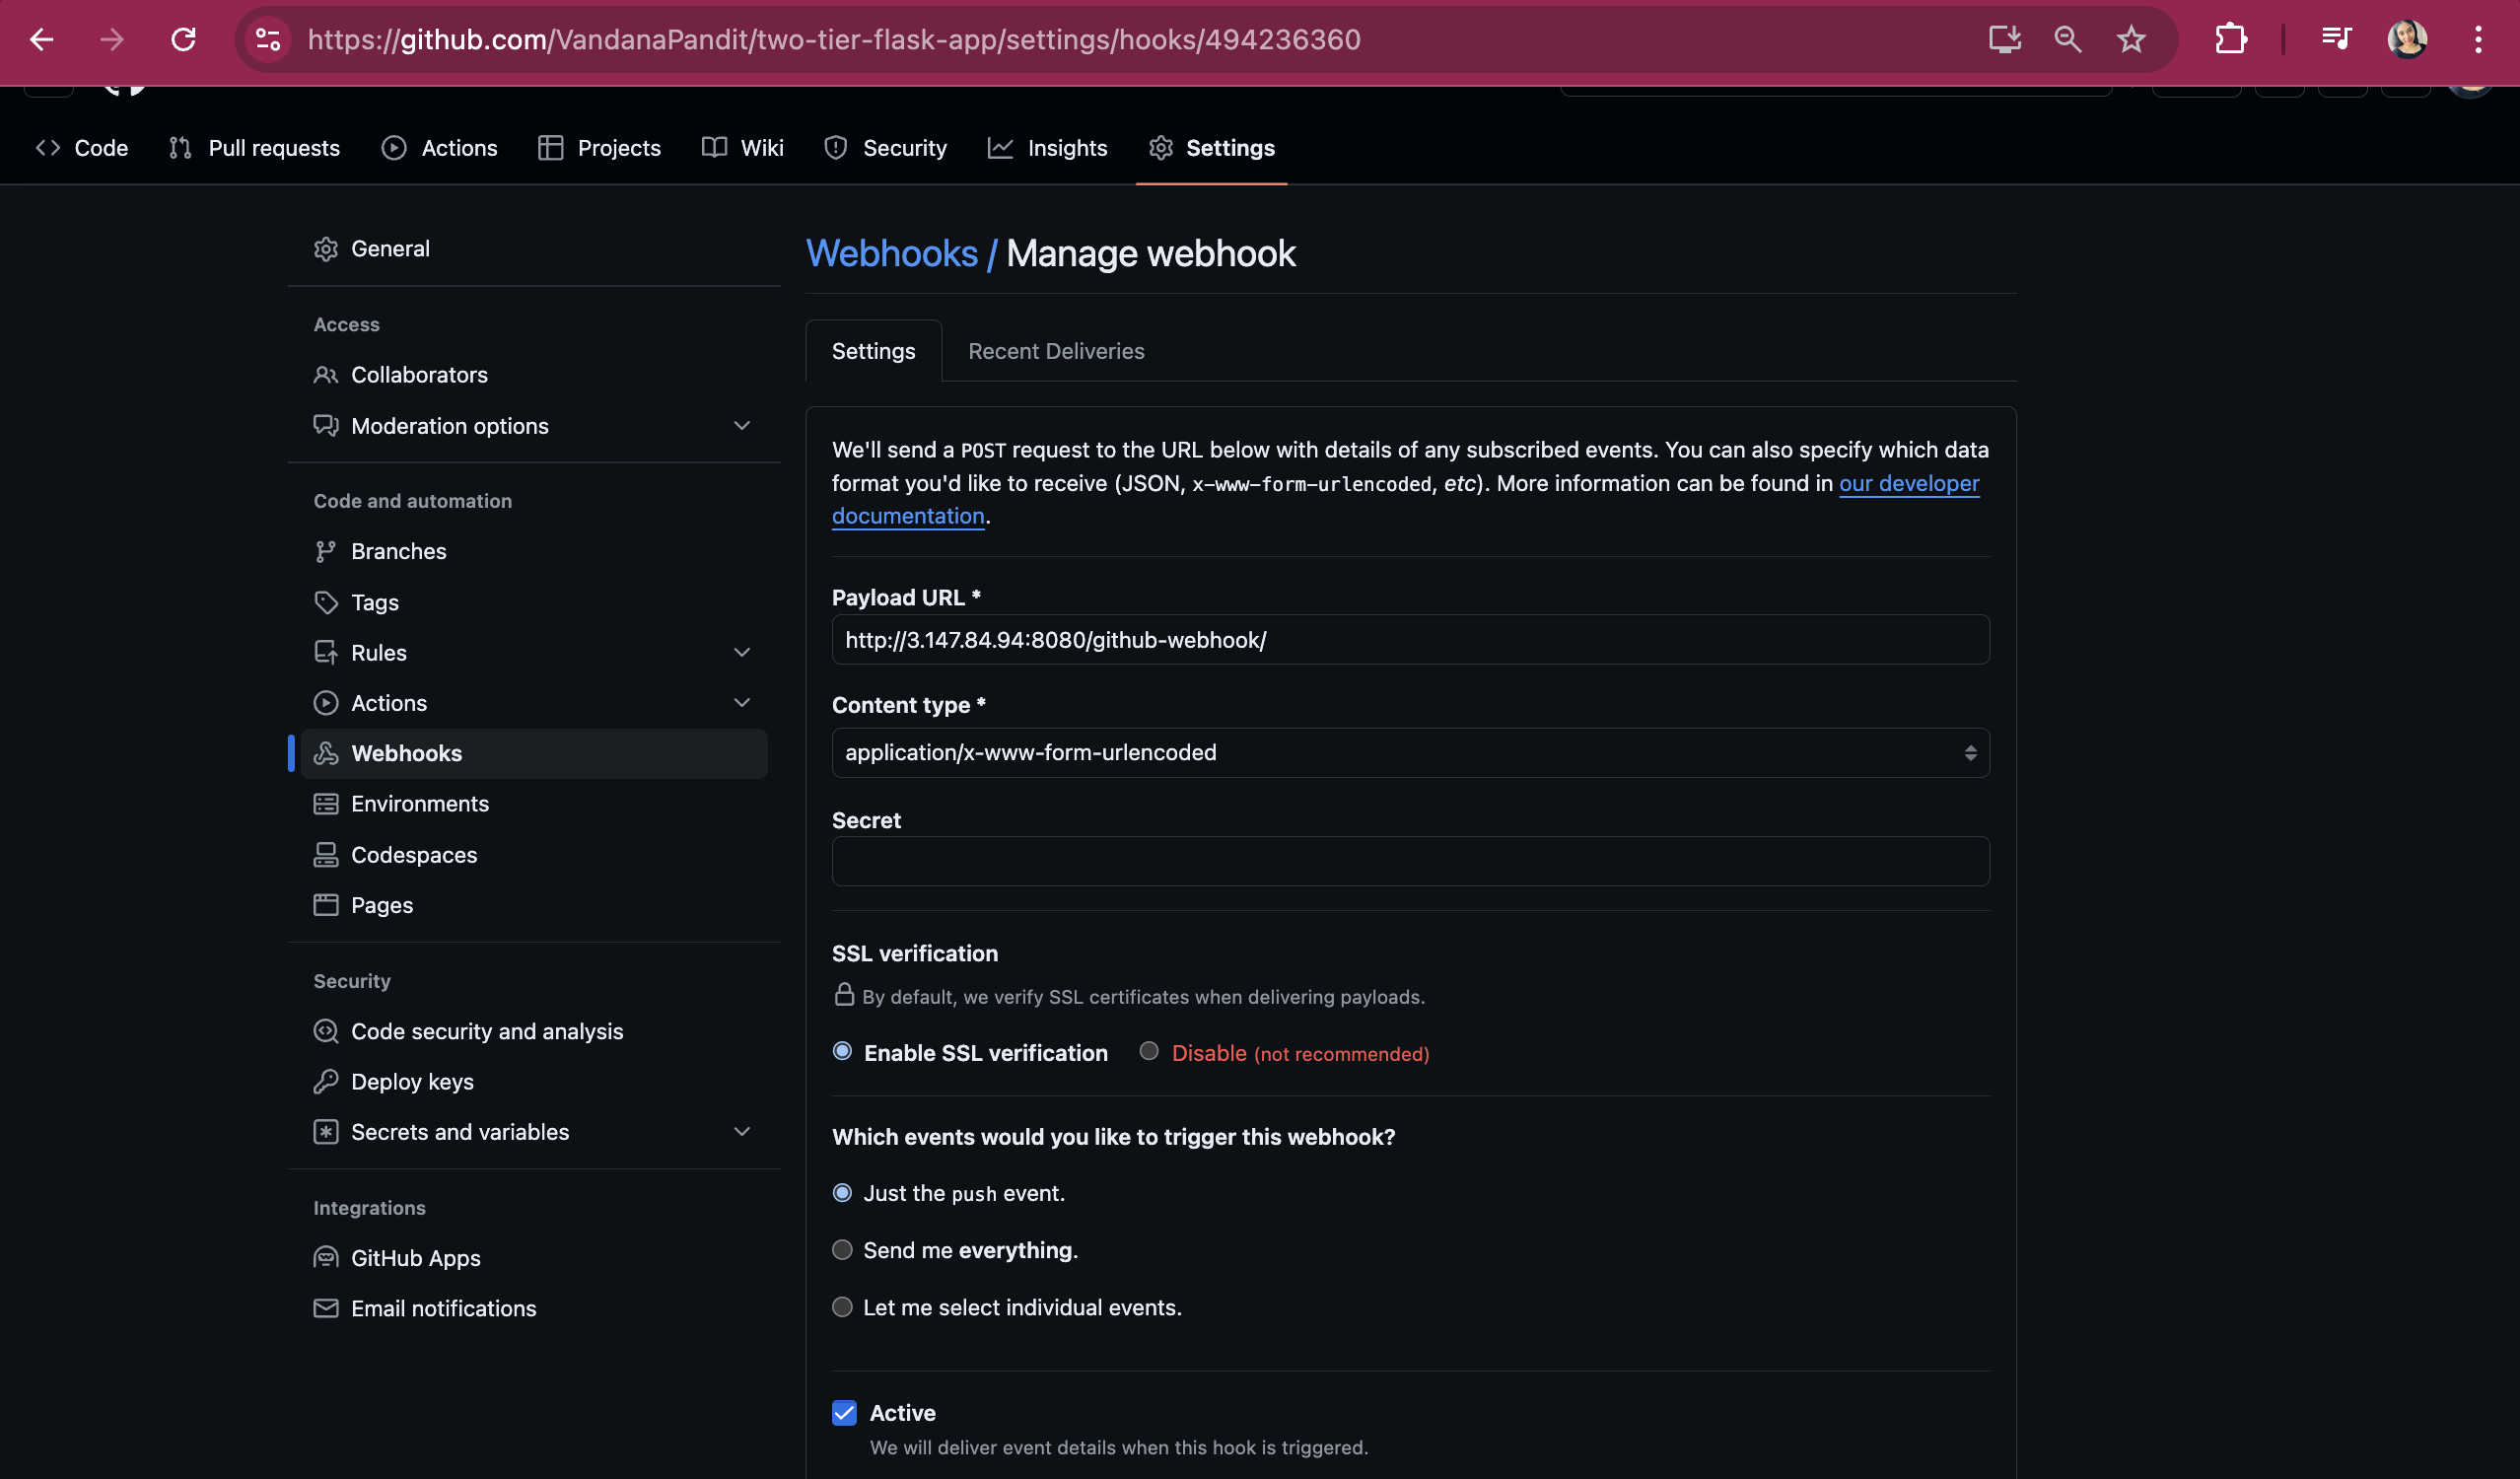
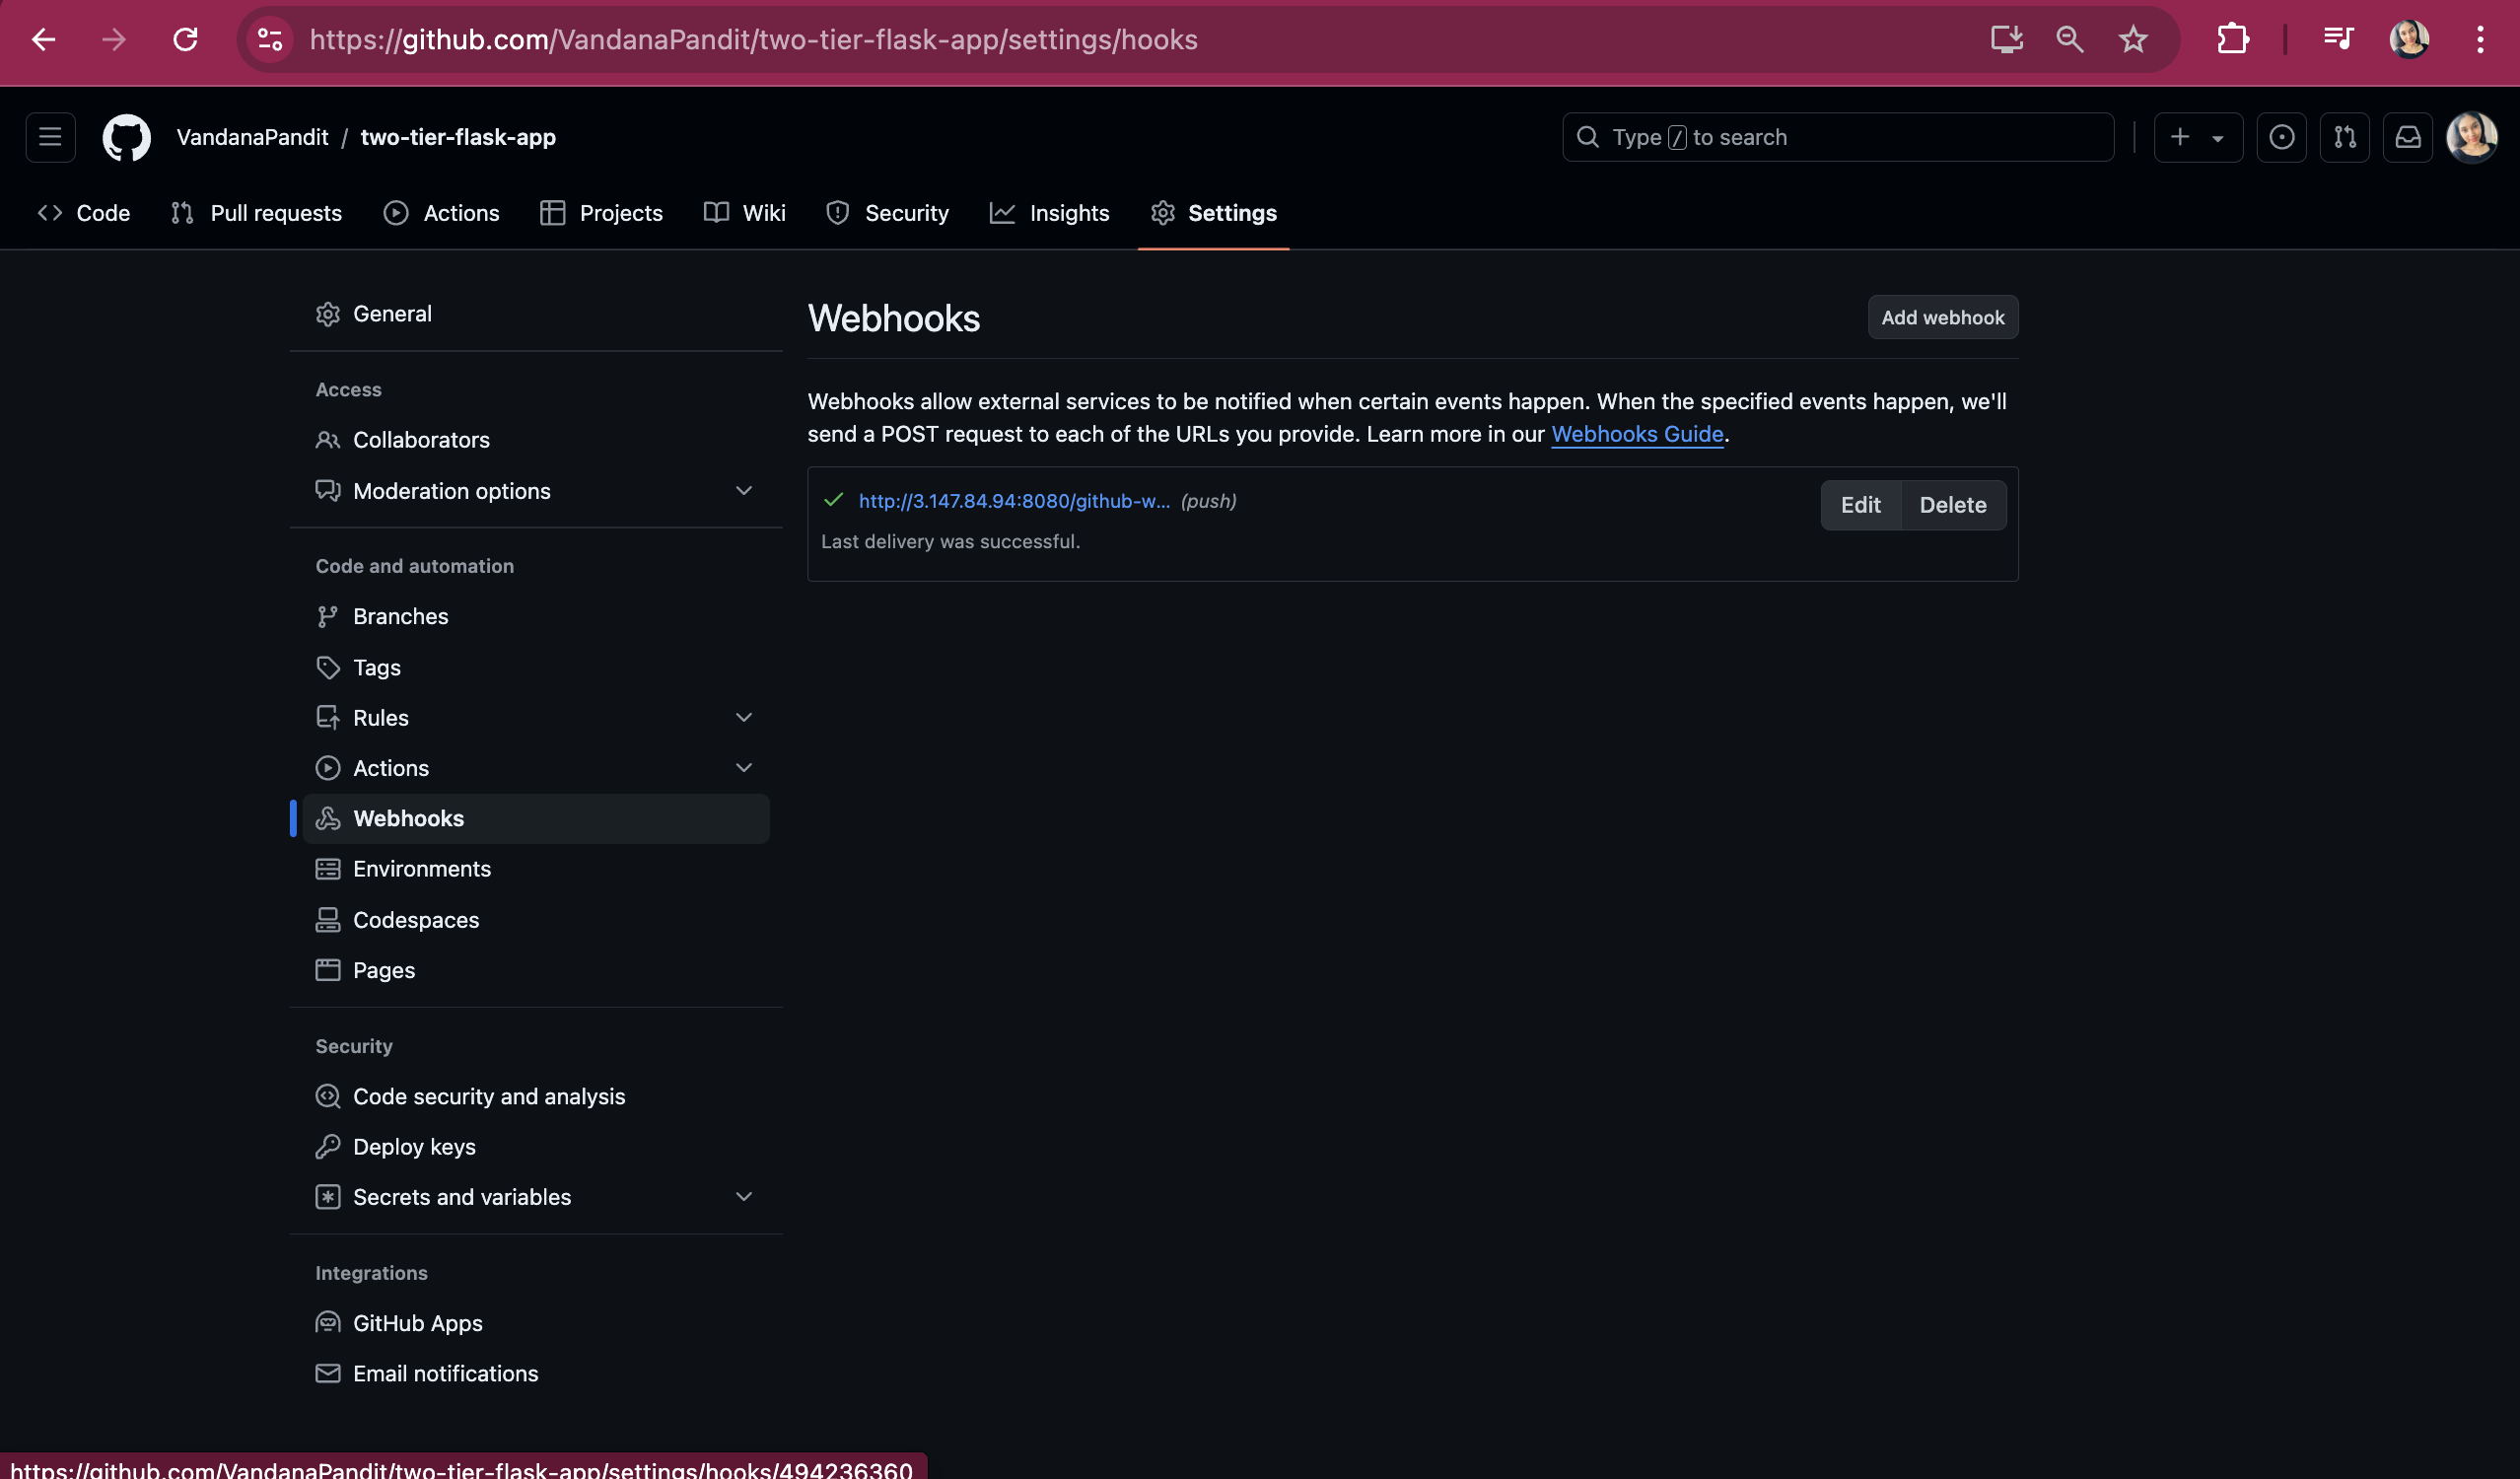
After the webhook has been added successfully, copy the groovy script and add a file in github repo named 'Jenkinsfile' and commit the changes
Go to the Jenkins configuration page and make the changes under Pipeline section as shown in the screenshot below:
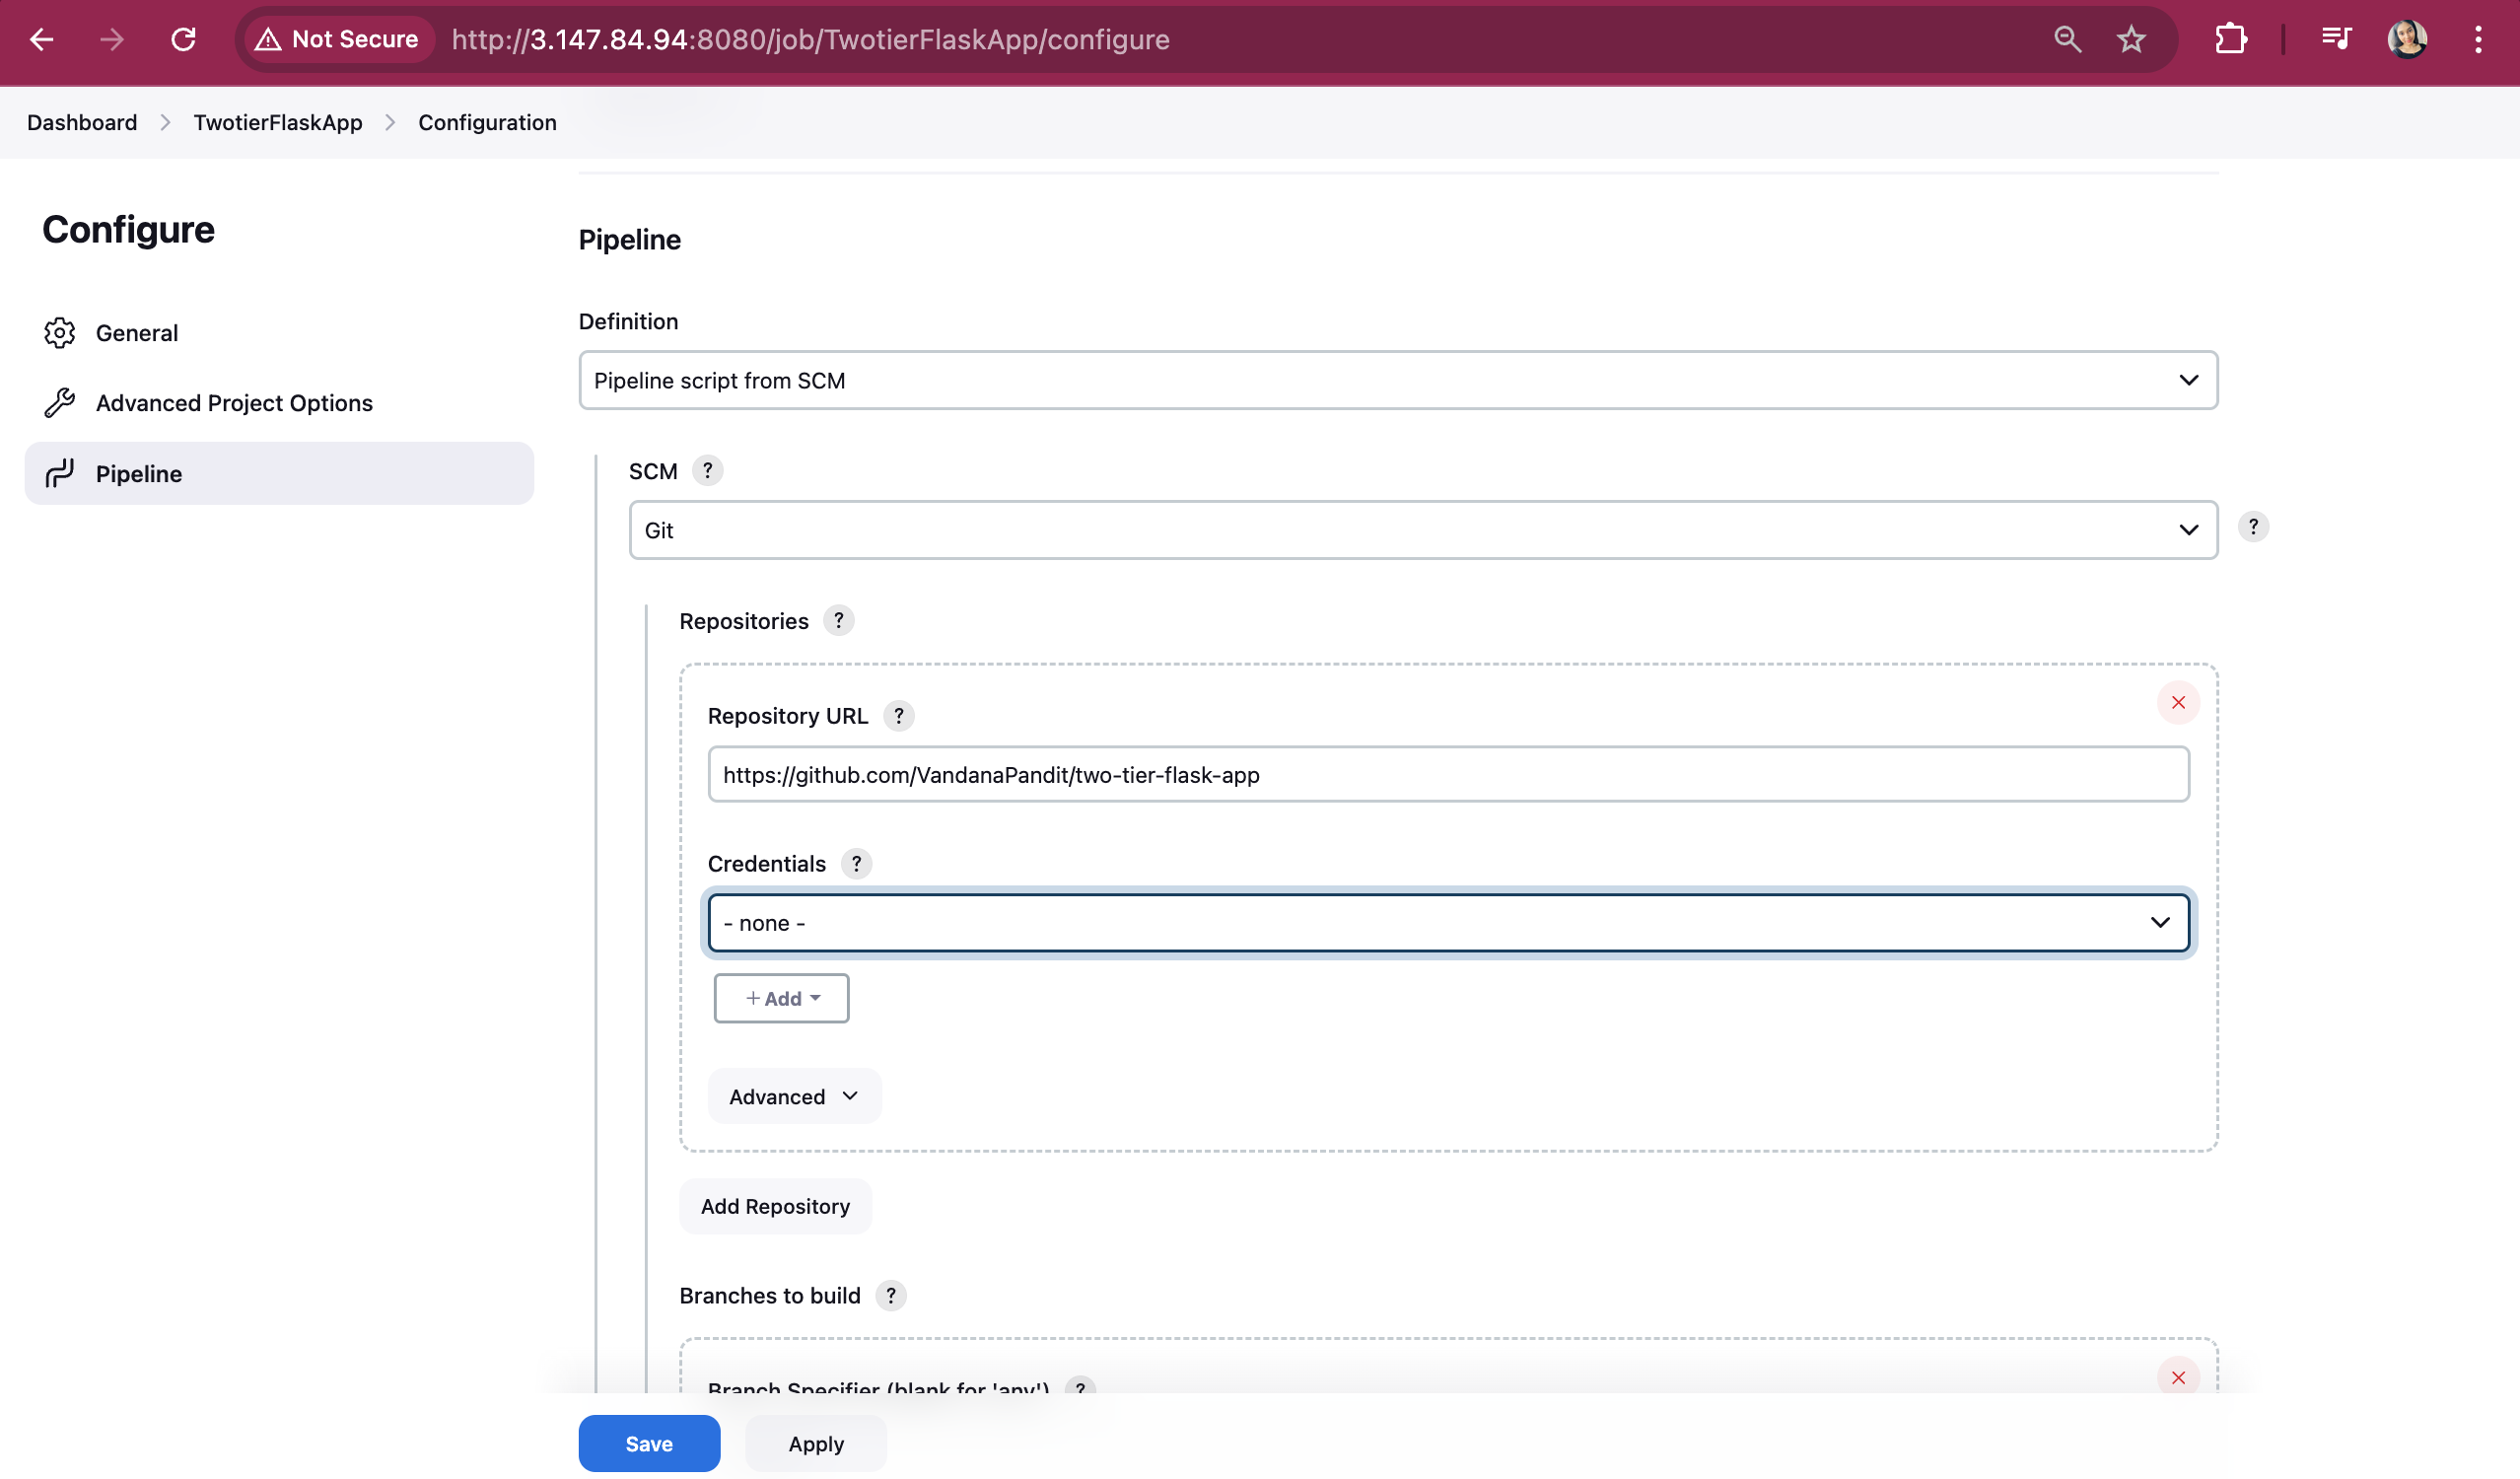
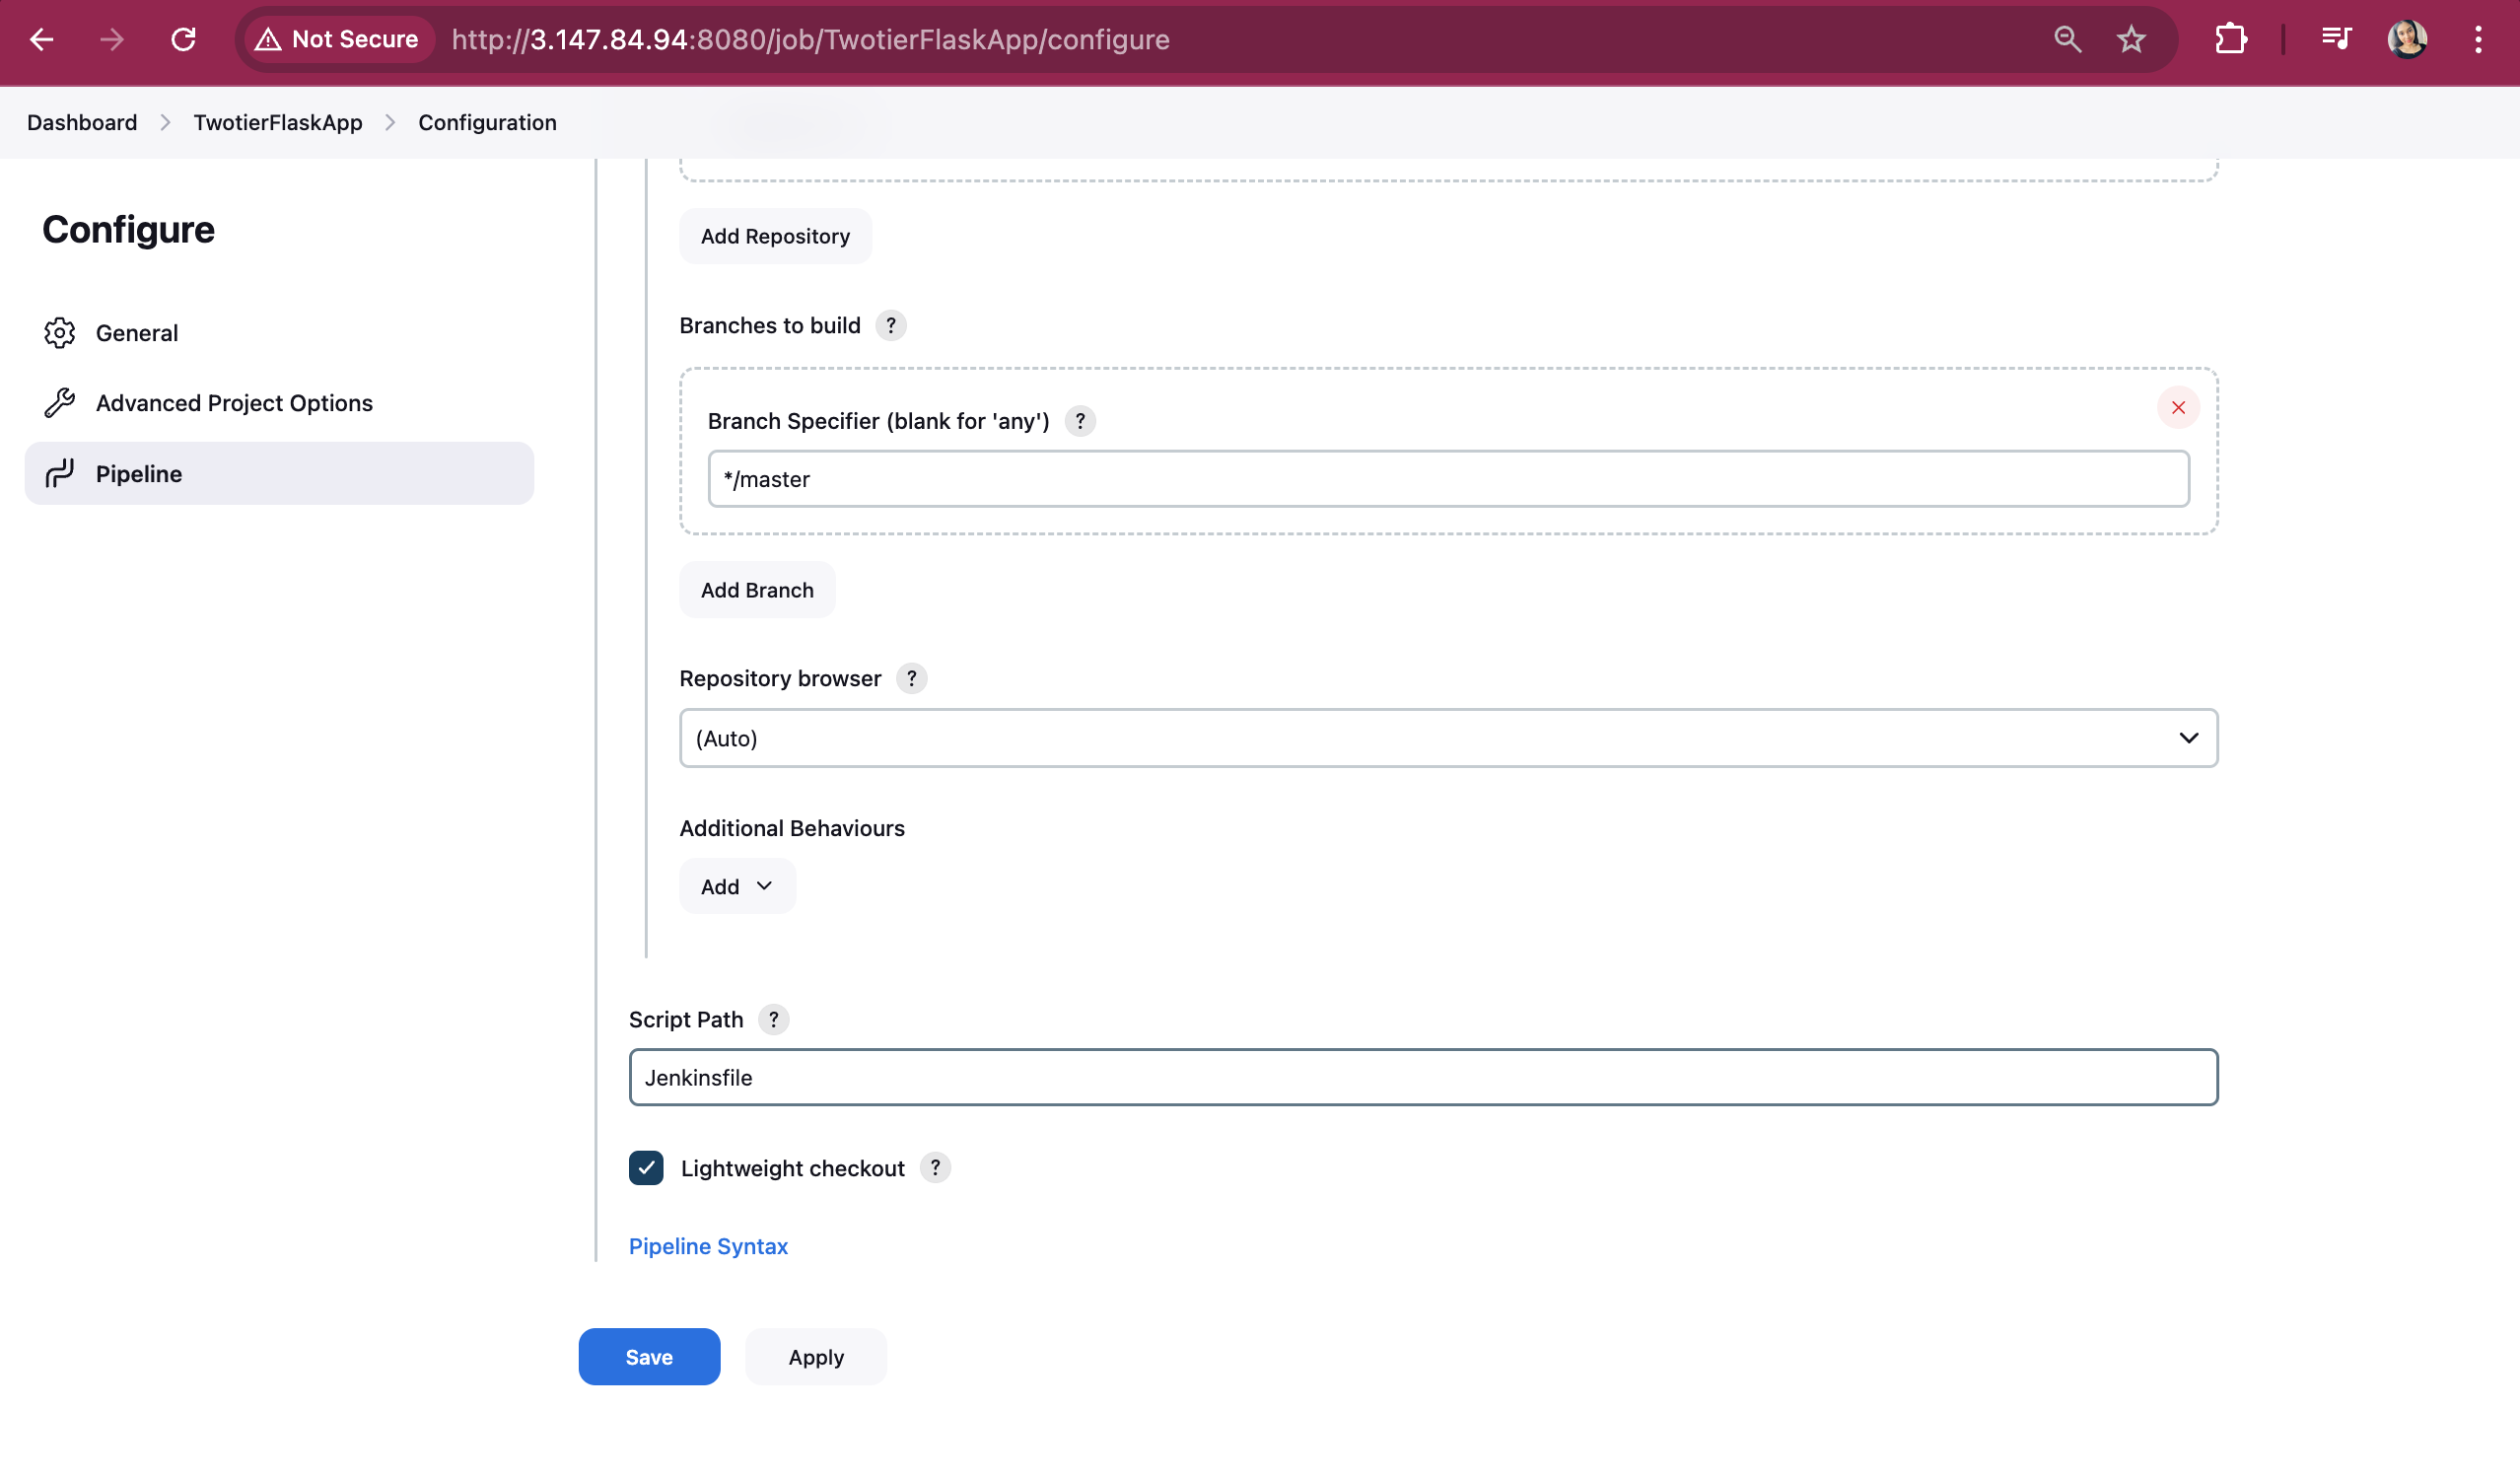
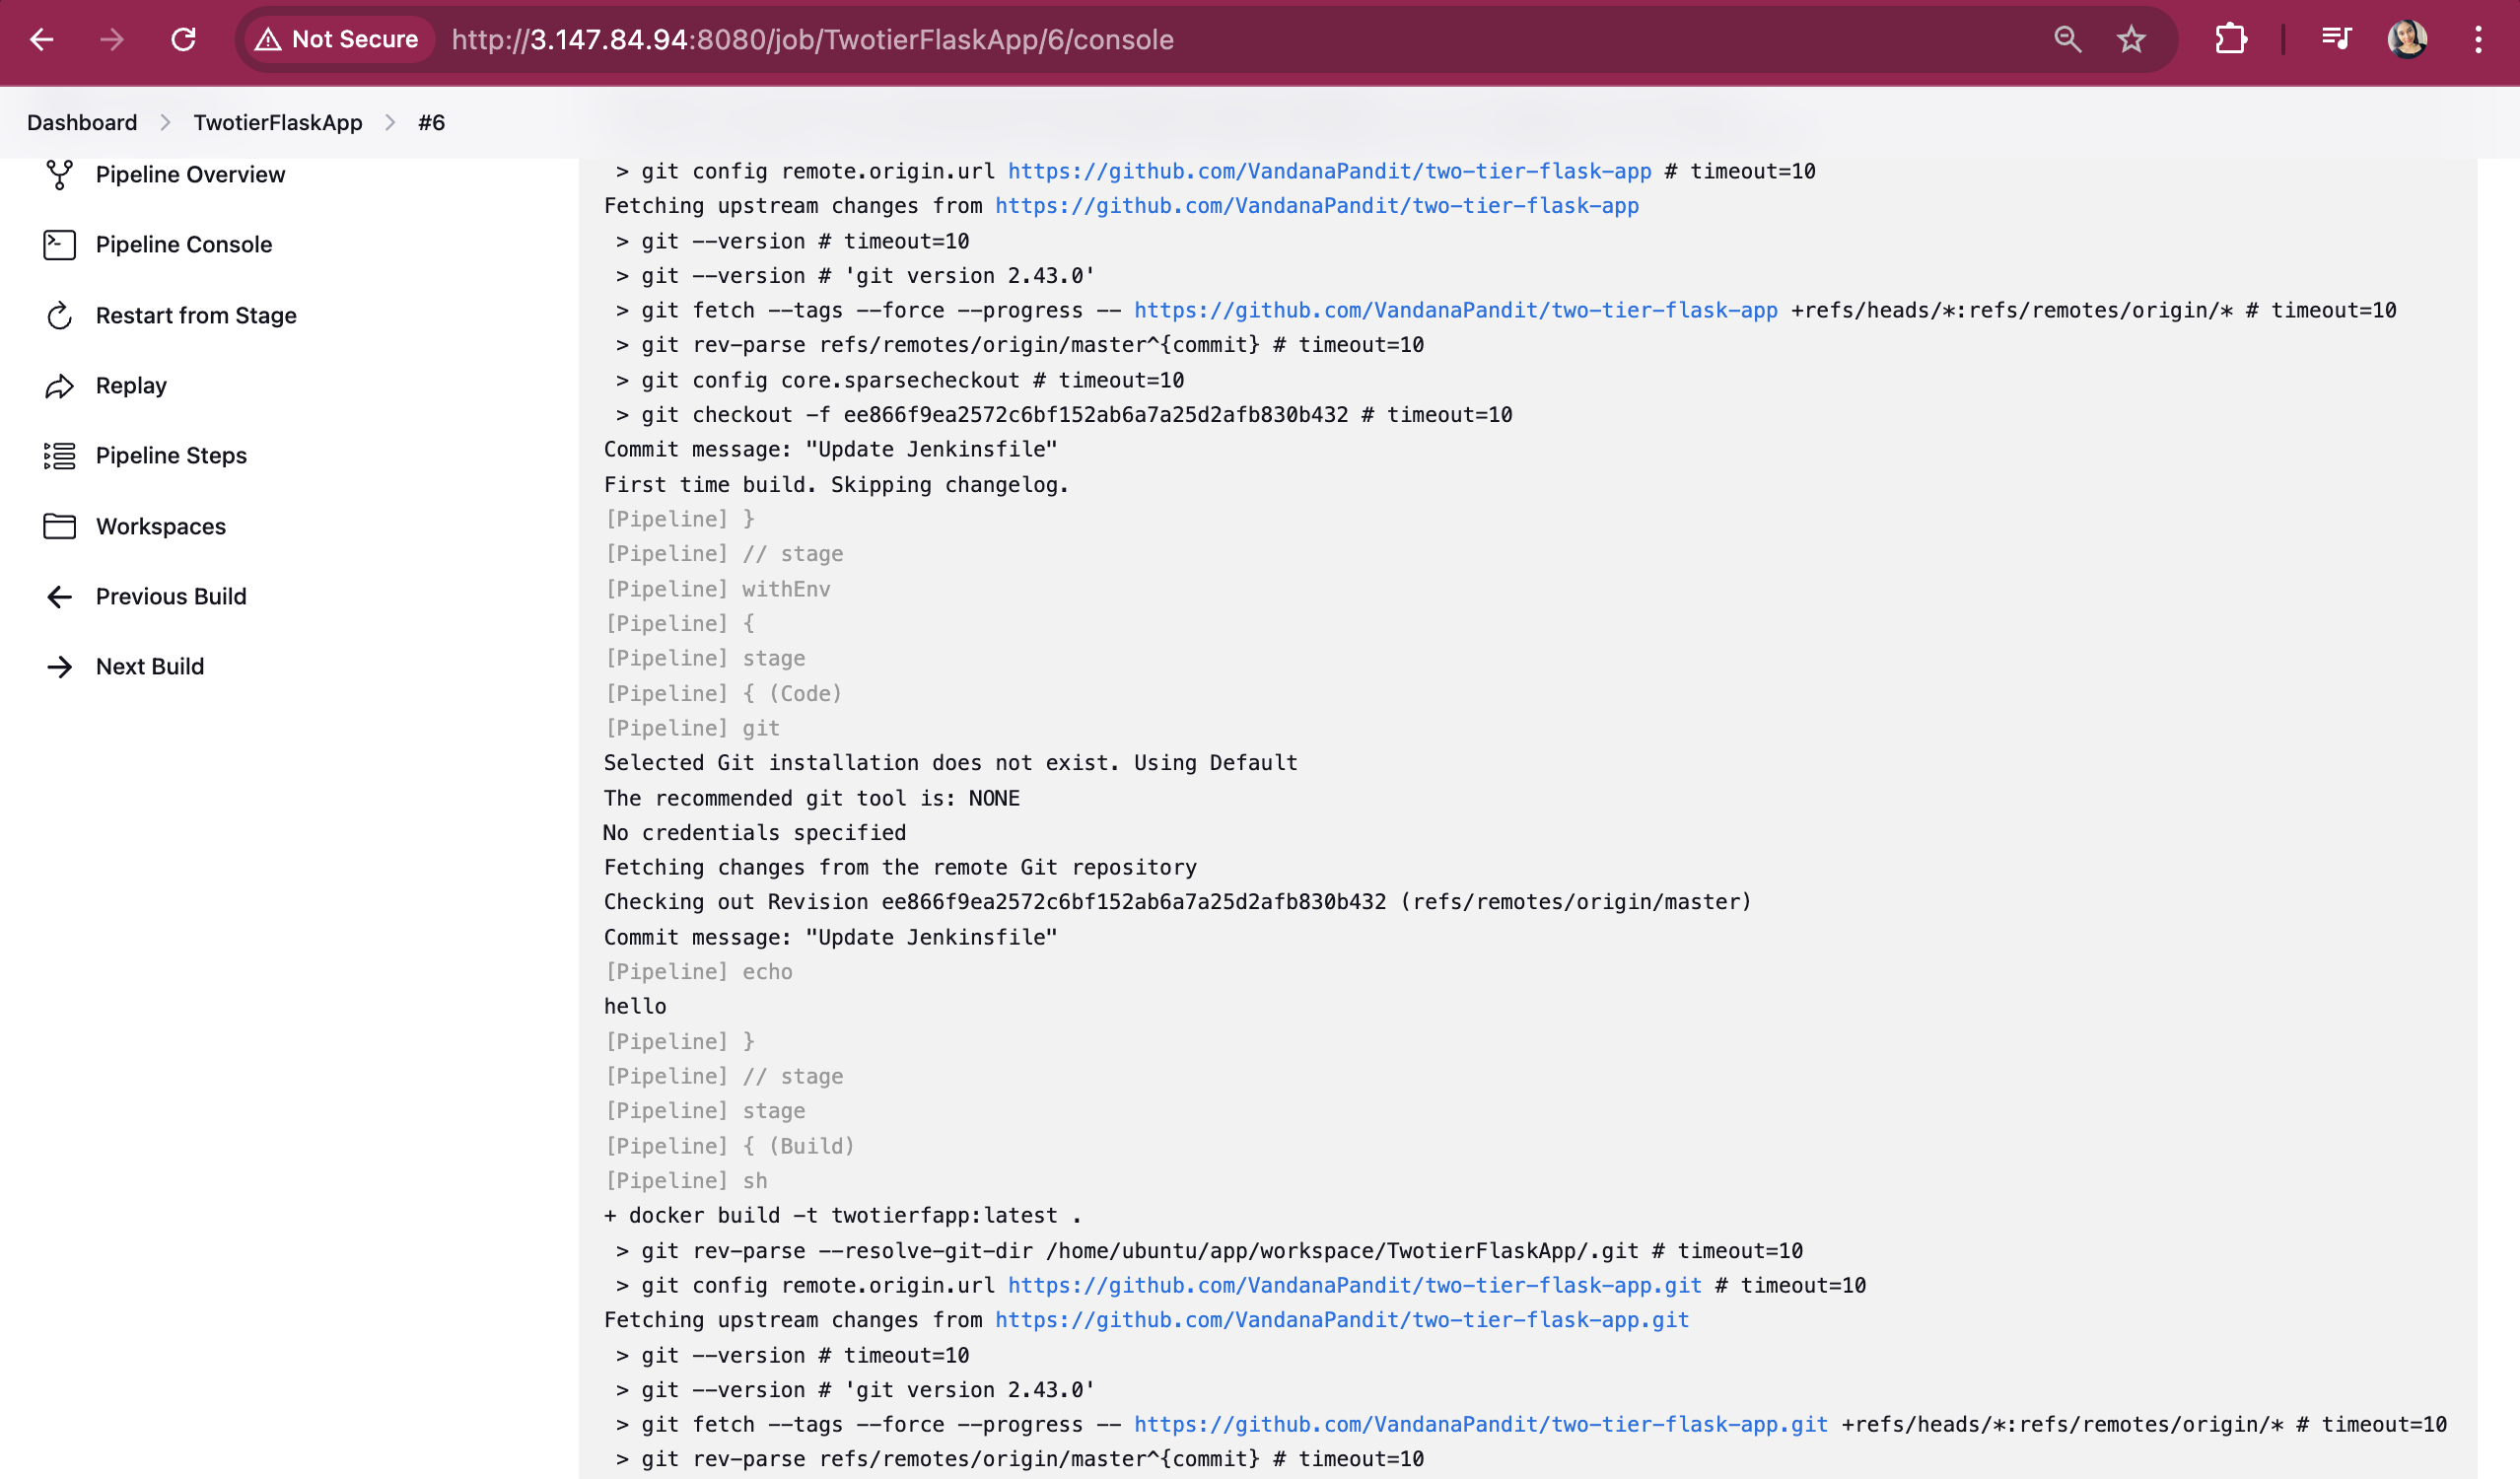
Added an echo "hello" in the Jenkins page and committed the changes.
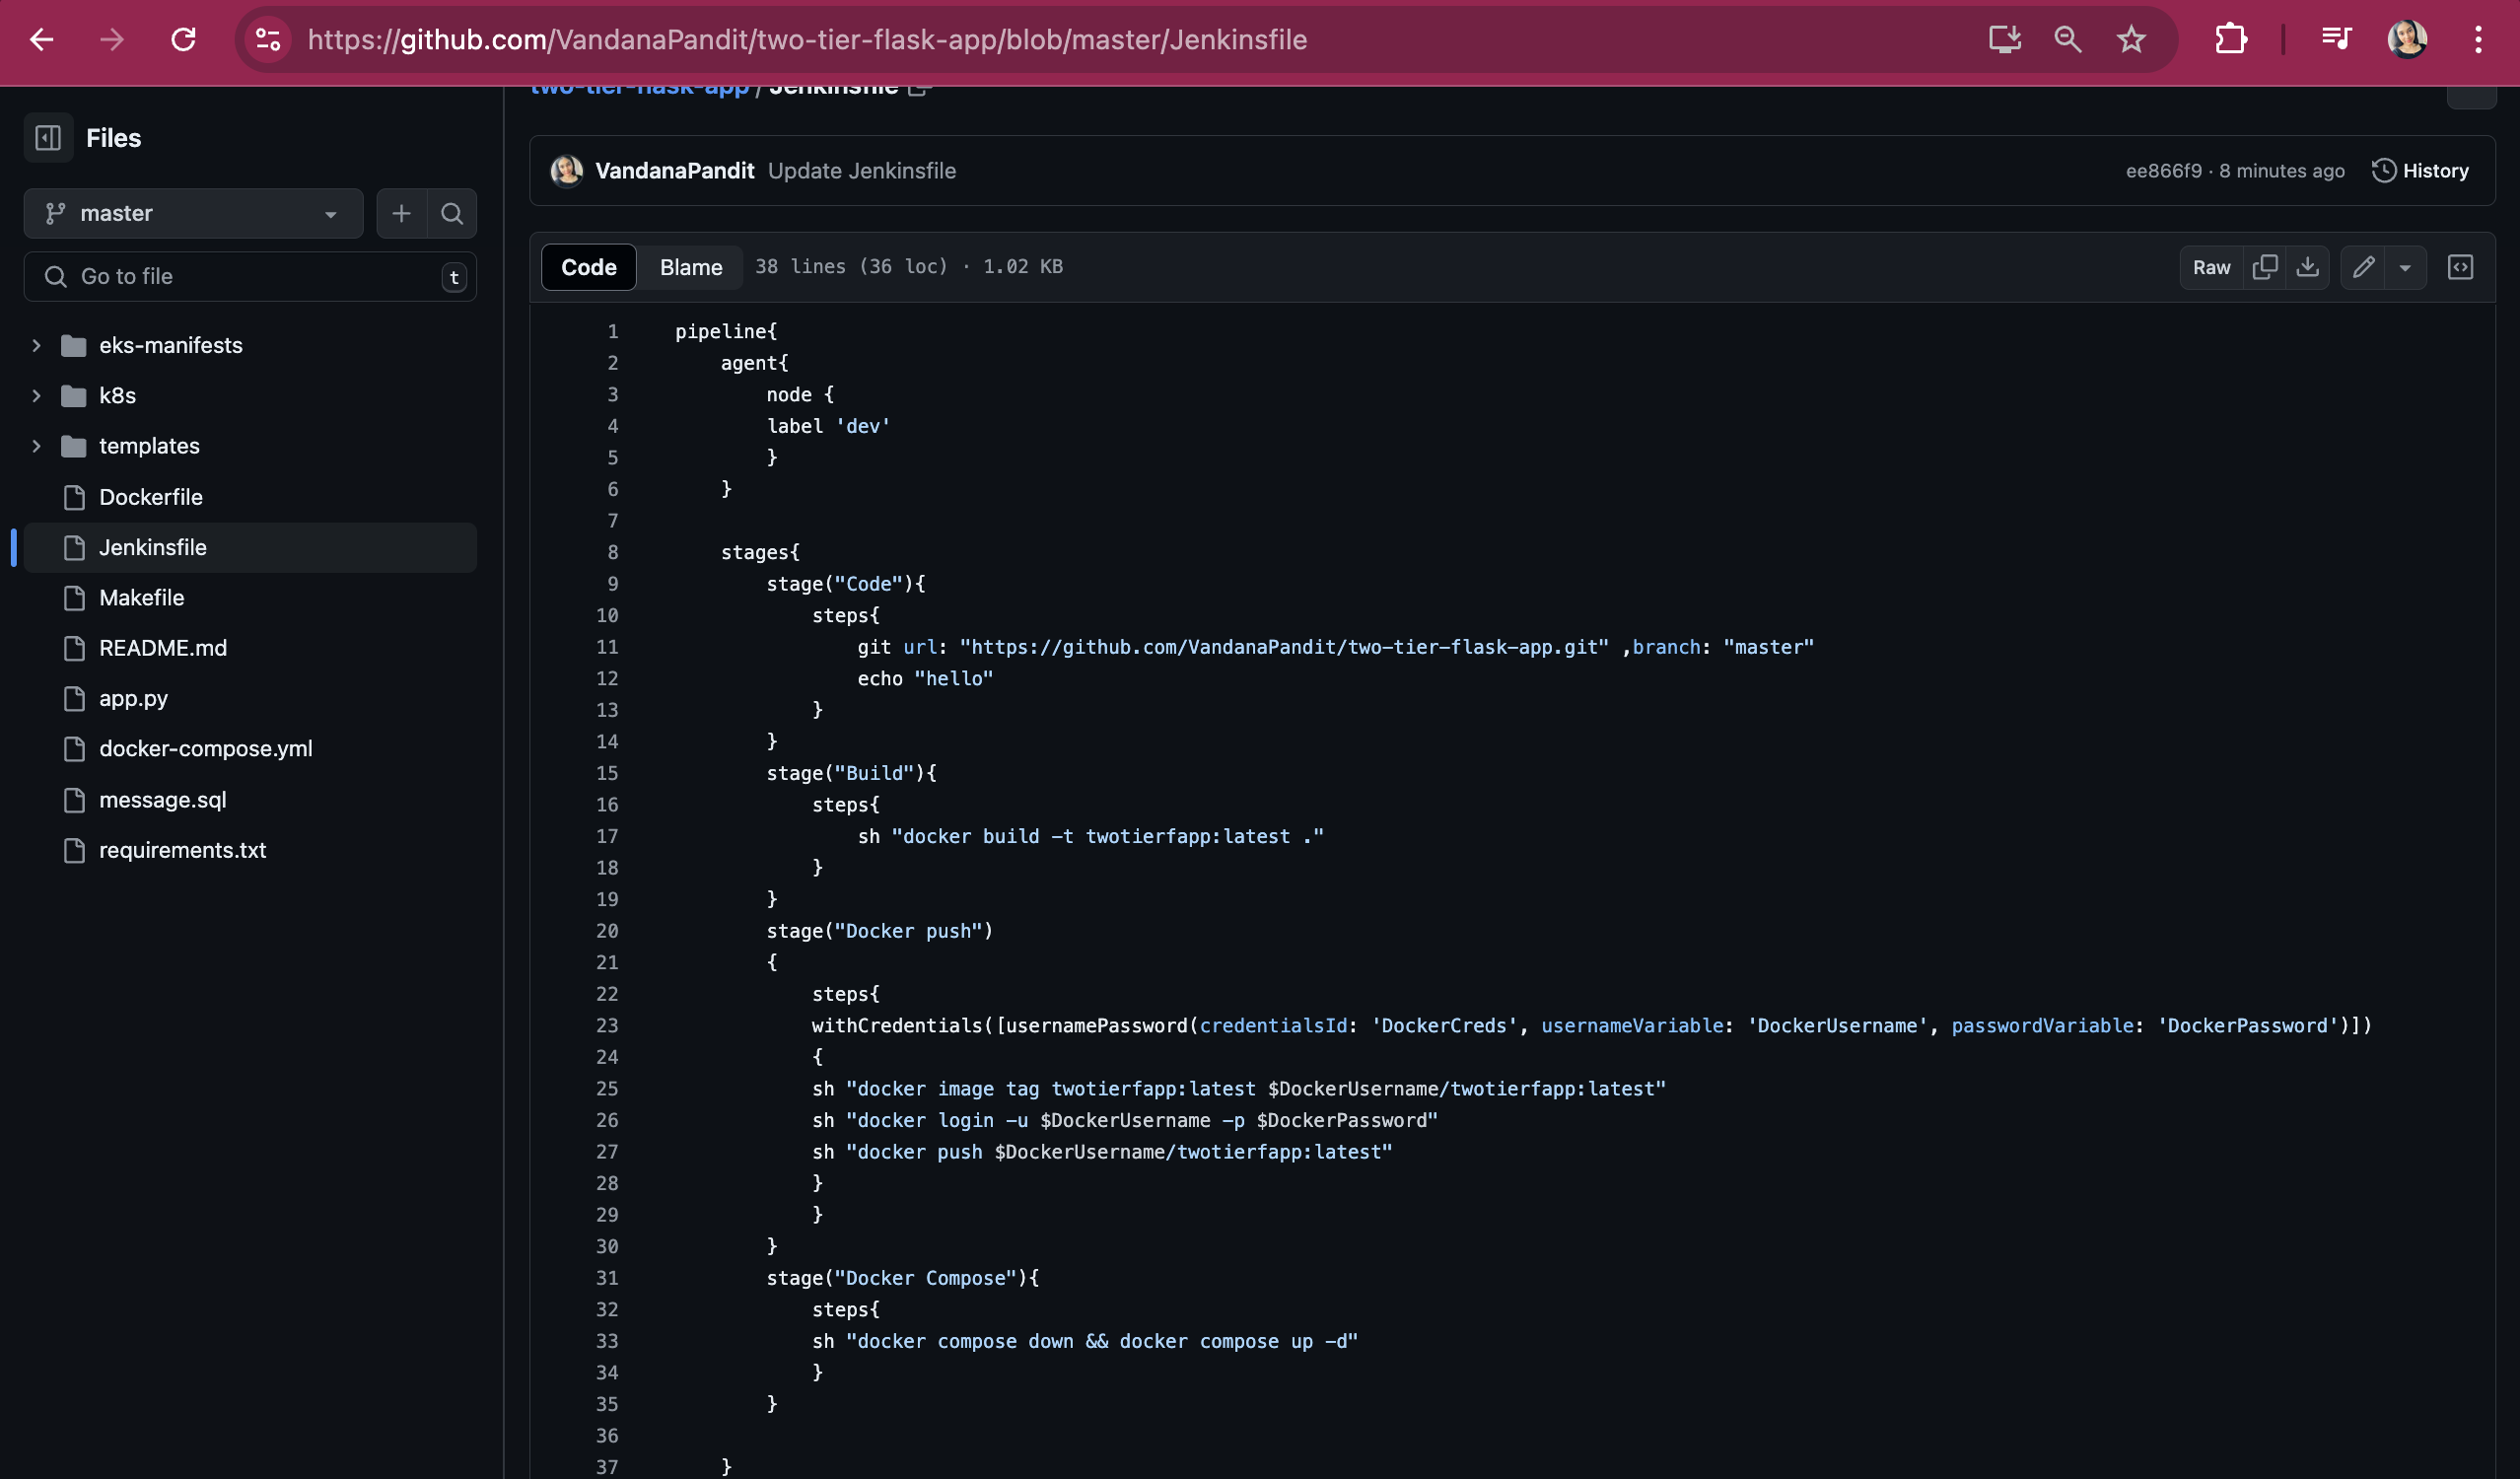
The build was triggered automatically, and the CI/CD process ran successfully.
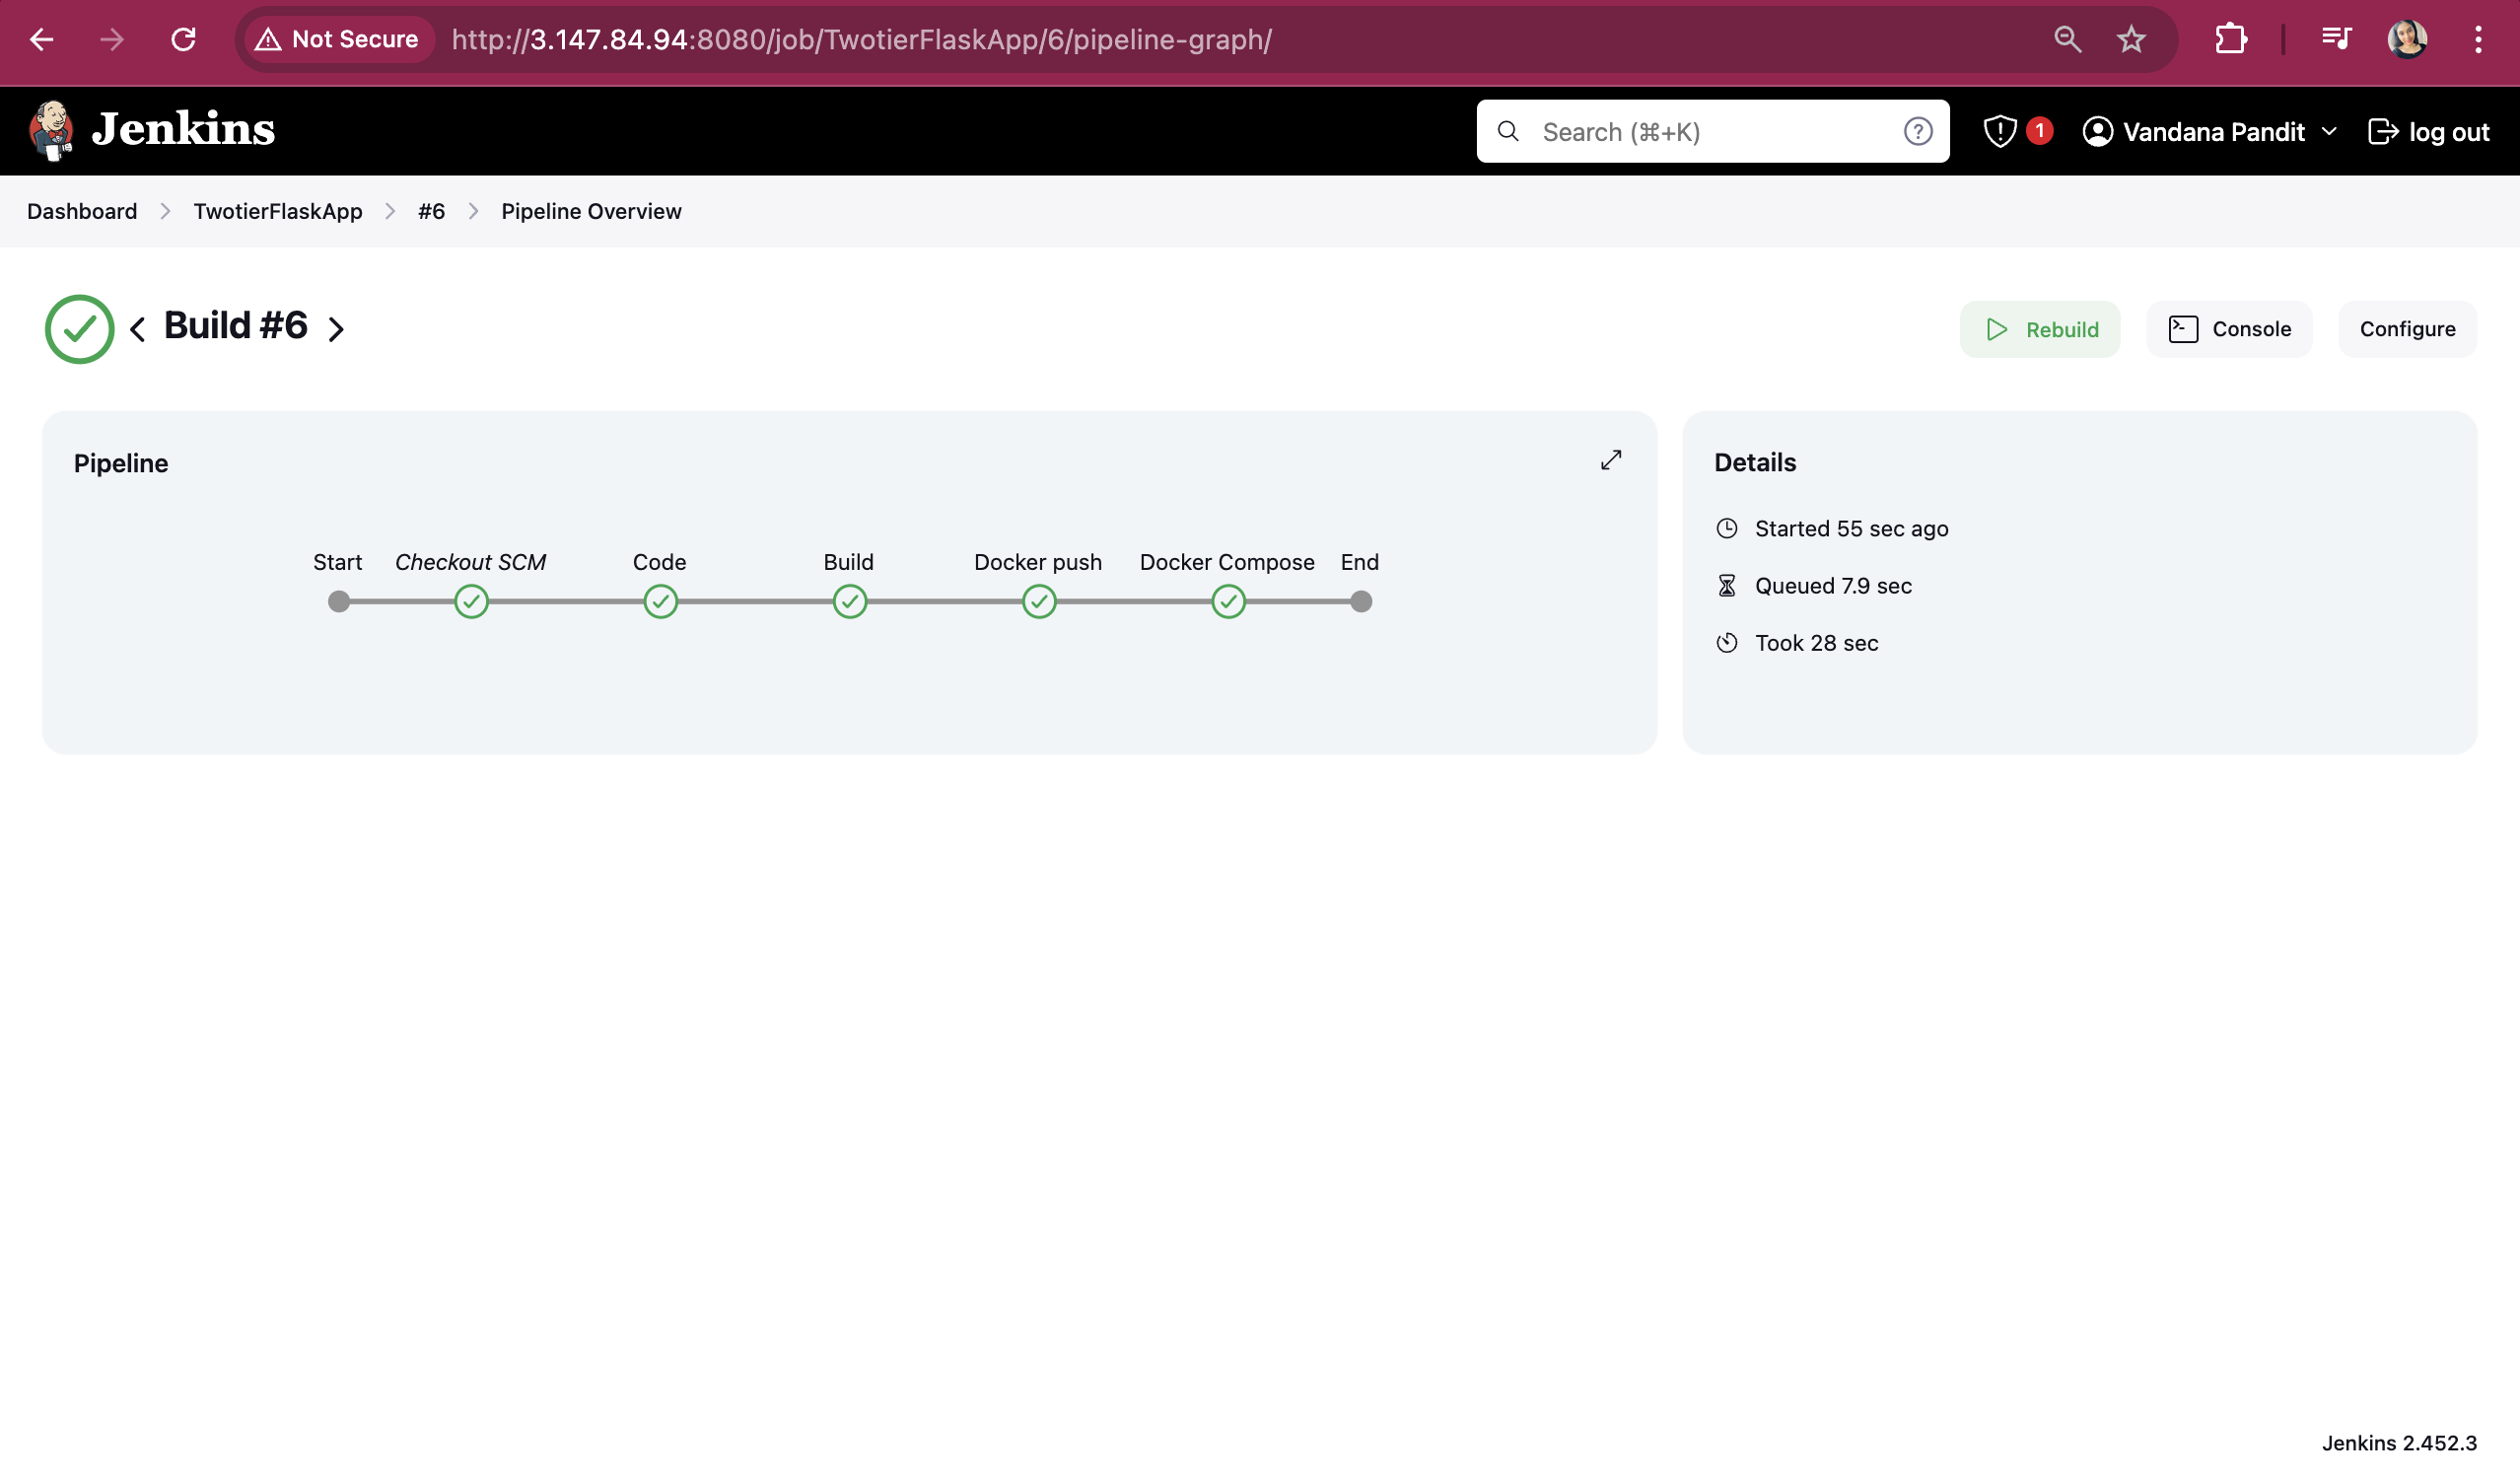
On Jenkins agent check via docker ps command

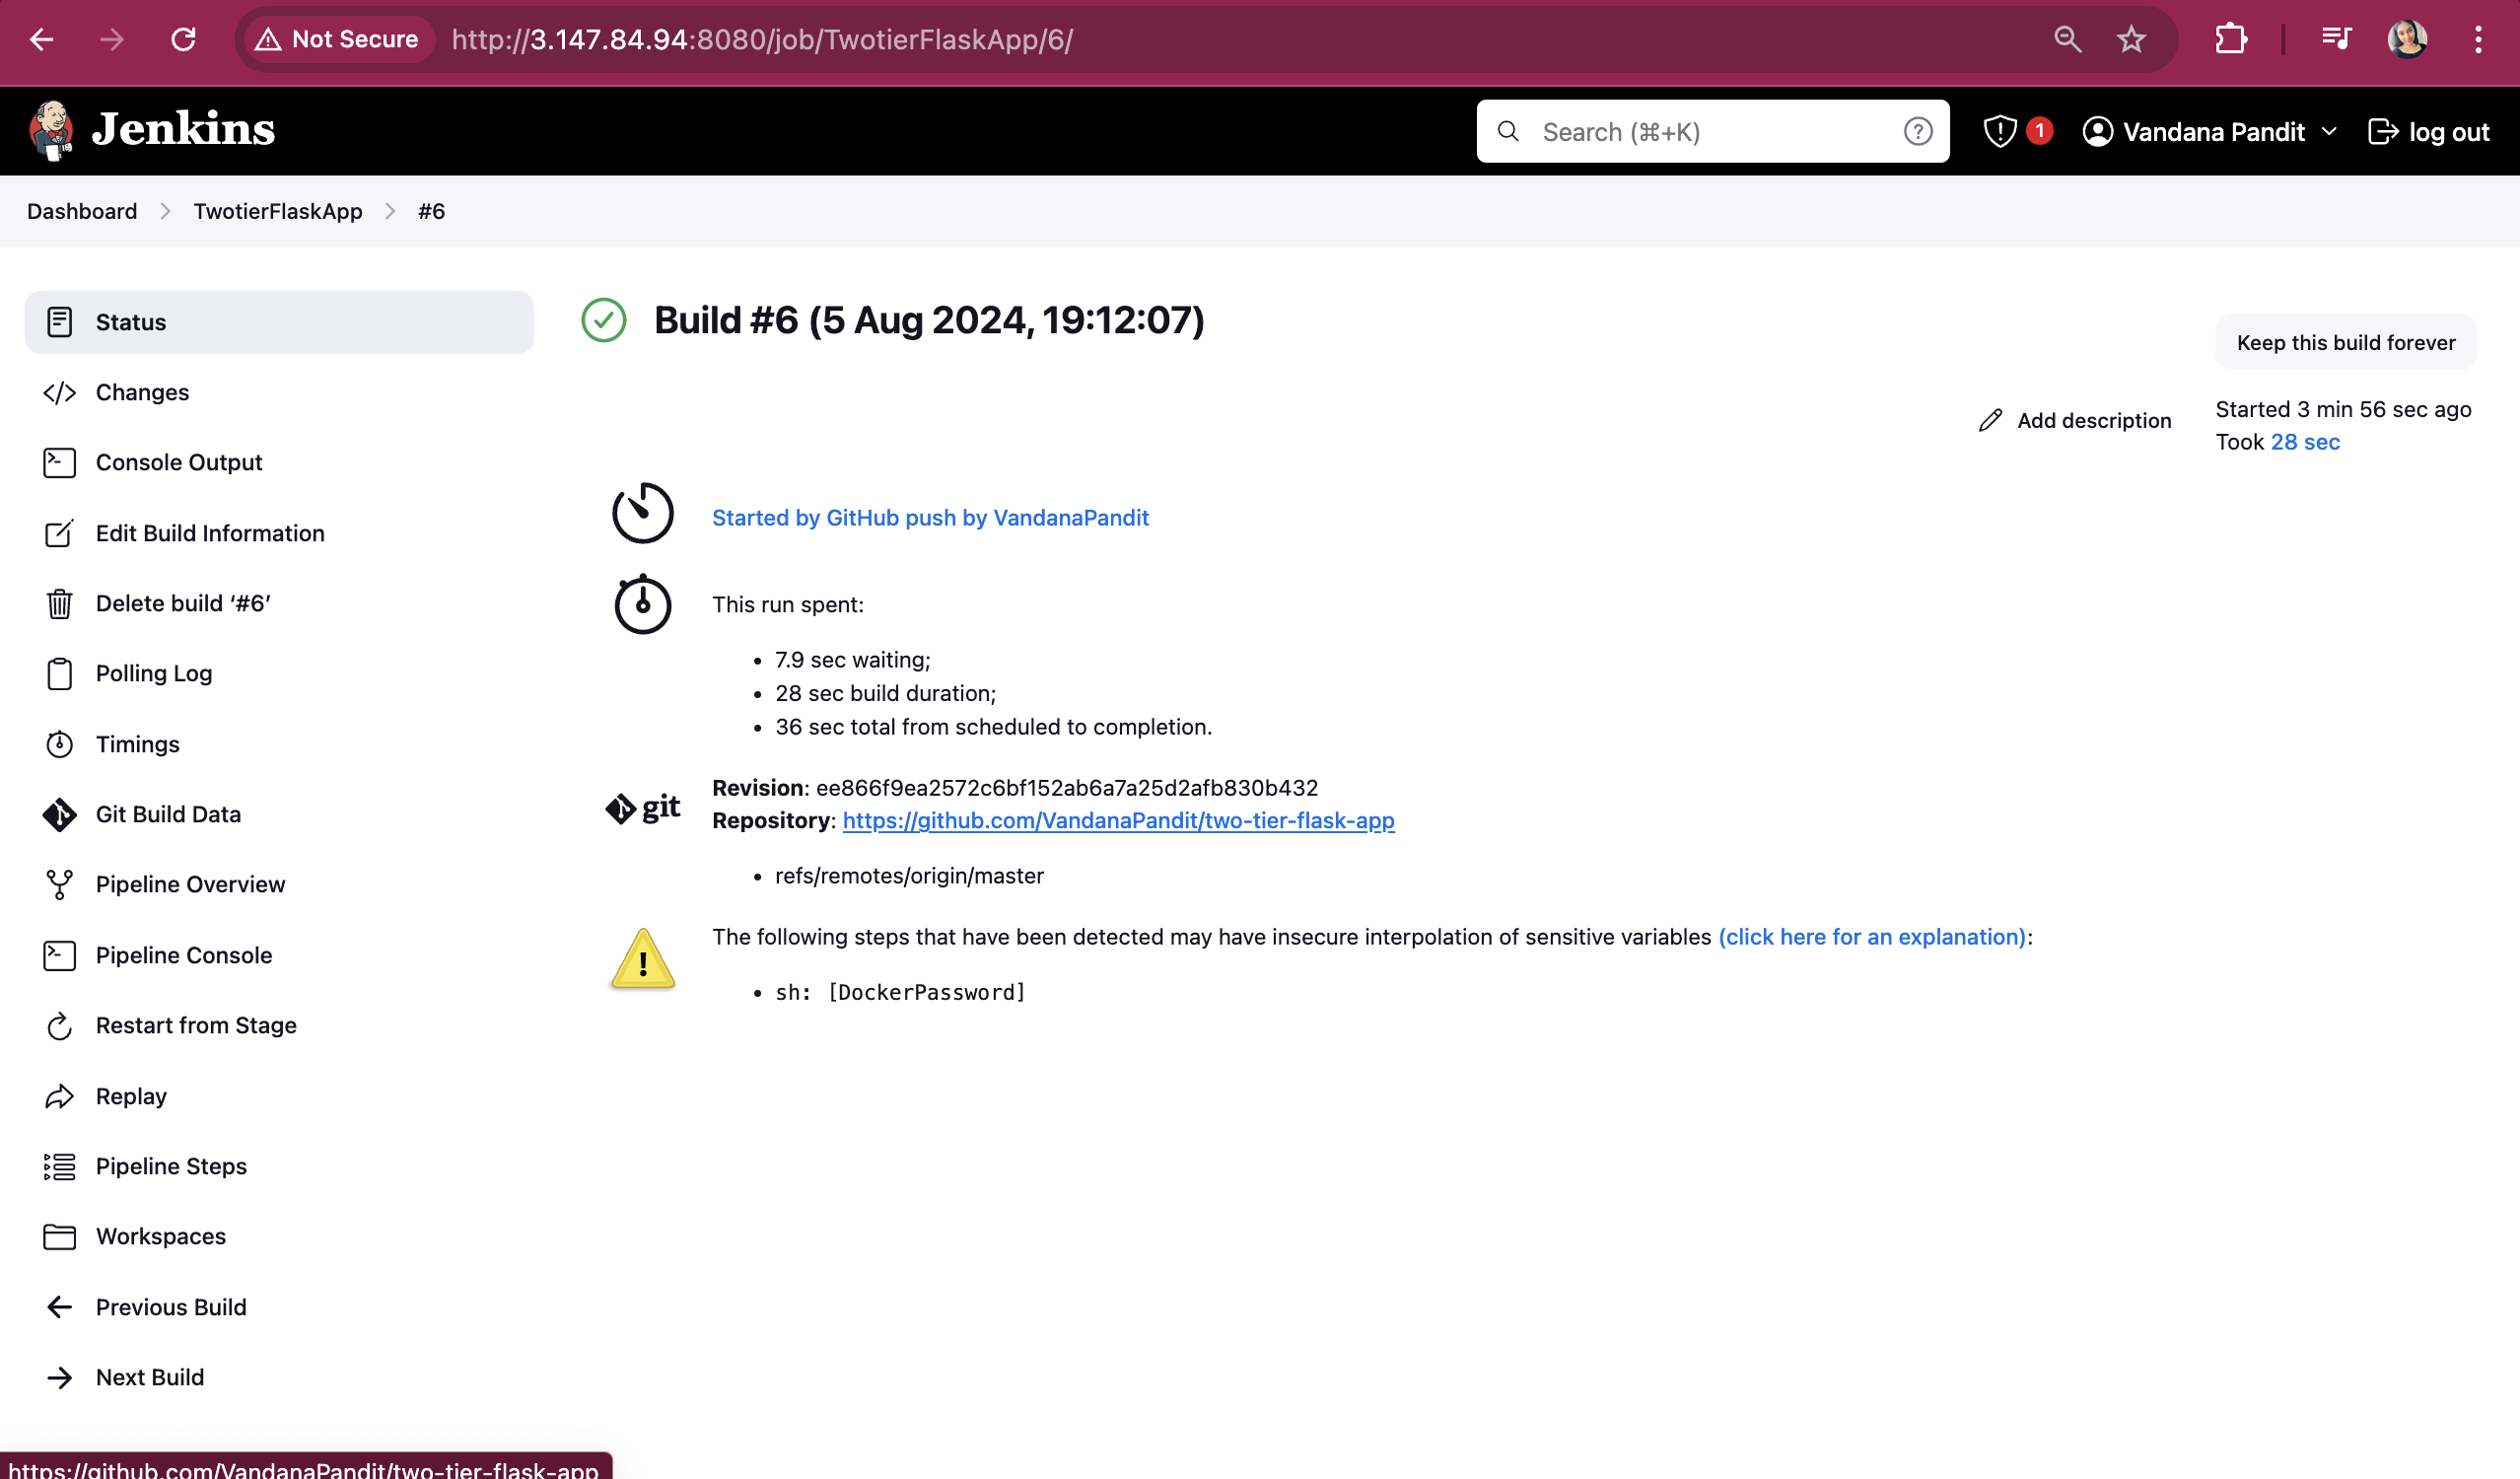
On the Build#6 Status page, you will see the message "Started by GitHub push by VandanaPandit." Because the build was triggered by github after we made changes in Jenkins file
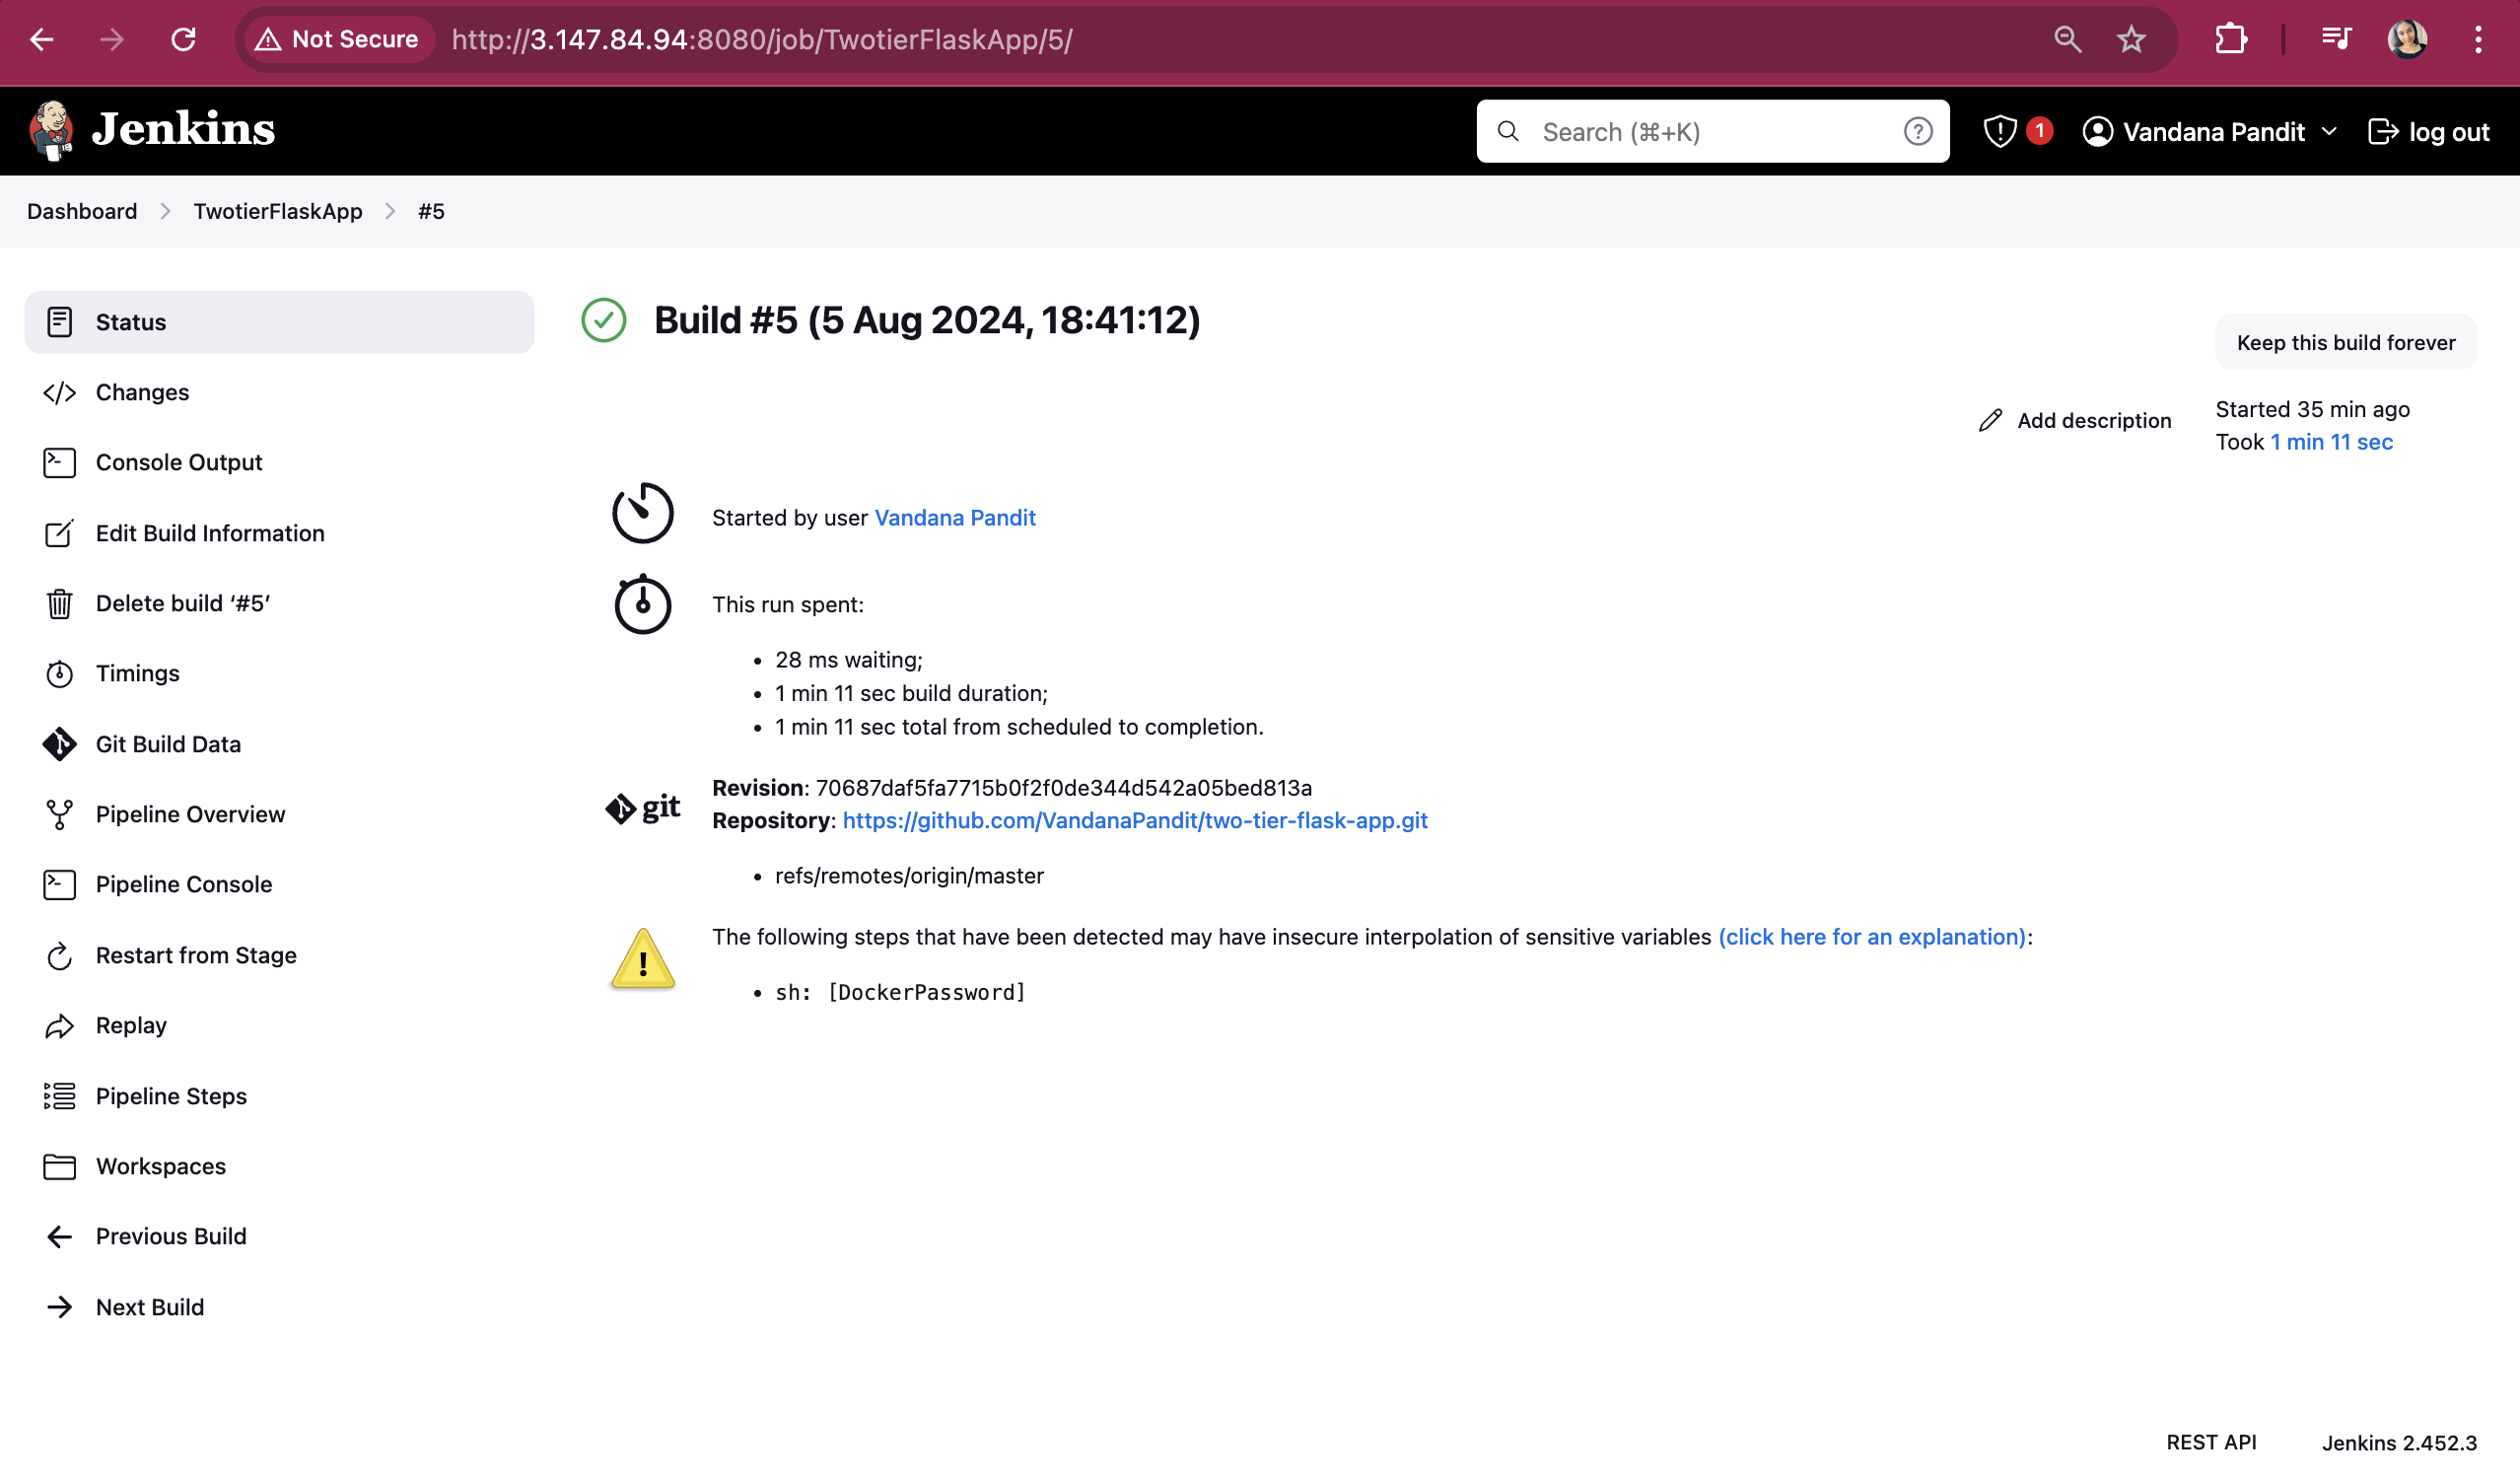
Wheneras for Build#5 on status page , you will see the message "Started by Vandana Pandit" because this was build manually by me.
Build#6 Console page
Successfully Deployed Two Tier Flask App:

Subscribe to my newsletter
Read articles from Vandana Pandit directly inside your inbox. Subscribe to the newsletter, and don't miss out.
Written by

Vandana Pandit
Vandana Pandit
👩💻 I am currently working as Infrastructure Engineer. 🔭 I’m currently preparing for CKA certification. 📝 Do check my linked post I keep posting articles related to DevOps