Installing Apache Tomcat on Ubuntu 22.04
 Dinesh Kumar K
Apache Tomcat is an open-source web server developed by the Apache Software Foundation. Tomcat is one of the most popular choices for running Java web applications and is widely used in the industry.
Step 1: Install Java Development Kit (JDK)
Update system's package repository
sudo apt update

Tomcat requires Java to run. Install the default Java Development Kit (JDK)
sudo apt install default-jdk

Step 2: Download Apache Tomcat
Navigate to the /opt/ directory where we will install Apache Tomcat:
cd /opt/

Next, download the Apache Tomcat archive using wget.
wget https://dlcdn.apache.org/tomcat/tomcat-9/v9.0.93/bin/apache-tomcat-9.0.93.tar.gz

Step 3 : Extract Apache Tomcat
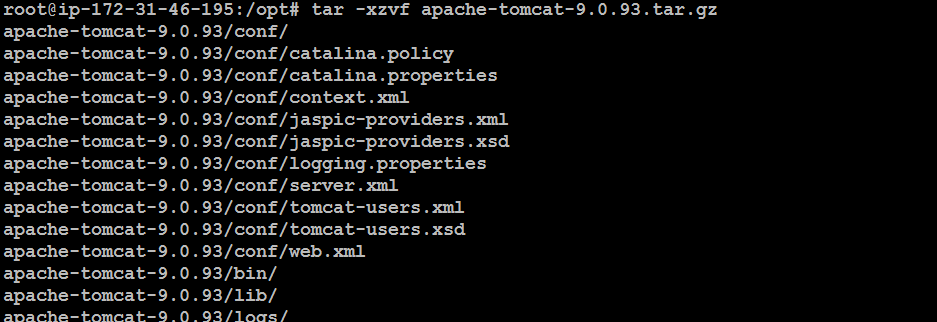
Once the download is complete, extract the archive using the tar command with the -xzvf option:
tar -xzvf apache-tomcat-9.0.93.tar.gz

Step 4 : Move Tomcat to Its Final Location
Move the extracted Apache Tomcat directory to /opt/tomcat/ for better organization:
mv apache-tomcat-9.0.93 /opt/tomcat/

Step 5 : Create a Tomcat User
For security purposes, create a dedicated user for running Tomcat:
adduser tomcat

Step 6 : Set Permissions and Environment Variables
Set the ownership of the Tomcat directory to the newly created user and group:
chown -R tomcat:tomcat /opt/tomcat/

Make the Tomcat startup scripts executable:
chmod -R u+x /opt/tomcat/bin/

Step 7 : Create a Systemd Service File
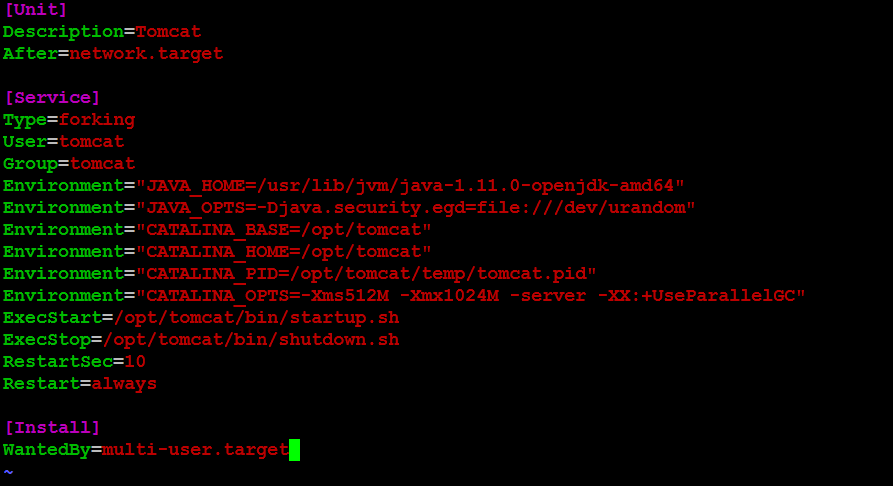
To manage Tomcat as a service, create a systemd service file:
vi /etc/systemd/system/tomcat.service

Copy and paste the following configuration into the file:
[Unit]
Description=Tomcat
After=network.target

[Service]
Type=forking
User=tomcat
Group=tomcat
Environment="JAVA_HOME=/usr/lib/jvm/java-1.11.0-openjdk-amd64"
Environment="JAVA_OPTS=-Djava.security.egd=file:///dev/urandom"
Environment="CATALINA_BASE=/opt/tomcat"
Environment="CATALINA_HOME=/opt/tomcat"
Environment="CATALINA_PID=/opt/tomcat/temp/tomcat.pid"
Environment="CATALINA_OPTS=-Xms512M -Xmx1024M -server -XX:+UseParallelGC"
ExecStart=/opt/tomcat/bin/startup.sh
ExecStop=/opt/tomcat/bin/shutdown.sh
RestartSec=10
Restart=always

[Install]
WantedBy=multi-user.target

Step 8 : Start Tomcat
Start the Tomcat service:
systemctl start tomcat

Check the status
systemctl status tomcat

Step 9 : Configure Tomcat Users
To manage user access to the Tomcat Manager and Host Manager applications, you need to configure user roles and permissions in the tomcat-users.xml file. This file is located in the conf directory within your Tomcat installation directory.
- Open the
tomcat-users.xmlfile for editing:
vi /opt/tomcat/conf/tomcat-users.xml

Add the following sample configuration to create a user with manager and admin roles. Replace your_username and your_password with your desired credentials:
-->
    <role rolename="admin-gui"/>
    <role rolename="manager-gui"/>
    <role rolename="manager-script"/>
    <user username="your_username" password="your_password" roles="admin-gui,manager-gui,manager-script"/>
</tomcat-users>
This configuration grants the user the roles required to access the Tomcat Manager and Host Manager applications.
Save and exit the text editor.
Optionally, you can configure additional users and roles as needed by adding more <user> elements within the <tomcat-users> section.
Now, your Tomcat Manager and Host Manager applications are configured with the specified user credentials and roles. You can use these credentials to access and manage your web applications through the Tomcat Manager web interface.
Remember to keep your credentials secure and choose strong passwords to ensure the security of your Tomcat server.
Step 10 : Comment Out Valve Tags
To enhance the security of the Tomcat Manager and Host Manager applications, it's a good practice to comment out the Valve tags in their respective context.xml files. This helps prevent unauthorized access.
In Manager:
Open the context.xml file for the Tomcat Manager application:
vi /opt/tomcat/webapps/manager/META-INF/context.xml

Locate the Valve tag and comment it out by adding <!-- before the opening tag and --> after the closing tag. Here's a sample:
<!-- Comment out the Valve tag for enhanced security -->
<!--
<Valve className="org.apache.catalina.valves.RemoteAddrValve"
       allow="127\.\d+\.\d+\.\d+|::1|0:0:0:0:0:0:0:1|0\.0\.0\.0|0:0:0:0:0:0:0:0"
       deny=""/>
-->

Save and exit the text editor.
In Host Manager:
Open the context.xml file for the Host Manager application:
vi /opt/tomcat/webapps/host-manager/META-INF/context.xml

Locate the Valve tag and comment it out using after the closing tag. Here's a sample:
<!-- Comment out the Valve tag for enhanced security -->
<!--
<Valve className="org.apache.catalina.valves.RemoteAddrValve"
       allow="127\.\d+\.\d+\.\d+|::1|0:0:0:0:0:0:0:1|0\.0\.0\.0|0:0:0:0:0:0:0:0"
       deny=""/>
-->

Save and exit the text editor.
By commenting out the Valve tags as shown in the samples, you restrict access to the Tomcat Manager and Host Manager applications to specific IP addresses. This added layer of security helps prevent unauthorized access and enhances the overall security of your Tomcat server.
Step 11 : Reload systemd and Check Status
After making these changes, reload systemd for the changes to take effect:
systemctl daemon-reload

Check the status of the Tomcat service again:
systemctl status tomcat.service

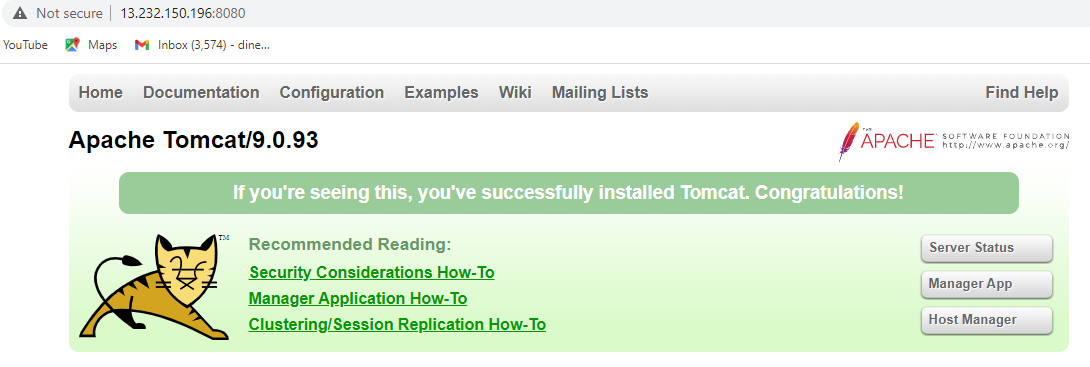
Now, Successfully installed and configured Apache Tomcat on Ubuntu system.

You can now deploy your Java web applications and enjoy the benefits of this powerful application server.
Subscribe to my newsletter
Read articles from Dinesh Kumar K directly inside your inbox. Subscribe to the newsletter, and don't miss out.
Written by

Dinesh Kumar K
Dinesh Kumar K
Hi there! I'm Dinesh, a passionate Cloud and DevOps enthusiast. I love to dive into the latest new technologies and sharing my journey through blog.