Tutorial: Creating NACLs and Security Groups in the AWS Management Console
 Brandon Damue
I recently wrote an article on Security Groups and Network Access Control Lists and then I thought it will be wise and helpful to follow that up with a tutorial article on how to create NACLs and Security Groups using the AWS management console.
Without wasting time, let's get right in.
Step 1: Logging into the Management Console
I am going to log into the management console using the credentials of an IAM user account I created for performing day to day tasks such as the ones required to complete this article. Incase you don't know it yet; it is a best practice to only use your root account when necessary and to instead use an IAM user account with the sufficient amount of permissions for everything else.
To begin this tutorial, navigate to the following link: https://aws.amazon.com/console/ and click the Sign in to the Console button at the top right part of the page to get to the login screen.
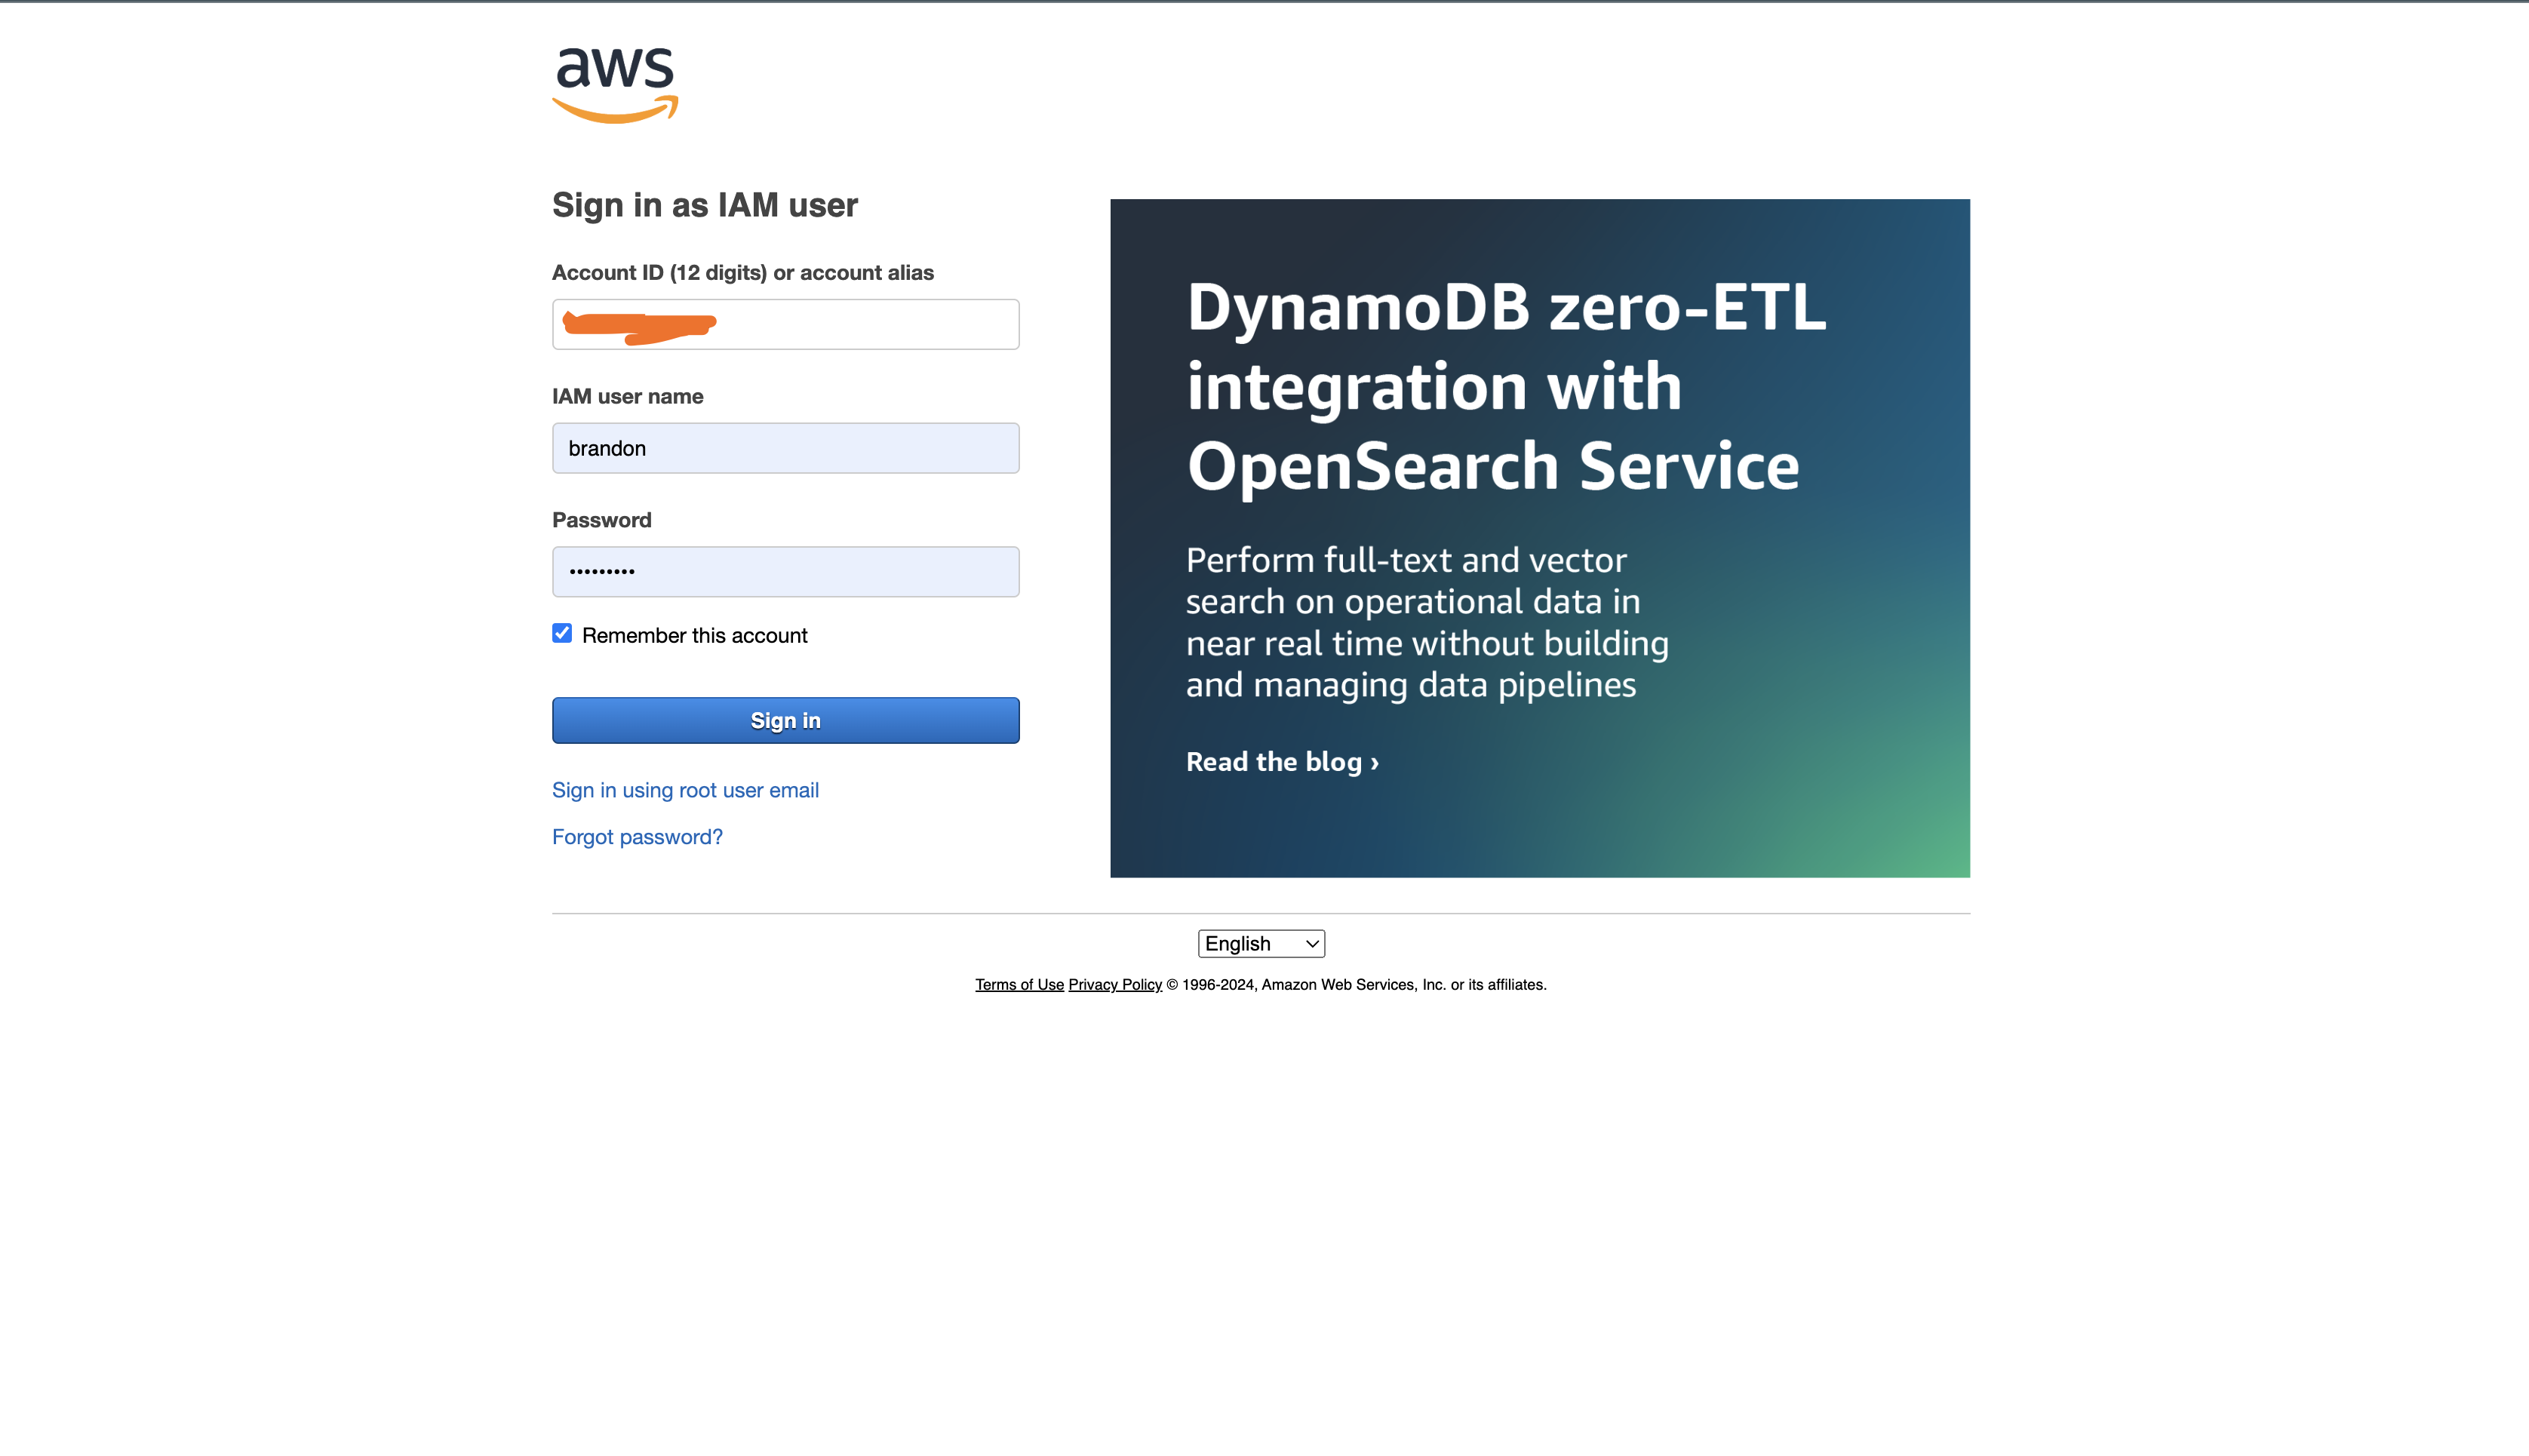
If you have never created an IAM user account I would advise that you log in as the root user of your AWS account, go to the IAM management console, create a user and then grant this new user Full EC2 access. When you do that, log in with that new user to continue with the tutorial.
Step 2: Creating A Security Group
Since Security Groups are virtual firewalls that control traffic to and from EC2 instances, to create a security group (SG), you have to navigate to the EC2 management console. (You can also this in the VPC console.)
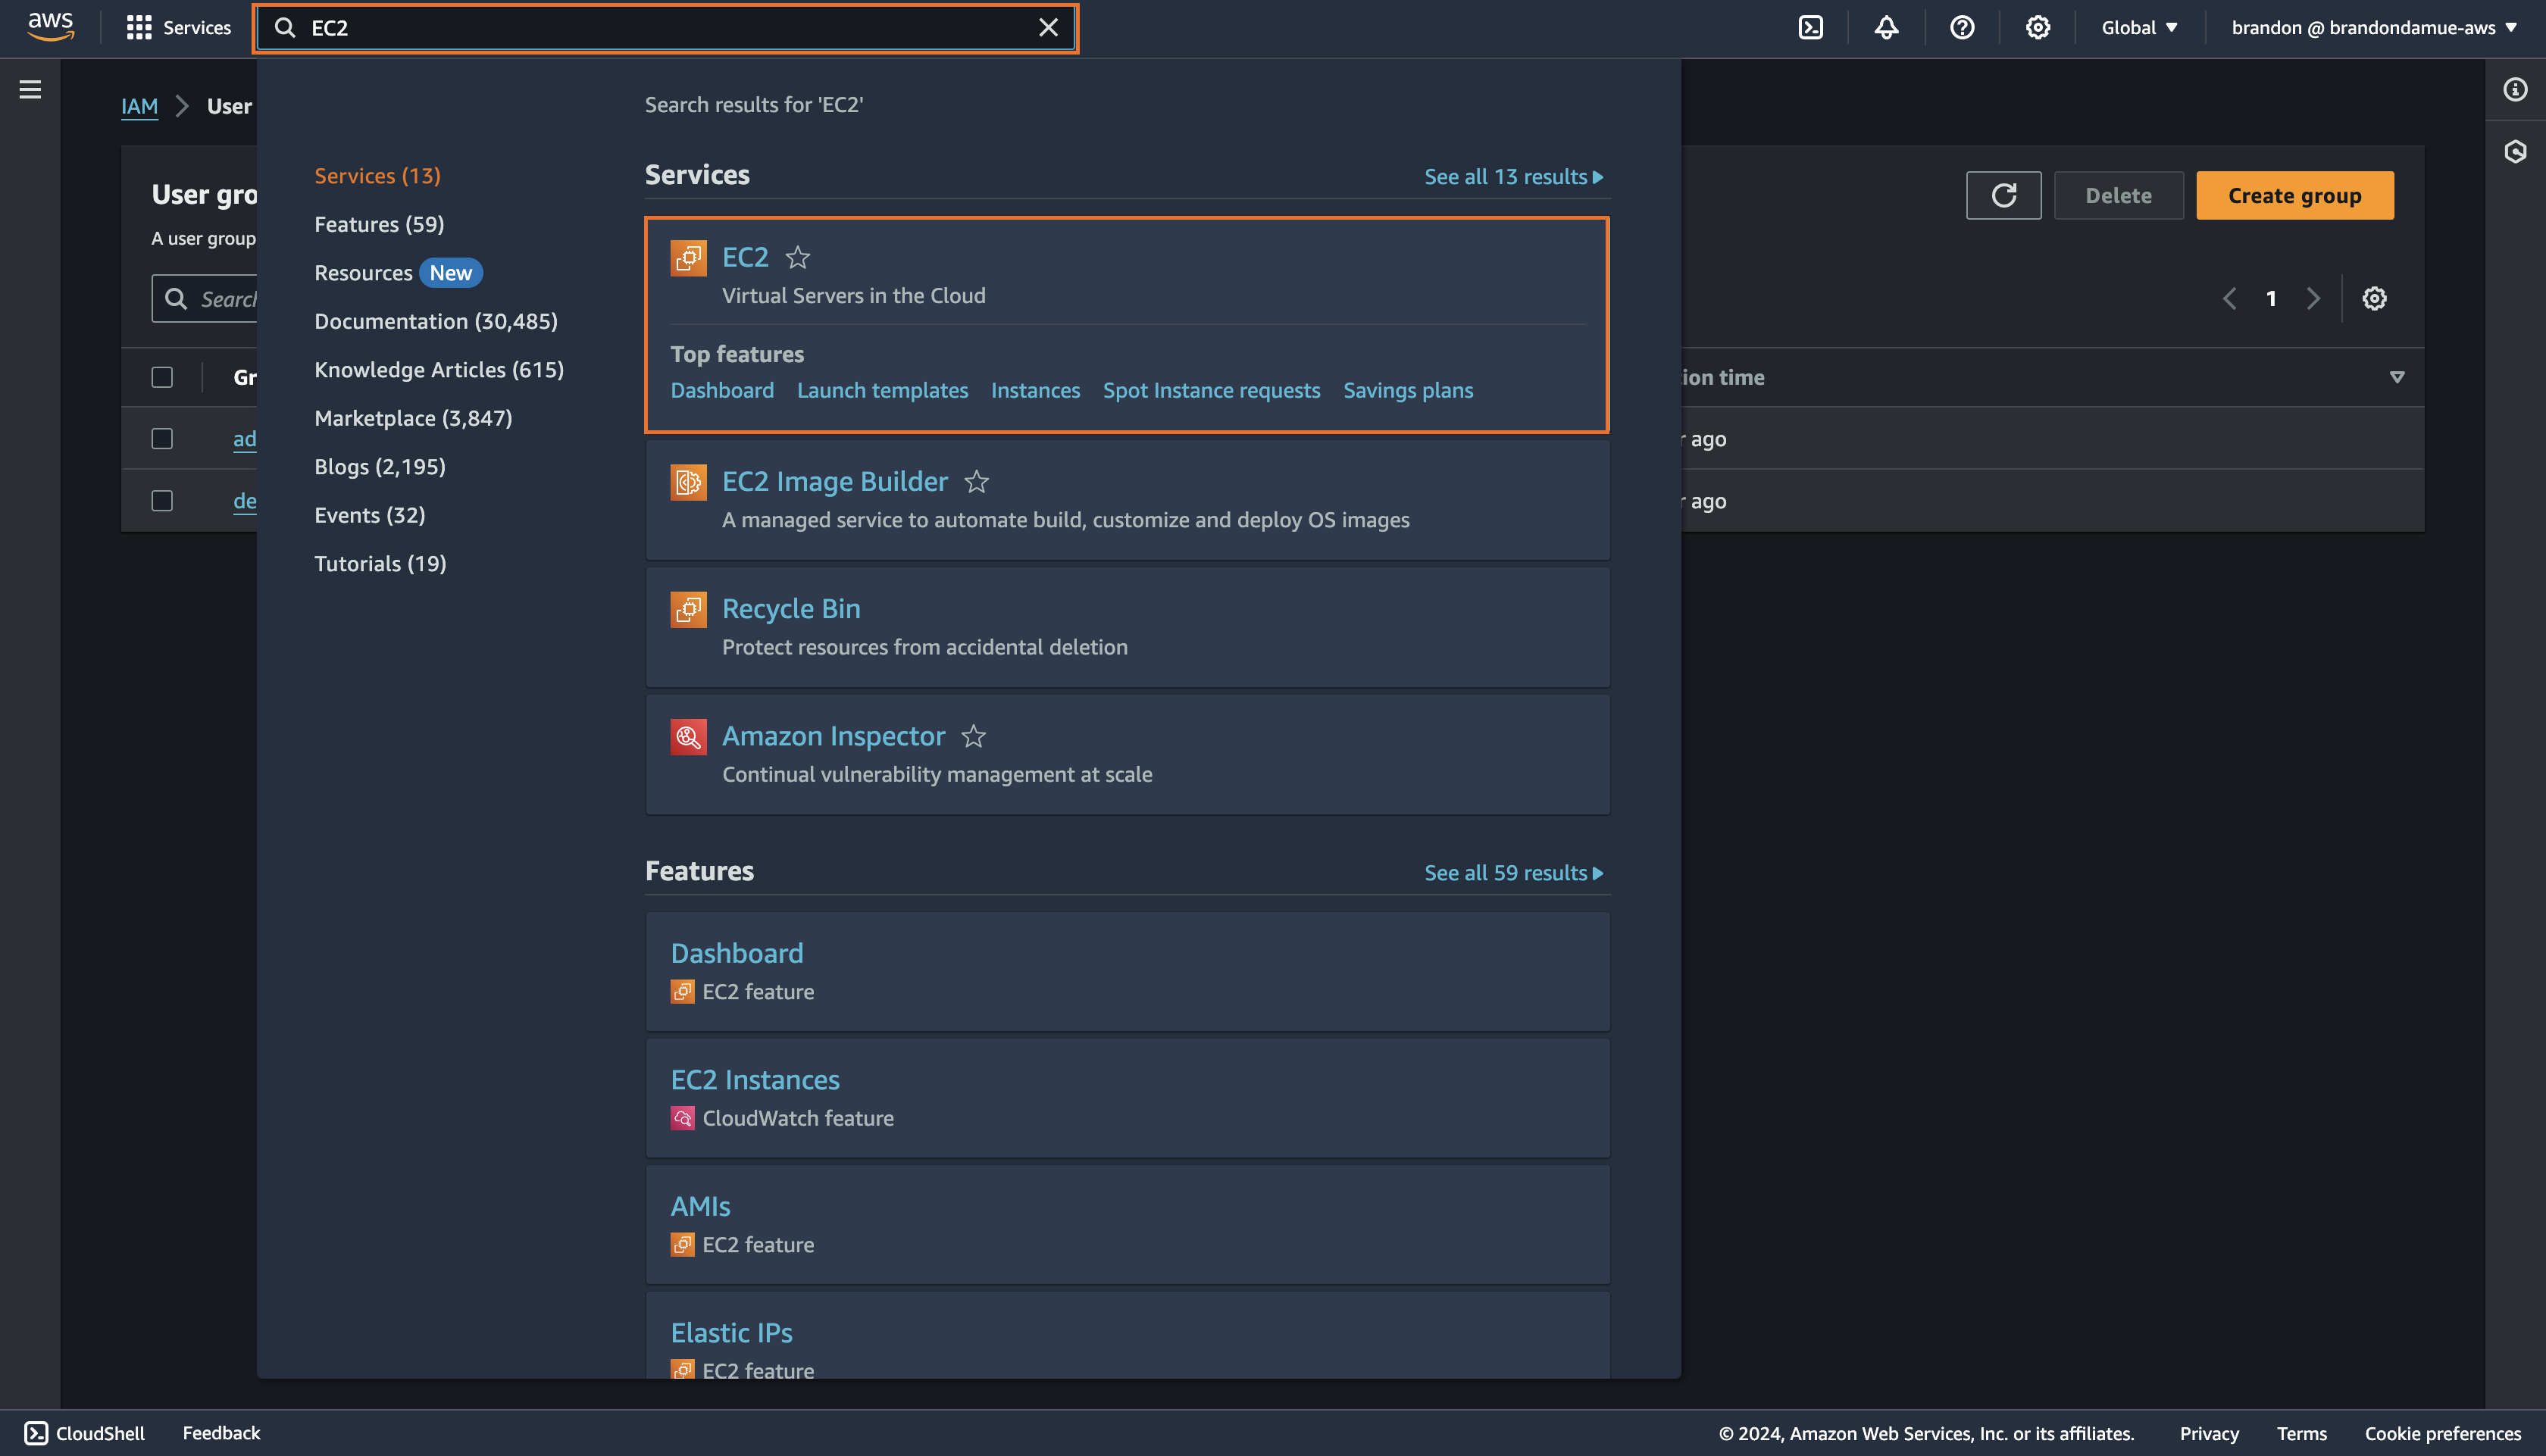
As shown in the image above, search EC2 in the search bar at the top and then click on the first search result that appears. Clicking that will take you to the EC2 management console.
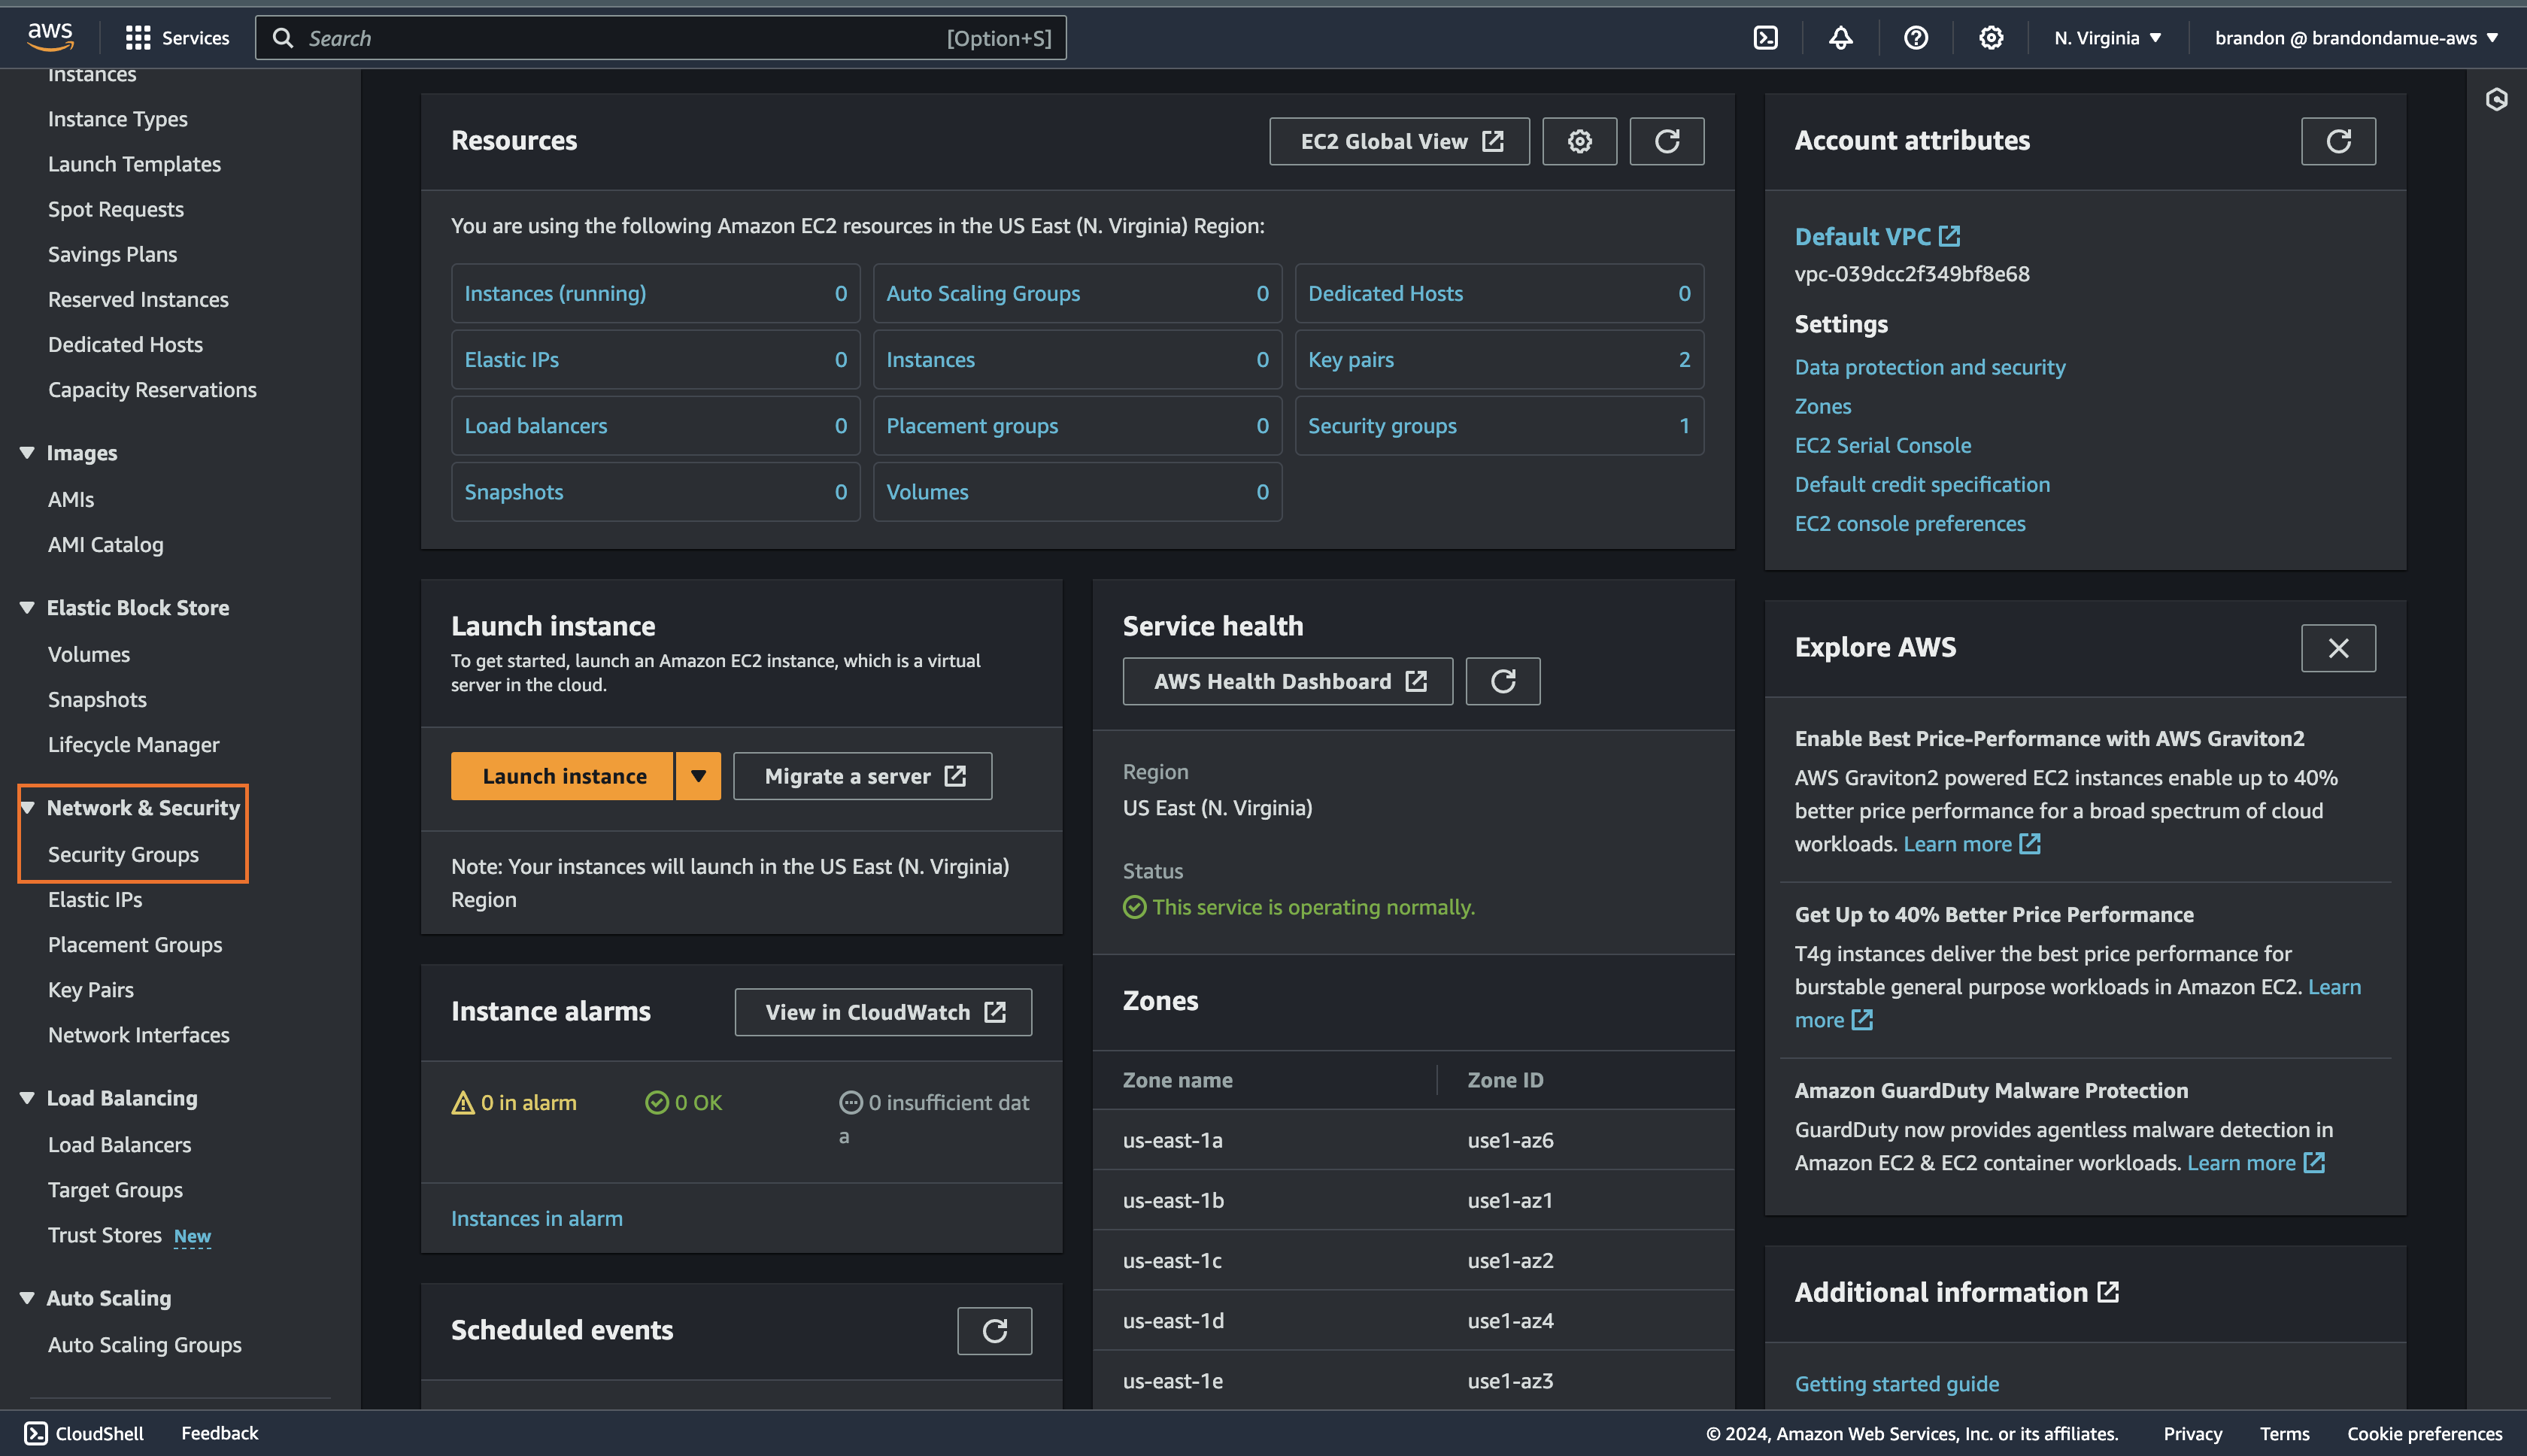
On this new web page, scroll down to the Network & Security dropdown on the sidebar on the left of the page and click on Security Groups.
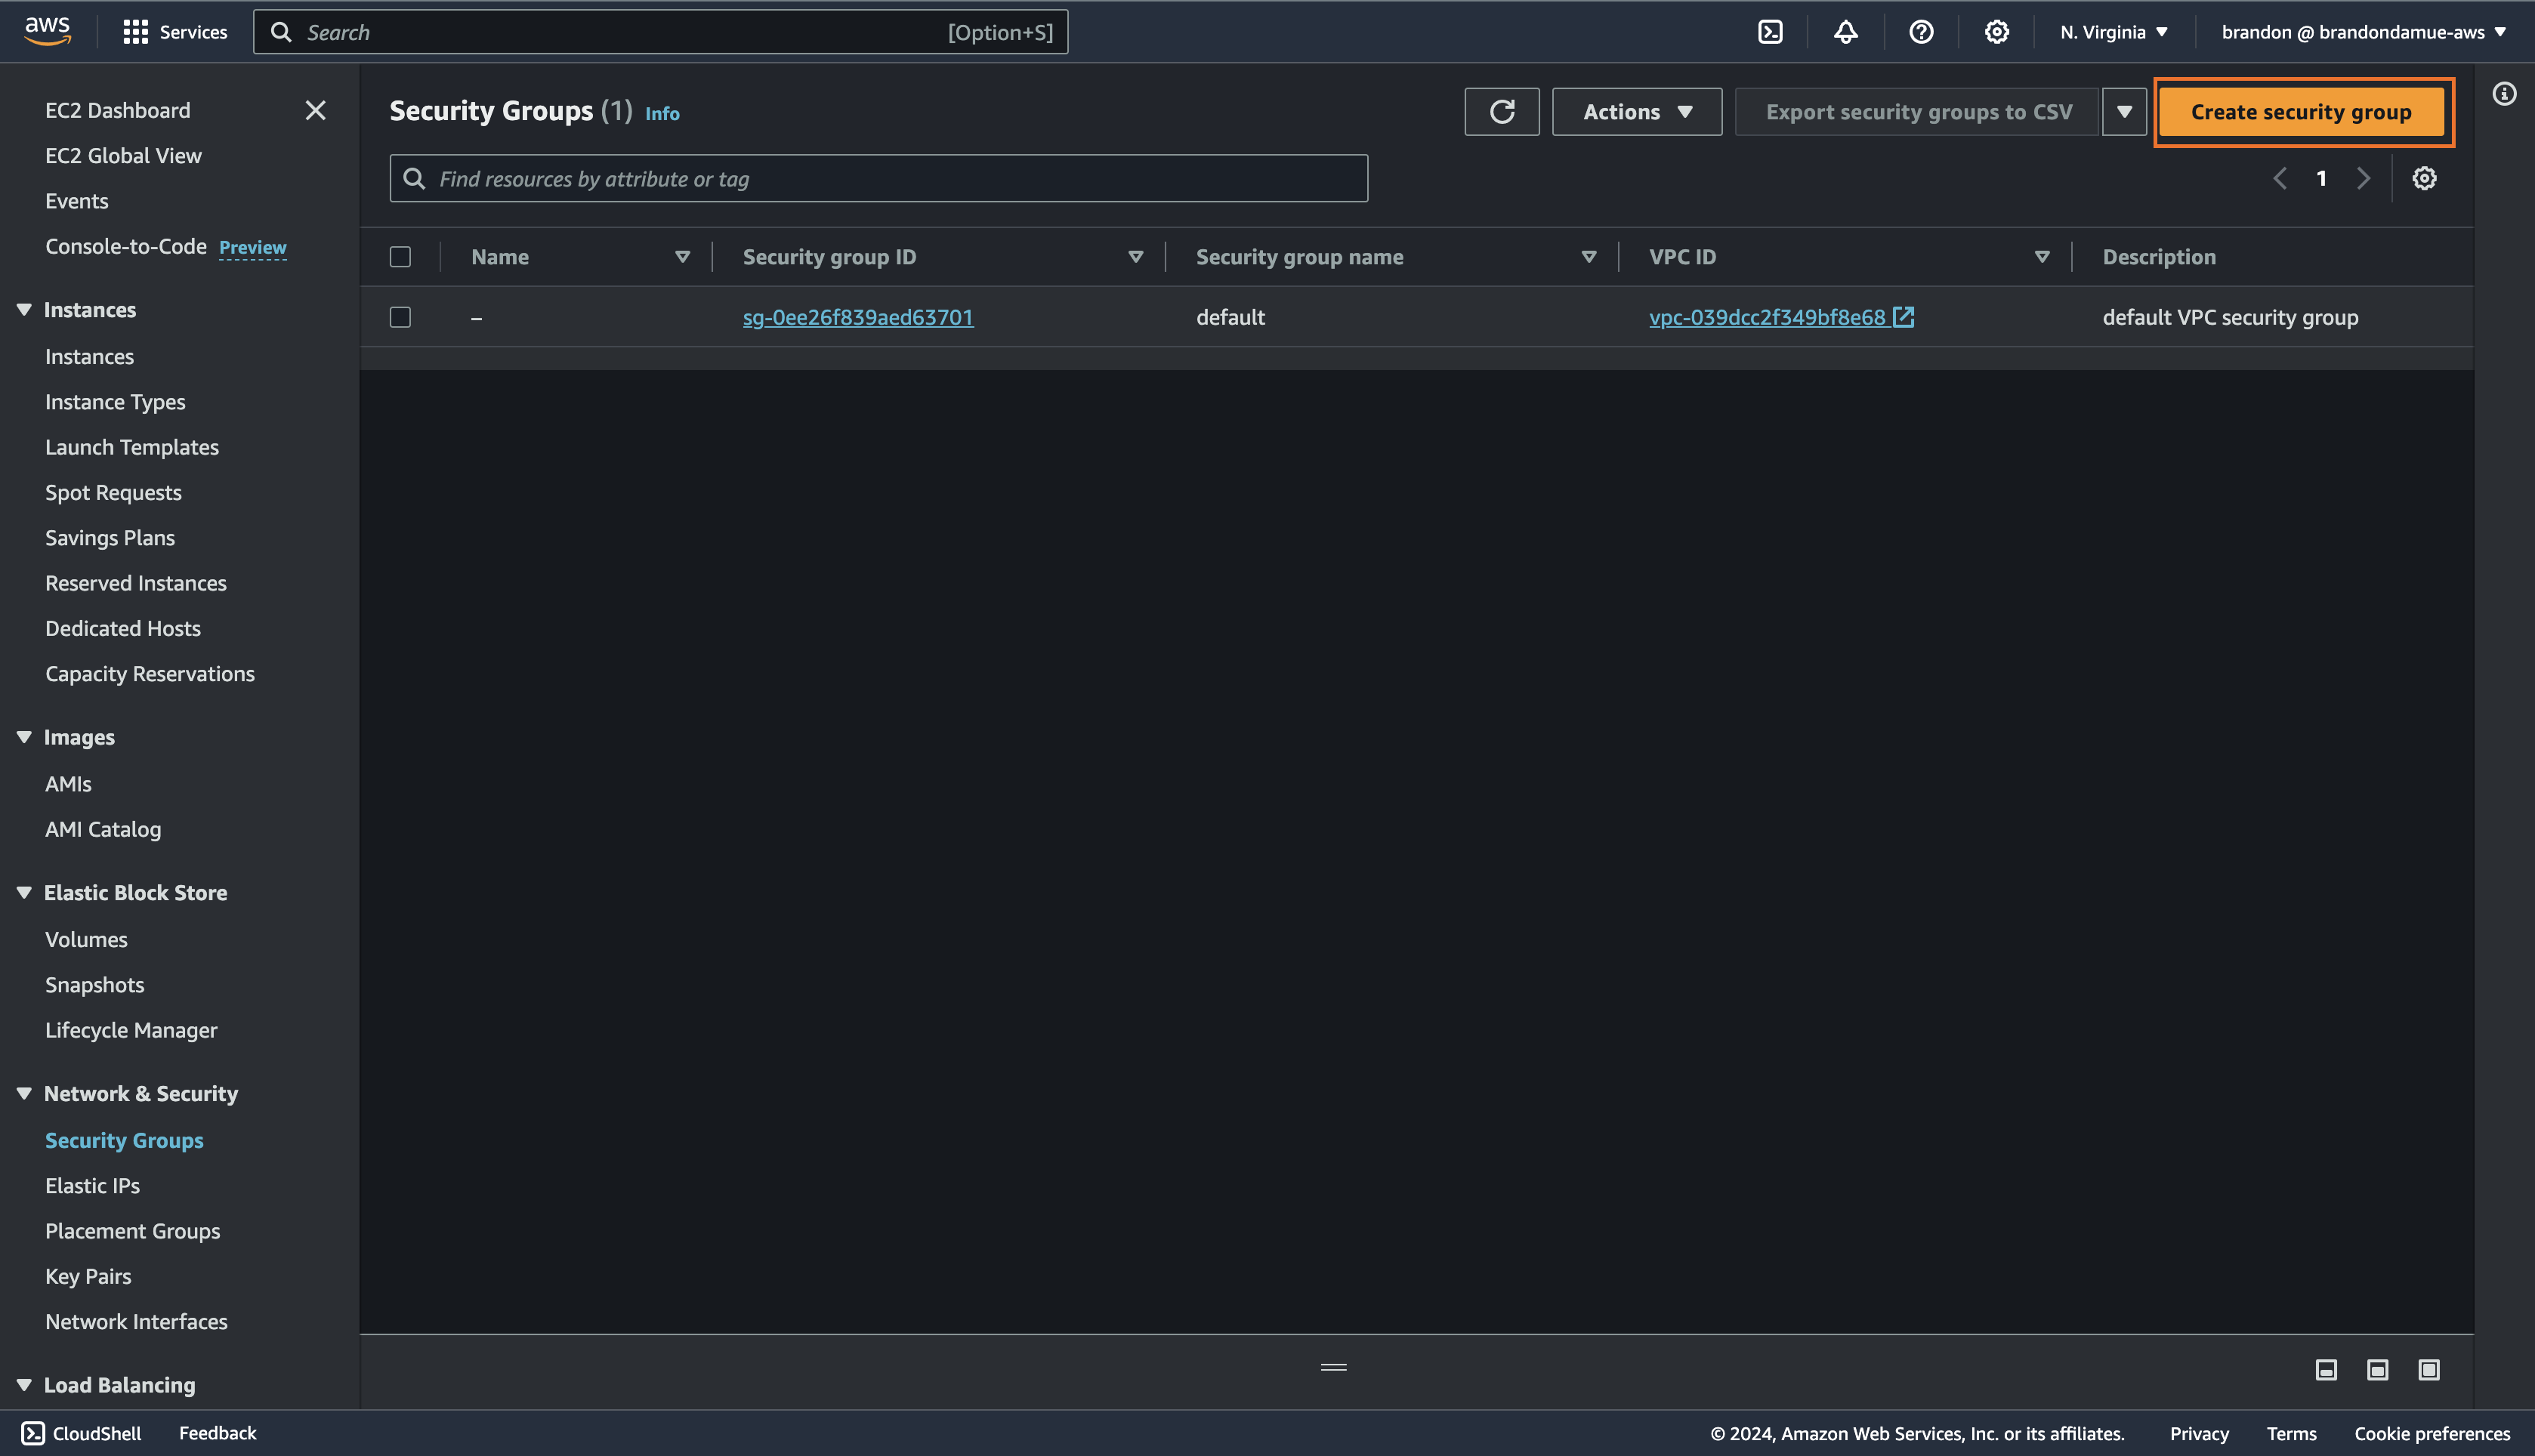
You will notice that there is a default security that exist in the default VPC. The goal of this tutorial is to create an SG of our own so, click on the Create Security Group button at the top right corner of the management console and then fill in the following details.
Security group name: CloudTutorialSG
Description: SG for cloud tutorial
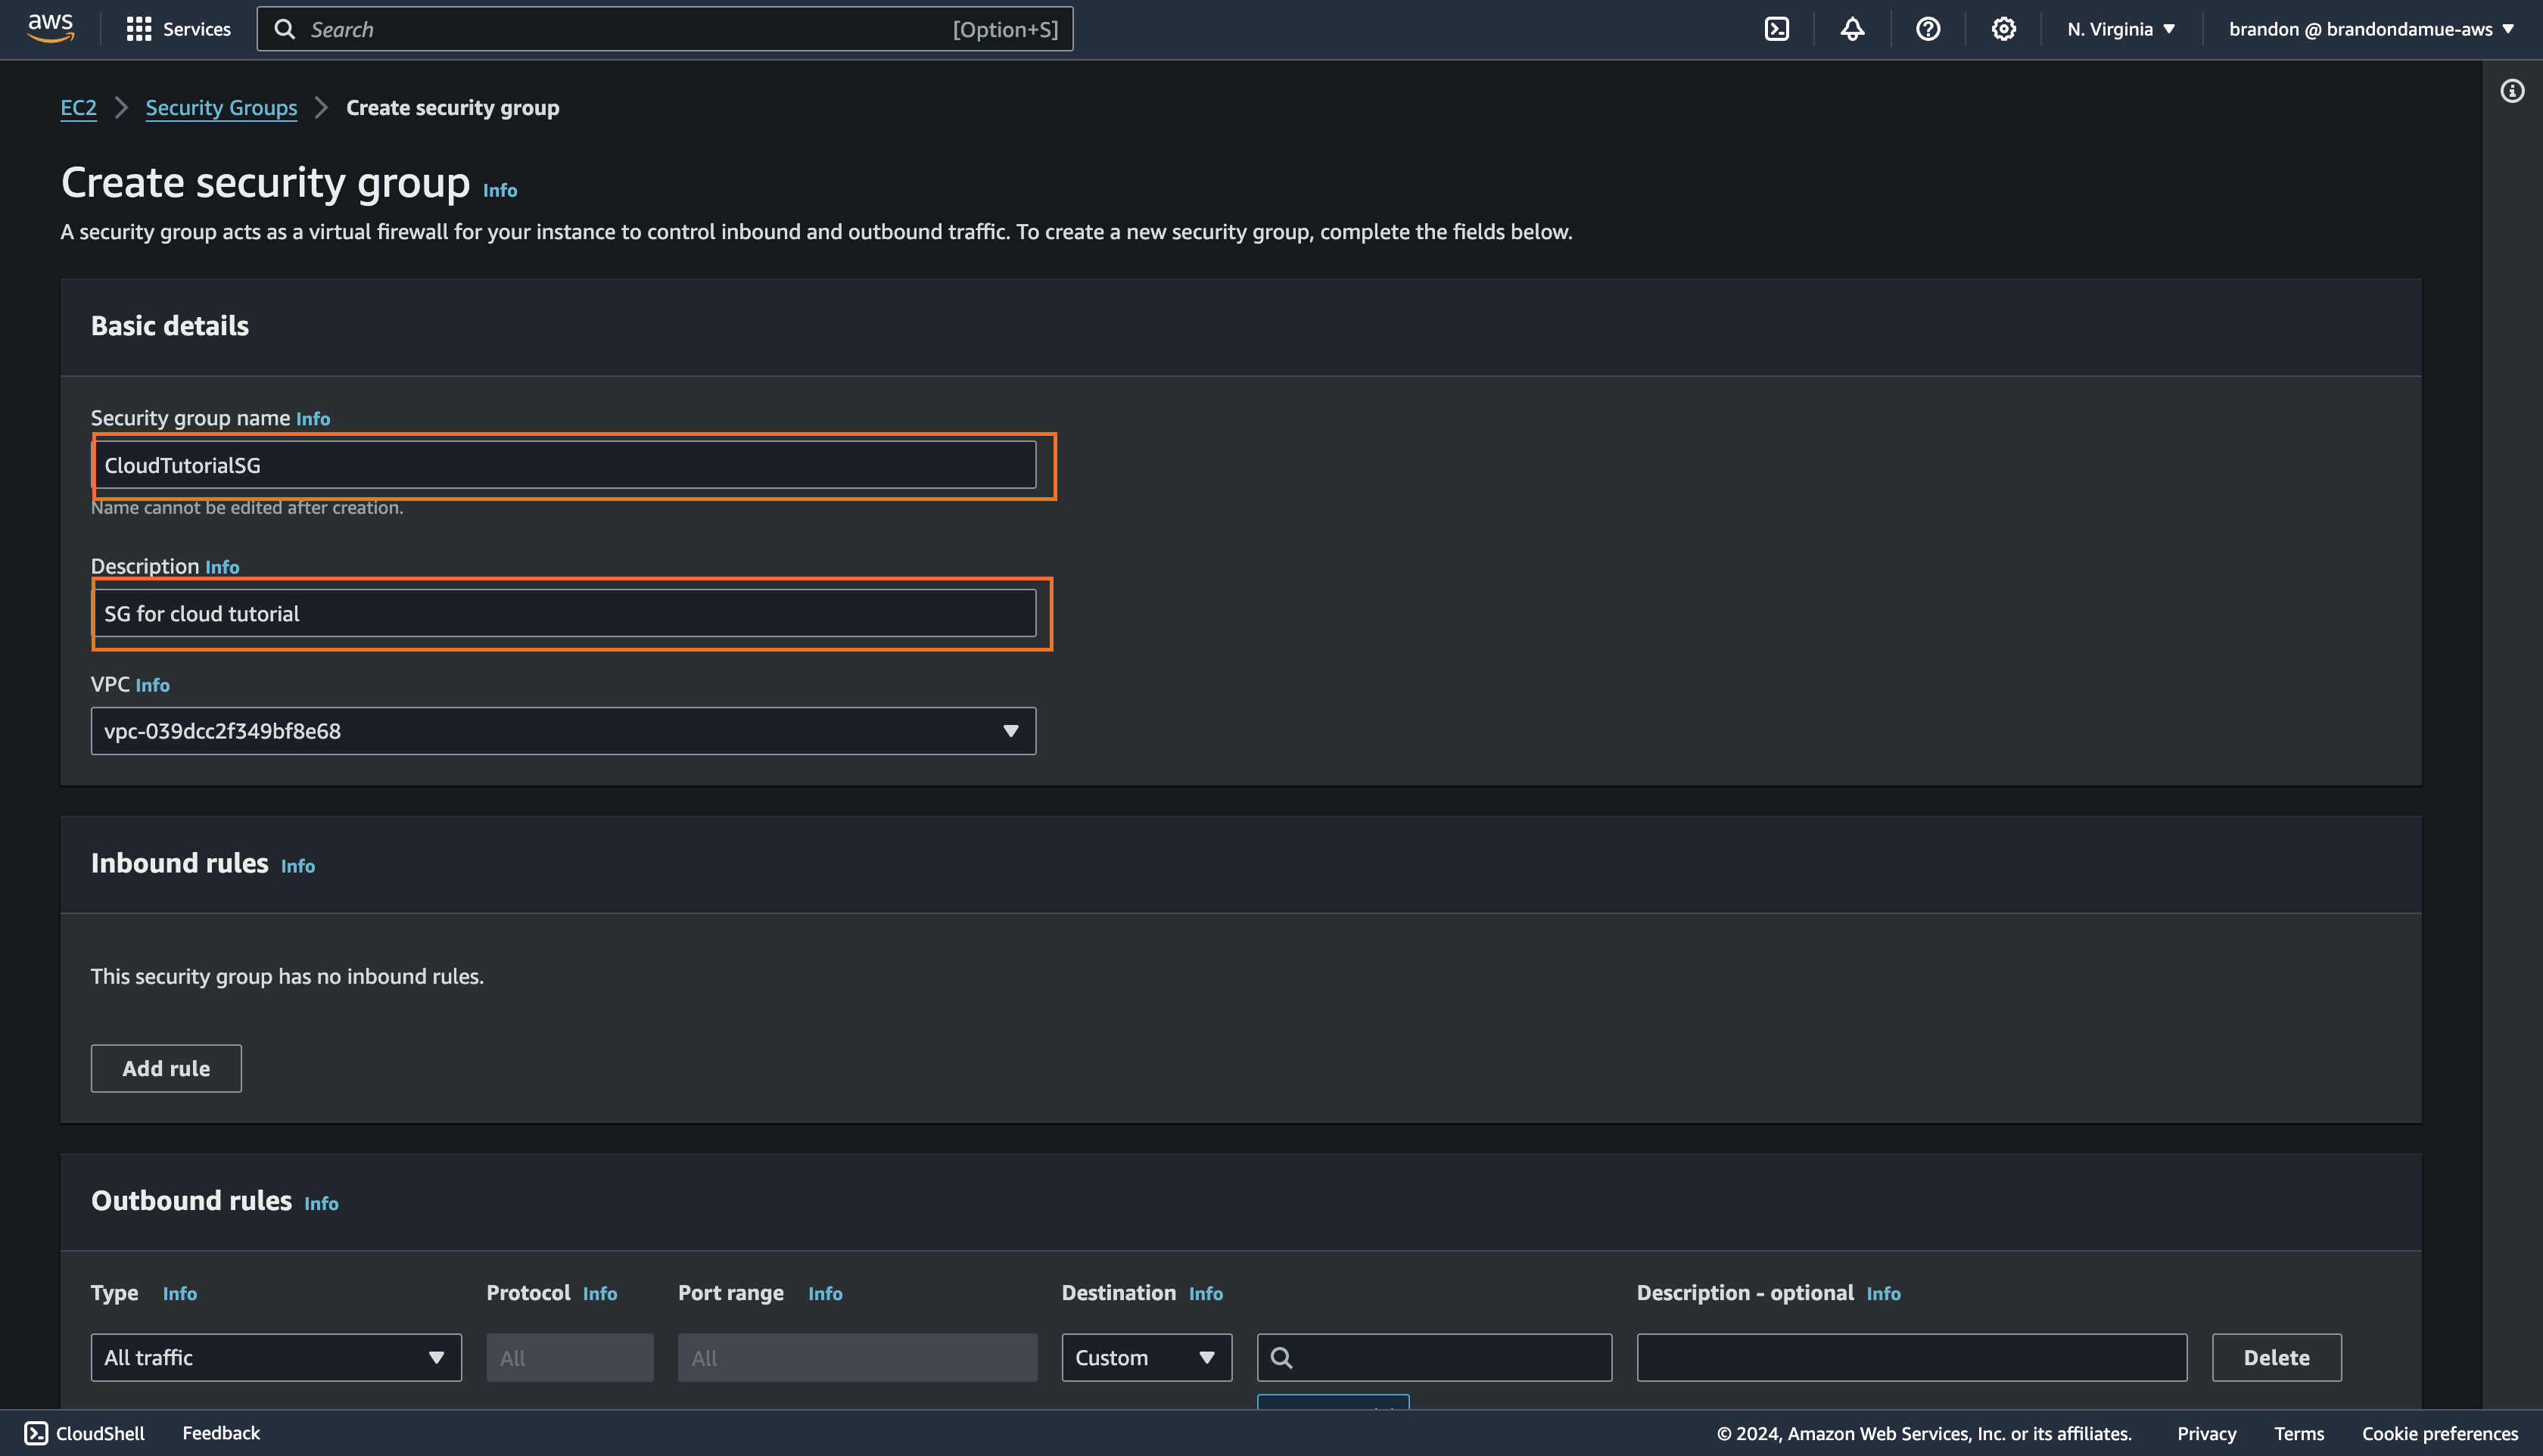
For any details not specified, maintain the default values or selections. After filling those details, click on the Add rule button under the inbound rule section. Inbound rules determine the traffic that is allowed into the EC2 instance that the SG will eventually be tied to.
We are going to create two inbound rules. The first one will allow SSH traffic from the IP address of your computer to the EC2 instances that the Security Group will eventually be tied to. The second rule will allow HTTP traffic from anywhere i.e. from all IP addresses on the internet.
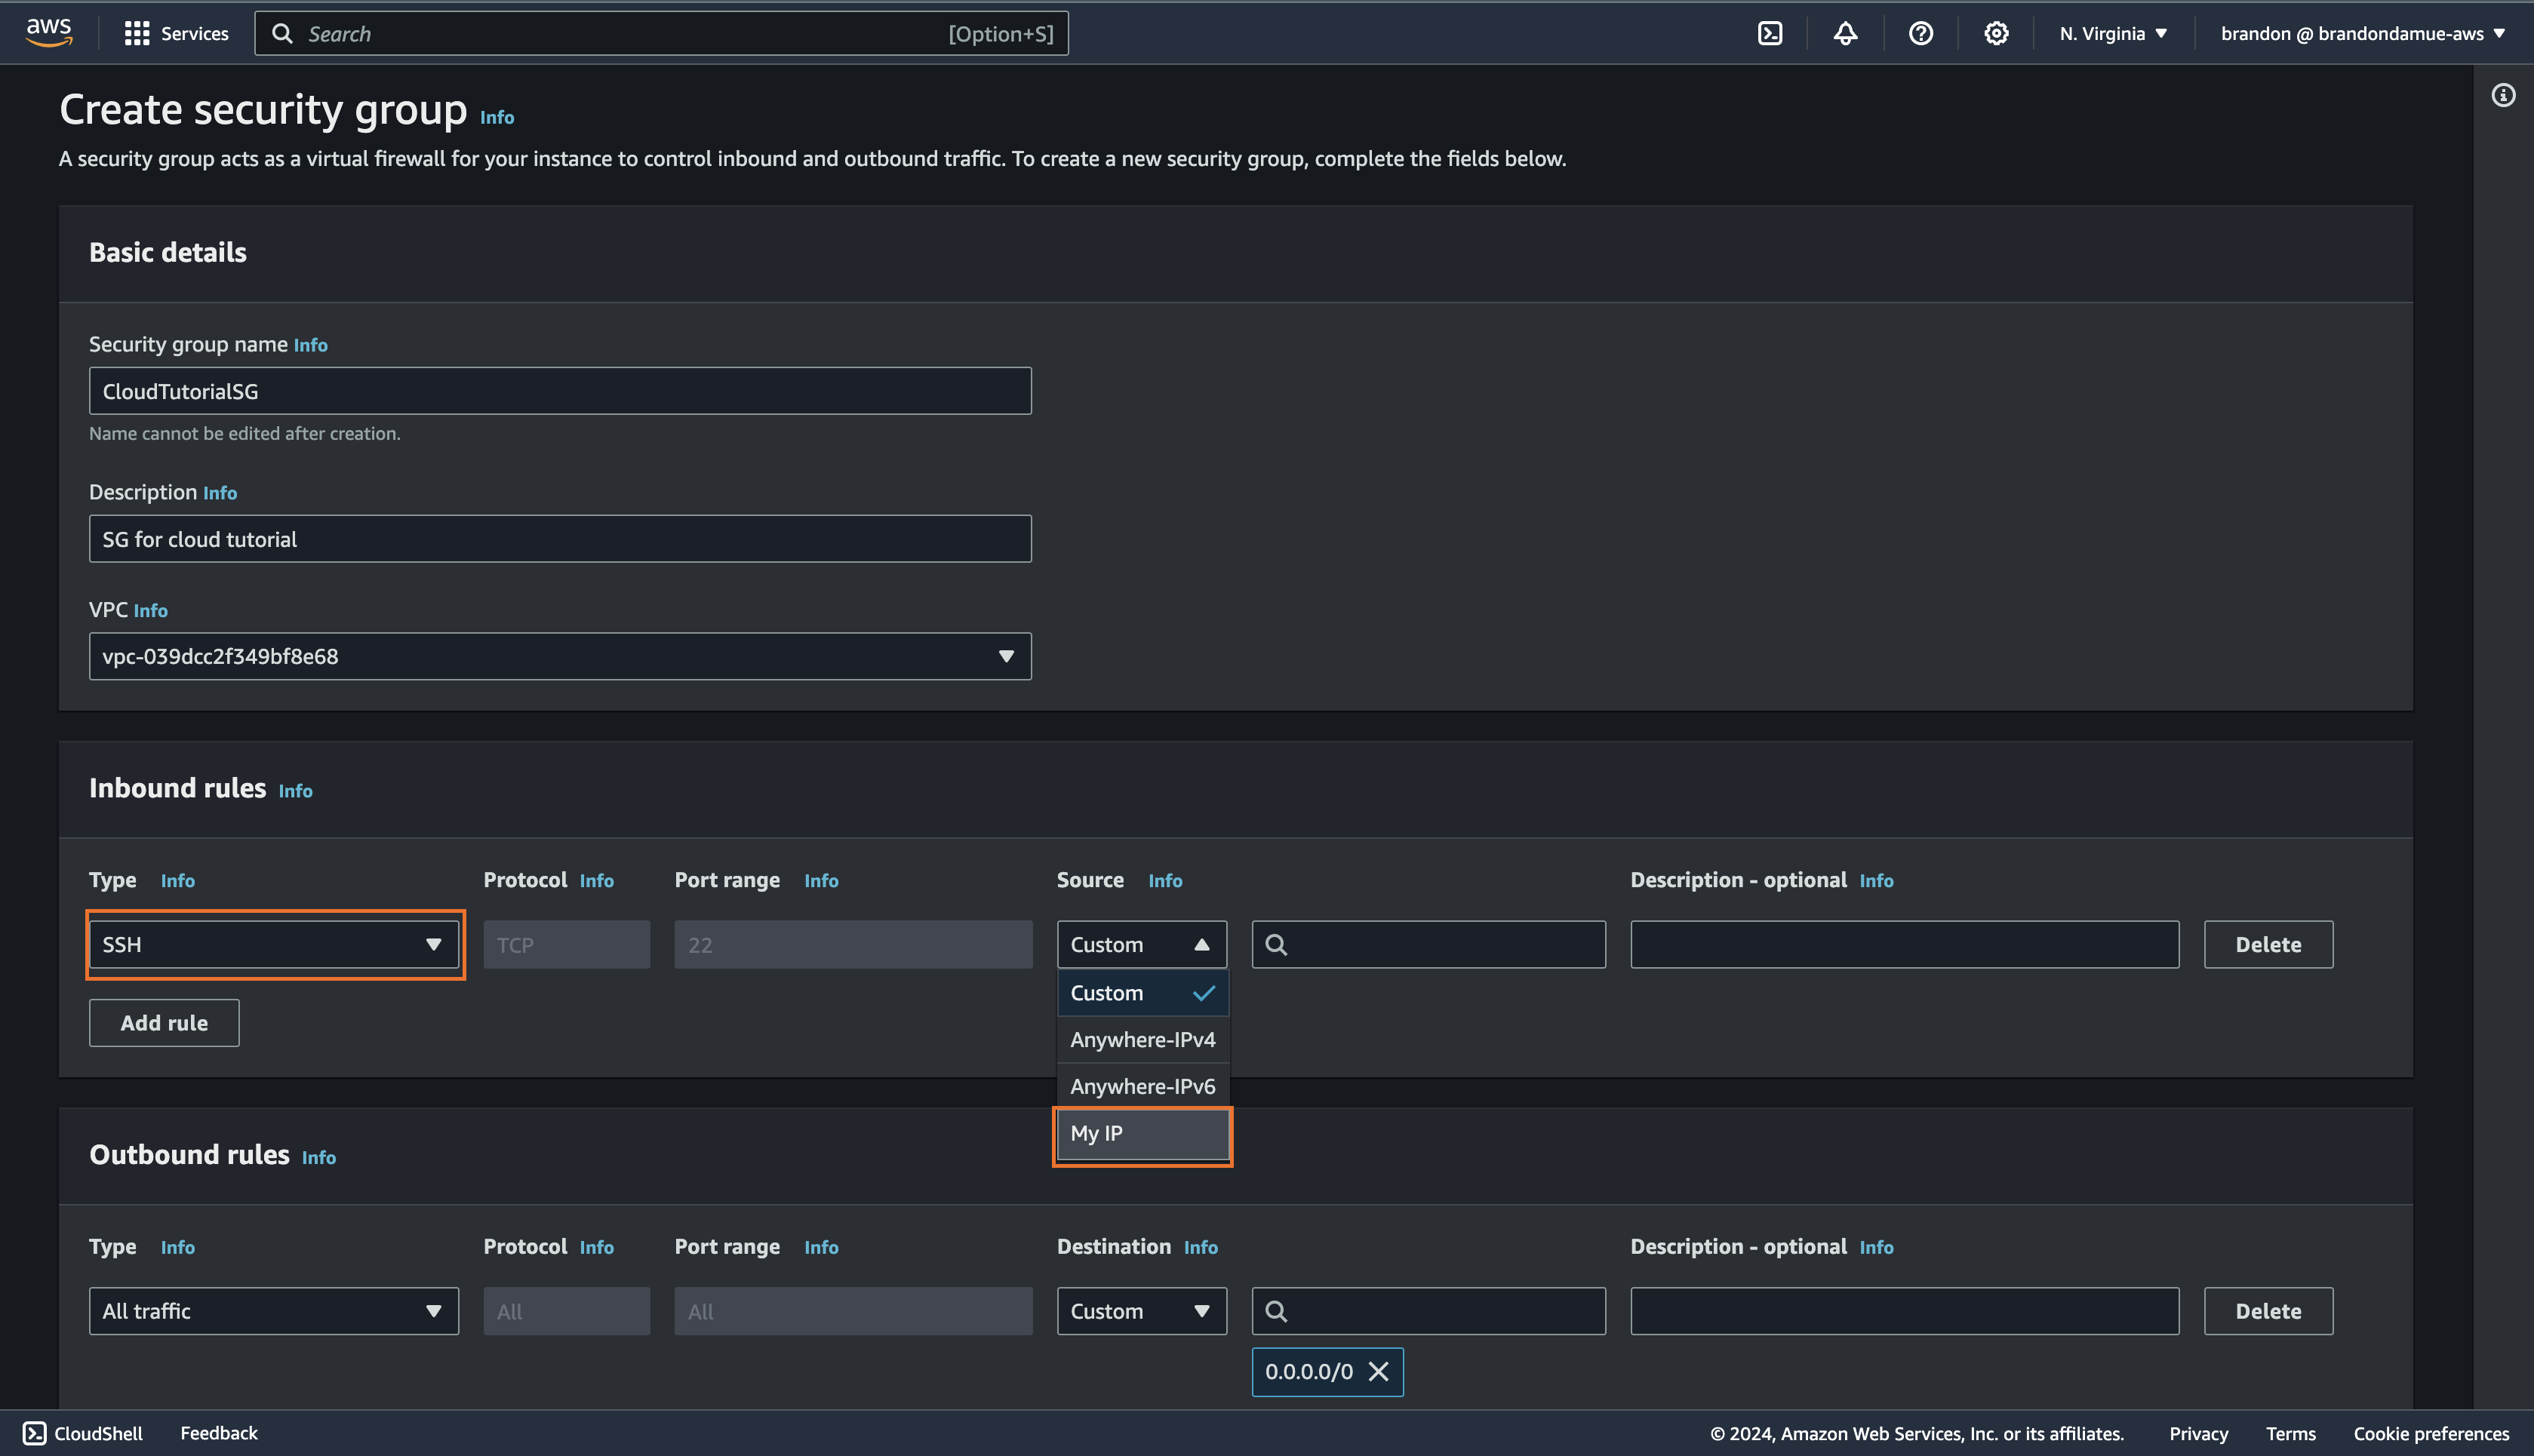
For the first rule, select SSH for the Type field and My IP for the Source field and then click on Add Rule to create the first rule.
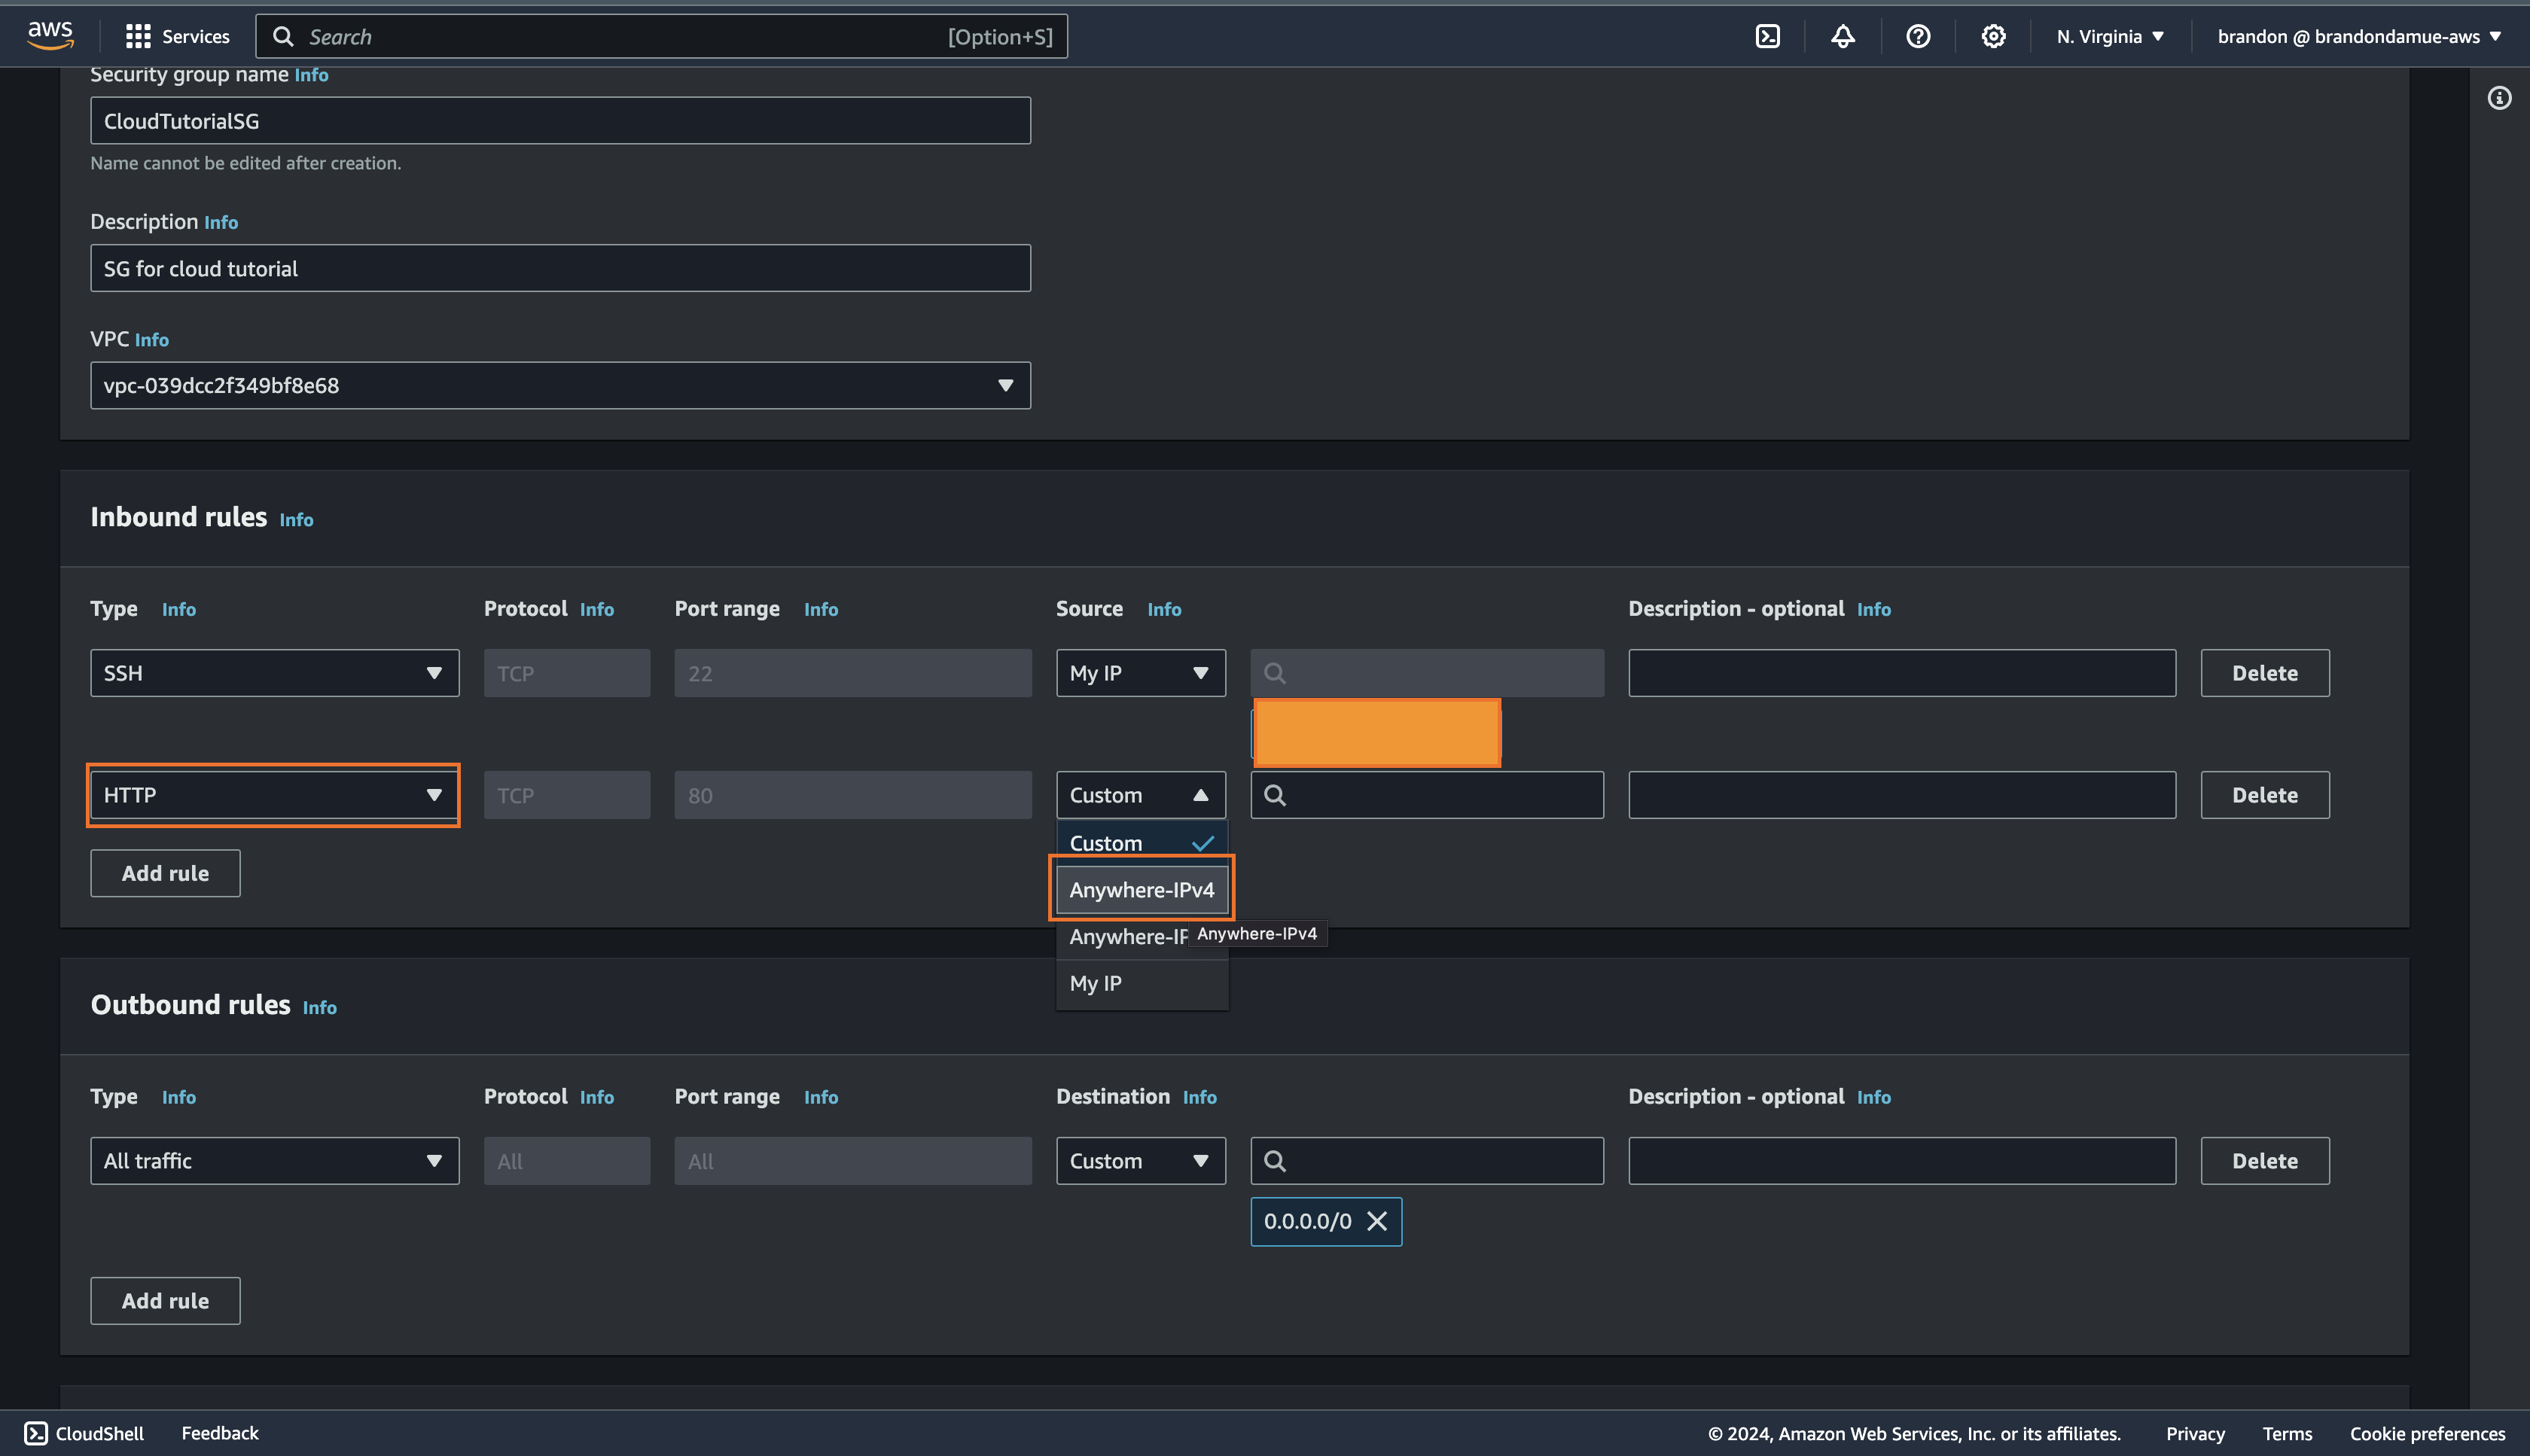
For the second inbound rule, select HTTP for the Type field and Anywhere-IPv4 for the Source field. Once this is done, scroll to the bottom of the page and click on the Create Security Group button.
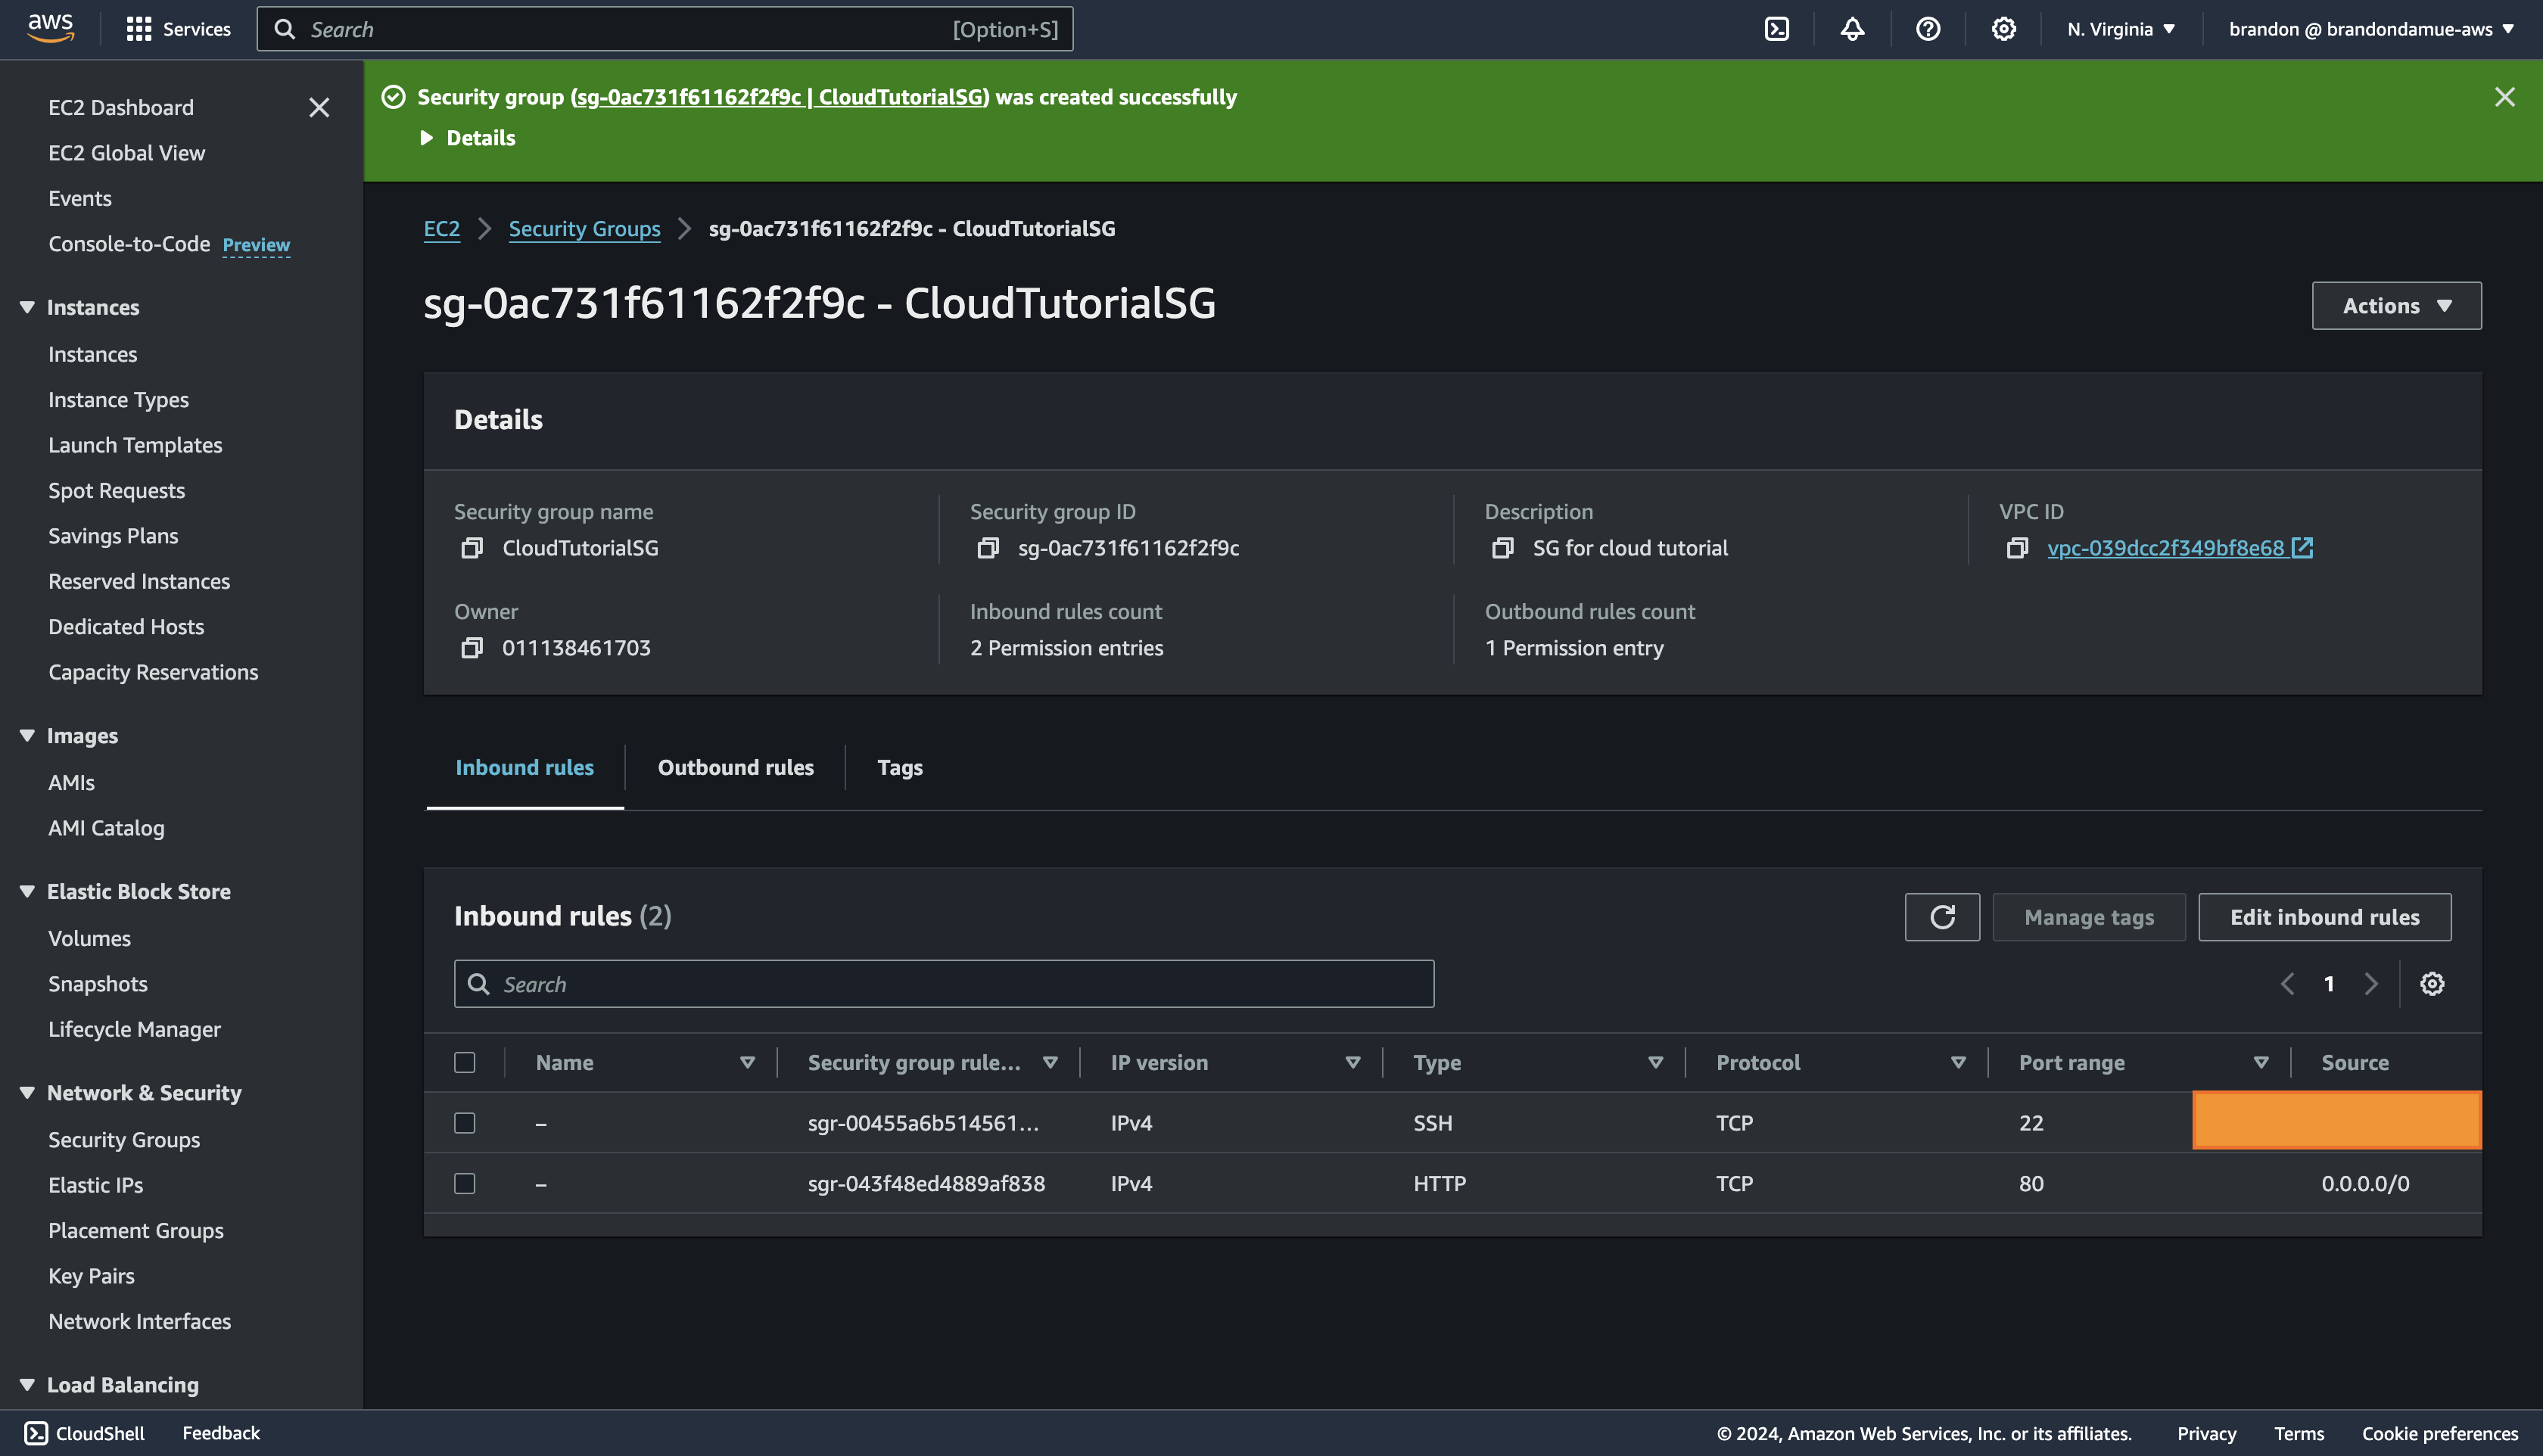
And voila we have successfully created a security group. 🎉🎉🎉
Step 3: Creating A NACL
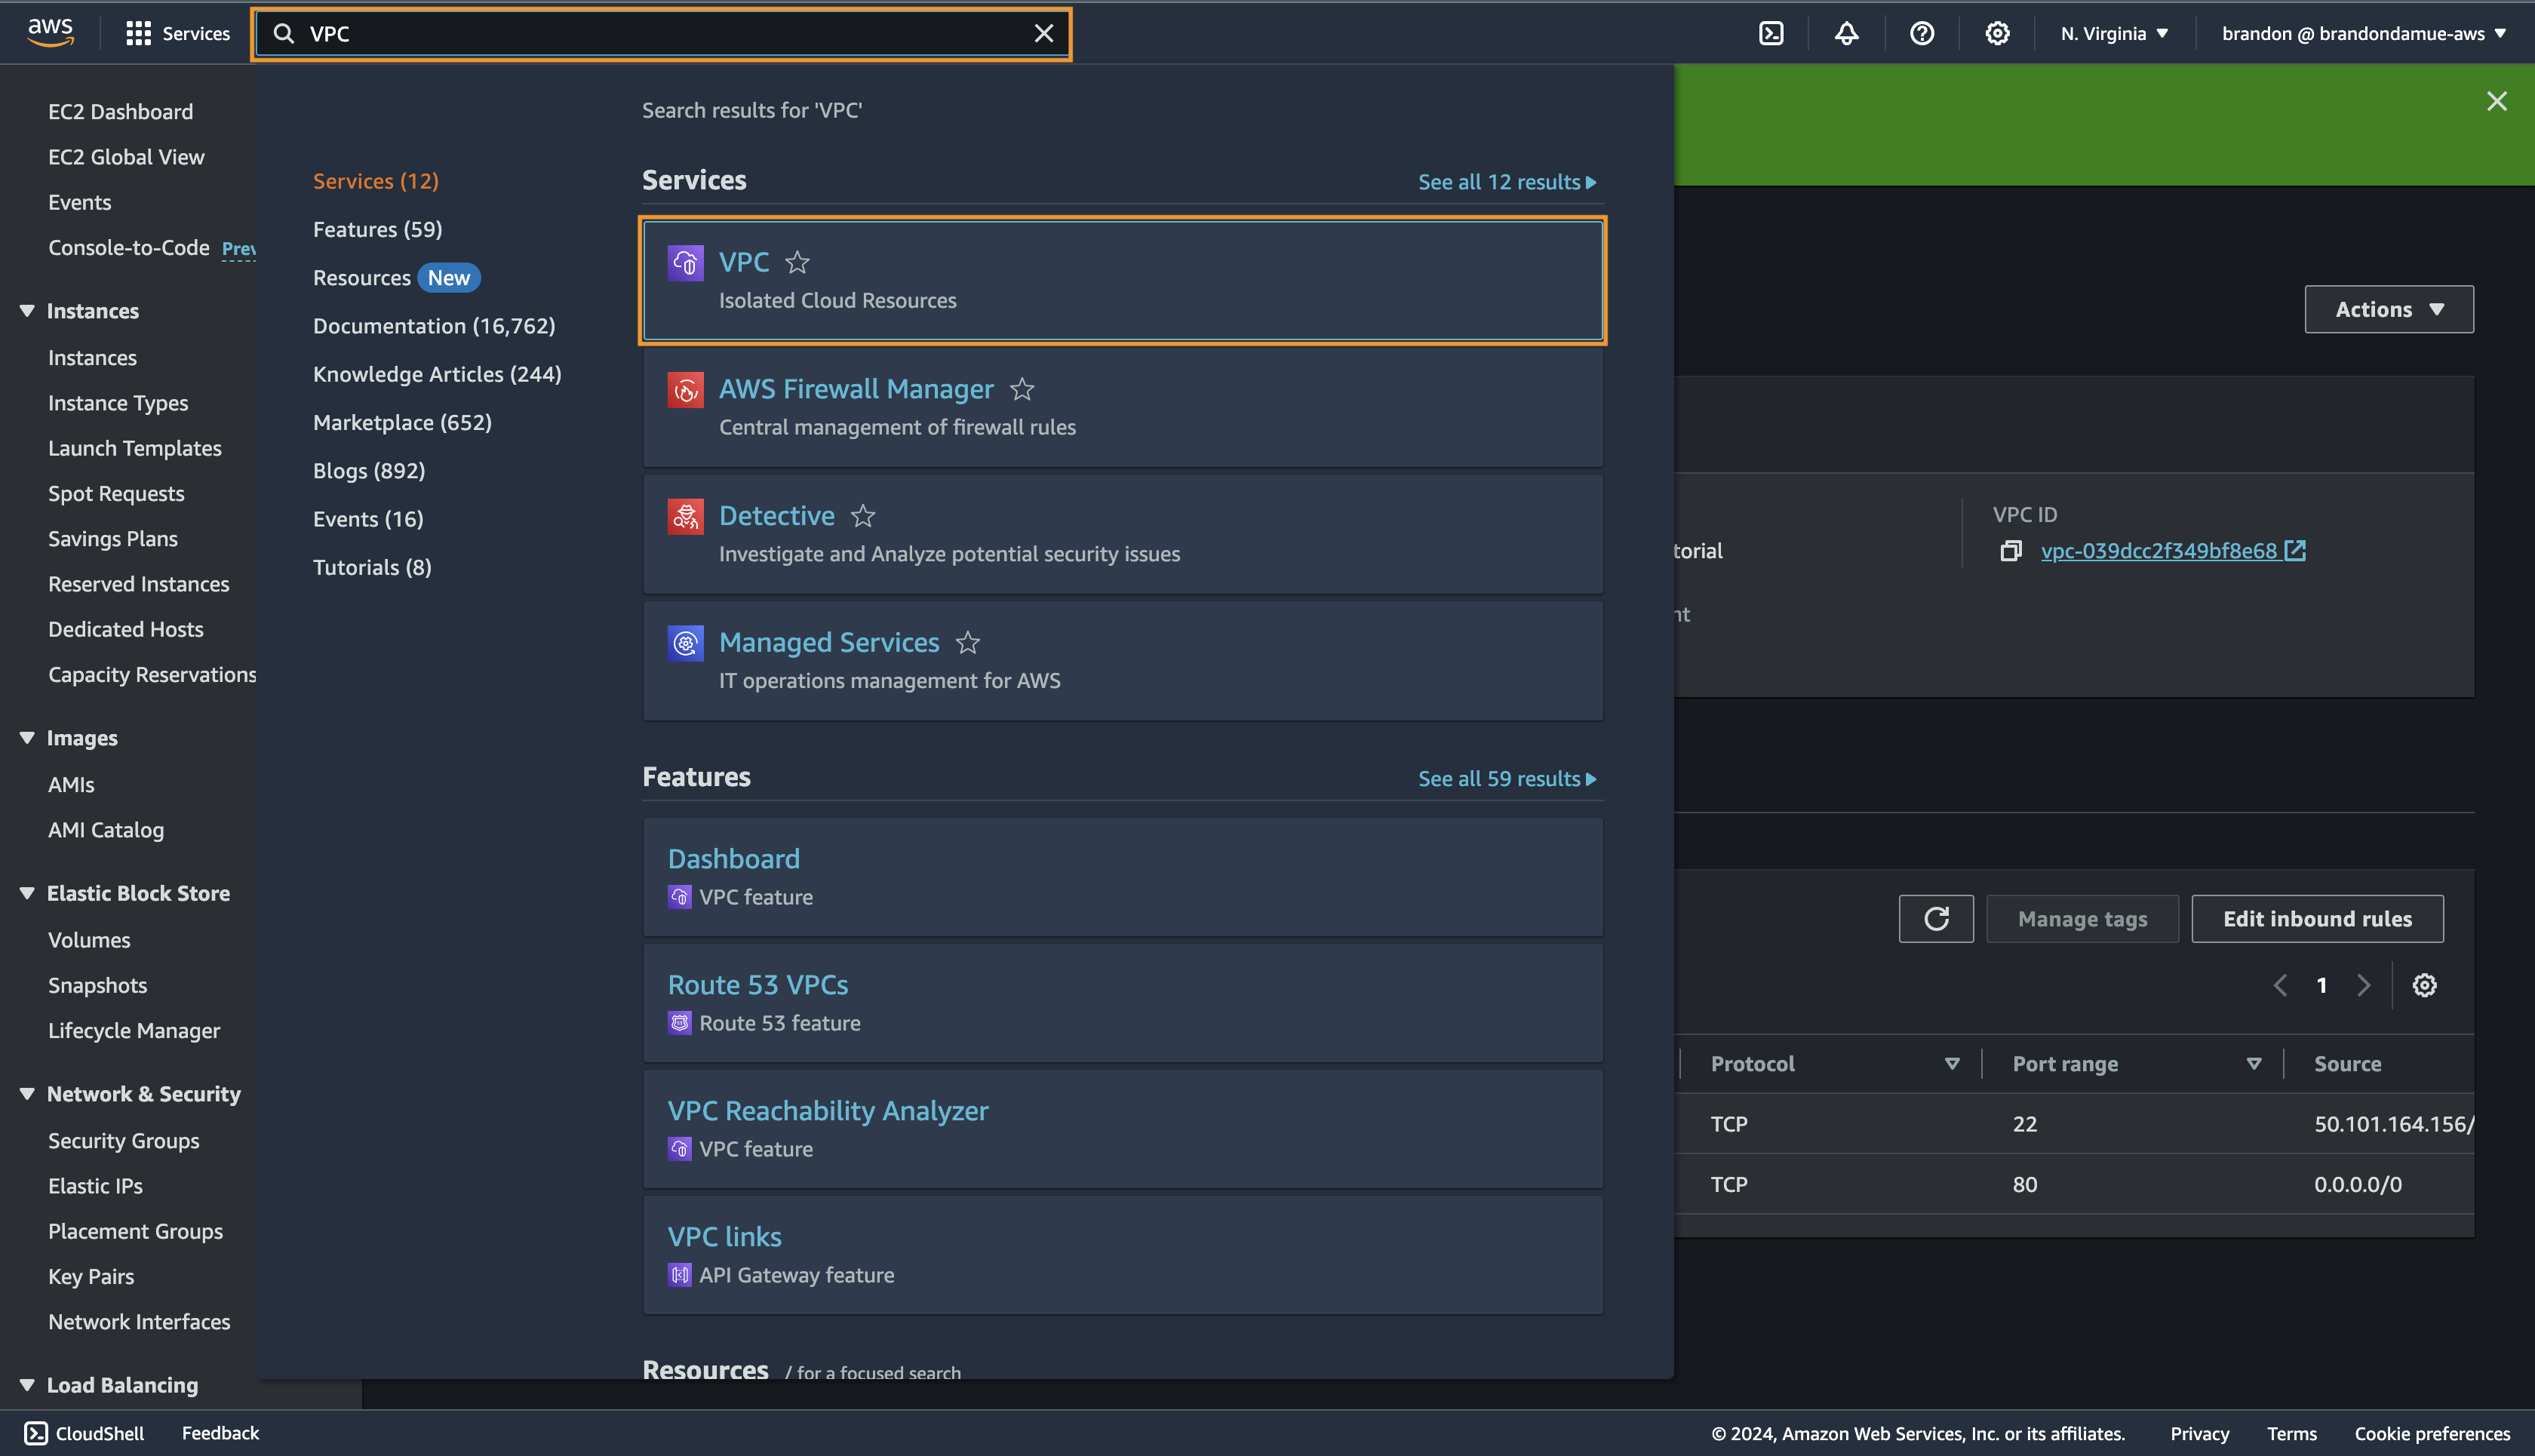
In the search bar at the top of the management console, type VPC and then click the first search result that appears.
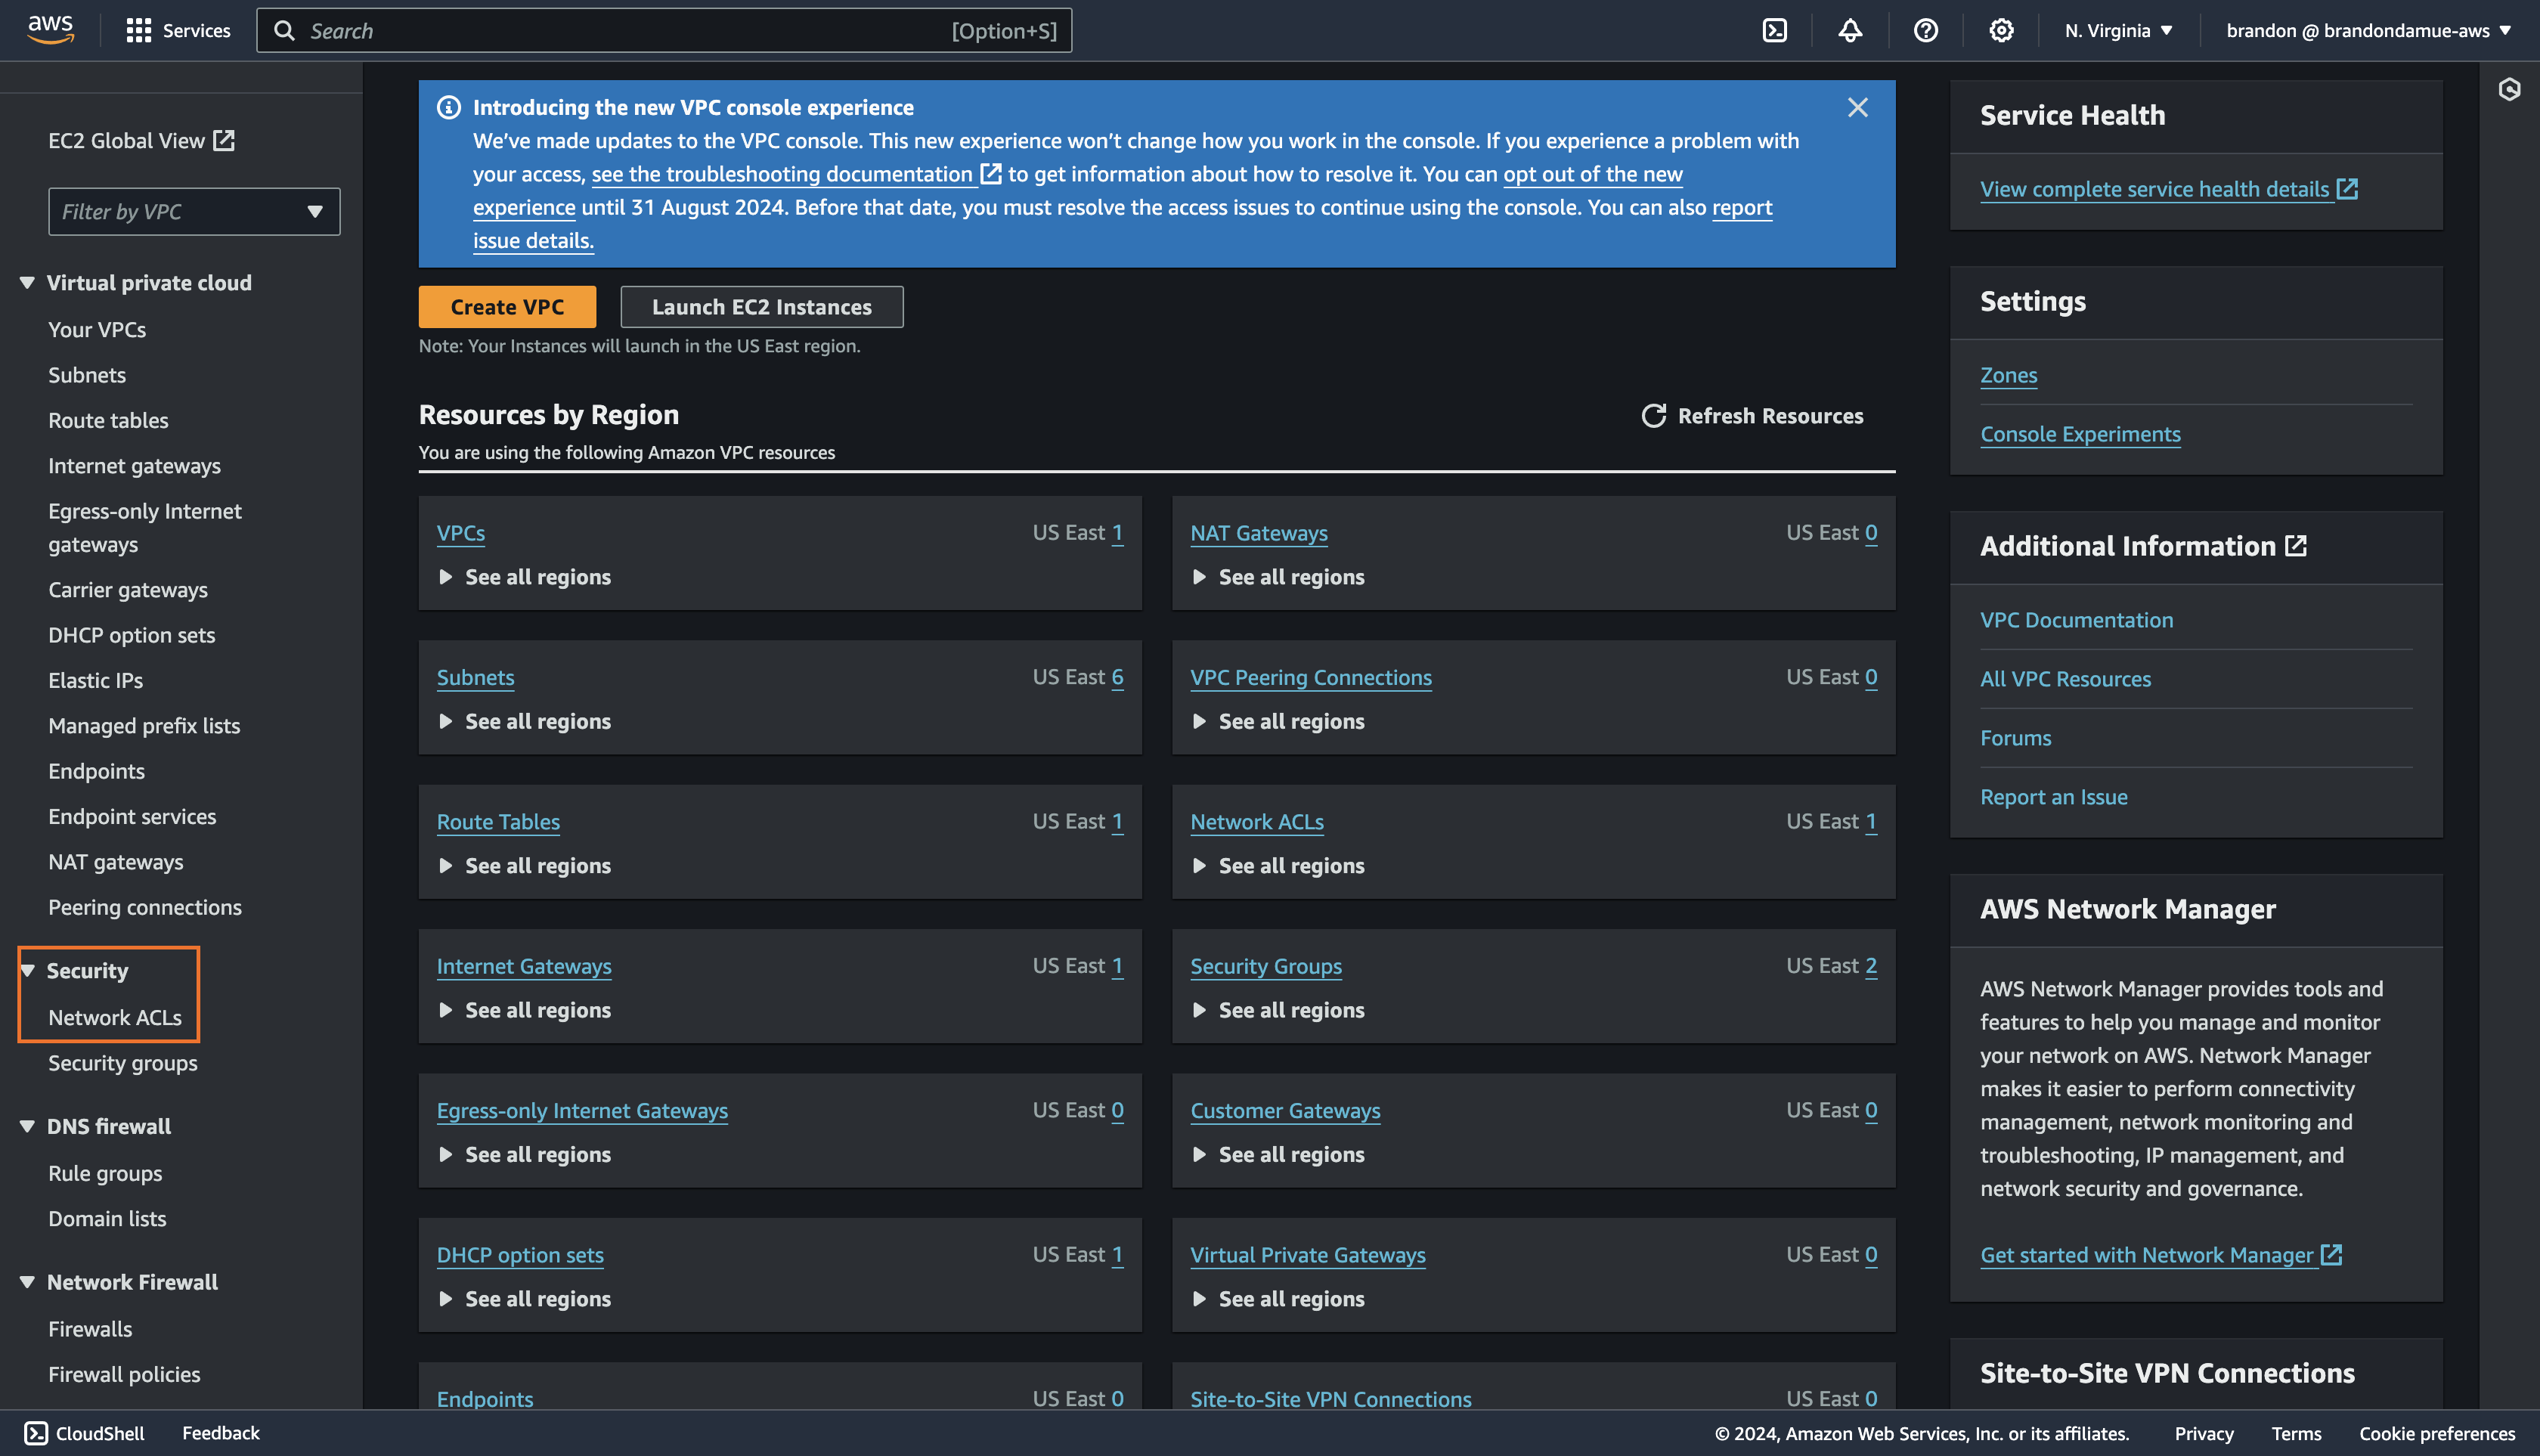
Click on Network ACLs under Security in the left sidebar and click on the Create network ACL on the new page that appears, fill in the following details and then click the Create Network ACL button
Name - optional: CloudTutorialNACL
VPC: Select the default VPC (this is the only option available because we haven't created a VPC of our own)
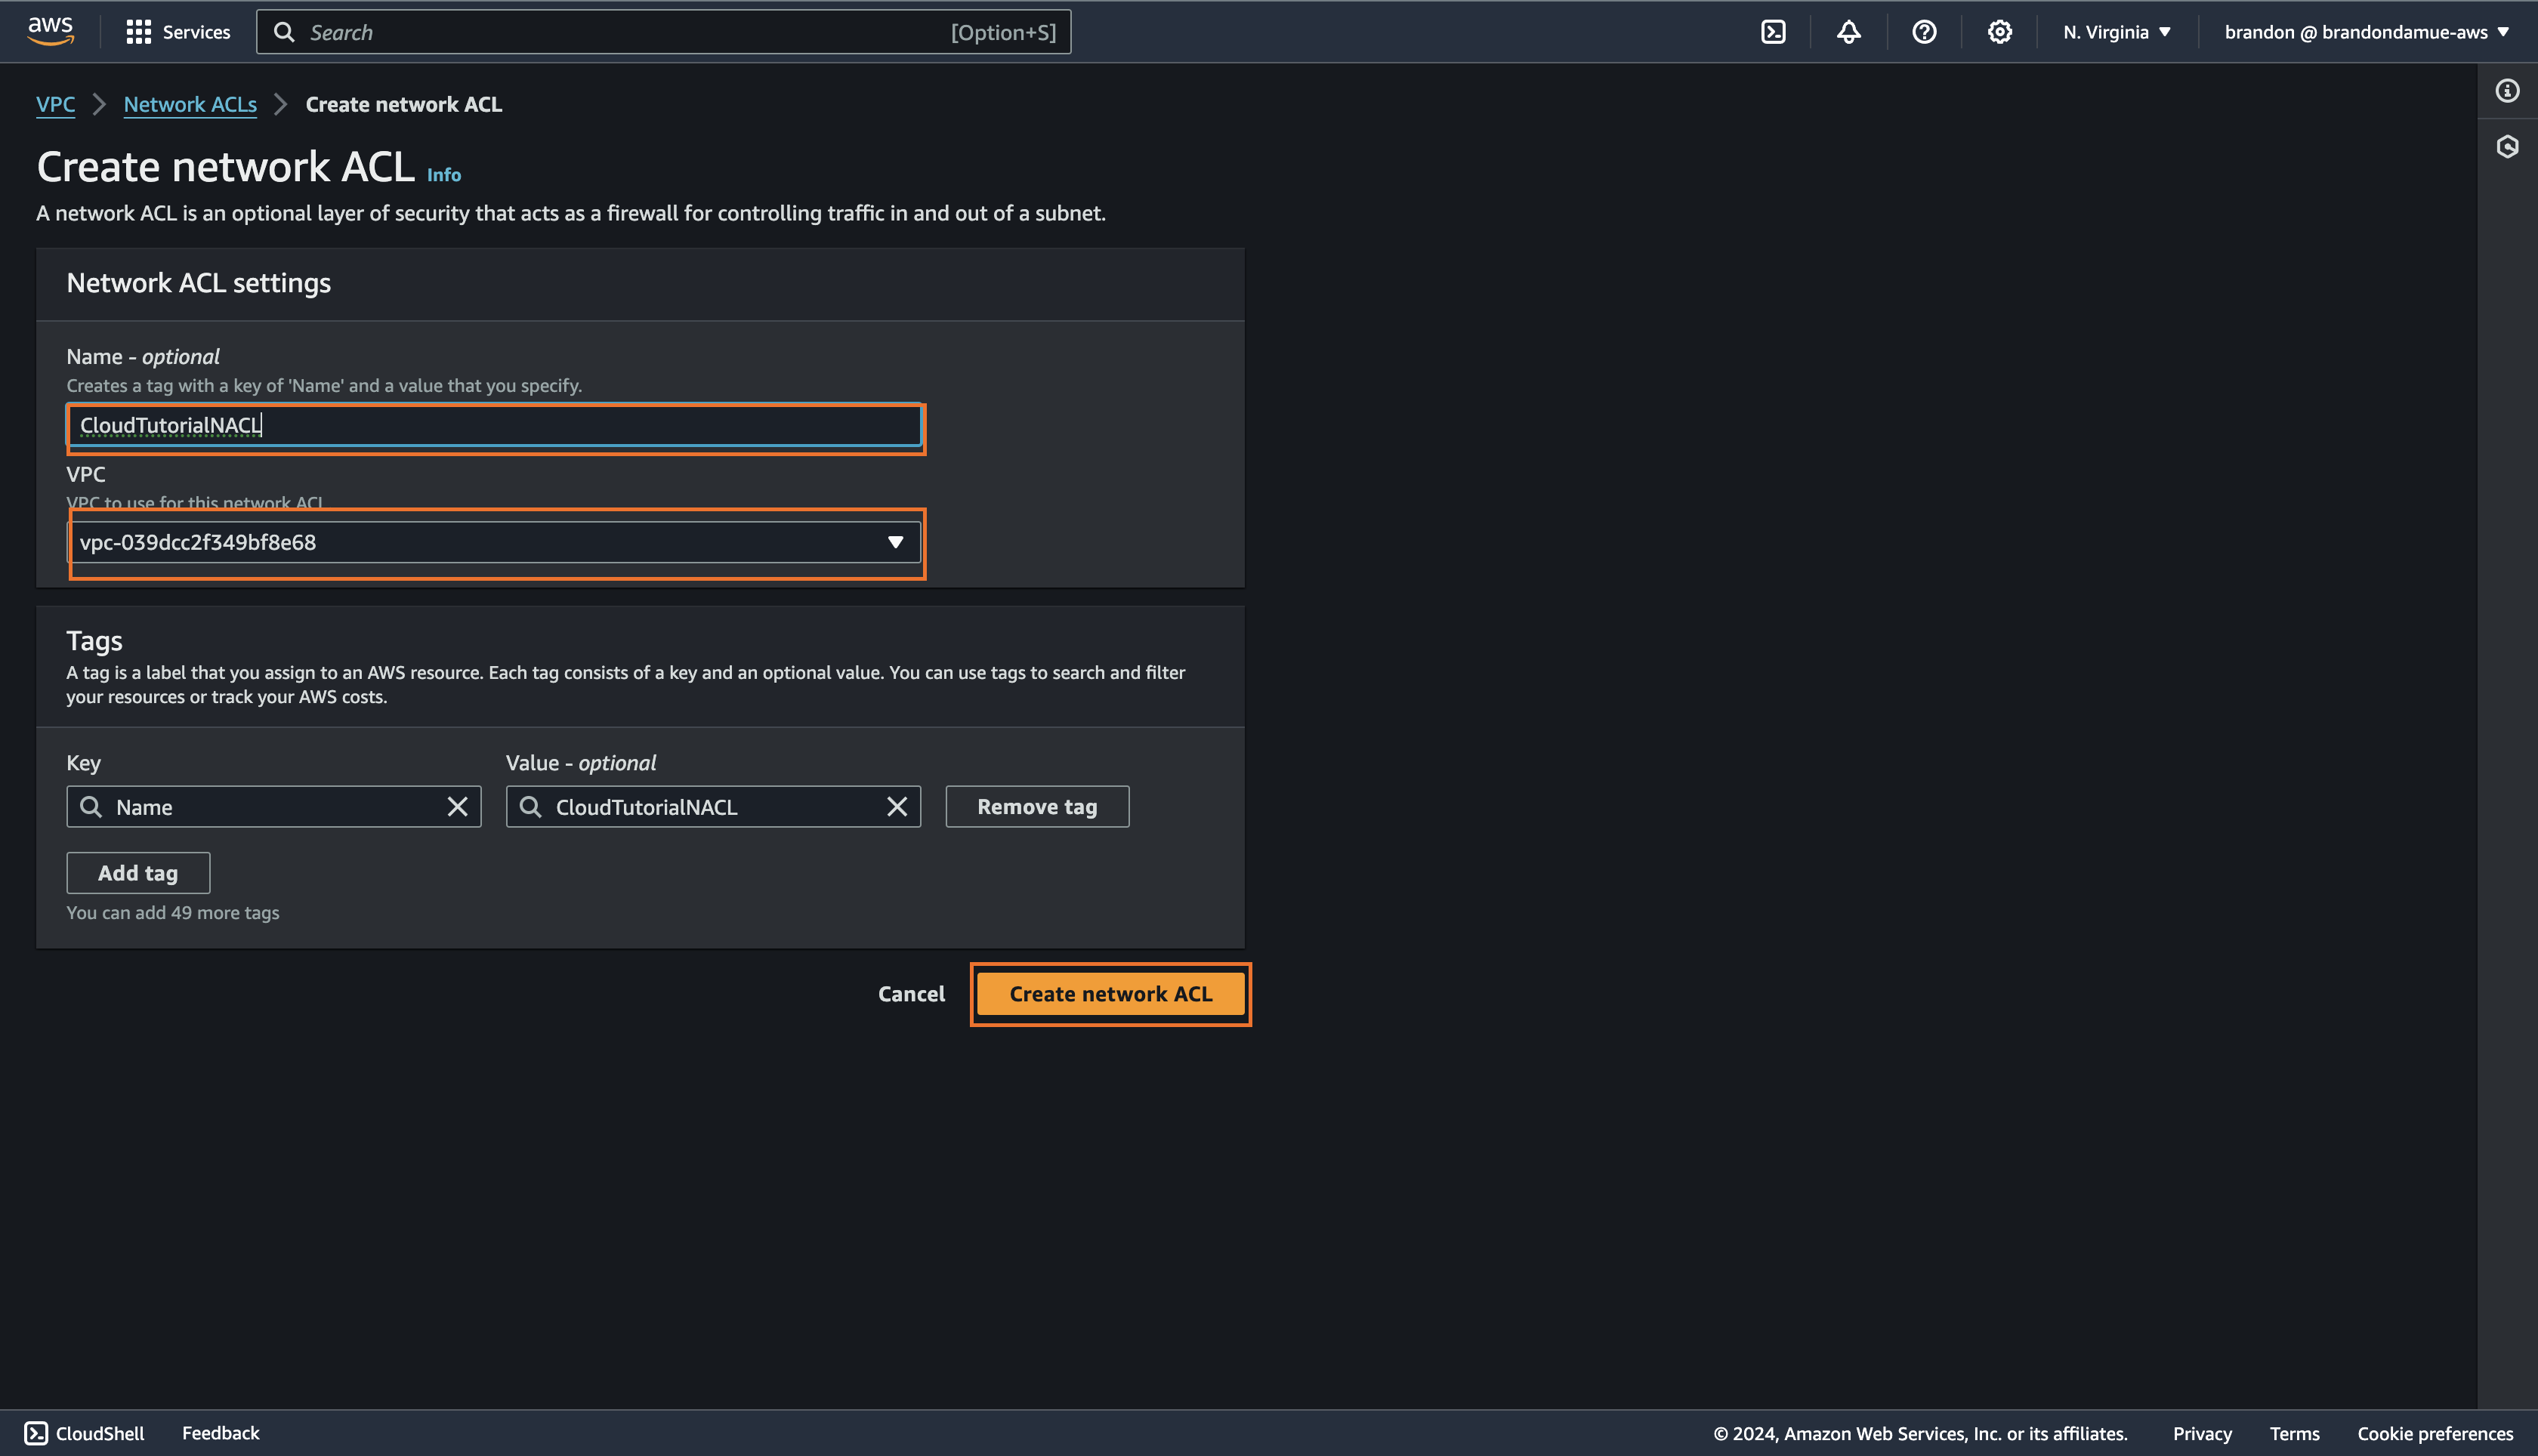
With that, you have created a NACL. We will go on to add an inbound rule and an outbound rule to this NACL. The inbound rule will allow SSH traffic from your computer's IP address and the outbound rule will allow HTTP traffic to the internet.
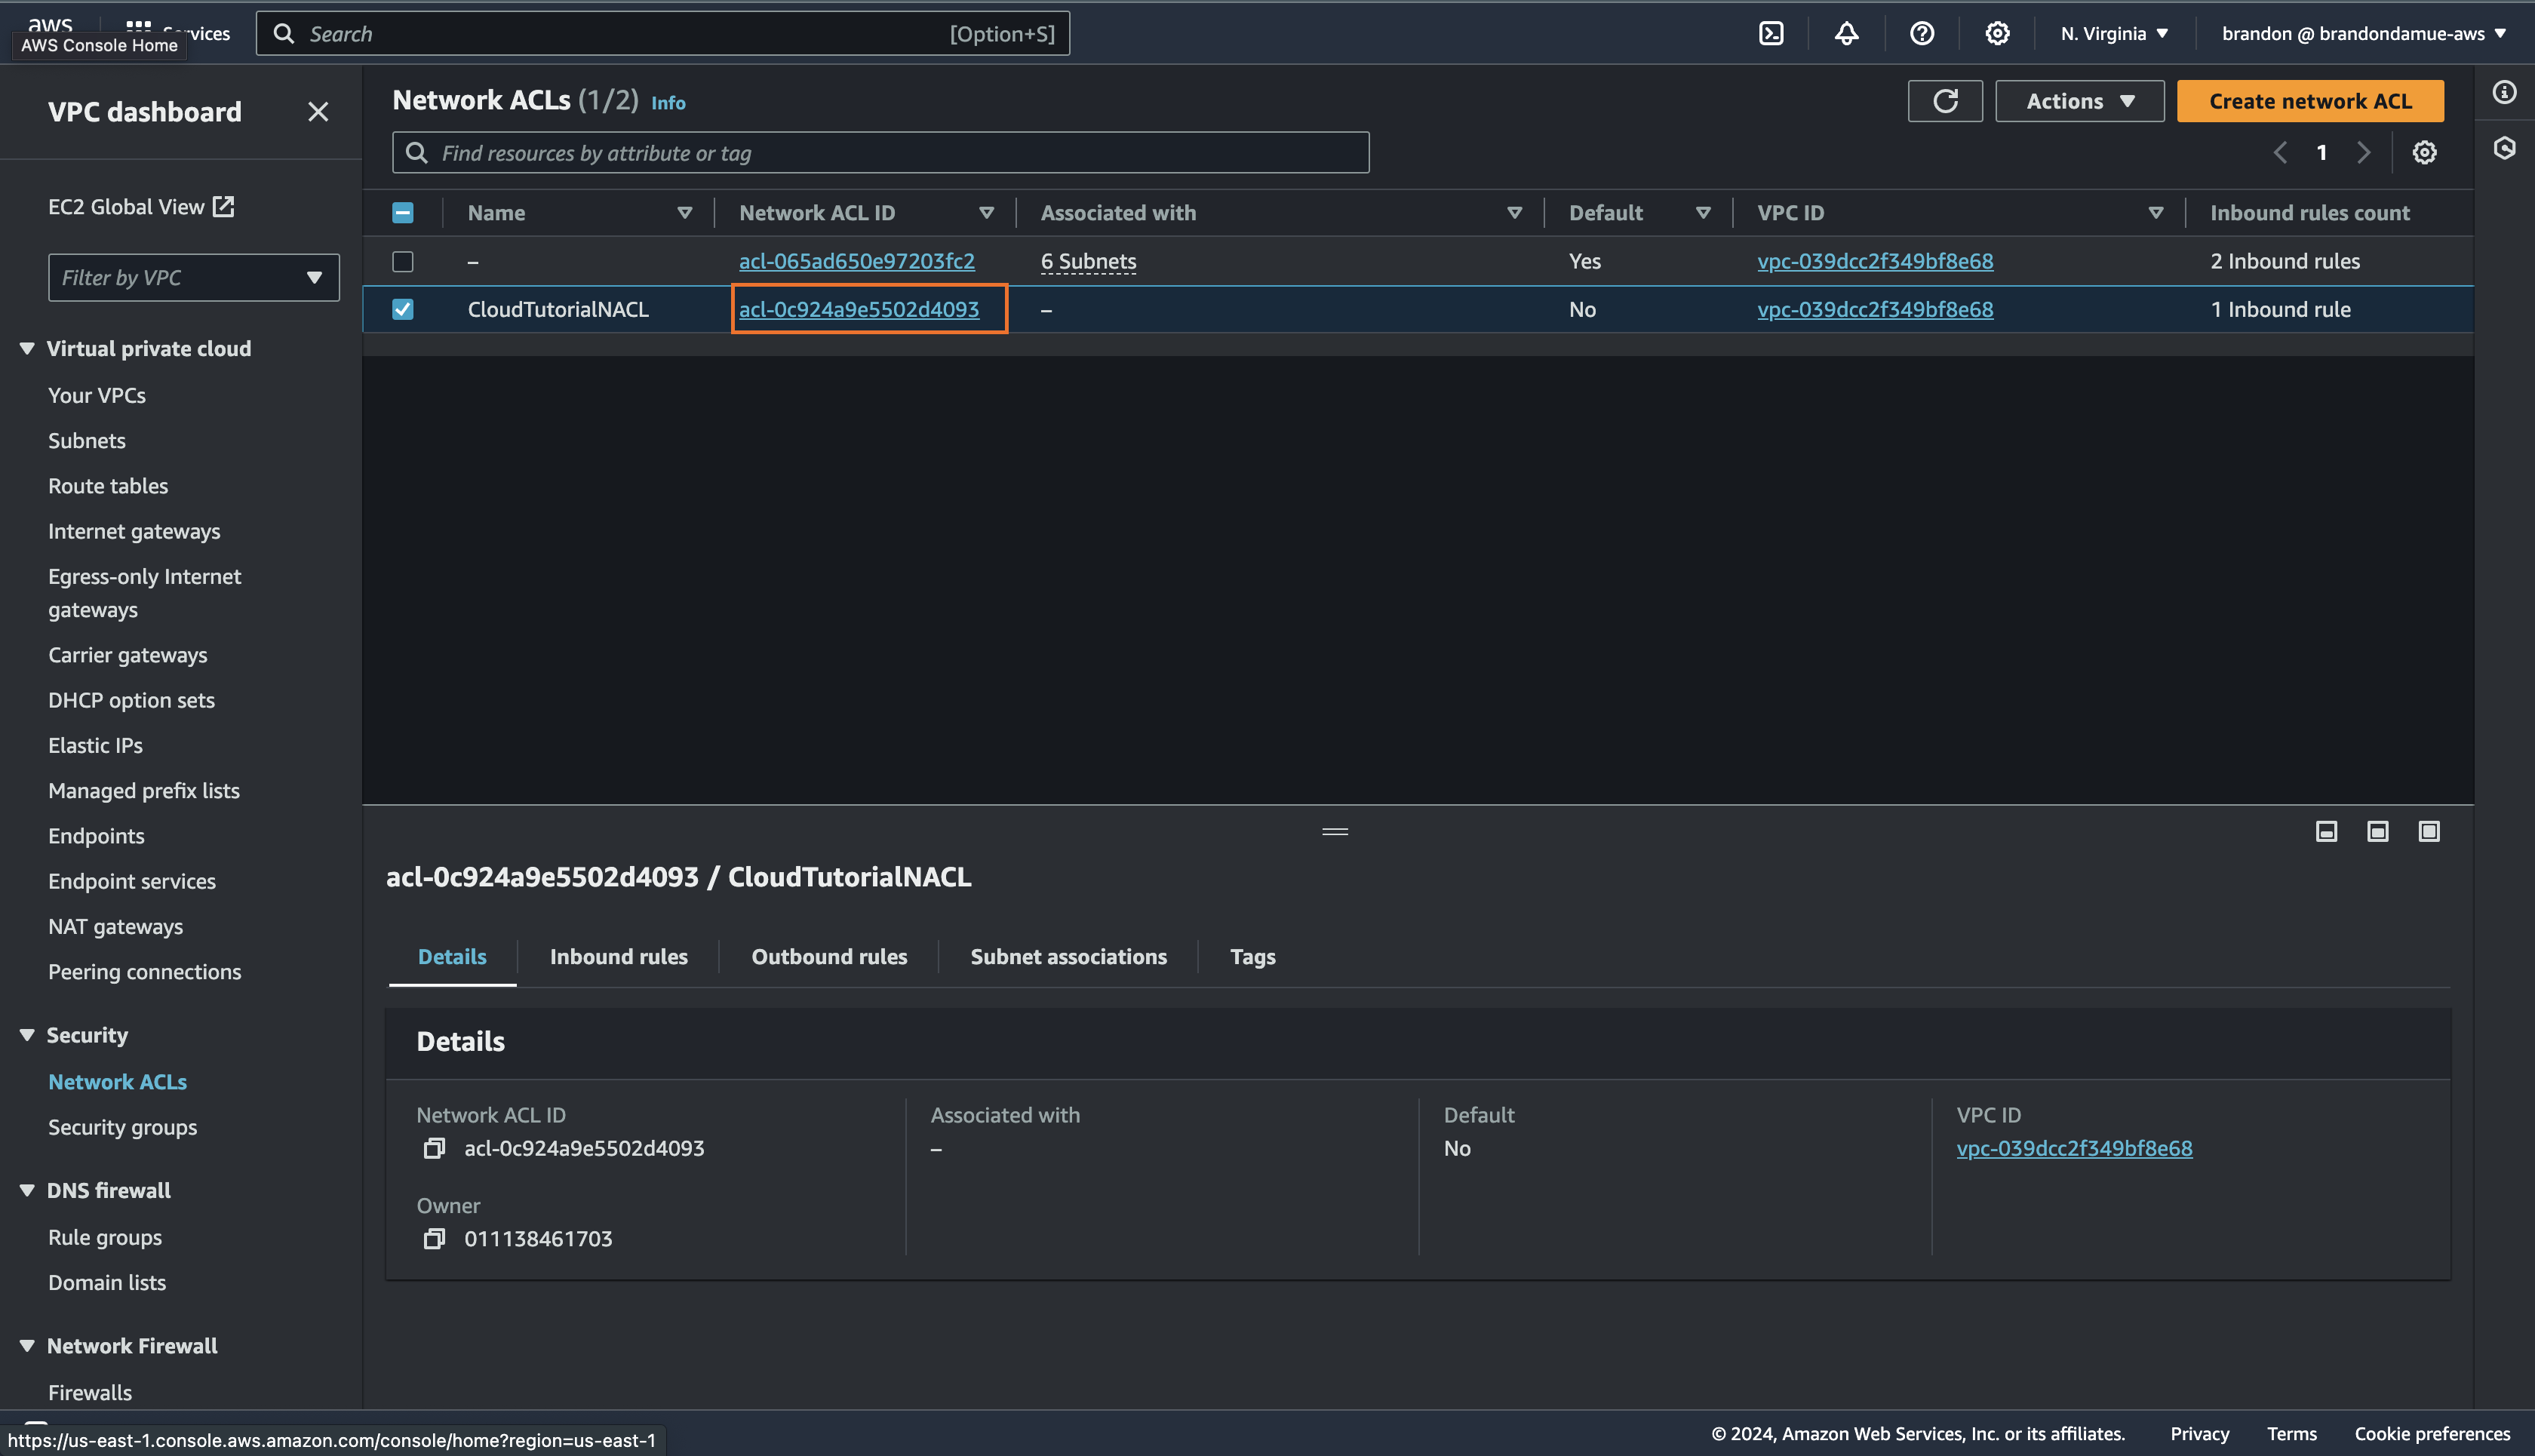
From the list of NACLs click on the NACL ID of the NACL we just created and in the inbound rule tab click on the Edit inbound rule button and click on Add New Rule.
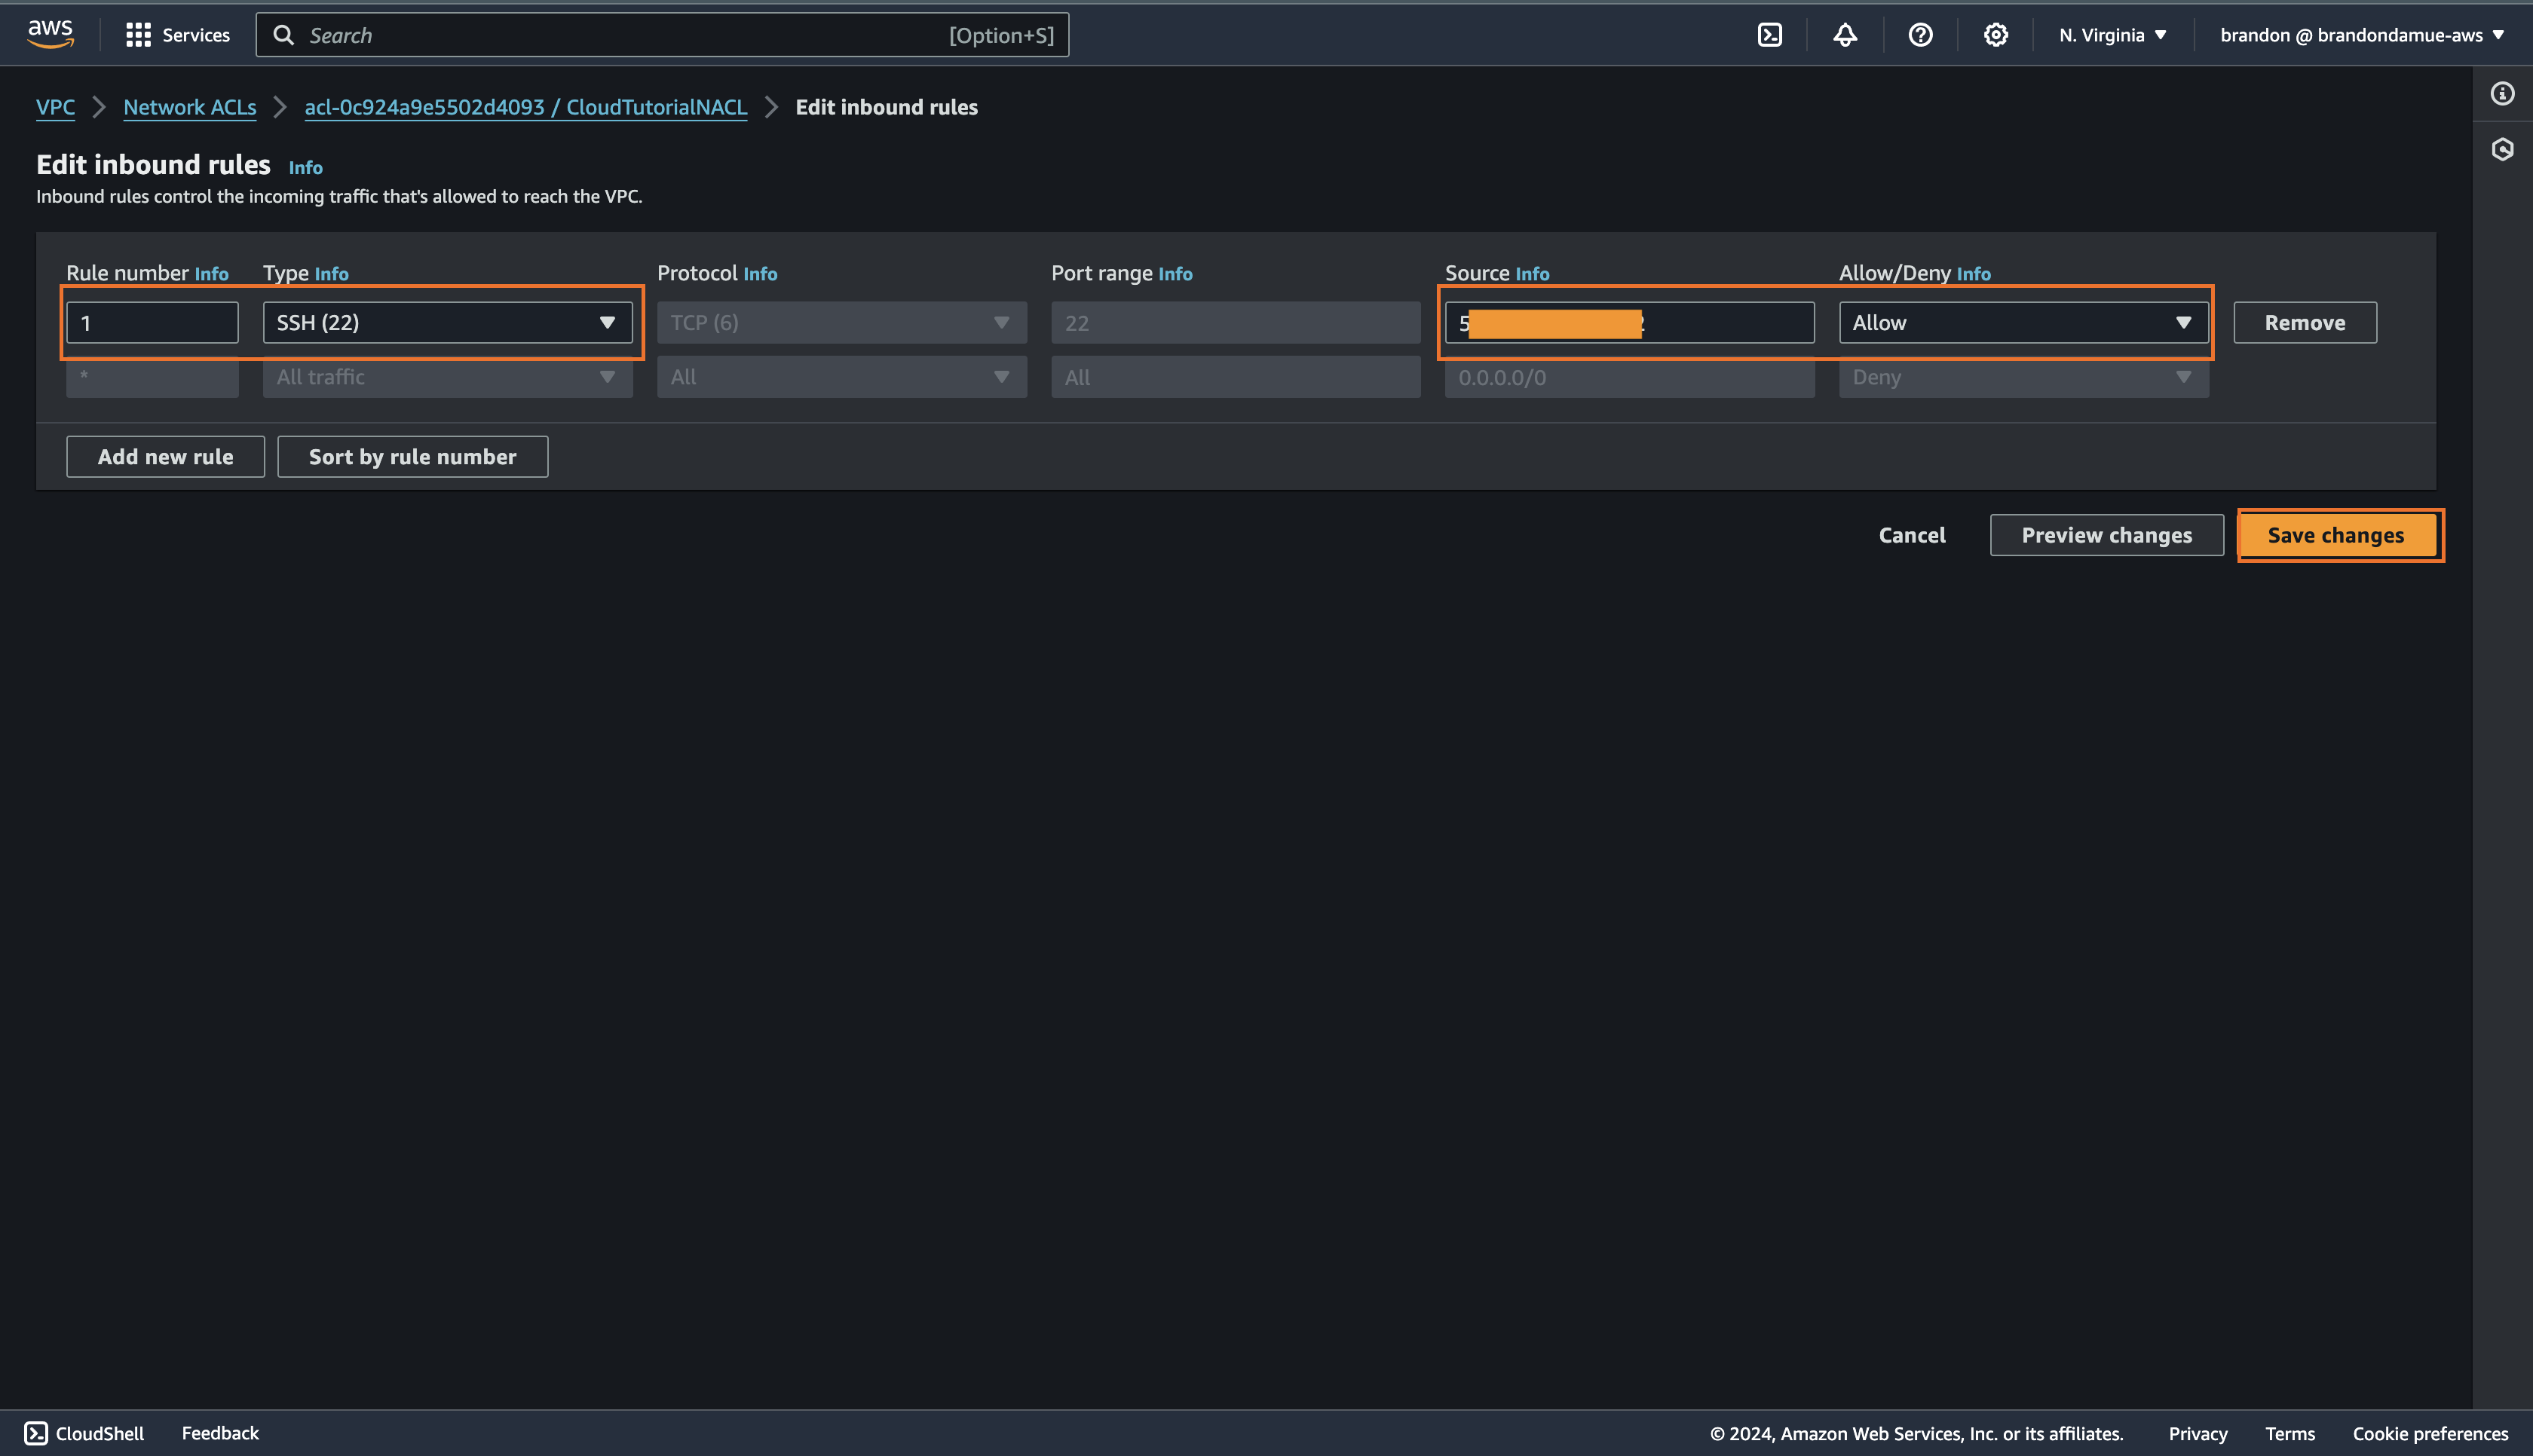
Fill in the details as shown below. Go to this link to copy your computer's IP address. Paste this address in the Source field and add /32 to it. When you have filled in all the details, click on Save Changes.
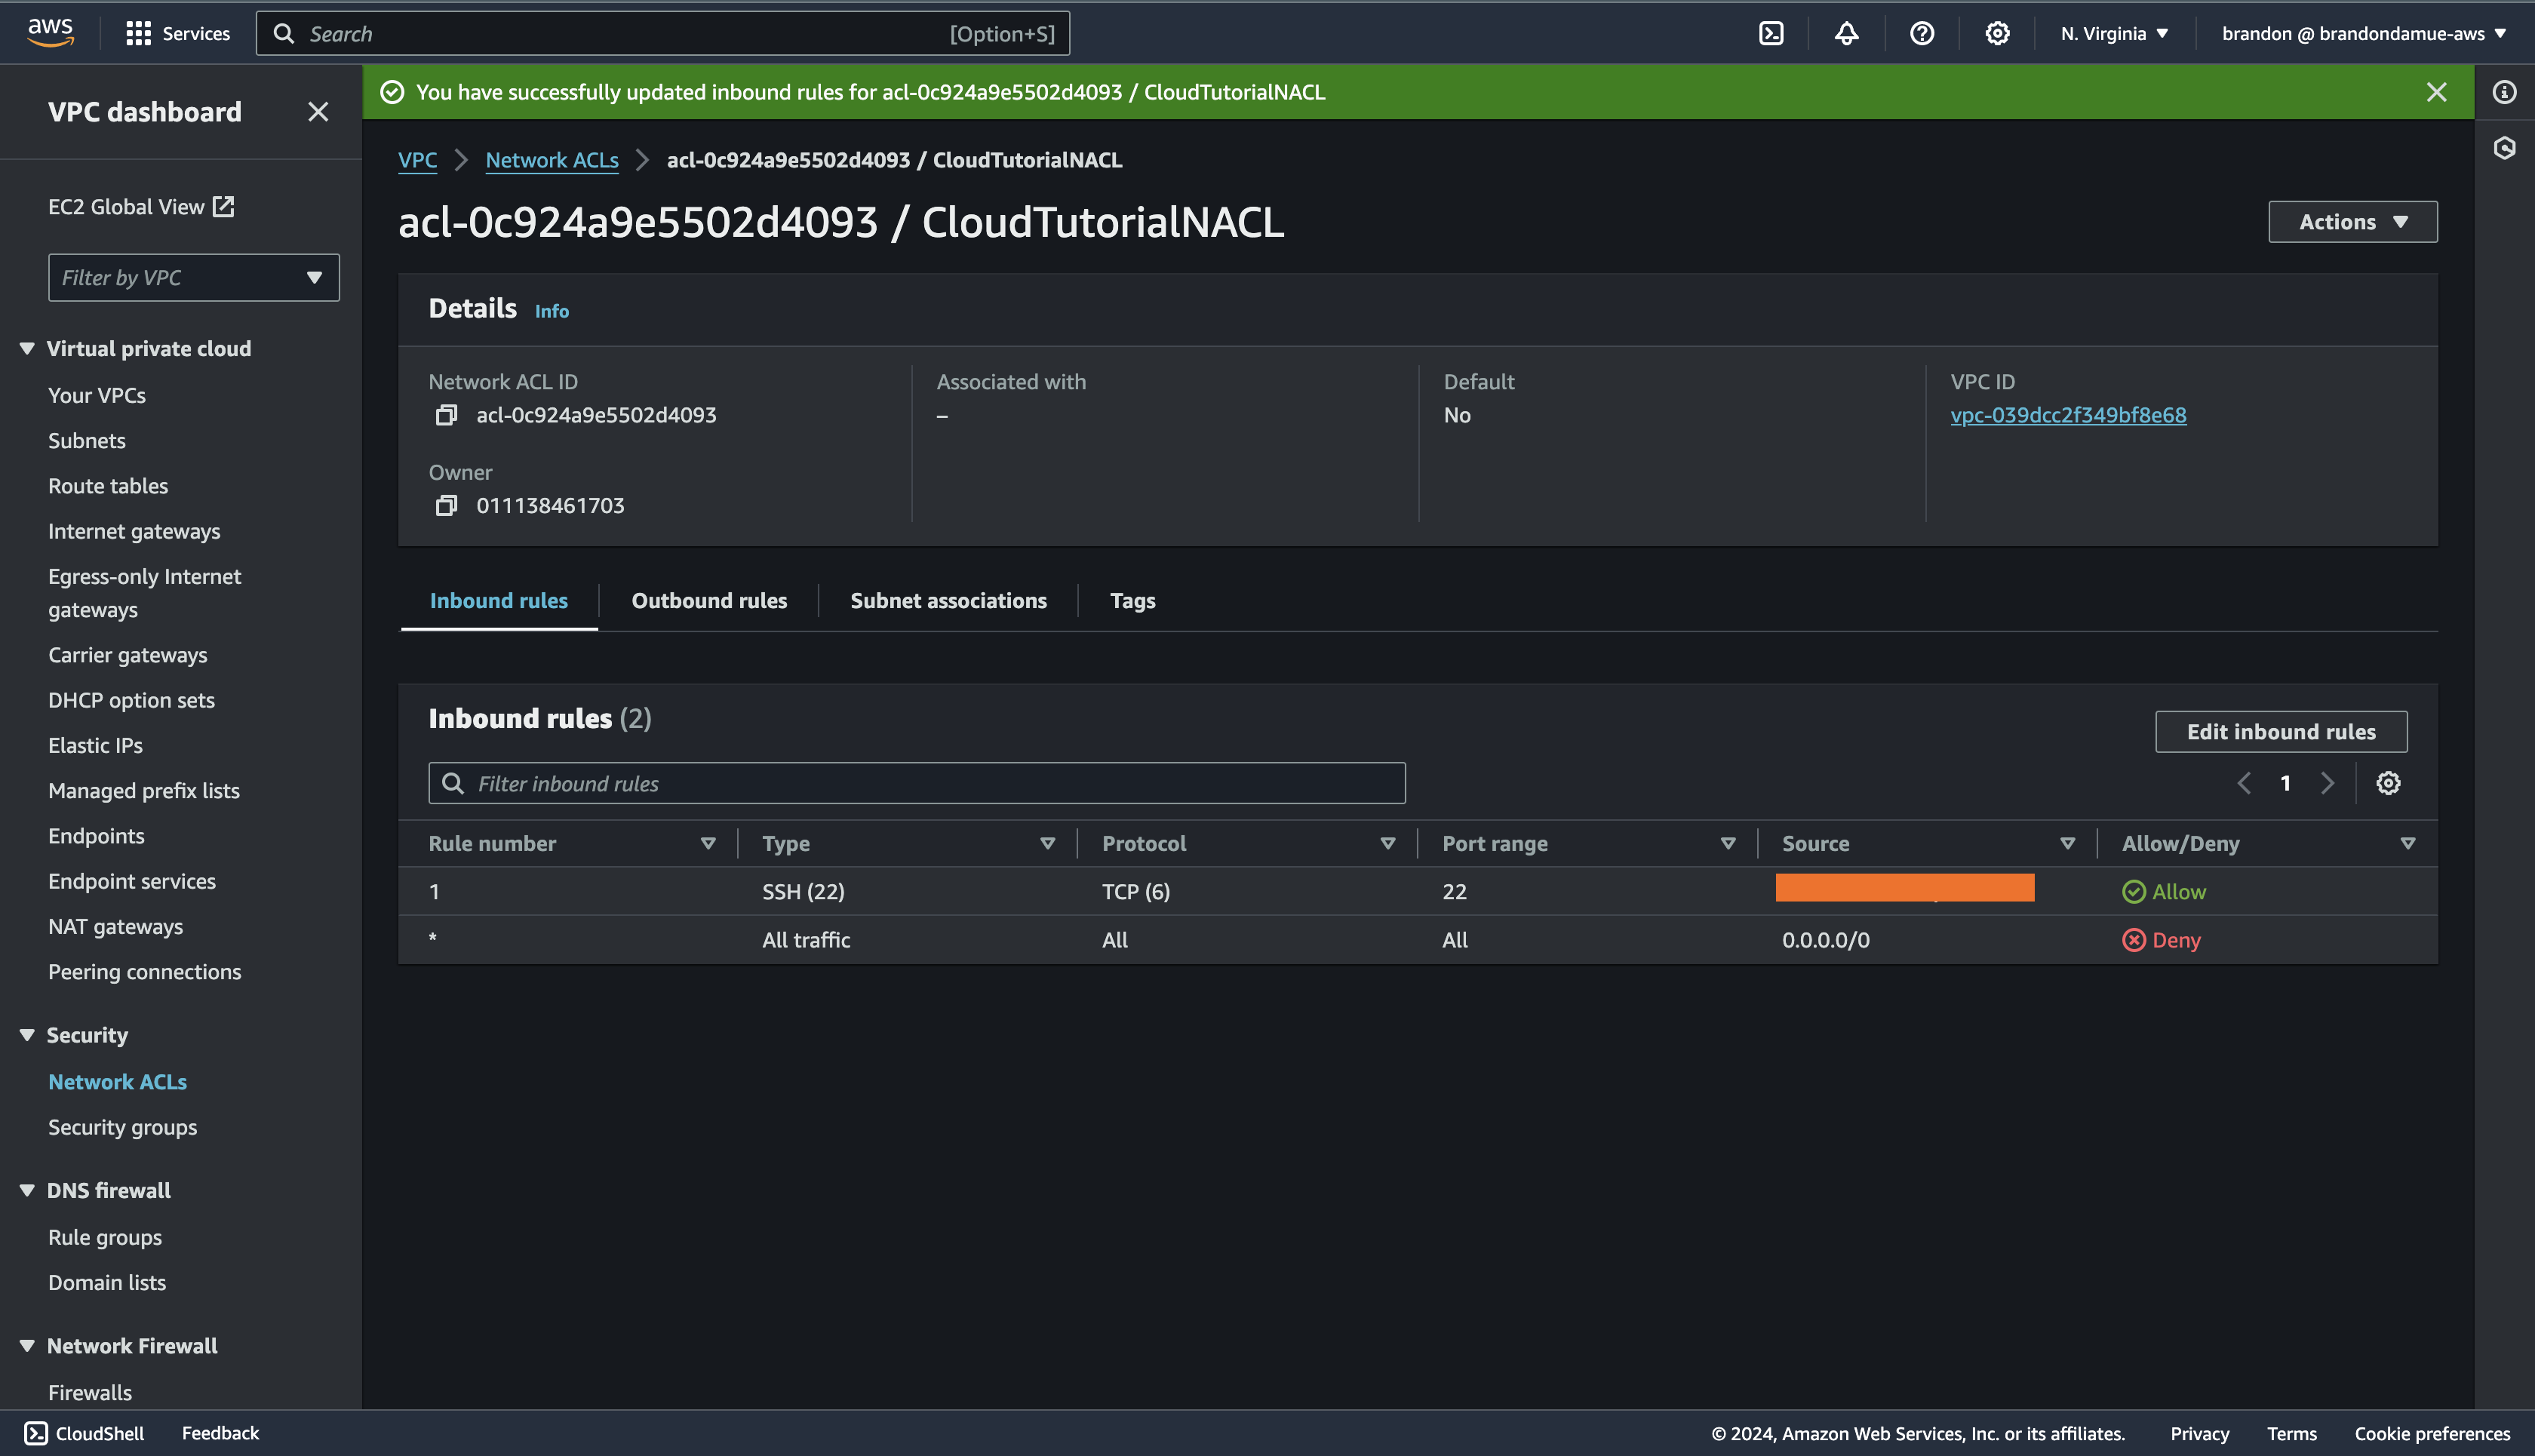
Next up we are going to create an outbound rule that allows HTTP traffic to the internet. Click on the Outbound rules tab and click on the Edit outbound rules button and then click on Add New rule.
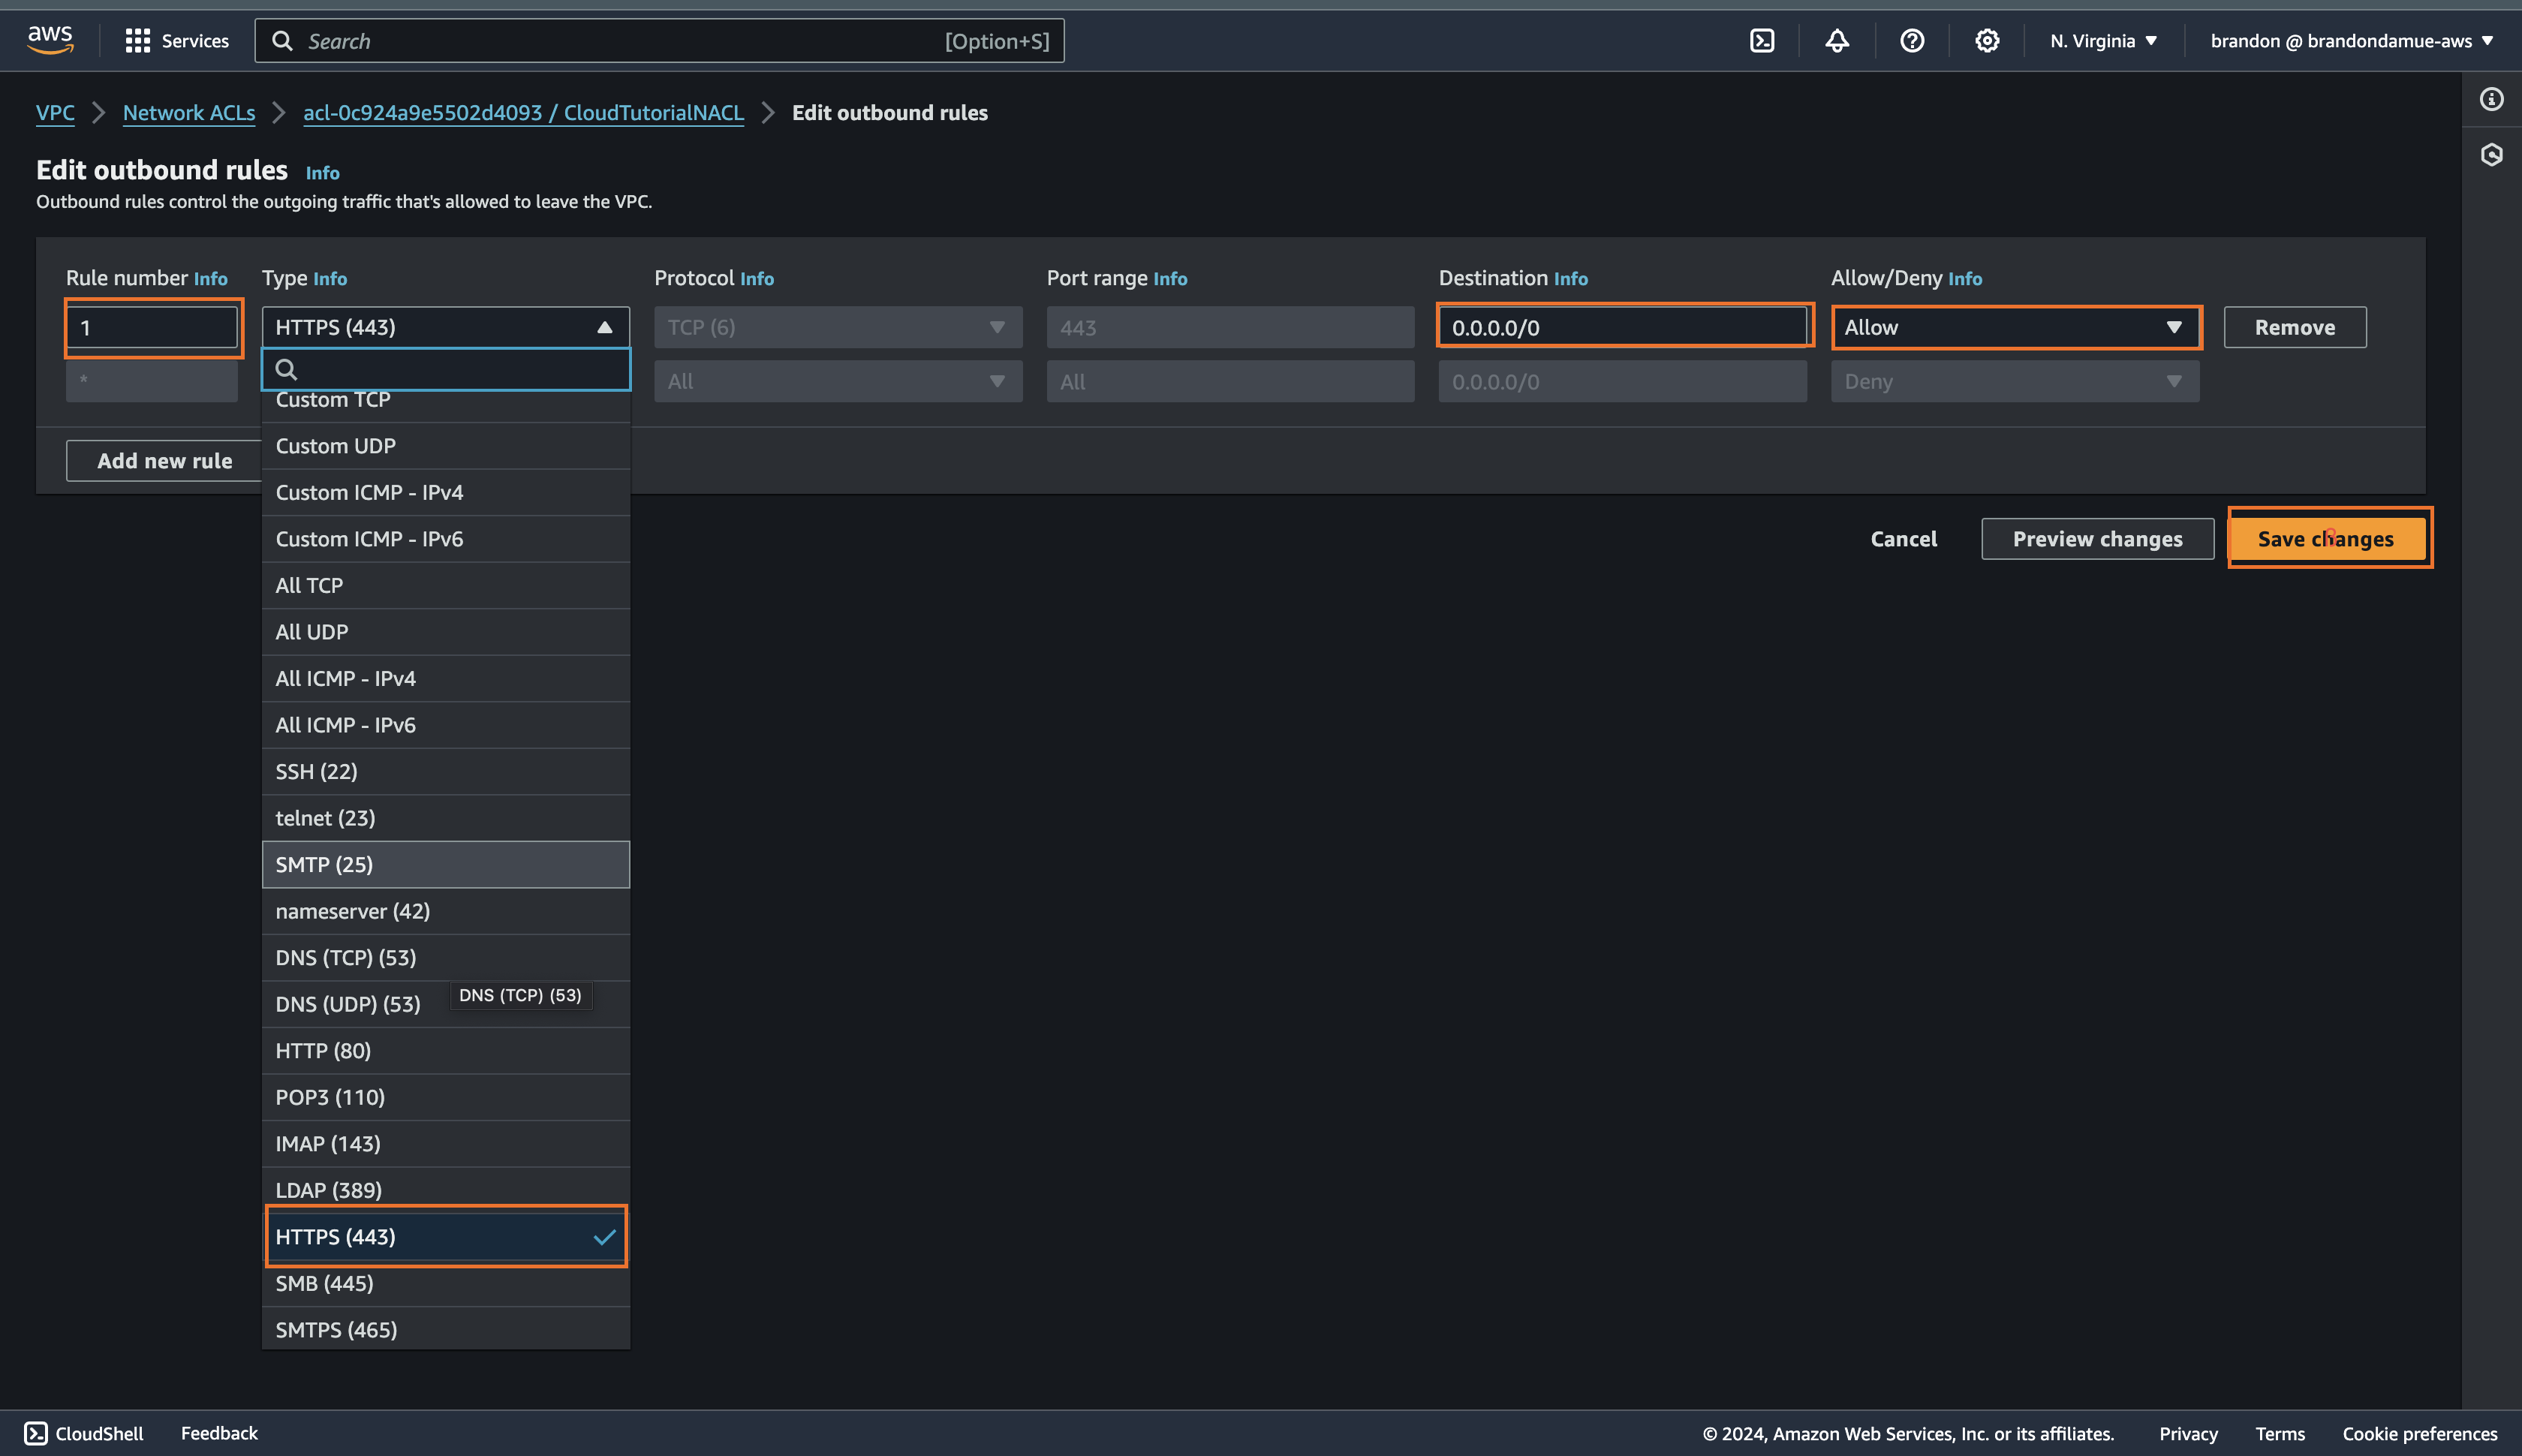
Fill in the details as shown above and click on Save Changes. With that we have created an outbound rule for our NACL that allows HTTPS traffic to the internet.
Step 4: Clean Up
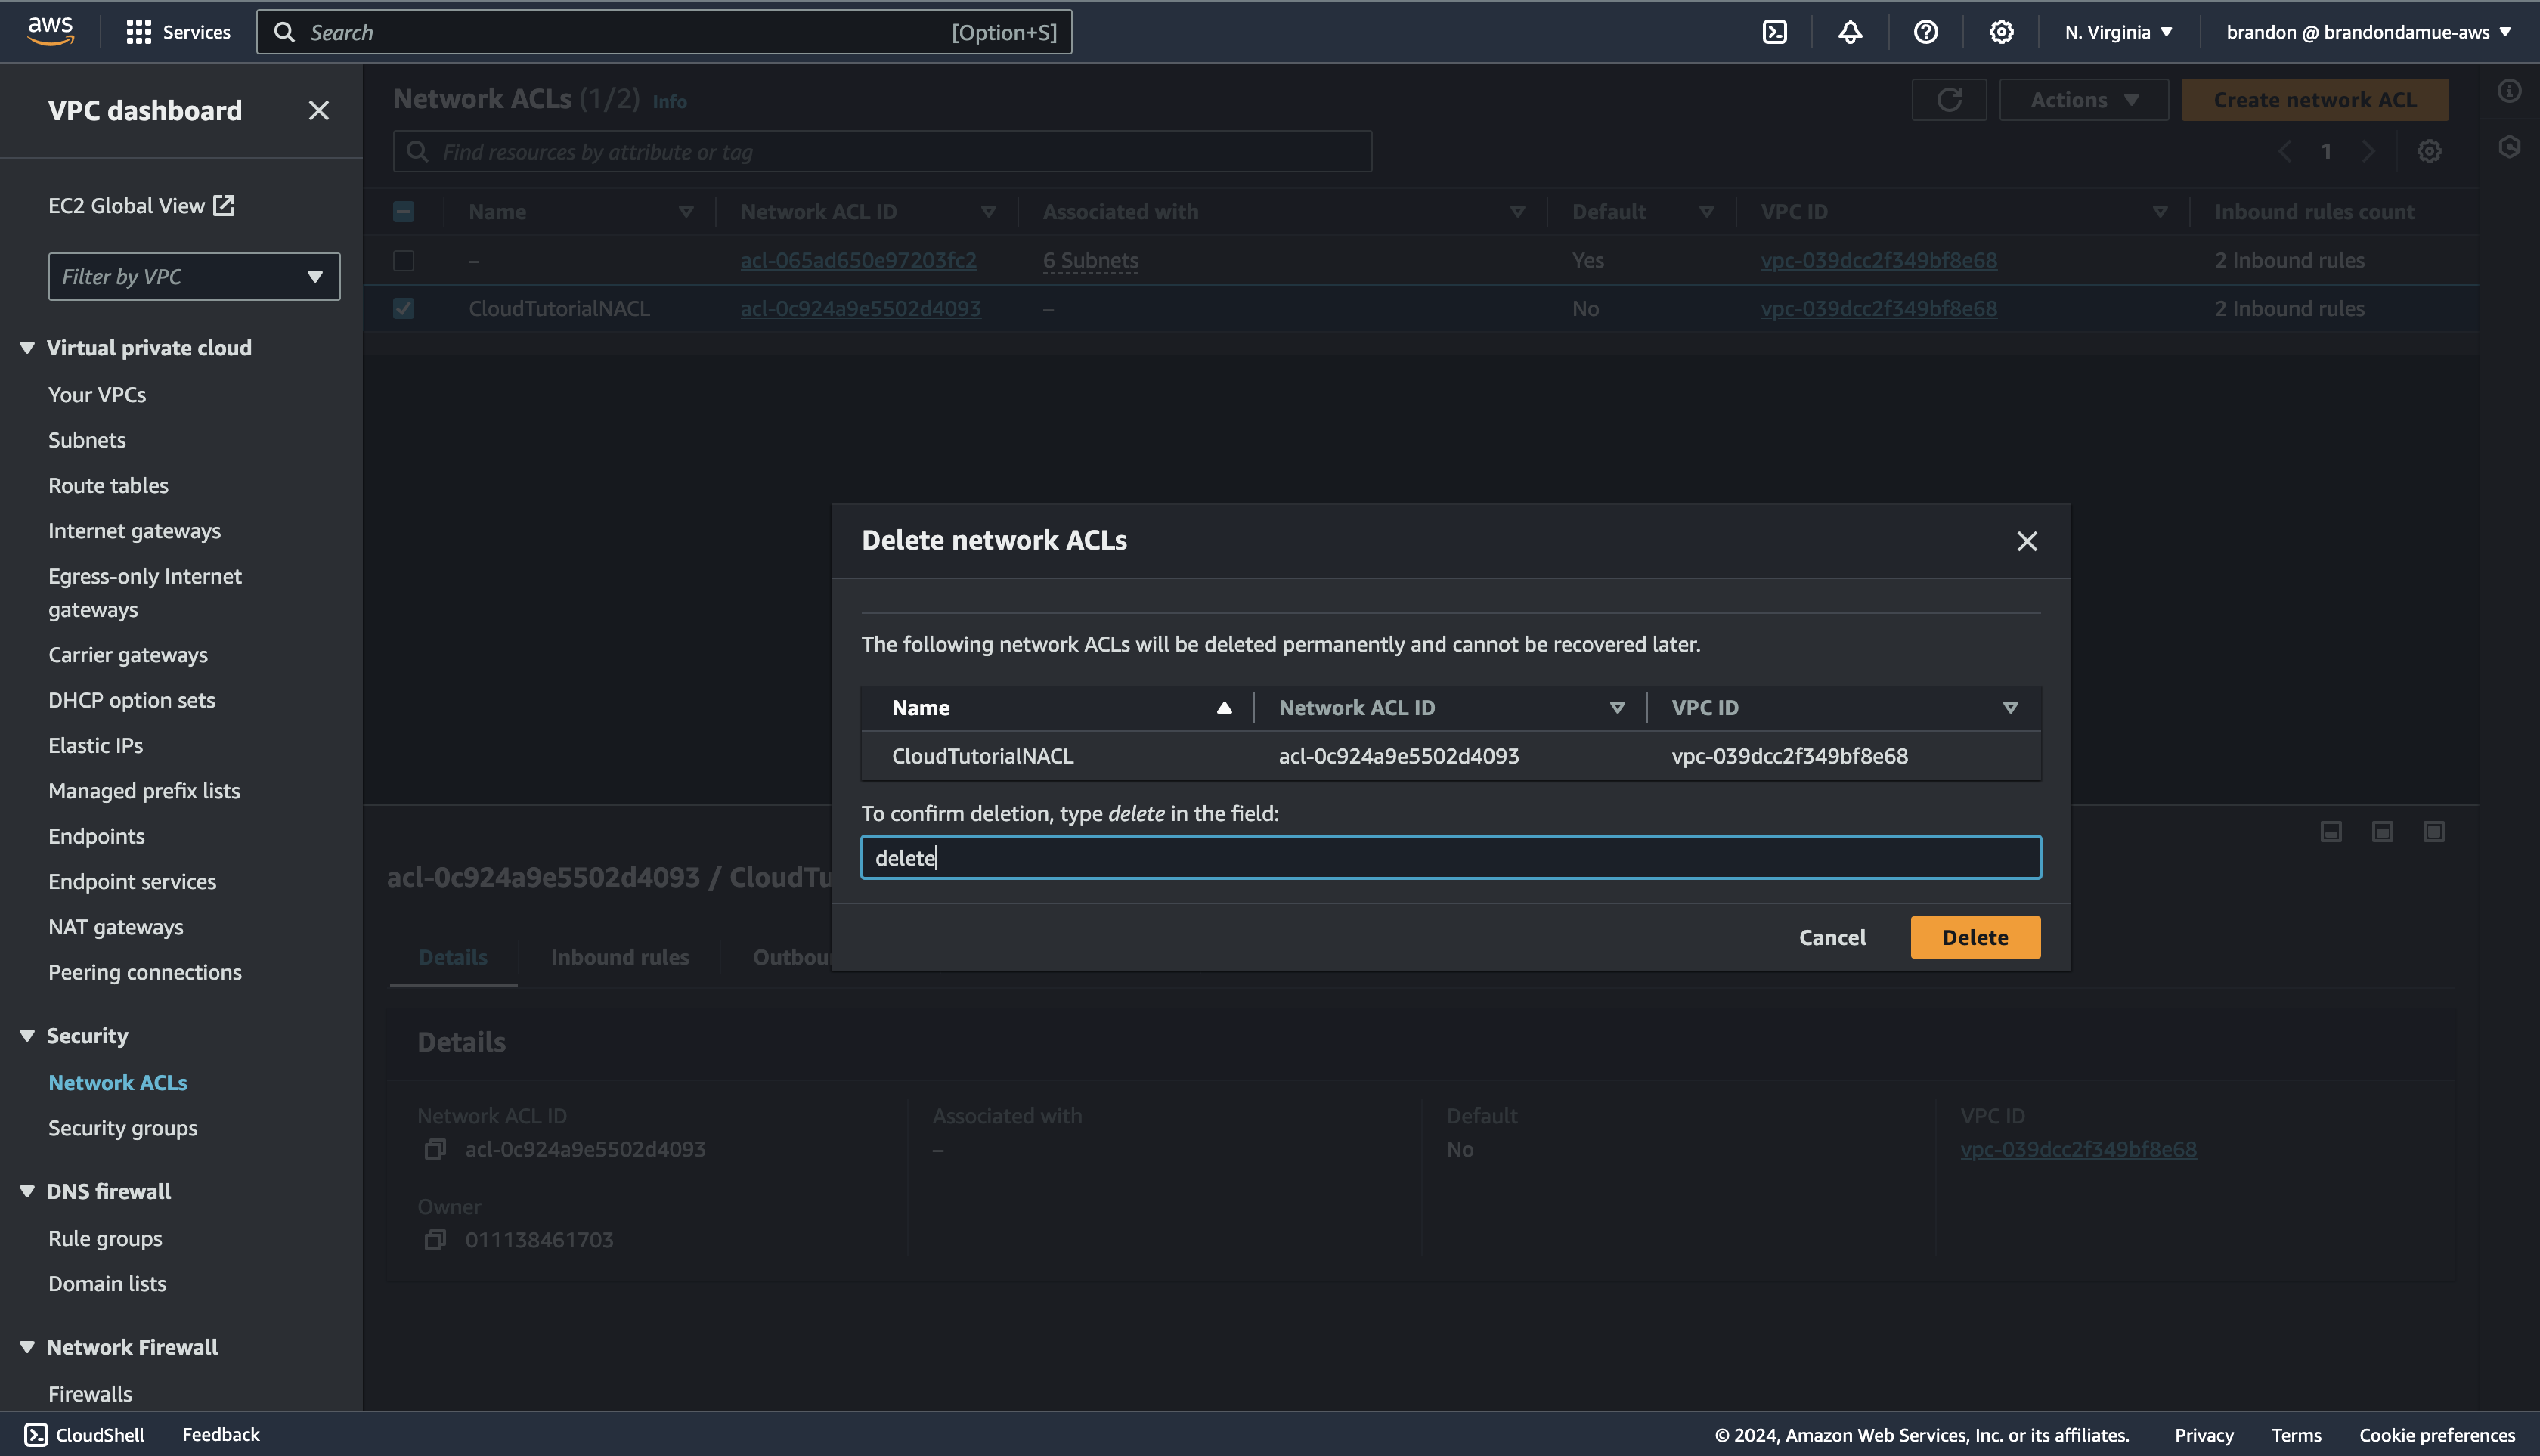
Now that we have seen how to create a NACL and a security group, it's time for clean up 🧼🧼🧼. We are going to delete the security group and NACL that we created starting with the NACL. Navigate to the NACLs page, select the NACL we created and click the Actions dropdown, select Delete network ACL then enter delete in the dialog box that appears and click the delete button.
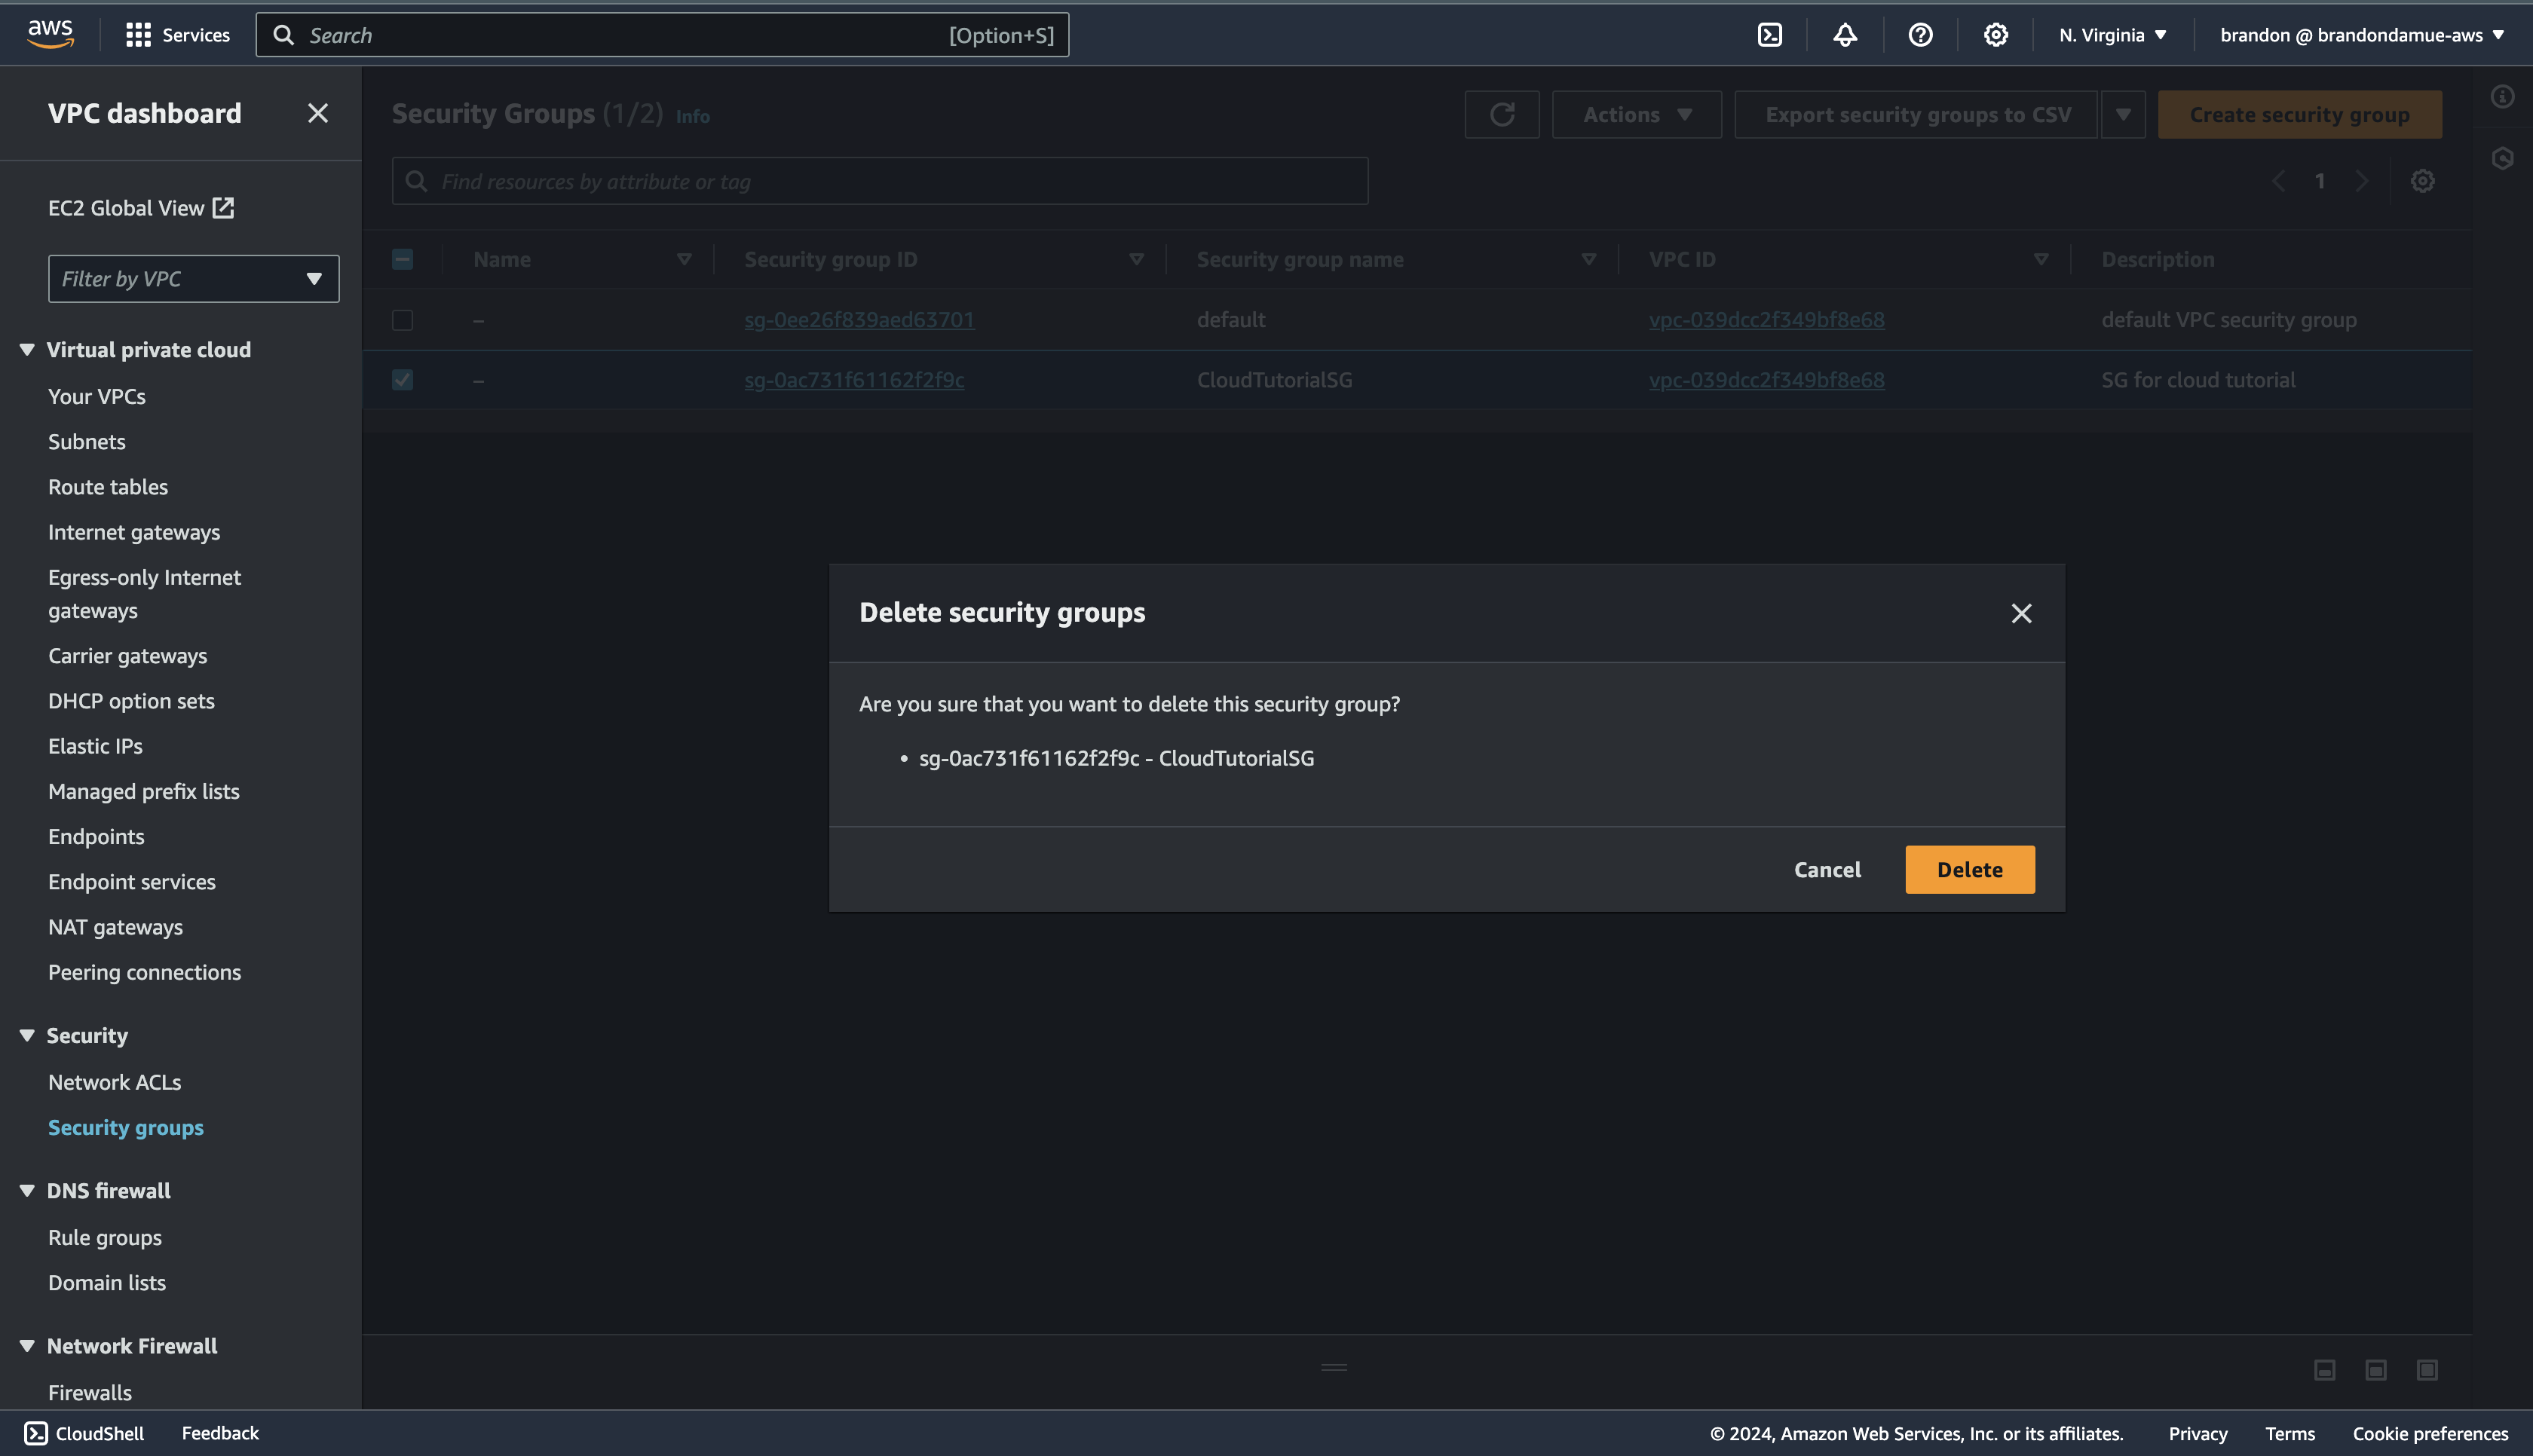
With that out of our way, it is time to delete the Security Group. Navigate to the Security Group page, select the security group we created, click on the Actions dropdown at the top of the page and select Delete security group and click Delete in the dialog box that appears.
You can go take a coffee (or your favorite beverage). The job is done. 🎉
Subscribe to my newsletter
Read articles from Brandon Damue directly inside your inbox. Subscribe to the newsletter, and don't miss out.
Written by

Brandon Damue
Brandon Damue
👋 Hello, I'm Brandon Damue, a 🚀 software developer and ✍️ technical writer with a passion for 📚 reading, 🔧 self-improvement, and a keen interest in various ☁️ cloud computing technologies. I have years of experience in software development, and I've honed my skills in multiple programming languages and frameworks, as well as ☁️ cloud computing technologies such as AWS. My expertise allows me to build and deploy robust and scalable applications as well write articles to help developers in their careers and learning journeys. As a 📝 technical writer, I have a talent for explaining complex concepts in a clear and concise manner. I've published numerous articles and tutorials on various platforms, and I'm well-known for my ability to provide valuable insights and knowledge. On my Hashnode blog, I share my insights and experiences on software development, technology, and personal growth. Follow my blog to stay up-to-date on the latest trends and advancements in ☁️ cloud computing and the tech industry. 💡