Getting Started with Git: Configuration and Essential Commands
 Pratyukt Writes
Table of contents
- Introduction
- Prerequisites
- Step 1: Configuring Git
- Step 2: Initializing a Git Repository
- Step 3: Staging Changes with git add
- Step 4: Committing Changes git commit
- Step 5: Checking the Status with git status
- Step 6: Viewing Commit Logs with git log
- Step 7: Displaying Changes with git show
- Step 8: Switching Branches with git checkout
- Step 9: Restoring Changes git restore
- Conclusion

Introduction
Welcome! If you're new to Git and want to learn how to set it up and use basic commands, you've come to the right place. This guide will walk you through the initial configuration and some essential commands to get you started with version control using Git.
Prerequisites
Before we dive in, make sure you have Git installed on your local machine. If you haven't installed it yet, you can install it on your Linux machine using the following command:.

Step 1: Configuring Git
First things first, let's set up your Git configuration. This includes setting your username and email, which will be associated with your commits.
Setting Your Username
To set your username, open your terminal and run:
Replace "Your Name" with your actual name. This name will appear in your commit
history.

Setting Your Email
Next, set your email with the following command:

Replace "pratyuktpc@gmail.com" with your actual email address. This email will be linked to your commits. ( you can email me, btw.) *wink*
Step 2: Initializing a Git Repository
Now, let's start tracking a project with Git. Navigate to your project directory in the terminal and initialize a Git repository.

This command sets up a new Git repository in your project directory. You'll see a new folder named .git, which contains all the metadata and version history for your project.
Step 3: Staging Changes with git add
To start tracking changes in your files, you need to stage them. Staging prepares your changes for a commit.
Staging Specific Files
To stage a specific file, use:

Replace " index.html " with the name of the file you want to stage.
Step 4: Committing Changes git commit
Once you've staged your changes, it's time to commit them. A commit is like a snapshot of your project at a specific point in time. To commit your changes, run:

Replace "First version of index.html" with a brief description of the changes you've made. This message helps you and others understand what changes were made in this commit.
Step 5: Checking the Status with git status
To see what's happening in your repository, you can use:

This command shows the status of your working directory and staging area. It tells you which files are modified, staged, or untracked.
Step 6: Viewing Commit Logs with git log
To view the history of your commits, use:

This command displays a list of all commits in your repository, along with their messages, authors, and timestamps.
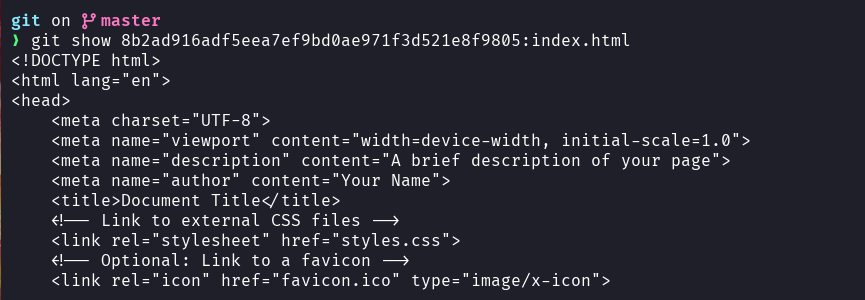
Step 7: Displaying Changes with git show
If you want to see the details of a specific commit, use:

Replace the long string of numbers after "show" with the hash of the commit you want to inspect. The commit hash is the long string of numbers and letters shown in the git log output.
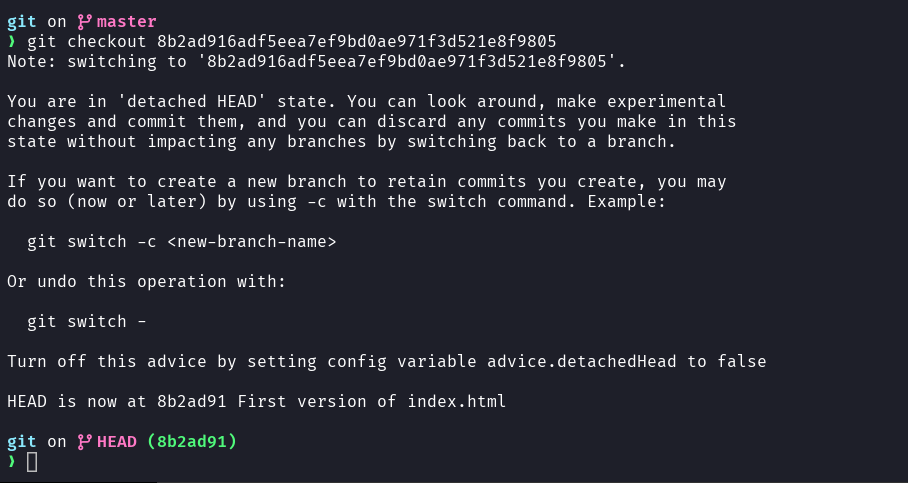
Step 8: Switching Branches with git checkout
Branches allow you to work on different features or versions of your project simultaneously. To switch to a different branch, use:

Replace the big string of numbers after "checkout" with the name of the branch or hash number you want to switch to. Here I have used the hash number.
Step 9: Restoring Changes git restore
If you need to discard changes in your working directory, you can use the git restore command.
Discard Changes in a Specific File
To discard changes in a specific file, use:

Replace "index.html" with the name of the file you want to restore.
Discard All Changes
To discard all changes in your working directory, use:

This command reverts all files back to their last committed state.
Conclusion
Congratulations! You've now learned how to configure Git and use some essential Git commands. These basics will help you manage your project's history and collaborate effectively with others. Happy coding!
Subscribe to my newsletter
Read articles from Pratyukt Writes directly inside your inbox. Subscribe to the newsletter, and don't miss out.
Written by

Pratyukt Writes
Pratyukt Writes
DevOps Engineer @Apmosys_Technologies