Machine Learning : Deep Learning - Stacked AutoEncoders (Part 31)
 Md Shahriyar Al Mustakim Mitul
Autoencoders
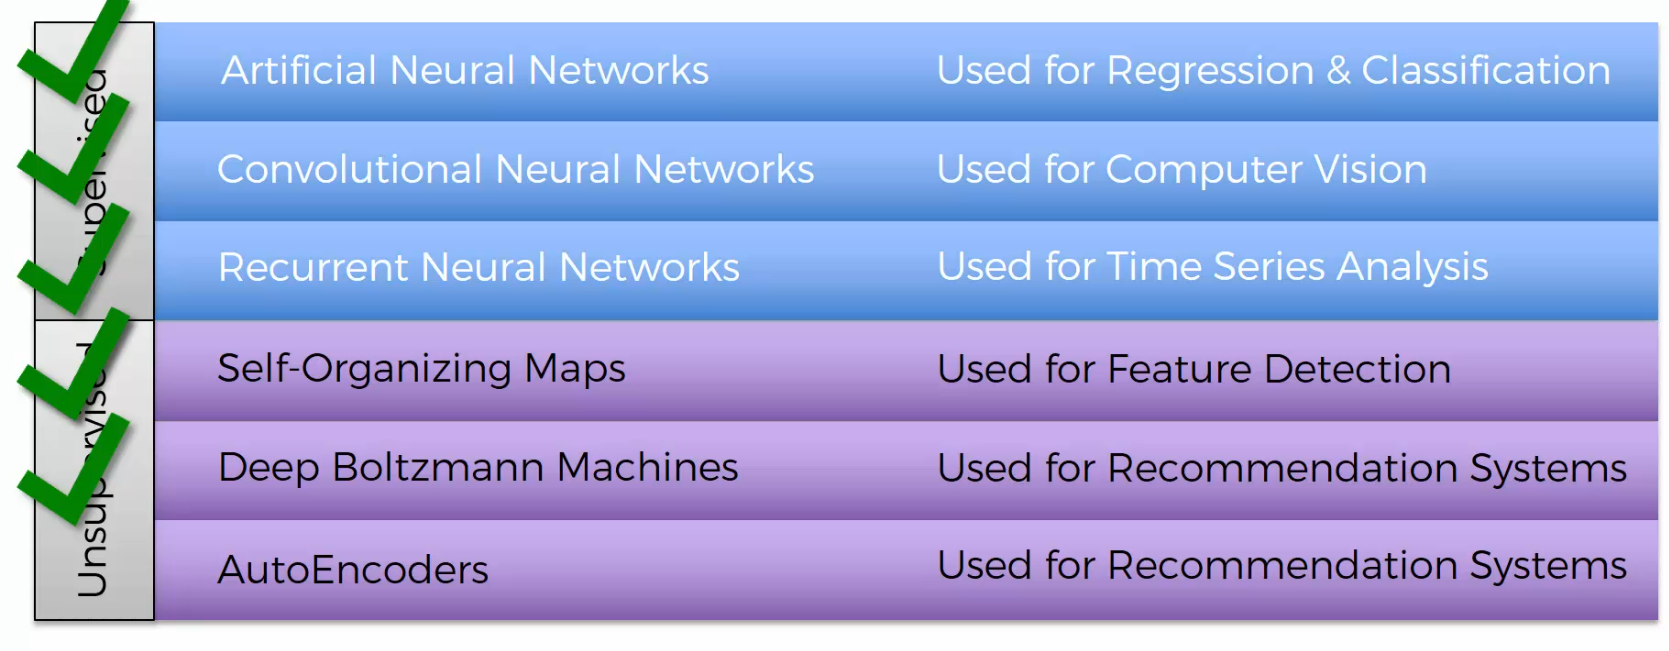
AutoEncoders are within Unsupervised Neural Networks.
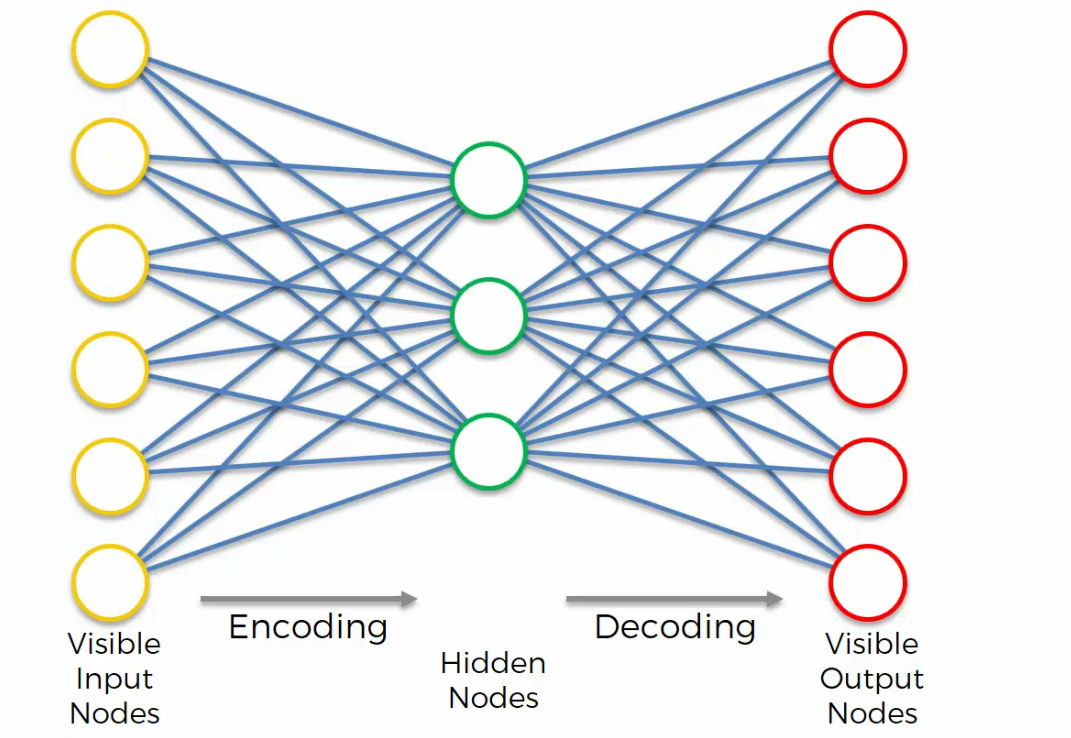
AutoEncoders look like this:
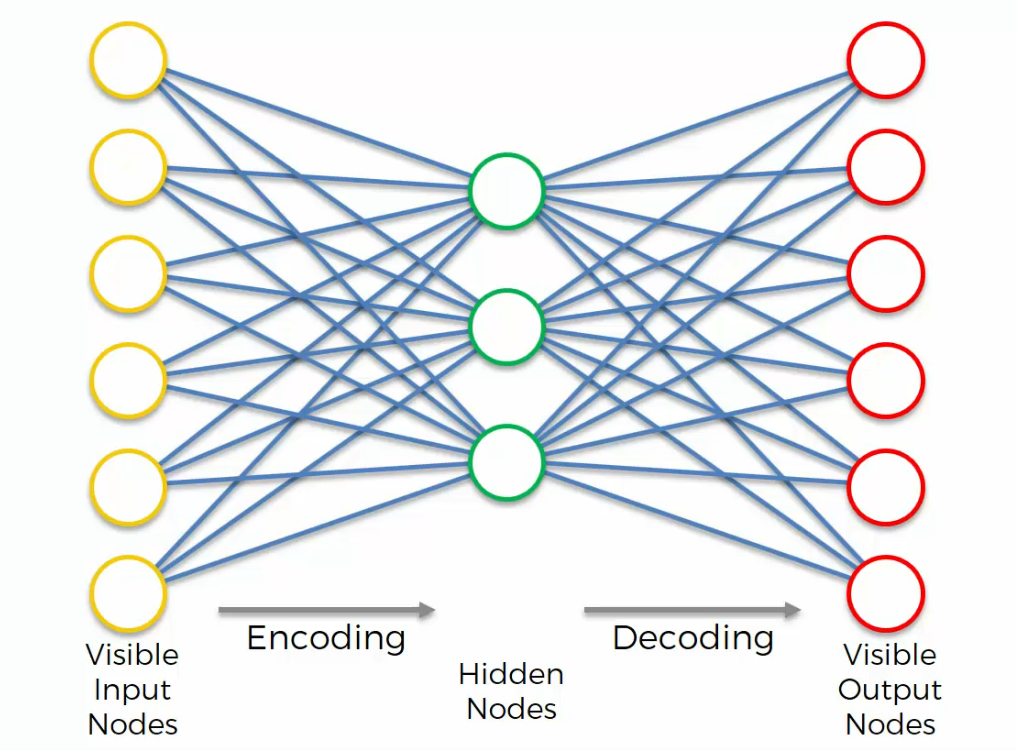
Auto Encoder encodes itself. That it takes some sort of inputs, put some through a hidden layer, and then it gets outputs, but it aims for the outputs to be identical to the inputs.
now let's have have a look at an example of how they actually work, so we can understand them better on an intuitive level.
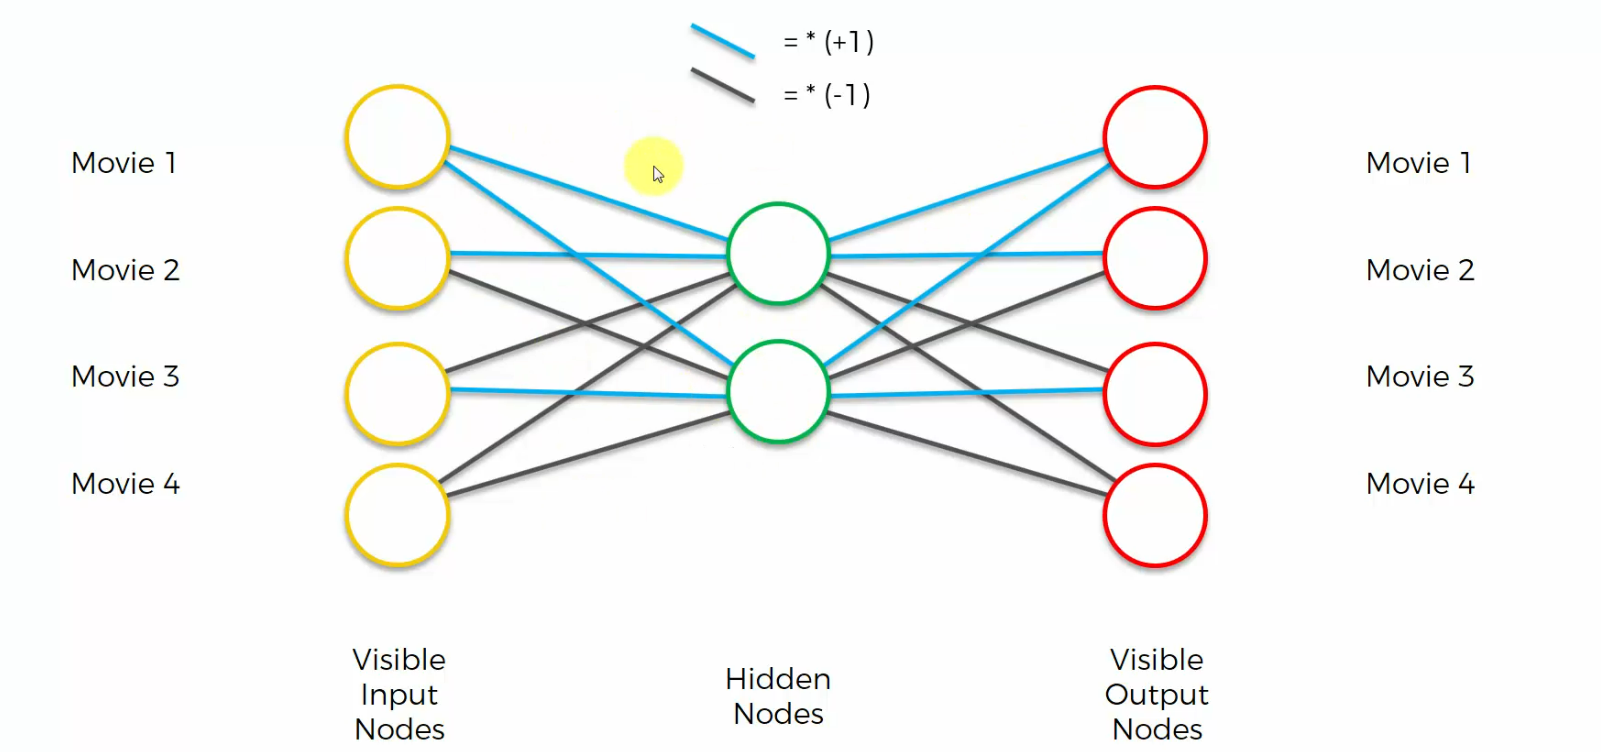
There's a simplified auto encoder, with just four input nodes, and two nodes in the hidden layer.
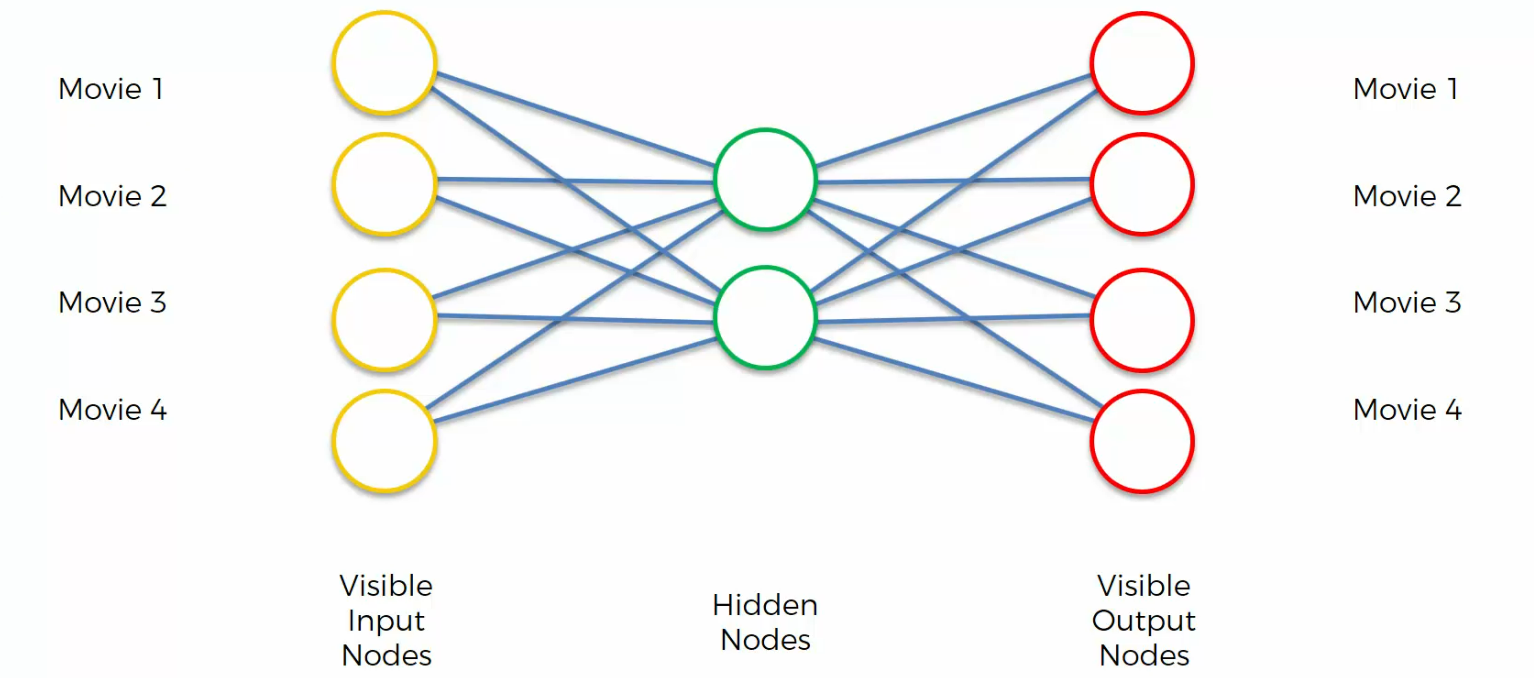
As we can see, we've got four movies over here and four movies right here.
And what are these movies?
Well, these are just movies that a person has watched, and we're going to be encoding the rating , people have left for those movies.
1 means a person liked that movie, and 0 means a person didn't like that movie.
Well, first of all, we first training the auto encoder. We're just going to come up with certain connections right away, certain weights just to prove.
This whole example is to prove that it is possible to take four values and encode them into actually two values, and carry your data around,and basically save space and extract those features. This example just to show that this whole situation is possible.
First of all we're going to color our synapses in two different colors, blue and black. Or light blue and black, where
light blue is basically a multiplication by one, so your weight is plus one,
and black is a multiplication by minus one. So your weight is minus one.
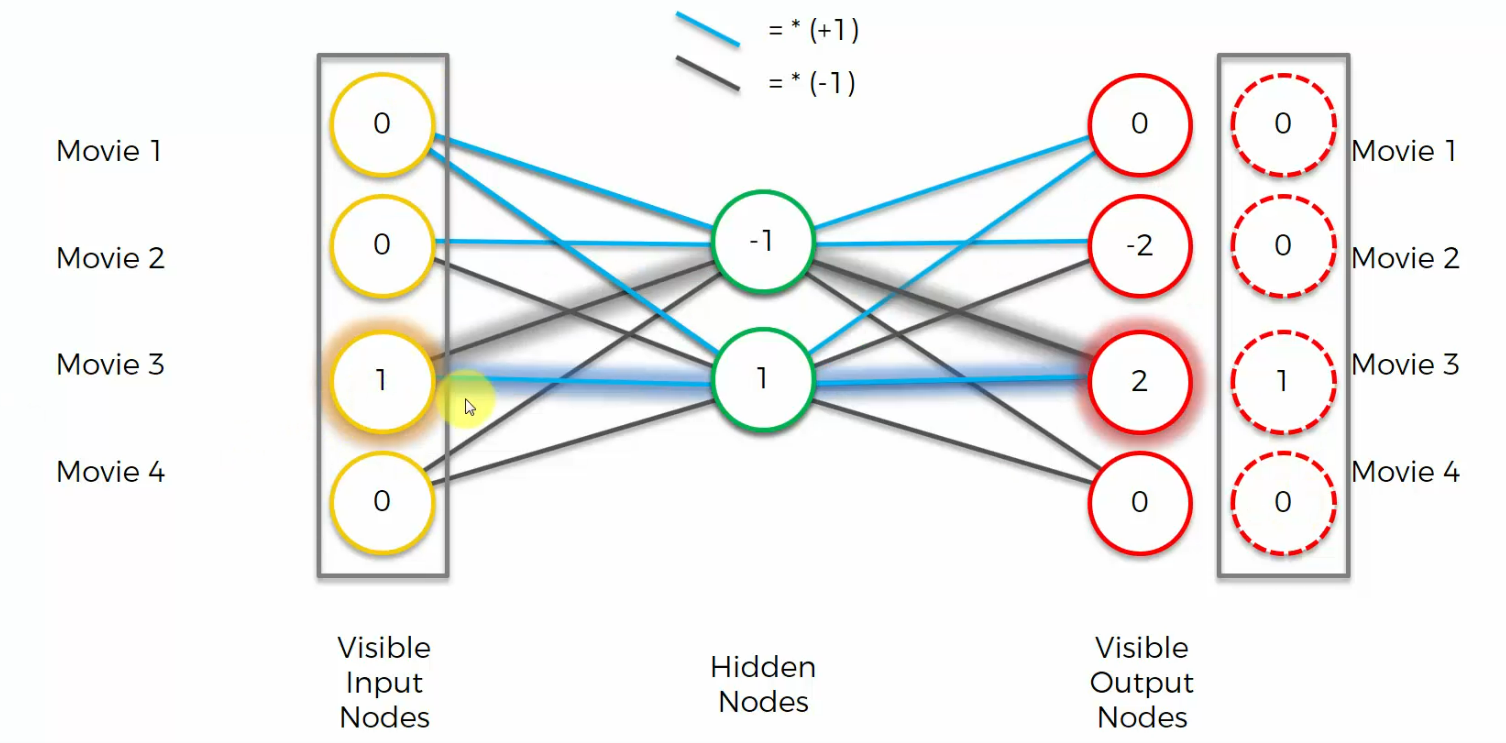
Let's have a look at an input. Let's say as an input, we've got one, zero, zero, zero.
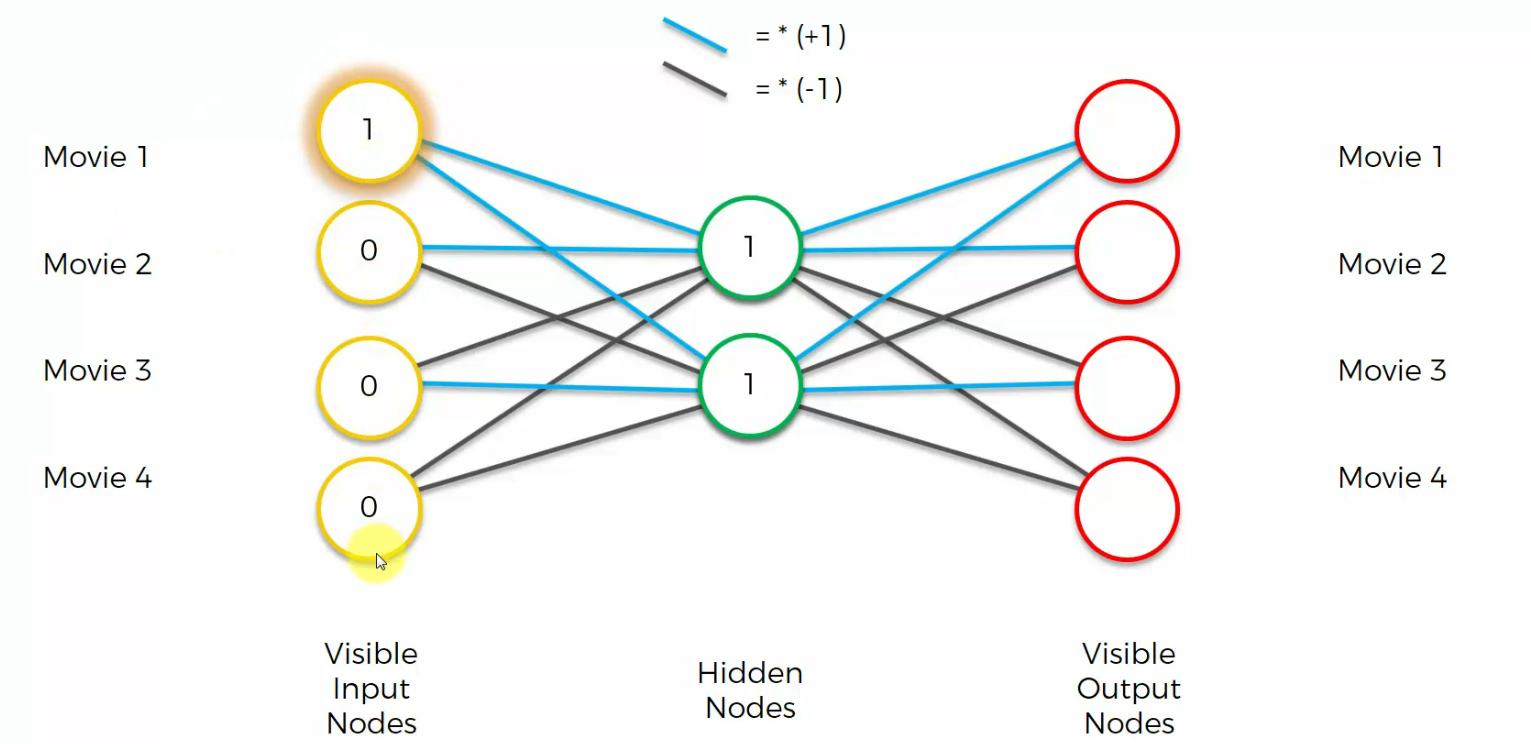
What will the hidden nodes look like in that case?
Well, in that case, hidden nodes will be, this one will turn into one here, and this one
will turn into one here, because blue is multiplying by one.
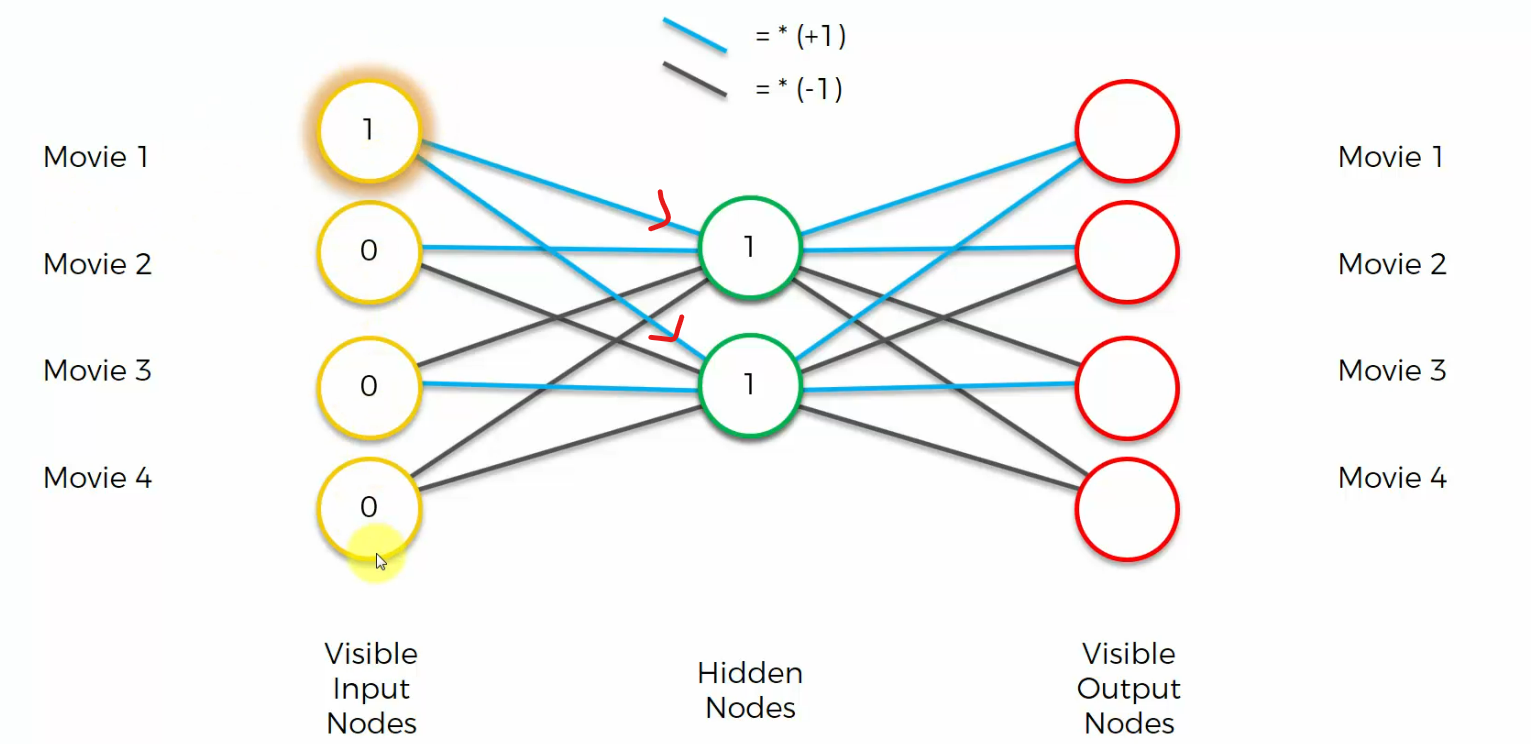
These zeros, they will always just add zero, basically, they're not going to contribute to the hidden nodes.
and now let's see what happens. For the top nodes we multiply by a plus one by a plus one and we get two
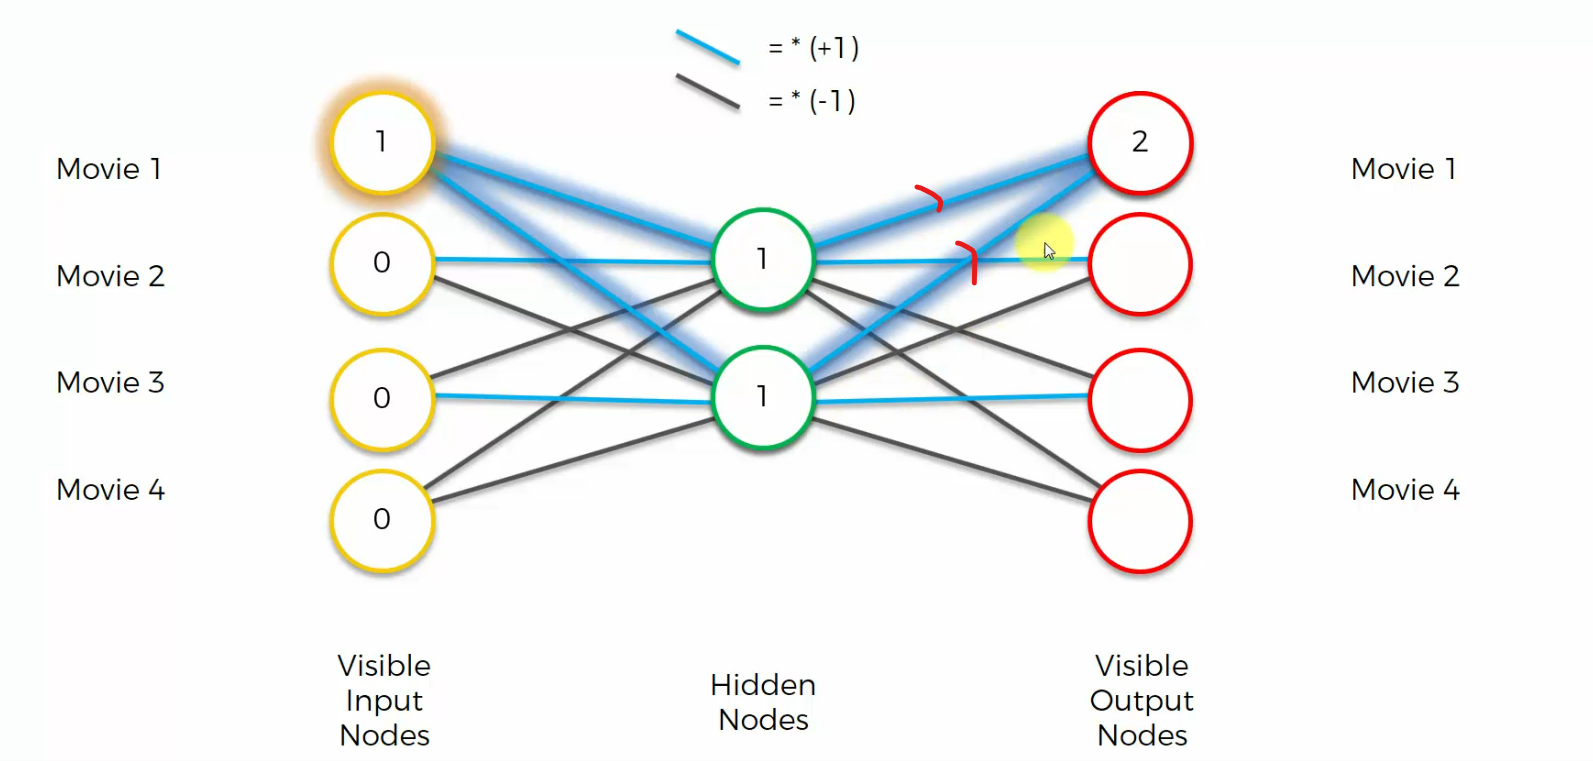
For this node we get one times one equals one, one times minus one equals minus one, you add them up, you get zero.
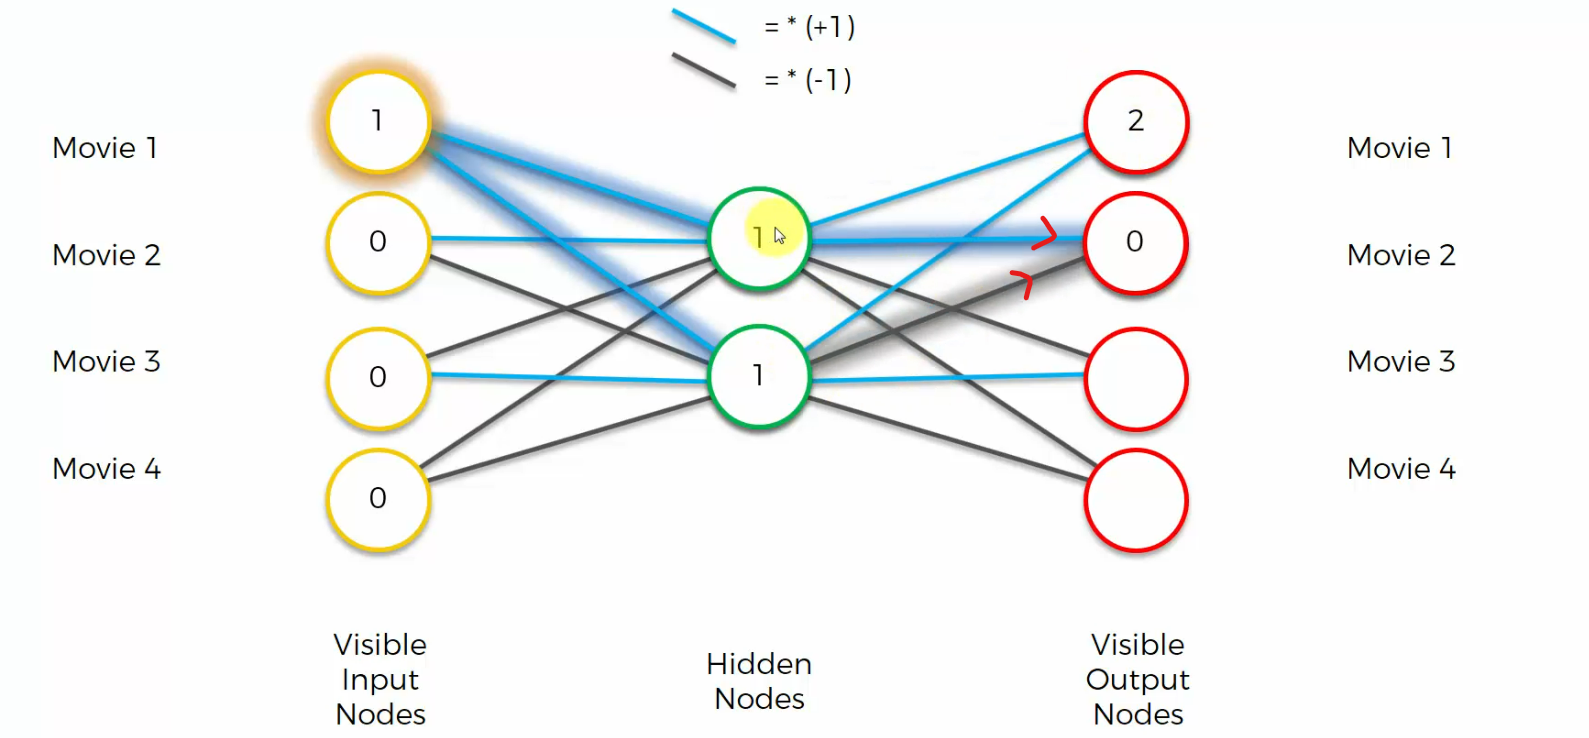
and so on.......
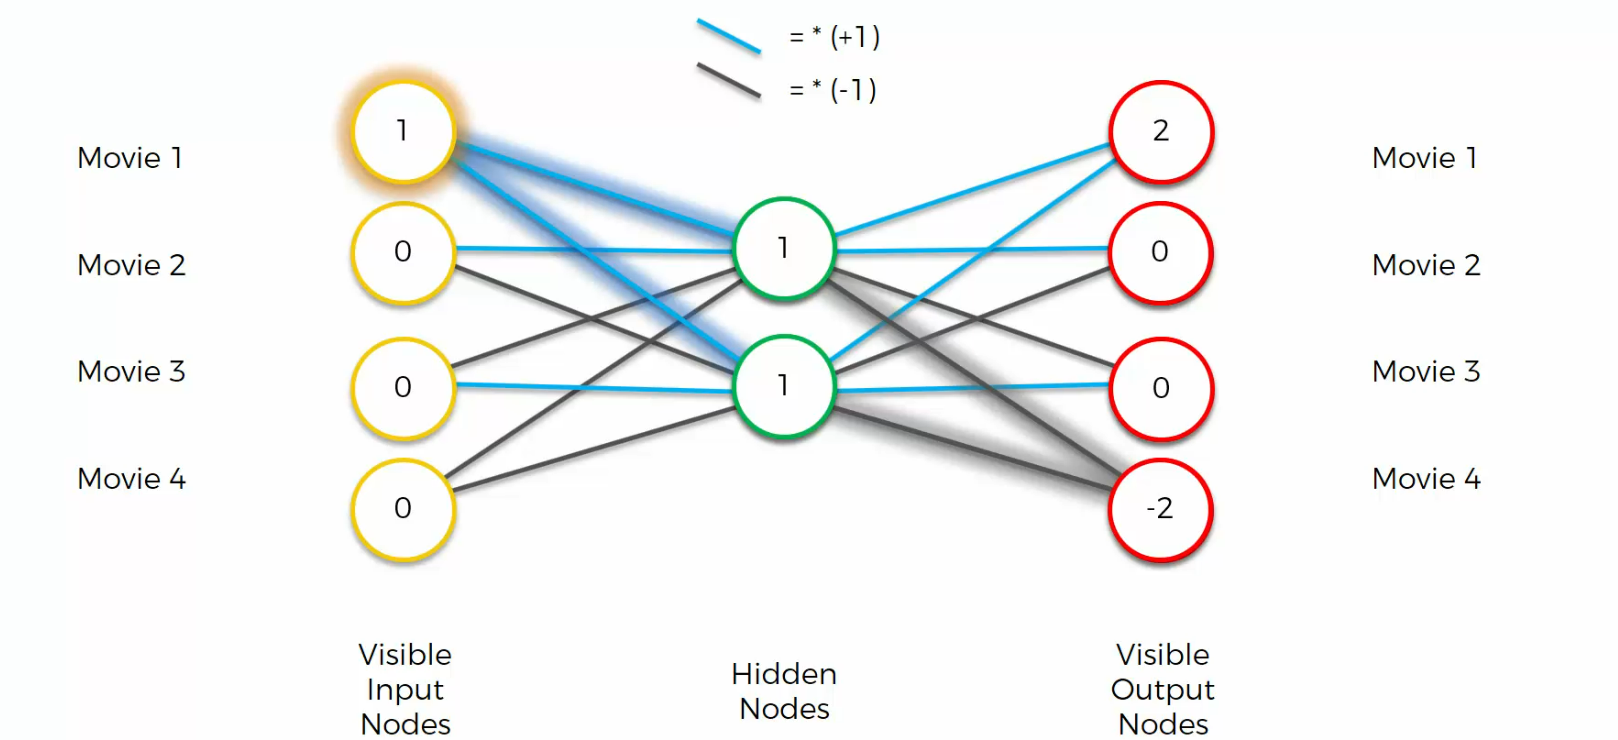
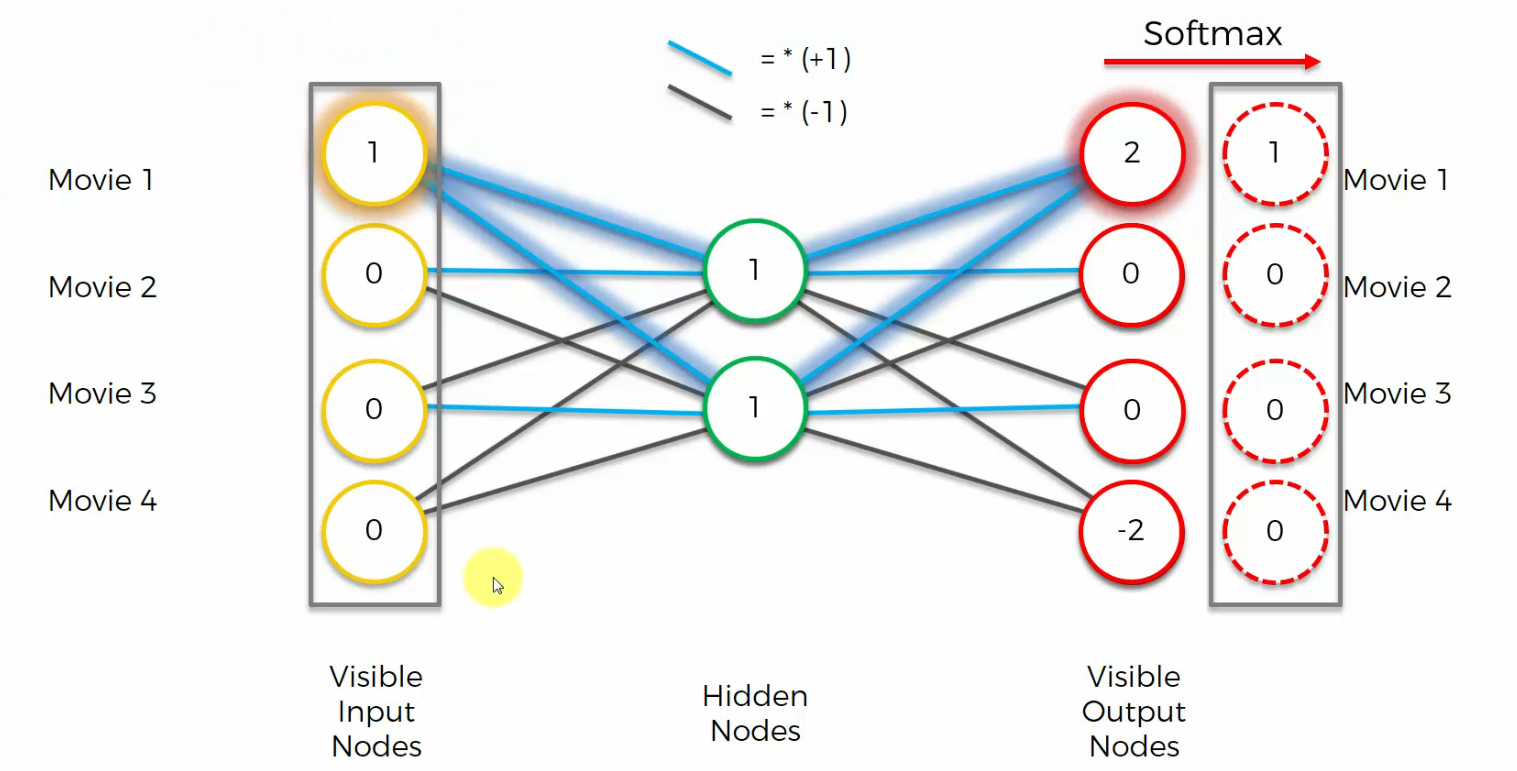
In Auto Encoder we also have a softmax function on the end
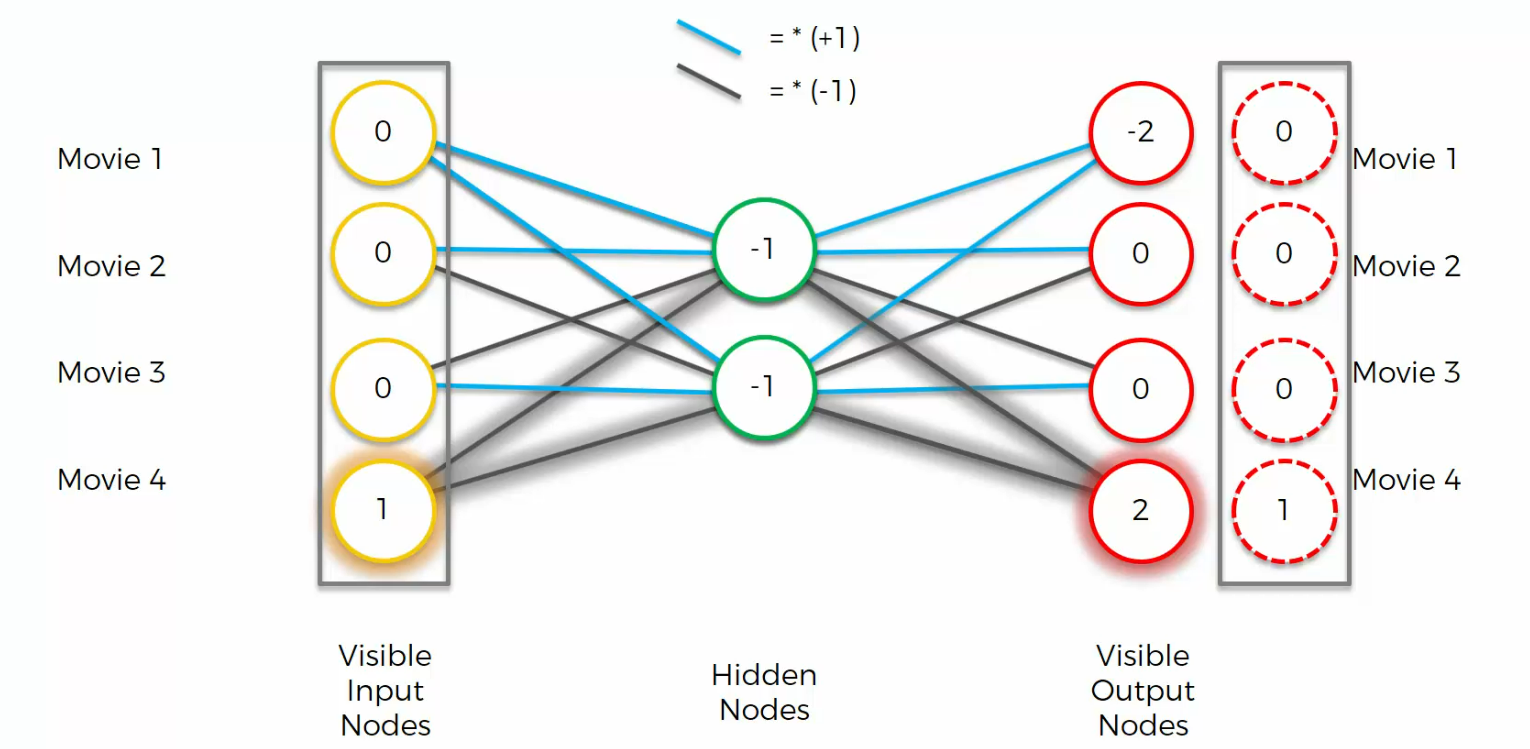
If you apply a softMax, you will get 1 where you see the highest value and then 0s where you see everything else. As you can see, this result is indeed identical to what we input into our network.
Again, if we had a different input, this is how Auto encoder would work
example 2
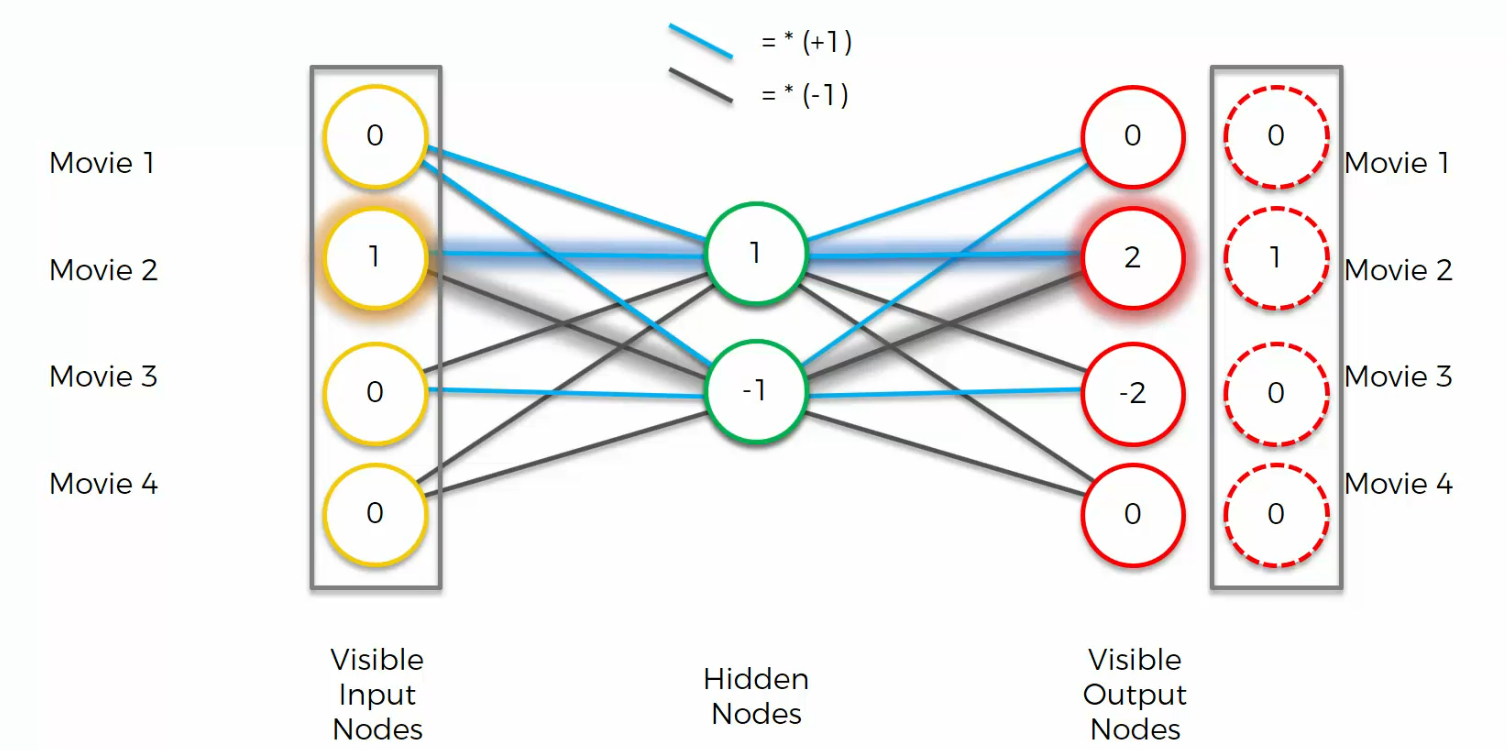
example 3
example 4
Read more
Biases
This is what we have seen
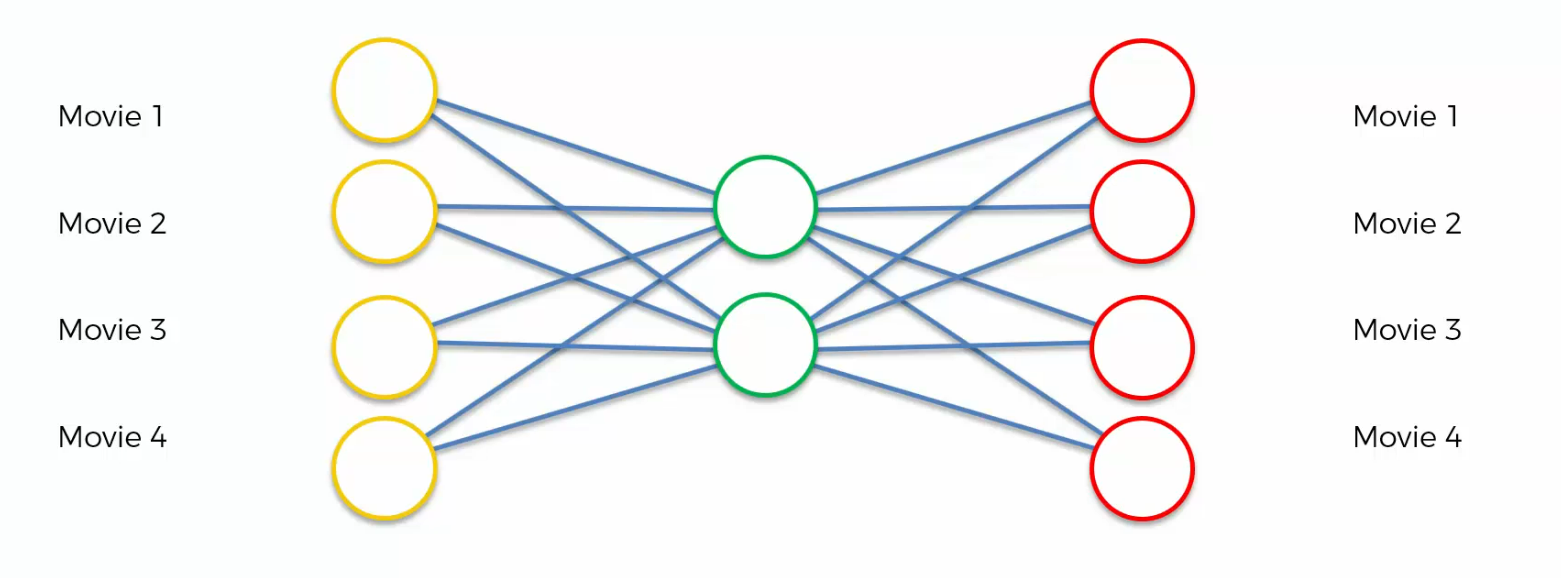
but we can also see something like this
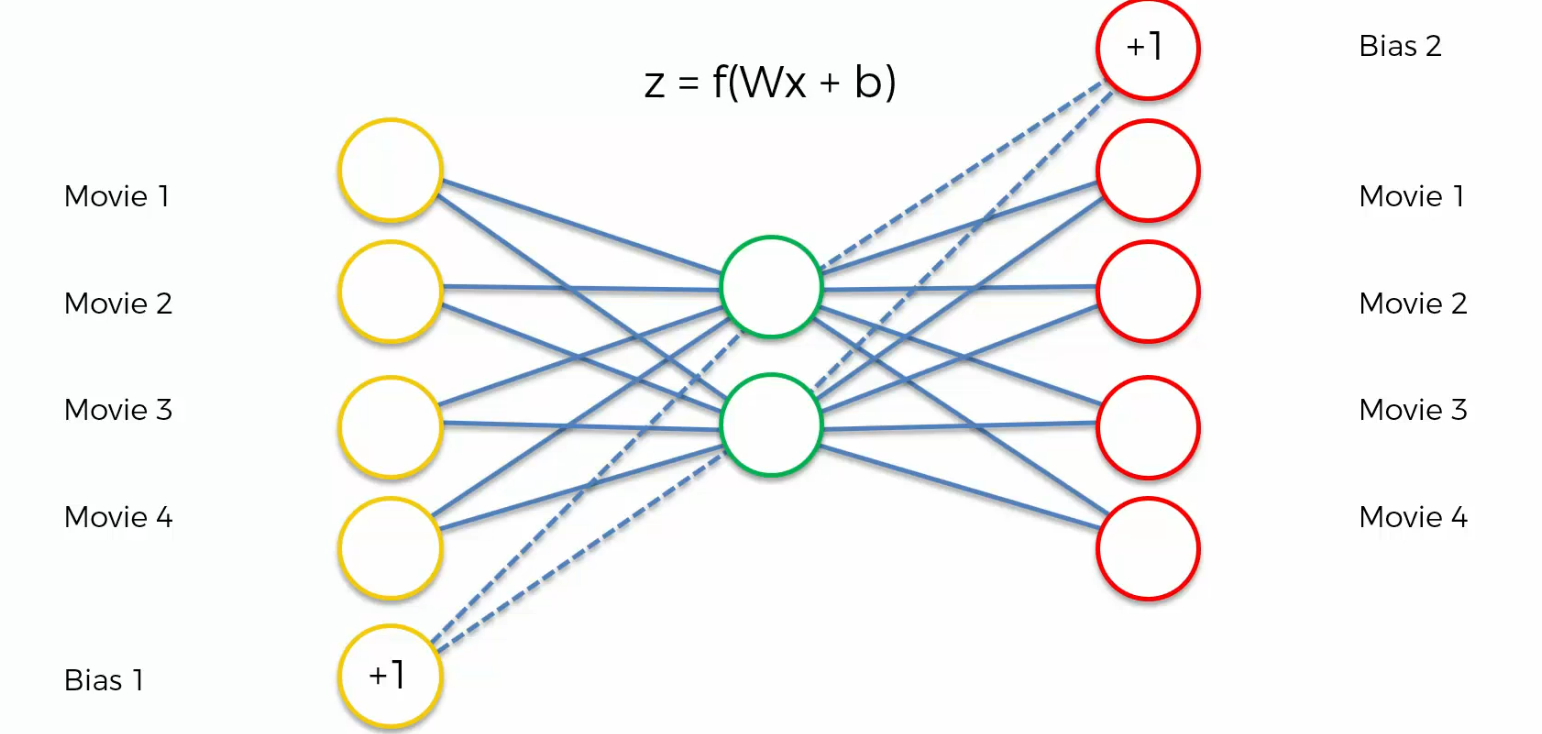
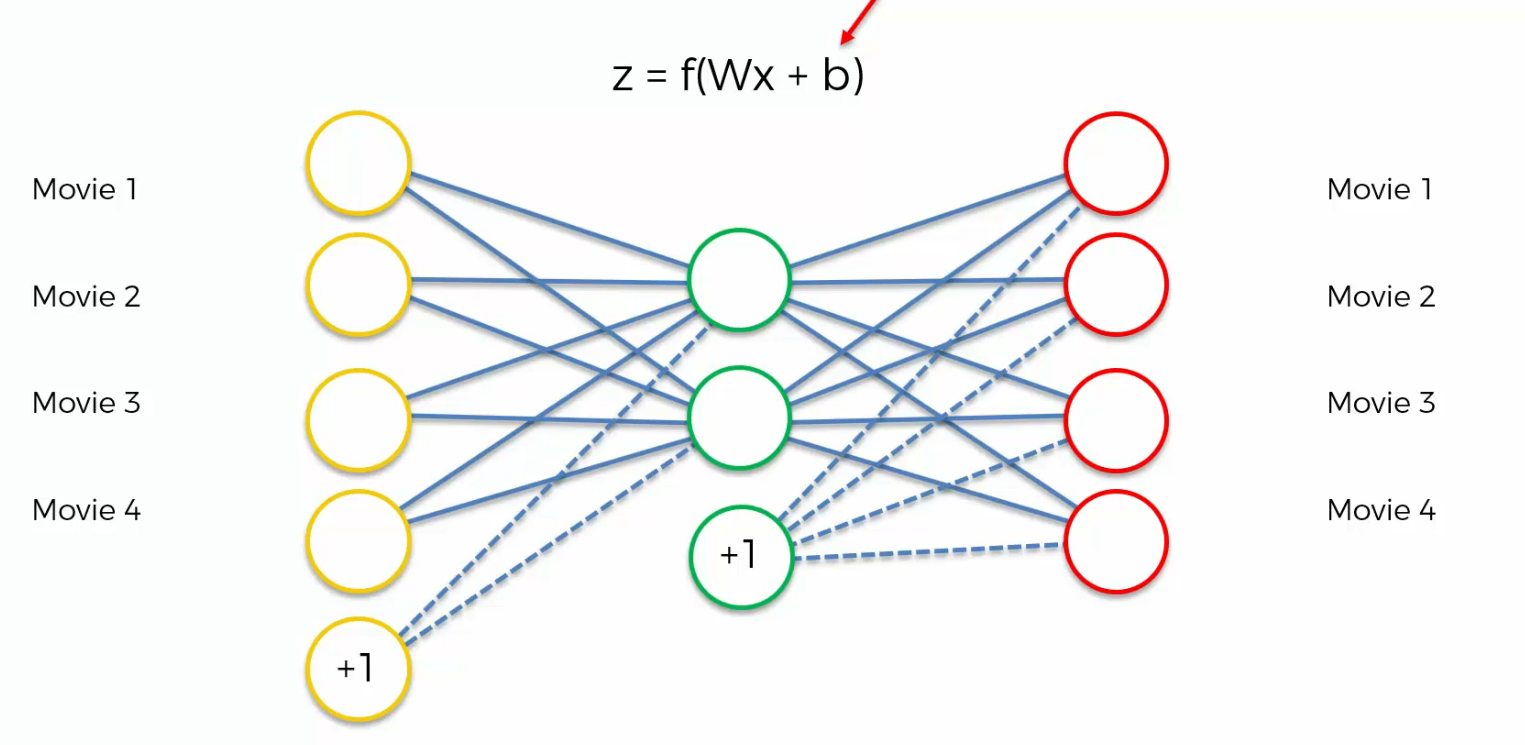
So, biases mean you might say plus one inside each one of them and usually it does.
And bias just basically means that In your activation function you've got that b over there.
So, it's just weights times x plus b and probably the more correct representation
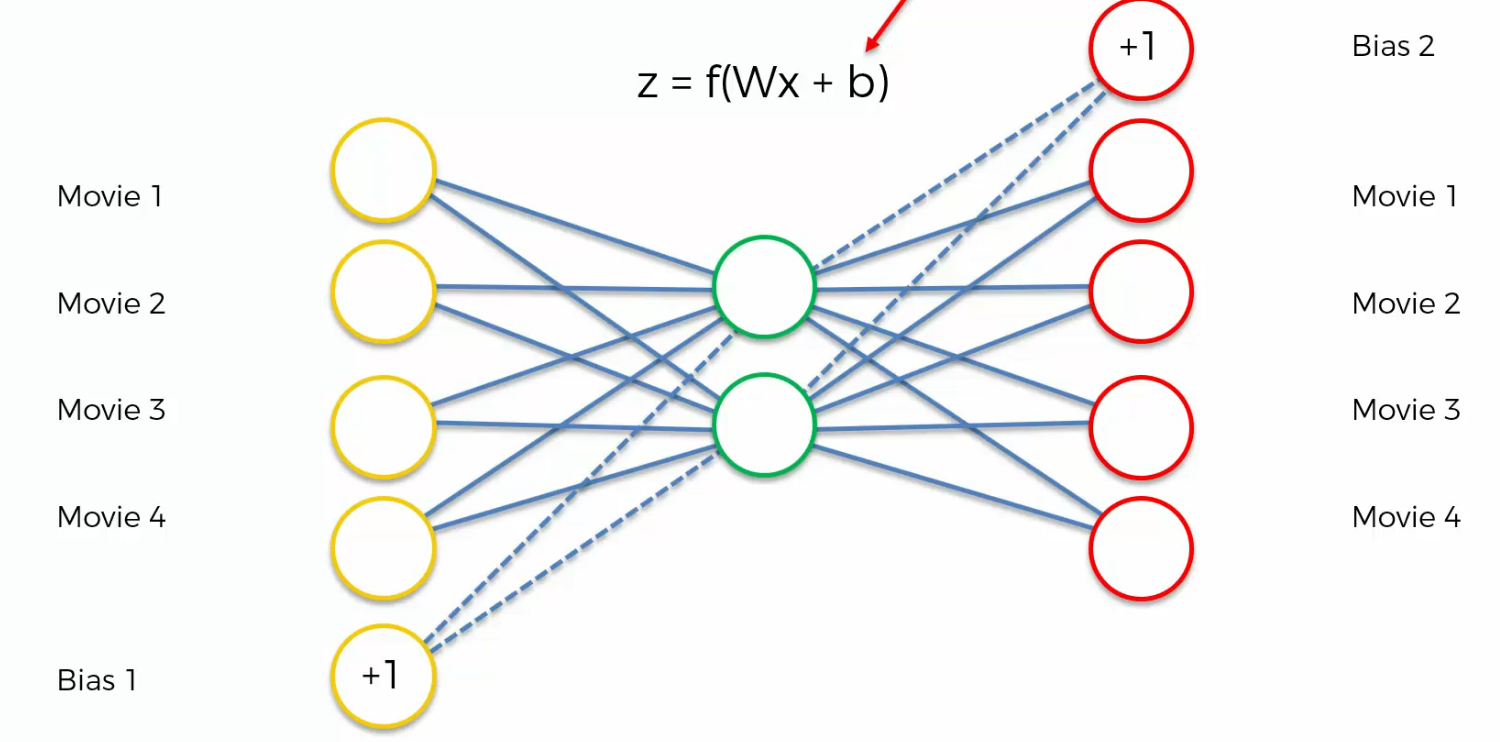
Probably the more correct representation which you'll more often see than this one. This is how it should be represented if people are showing biases.
Training an Auto Encoder
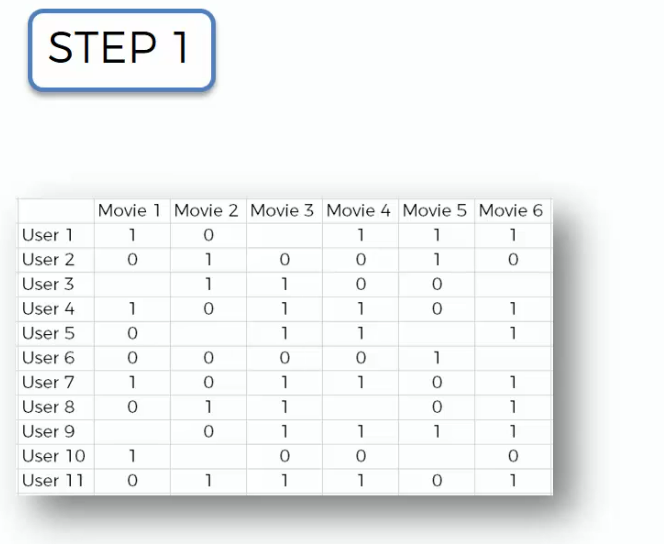
As inputs will get the ratings of lots and lots of users for these six movies,
and based on those ratings it'll come up with a way to compress that information and come up with those weights that will allow it to encode and decode it in the future.
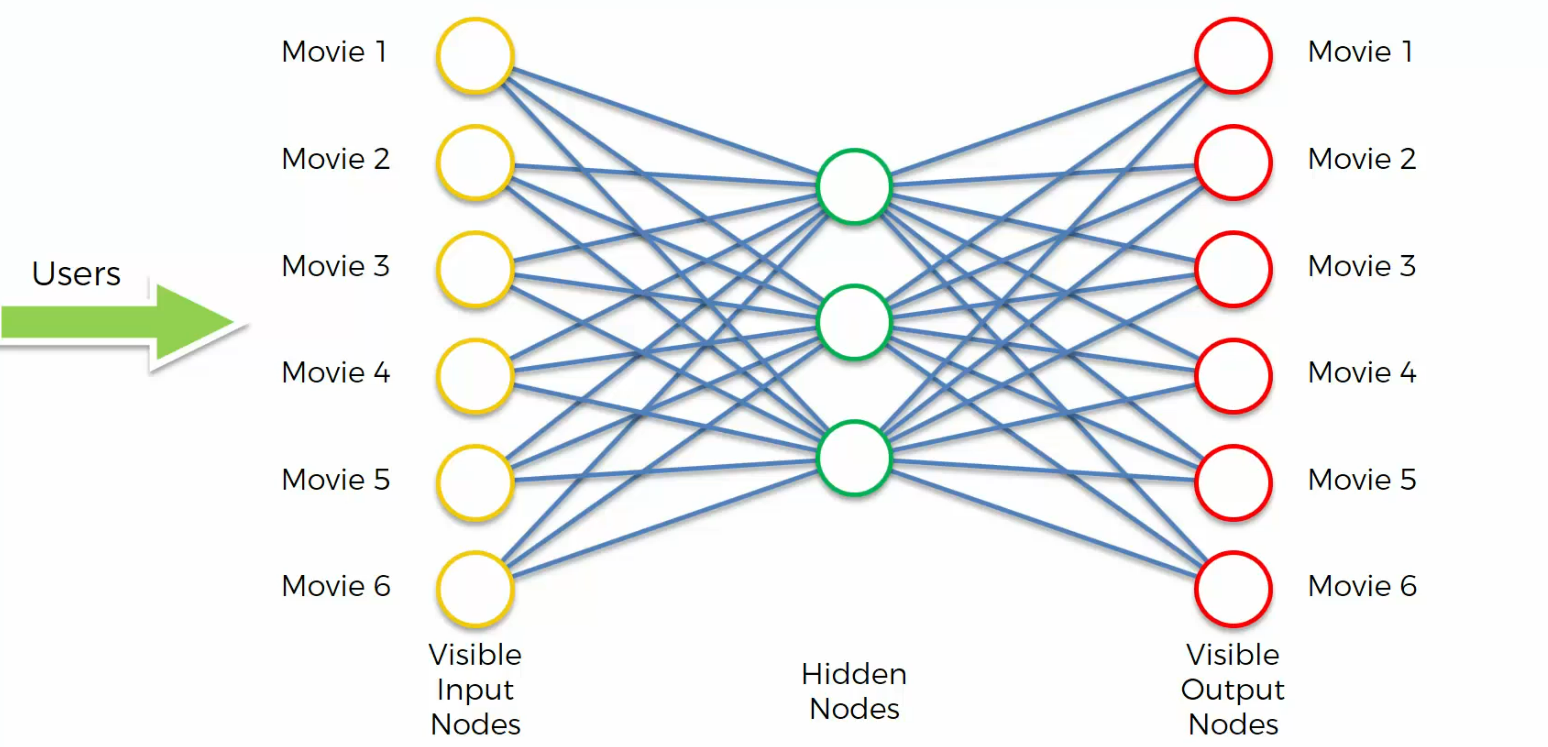
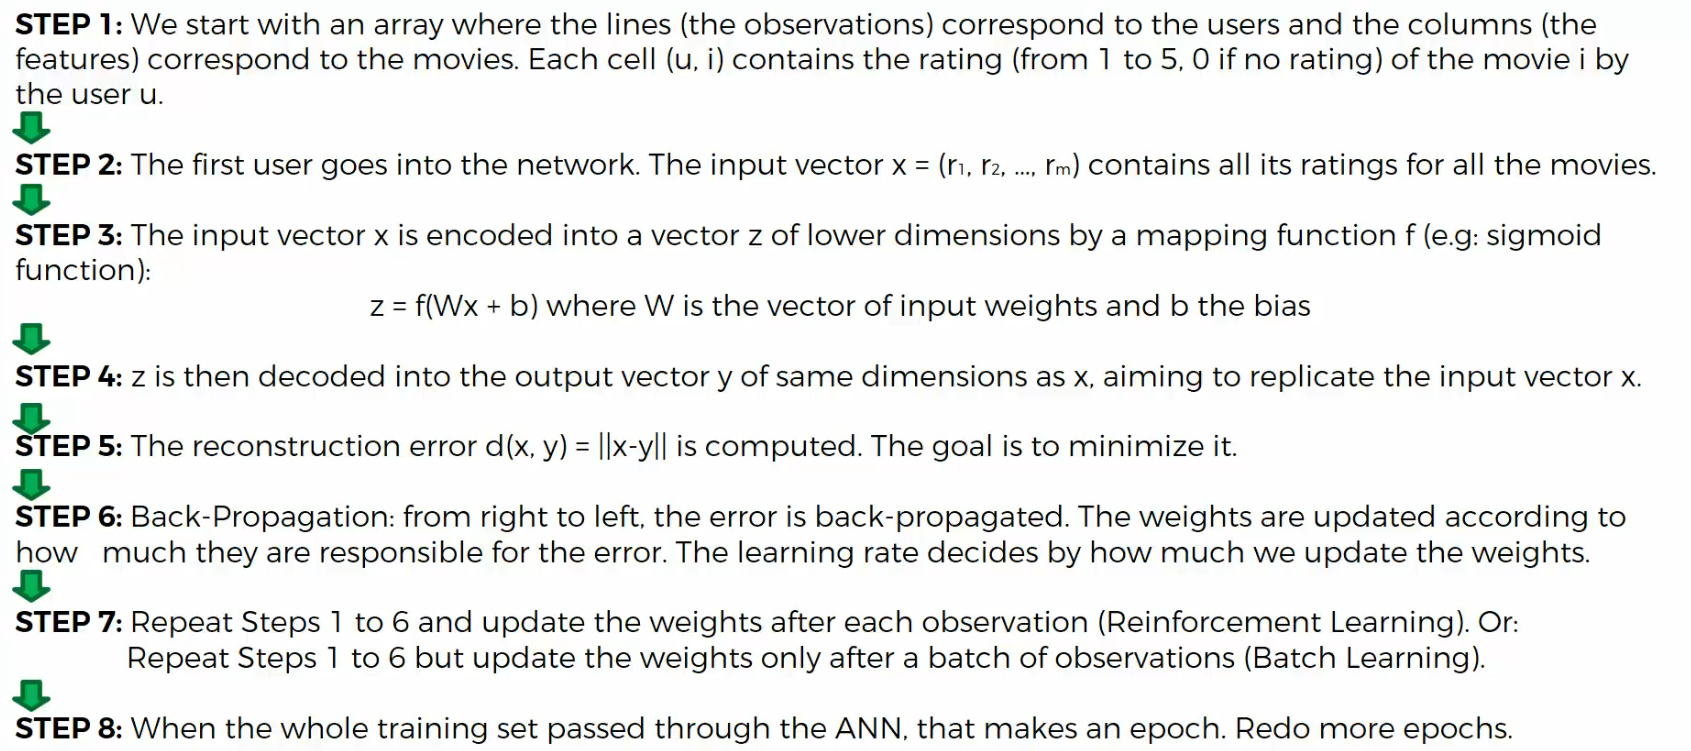
Here is our input
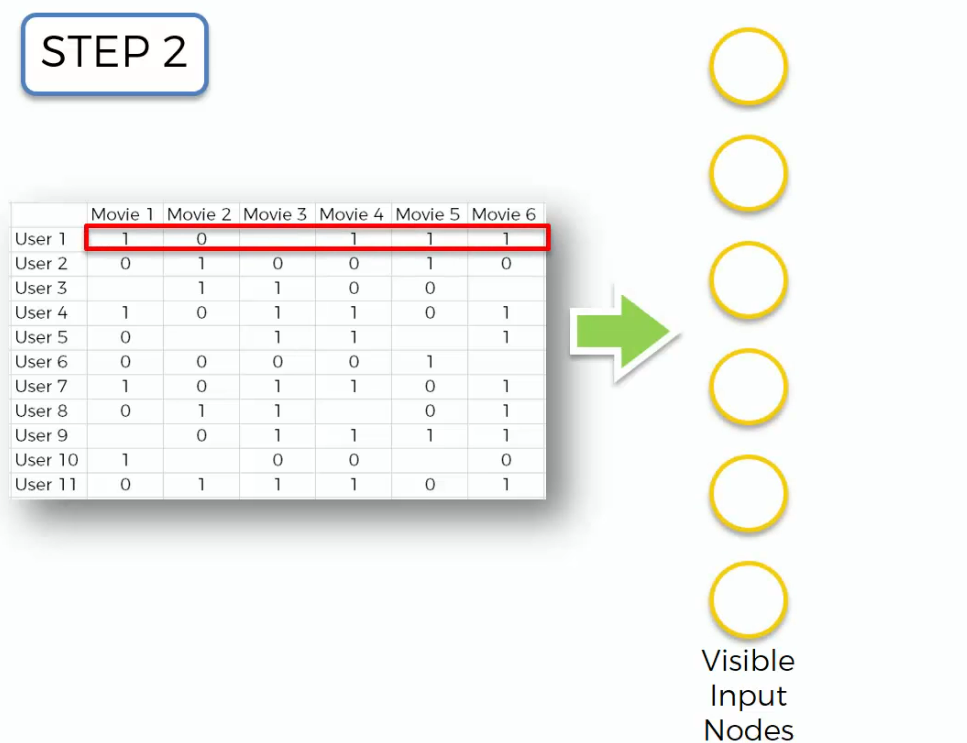
In step two, we take the first row, we put it into our Auto Encoder,
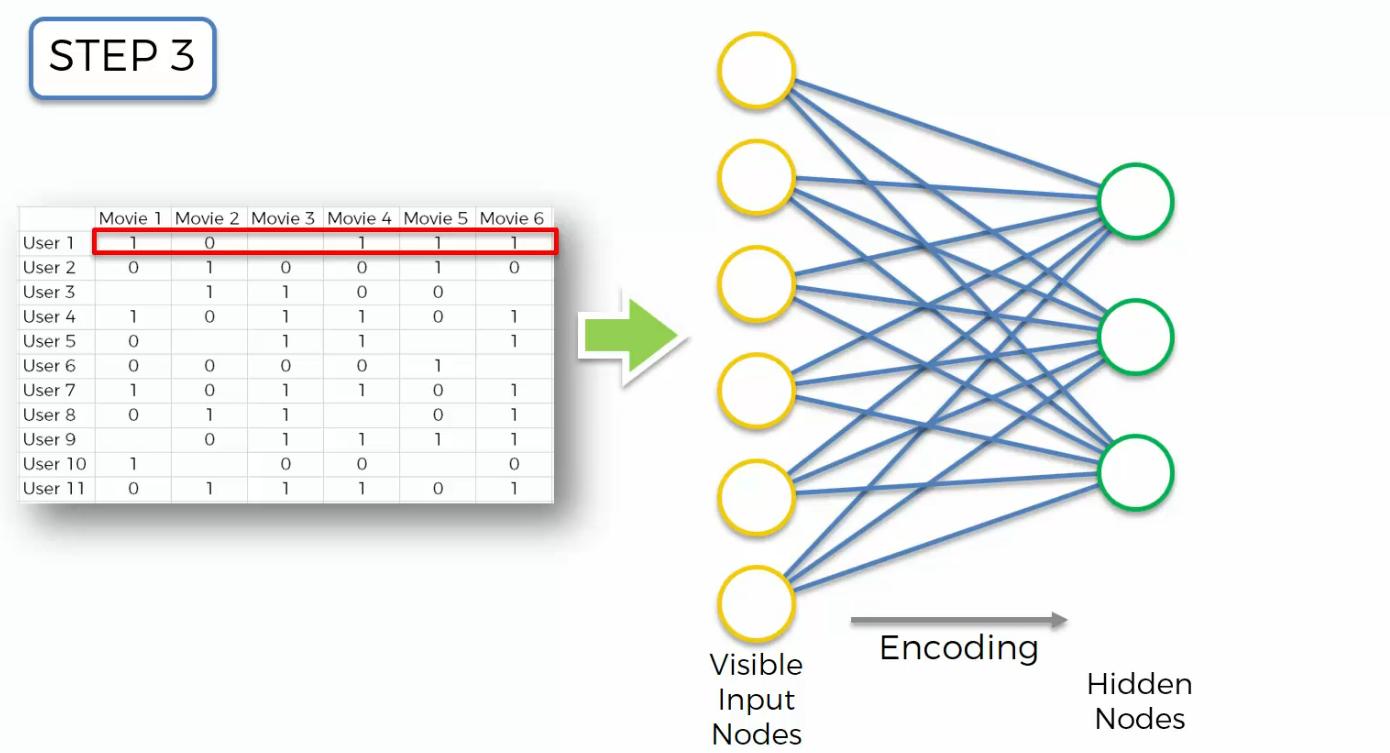
In step three, we calculate the hidden nodes, voila. Again, at the very start you'll have some randomly initialized weights, then that process called encoding.
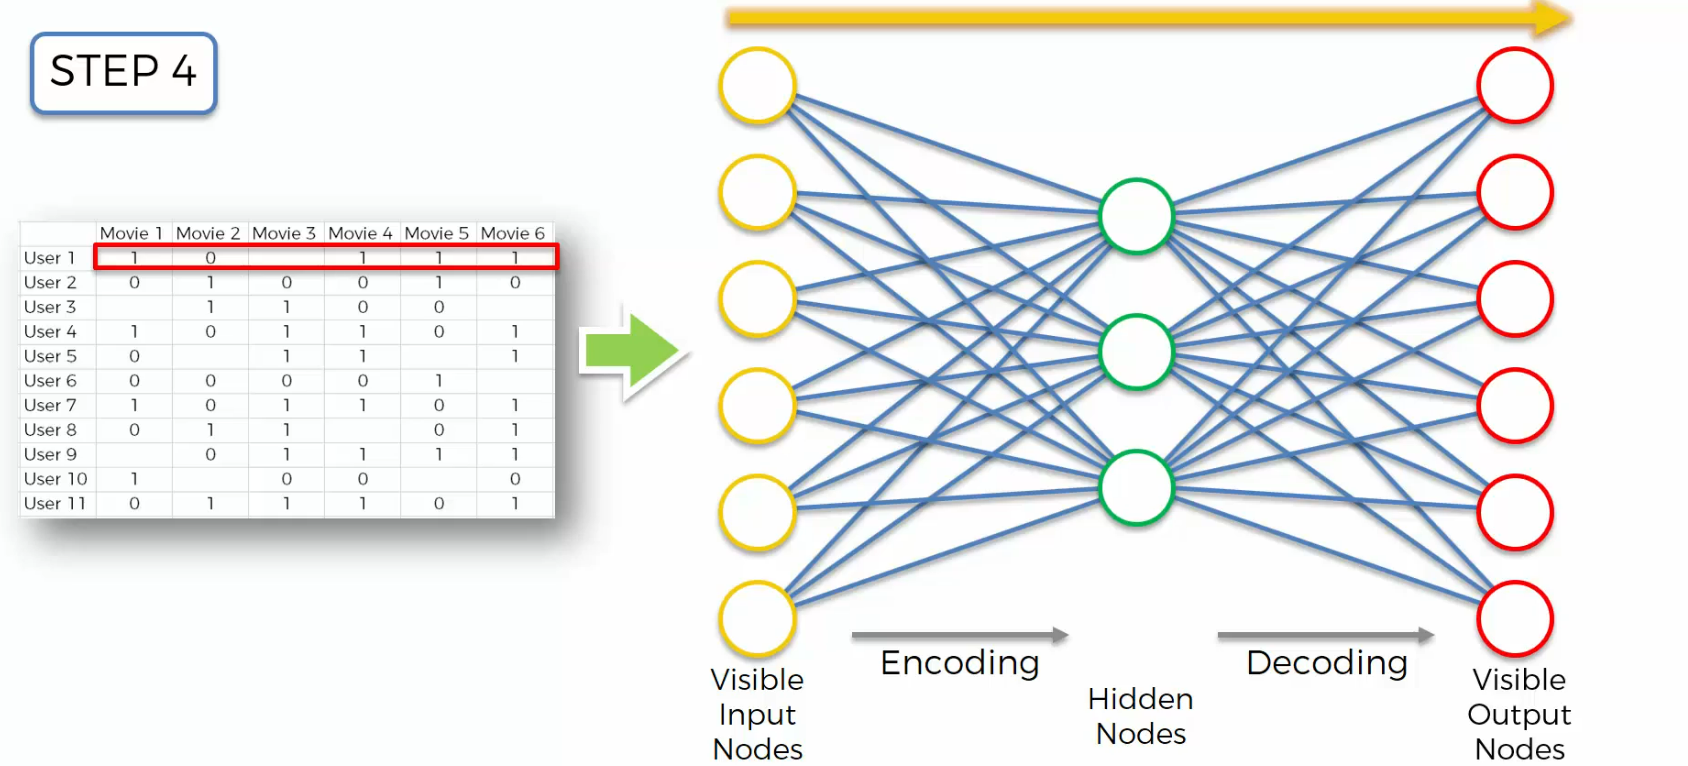
Step four, we're going to calculate our visible output nodes, again initially it will be some random starting weights.
That's a process called decoding. And then, so basically, this is a summary that yellow arrow is a summary. We've just put the information, the data through our Auto Encoder from left to right.
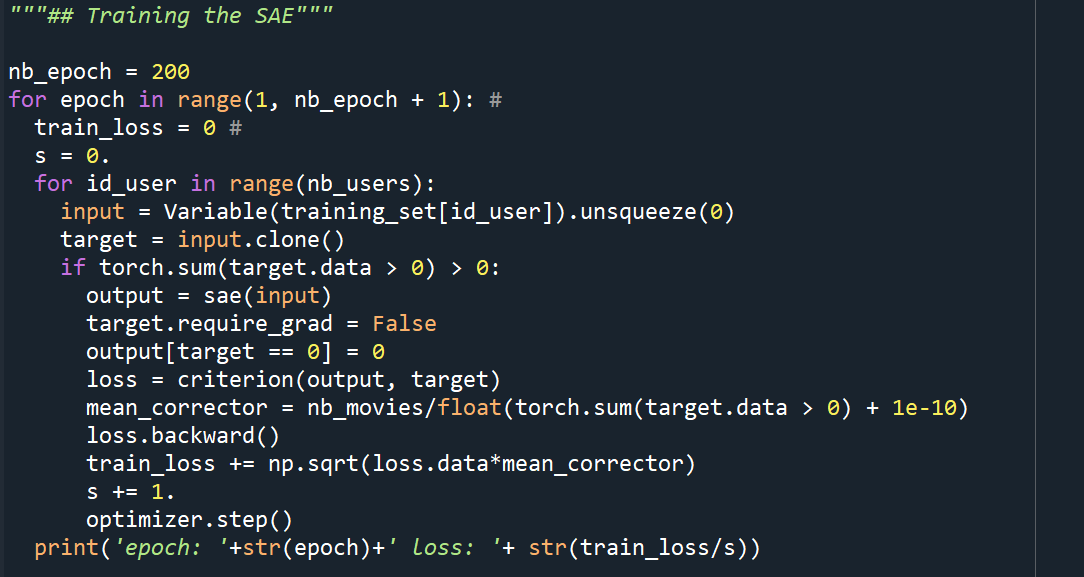
And step five, we're going to compare the results to the actual ratings for those movies. Movie one, two, three, four, five, six. And then we'll calculate the error.
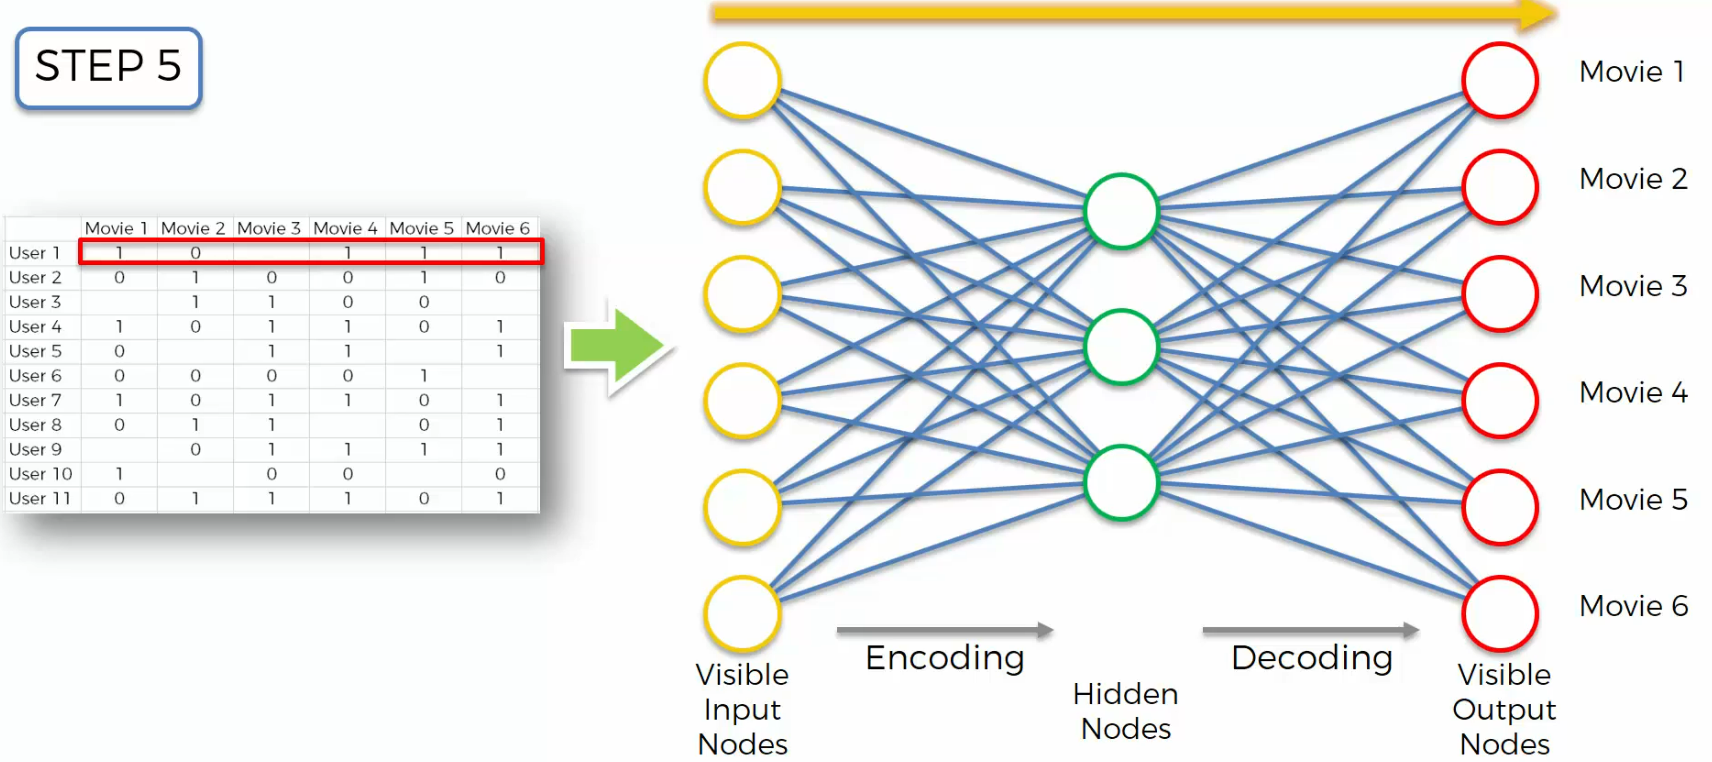
In step six, And then we will propagate it back through the network,
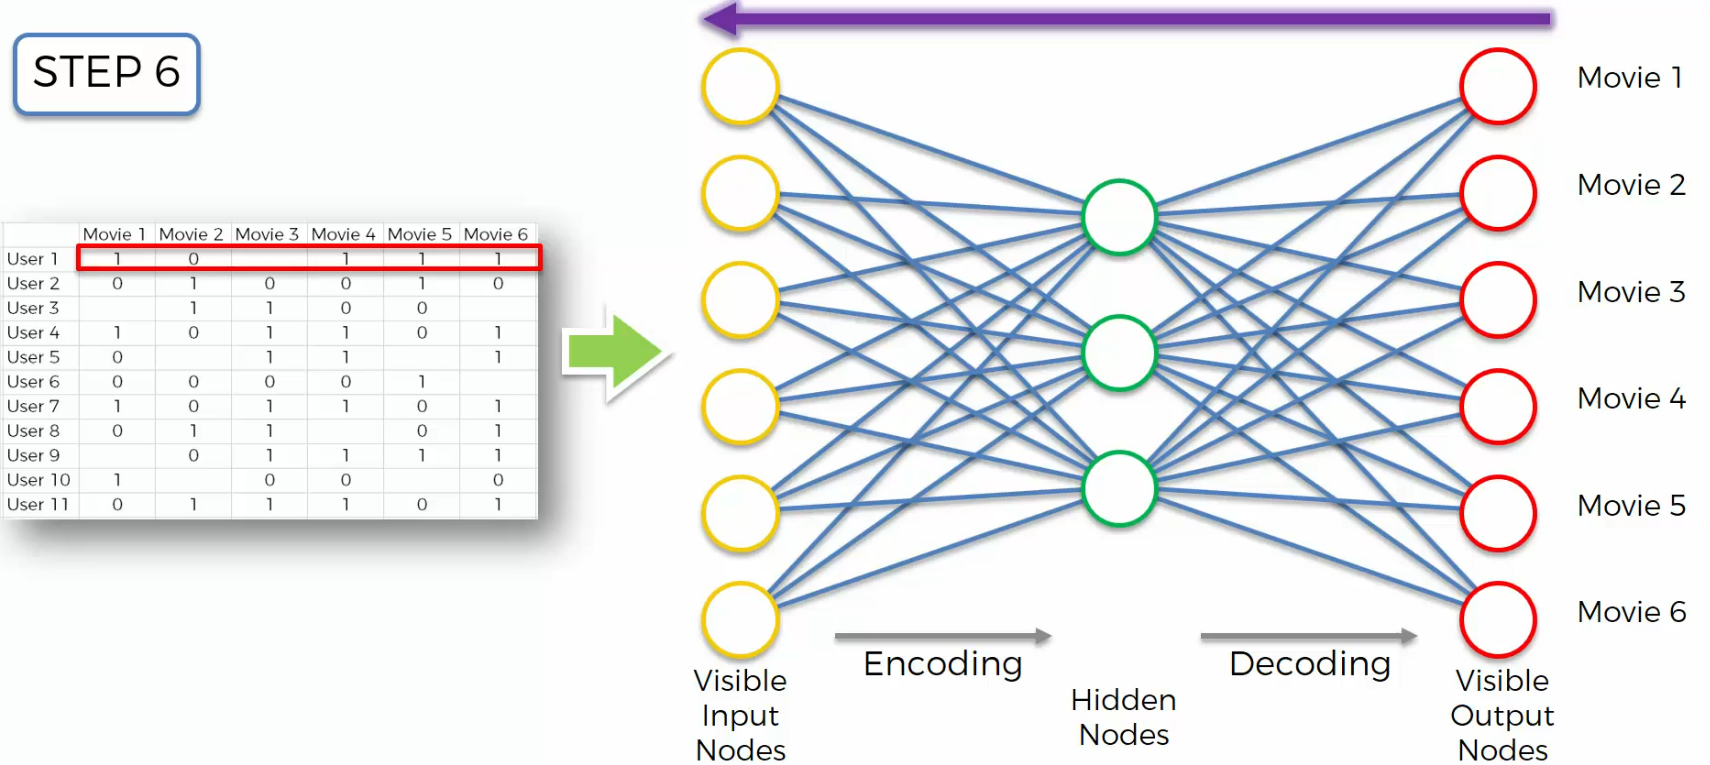
we'll adjust the weights accordingly.
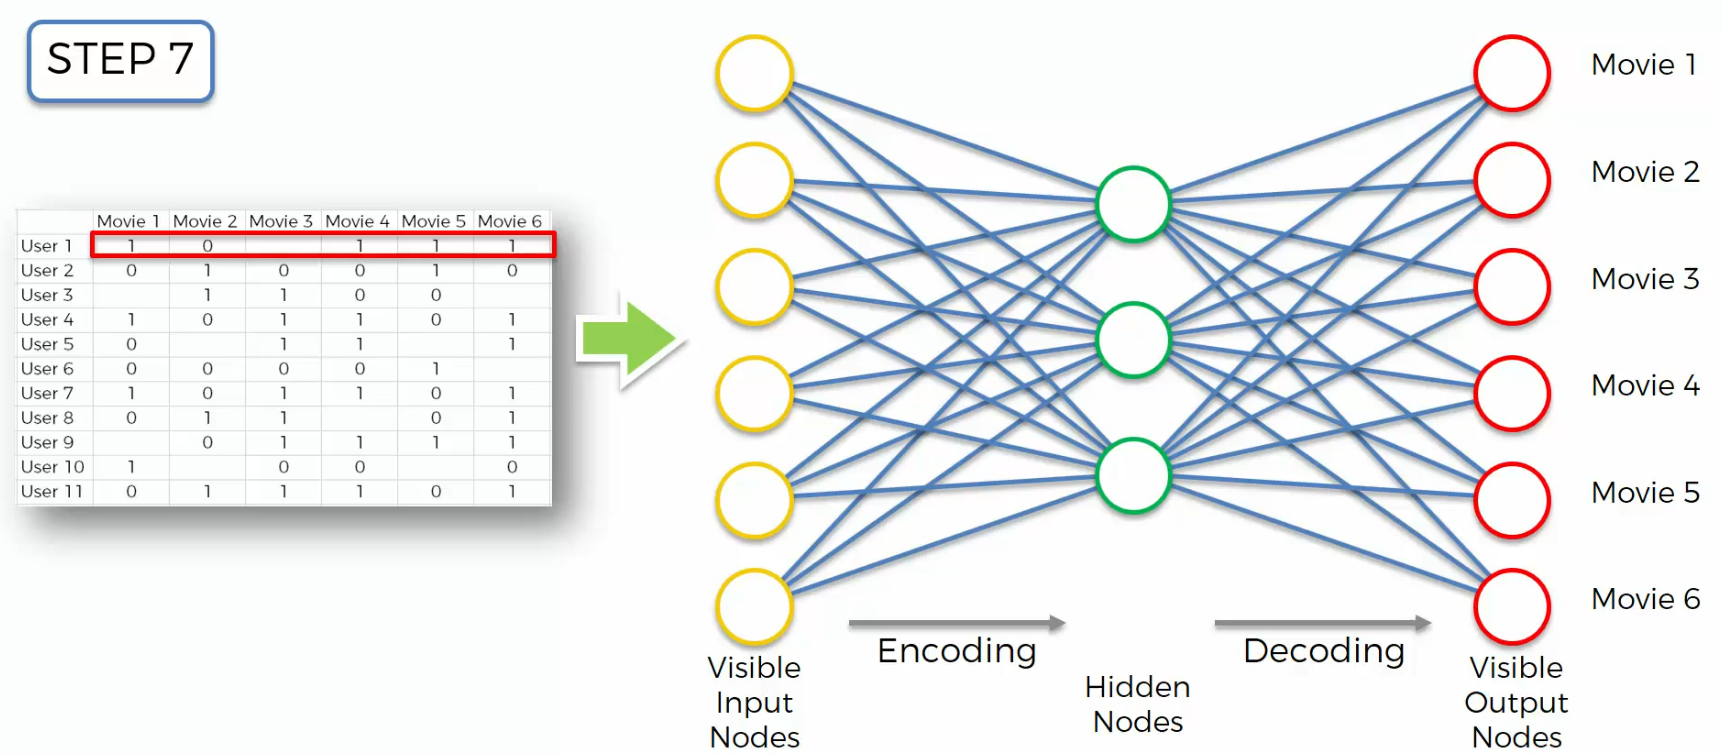
And, next we will take the next row in our data set. And we'll do the same thing and so on and so on and so on we'll continue through all the rows.
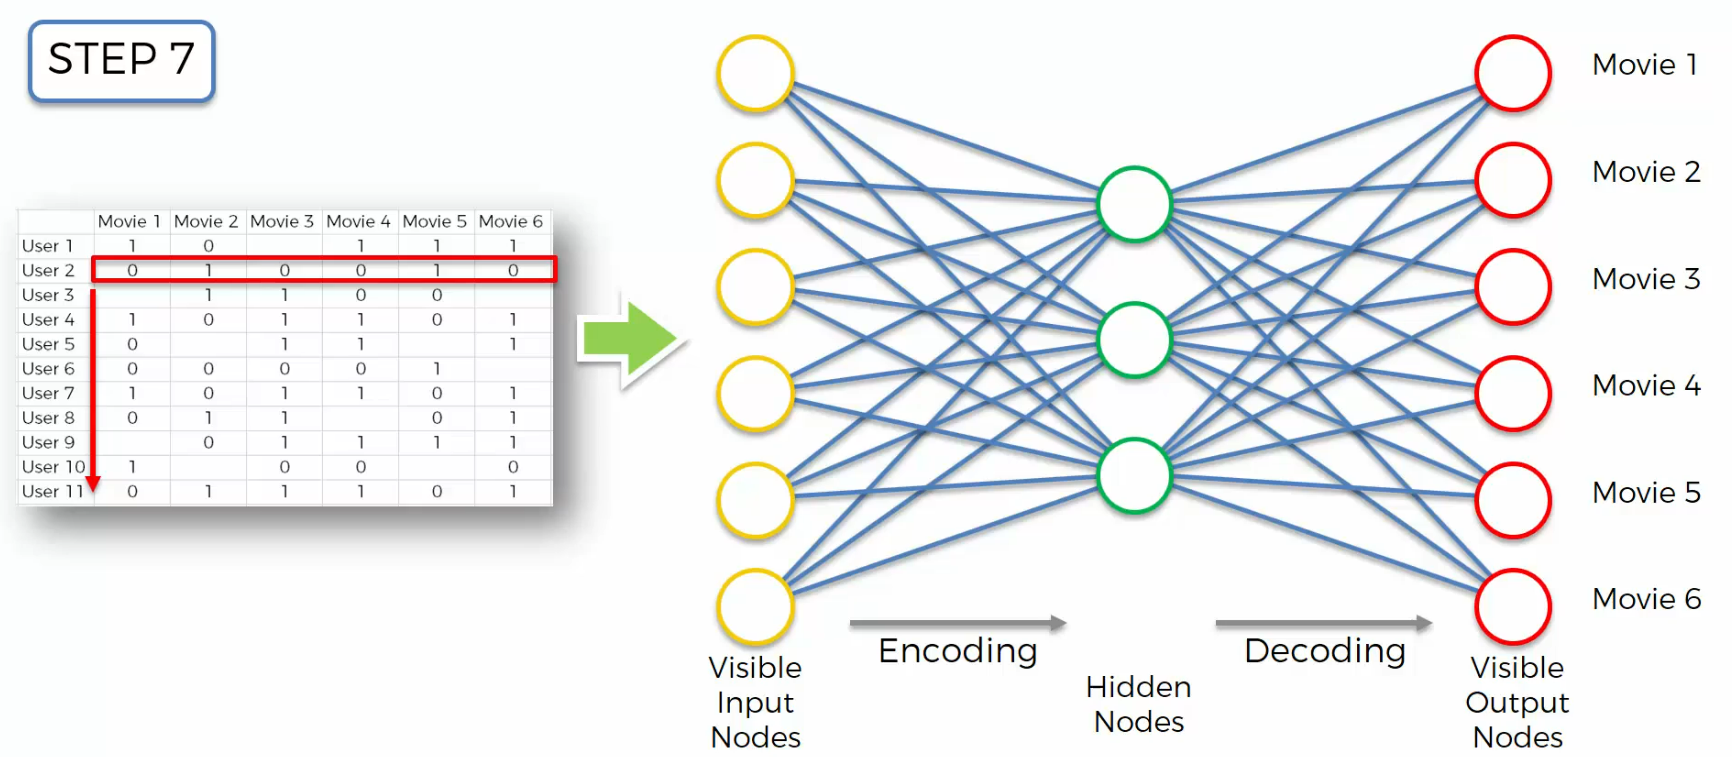
And then once we're done, we'll move on to step eight, that means we've finished a whole epoch. And then we just repeat these epochs,we continue doing that with our data set depending on how many times we wanna do that.
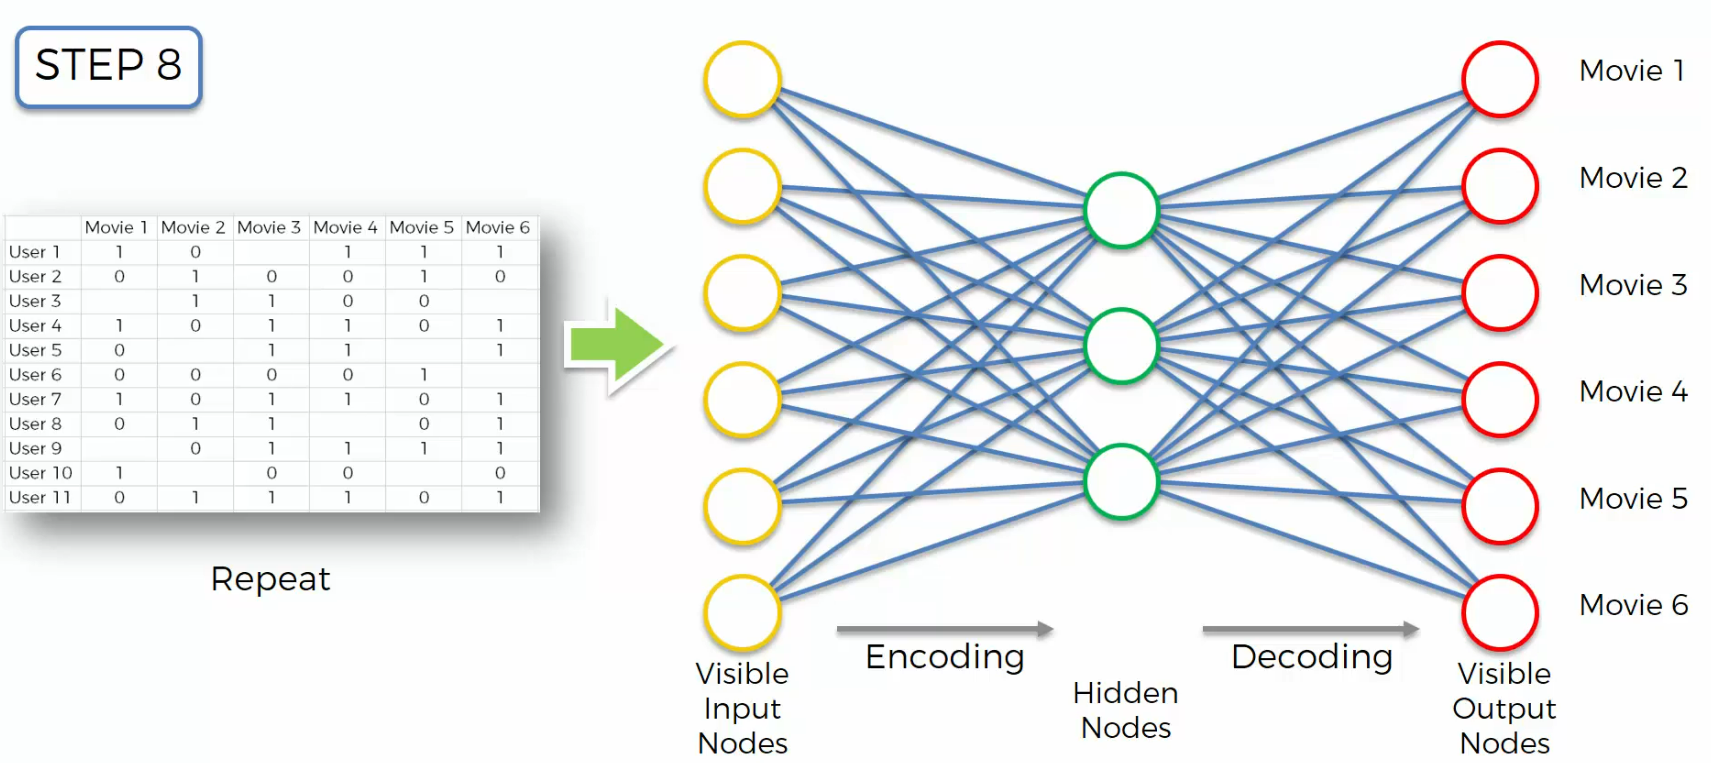
Read this out if you want to build autoencoders in keras
Over complete Hidden Layers
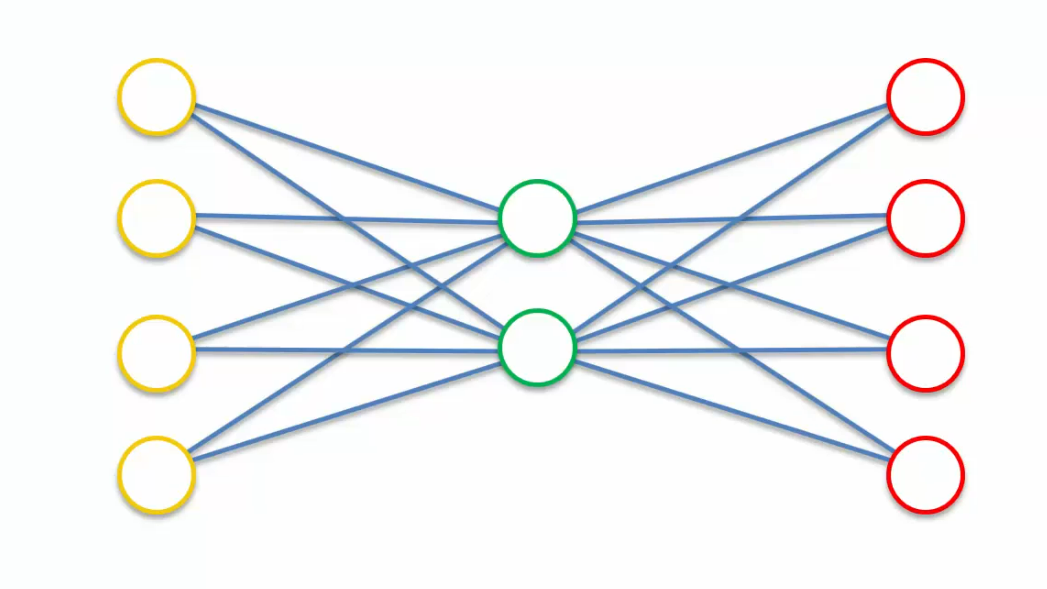
The question is here, what if we wanted to increase the number of nodes in the hidden layer? What if we wanted actually to have more nodes in the hidden layer than in the input layer?
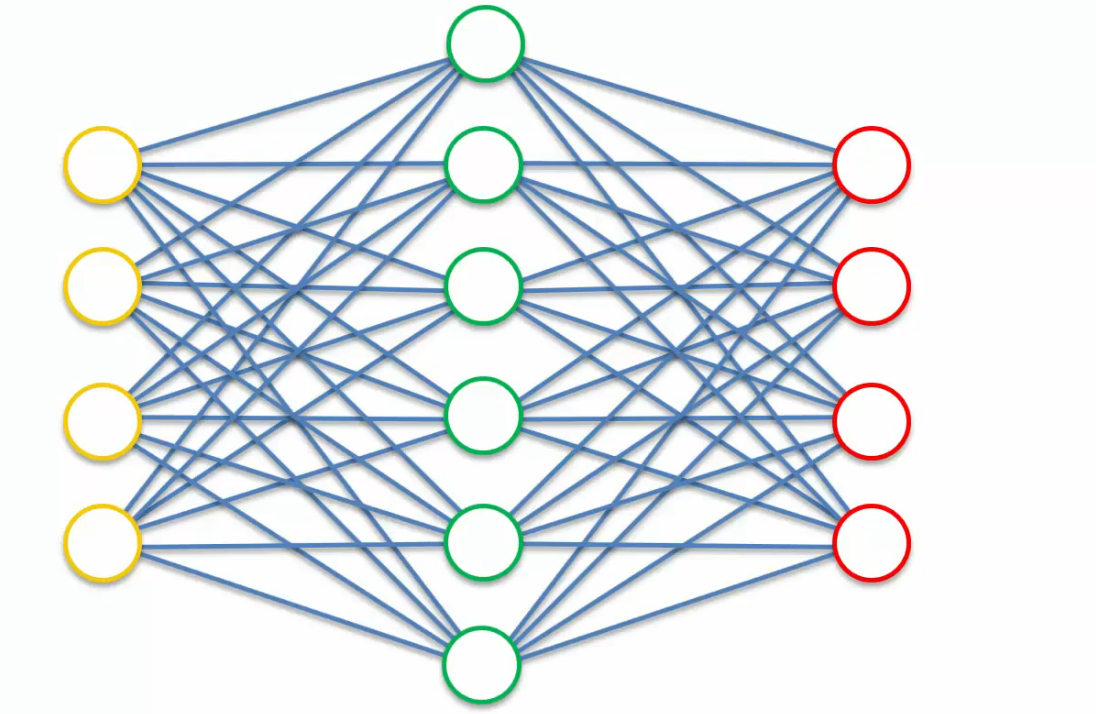
Something like this.We said that an autoencoder can be used as a feature extraction tool, but what if we want more features?
In case you have four inputs, basically as soon as you give it a hidden layer which is the same size or greater than the input layer, it just basically is able to cheat and just say, "Alright this node is always going to be equal to this node,"and then this node is equal to this node."So information is just gonna fly through like that,and then you'll even have some extra.
There are few autoencoders to solve this issue
Sparse Autoencoders
A sparse autoencoder is an autoencoder which looks like this, where the hidden layer is greater than the input layer. But a regularization technique which introduces sparsity has been applied. A regularization technique basically means something that helps prevent over-fitting or stabilizes the algorithm. In this case, if it was just sending the values through, it would be over-fitting in a way.
So, at any time the autoencoder can only use a certain number of nodes from it's hidden layer.
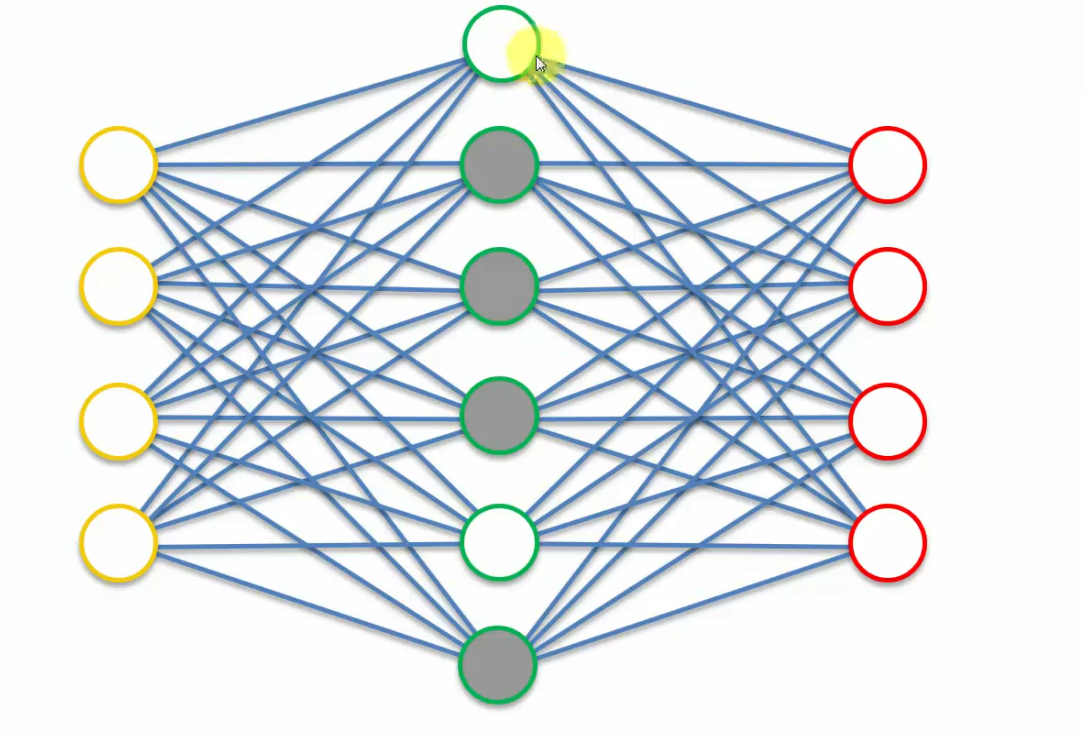
For instance, it can use two nodes in this case. And so, when the values go through these nodes are out putting very very small values, so or very tiny values which are insignificant.
so it's not inputting insignificant values and therefore only these nodes are actually participating.
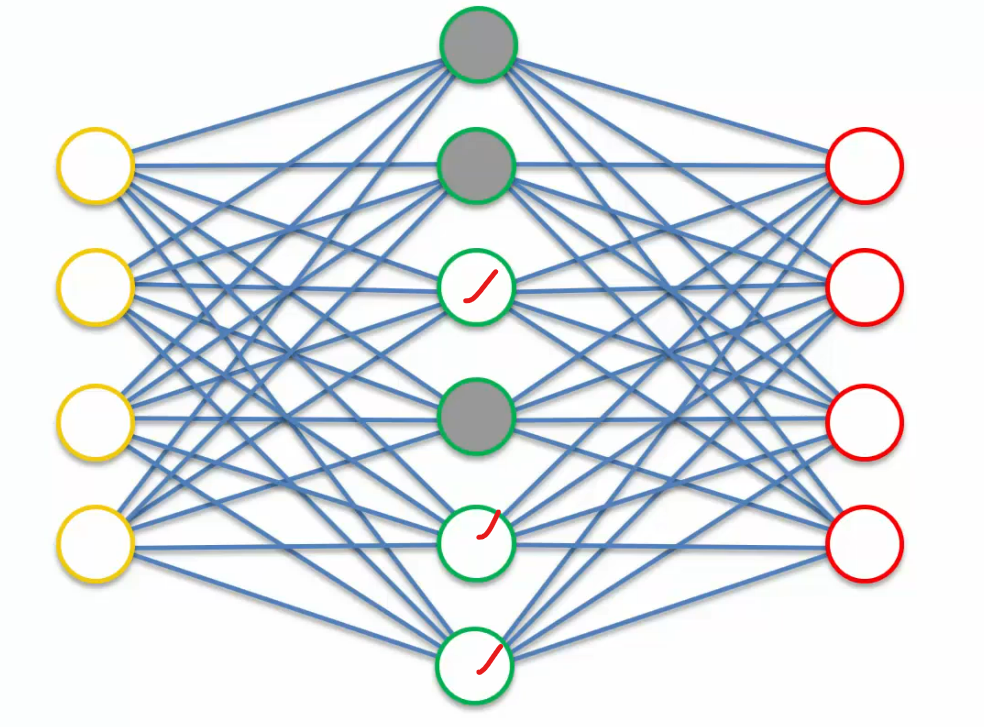
Then in another pass these nodes are really participating.
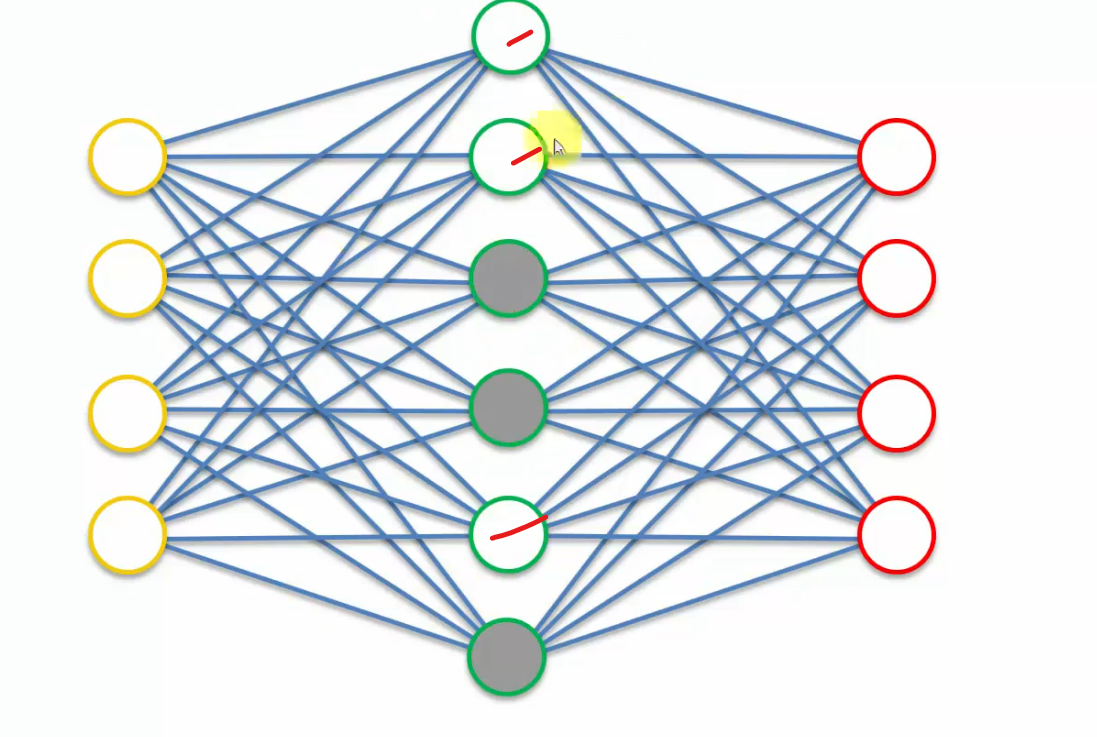
Another pass these nodes are really participating.
So you are extracting features from each one of these nodes.But at the same time, not at any given pass, you're not using all of these hidden layer nodes.
So the autoencoder cannot cheat because even though it has more nodes in the hidden layer than in the input layer, it is not able to use all of them at any given pass.
Read more
Denoising Autoencoders
This is what we have seen so far
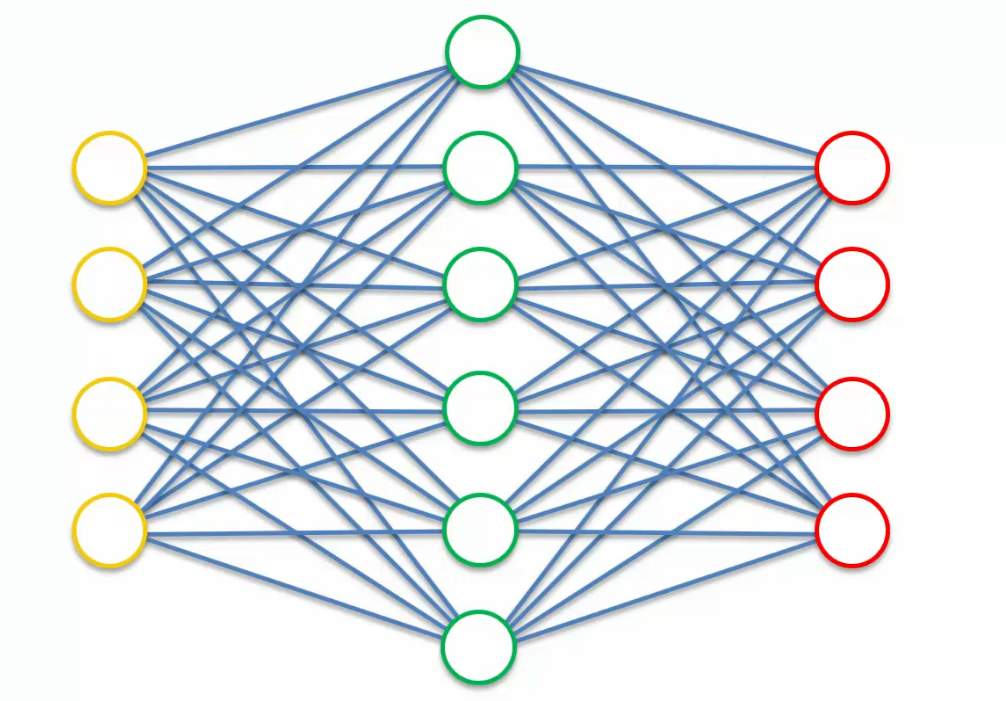
what we are going to do here is we are going to take these input values and we're going to move them to the left and replace them with something else and this something else is a modified version of our input values.
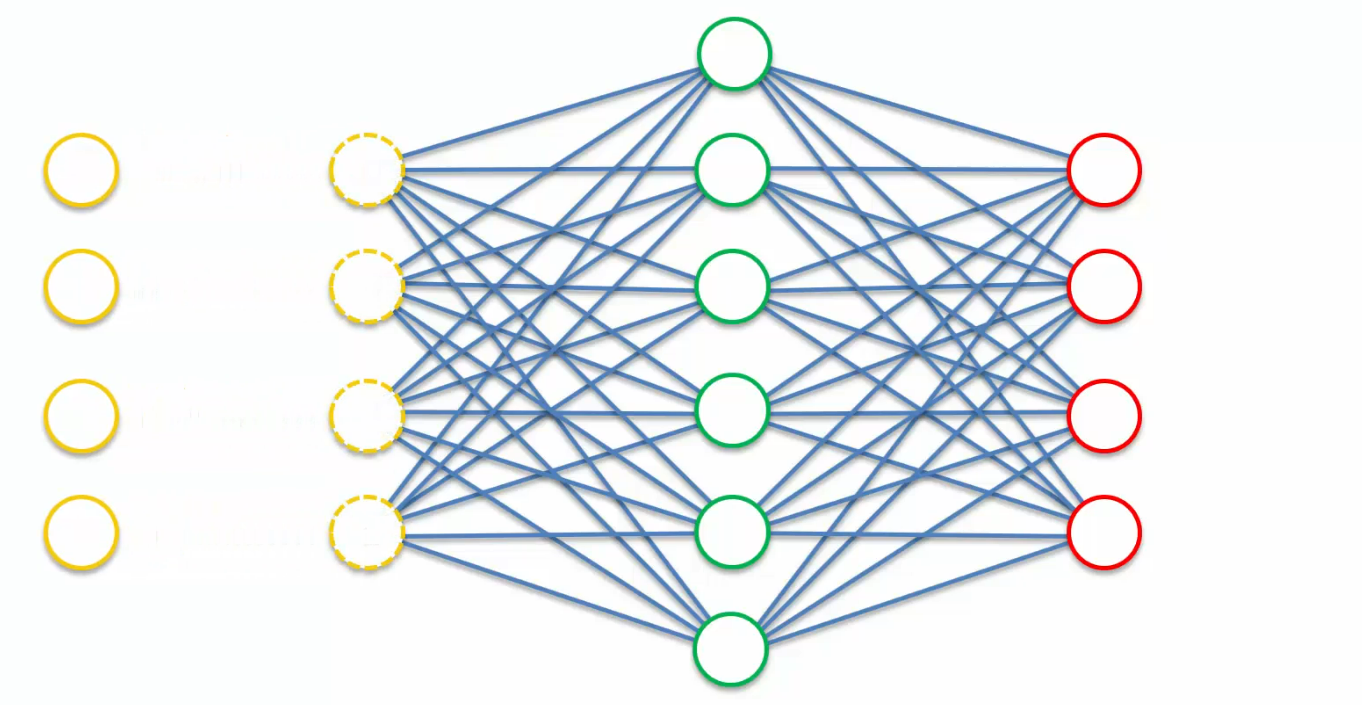
let's say we have input values X1, X2, X3 and X4.
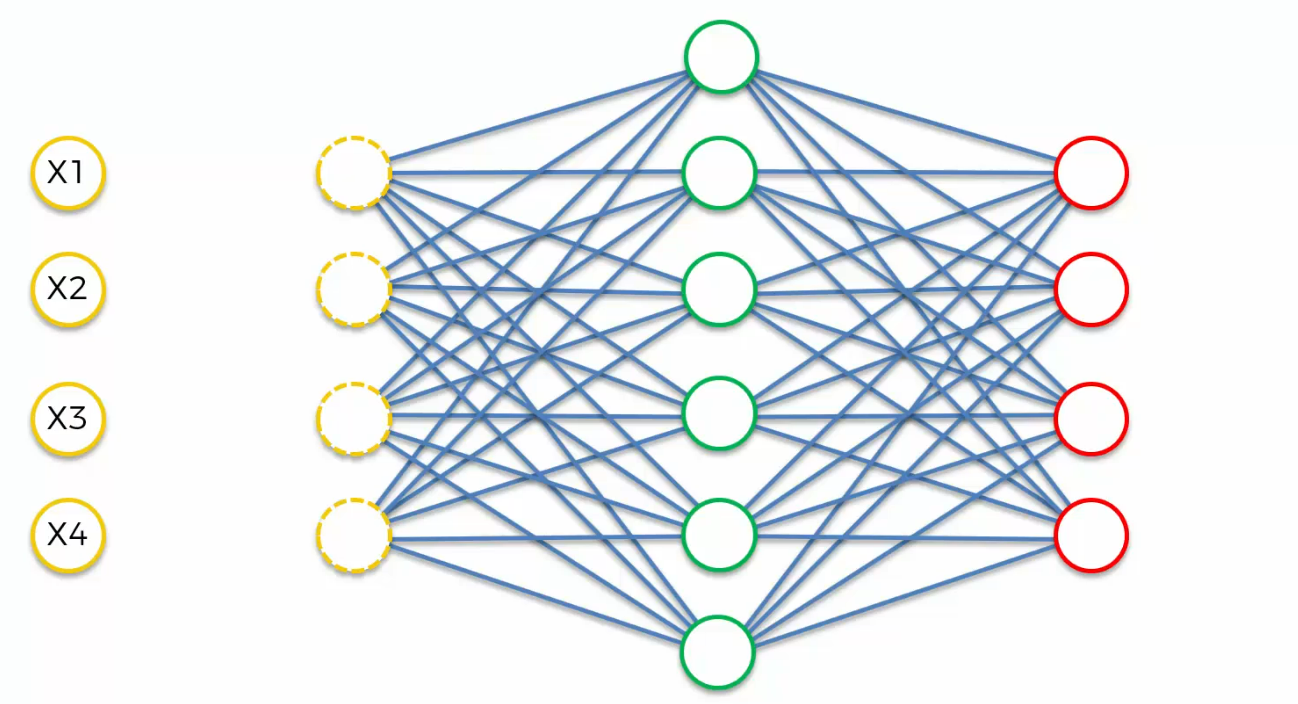
Well, what we are going to do is we're going to take these inputs and
randomly out of them, we're going to turn some of them into zeros.
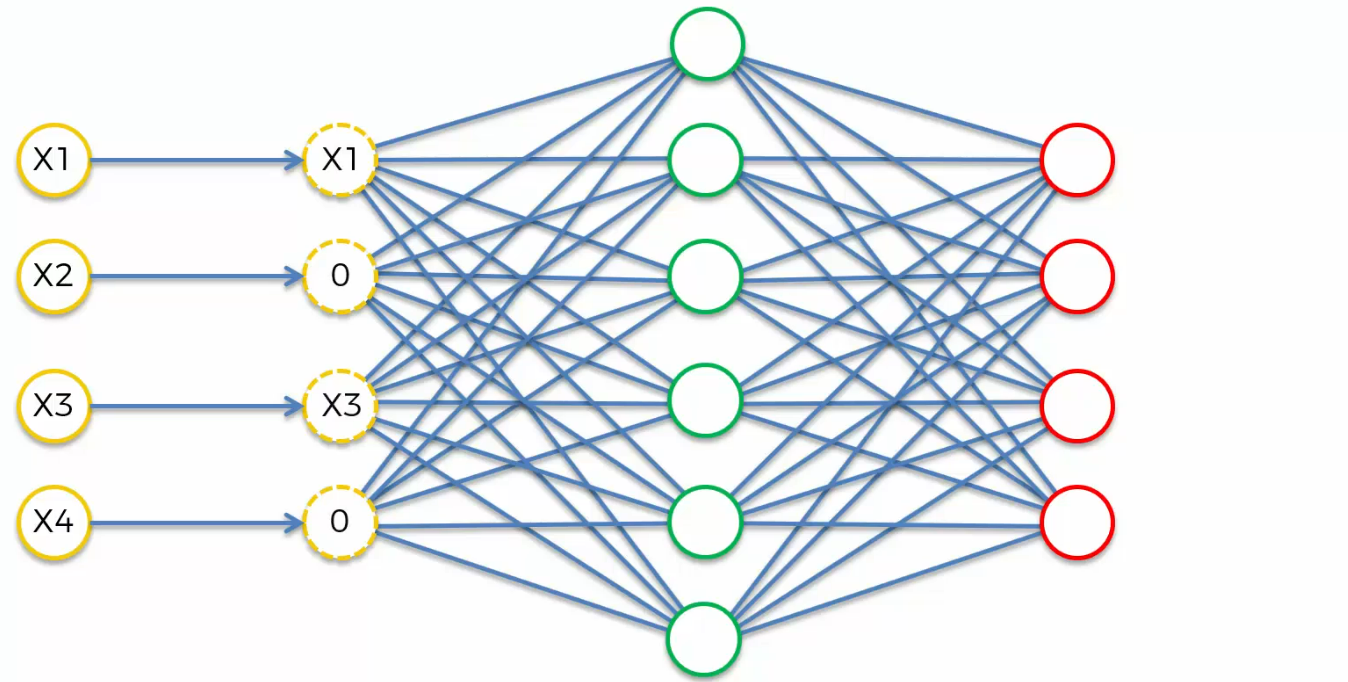
you can specify in the setup of your Autoencoder, it can be, for instance, half of
your inputs that you have are turned into zeros every single time and it happens randomly
Once you put this data through your Autoencoder,
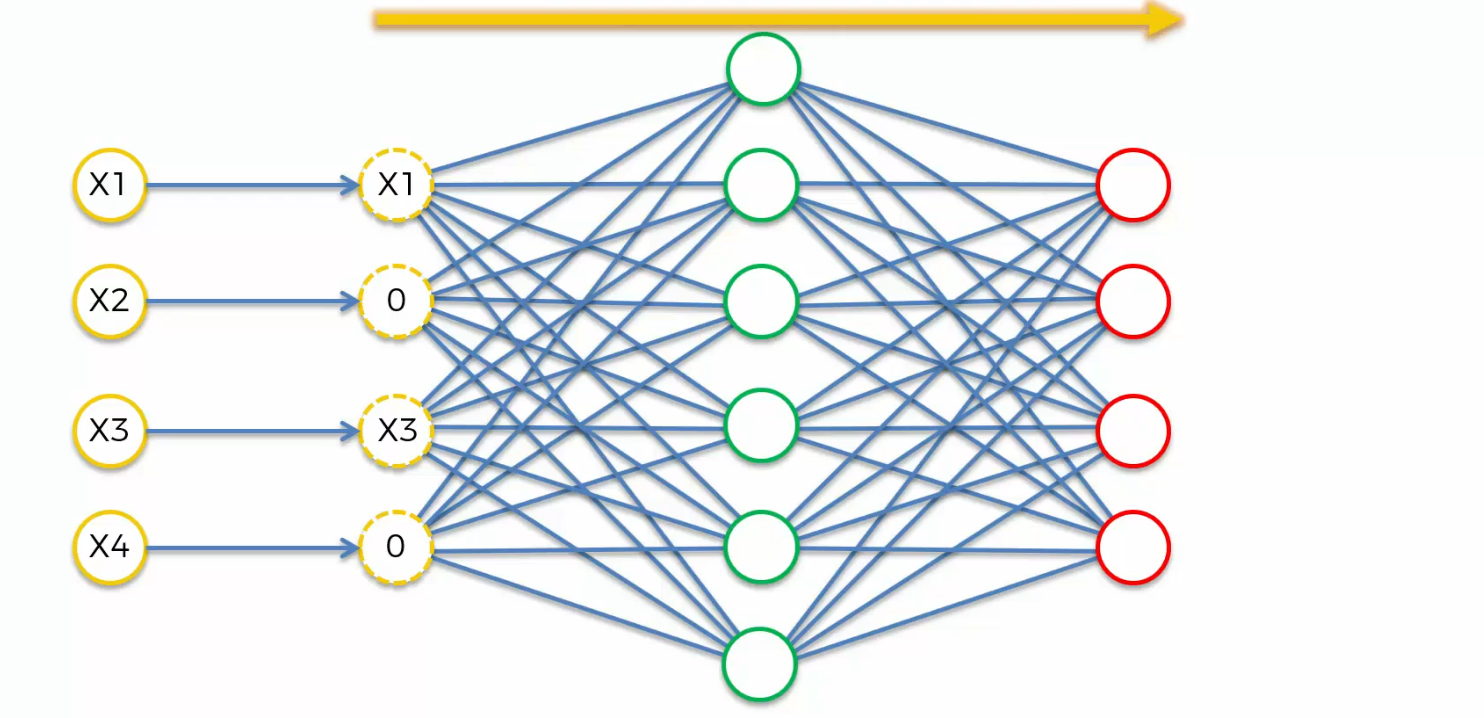
what you do in the end is you can pair the output, not with the modified values, but with their original input values.
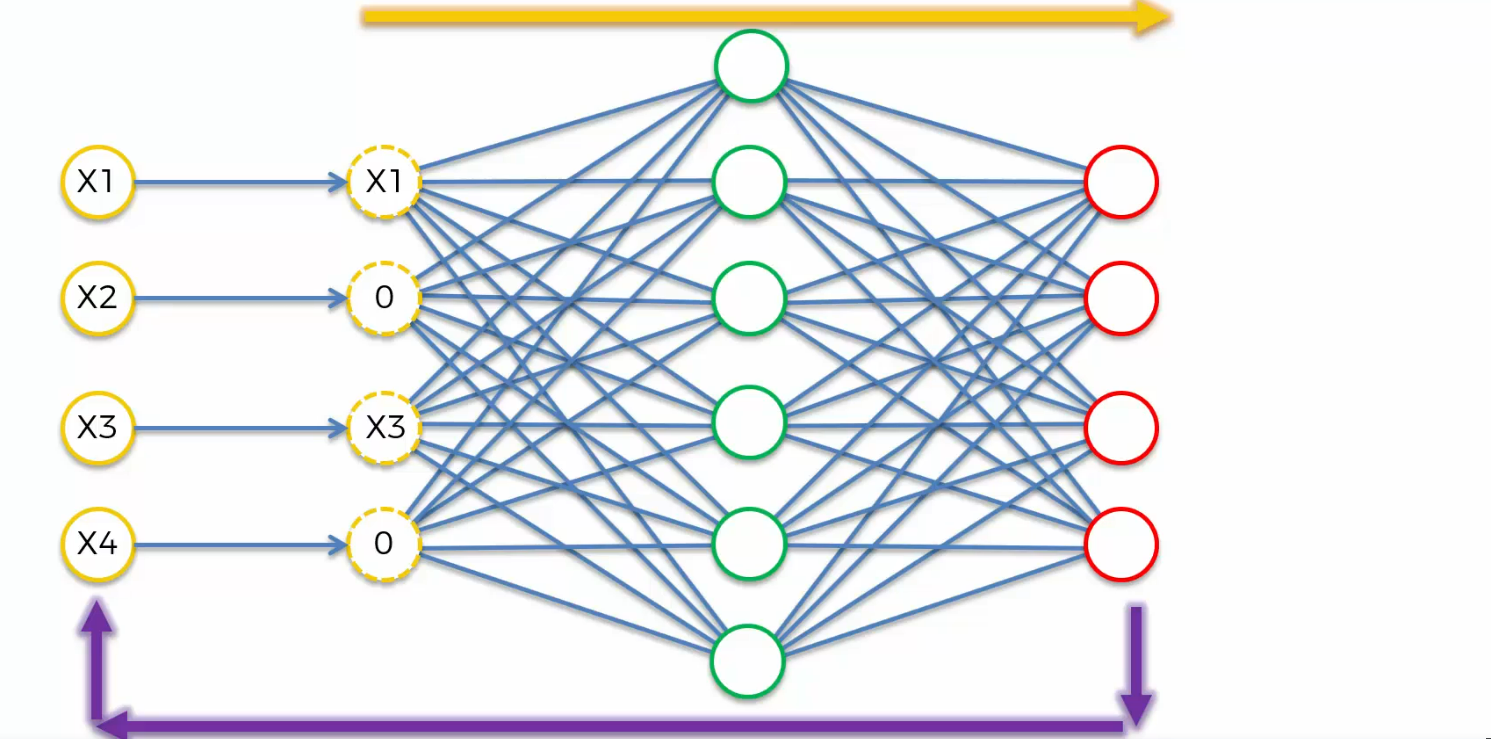
That prevents the Autoencoder from simply just copying that data or those inputs all the way through to the outputs because it's actually comparing the output, not with the noisy but with the original inputs. it's important to note here that because this happens randomly, this type of Autoencoder is a stochastic Autoencoder.
Read more
Contractive Autoencoders
This is the basic autoencoder we have seen
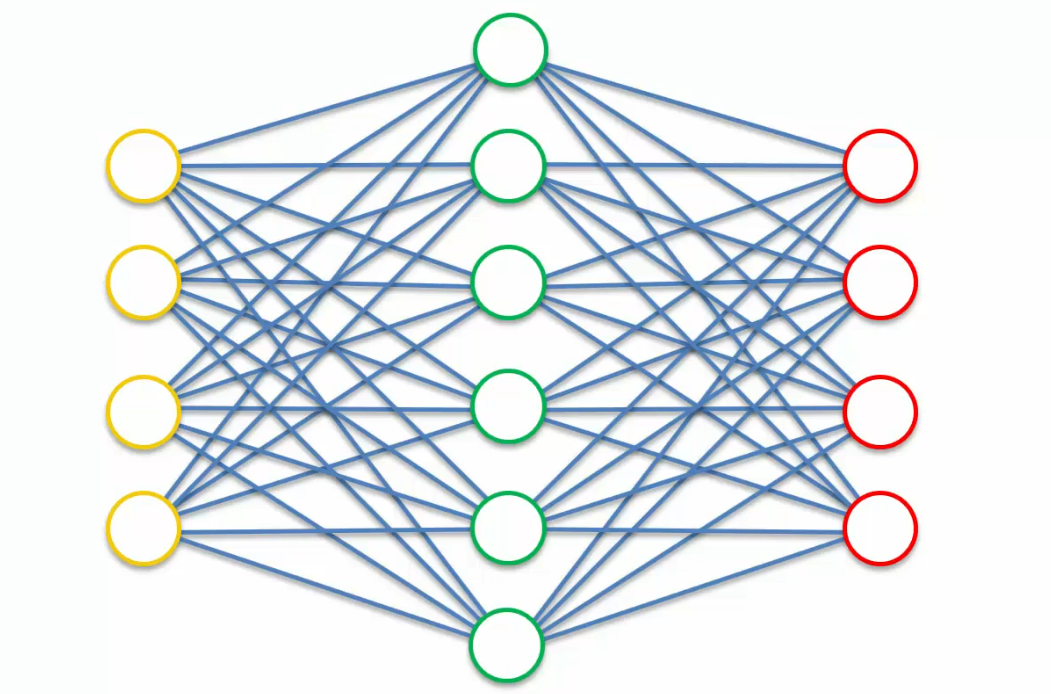
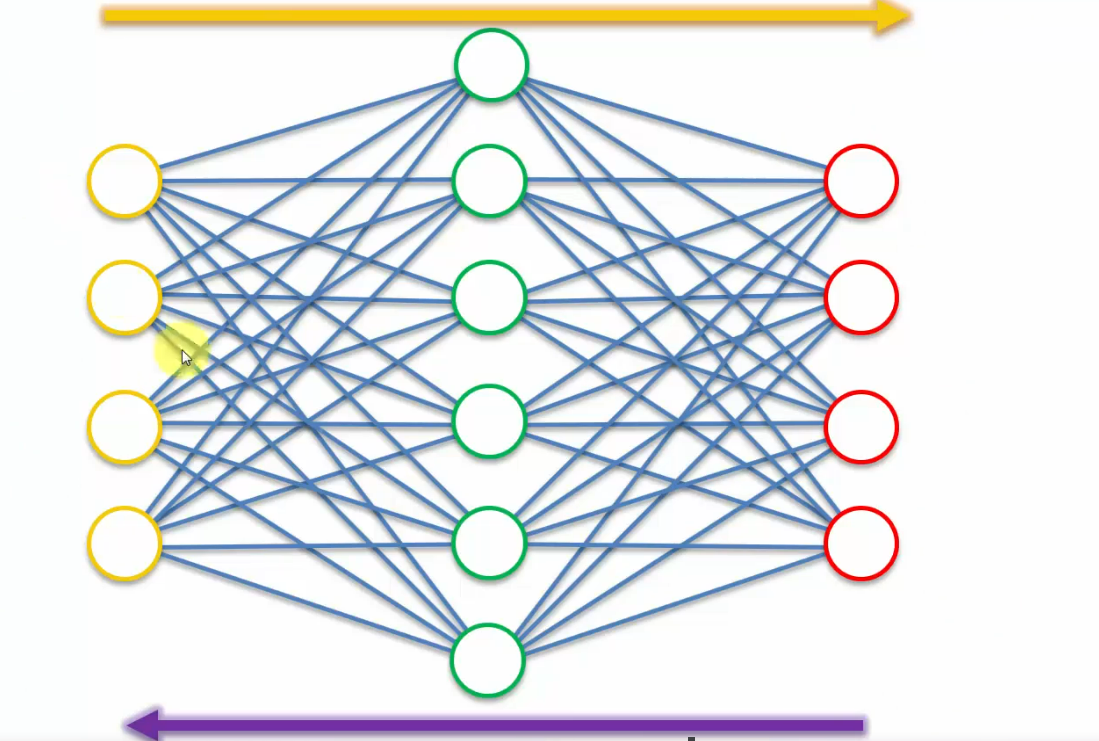
so, what the contractive autoencoder does is it leverages the whole process, this whole training process where information goes through the autoencoder,
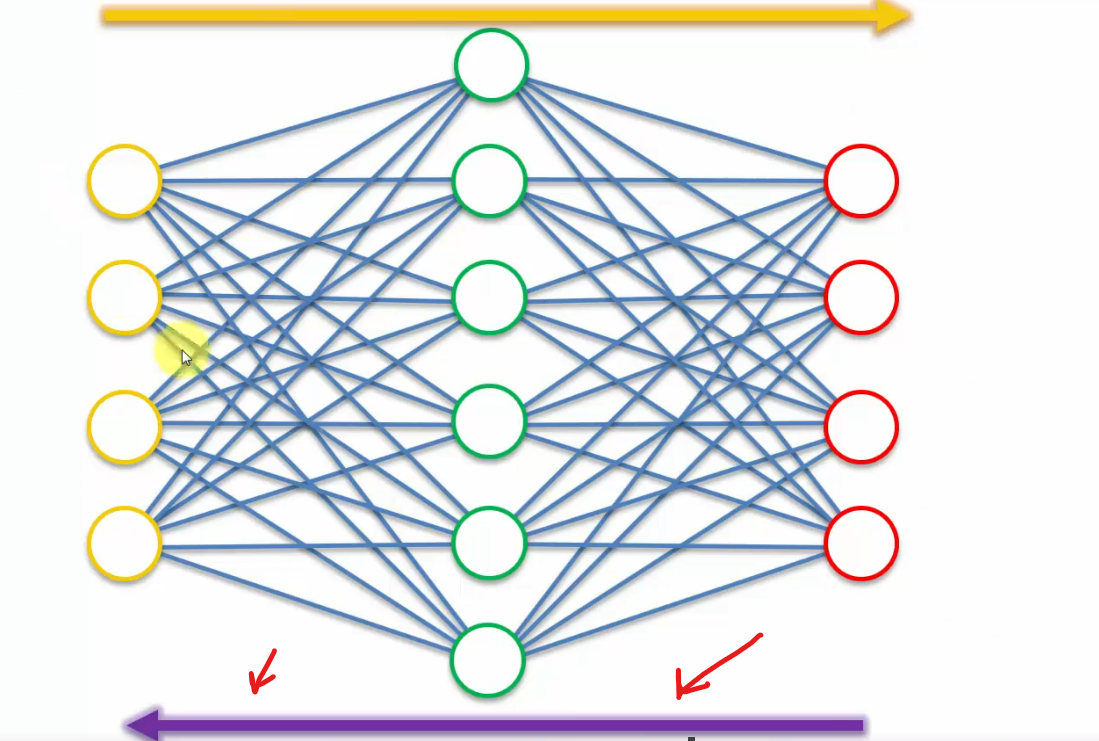
then we get the outputs and then they are compared to the inputs.
contractive autoencoders, they add a penalty into this loss-function that's going back through the network and it specifically doesn't allow the autoencoder to just simply just copy these values across.
Read more
Stacked Autoencoders (SAE)
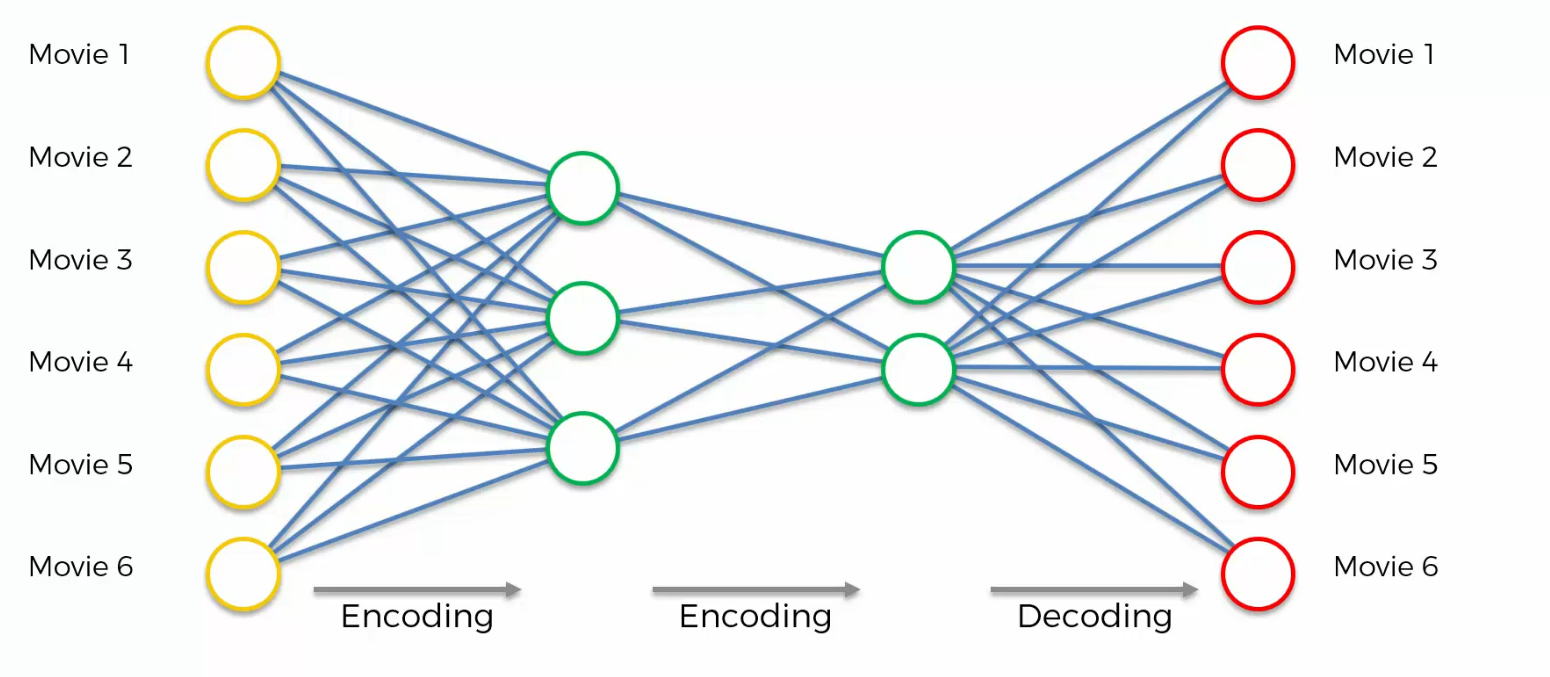
It's been shown that sometimes this model can supersede the results that are achieved by deep belief networks (DBN).
You may reed more
Deep Autoencoders
This is deep autoencoder . It's RBMs that are stacked. Then they're pre-trained layer by layer. Then they're unrolled. Then they're fine tuned with back propagation. So then you do get directionality, and then you, in your network and then you have back propagation. But in essence a deep autoencoder, comes from RBMs.
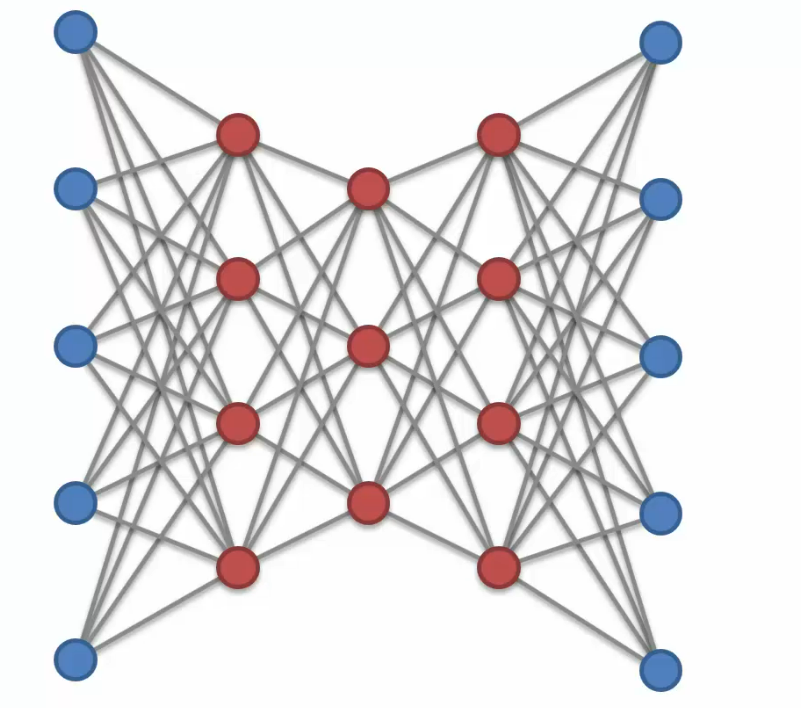
Looks same like Stacked autoencoders, right?
But stacked autoencoders are just normal autoencoders stacked. A deep autoencoder is RBMs stacked on top of each other and then certain things are done with them in order to achieve a autoencoding mechanism.
Read more
Let's code down the Autoencoders
80% of the code is exactly the same we did on Boltzmann machine
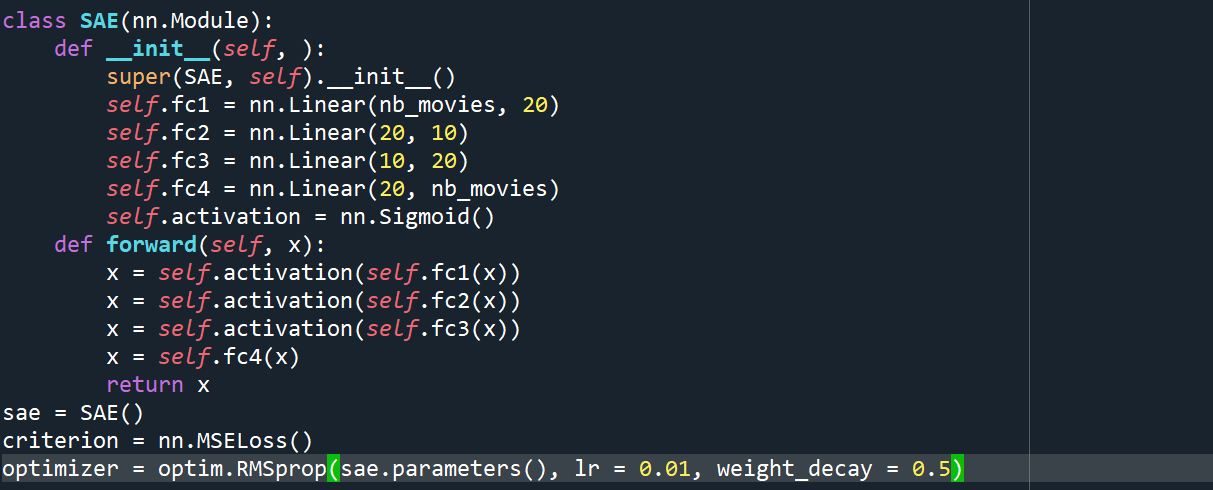
These are the codes we had new this time
Creating the architecture of the Neural Network
Training the SAE (Stacked Autoencoders)
Testing the SAE
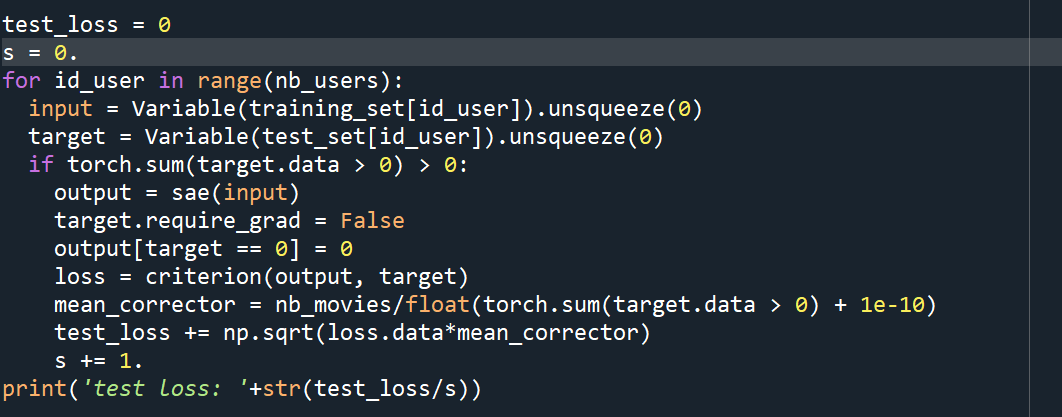
We ended up with a loss error of 0.90 So that's not too bad and got test loss of 0.9449~0.95, perfect.
We built a robust recommended system. The test loss is 0.95 stars, that is less than one star.
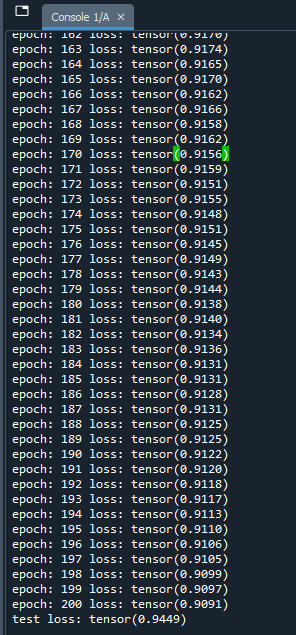
So for example if you're applying this recommended system for the movie you're gonna watch tonight, and let's say that after watching the movie you give the rating four stars, then this recommended system would predict that you would give between three and five stars to this movie. So in other words, it predict that you're likely to like your movie.
Done!
Get the codes
Subscribe to my newsletter
Read articles from Md Shahriyar Al Mustakim Mitul directly inside your inbox. Subscribe to the newsletter, and don't miss out.
Written by
