Hosting Your Serverless Website Using AWS
 Arish Ahmad
Table of contents
- Step 1: Creating a S3 Bucket
- Step 2: Creating CloudFront distribution.
- Step 3: Updating S3 bucket policy
- Step 4: Set up Route53
- Step 5: Editing the CloudFront
- Step 6: Create a record in the Hosted Zone.
- Step 7: Set up the DynamoDB
- Step 8: Create the Lambda Function
- Step 9: Creating the JS file
- Step 10: Finishing Up
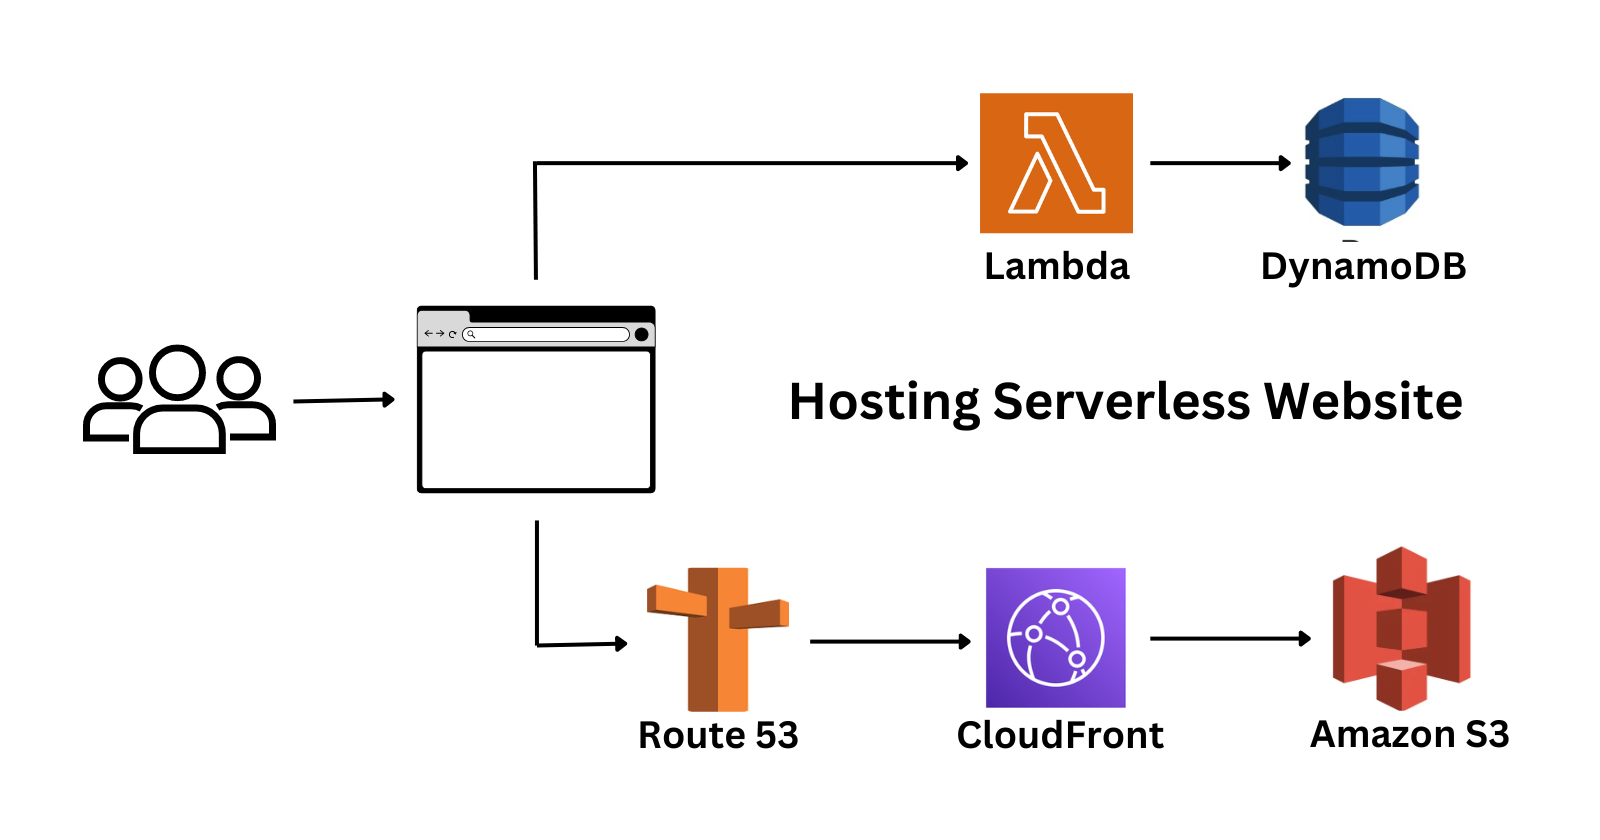
Note: This guide requires a web domain to host the website.
Step 1: Creating a S3 Bucket
Open the AWS Management Console and navigate to the S3.
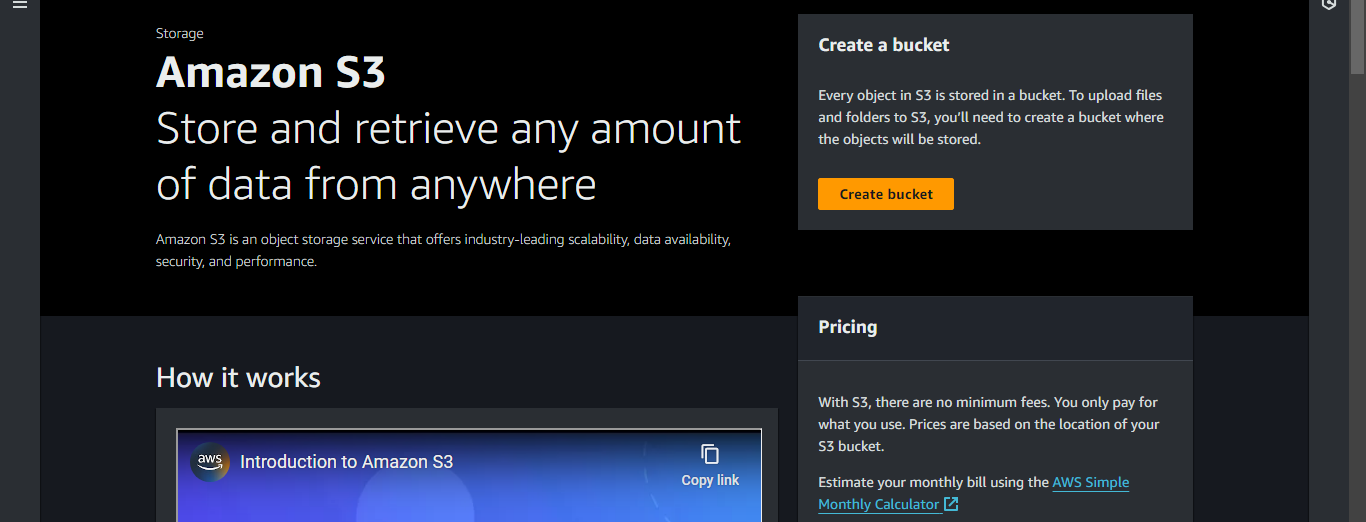
Click Create Bucket.
Give it a suitable name.
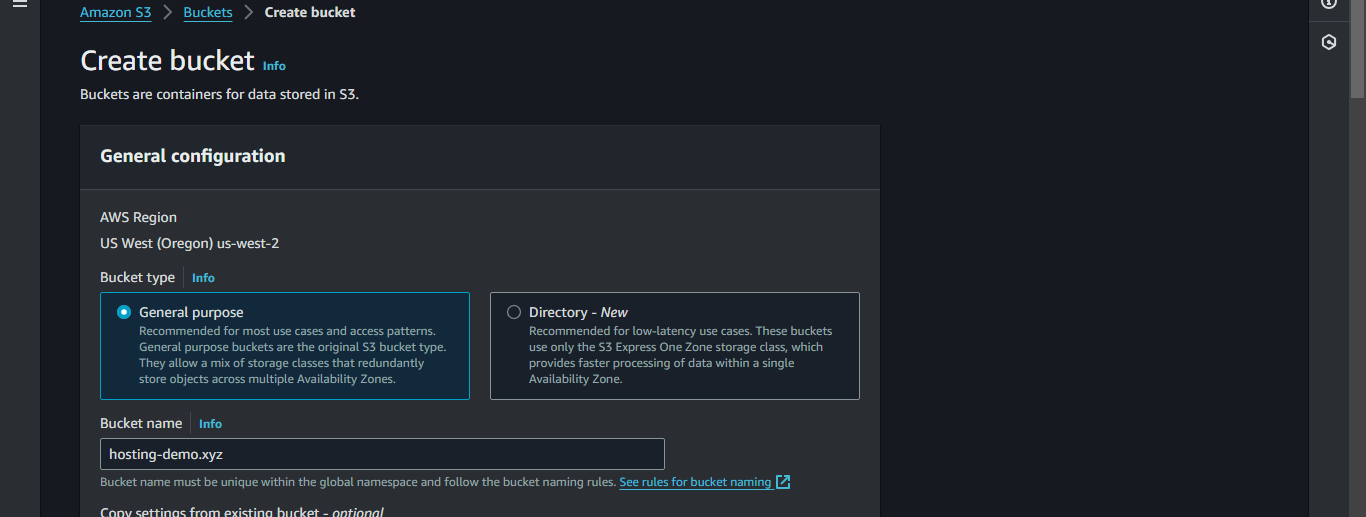
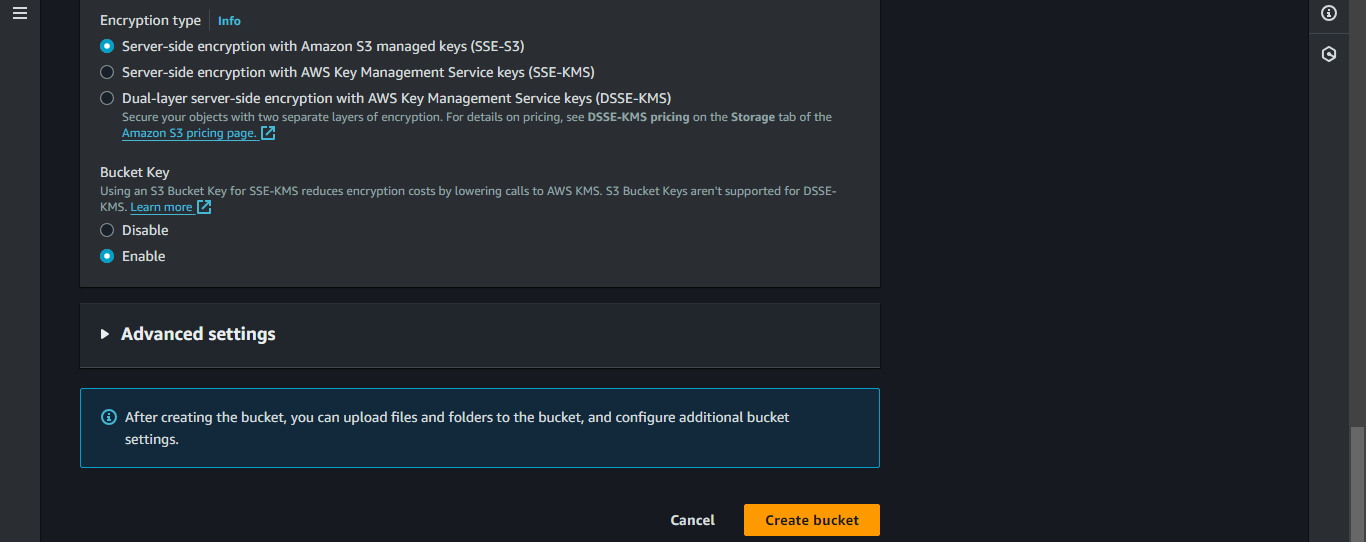
Scroll and click Create Bucket.
Copy the following and create an index.html file.
 <!DOCTYPE html>
 <html lang="en">
 <head>
     <meta charset="UTF-8">
     <meta name="viewport" content="width=device-width, initial-scale=1.0">
     <title>Demo Website</title>
 </head>
 <body>
     <div class="container">
         <h1>You're truly welcome!</h1>
         <h2>Do like the Blog if you find the tutorial helpful.</h2>
         <ul class="social-links">
             <li><a href="https://arishahmad.hashnode.dev/hosting-your-serverless-website-using-aws" target="_blank">Blog</a></li>
         </ul>
         <h3 id="views">Views</h3>
     </div>
     <script src="script.js"></script>
 </body>
 </html>
Upload this file in the S3 bucket.
Step 2: Creating CloudFront distribution.
Navigate to CloudFront in the AWS Management Console.
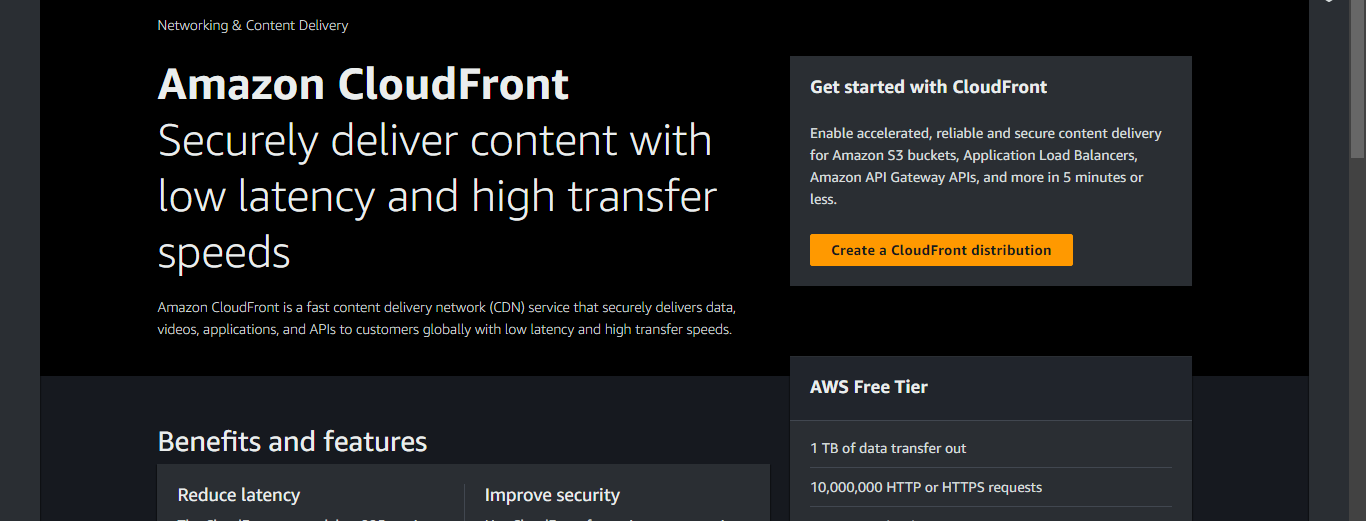
Click Create a CloudFront distribution.
Select the S3 bucket you just created under the Origin domain.
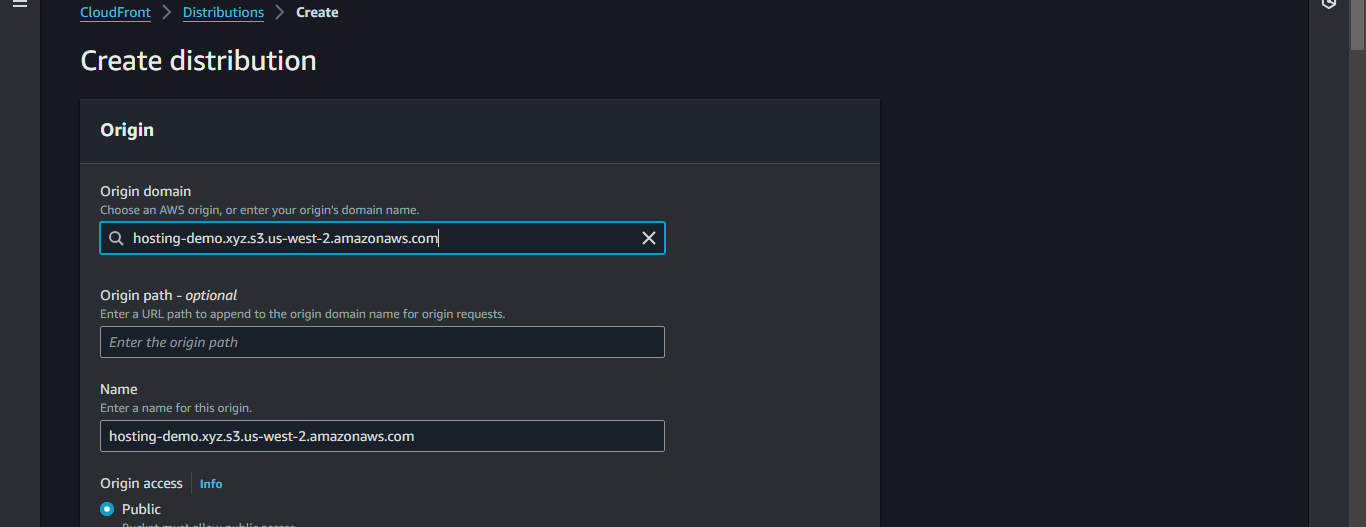
Under Origin access click Origin access control settings.
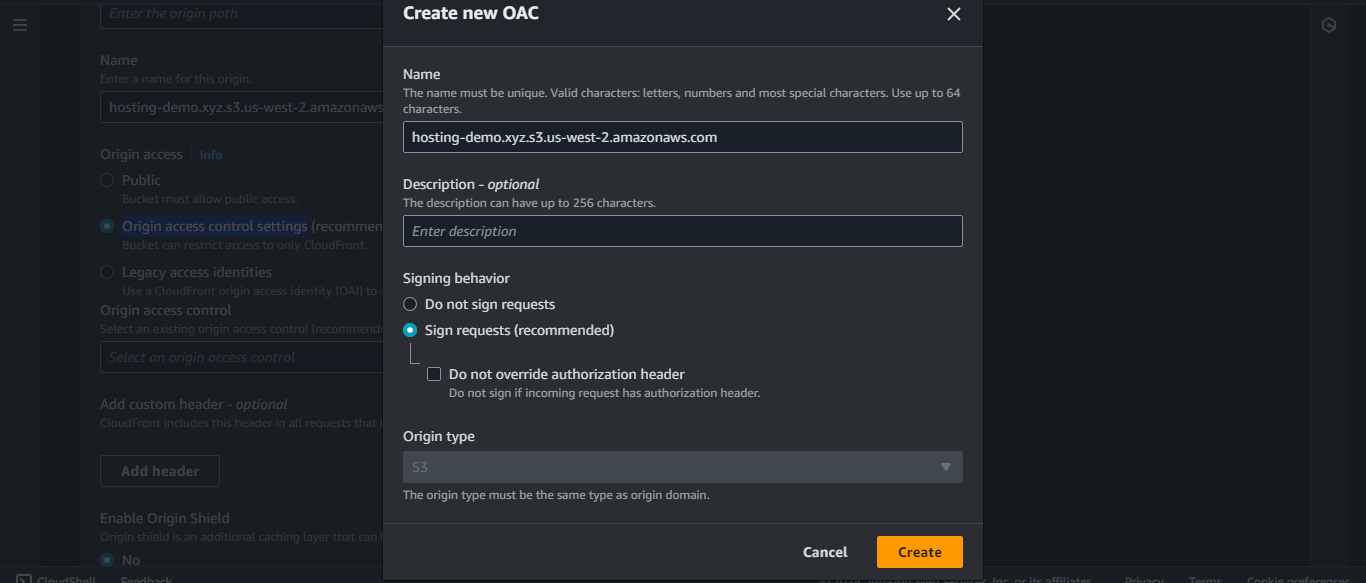
Click Create new OAC -> Create.
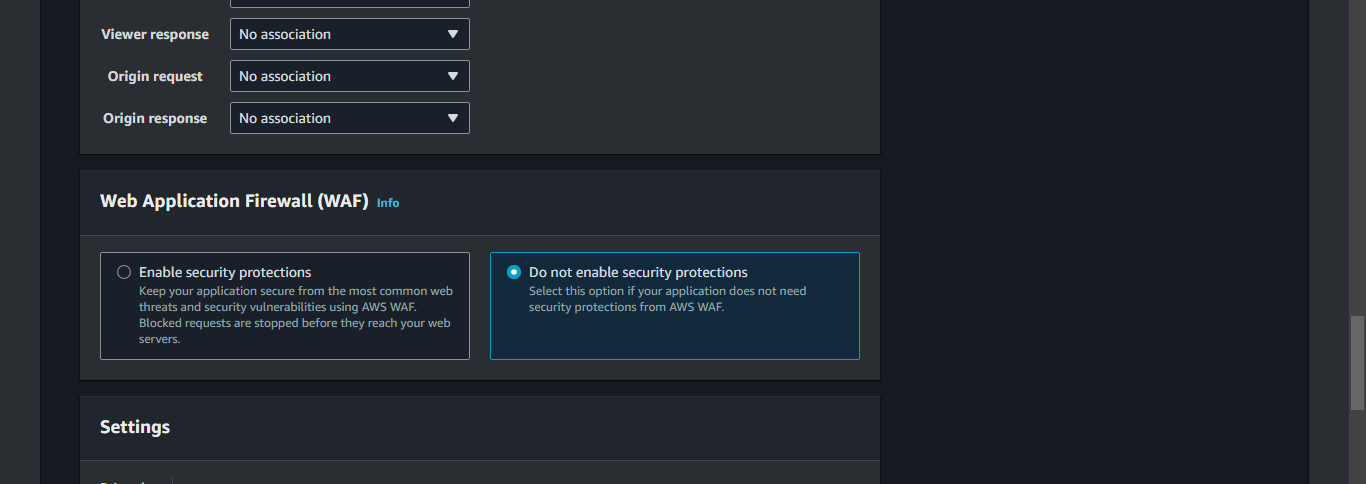
Under Web Application Firewall (WAF) select Do not enable security protections.
Scroll and click Create distribution.
This screen will pop up.
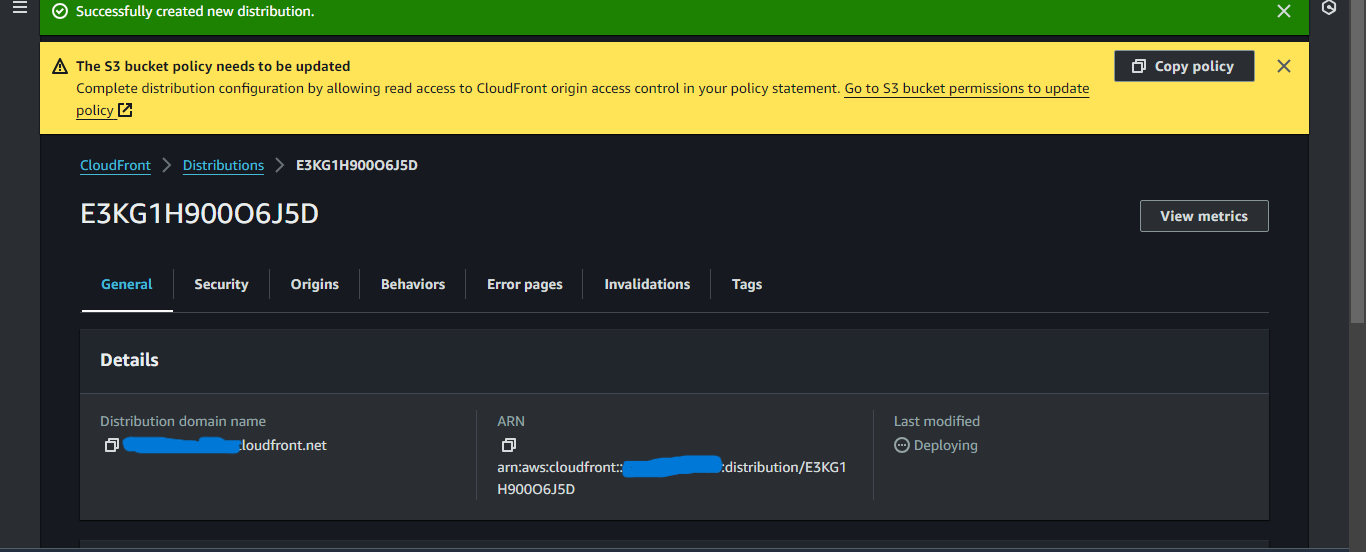
Click Copy policy.
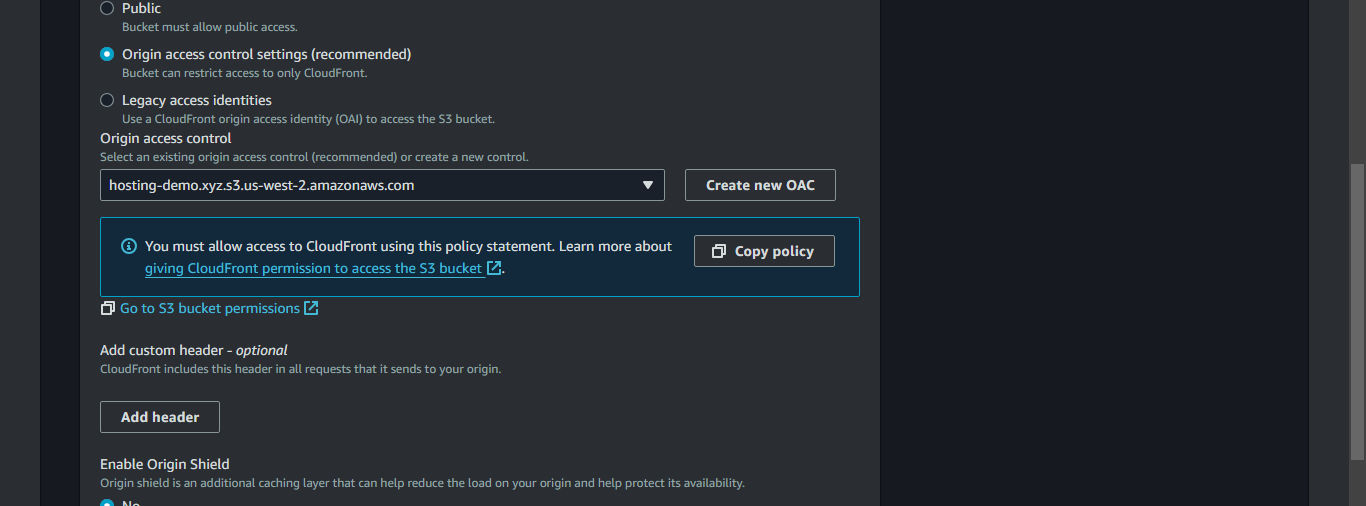
If the Copy policy option doesn't appear.
Open the distribution.
Click on Origins.

Select the origin and click Edit.
Scroll and click Copy policy.
Step 3: Updating S3 bucket policy
Navigate to S3 in the AWS Management Console.
Open the bucket.
Click on Permissions.
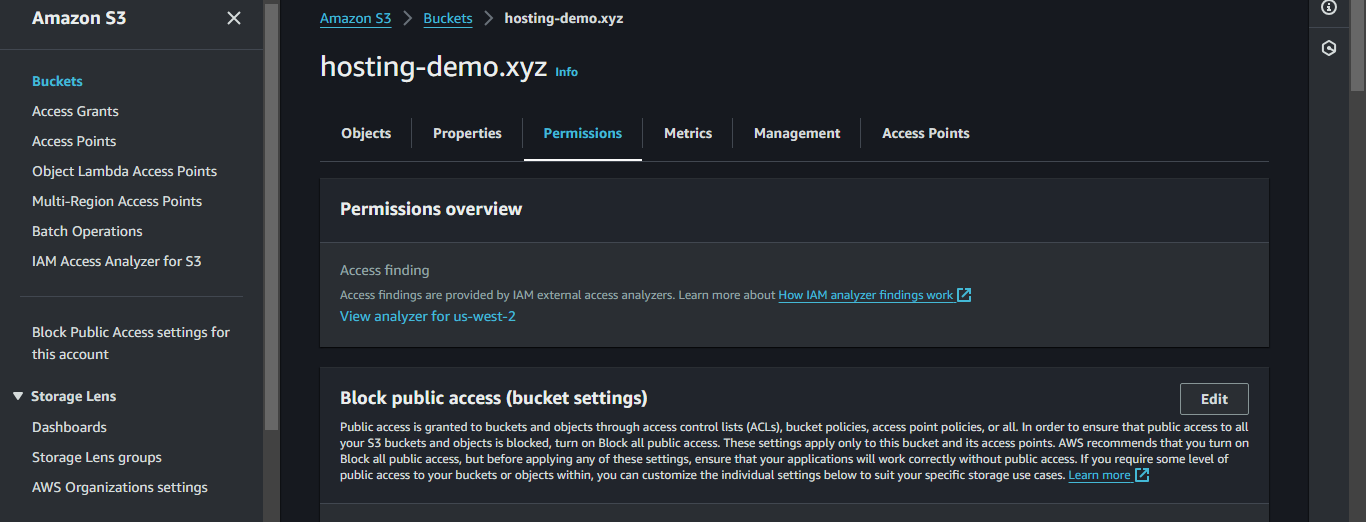
On Bucket policy click Edit.
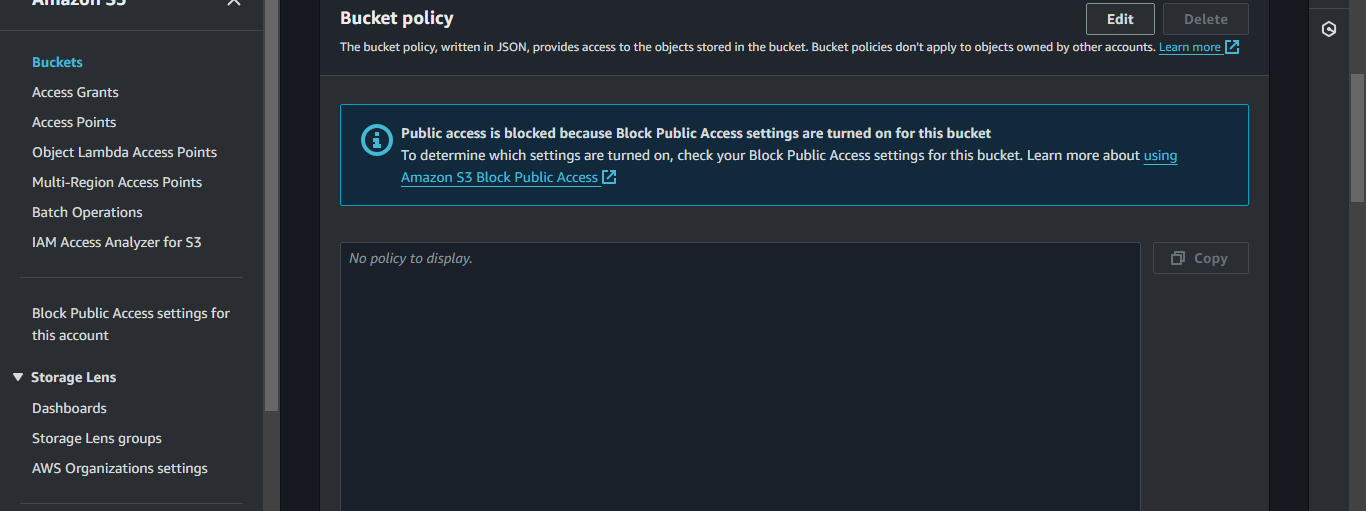
Paste the policy and click Save changes.
Step 4: Set up Route53
Navigate to Route 53 Dashboard in the AWS Management Console.
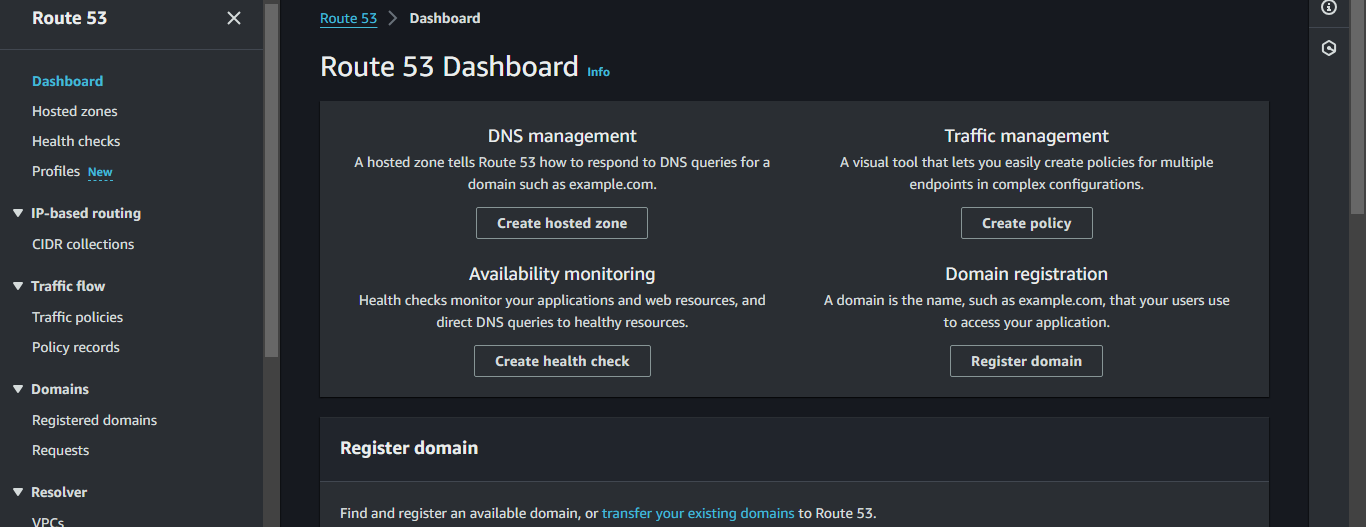
Click Create hosted zone.
Enter the Domain name.
Select Public hosted zone under Type.
Scroll and click Create hosted zone.
Select the record with NS type, Record details will open up.
Copy each value of this record and add this to the Nameserver. This option will be provided by the platform where you bought the domain.
Step 5: Editing the CloudFront
Open the CloudFront distribution.
Select the distribution and Click Edit on Settings.
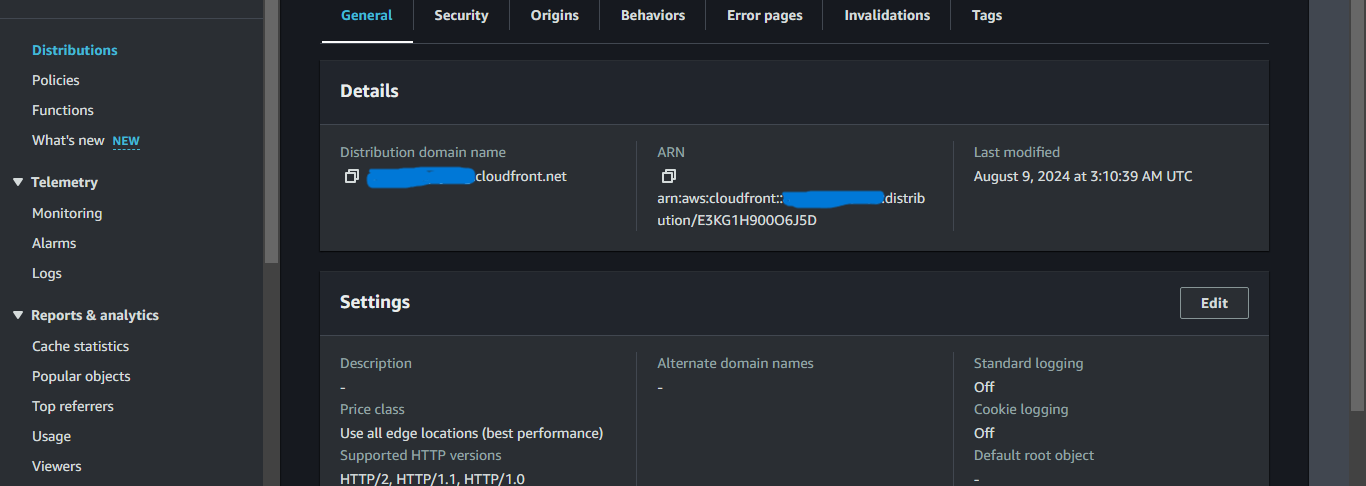
Select Add items under Alternate domain name (CNAME).
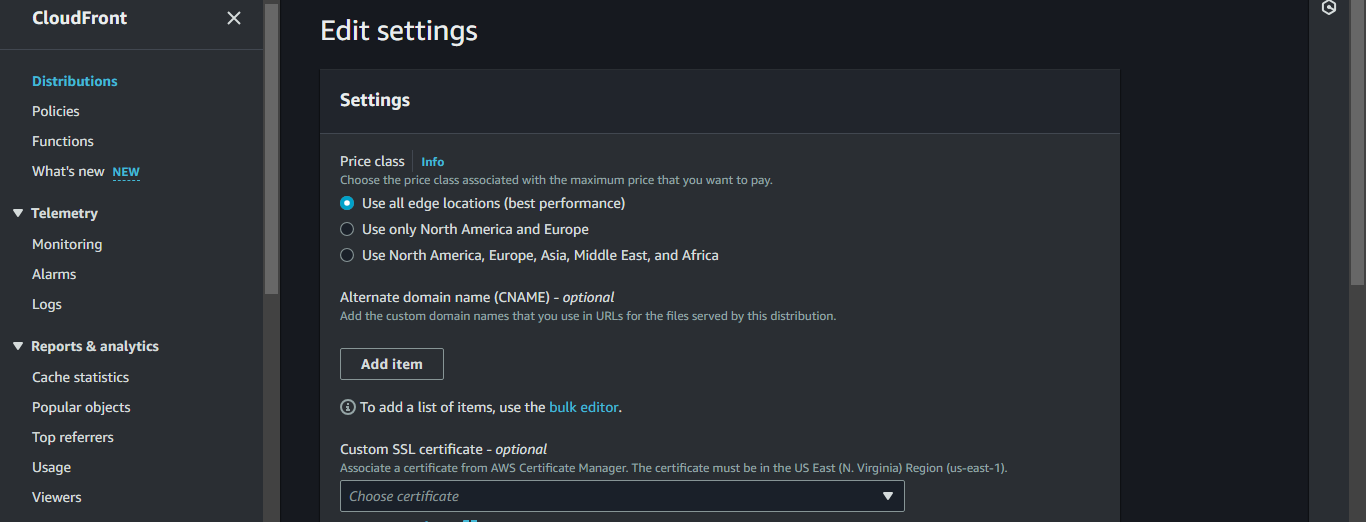
Enter the domain on which you want to host the website (Example: If your domain name is example.com then enter demo.example.com).
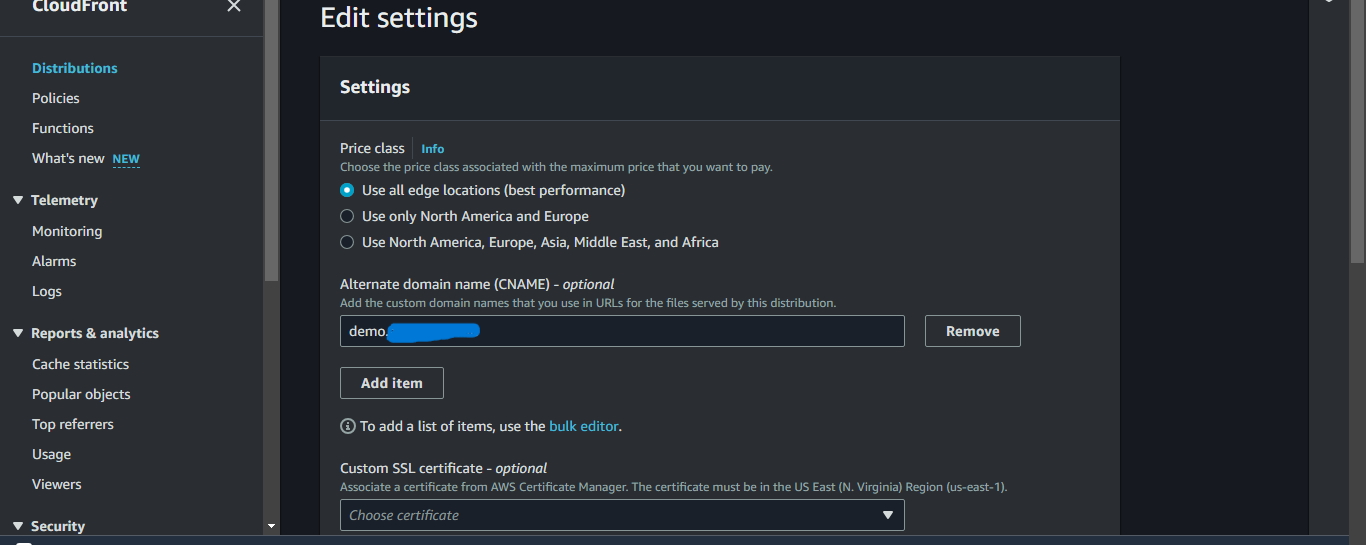
Scroll and click Request certificate. A new tab will open up.
Click Next.
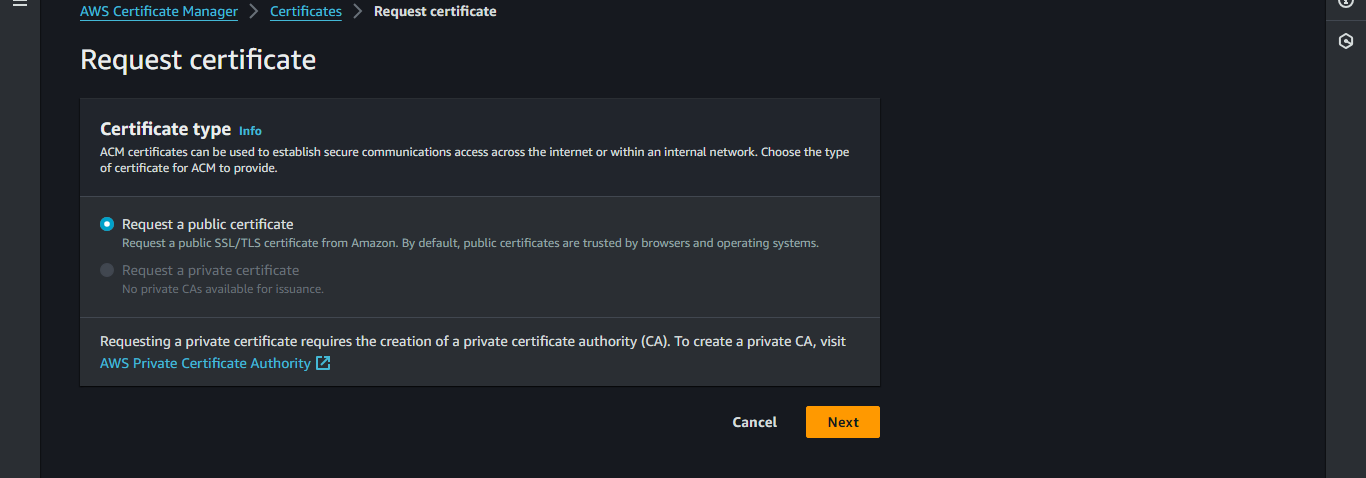
Enter .<your domain name> (Example: If your domain name is example.com, enter *.example.com).
Scroll and click Request.
Your new certificate might continue to display a status of Pending validation for up to 30 minutes.
Open the Certificate.
Click Create records in Route 53.
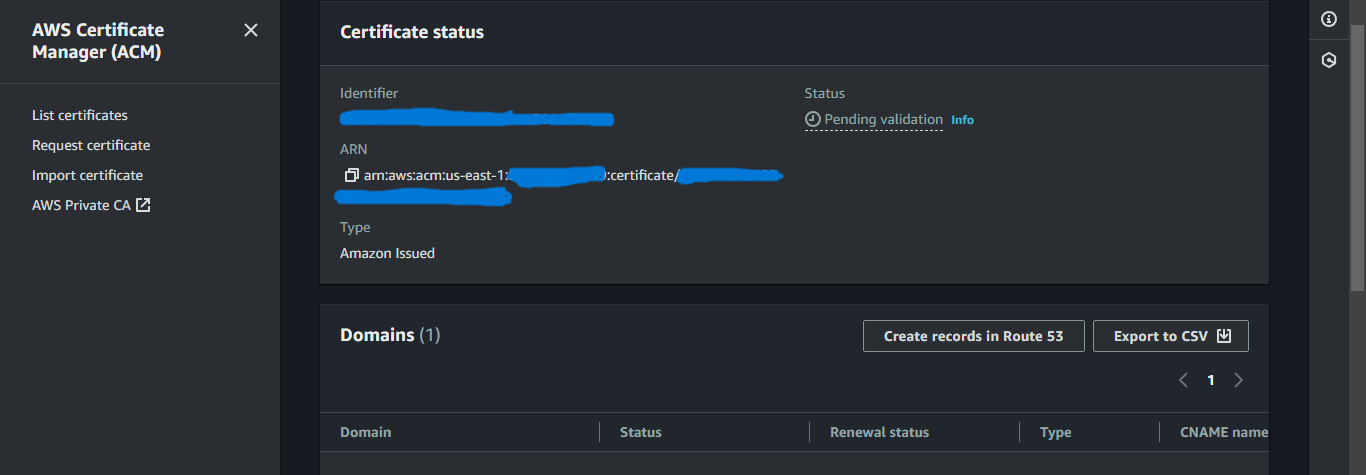
Click Create records.
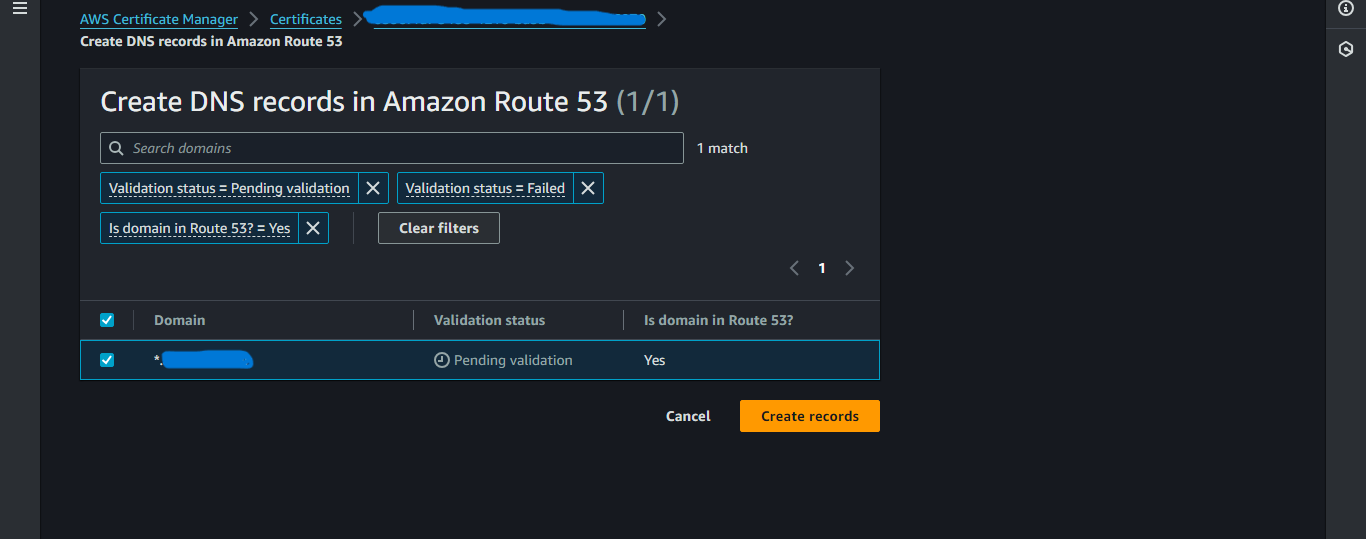
You can check the new route must be added in the hosted zone.
Now wait till the status of certificate is not Issued.
Go back to the CloudFront tab, and select the newly created Custom SSL certificate.
Enter index.html under the Default root object.
Scroll and click Save changes.
Step 6: Create a record in the Hosted Zone.
Open the hosted zone in Route53.
Click Create record.

In record name enter the subdomain. This should be same as the alternate domain name you entered in the CloudFront distribution.
Enable the Alias.
Choose Alias to CloudFront distribution and select the distribution you created.
Click Create Record.
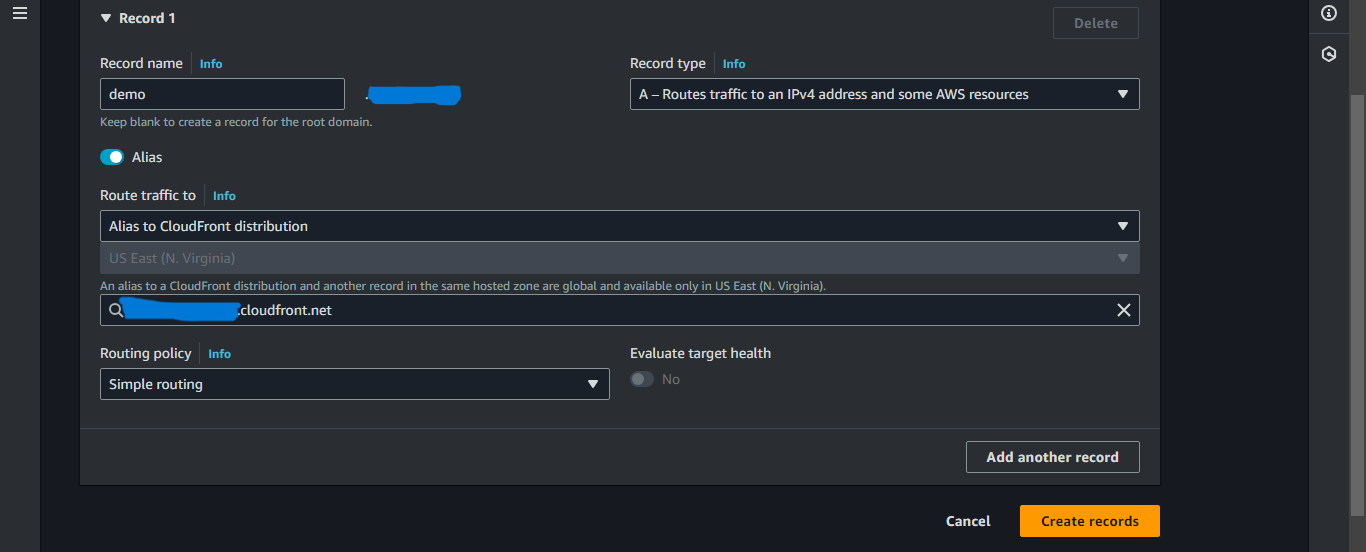
Now visit the alternate domain name, and you will see the hosted website. This might take few minutes until the CloudFront distribution is ready.
Step 7: Set up the DynamoDB
Navigate to DynamoDB in the AWS Management Console.
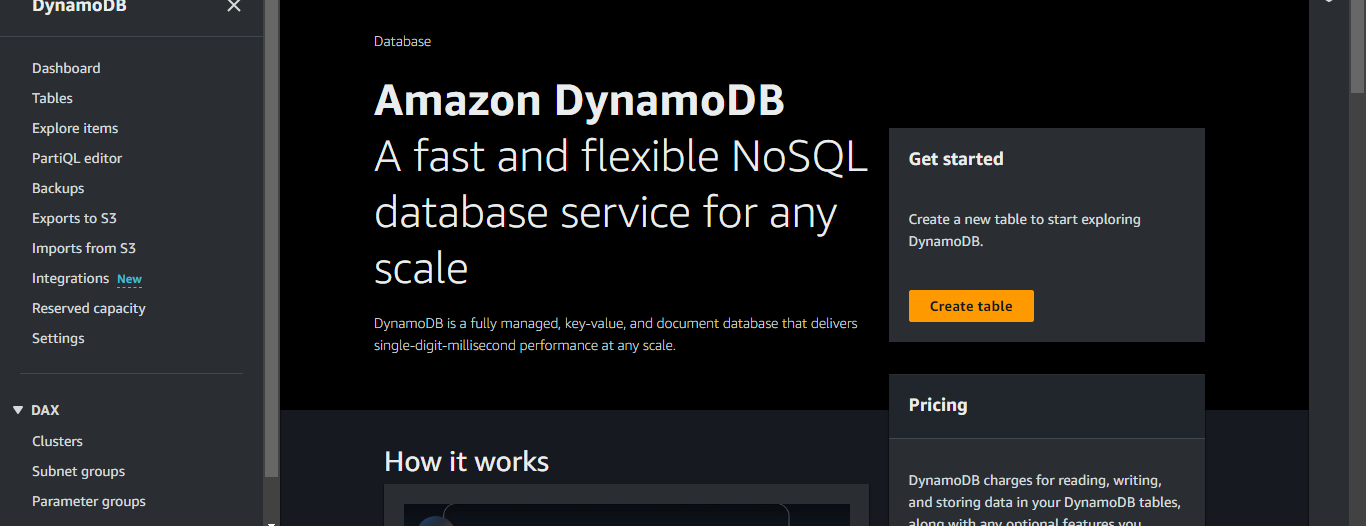
Click Create table.
Enter a suitable name.
Endet id in Partition key.
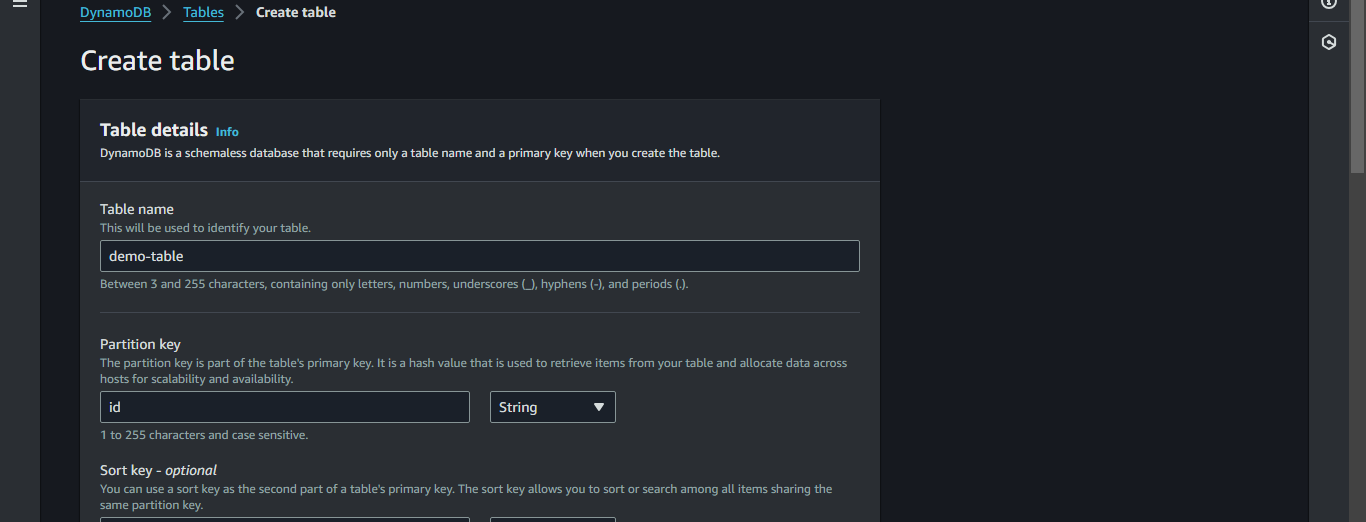
Scroll and click Create Table.
Select the table, go to Actions -> Explore items.
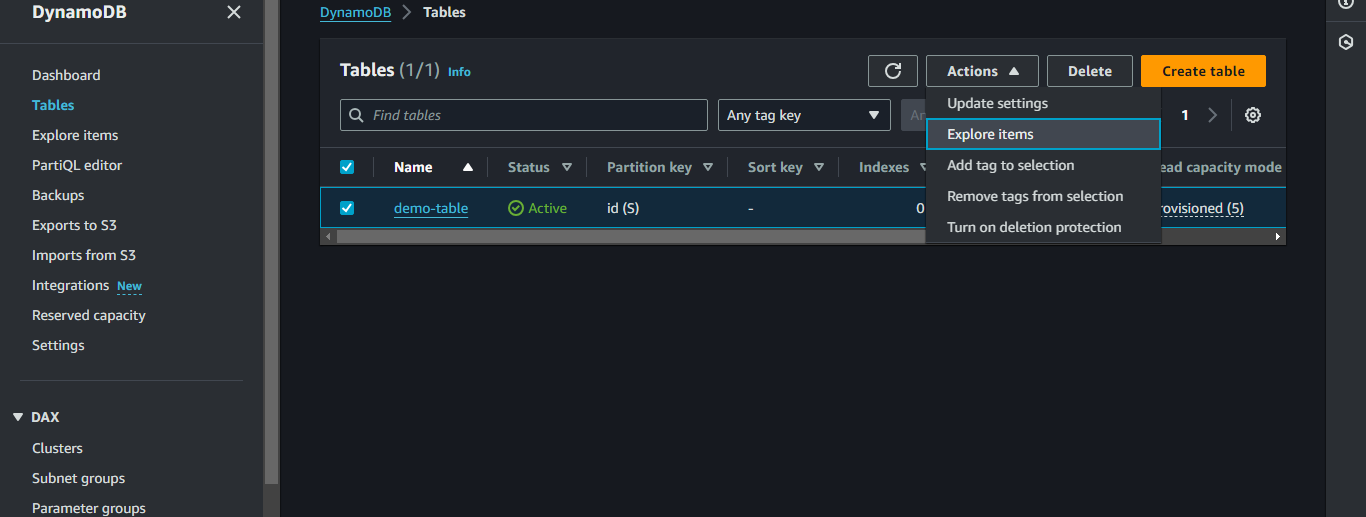
Click Create item.
Enter value 0 in id Attribute.
Select Add new attribute -> Number.
Enter the Attribute name as views and enter value 0.
Click Create item.
Step 8: Create the Lambda Function
Navigate to AWS Lambda in the AWS Management Console.
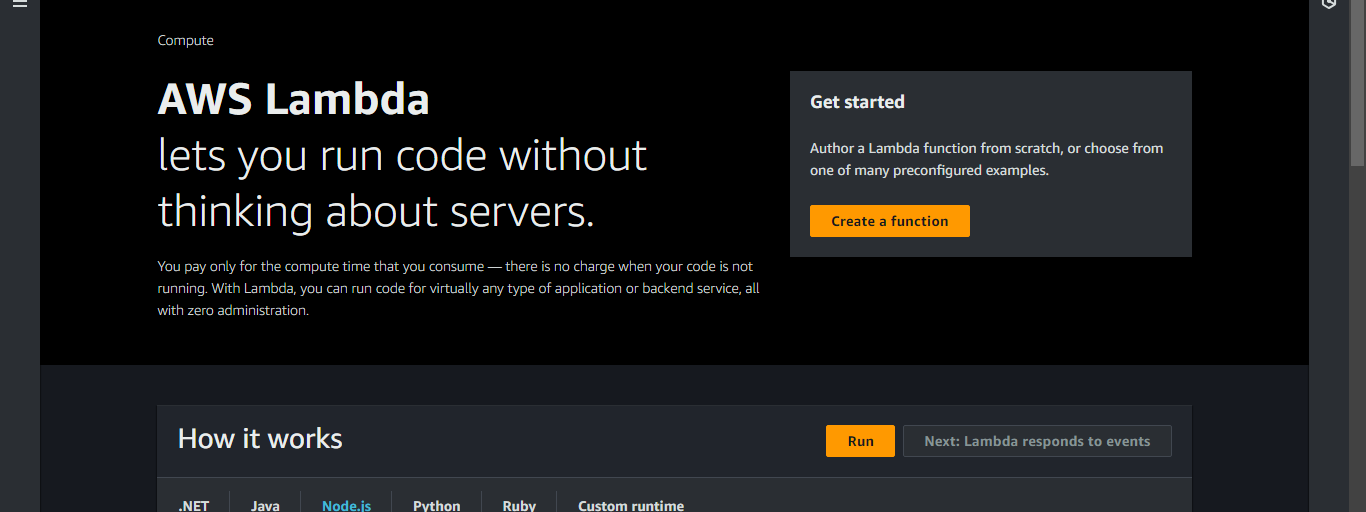
Click Create a function.
Enter a suitable Function name.
Select Python 3.8 in Runtime.
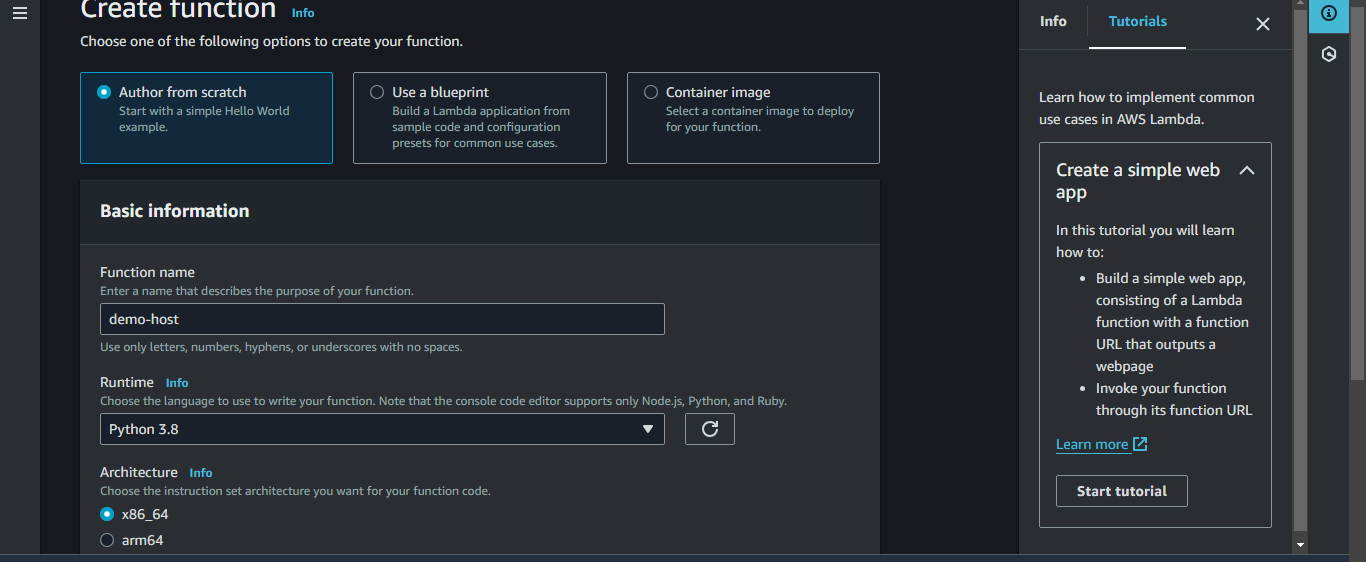
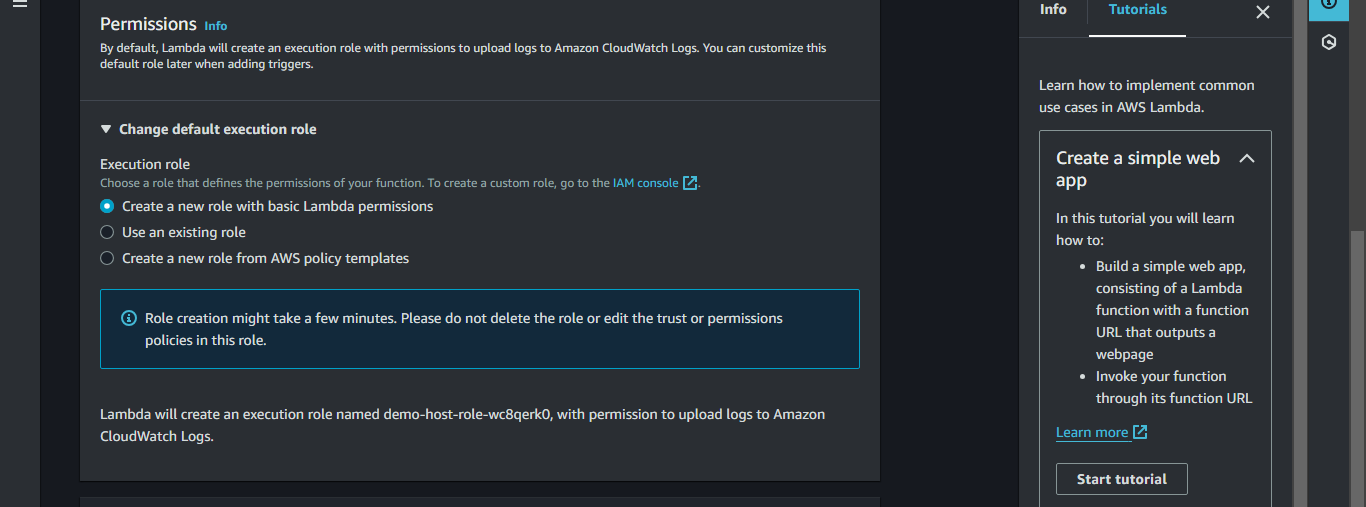
Select Create a new role with basic Lambda permissions in the Execution role.
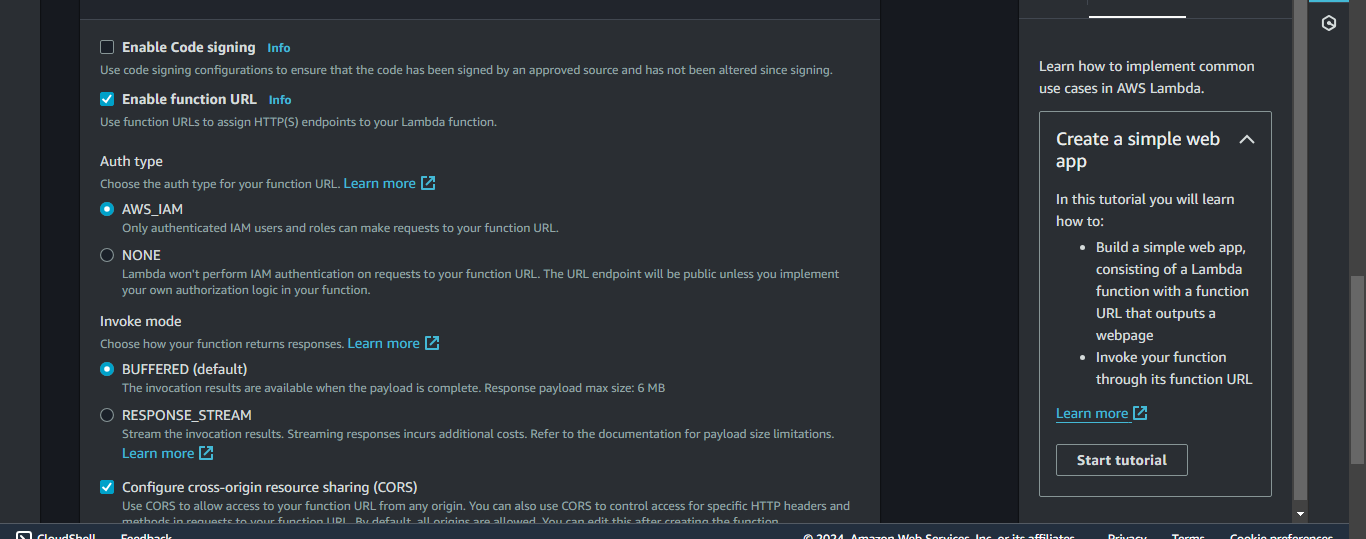
In Advanced settings click Enable function URL and NONE in Auth Type.
Check the Configure cross-origin resource sharing (CORS).
Scroll and click the Create function.
Copy the following code.
 import json
 import boto3
 dynamodb = boto3.resource('dynamodb')
 table = dynamodb.Table('demo-table')
 def lambda_handler(event, context):
     response = table.get_item(Key={
         'id':'0'
     })
     views = response['Item']['views']
     views = views + 1

     print(views)

     response = table.put_item(Item={
         'id':'0',
         'views': views
     })

     return views
Paste this file in the code area.
Note: Change the table name in this file.
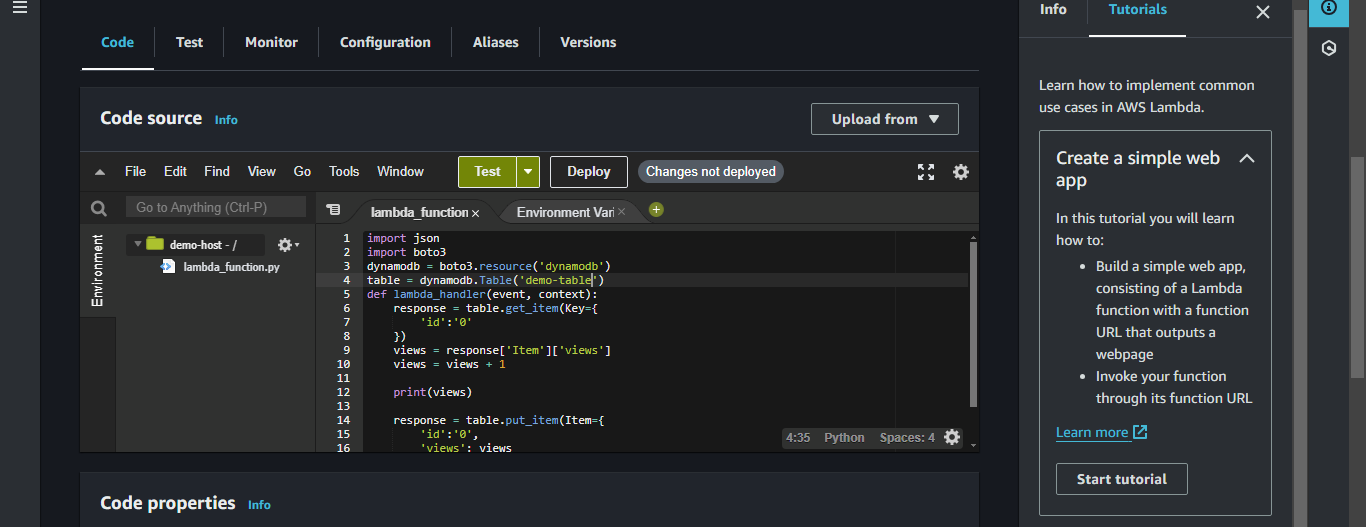
Save the file then Click Deploy.
Click Configuration -> Permissions.
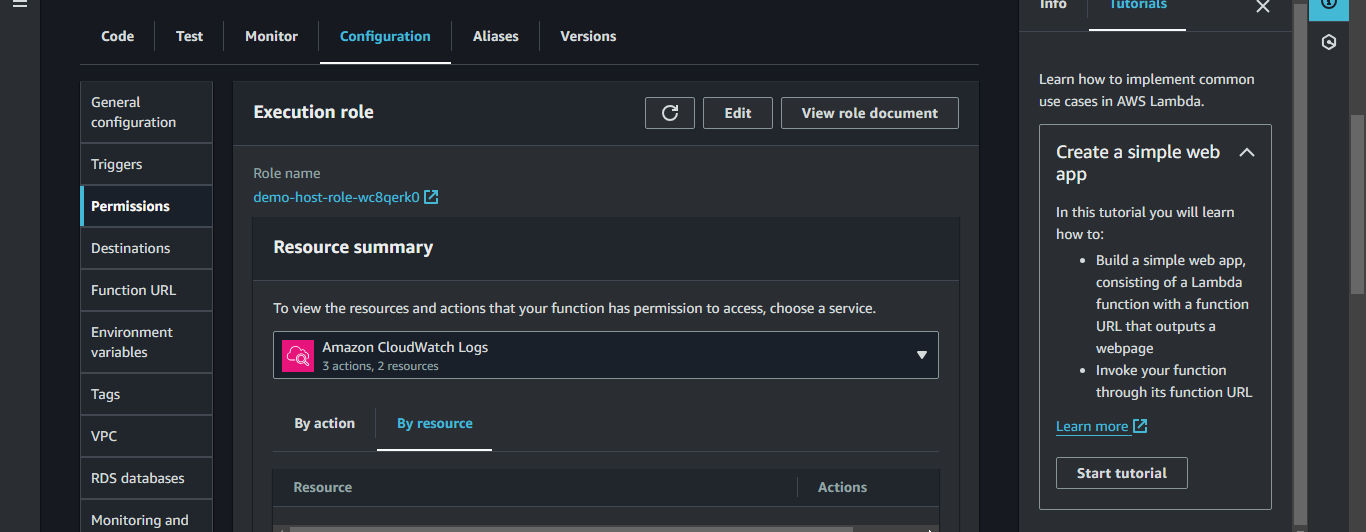
Click on the role, a new tab will open up.
Click Addpermissions -> Attach policies.

Search and select AmazonDynamoDBFullAccess.
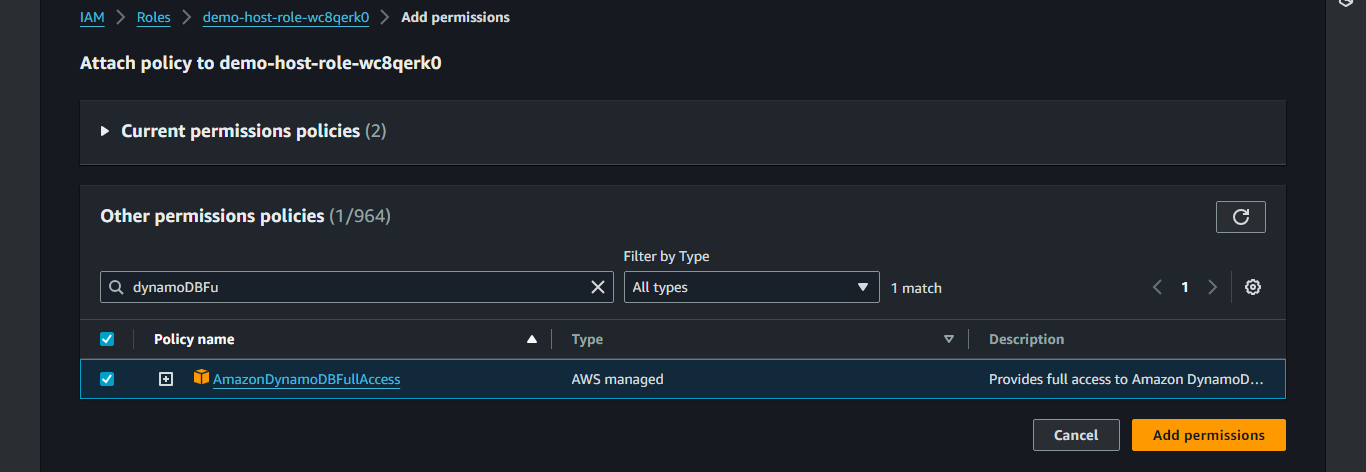
Click Add permissions.
Now Come back to the Lambda tab.
Click Code and then click Test.
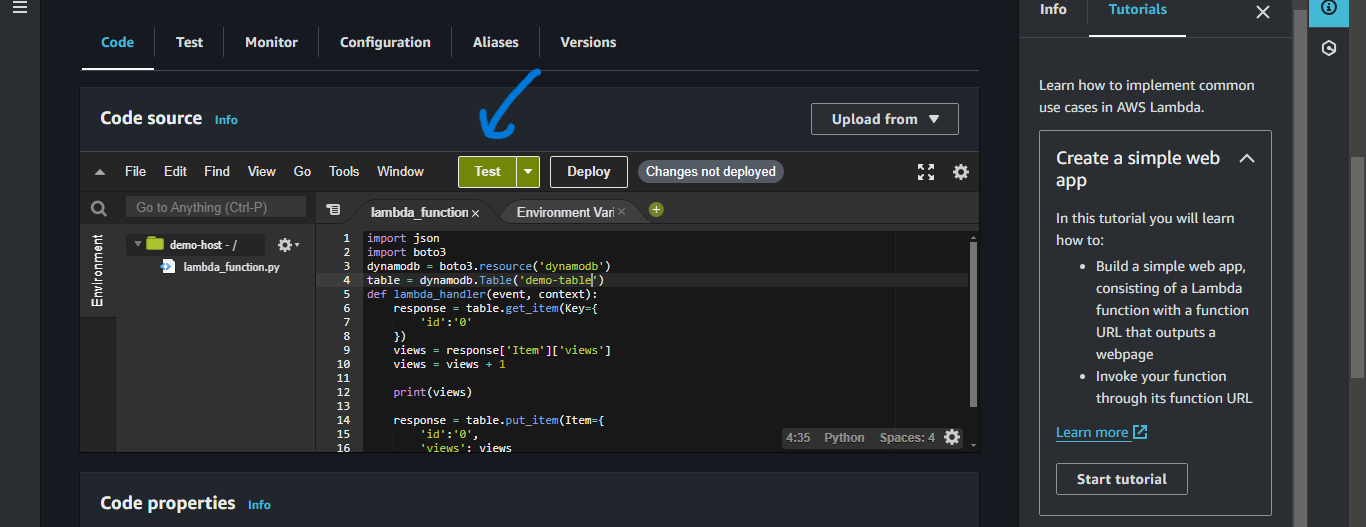
Enter a suitable name, then click Save.
Now click Test again, and you can see the response.
Step 9: Creating the JS file
Copy the following code.
 let counter = document.getElementById("views");

 async function updateCounter() {
     try {
         let response = await fetch("lambda_function_url");
         if (!response.ok) {
             throw new Error('Network response was not ok');
         }
         let data = await response.json();
         console.log(data);
         counter.innerHTML = `Views: ${data}`;
     } catch (error) {
         console.error('Failed to fetch data:', error);
         counter.innerHTML = 'Failed to load views';
     }
 }

 updateCounter();
Create a file named script.js file, and paste the code.
Copy the Lambda function URL and replace lambda_function_url in the file with the URL.
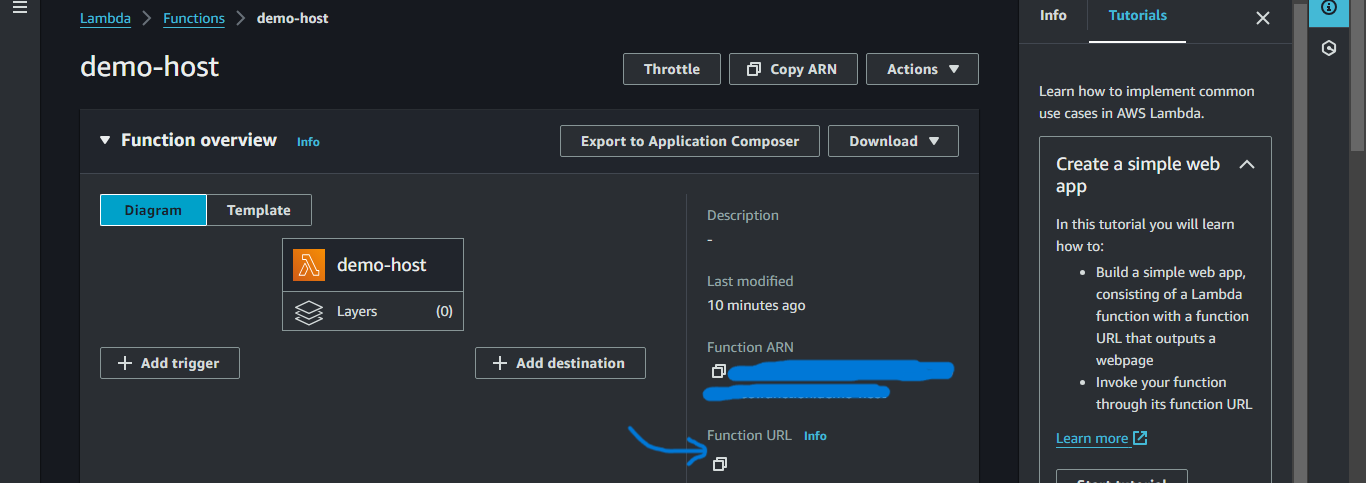
Now upload this script.js file in the S3 bucket.
Step 10: Finishing Up
Visit the Alternate domain name you entered in the CloudFront. You can see the hosted website and with each reload the view counter will increase. You can also check the increased value of views in the dynamoDB.
If the changes are not visible you may need to create an Invalidation.
Open the CloudFront distribution you created.
Click Invalidations -> Create invalidation.

Type /* and click Create invalidation.
Wait while the status is in progress.
Reload the website, and you'll be able to see the changes.
Subscribe to my newsletter
Read articles from Arish Ahmad directly inside your inbox. Subscribe to the newsletter, and don't miss out.
Written by

Arish Ahmad
Arish Ahmad
Final-year BTech student specializing in software development. Completed a Flutter internship and amassed three years of project experience, crafting Threads clone, Stream Arbiter, Ticketify, and Google Docs. Proficient in C++, having successfully solved 250+ LeetCode questions.