Step-by-Step Guide to Create AWS ECR and ECS with the help of GitHub, Docker, IAM and EC2.
 ajay singh
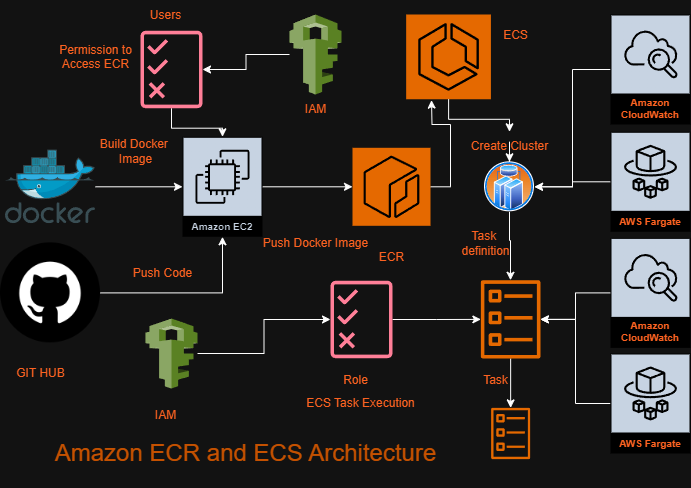
A. To create IAM user, Please check my Blog "How to use IAM in AWS". Now Attaching Policies to the existing user to access ECR from EC2 and with the help of Access Key and Secret Key configuring AWS CLI in EC2 Instance.
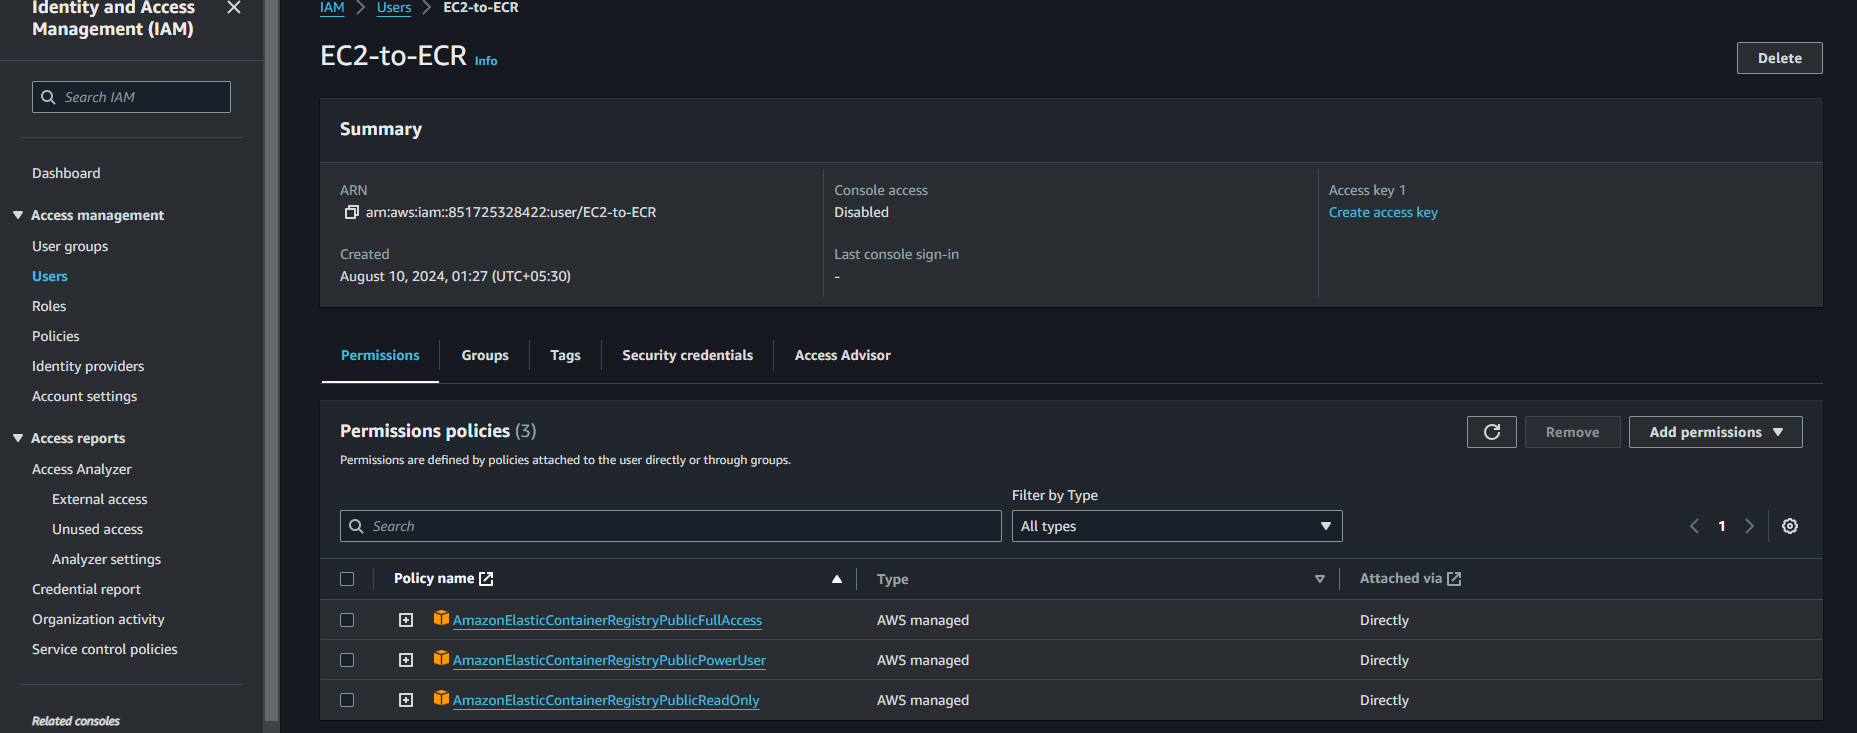
1. My IAM User Name is "EC2-to-ECR" and Attached these three ECR Policies.
a. AmazonElasticContainerRegistryPublicFullAccess
b. AmazonElasticContainerRegistryPublicPowerUser
c. AmazonElasticContainerRegistryPublicReadOnly
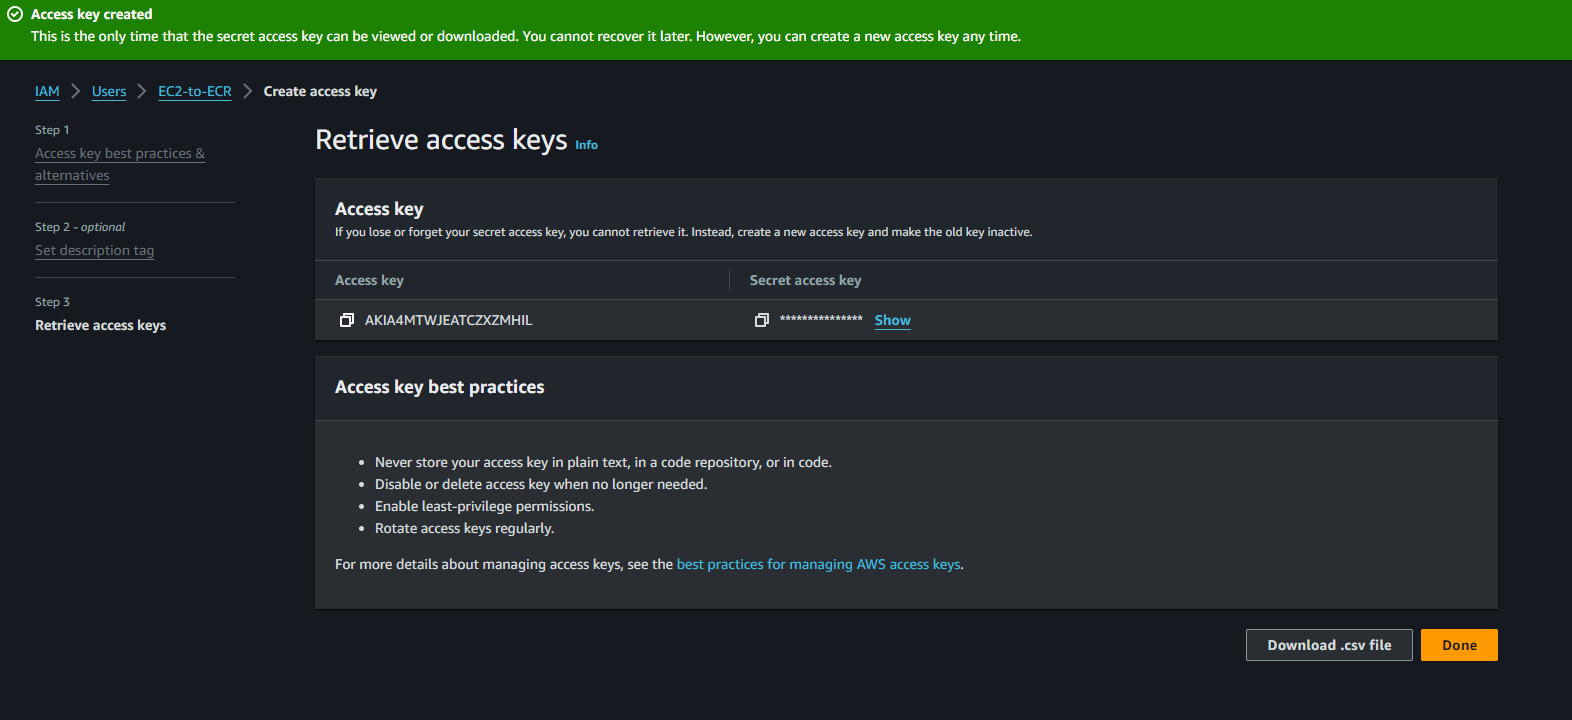
2. Create access-key credentials inside the user security credentials option.

3. Download your Access Key and secret access key in csv file for further use.
B). Create a Role that will use in ECS task-definition for the task execution:
1. Search IAM in AWS console management and got role==> create Role.

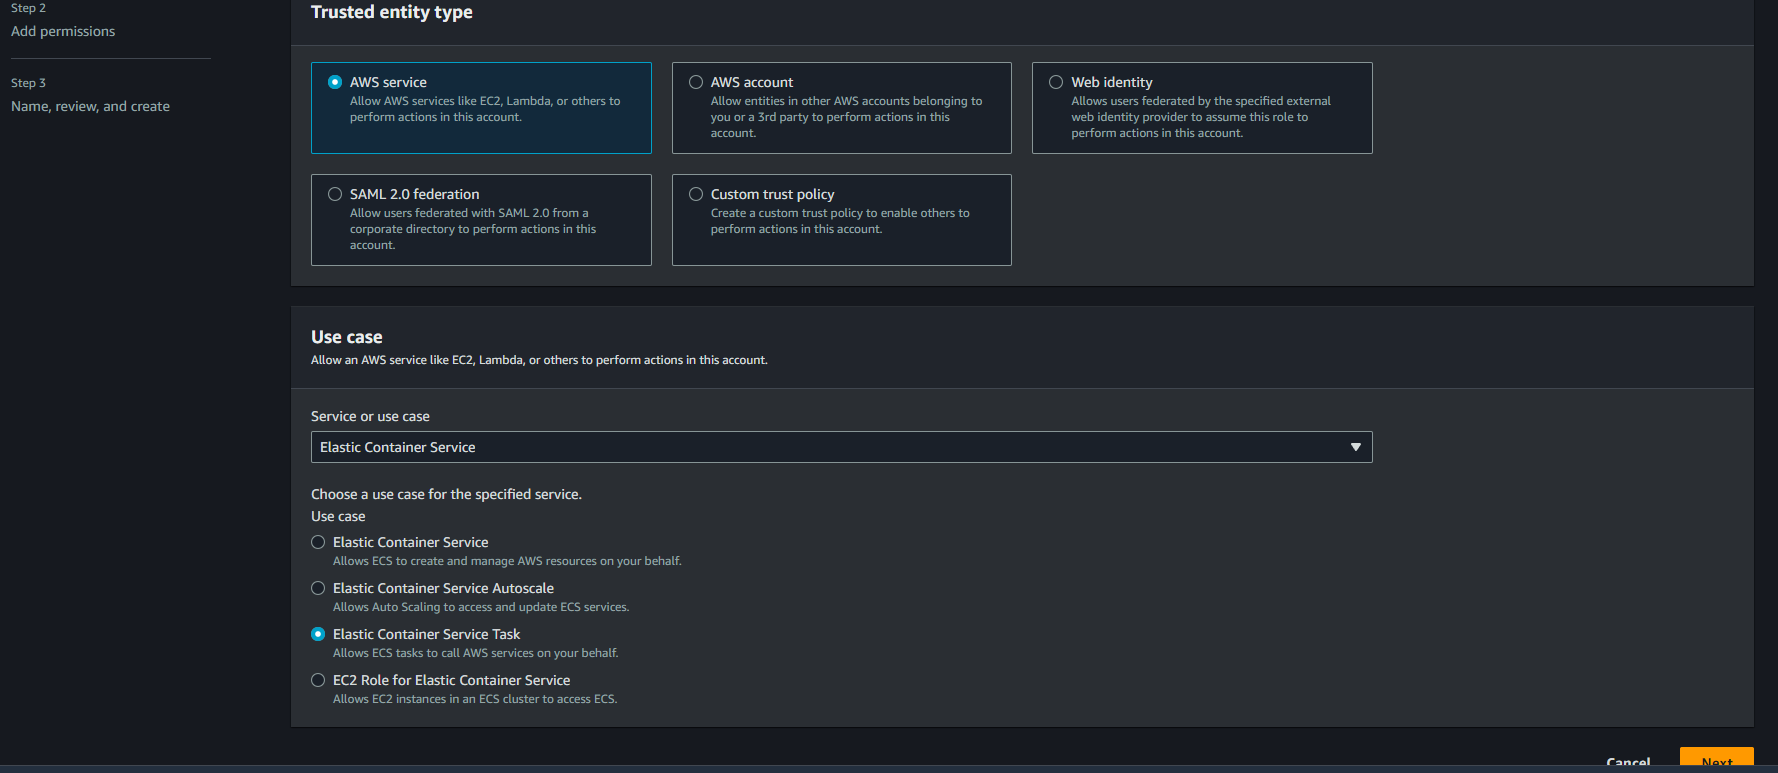
2. Choose Trusted entity(AWS Service) and Service (Elastic container service)
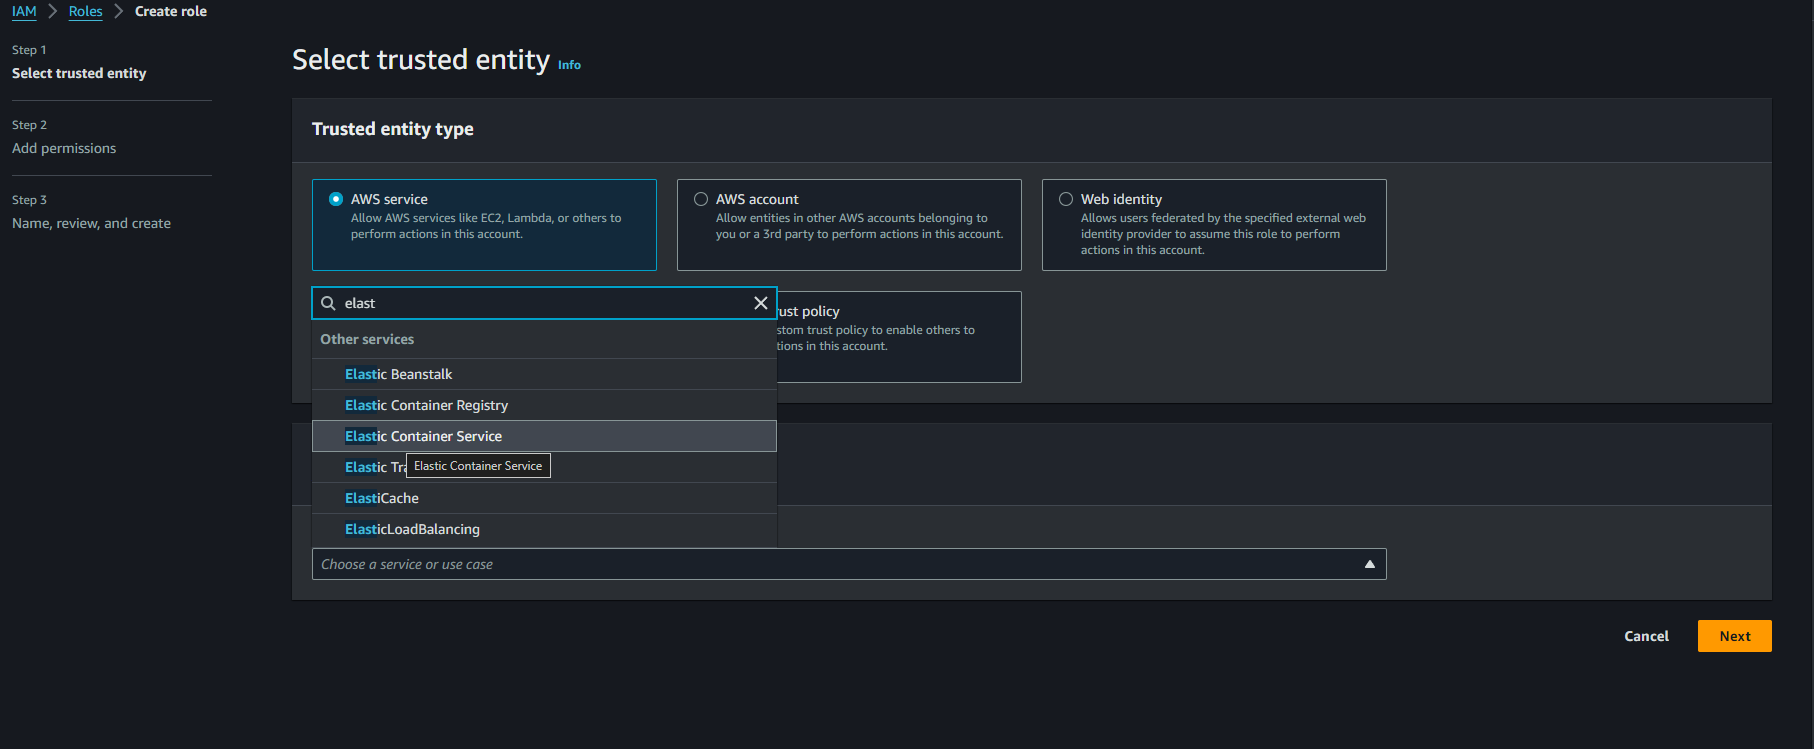
Then choose use case (Elastic container service task).
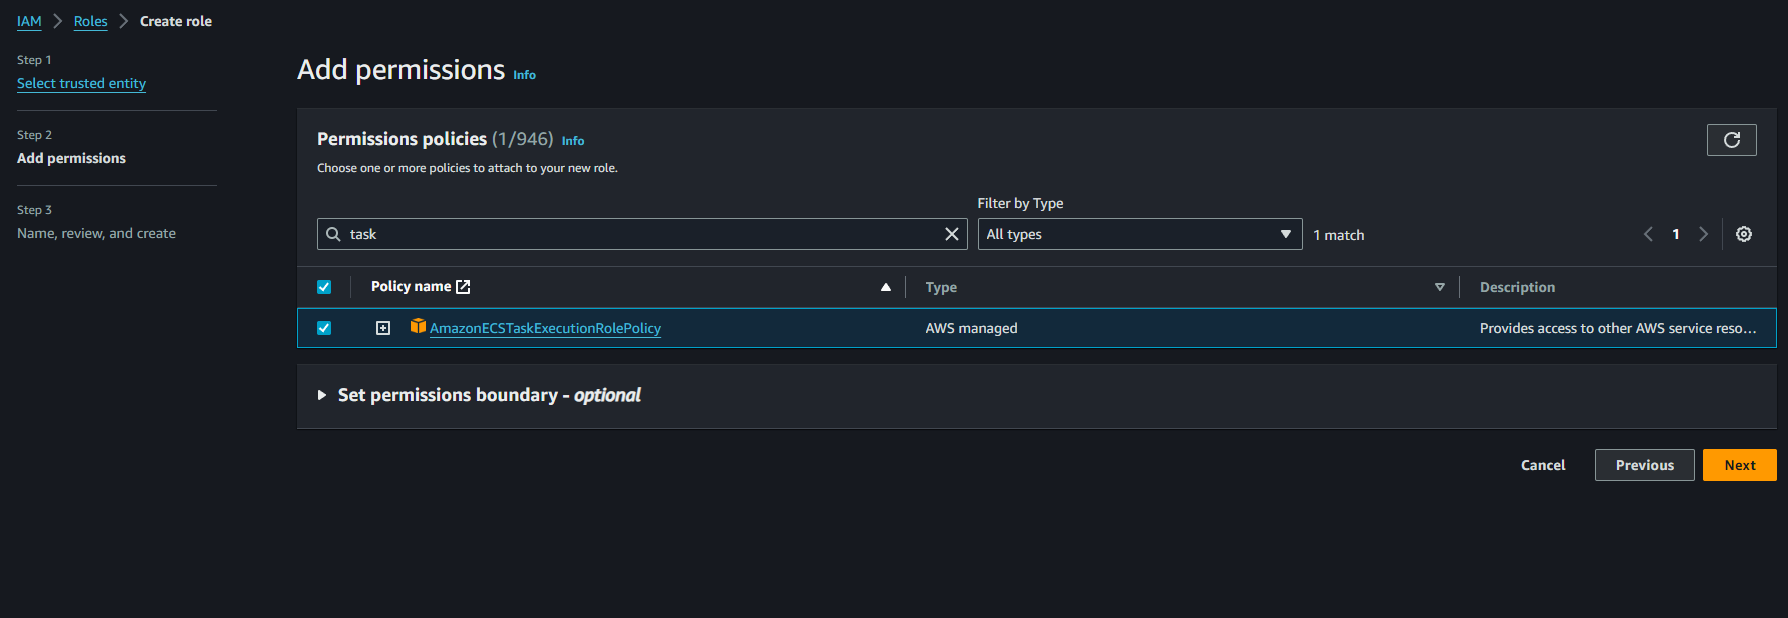
Add permission 'AmazonECSTaskExecutionRolePolicy'
Add Role Name that will show you in your role section
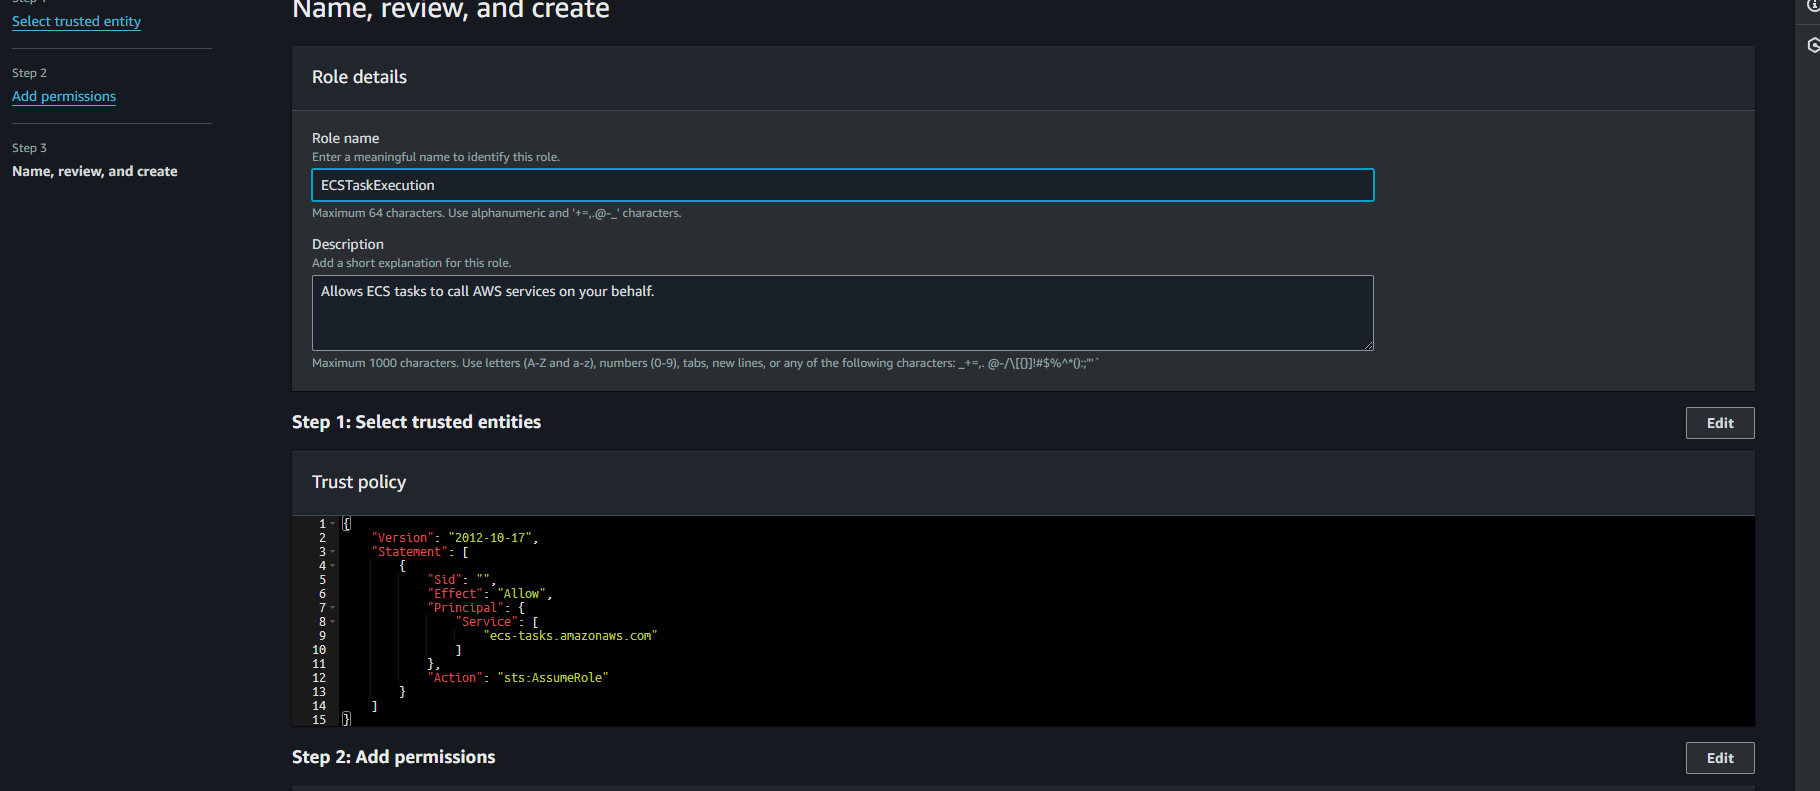
Role has been Created

C). Amazon Elastic Compute Cloud(EC2): - Amazon EC2 allows you to create virtual machines, or instances, that run on the AWS Cloud.
Search EC2 in console management search bar then follow the below steps.
EC2 Dashboard==>Launch instance, Provide some basic information like Name Of Instance, Choose OS Image (AMI), Architecture, Instance Type, Key Pair, Network(VPC, Subnet, Auto Assign Public IP),Security Group and Storage then Launch the instance.
You can get the SSH connect command from your EC2 Instance==>click on connect option then ssh command will show in your screen. Login to EC2 instance via a key Pair (.pem file) and Clone your git Repo.
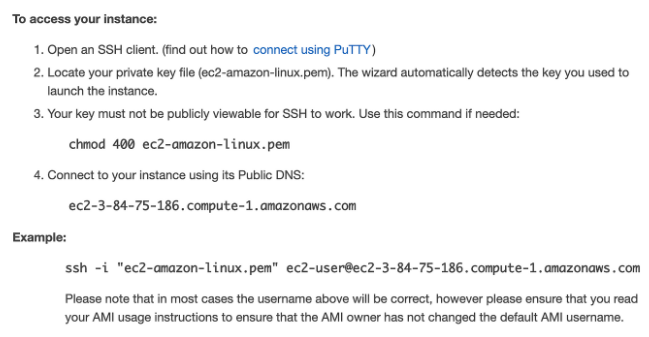
# On your Local Terminal hit the below command
ssh -i /Key-Pair-Path/ec2-amazon-linux.pem ec2-user@ec2-3-84-75-186.compute-1.amazonaws.com
sudo apt update -y
git clone https://github.com/username/yourrepo.git
D). Amazon Elastic Container Registry(ECR):- Amazon Elastic Container Registry (ECR) is a fully managed container registry that makes it easy to store, manage, share, and deploy your container images and artifacts anywhere(Publicly and Privately).
Create a Repository==>Get Started
General Settings==>Visibility Setting- Choose Public
Repository name must start with a letter and can only contain lowercase letters, numbers, hyphens, underscores, and forward slashes.
Choose OS and Architecture. Then Click on Create Repository.
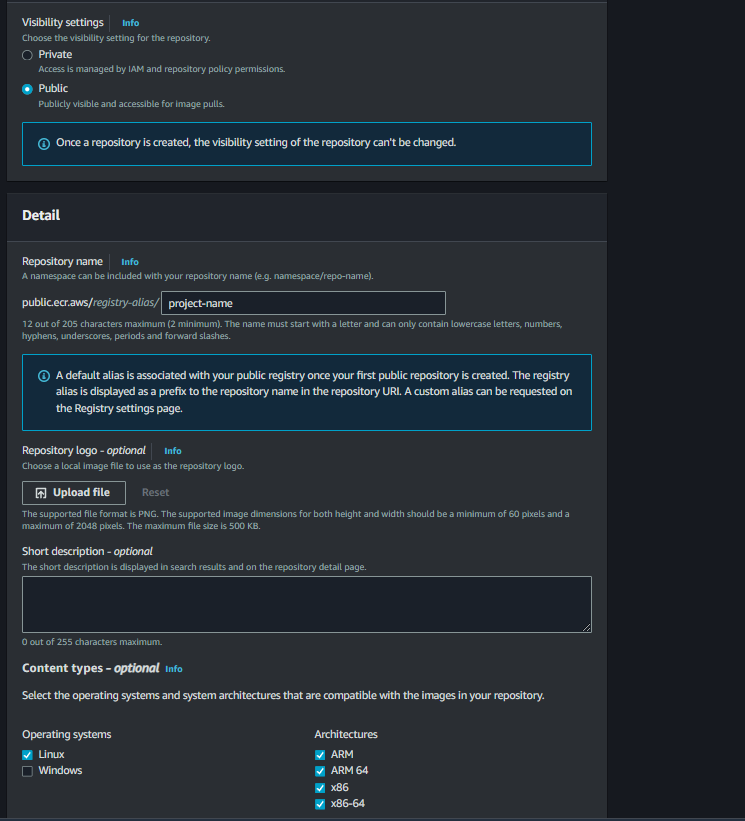
Now, Repository has been Created click on "repo name" then click on View push command on right top, You will get the instructions, How to push the docker image in ECR.

Read Instruction how to push Image in ECR. Once you click on getting started with Amazon ECR you will redirect to the URL, where you will get the installation and configuration steps for Docker and AWS CLI.
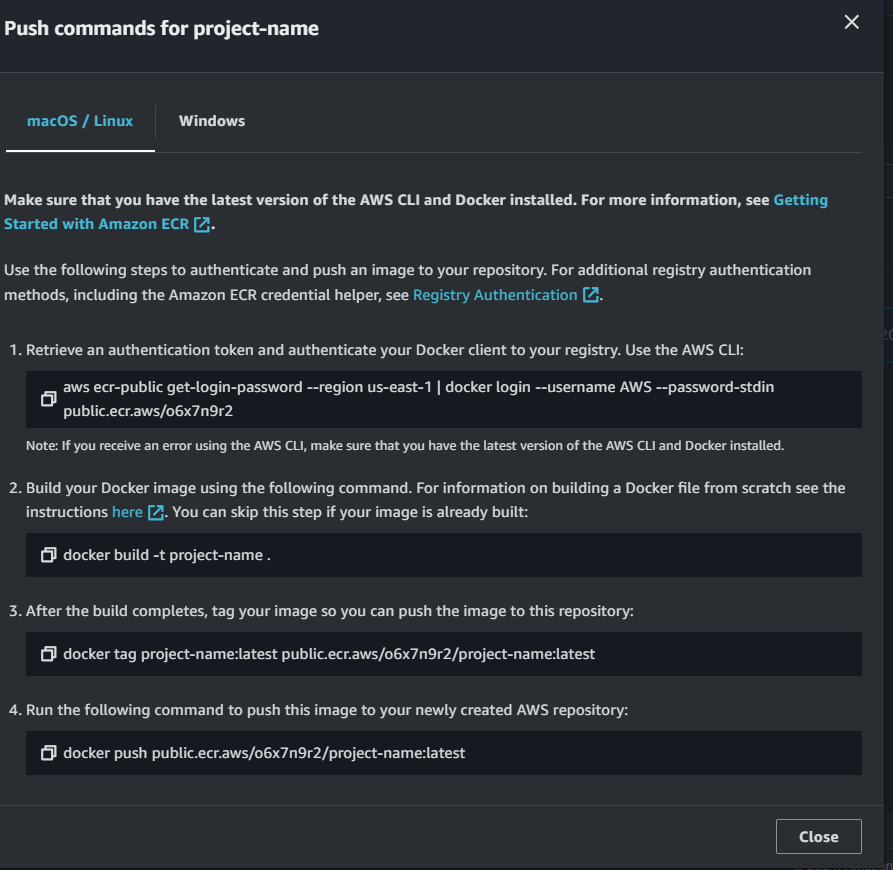
Install Docker and AWS CLI in EC2 Instance using below link and configure AWS CLI with the help of IAM User Credentials.
 # URL
 https://docs.aws.amazon.com/AmazonECR/latest/userguide/getting-started-cli.html
 # Install docker
 sudo apt-get update -y
 sudo apt-get install docker.io
 # if you run "docker ps" command, you will get the error. follow gievn steps to
 # overcome from the issue.
 # check the login user
 whoami
 # add the user in docker group
 sudo usermod -aG docker $USER
 # we can make the changes successfully with below commad or else reboot your system.
 newgrp docker
 docker ps
 # Install aws cli
 curl "https://awscli.amazonaws.com/awscli-exe-linux-x86_64.zip" -o "awscliv2.zip"
 unzip awscliv2.zip
 sudo ./aws/install
 # Configure AWS CLI With IAM Credentails that we have created.
 EC2@Instance:~$ aws configure
 AWS Access Key ID [****************YSTM]: AKIA4MTWJEATCZXZMHIL
 AWS Secret Access Key [****************ekVy]: Ng6UxCW*********S4naqk12gPD8RRvwr
 Default region name [ap-south-1]: ap-south-1
 Default output format [None]:
 # Check Version
 EC2@Instance:~$ aws --version
 aws-cli/2.17.22 Python/3.11.9 Linux/5.15.133.1-microsoft-standard-WSL2 exe/x86_64.ubuntu.22
Now, use all command one by one on EC2 instance with the given instructions.
 # Authenticate Docker client
 aws ecr-public get-login-password --region us-south-1 | docker login --username AWS --password-stdin public.ecr.aws/o6x7n9r2
 # Whenever you will try to run above command it will show you error
 # unable to locate credentials.
 # So, Firstly Create IAM User and
 #Docker Image build, remember your projet must have Dockerfile.
 cd your-project-dir/
 docker build -t project-name .
 #Tag docker image
 docker tag project-name:latest public.ecr.aws/o6x7n9r2/project-name:latest
 #Push docker image to ECR.
 docker push public.ecr.aws/o6x7n9r2/project-name:latest
3. Before and After Pushing an image in ECR Repository :-
a) Before Pushing Image in ECR:

b) After Pushing Image in ECR:

E) Amazon Elastic Container Service:- Fully managed containers, Amazon Elastic Container Service (Amazon ECS) is a highly scalable and fast container management service that makes it easy to run, stop, and manage containers on a cluster. Amazon ECS makes it easy to deploy, manage, and scale Docker containers running applications, services, and batch processes.
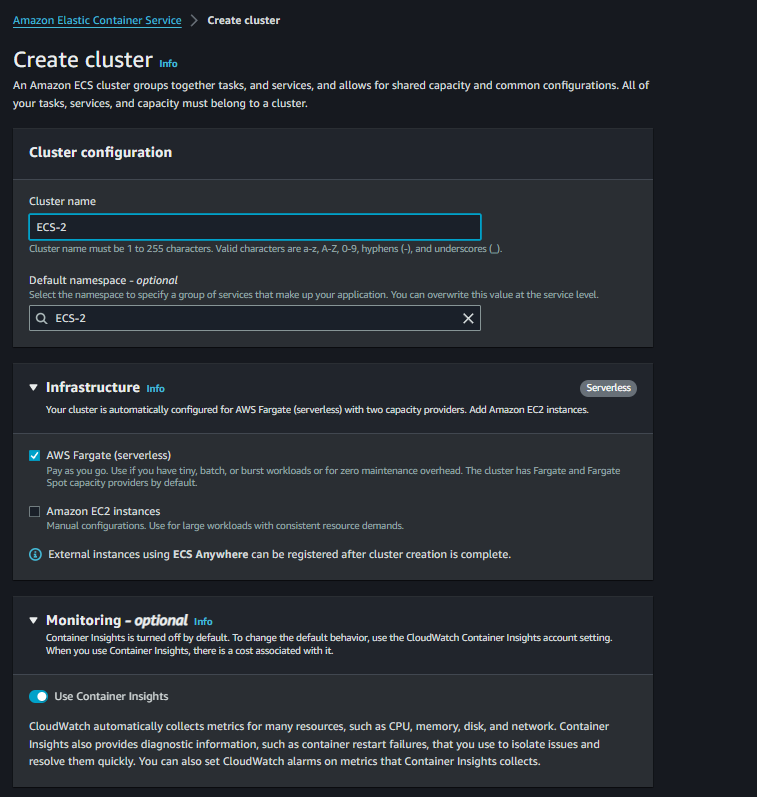
1. Search ECS in AWS management console and Click on Create Cluster then type your cluster name, enable fargate instance and in monitoring option use container insight to enable cloudwatch.

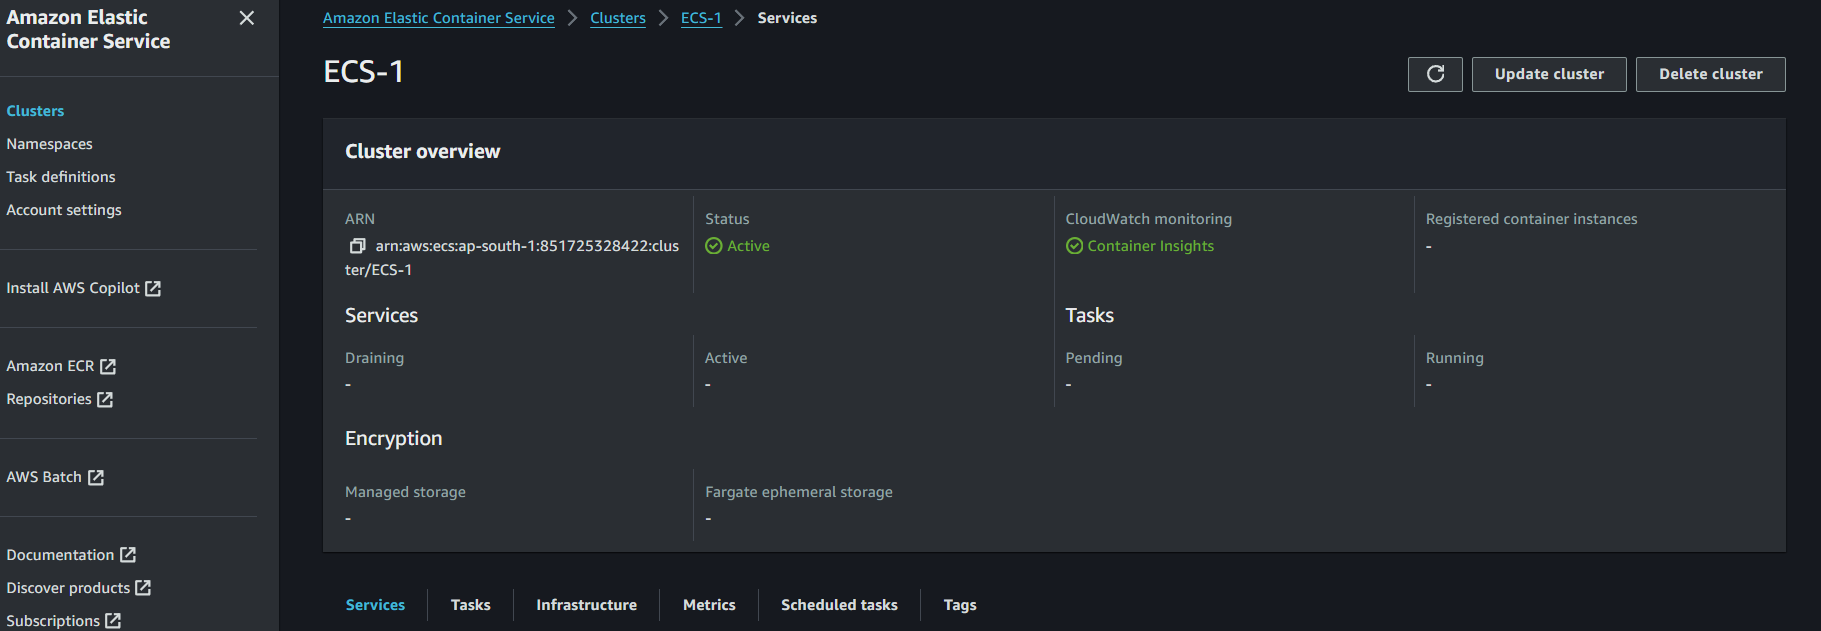
In Created Cluster there is no task and services right now.
- Task:
A task is a single running instance of a task definition, which is like a blueprint that describes how your container should behave.
Create task-definition : Click on Create task definition.
The task definition includes details like which Docker image to use, the CPU and memory requirements, and networking settings.
create task definition
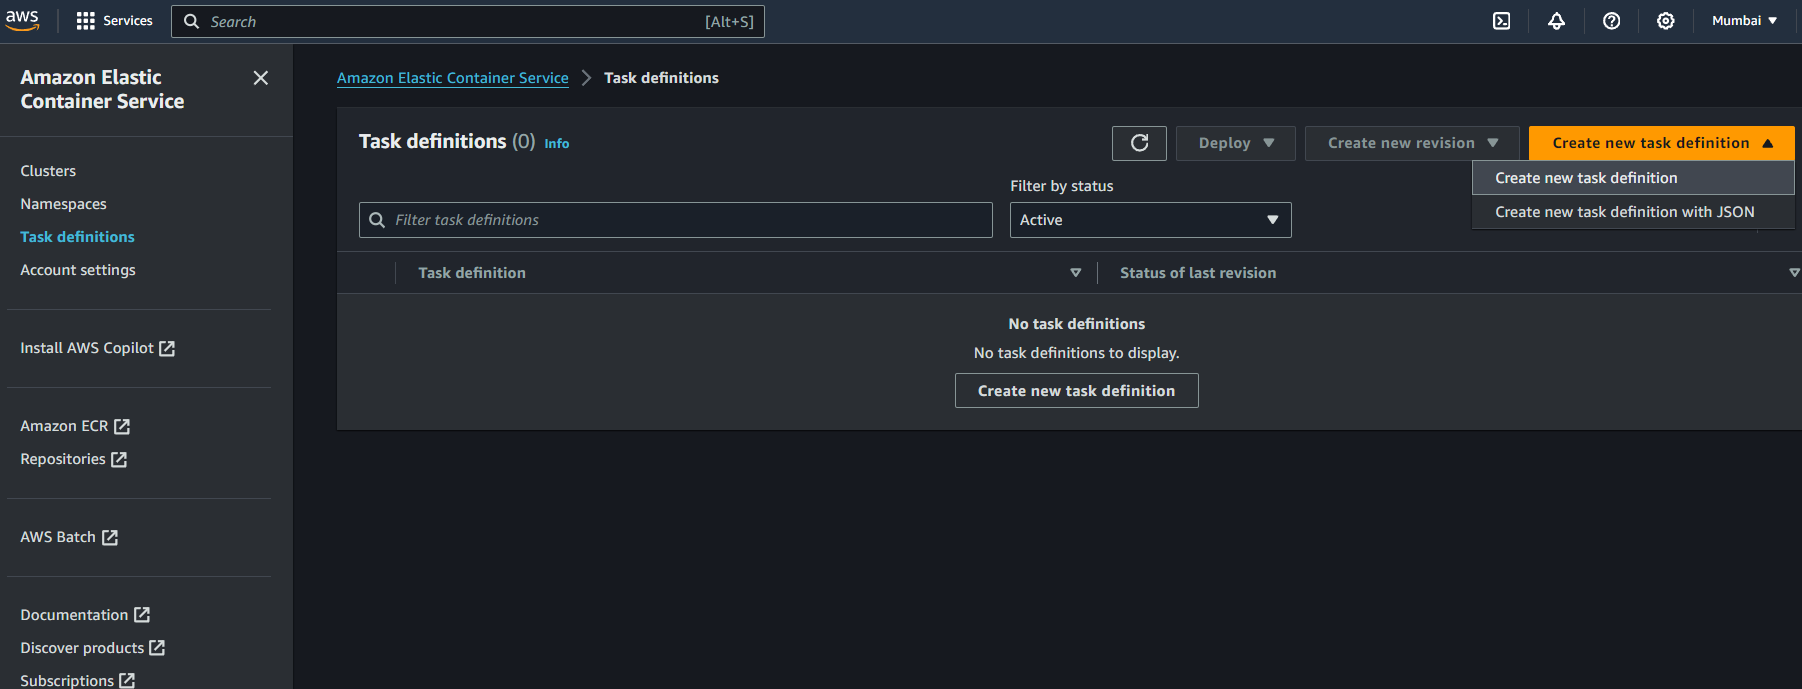
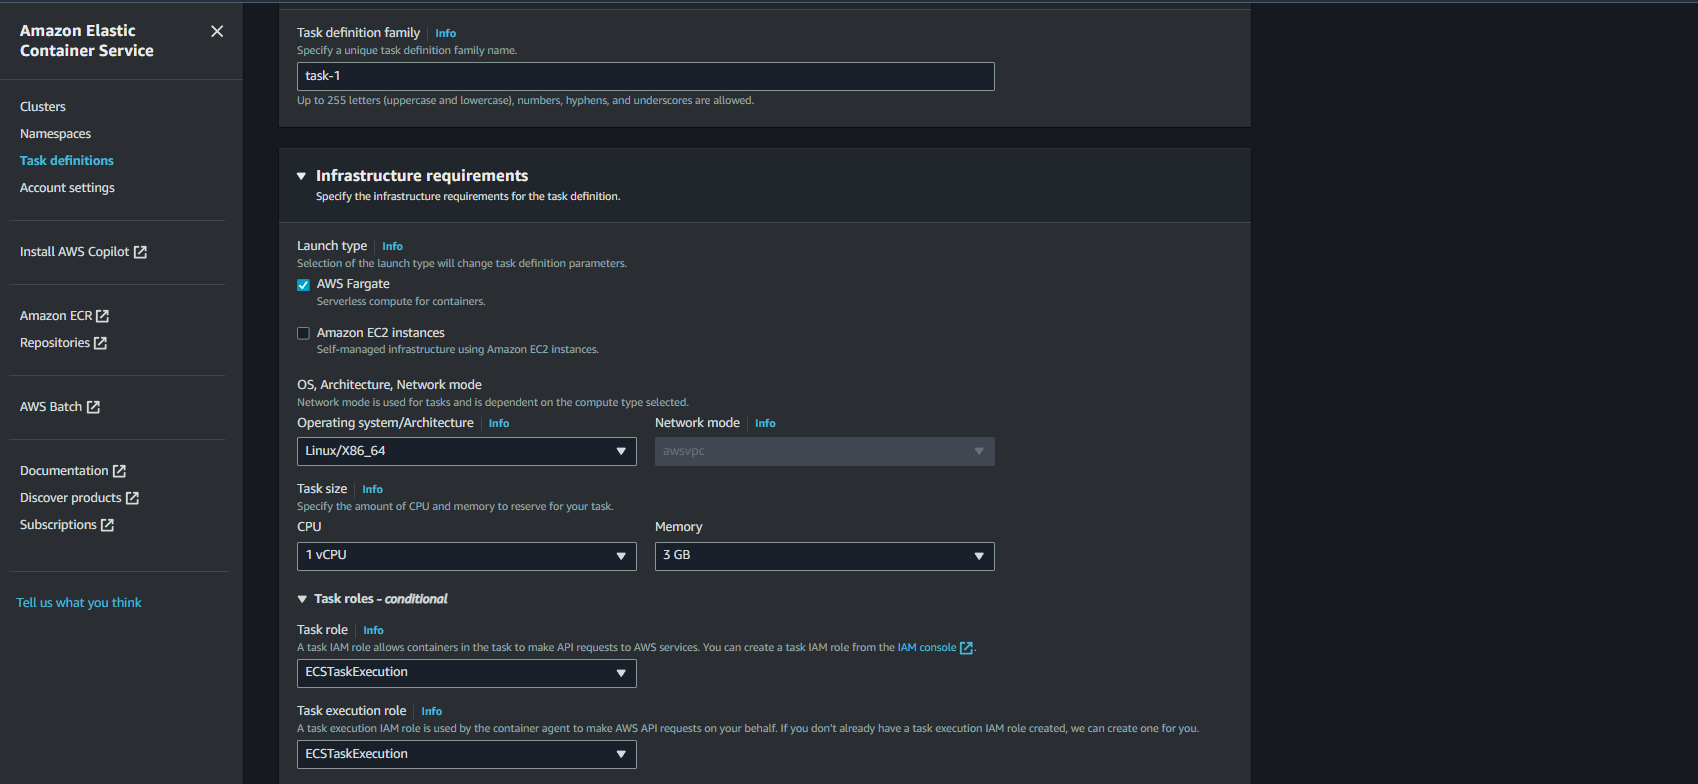
Enter the task-definition name, launch type, OS, CPU resource, Role(task execution role)
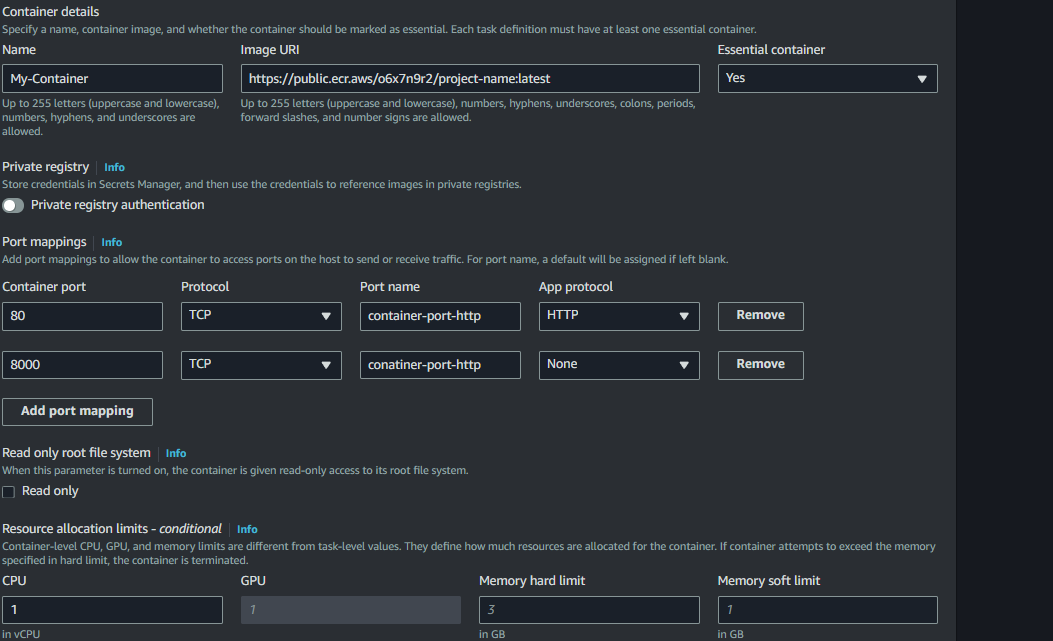
Container details- your ECR repo name in my case it was 'project-name'. In snapshot, It's showing wrong. Image URI is your ECR repo image url. Then enter Port, My application is running on 8000 Port.
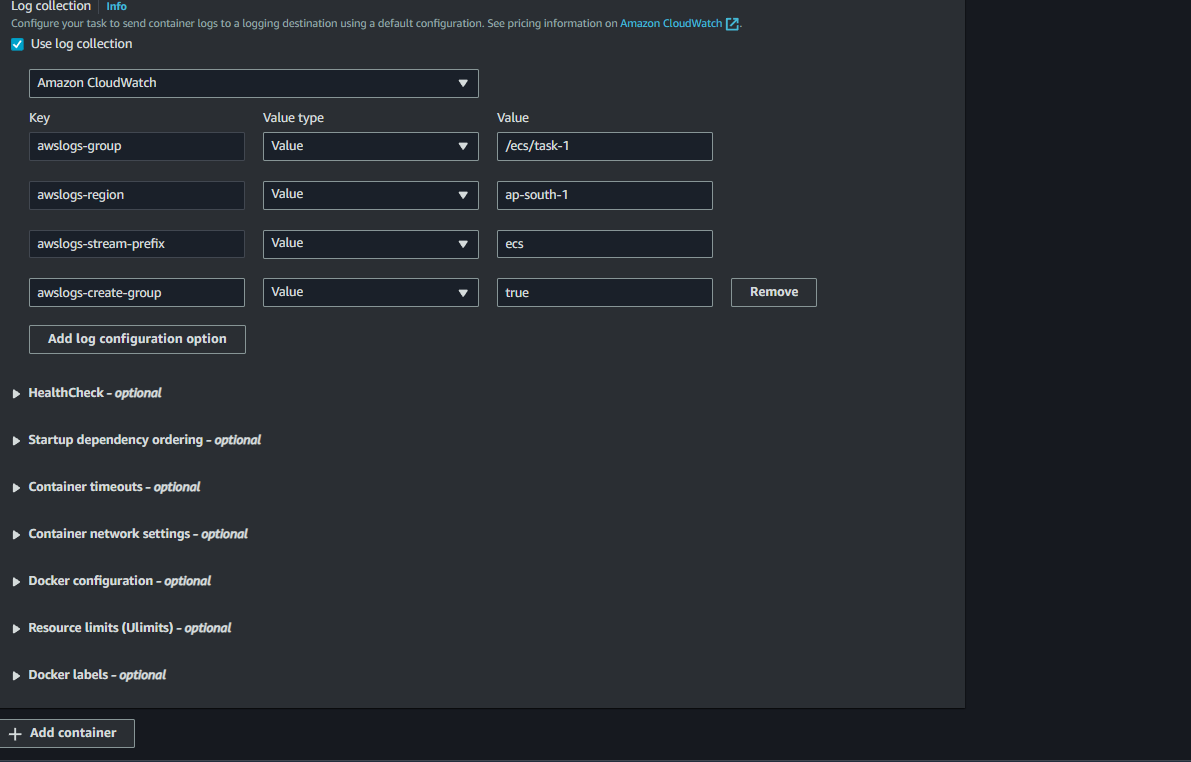
Enable CloudWatch for Task-definition
Task definition created successfully.

Now, Run task

This form will automatically filled as per your task definition. just run the task.
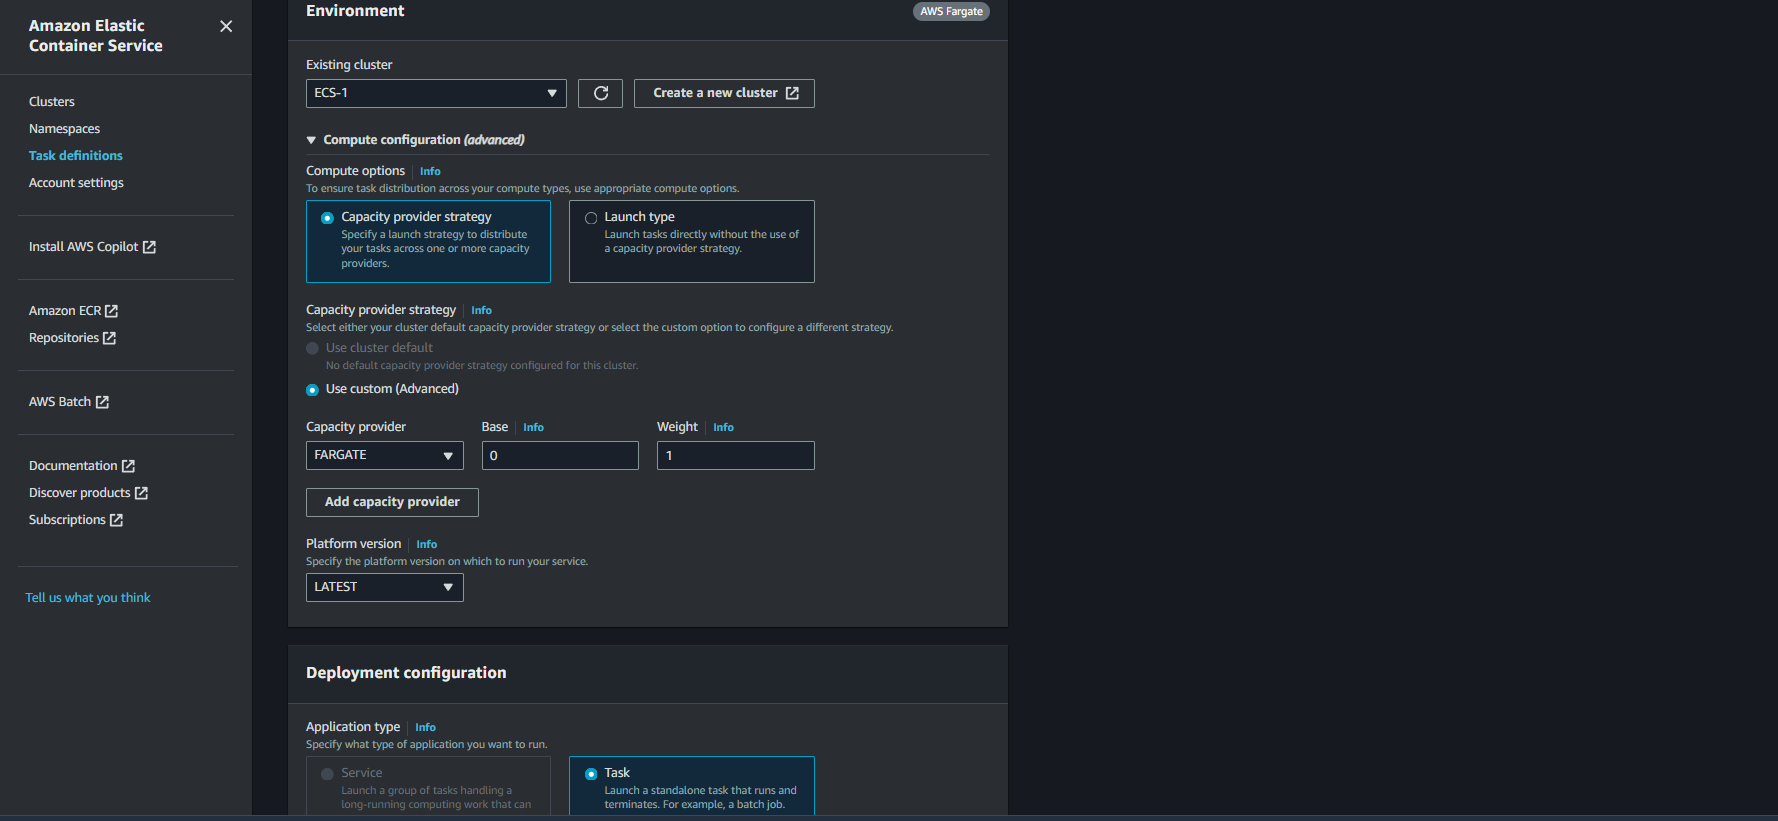
Check status of task from the cluster==>task definition==>task
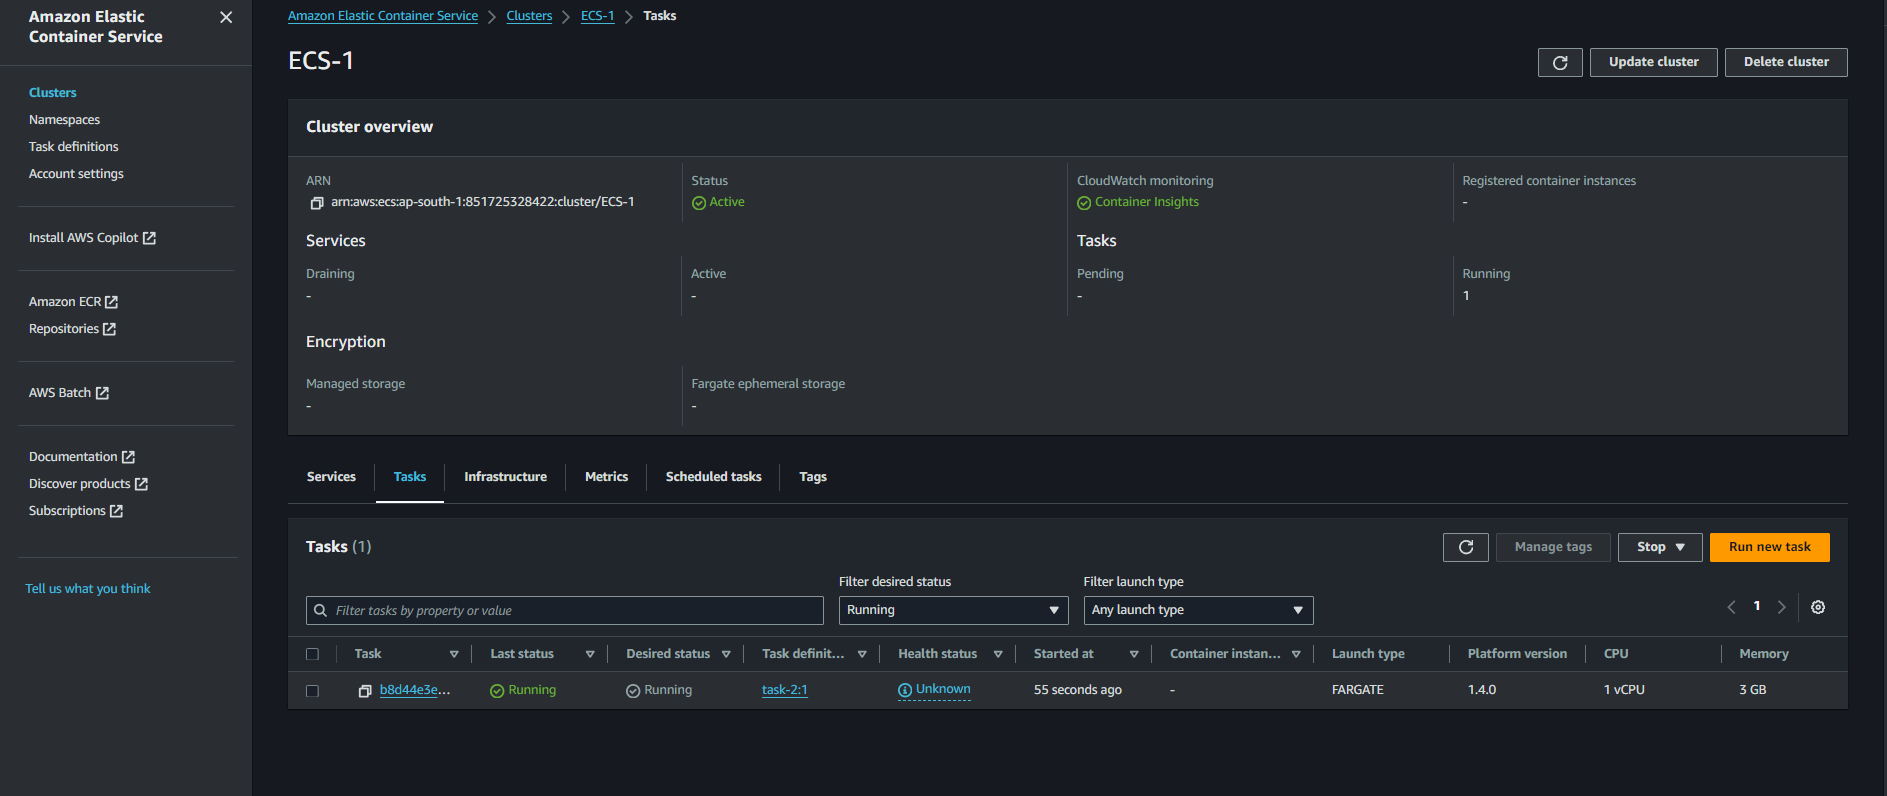
Task is running successfully. Copy and paste Public IP with a Port on your Browser.
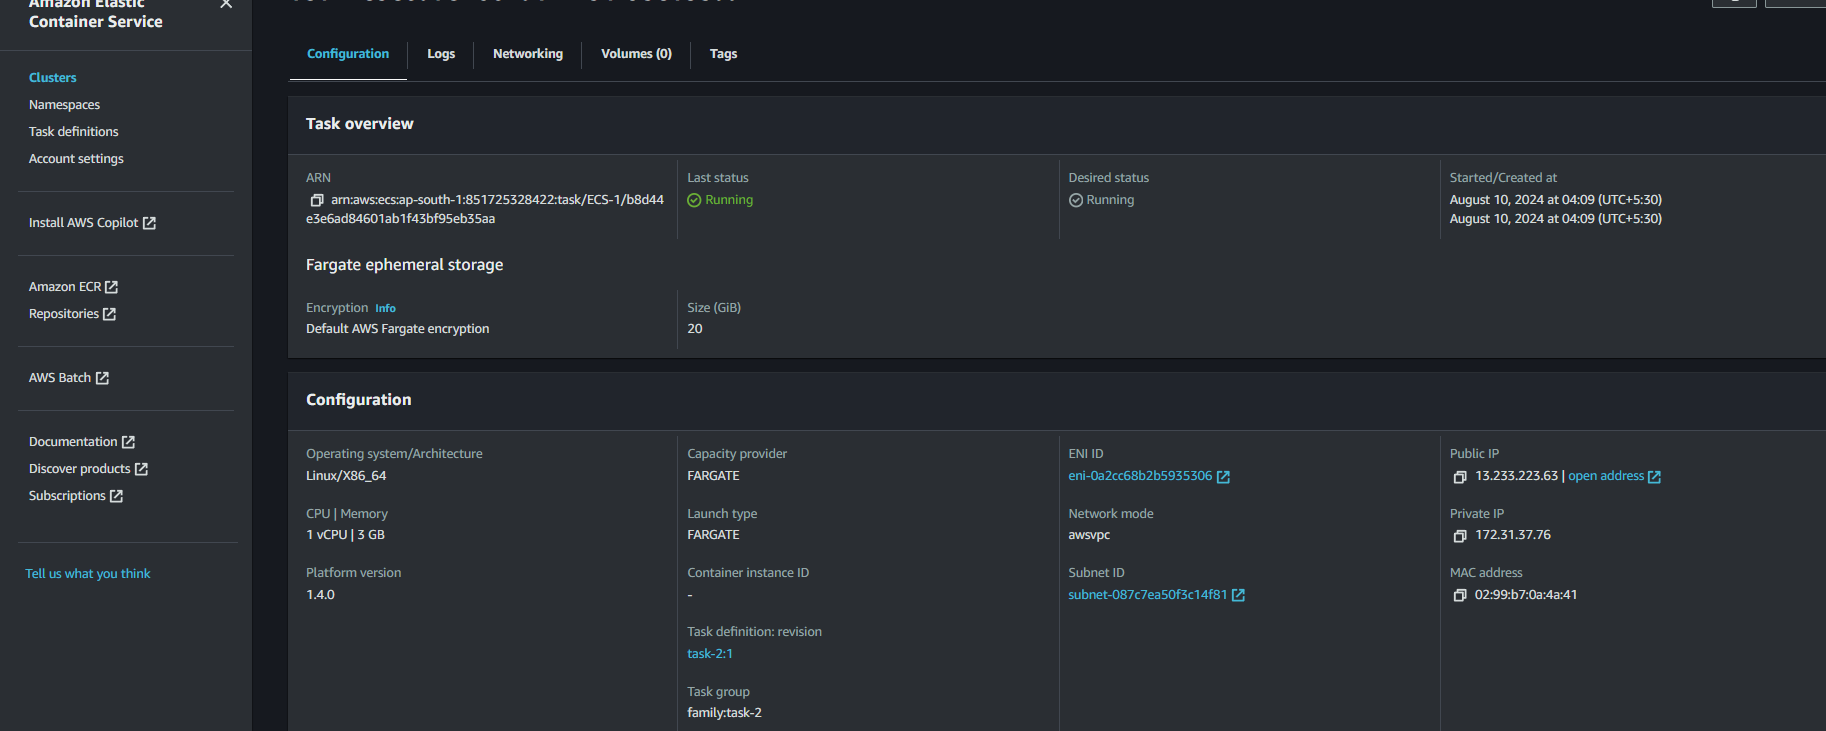
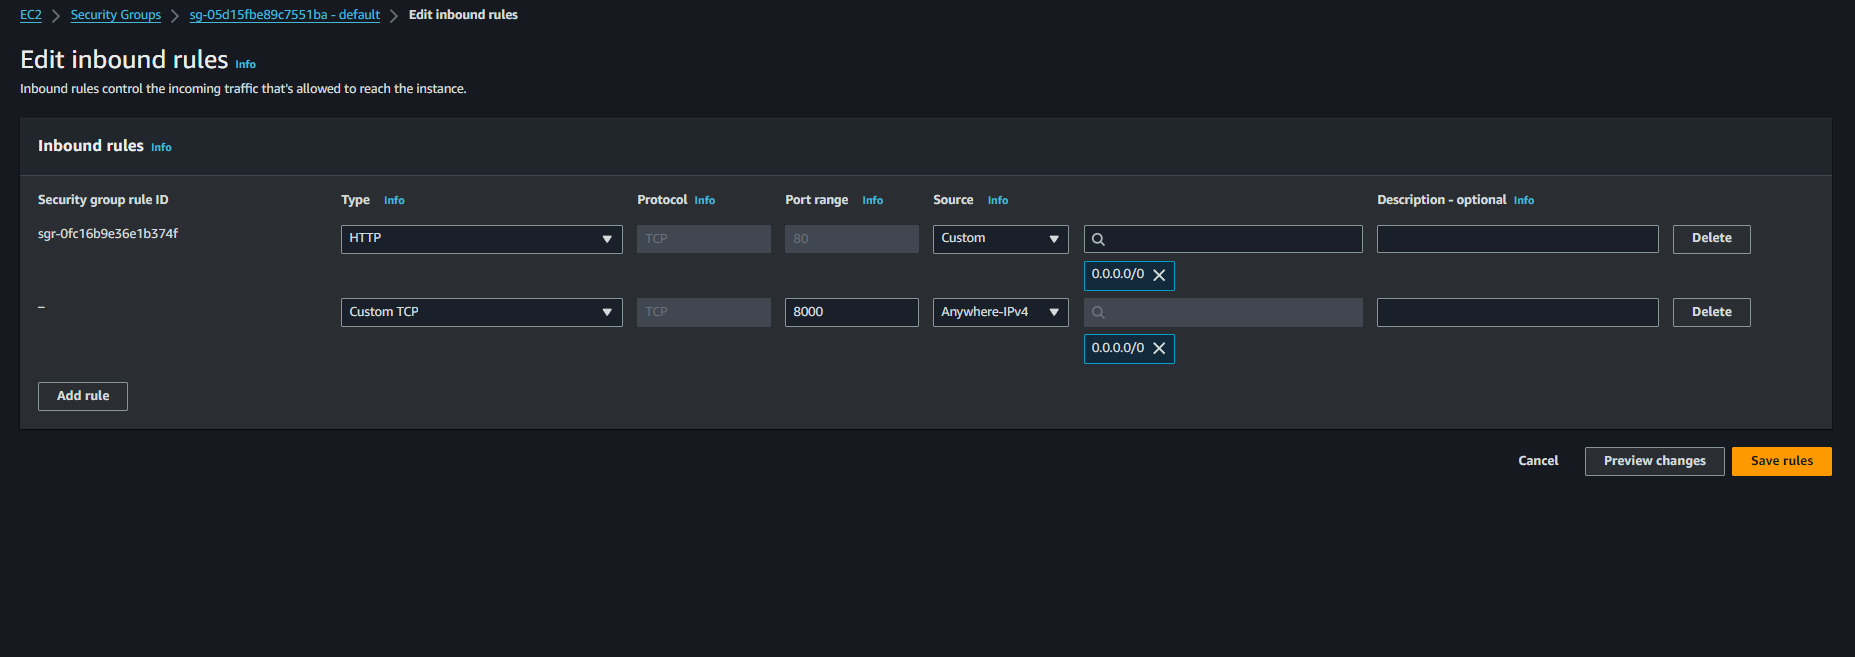
If you have an any issue to access your app with public-ip and port, check security group (click on ENI ID)

Then click on Security Group.
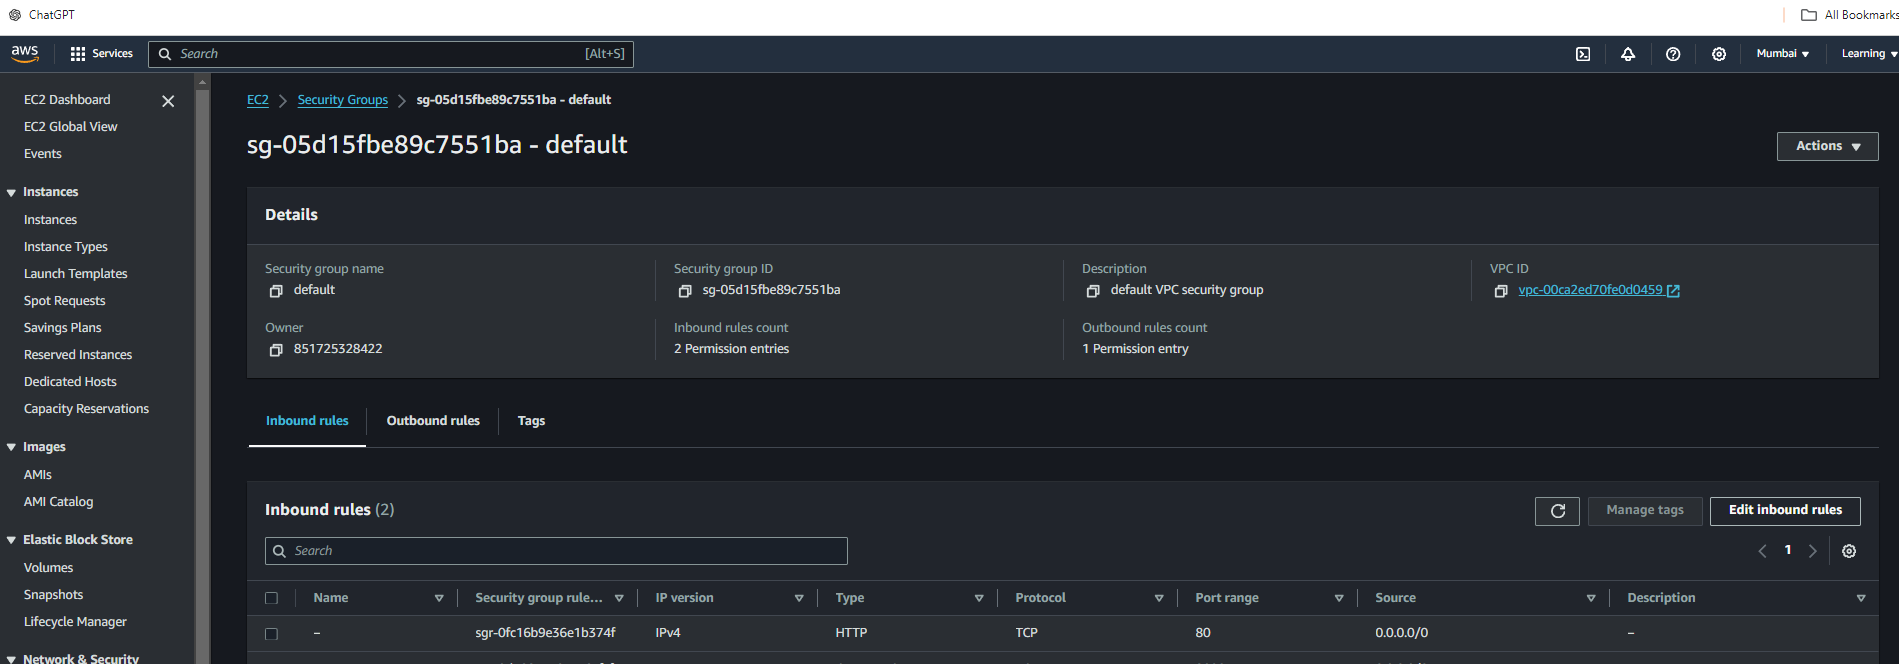
Click on Inbound edit rule and enable your application port.
My application is working...

Subscribe to my newsletter
Read articles from ajay singh directly inside your inbox. Subscribe to the newsletter, and don't miss out.
Written by

ajay singh
ajay singh
Hi Folks, Your thoughts and suggestions are invaluable to me! Feel free to leave comments on my posts. Let's connect and grow together!