A Step-by-Step Guide to Building a Custom Chatbot with IBM Watsonx
 Amna Hassan
Introduction
In today’s fast-paced world of AI, integrating large language models (LLMs) into applications is becoming increasingly essential for businesses. Whether you’re building a chatbot, virtual assistant, or any other AI-powered application, leveraging your own data can significantly enhance the model’s responses and relevance. One of the most efficient ways to achieve this is through a technique called Retrieval-Augmented Generation (RAG). In this tutorial, we’ll explore how to build a chat application that interacts with your own data using IBM Watsonx, LangChain, and Streamlit.
What is Retrieval-Augmented Generation (RAG)?
RAG is a technique that involves feeding chunks of your data into the prompt for the LLM. This allows the model to generate responses based on the specific context provided by your data, rather than relying solely on general training data. This approach is particularly useful for applications that require domain-specific knowledge or need to answer questions based on proprietary documents.
Step 1: Setting Up Your Chat Application
The first step is to set up the basic structure of your chat application. We’ll be using Streamlit, a popular Python framework for building web apps, along with LangChain and IBM Watsonx.
1.1 Installing Dependencies
Before we dive into coding, it's crucial to set up your development environment with the necessary dependencies. In this section, we'll guide you through creating a virtual environment and installing the required libraries for your project.
Set Up a Virtual Environment
To keep your project’s dependencies organized and avoid potential conflicts with other projects, it's highly recommended to use a virtual environment. A virtual environment allows you to manage packages and libraries independently for each project.
Creating a Virtual Environment:
Open your terminal or command prompt.
Navigate to the directory where you want to store your project:
cd /path/to/your/projectCreate a virtual environment using the following command:
python3 -m venv venvThis command will create a new directory named
venvthat contains the virtual environment.Activate the virtual environment:
Windows:
venv\Scripts\activatemacOS/Linux:
source venv/bin/activate
Once activated, your command line prompt should display the name of the virtual environment (e.g., (venv)), indicating that it's active.
1.2 Install Required Libraries
With your virtual environment activated, the next step is to install the necessary Python libraries that your project will use.
Install Streamlit: Streamlit is a popular framework for quickly building interactive web applications with Python. To install it, run:
pip install streamlitInstall LangChain: LangChain provides a comprehensive set of tools for working with large language models (LLMs) and managing data retrieval processes. Install it by running:
pip install langchainInstall IBM Watsonx SDK: The IBM Watsonx SDK allows you to interact with IBM's advanced AI services, including their large language models. To install it, use:
pip install ibm-watson(Optional) Install Additional Libraries: Depending on the specifics of your project, you may need to install additional libraries. For instance:
PDF Handling: If your application needs to work with PDF documents, install
PyPDF2:pip install PyPDF2Vector Database Client: If you're using a vector database like Chroma to store and retrieve embeddings, install its client library:
pip install chromadb
1.3 Verify Installations
After installing the libraries, it's a good practice to verify that everything is set up correctly. Open a Python shell within your virtual environment and run the following imports:
import streamlit as st
import langchain
from ibm_watson import AssistantV2
If no errors are raised, your environment is properly configured, and you’re ready to start building your AI application.
Note: Be sure to include these import statements at the beginning of your main application file to ensure that the necessary libraries are available throughout your code. Adding these imports will allow you to use Streamlit for the web interface, LangChain for managing LLM interactions, and IBM Watsonx for generating responses.
1.2 Create the Chat Interface
Streamlit provides a simple way to create interactive components. You’ll start by adding a chat input component to capture user prompts and a chat message component to display the messages.
# Create input for user message
user_message = st.chat_input("Ask a question")

# Display user message
st.chat_message("user").markdown(user_message)
However, initially, the app will only display the last message. To store and display all the messages, you need to create a session state variable.
1.3 Manage Message History
To keep track of the conversation history, append each user prompt to a list stored in Streamlit’s session state. This allows you to display the full chat history.
if 'messages' not in st.session_state:
    st.session_state['messages'] = []

st.session_state['messages'].append({"role": "user", "content": user_message})

# Display all messages
for msg in st.session_state['messages']:
    st.chat_message(msg['role']).markdown(msg['content'])
Step 2: Integrating IBM Watsonx LLM
Next, you’ll integrate IBM Watsonx into your application to leverage a state-of-the-art LLM.
2.1 Get Watsonx Credentials
To leverage IBM Watsonx in your application, you’ll need to set up credentials that include an API key and service URL. These credentials are essential for authenticating and interacting with IBM’s AI services.
Obtain API Key and Service URL from IBM Cloud
Sign in to IBM Cloud:
Open your web browser and go to the IBM Cloud Dashboard.
Sign in with your IBM Cloud account. If you don’t have an account, you’ll need to create one.

Navigate to the IBM Watsonx Service:
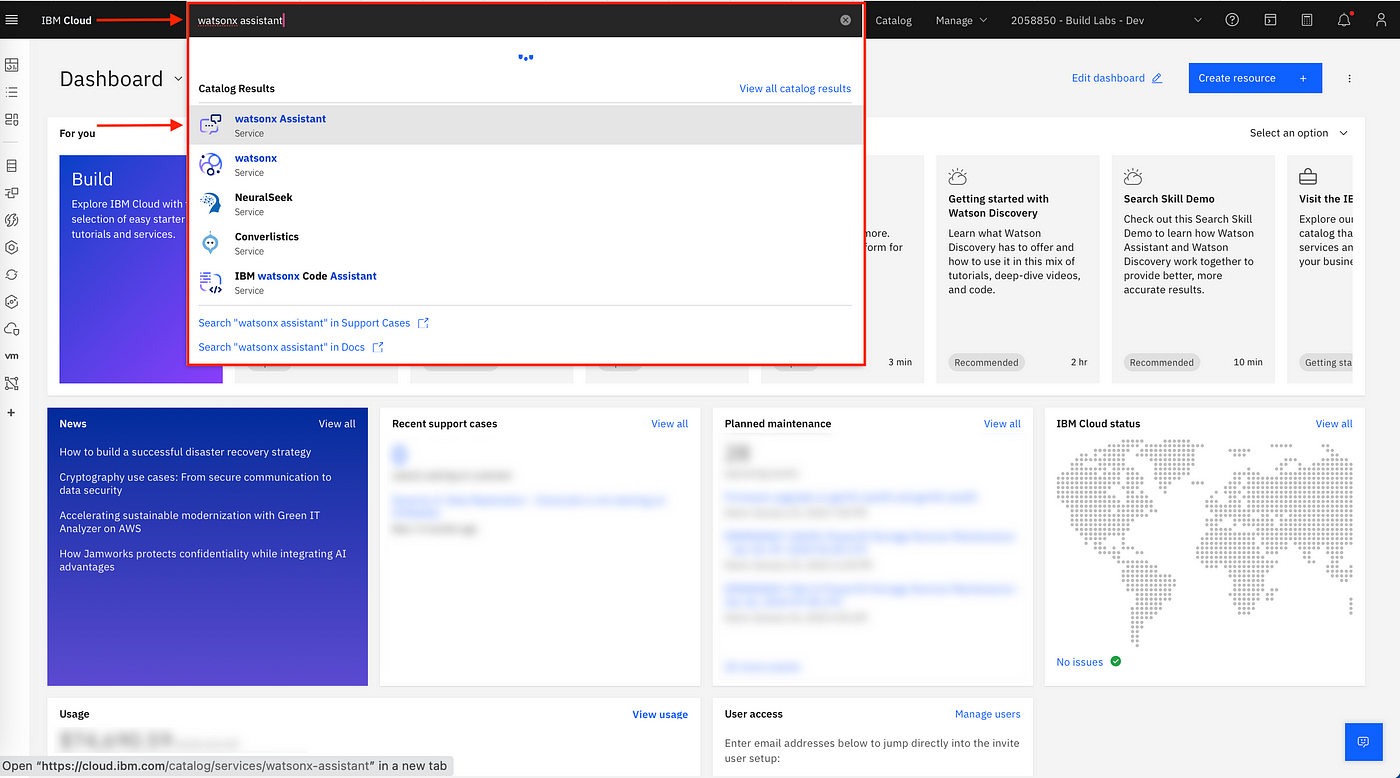
Once logged in, use the search bar at the top of the dashboard to search for "Watsonx".

From the search results, select the Watsonx service that matches your needs (e.g., IBM Watsonx for NLP, IBM Watsonx for ML).
Create a Watsonx Instance:
If you haven't already created an instance of the Watsonx service, you’ll need to do so:
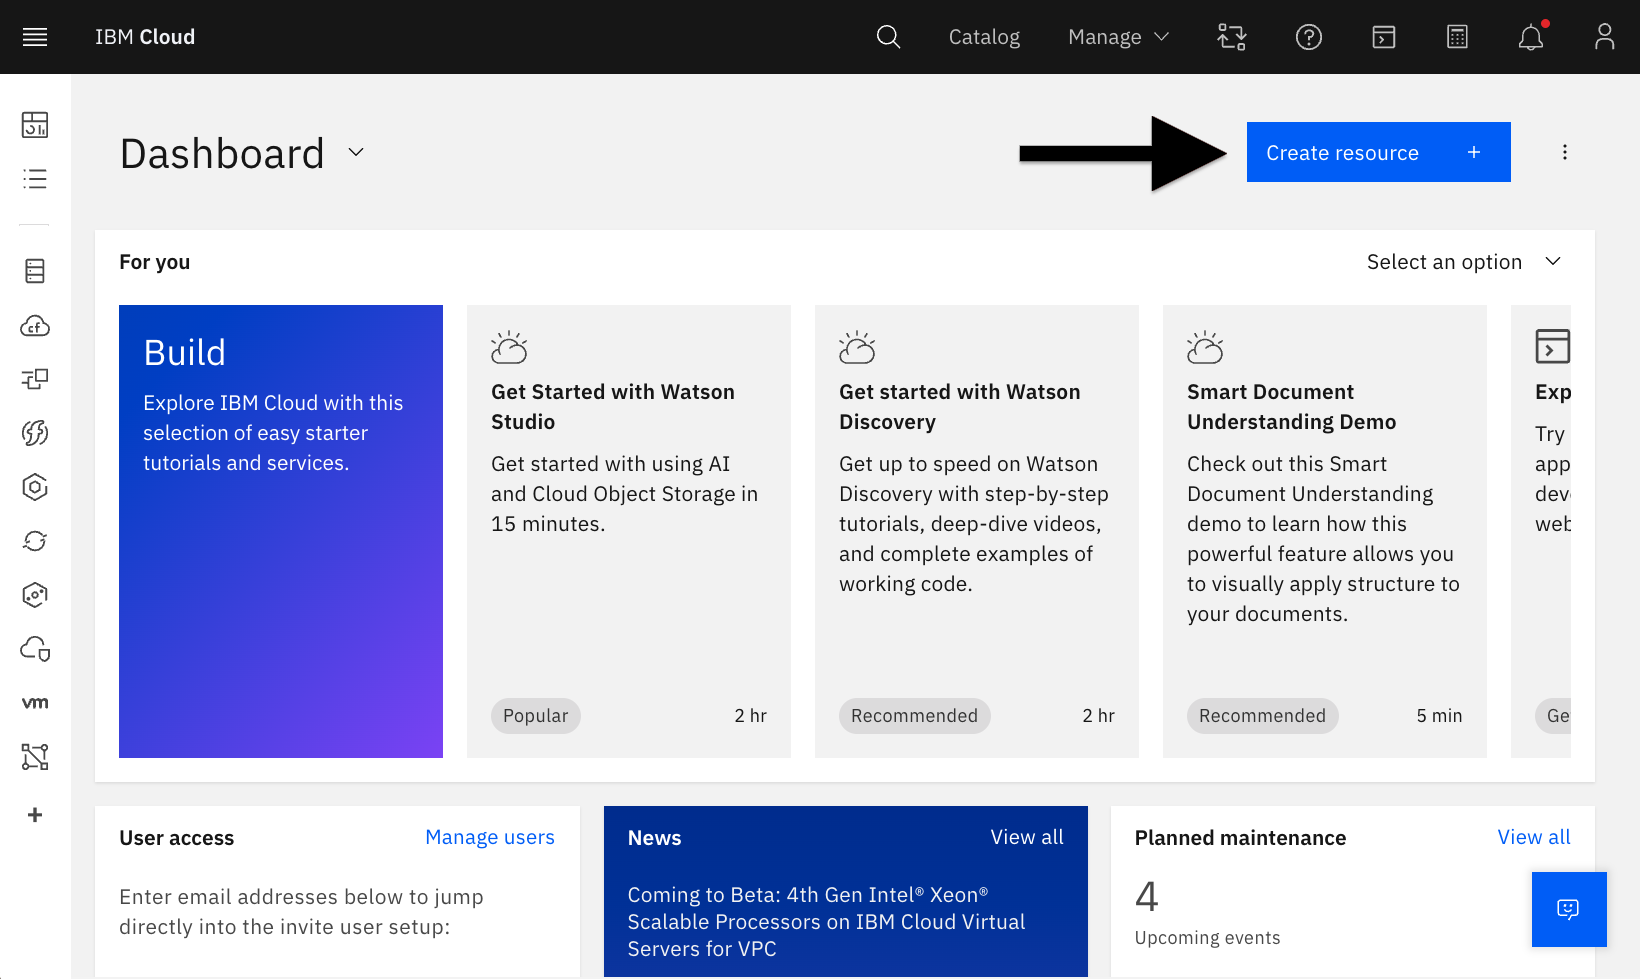
Click on Create or Launch to start the process of setting up a new Watsonx service instance.

Select the region and pricing plan that fits your requirements. For most development purposes, the Lite or free tier should suffice.
Click Create or Provision to finalize the setup.
Generate an API Key:
After your Watsonx instance is created, navigate to the Manage section of your Watsonx service.
Look for a section labeled API Keys or Credentials. Here, you can create a new API key:
Click on Create API Key or Add Credentials.
Give your API key a recognizable name (e.g., "WatsonxAPIKey").
Click Create to generate the API key.
Once generated, you will see a long string of characters—this is your API key. Copy this key and store it in a secure location, as it will not be displayed again.
Obtain the Service URL:
In the same Manage section, look for the Service Endpoints or Service URL section.
This URL is specific to the region and service you are using (e.g.,
https://api.us-south.watson.cloud.ibm.com).Copy the Service URL as you will need it to interact with Watsonx services.
2.2 Set Up Watsonx Credentials
To use Watsonx, you’ll need to create a credentials dictionary that includes your API key and service URL. You can obtain these from the IBM Cloud dashboard.
credentials = {
    'api_key': 'YOUR_API_KEY',
    'service_url': 'YOUR_SERVICE_URL'
}

llm = WatsonxLLM(api_key=credentials['api_key'], service_url=credentials['service_url'])
2.3 Generate Responses with the LLM
With your credentials in place, you can now pass the user’s prompt to the LLM and get a response.
response = llm.generate(prompt=user_message)

# Display LLM response
st.chat_message("assistant").markdown(response)
st.session_state['messages'].append({"role": "assistant", "content": response})
Step 3: Incorporating Custom Data
This is where the RAG technique comes into play. To allow the LLM to answer questions based on your data, you need to load the data and integrate it with your application.
3.1 Load and Process Data
Assume you have a PDF document containing important information that you want the LLM to reference. You’ll load this PDF and convert it into a vector index, which the LLM can use to retrieve relevant information.
def load_pdf(pdf_path):
    # Load PDF and convert to vector index
    vector_store = VectorStore.from_pdf(pdf_path)
    return vector_store

pdf_index = load_pdf('your_document.pdf')
3.2 Implement the RAG Process
Using LangChain’s retriever, you can now pass the indexed data to the LLM as part of the prompt, enabling it to generate contextually accurate responses.
retriever = LangChainInterface(vector_store=pdf_index, llm=llm)
answer = retriever.ask(prompt=user_message)

# Display the answer
st.chat_message("assistant").markdown(answer)
st.session_state['messages'].append({"role": "assistant", "content": answer})
Conclusion
In this tutorial, we’ve built a chat application using IBM Watsonx, LangChain, and Streamlit that can interact with your own data. By leveraging the RAG technique, your AI model can generate more accurate and context-aware responses, making it a powerful tool for any business application.
Whether you're dealing with customer support, internal knowledge bases, or domain-specific queries, this approach provides a scalable and efficient way to enhance your LLM’s capabilities. As you continue to develop your AI applications, consider expanding on this framework by integrating additional data sources, refining your model, and exploring more advanced use cases.
Subscribe to my newsletter
Read articles from Amna Hassan directly inside your inbox. Subscribe to the newsletter, and don't miss out.
Written by

Amna Hassan
Amna Hassan
As the Section Leader for Stanford's Code In Place and a winner of the 2024 CS50 Puzzle Day at Harvard, I bring a passion for coding and problem-solving to every project I undertake. My achievements include winning a hackathon at LabLab.ai and participating in nine international hackathons, showcasing my dedication to continuous learning and innovation. As the Women in Tech Lead for GDSC at UET Taxila, I advocate for diversity and empowerment in the tech industry. With a strong background in game development, web development, and AI, I am committed to leveraging technology to create impactful solutions and drive positive change.